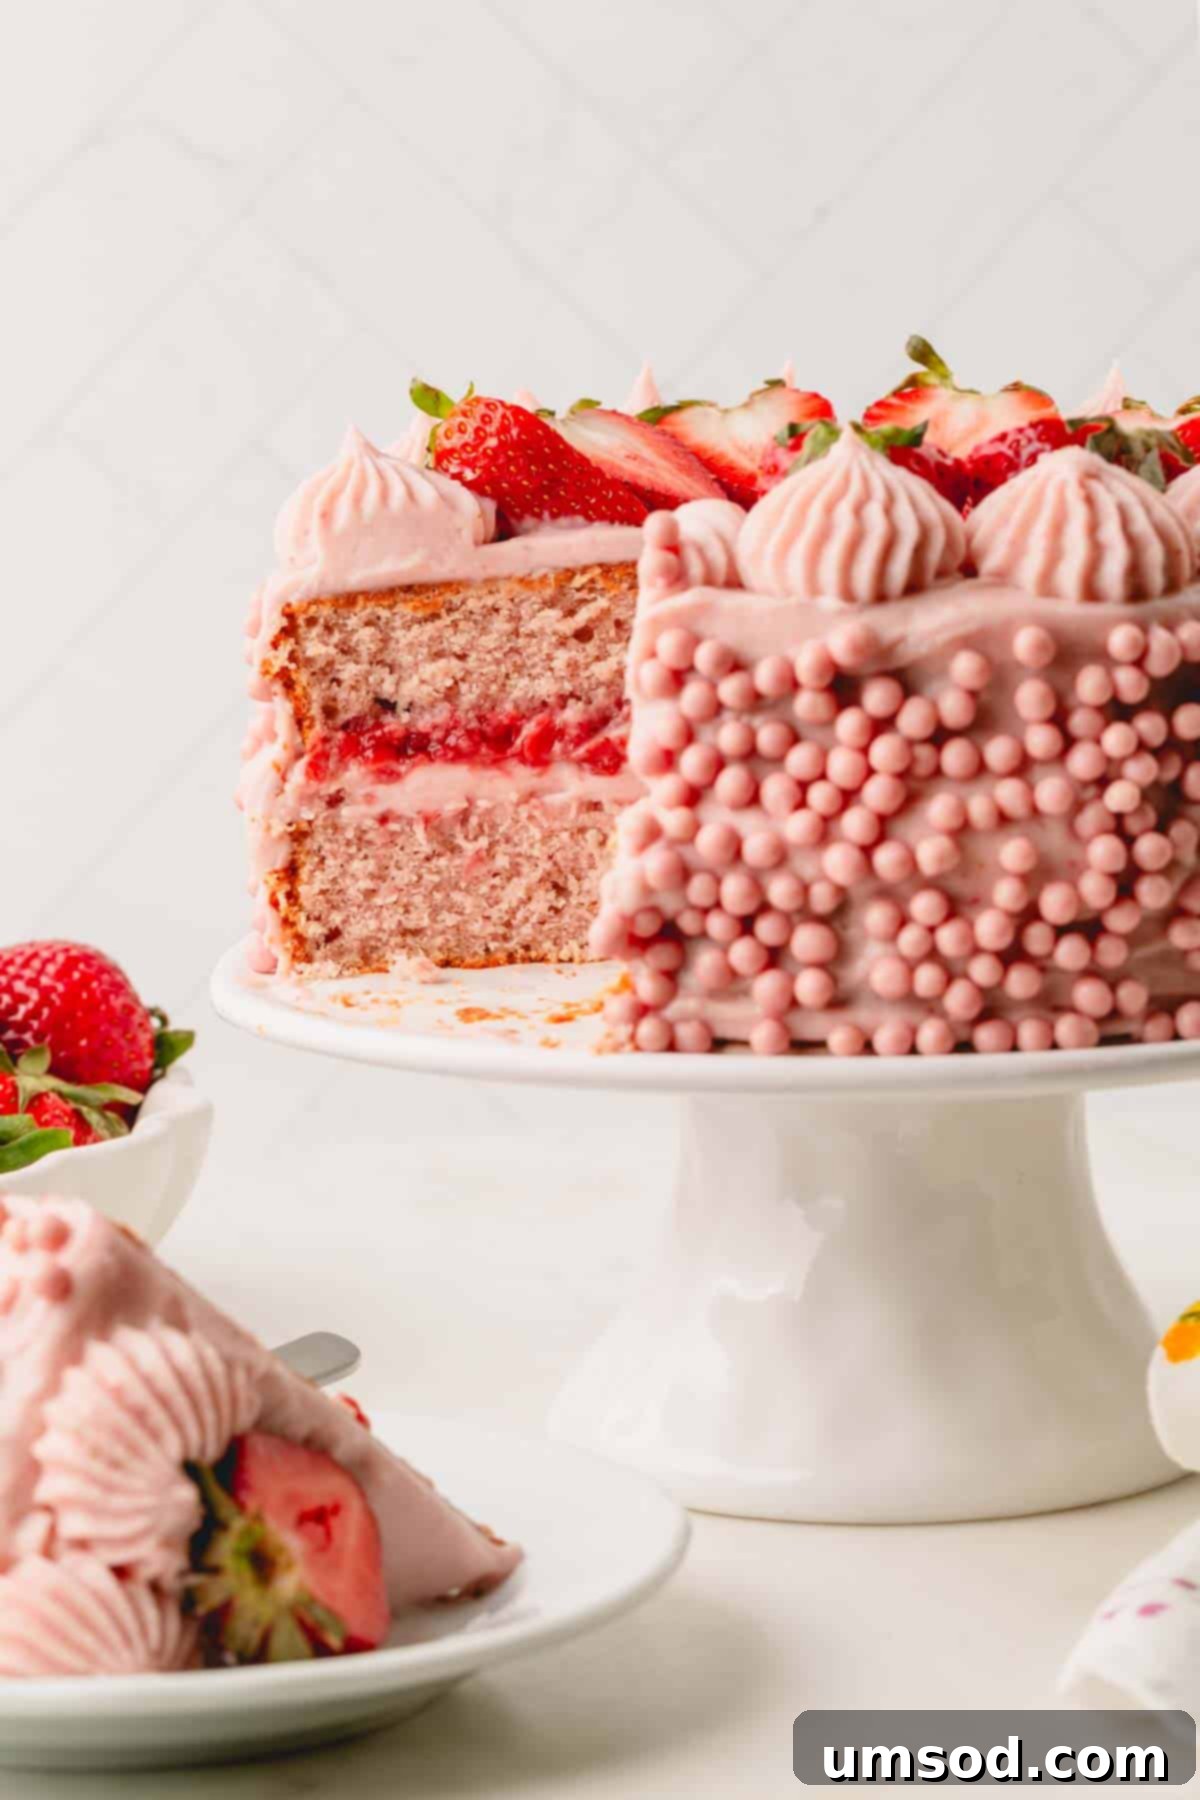
Unlock the secret to a truly unforgettable dessert with this incredible homemade strawberry cake recipe. Bursting with authentic, vibrant strawberry flavor, this cake achieves its stunning taste and beautiful pink hue without relying on fresh strawberries in the batter or artificial food coloring. Instead, we harness the concentrated power of freeze-dried strawberries to infuse every bite with pure, natural deliciousness. Prepare to dazzle your taste buds and impress your guests with a cake that’s as visually appealing as it is delightfully flavorful.
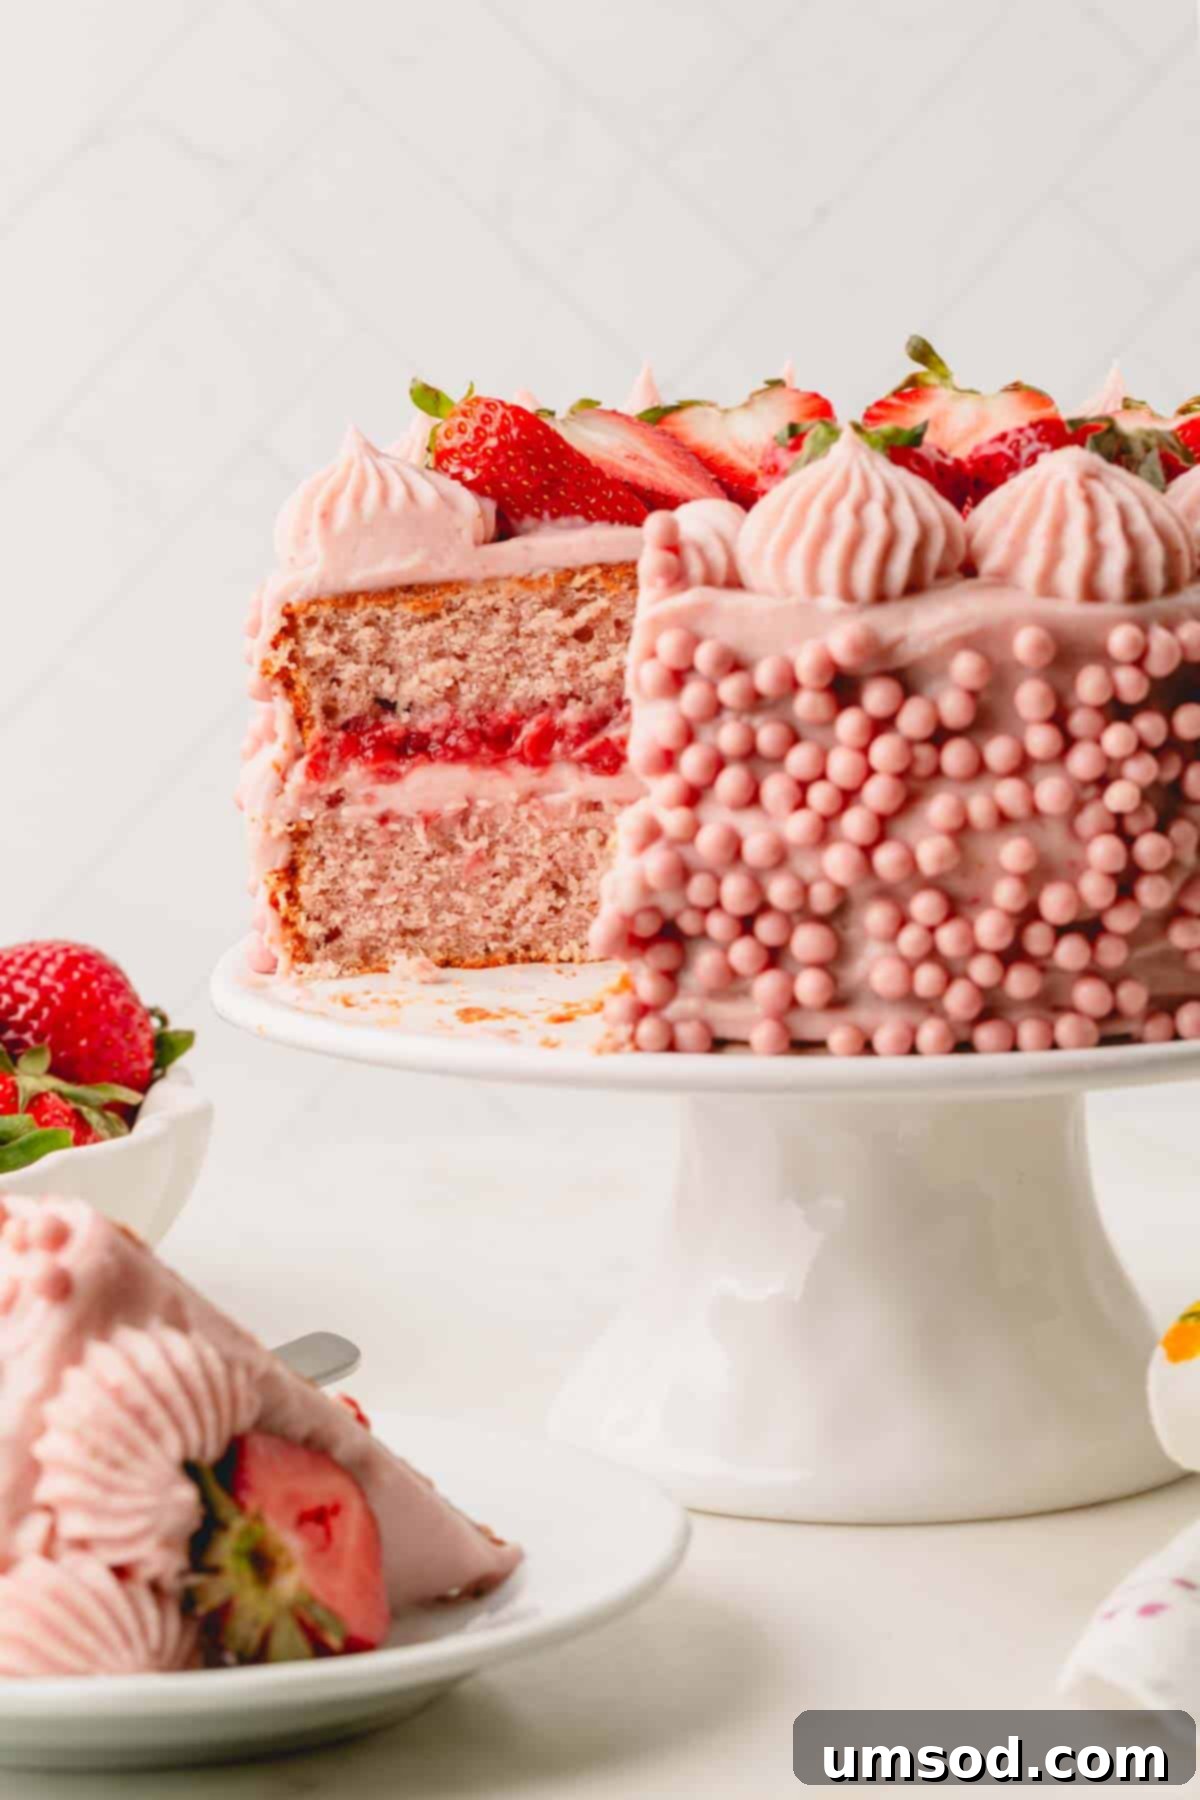
The Quest for the Perfect Strawberry Cake
My culinary journey to create the ultimate homemade strawberry cake began with a simple yet ambitious goal: to develop a quick and easy recipe that could be whipped up on a whim, without compromising on flavor or texture. I wanted a cake that felt special but was accessible to every home baker. Instead of starting from scratch, I leveraged my popular classic white cake recipe as the foundational base. This proven recipe already boasts an exquisite texture, making it the perfect canvas for a delightful strawberry twist.
This particular recipe has undergone rigorous testing and retesting to ensure flawless results every single time. I’m excited to share all my insider tips and tricks, guaranteeing that your strawberry cake turns out perfectly in your own kitchen. By the time you’ve mastered this recipe, you’ll feel confident enough to open your own boutique bakery!
Why You’ll Fall in Love with This Strawberry Cake
Forget artificial flavors and neon colors. This is a strawberry cake designed to celebrate the true essence of strawberries, crafted entirely from scratch. Here’s why this recipe will become your new favorite:
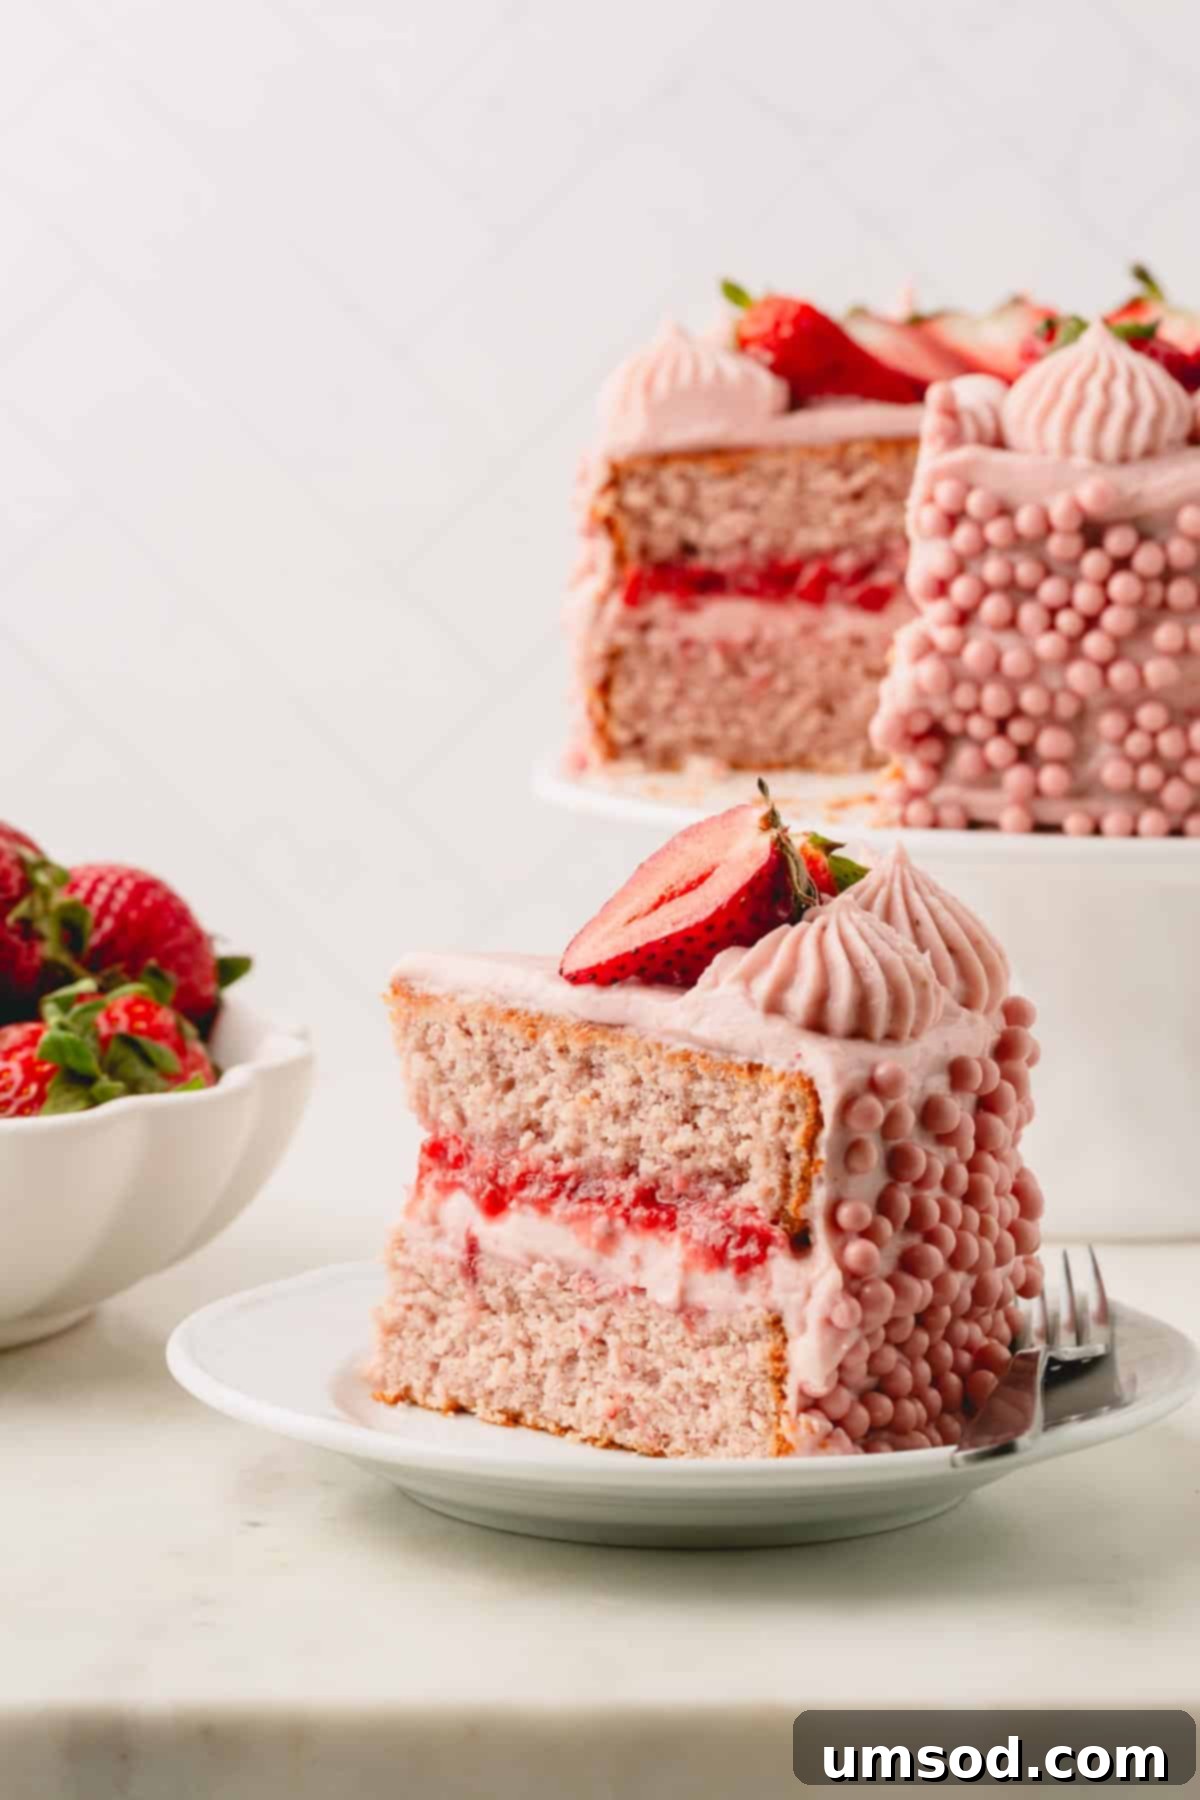
- Authentic Strawberry Flavor, Not Artificial Sweetness: This cake is a strawberry lover’s dream, featuring three distinct layers of strawberry goodness. From the cake batter itself to the luscious strawberry sauce filling and the creamy frosting, every component is infused with real strawberry flavor, avoiding any synthetic taste.
- Irresistibly Moist and Tender Texture: Prepare for a melt-in-your-mouth experience. This cake boasts a wonderfully moist and delicate crumb that is tight, even, and incredibly tender. Each forkful is a testament to perfect baking.
- Naturally Vibrant Pink Hue – No Food Coloring Needed: Many strawberry cakes achieve their bright pink appearance through artificial dyes. Our recipe takes a natural approach, using only freeze-dried strawberries to impart a beautiful, subtle pink color to the cake. If you desire a more intense, brighter pink, a drop or two of pink food coloring can be added, but it’s entirely optional.
Pin this recipe now to save it for later!
Pin It
Essential Ingredients for Your Strawberry Masterpiece
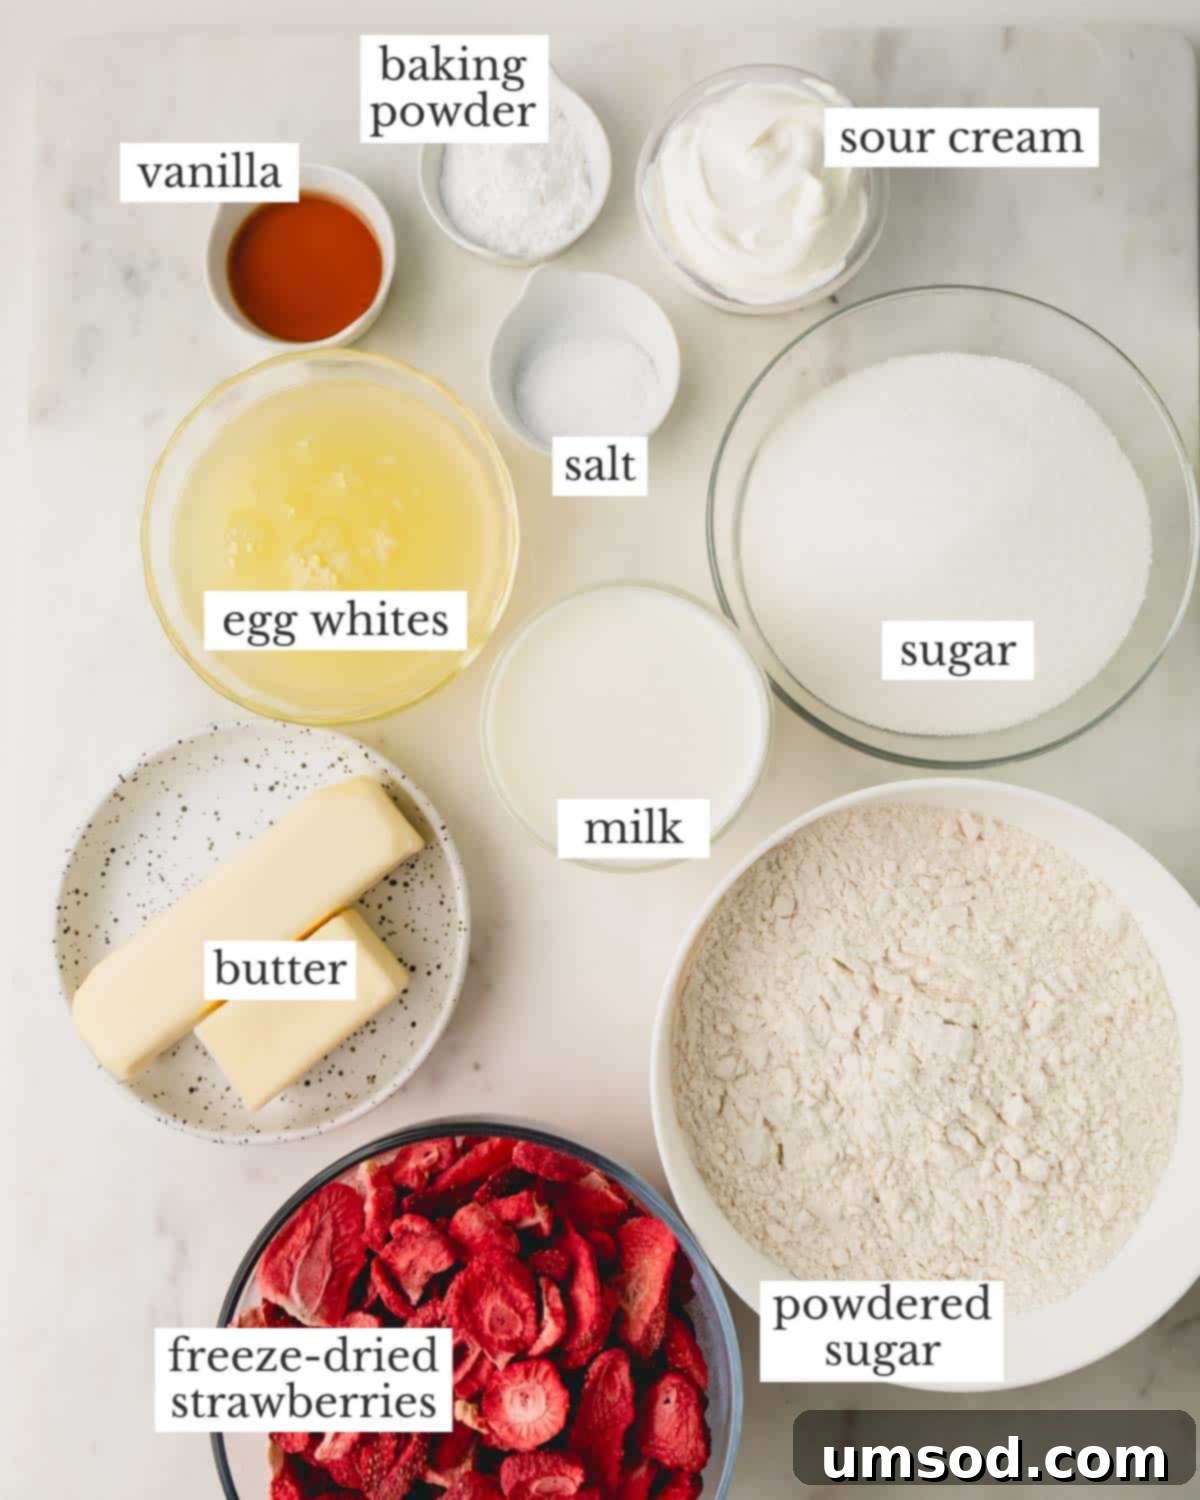
Crafting this phenomenal strawberry cake starts with understanding the role each ingredient plays in achieving its signature flavor and texture. Here’s a detailed look at the key components:
- Strawberry Sauce: While store-bought options exist, making your own strawberry sauce elevates this cake to new heights. It requires only fresh strawberries, granulated sugar, water, cornstarch, and a splash of lemon juice. The beauty of homemade sauce is its vibrant freshness and the ability to prepare it a few days in advance, saving you time on baking day.
- Freeze-Dried Strawberries: This is our secret weapon for packing intense fruity flavor and imparting that gorgeous, natural pink color without any artificial dyes. When pulverized, freeze-dried strawberries become a potent flavor enhancer, ensuring every bite of cake tastes purely of strawberries.
- Milk: Essential for binding the ingredients and adding crucial moisture, milk contributes to the cake’s tender crumb. For the richest flavor, whole milk is recommended, but any dairy or non-dairy milk you have on hand will work effectively.
- Sour Cream: After extensive testing with sour cream, buttermilk, and oil, sour cream consistently delivered the best texture, creating the desirable tight and even crumb that makes this cake so special. Its acidity also helps tenderize the cake.
- Pure Vanilla Extract: A touch of high-quality pure vanilla extract enhances the overall sweetness of the cake and adds a lovely depth to the strawberry flavor. While homemade vanilla extract offers a unique richness, a good store-bought pure vanilla is perfectly acceptable. Avoid imitation vanilla for the best results.
- Cake Flour: A true game-changer for achieving an incredibly soft, tender cake with a delicate, fine crumb. It’s crucial not to substitute cake flour with all-purpose flour, as this will result in a denser, coarser cake texture. If you must, a DIY cake flour can be made using bleached all-purpose flour and cornstarch, which also aids in achieving that beautiful pink hue.
- Unsalted Butter: Always opt for unsalted butter when baking. This allows you complete control over the salt content in your baked goods. If using salted butter, be sure to omit any additional salt specified in the recipe to prevent an overly salty outcome.
- Large Egg Whites: These provide essential structure to the cake, contributing to its light and airy texture. For convenience, you can substitute 6 large egg whites with ¾ cup of carton egg whites.
- Strawberry Cream Cheese Frosting: The perfect complement to our strawberry cake, this homemade frosting is made with a blend of freeze-dried strawberries, rich cream cheese, powdered sugar, a pinch of coarse kosher salt, and heavy whipping cream. It’s surprisingly easy to whip up and creates a truly decadent finish.
Quick Tip: Softening Butter in a Flash
The ideal way to soften butter is to allow it to sit at room temperature for approximately 2 hours. However, if time is of the essence, try this clever trick:
- Fill a tall glass with very hot water and let it stand for a few minutes.
- Carefully pour out the hot water, then immediately invert the warm glass over your stick of butter.
- After just about 5 minutes, you’ll have perfectly softened butter, ready for baking!
Crafting Your Own Cake Flour (DIY Option)
While I strongly advocate for using commercially available cake flour for this recipe, you can prepare a homemade version in a pinch. Remember, the use of bleached flour is crucial for both texture and color.
For 1 cup of DIY Cake Flour:
- Measure 1 cup (125g) of bleached all-purpose flour.
- Remove 2 tablespoons (15g) of flour from the cup.
- Add 2 tablespoons (16g) of cornstarch to the remaining flour.
- Whisk thoroughly to combine all ingredients.
Step-by-Step: Baking Your Best Strawberry Cake
Creating this magnificent strawberry cake involves three main components: the tender strawberry cake layers, a flavorful strawberry sauce filling, and a dreamy strawberry cream cheese frosting. For best results, I recommend preparing the strawberry sauce in advance, as it needs time to chill.
Part 1: The Luscious Strawberry Sauce
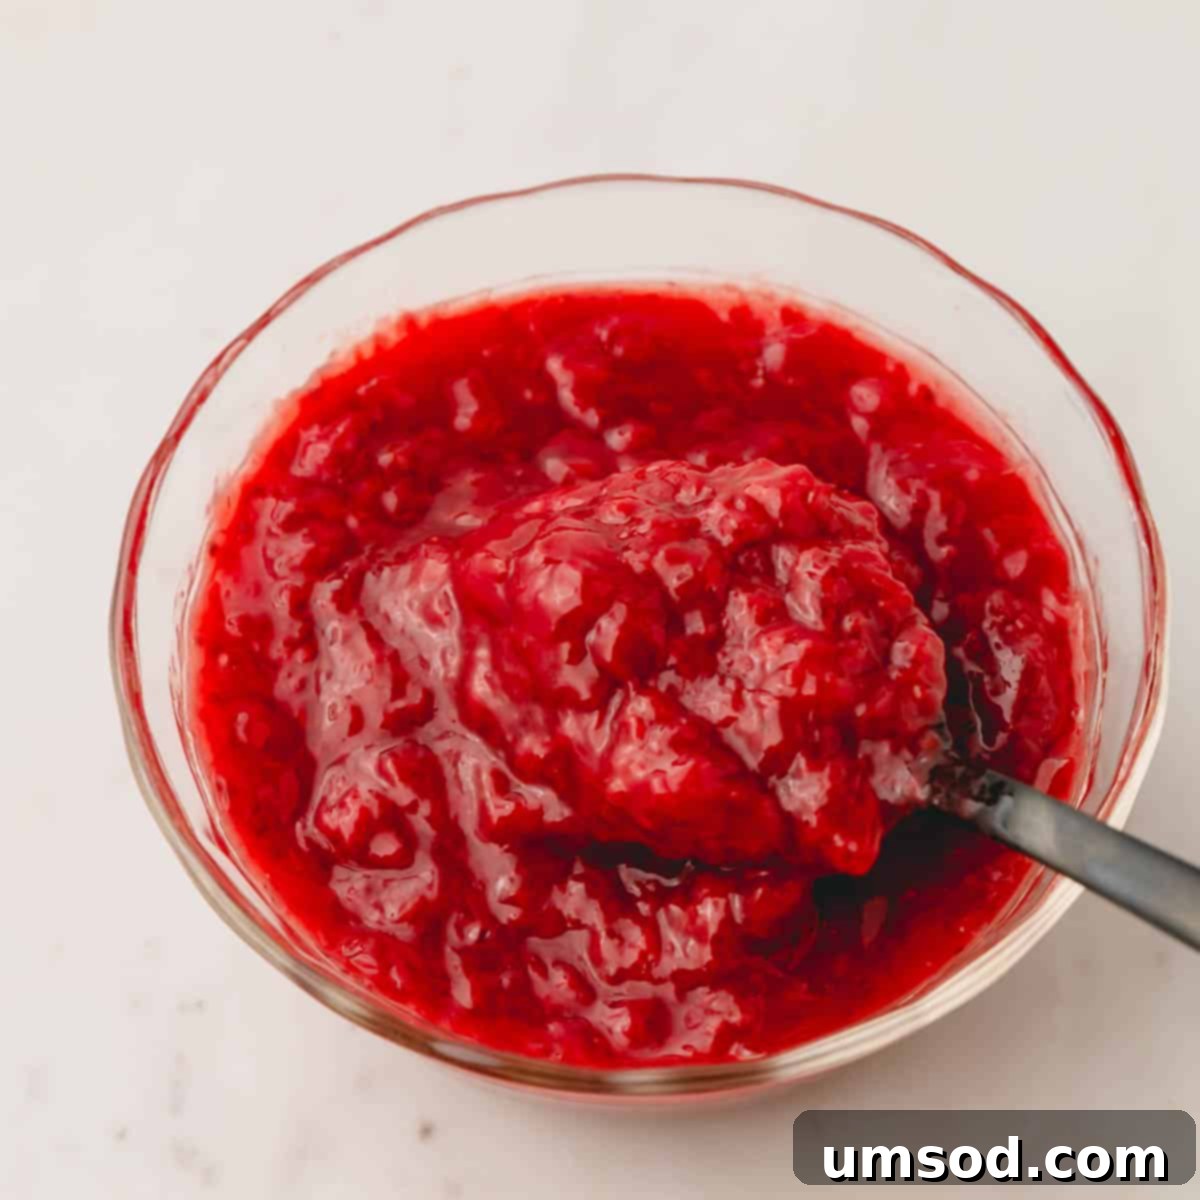
Follow the instructions to make homemade strawberry sauce, allowing it to chill in the refrigerator for at least an hour. You’ll need about ½ cup of sauce for the cake filling, so you can halve the recipe if you wish. The extra sauce is delightful on pancakes or ice cream!
Part 2: Preparing the Fluffy Cake Layers
Preheat your oven to 350°F (177°C). Prepare two 8-inch cake pans by lining their bottoms with parchment paper and spraying them thoroughly with cooking spray to ensure the cakes release easily.
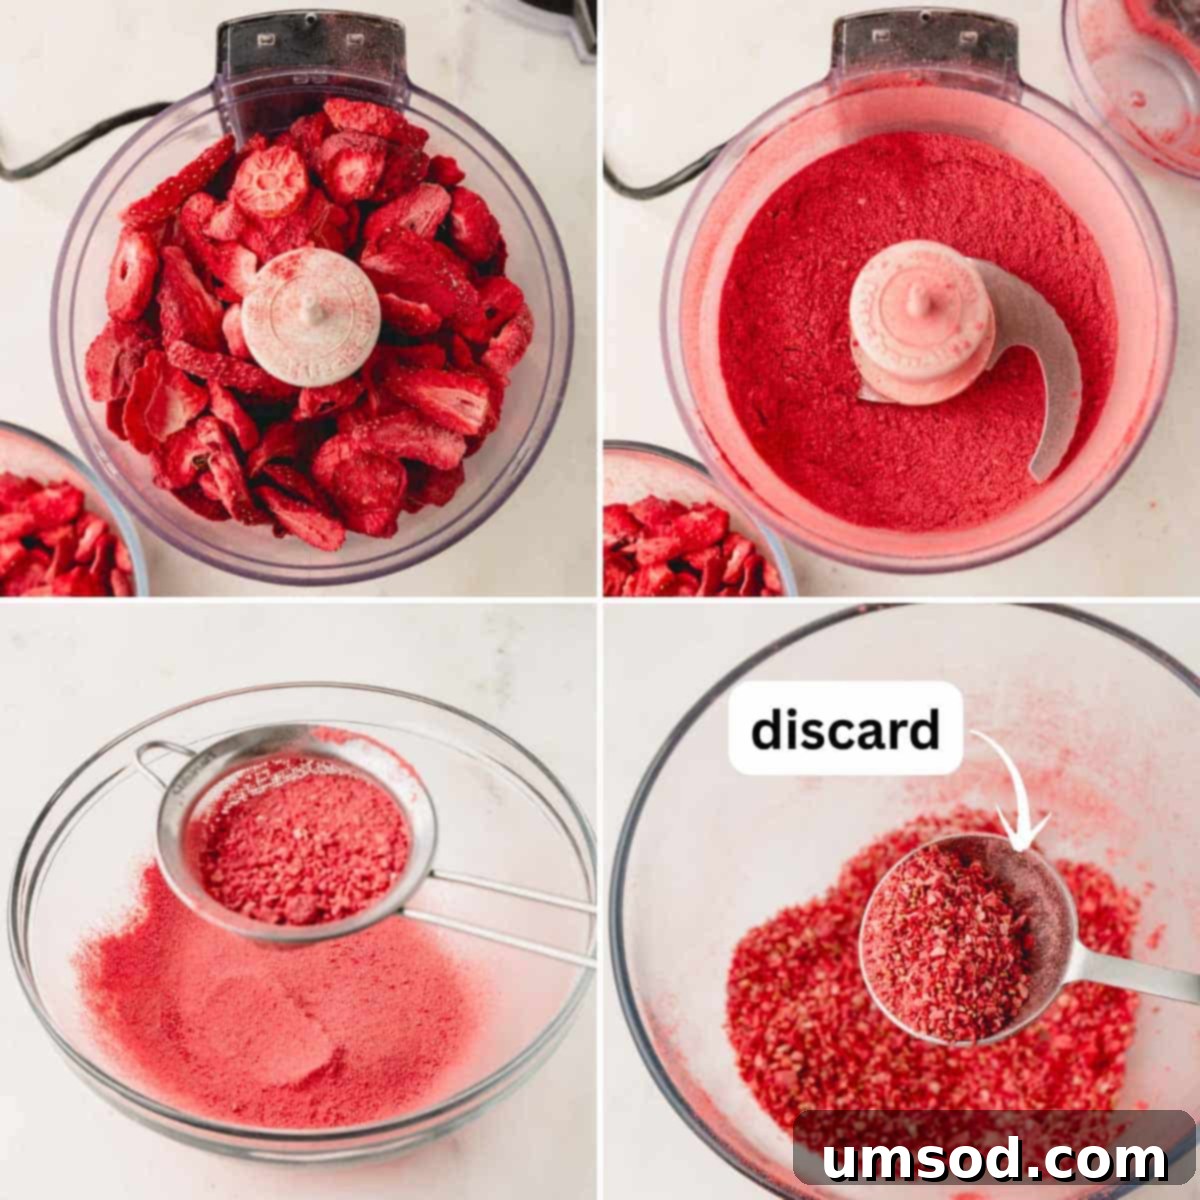
- Transforming Freeze-Dried Strawberries: Begin by crushing your freeze-dried strawberries into a fine powder. A blender or a good old rolling pin will do the trick. Once powdered, sift it through a fine-mesh sieve to remove any remaining seeds or larger pieces, ensuring a perfectly smooth cake texture. You’ll need approximately 65 grams of this fine strawberry powder.
Time-Saving Hack: Pre-Made Strawberry Powder
To bypass the crushing and sifting process entirely, consider using pre-made freeze-dried strawberry powder. You’ll still need 65g of powder for the recipe.
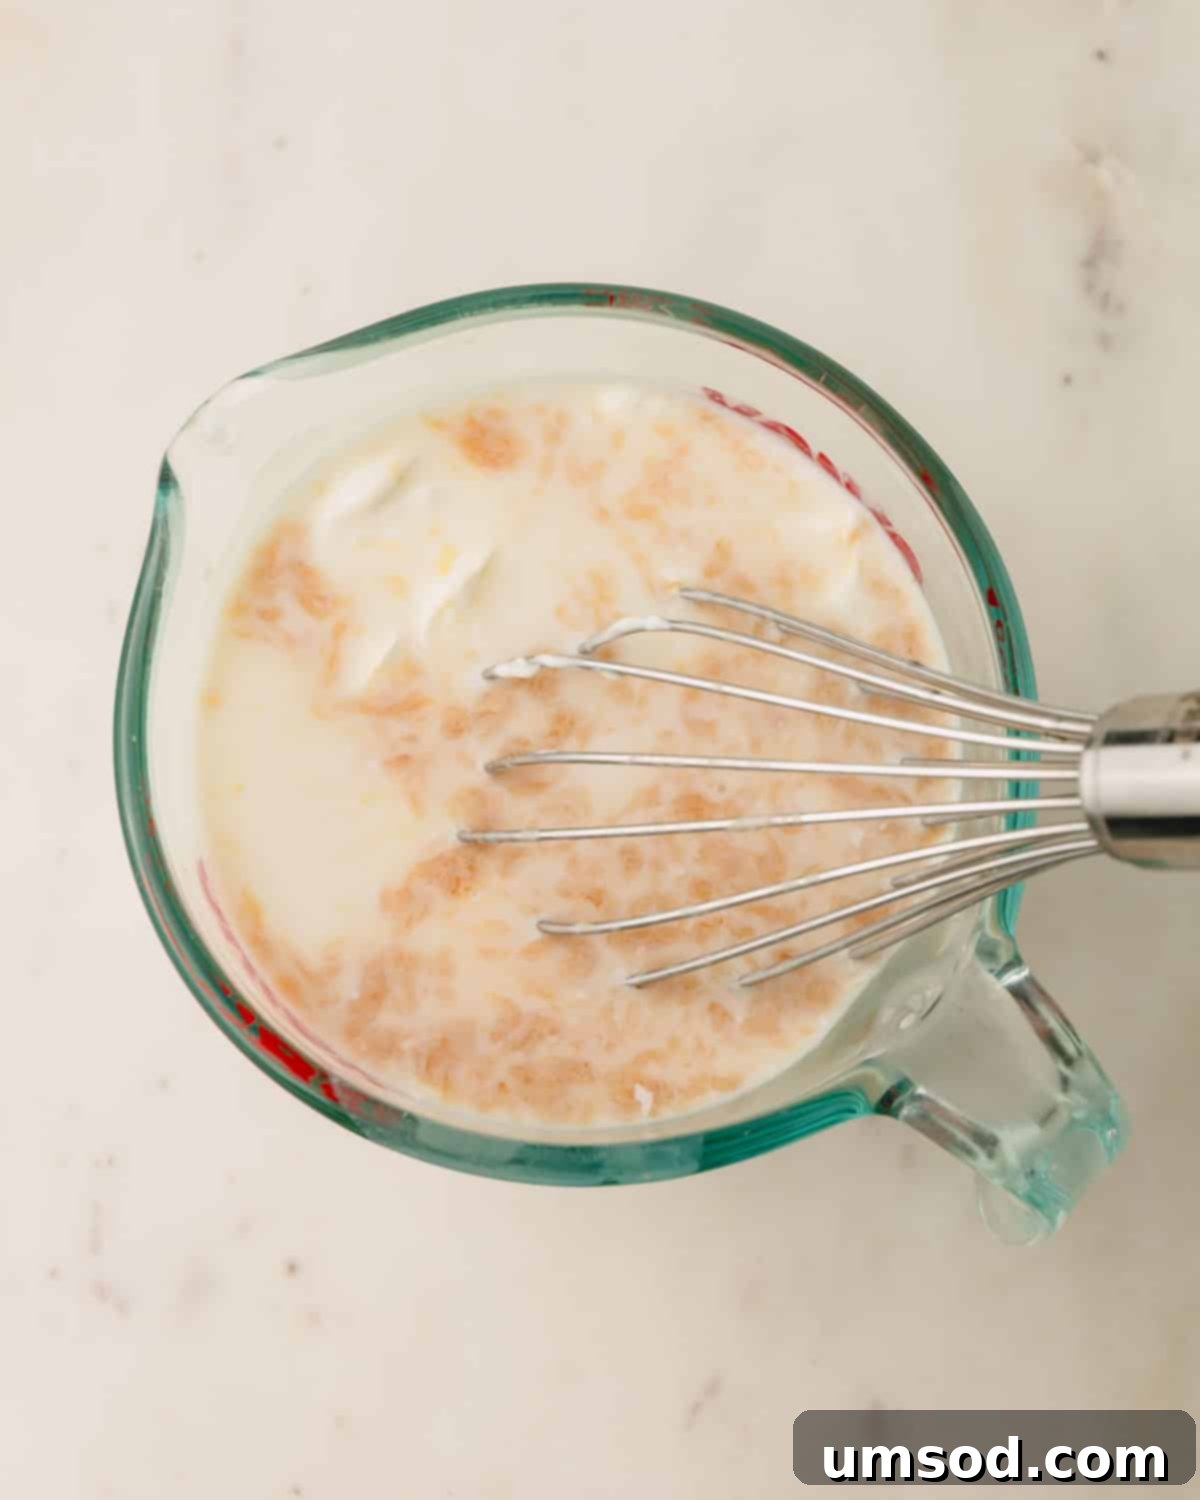
- Combining Wet Ingredients: In a medium bowl or a 4-cup measuring glass, whisk together the milk, sour cream, and pure vanilla extract until well combined.
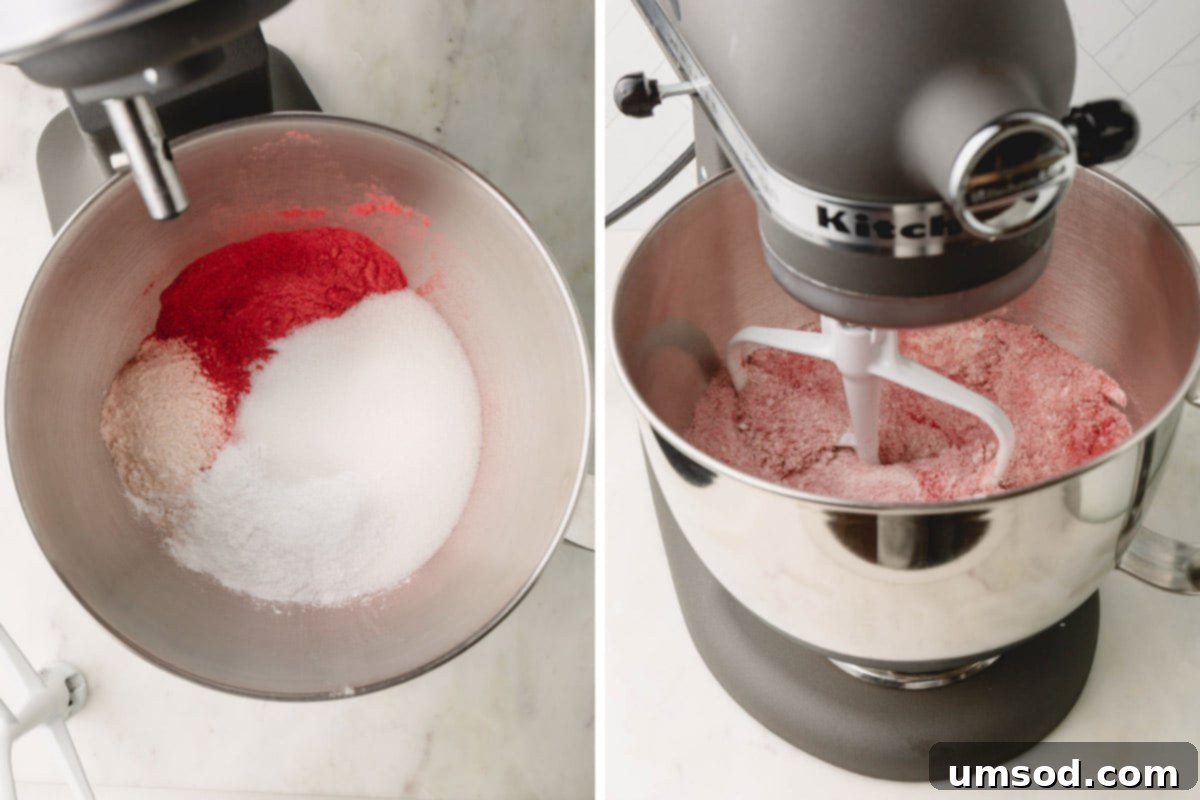
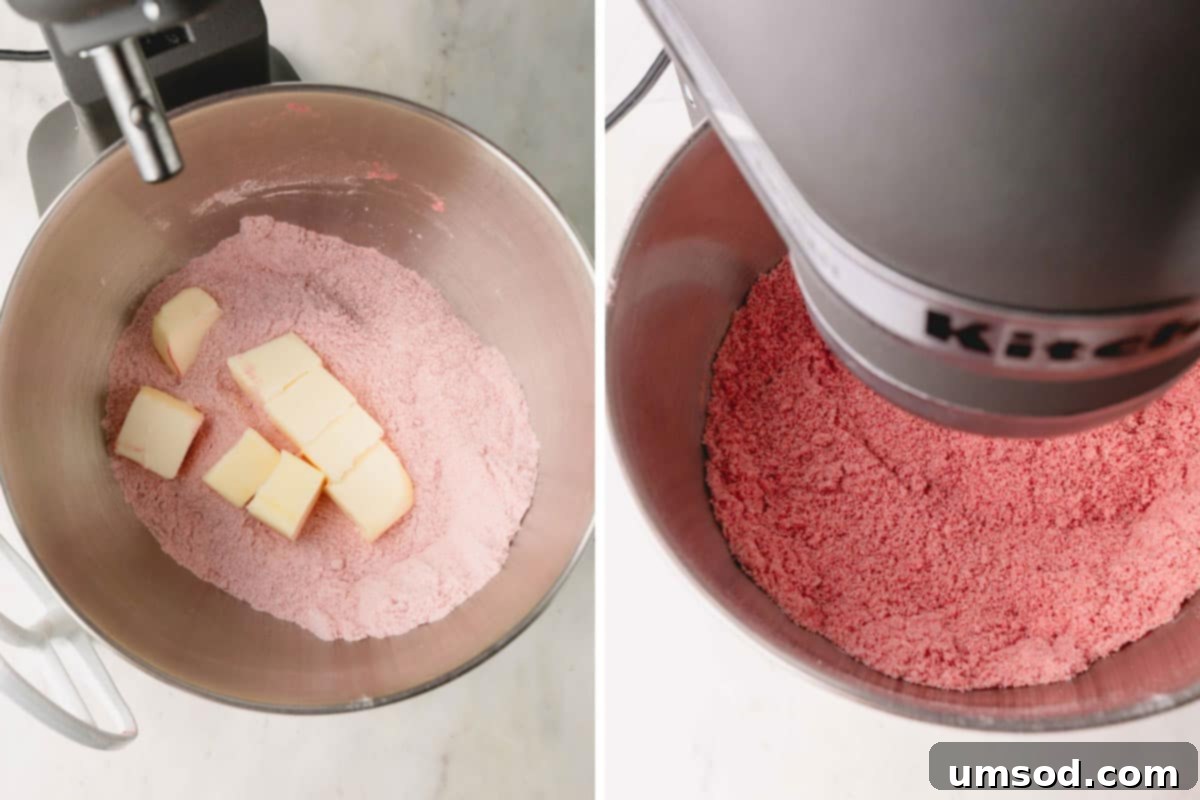
- Mixing Dry Ingredients: In the bowl of a stand mixer fitted with the paddle attachment, combine the sifted strawberry powder, cake flour, granulated sugar, baking powder, and salt. Mix on low speed until all ingredients are just incorporated.
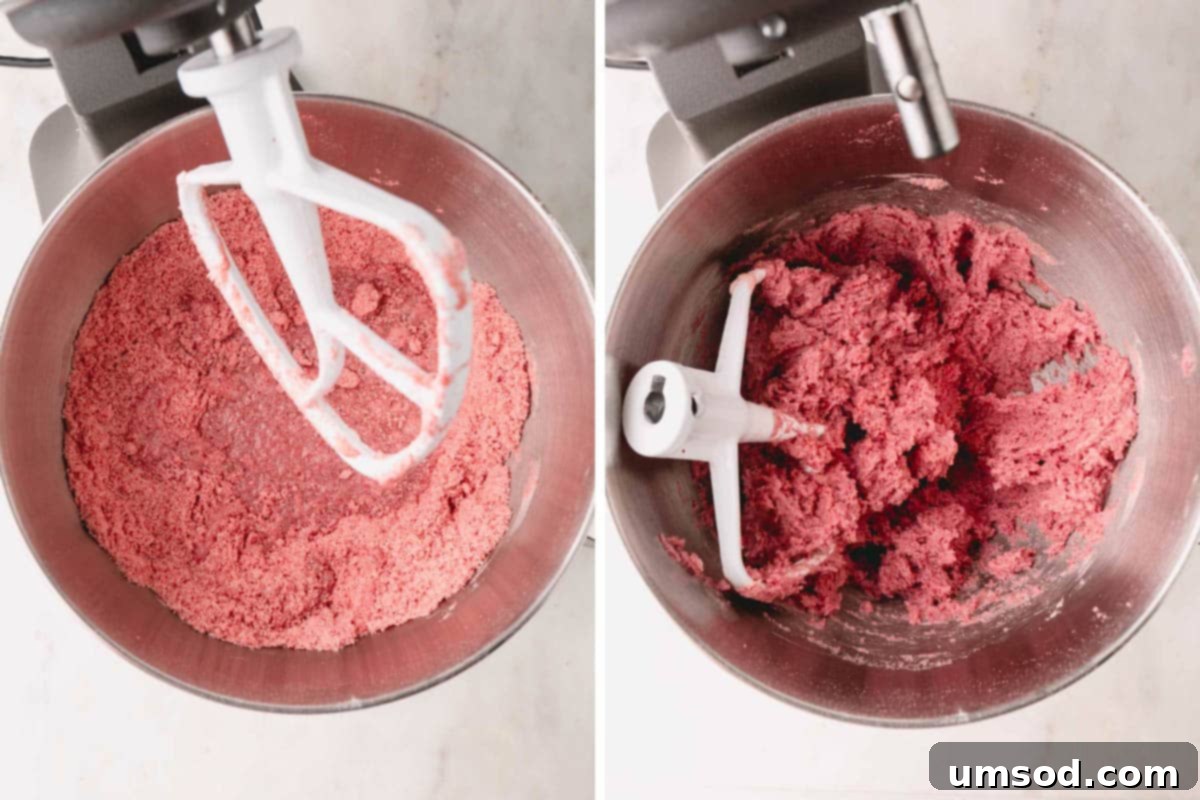
- Incorporating Butter: Add the softened unsalted butter to the dry ingredients. Continue mixing on low speed until the mixture resembles wet sand and no dry ingredients are visible, which typically takes about 3 minutes.
- Adding Egg Whites: Increase the mixer speed to medium and add the egg whites, mixing until they are fully combined into the batter, about 1 minute.
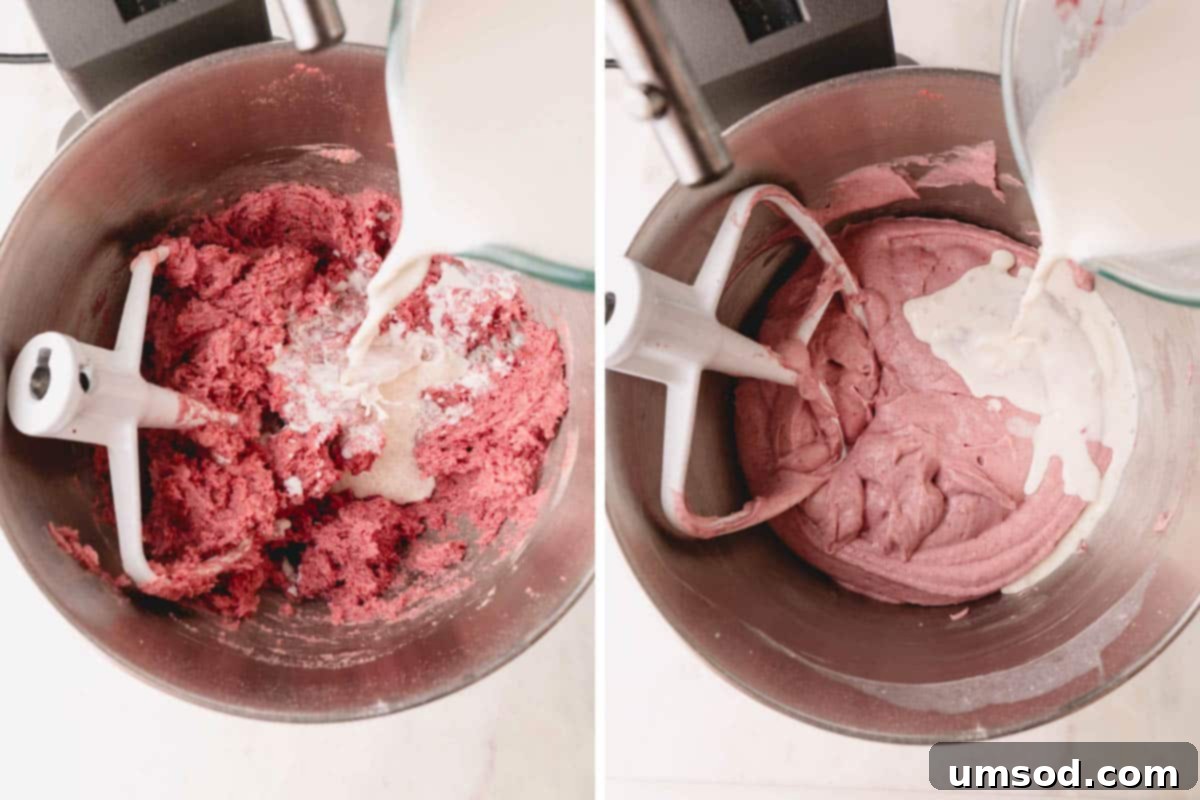
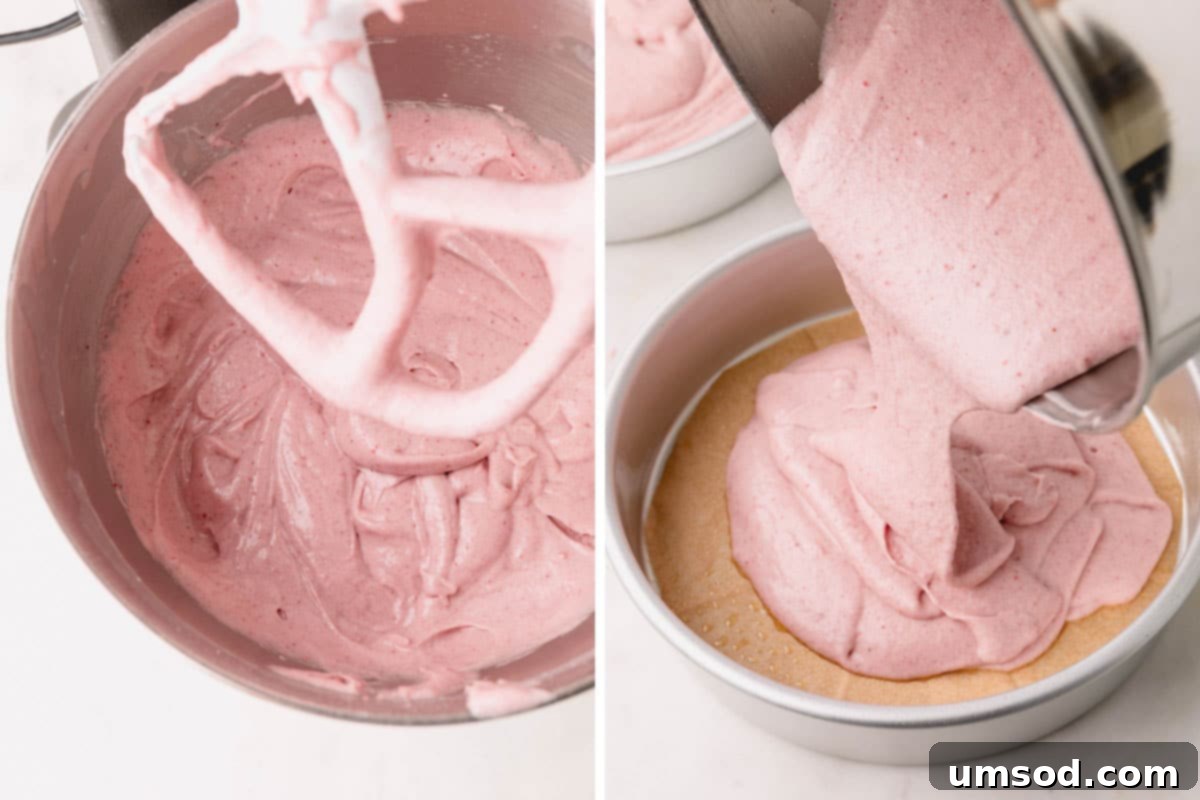
- Alternating Milk Mixture: Pour in half of the whisked milk mixture and beat on medium speed for about 1 ½ minutes. Then, add the remaining milk mixture and continue to beat for another minute, scraping down the sides of the bowl as needed to ensure all ingredients are fully incorporated and the batter is smooth.
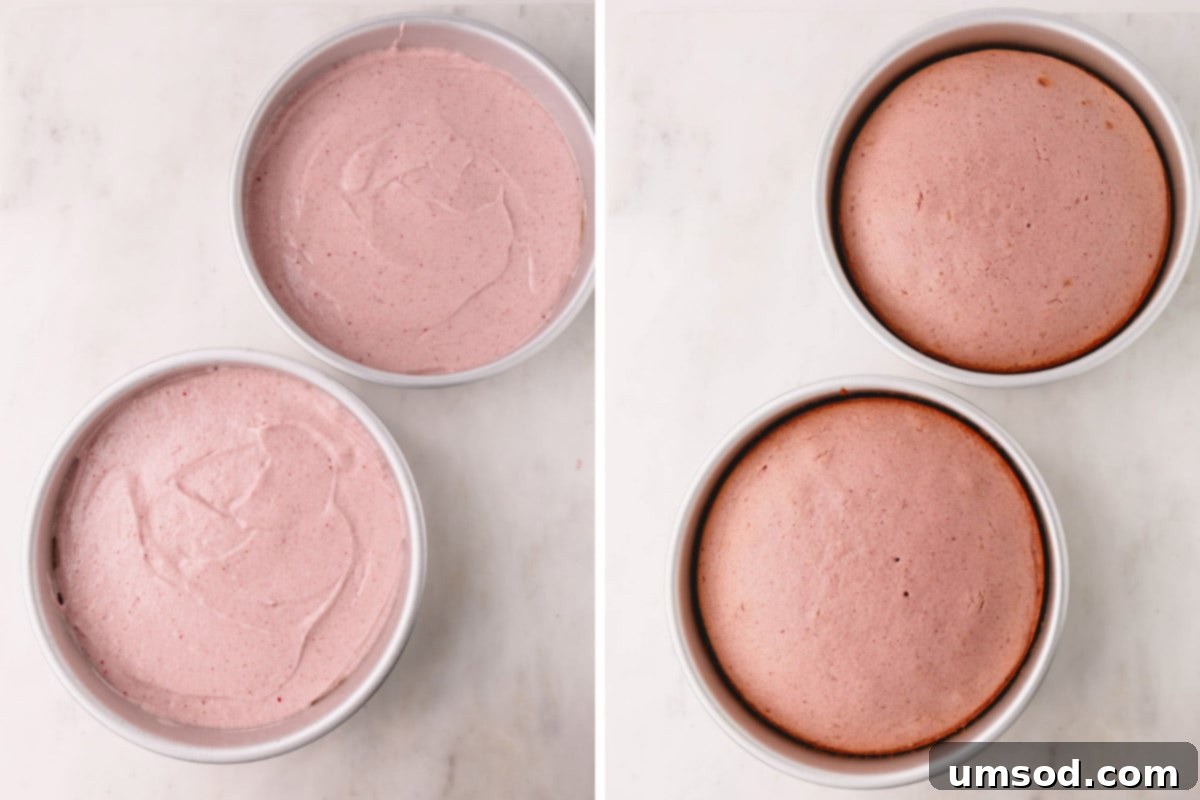
- Dividing and Baking: Divide the prepared batter evenly between your two baking pans, spreading it out smoothly with a spatula.
Pro Tip: For Perfectly Even Cake Layers
To achieve consistently even cake layers, it’s highly recommended to weigh the batter when dividing it into the cake pans. For this recipe, if your total batter weighs around 1,421 grams, pour approximately 710 grams into each pan.
- Baking to Perfection: Bake the cakes for 23-28 minutes, or until the tops are lightly golden and a toothpick inserted into the center comes out clean or with just a few moist crumbs attached.
- Cooling the Cakes: Allow the cakes to rest in their pans for a few minutes after baking. Then, carefully invert them onto a wire rack to cool completely. This full cooling process is essential before frosting.
Quick Release: Loosening Your Cake
If needed, gently run a thin knife around the edges of the cake pan to separate the baked cake from the pan, making it easier to transfer to the cooling rack.
Part 3: Whipping Up the Dreamy Cream Cheese Frosting
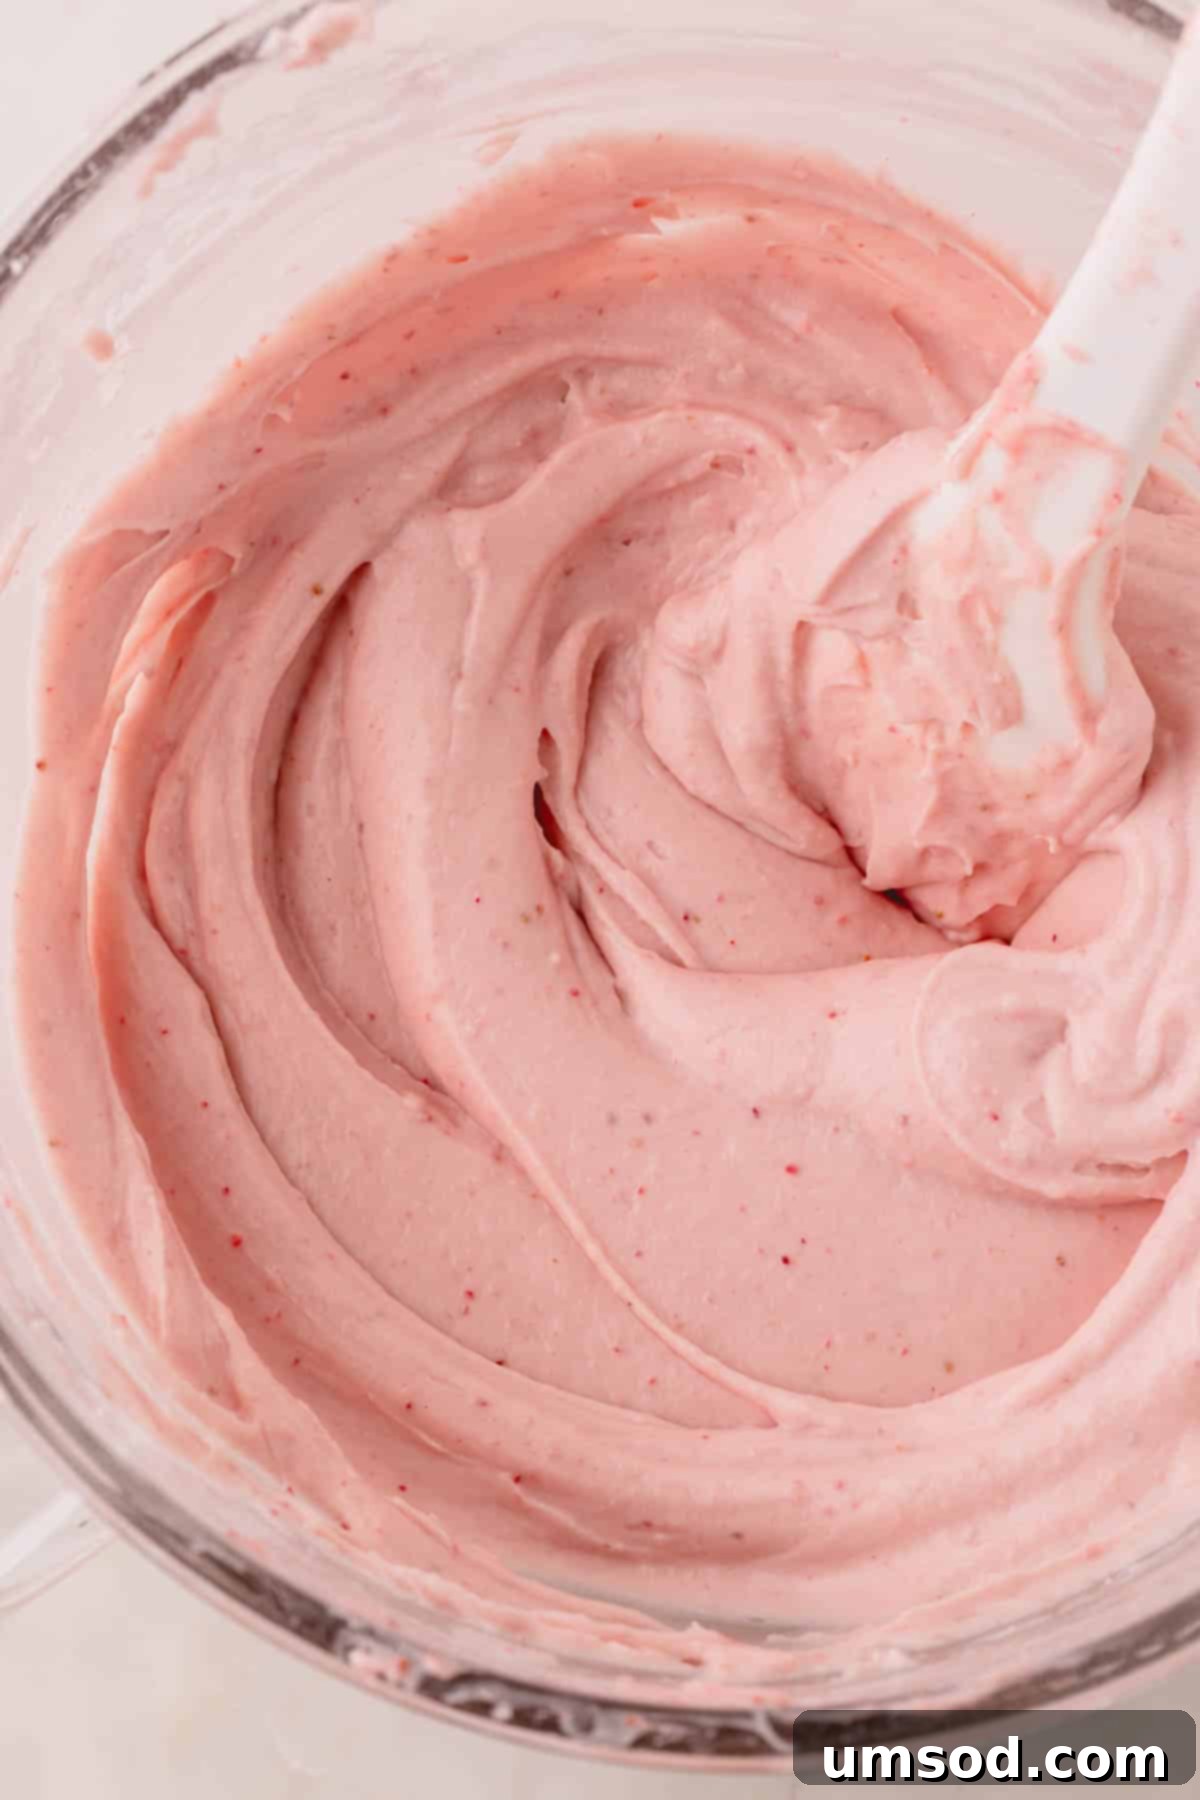
While your cake layers are cooling, prepare the rich and tangy strawberry cream cheese frosting. Once prepared, transfer the frosting into a piping bag fitted with your desired tip (a large round tip like Wilton 2A works wonderfully for filling and coating).
Part 4: Assembling Your Stunning Strawberry Cake
- Leveling the Layers: Using a serrated knife, carefully level the tops of your cooled cake layers. This creates a flat surface, ensuring your assembled cake is stable and even.
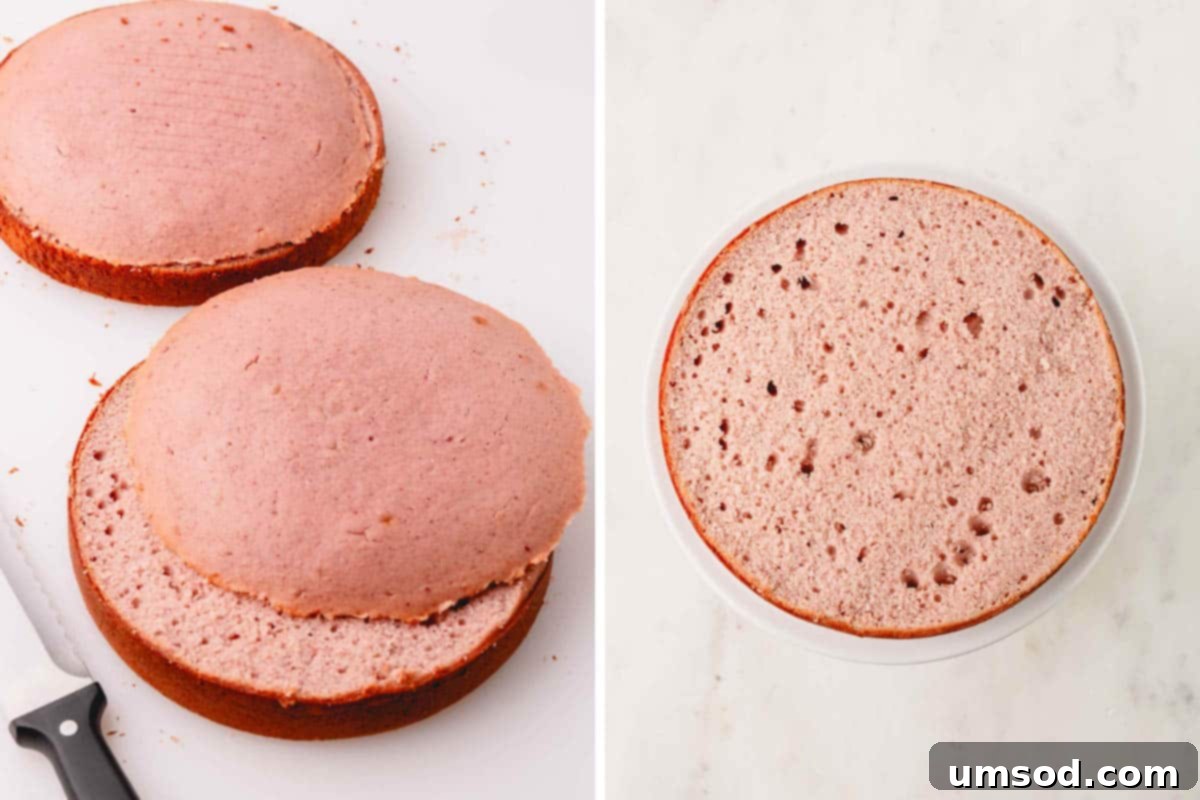
- Setting the Base: Place your first leveled cake layer onto your chosen serving platter. For a cleaner presentation, I like to arrange 3-4 strips of parchment or wax paper underneath the cake, extending slightly past the edges. These can be easily removed once the cake is frosted.
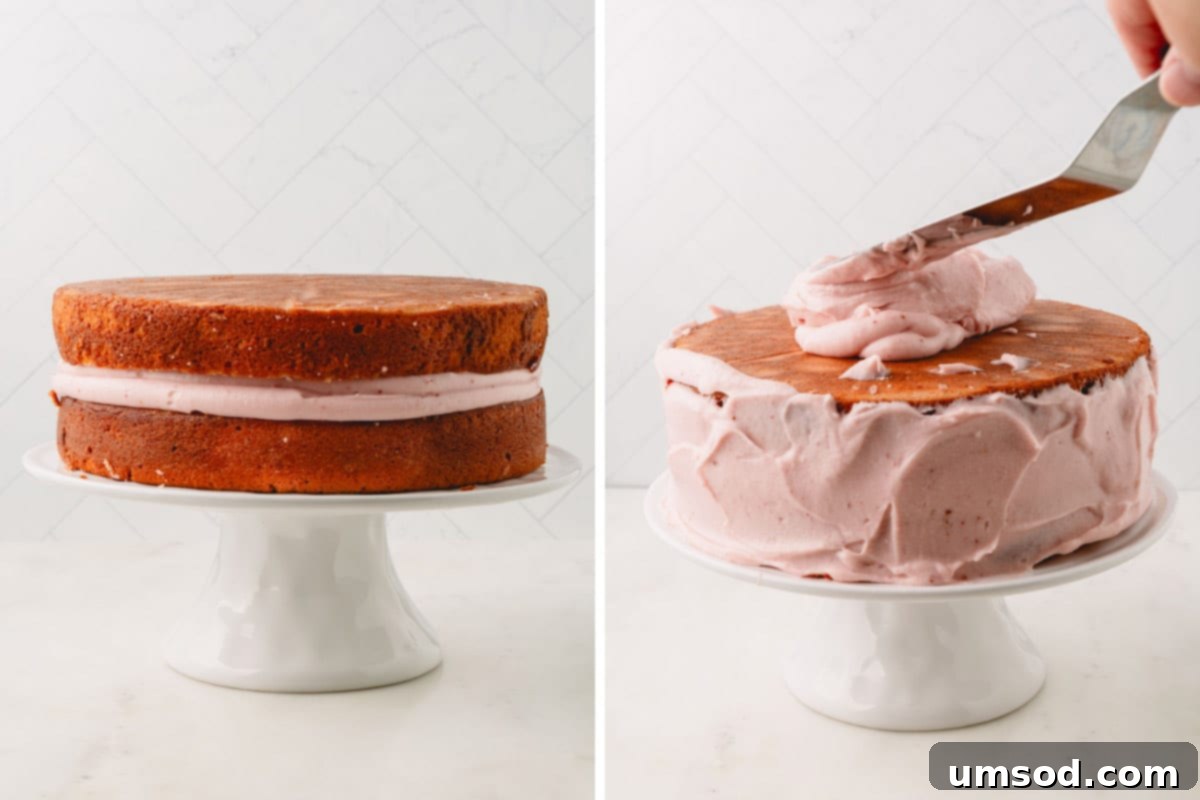
- Piping the First Frosting Layer: Pipe a generous layer of strawberry cream cheese frosting over the first cake layer, then use an offset spatula to smooth it into an even coating. Next, pipe a small border of frosting around the very edges of this layer, creating a “dam.”
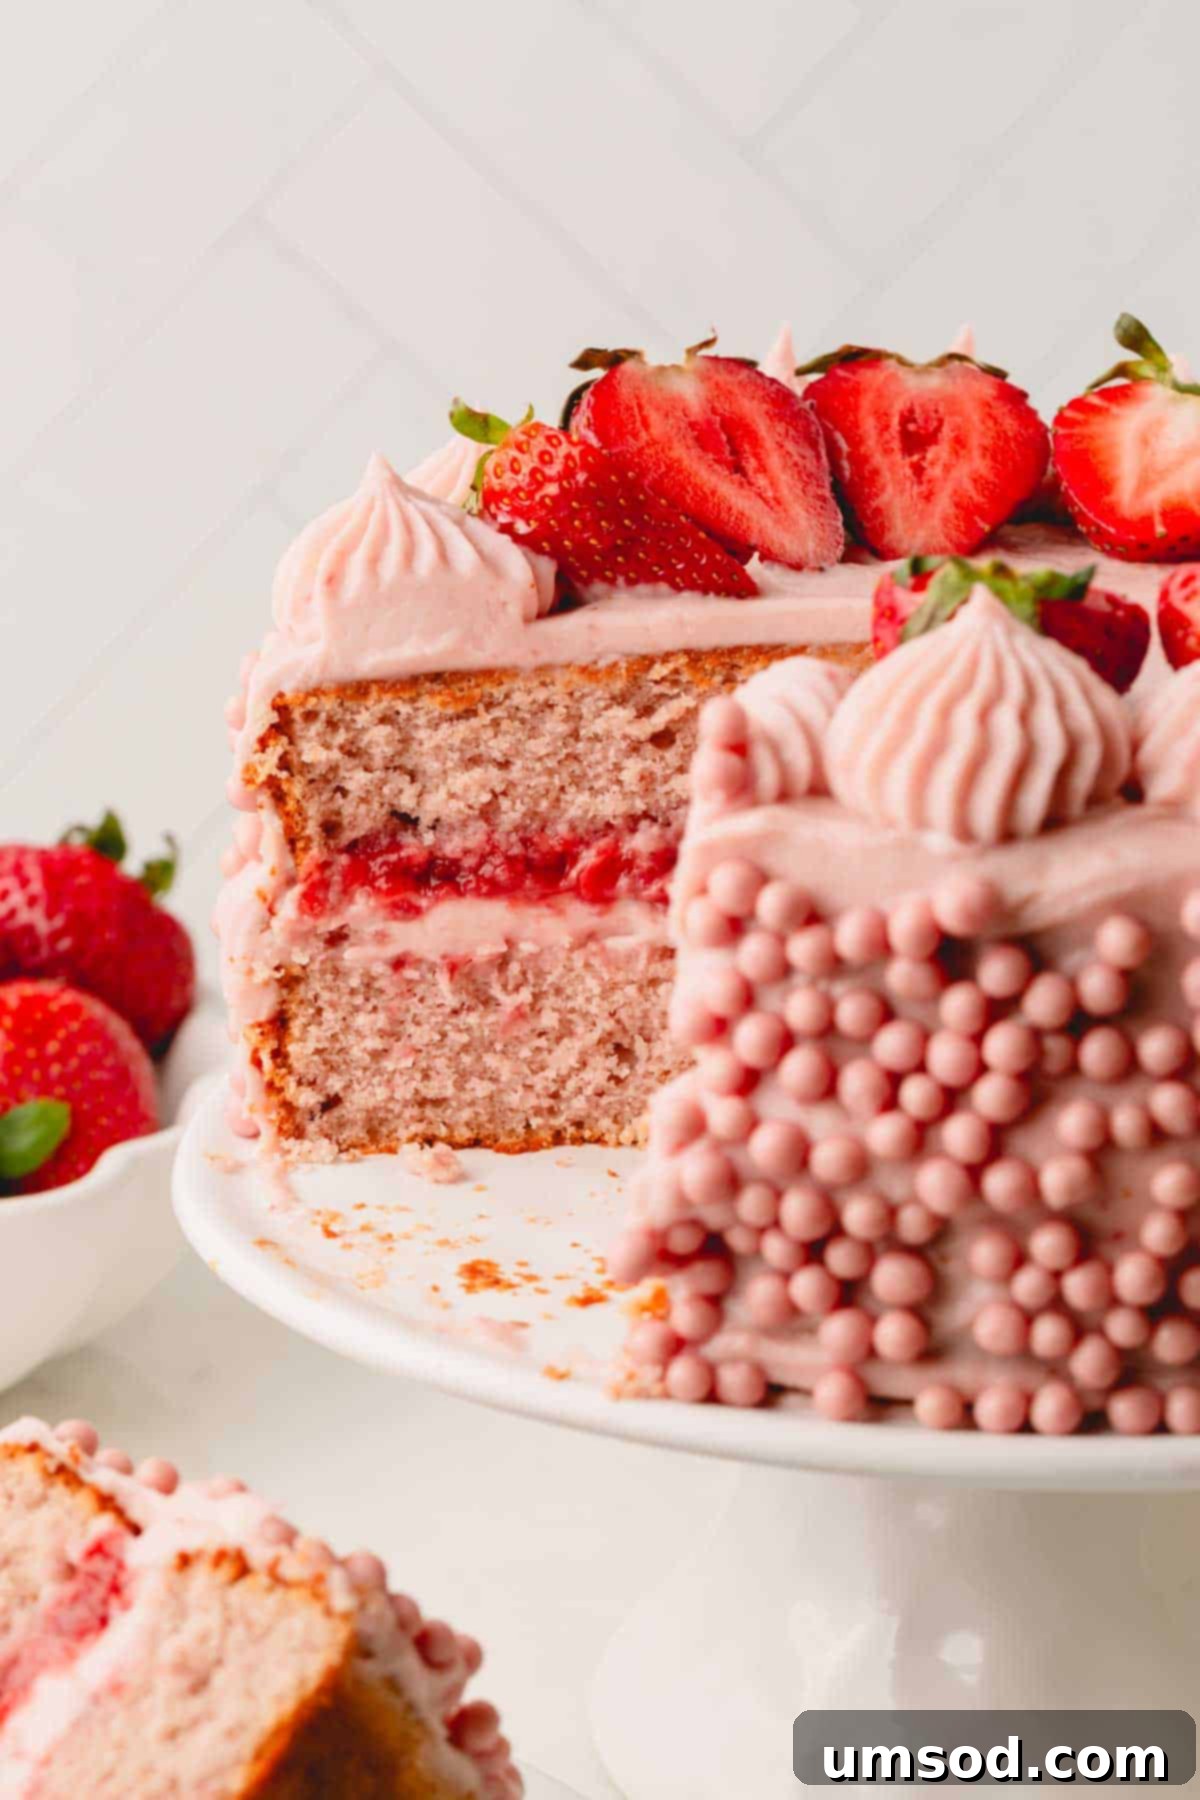
- Adding the Strawberry Sauce Filling: Carefully spoon about ½ cup of the chilled strawberry sauce into the center of the cake, spreading it evenly within the piped frosting border.
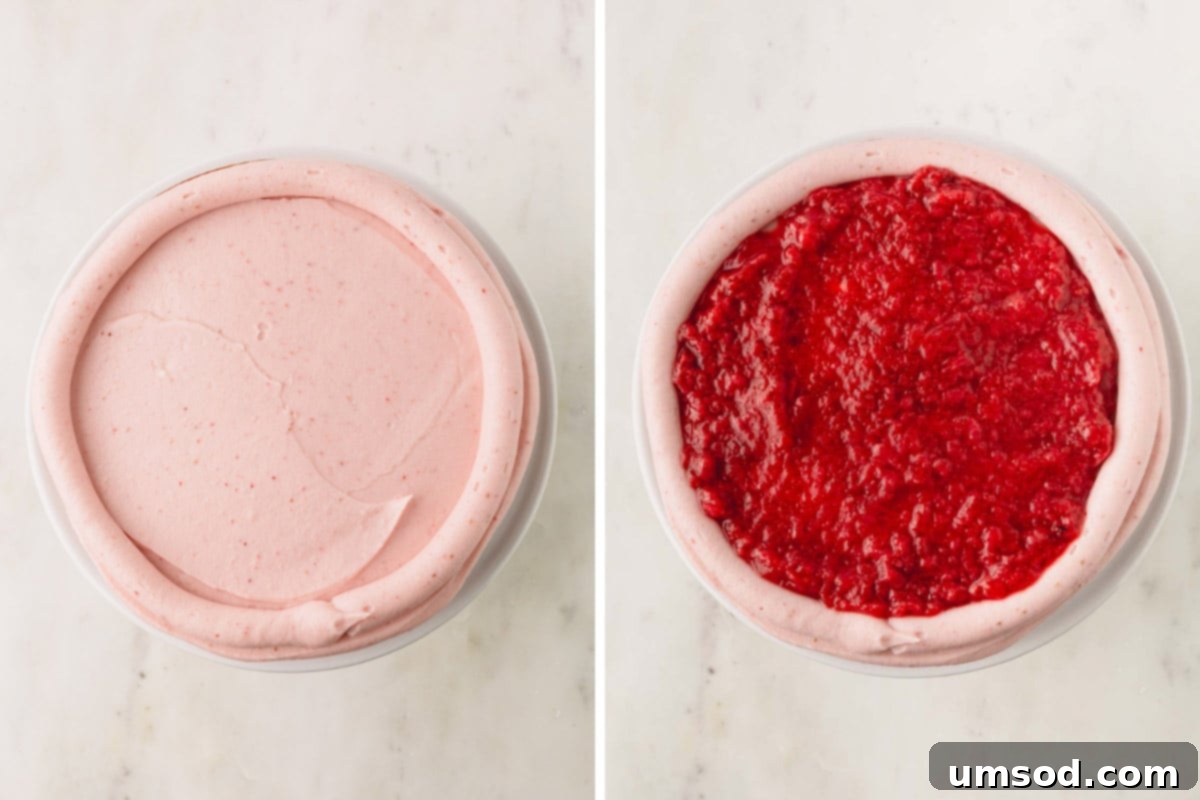
- Stacking the Second Layer: Gently place the second cake layer on top, flipping it upside down. This technique ensures the top surface of your cake is perfectly flat and smooth, ready for the final frosting.
- Final Frosting Coat: Use the remaining strawberry cream cheese frosting to coat the entire cake, smoothing it over the top and sides with your offset spatula for a beautiful finish.
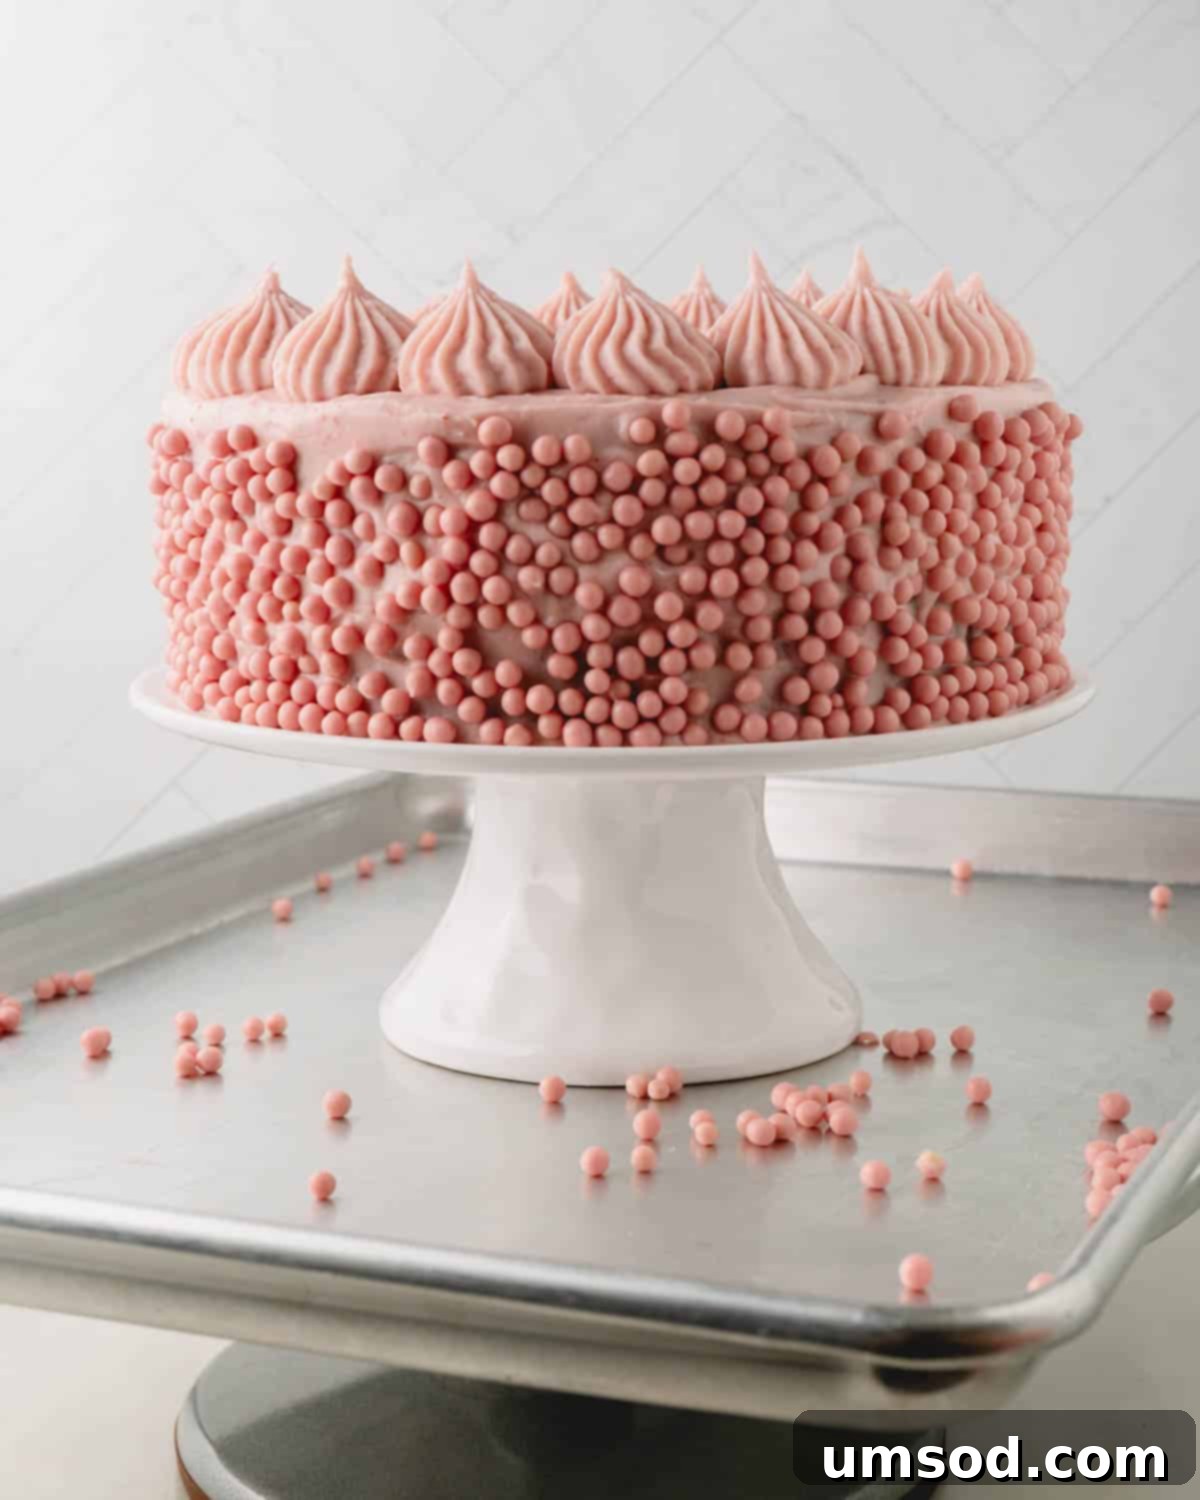
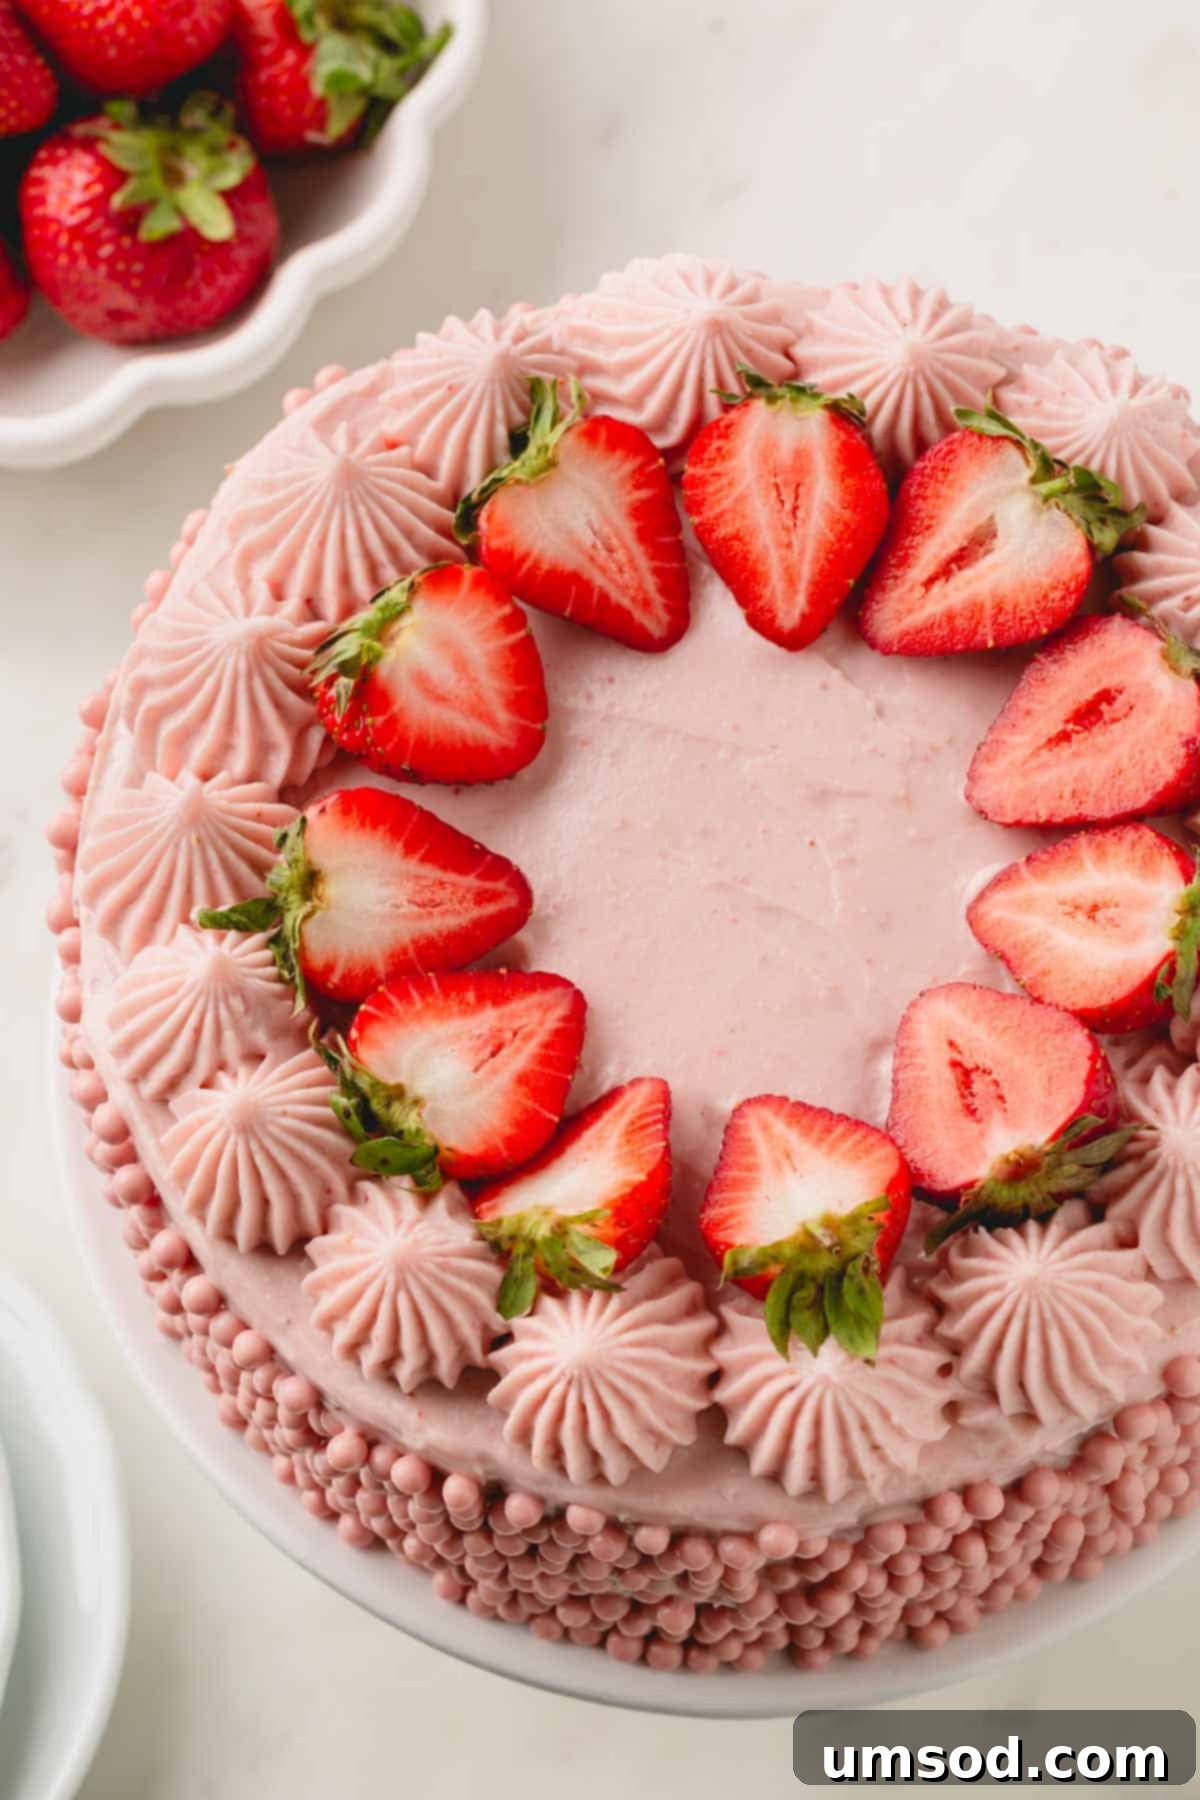
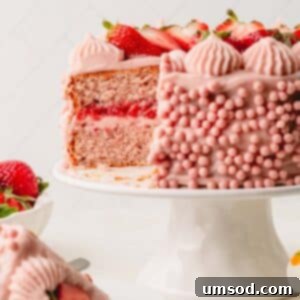
- Decorating with Flair: Now comes the fun part! Decorate your cake as desired. I often pipe any leftover frosting around the top edges, then adorn it with fresh sliced strawberries and delightful strawberry pearl crisps for an extra touch of elegance and crunch.
Essential Tip: For Effortless Frosting
Completely cooled or even chilled cake layers are significantly sturdier and much easier to handle when frosting. In fact, I often prefer to bake my cake layers 1-2 days in advance for this very reason. It allows them to firm up. Remember, never attempt to frost a warm cake! The frosting will simply melt and slide right off, ruining your beautiful creation.
Watch the video for assembly tips!
Pro Tips for Strawberry Cake Success
Achieving bakery-worthy results with your homemade strawberry cake is easy with these expert tips:
- Prioritize the Strawberry Sauce: Always make the strawberry sauce first, as it requires adequate chilling time to thicken and set properly. You can conveniently prepare it up to 3 days in advance.
- Sift for Smoothness: While it adds an extra step, sifting the crushed freeze-dried strawberries is highly recommended. This removes any seeds or larger pieces, ensuring an incredibly smooth, melt-in-your-mouth cake texture. Alternatively, opt for pre-made freeze-dried strawberry powder.
- Invest in Quality Cake Flour: Bleached cake flour is the cornerstone of this recipe’s tender crumbs and contributes to its beautiful pink color. I strongly recommend purchasing a store-bought cake flour. In a pinch, refer to our DIY cake flour instructions using bleached all-purpose flour.
- Accurate Flour Measurement is Key: Use the spoon and level method to measure your flour precisely. This involves using a spoon to scoop flour into the measuring cup until it overflows, then leveling it off with the back of a butter knife. For even greater accuracy, always weigh your flour using a kitchen scale.
- Avoid Over-Baking: Over-baking is the quickest way to end up with a dry, crumbly cake. Begin checking for doneness at the lower end of the baking time by inserting a toothpick into the center of the cake. It should come out clean or with just a few moist crumbs.
- Trim for Perfection: For a pristine, professional-looking homemade strawberry cake, use a serrated knife to carefully trim off any brown edges, as well as the slightly domed top and bottom of the cake layers, before applying the frosting.
- Never Frost a Warm Cake: This cannot be stressed enough! If your cake layers are even slightly warm to the touch, your beautiful frosting will melt and slide right off. Ensure they are completely cool, or even slightly chilled, before frosting.
- Use 8-inch Round Cake Pans: This recipe is specifically developed for two 8-inch round cake pans, which provide the ideal thickness and baking time for the layers. If you choose to use smaller pans, you will need to adjust and likely increase the baking time.
- Bake Layers in Advance: For ultimate convenience, you can bake the cake layers up to a month ahead of time. Once completely cooled, wrap each layer tightly in plastic wrap, then place them in a freezer bag. They can be refrigerated for a few days or frozen for up to 30 days.
Plan Ahead: Make-Ahead & Storage Solutions
This strawberry cake is perfect for preparing in stages, making it ideal for entertaining or simply enjoying fresh slices throughout the week. Here’s how to manage your time and keep your cake fresh:
Make-Ahead Tips:
- Strawberry Sauce: The homemade strawberry sauce can be stored in an airtight container in the refrigerator for up to 7 days. For longer storage, freeze it for up to 3 months. Remember to thaw frozen sauce in the refrigerator before using.
- Strawberry Cream Cheese Frosting: Prepare your homemade strawberry cream cheese frosting up to 3 days in advance and store it in an airtight container in the fridge. For longer periods, it can be frozen for up to 3 months. When ready to use, thaw the frosting in the refrigerator and re-whip it with a mixer until it regains its smooth, fluffy consistency.
- Cake Layers: Cakes are often at their best when the layers are made in advance! Completely cooled or chilled layers are much sturdier, making them easier to frost and slice without crumbling. Once the cake layers are completely cool, wrap each layer tightly in plastic wrap, then place them in a freezer bag. Store the wrapped cake layers at room temperature for up to 1 day, or freeze them for up to 1 month.
Storing Your Frosted Masterpiece:
- Refrigerated Storage: Store your fully frosted strawberry cake in the refrigerator for up to 5 days. Ensure it is covered with an airtight cake container or loosely wrapped in foil to prevent it from drying out or absorbing refrigerator odors.
- Freezing Frosted Cake: Frosted cakes freeze beautifully! Wrap the entire cake tightly in plastic wrap, followed by an additional layer of aluminum foil. Freeze for up to 3 months. Thaw slowly in the refrigerator overnight before serving.
Frequently Asked Questions (FAQs)
Can I put fresh strawberries in a cake?
I generally don’t recommend incorporating fresh strawberries directly into this cake batter. Fresh berries can release too much moisture during baking, leading to a soggy texture in the cake. For this recipe, I prefer to reserve fresh strawberries exclusively for beautiful decoration on top of the finished cake.
Can I use a different frosting?
Absolutely! Feel free to customize your cake with your favorite frosting. Whether you prefer a store-bought option or another homemade recipe, it will surely be delicious. Some excellent alternatives include classic cream cheese frosting, elegant vanilla Swiss meringue buttercream, simple American buttercream, or a zesty lemon cream cheese frosting!
Explore More Delicious Cake Recipes
If you loved this strawberry cake, you’ll surely enjoy exploring our other popular cake recipes:
- Classic Sponge Cake
- The Best Simple Chocolate Cake
- Homemade Angel Food Cake
- Classic Yellow Cake
Strawberry Cake Recipe
By: Shinee Davaakhuu
This homemade strawberry cake recipe is bursting with vibrant strawberry flavor, and it doesn’t require fresh strawberries or strawberry sauce in the batter. Instead, we use freeze-dried strawberries to add both flavor and color to the cake. No food coloring required!
Prep Time: 35 mins
Cook Time: 38 mins
Chill Time: 2 hrs
Total Time: 4 hrs
Servings: 12 servings
Yields: One 8-inch two-layer cake
Pin Recipe | Comment | Print Recipe
Ingredients
For Strawberry Sauce:
- 8 oz (225 g) strawberries, fresh or frozen (Note 1)
- 2 tablespoons (25 g) granulated sugar
- ½ cup (60 ml) water (if using frozen strawberries, use ¼ cup water)
- ½ tablespoon (4 g) cornstarch
- ½ tablespoon (7 g) lemon juice
For Strawberry Cake:
- 80 g freeze-dried strawberries (Note 2)
- 1 cup (240 ml) milk, at room temperature
- ½ cup (120 g) sour cream, at room temperature
- 2 teaspoons pure vanilla extract
- 2 ½ cups (320 g) bleached cake flour (Note 3)
- 1 ½ cups (300 g) granulated sugar
- 4 teaspoons baking powder
- 1 teaspoon coarse kosher salt
- 1 ½ sticks (170 g) unsalted butter, softened
- 6 (210 g) large egg whites, at room temperature (Note 4)
For Strawberry Cream Cheese Frosting:
- 30 g freeze-dried strawberries
- 15 oz (450 g) cream cheese, softened (Note 5)
- 1 stick (113 g) unsalted butter, at room temperature
- 4 cups (520 g) powdered sugar
- 1/8 teaspoon coarse kosher salt
- 1 cup (240 ml) heavy whipping cream, cold
For Decorating (Optional):
- Strawberry pearls
- Fresh strawberries
Instructions
To make the strawberry sauce:
- In a medium saucepan, combine the strawberries, granulated sugar, and water.
- Bring the mixture to a rolling boil over medium-high heat, stirring frequently to prevent sticking.
- Meanwhile, in a small bowl, whisk together the cornstarch and lemon juice until a smooth slurry forms.
- Slowly pour the cornstarch mixture into the boiling strawberries while continuously stirring.
- Reduce the heat to medium and cook for 10 minutes, stirring occasionally. Use a fork or potato masher to smash the berries to your desired smooth consistency.
- Chill the sauce, covered, in the refrigerator for at least 1 hour. Store any leftover sauce in an airtight container for up to 1 week. You will not use all the sauce for the cake filling.
To make the cake:
- Preheat your oven to 350°F (177°C). Line the bottom of two 8-inch cake pans with parchment paper, then spray the pans with cooking spray to ensure the cakes do not stick.
- Crush the freeze-dried strawberries into a fine powder using a blender or rolling pin. Sift the powder through a fine-mesh sieve, discarding any seeds or large pieces. You should yield roughly 65g of strawberry powder.
- In a medium bowl, whisk together the milk, sour cream, and vanilla extract until well combined.
- In a stand mixer fitted with the paddle attachment, combine the powdered freeze-dried strawberries, cake flour, granulated sugar, baking powder, and salt. Mix on low speed until just combined.
- Add the softened unsalted butter to the dry ingredients and continue mixing on low speed for about 3 minutes, until no dry ingredients remain and the mixture resembles wet sand.
- Add the large egg whites and mix on medium speed for about 1 minute until fully combined.
- Pour in half of the milk mixture and beat on medium speed for 1 ½ minutes.
- Then, add the remaining milk mixture and continue to beat for another minute, making sure to scrape down the sides of the bowl halfway through to incorporate all ingredients evenly.
- Divide the batter evenly into the prepared cake pans and smooth the tops with a spatula. Bake for 23-28 minutes, or until the cakes are lightly golden and a toothpick inserted into the center comes out clean or with just a few moist crumbs.
- Allow the cakes to rest in their pans for 3 minutes. If necessary, gently loosen the edges with a knife, then invert the cakes onto a wire rack to cool completely. (Cooled cake layers can be wrapped and stored at room temperature for up to 1 day or frozen for up to 1 month.)
To make the frosting:
- Pulse the freeze-dried strawberries in a small food processor until they form a fine powder. (Alternatively, crush them finely with a rolling pin.)
- Sift the crushed strawberries through a fine-mesh sieve, discarding any remaining seeds or large pieces.
- In a mixing bowl with a paddle attachment, beat the softened cream cheese and butter on medium-high speed for about 1 minute, until light and fluffy.
- Add the powdered sugar, strawberry powder, and salt. Beat on low speed for about 1 minute until partially incorporated.
- Add the cold heavy cream and mix on low speed until mostly combined. Then increase the speed to medium-high and continue to beat for about 3 minutes, until the frosting is smooth, light, and fluffy.
- Transfer the frosting into a piping bag fitted with a large round tip (such as Wilton 2A).
To assemble:
- Using a serrated knife, carefully level the tops of your cooled cake layers to create a flat surface. (TIP: Cake layers are much easier to handle once they are completely cooled and/or chilled in the fridge.)
- Place one cake layer onto your serving platter. (TIP: For a clean platter, place 3-4 strips of parchment or wax paper underneath the cake edges before placing the first layer.)
- Pipe a generous layer of the strawberry cream cheese frosting all over the first cake layer and smooth it with an offset spatula. Then, pipe a border of frosting around the very edges of the cake layer to create a “dam.”
- Spoon about ½ cup of the chilled strawberry sauce into the middle of the cake and spread it evenly within the piped frosting border.
- Carefully place the second cake layer on top, flipping it upside down so the top surface of the cake is perfectly flat.
- Coat the entire cake with the remaining frosting, smoothing it over the top and sides with an offset spatula.
- Decorate the cake as desired. For example, pipe any remaining frosting around the edges, arrange fresh sliced strawberries, and cover the sides with strawberry pearl crisps for a festive touch.
⭐️ Did you make this recipe?
Please leave a review and let us know how you liked it!
Tips & Notes
- Note 1: Both fresh and frozen strawberries work wonderfully for the sauce. There’s no need to thaw frozen berries before use.
- Note 2: You’ll need approximately 65g of sifted strawberry powder for the cake batter. To save time, you can purchase freeze-dried strawberry powder instead of crushing your own.
- Note 3: Substituting all-purpose flour for bleached cake flour is not recommended, as it will result in a denser, coarser cake texture and a less vibrant pink color.
- Note 4: If using carton egg whites, you’ll need about ¾ cup to substitute for 6 large egg whites.
- Note 5: For the best and sturdiest cream cheese frosting, always use full-fat, brick-style cream cheese, not the spreadable kind from a tub.
- Storing Tips:
- Store your frosted strawberry cake on the counter at room temperature for 1-2 days, or refrigerated for up to 5 days. Cover the cake with an airtight cake container or loosely wrap it in foil.
- Frosted cakes also freeze well! Wrap the cake tightly in plastic wrap, followed by a layer of aluminum foil, and freeze for up to 3 months.
- Cupcakes: This recipe can easily be adapted for cupcakes. Fill cupcake liners 2/3 full and bake for 20-22 minutes. This recipe yields approximately 33 cupcakes.
Nutrition Information (Per Serving)
- Servings: 1 serving
- Calories: 606 kcal
- Carbohydrates: 70 g
- Protein: 7 g
- Fat: 34 g
- Sugar: 45 g
- Sodium: 580 mg
Categories
Course: Dessert
Cuisine: American
Did you make this?Leave a rating and your feedback. Thank you!
