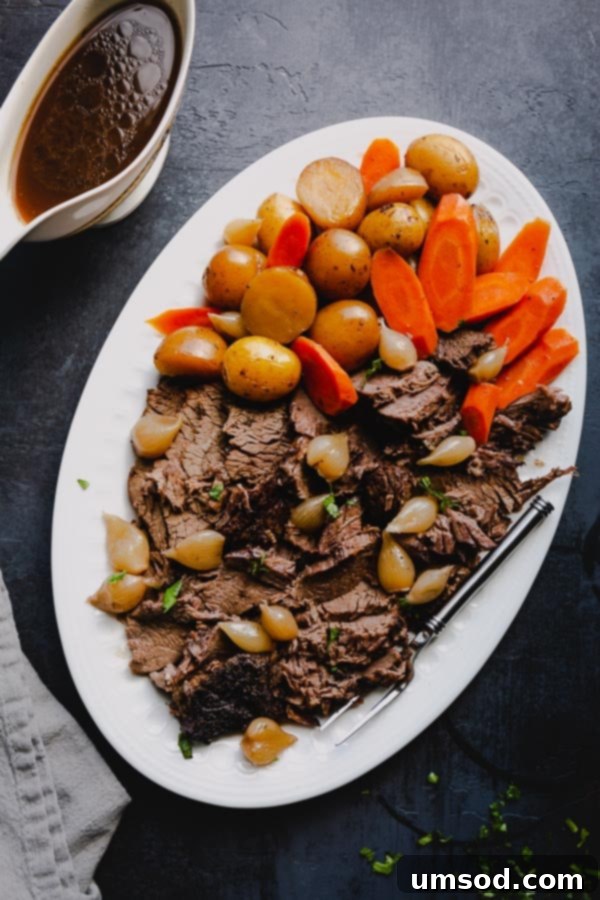
Classic Pot Roast: The Ultimate Comfort Food for Family Dinners
There are few dishes as universally comforting and satisfying as a classic pot roast. This timeless recipe is the epitome of home cooking, perfect for a cozy Sunday dinner, offering not just a delicious meal but also a delightful aroma that fills your home. What’s even better? It yields plenty of leftovers, ensuring wholesome, flavorful meals throughout the week. This comprehensive guide will walk you through creating a simple, yet profoundly flavorful pot roast that will undoubtedly become a staple in your recipe collection.
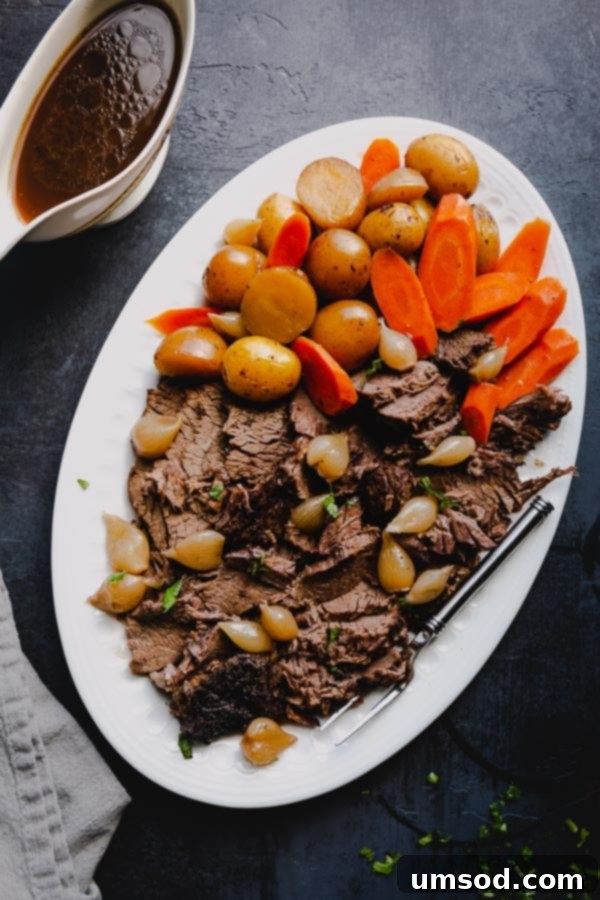
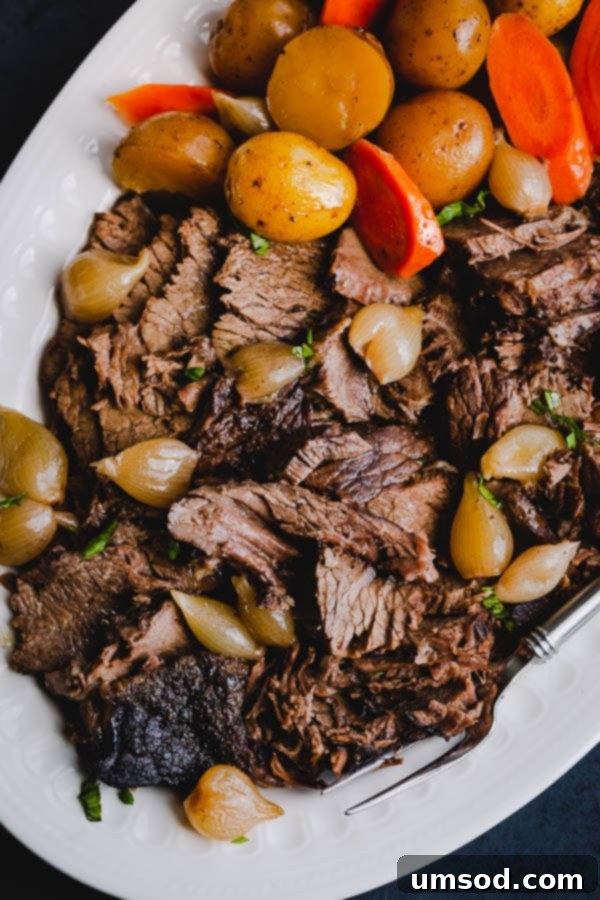
Imagine curling up on the couch under a warm blanket on a chilly evening. Now imagine a plate of tender, succulent beef, fall-apart carrots, potatoes, and sweet pearl onions, all smothered in a rich, savory gravy. That’s the pure comfort a classic pot roast delivers. This recipe, designed for ease and maximum flavor, requires only a few minutes of active preparation before spending a leisurely afternoon in the oven. It’s truly a “set it and forget it” dish, freeing you up to enjoy your day while your kitchen works its magic.
Unlike some pot roast variations, such as an easy pot roast with a tomato-based sauce, this traditional recipe champions the deep, complex flavors unlocked by red wine. The addition of red wine not only tenderizes the meat but also creates an incredibly rich and aromatic gravy that is the hallmark of a truly classic pot roast. For those who enjoy modern kitchen gadgets, an Instant Pot pot roast recipe can offer a quicker alternative, but nothing quite compares to the slow-braised perfection achieved in a Dutch oven.
Choosing the Best Beef for Your Pot Roast
What cut of meat defines a pot roast?
It’s a common misconception that “pot roast” refers to a specific cut of beef. In reality, pot roast is a cooking method – a technique of braising a tough cut of meat over low heat for an extended period until it becomes incredibly tender and “falls apart.” This slow cooking process breaks down the connective tissues and collagen in the beef, transforming what would otherwise be a chewy piece of meat into a melt-in-your-mouth experience. This versatility makes it a fantastic meal, not only for dinner but also for transforming into a myriad of delicious leftovers, from flavorful tacos and hearty sandwiches to comforting soups and loaded nachos. Your culinary creativity is the only limit!
Which cuts of beef are ideal for pot roast?
When selecting your beef at the grocery store or butcher, focus on cuts that are known for their marbling and connective tissue rather than leanness. While it might seem counterintuitive, these tougher, less expensive cuts are precisely what you want for pot roast. They contain collagen, which, when slowly cooked, transforms into gelatin, adding moisture, richness, and that desirable fall-apart texture. If you were to grill these cuts, they would indeed be like “shoe leather,” but with proper braising, they become culinary gold.
Excellent choices for a tender and flavorful pot roast include:
- Chuck Roast: Often labeled as “chuck eye roast,” “arm roast,” or simply “pot roast,” this is the most popular and arguably the best cut for pot roast. It comes from the shoulder and contains a good balance of meat, fat, and connective tissue, ensuring a rich flavor and tender texture when cooked low and slow.
- Brisket: This cut comes from the breast or lower chest of the animal. It’s very flavorful but leaner than chuck, requiring careful braising to prevent it from drying out. Both the “flat” (leaner) and “point” (fattier) cuts work well, though the point typically yields a more succulent result.
- Round Roast: Cuts like “bottom round” or “top round” come from the hind leg. These are very lean, so they can be a bit trickier to braise without becoming dry. However, with enough moisture and time, they can also become tender and shreddable, offering a healthier option for pot roast enthusiasts.
Crafting Your Perfect Classic Pot Roast: A Step-by-Step Guide
Creating a mouth-watering pot roast is a surprisingly straightforward process. With simple ingredients and an easy-to-follow technique, you’ll achieve fall-apart tender, deeply flavorful meat alongside soft potatoes, carrots, and sweet pearl onions. The final touch? A luscious, thick gravy to smother over every component, elevating this dish to pure culinary bliss.
Step 1: Sear the Roast for Enhanced Flavor
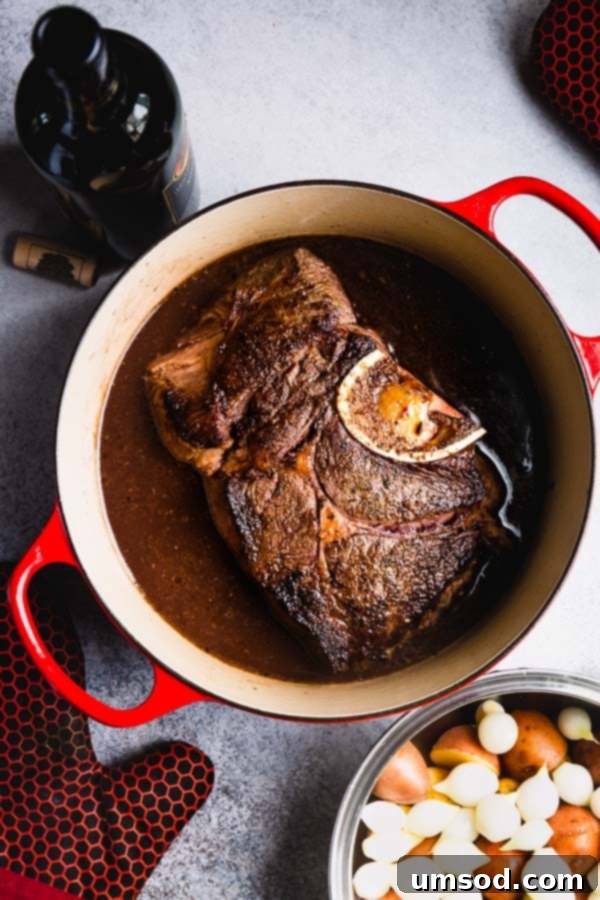
The first crucial step to an incredibly flavorful pot roast is searing the meat. Begin by thoroughly patting your chosen roast dry with paper towels. This is vital because a dry surface allows for better browning. Once dry, generously season all sides of the beef with coarse kosher salt and freshly ground black pepper – don’t forget the smaller edges!
Heat a large Dutch oven over medium-high heat, then add your chosen fat. Bacon fat is highly recommended for its smoky flavor contribution, but high-smoke-point oils like avocado oil or vegetable oil work perfectly as well. Once the oil is shimmering and hot, carefully place the seasoned roast into the Dutch oven. Sear it on all sides until a rich, dark brown crust forms, typically about 8 minutes per side. This browning, known as the Maillard reaction, creates hundreds of complex flavor compounds that will become the backbone of your pot roast’s deliciousness. Remove the seared roast to a plate and set it aside.
PRO TIP: When attempting to turn the meat, it might initially seem to stick to the bottom of the Dutch oven. Resist the urge to force it! This sticking usually indicates that the crust is still forming. Wait a few more minutes; as the browning intensifies, the pot should naturally “release” the meat. Keep a close eye on your heat to prevent burning while ensuring a beautiful crust.
Why is searing the meat important before braising?
While not strictly mandatory, searing the meat before braising is a step that drastically elevates the final flavor profile of your pot roast. As mentioned, the Maillard reaction creates deep, savory, and caramelized notes that cannot be achieved through slow cooking alone. Beyond flavor, searing also helps to “lock in” the juices, creating a protective crust that contributes to a more moist and tender finished product. It’s an investment of a few extra minutes that pays off immensely in taste and texture.
Step 2: Deglaze and Braise for Unparalleled Tenderness
After removing the seared roast, return the Dutch oven to the stovetop. Add beef broth to the same pot. The liquid will immediately begin to sizzle, lifting all those flavorful browned bits (fond) from the bottom of the pan. Use a wooden spoon to gently scrape the bottom of the pot, ensuring all those delicious fragments are released into the broth. This process, known as deglazing, is crucial for capturing all the concentrated flavors created during searing, enriching your entire dish.
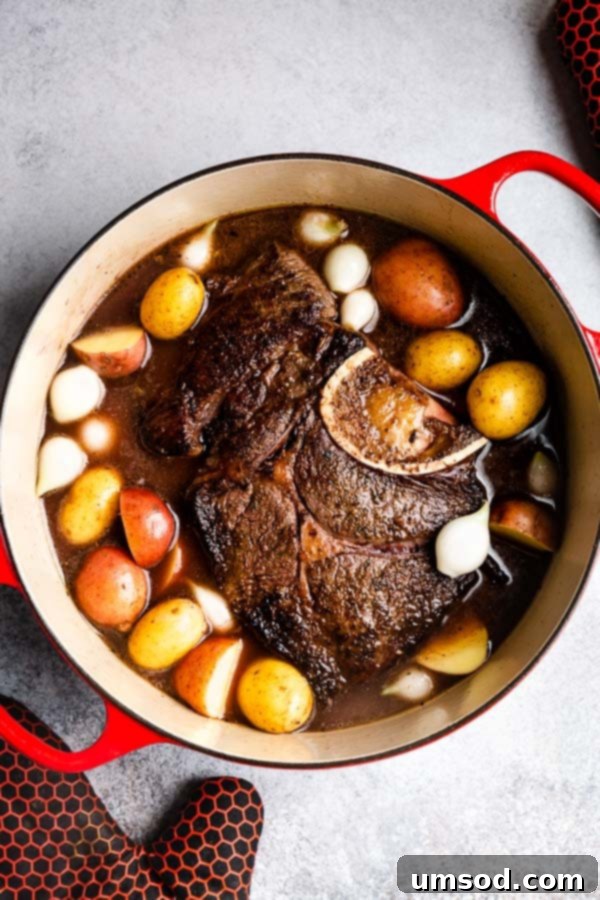
Next, stir in the red wine. The acidity of the wine further contributes to deglazing and adds a layer of depth and complexity to the braising liquid and, ultimately, the gravy. Carefully place the seared roast back into the pot, ensuring it’s nestled comfortably among the liquids. Now, add your chosen vegetables: baby potatoes, sweet pearl onions, and chunky carrots. These root vegetables will slowly absorb the rich flavors of the braising liquid, becoming incredibly tender and delicious.
Cover the Dutch oven tightly with its lid or heavy-duty foil, then transfer it to a preheated 300°F (150°C) oven. The magic of braising will now begin. Allow the pot roast to cook undisturbed for approximately 3.5 hours, or until the meat is undeniably “fall-apart” tender. This extended, low-temperature cooking period is the secret to transforming tough cuts into culinary masterpieces.
Understanding the Art of Braising
Braising is a cooking method that involves first searing food at a high temperature, then finishing it in a covered pot with a small amount of liquid at a low temperature for a long period. Essentially, it’s a slow-cooking or “stewing” technique that is particularly effective for tougher cuts of meat. The combination of moist heat and extended cooking time breaks down the collagen in the meat into gelatin, resulting in a remarkably tender, juicy, and flavorful dish. It’s a patient cooking process, but the results are always worth the wait.
Once the meat reaches this perfect tender stage, carefully transfer the cooked vegetables to a serving platter. Gently lift the succulent meat onto a carving board. Cover the meat loosely with foil and allow it to rest for about 10-15 minutes. This resting period allows the juices to redistribute throughout the meat, ensuring maximum succulence. After resting, you can either slice the roast against the grain or, as is often preferred with such tender meat, shred it apart with two forks.
How long should you cook a pot roast for optimal tenderness?
Braising meat differs significantly from grilling a steak or baking a roast chicken. While the USDA recommends an internal temperature of 145°F (63°C) for beef for safety, a pot roast is cooked far beyond this point to achieve its characteristic “fall-apart” texture. For a truly tender, shreddable pot roast, the internal temperature will typically reach around 200°F (93°C) or even higher. At this temperature, the collagen has completely broken down, leaving you with juicy, melt-in-your-mouth beef. If you were to cook a steak to 200°F, it would indeed be tough and dry, but for a pot roast, it’s the perfect target for unparalleled tenderness.
Step 3: Crafting the Perfect Pot Roast Gravy
The rich, savory gravy is an indispensable component of any classic pot roast. To create it, begin by pouring the remaining braising liquid from the Dutch oven through a fat separator, discarding any excess fat. This step ensures your gravy will be velvety smooth and not greasy.
In a medium saucepan, melt butter or, for an extra layer of flavor, a couple of tablespoons of reserved bacon fat over medium heat. Once melted, add an equal amount of all-purpose flour. Whisk continuously as the flour toasts, allowing it to cook until it turns a beautiful golden brown and emits a nutty aroma. This mixture is known as a roux.
What exactly is a Roux?
A roux (pronounced “roo”) is a classic French thickening agent made by cooking equal parts fat (like butter or oil) and flour together. It forms the base of many sauces, soups, and, of course, gravies. The key is to cook the flour sufficiently; if the flour isn’t cooked long enough, your gravy will have an unpleasant raw flour taste. Therefore, patiently whisk the roux until it achieves a deep golden-brown color and a distinct nutty fragrance. The longer you cook a roux, the darker and nuttier it becomes, and the less thickening power it retains, but the more flavor it imparts.
Once your roux has reached the desired golden-brown color and nutty aroma, slowly pour in the reserved braising liquid, whisking continuously to prevent any lumps from forming. Bring the mixture to a gentle boil, then reduce the heat and simmer for 3-5 minutes, or until the gravy thickens to your desired consistency. Taste and adjust seasonings if necessary, adding more salt or pepper to suit your preference. The result will be a luscious, flavorful gravy that perfectly complements your tender pot roast and vegetables.
Serving Your Classic Pot Roast
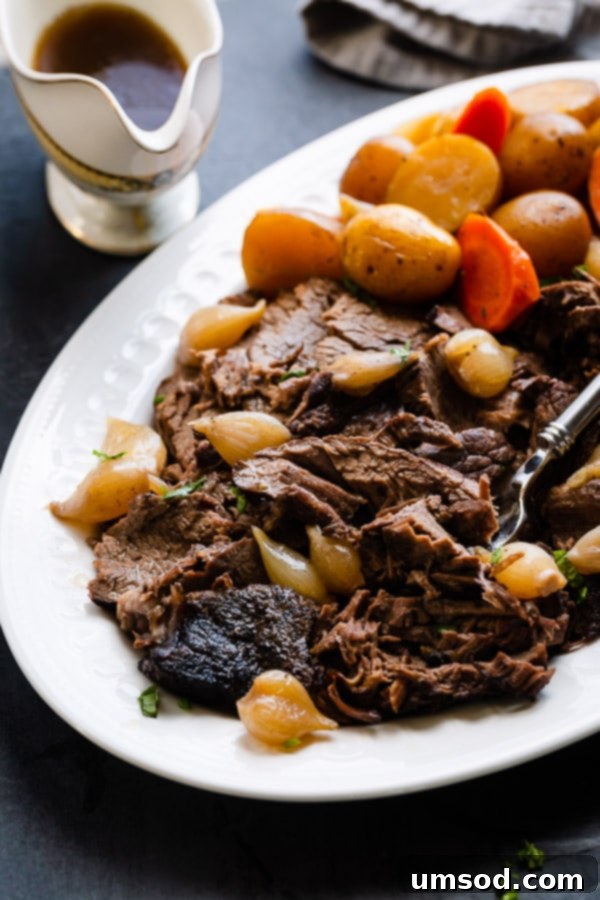
This classic pot roast is a meal in itself, but it truly shines when served thoughtfully. Arrange the tender beef and vibrant vegetables on a large platter. Pour the warm, rich gravy over the meat and vegetables, or serve it on the side in a gravy boat, allowing everyone to add as much as they desire. For a complete and unforgettable meal, consider these serving suggestions:
- Creamy Mashed Potatoes: A classic pairing, mashed potatoes are perfect for soaking up every drop of that delicious gravy.
- Crusty Bread: A warm, crusty baguette is excellent for dipping into the flavorful juices.
- Fresh Green Salad: A simple salad with a light vinaigrette can provide a refreshing contrast to the richness of the pot roast.
- Steamed Green Beans or Asparagus: Add a touch of extra greenery and freshness to your plate.
Creative Ways to Enjoy Pot Roast Leftovers
One of the many joys of making a large pot roast is the abundance of delicious leftovers. Don’t let them go to waste! The tender, flavorful beef can be repurposed into an exciting array of new meals:
- Pot Roast Sandwiches: Pile shredded pot roast onto toasted buns with a dollop of gravy or horseradish sauce for an epic sandwich.
- Pot Roast Tacos or Burritos: Shred the beef, warm it with some chili powder and cumin, and serve in tortillas with your favorite taco toppings.
- Shepherd’s Pie: Combine diced pot roast and vegetables with leftover gravy, top with mashed potatoes, and bake until golden brown.
- Hearty Pot Roast Chili: Transform leftovers into a robust chili by adding diced tomatoes, beans, and chili spices.
- Pot Roast Hash: Dice the beef and potatoes, then fry with onions and bell peppers for a comforting breakfast or brunch hash.
- Pot Roast Nachos: Layer shredded pot roast over tortilla chips with cheese, jalapeños, and other nacho toppings, then bake until bubbly.
This recipe is not only delicious but also surprisingly easy to execute, promising a satisfying meal every time. I truly hope your family enjoys this classic pot roast as much as mine does. If you prepare this recipe, please consider sharing a photo on Instagram and tagging me @shineshka – I love seeing your culinary creations!
Classic Pot Roast
Shinee Davaakhuu
30
4
6 -8 servings
Comment
Print Recipe
Ingredients
- 3 lbs chuck roast Note 1
- 2 teaspoons coarse kosher salt
- 1 teaspoon black pepper
- 2 tablespoons bacon fat Note 2
- 2 cups beef broth/stock
- ½ cup red wine
- 1 lb baby potatoes well scrubbed
- Pearl onions
- 3-4 large carrots peeled and chopped
For gravy:
- 2 tablespoons butter or bacon fat
- 2 tablespoons all-purpose flour
Instructions
- Preheat the oven to 300°F (150°C).
- Dry the roast thoroughly with paper towels and season generously with salt and pepper on all sides.
- Heat a large Dutch oven over medium-high heat, then add bacon fat or oil.
- Once the oil is shimmering hot, add the roast and sear on both sides until a rich, brown crust forms, about 8 minutes per side. Remove onto a plate and set aside.
- Add beef broth to the same pot and deglaze the pan, scraping the bottom with a wooden spoon to release all the flavorful browned bits.
- Stir in the red wine.
- Place the roast back into the pot and add potatoes, pearl onions, and carrots. Cover the pot tightly and transfer it to the preheated oven. Cook until the meat is fall-apart tender, approximately 3.5 hours.
- Transfer the cooked meat to a carving board, cover loosely with foil, and let it rest for 10-15 minutes. Remove the vegetables onto a serving platter.
- Run the remaining liquid through a fat separator and discard the separated fat.
- To make the gravy: In a medium saucepan, melt butter (or bacon fat) over medium heat. Add flour and toast until golden brown and nutty, whisking continuously to prevent burning. This mixture is called a roux and will thicken the gravy. It’s crucial to cook the flour sufficiently to avoid a raw flour taste, so ensure it’s nice and brown.
- Once the roux is fragrant and golden, slowly pour in the reserved liquid while continuously whisking to create a smooth mixture. Bring it to a boil, then reduce heat and simmer for 3-5 minutes, or until thickened to your desired consistency.
- Slice the rested roast against the grain, or pull it apart with two forks for a rustic presentation.
- Serve the tender pot roast with the braised vegetables and plenty of homemade gravy on the side.
⭐️ Did you make this recipe?
Please leave a review and let us know how you liked it!
Tips & Notes
Note 2: You can use any kind of oil instead of bacon fat, such as avocado oil, olive oil, or vegetable oil, for searing the meat.
Nutrition
Did you make this?
Leave a rating and your feedback. Thank you!
