The Ultimate Christmas Sugar Cookie Recipe: Soft, Easy, and Perfect for Decorating
Step into the festive season with our truly nostalgic Christmas sugar cookie recipe, designed to bring joy and deliciousness to your holiday celebrations. This incredible recipe allows you to create beautifully soft, tender, and perfectly flat sugar cookies in just about an hour, from start to finish. That means more time for the fun part: imaginative decorating with vibrant royal icing and sparkling sprinkles!
What makes these cookies stand out? They bake up wonderfully soft and tender, never puffing or spreading excessively, which creates a flawless canvas for your holiday designs. Best of all, there’s no need to chill the dough, making this an ideal last-minute baking project or a delightful activity for a busy holiday schedule. Prepare to bake, decorate, and share the cheer with these delightful homemade treats!

Love this recipe? Pin it for later!
Pin It Now
Why This Is Your Go-To Christmas Sugar Cookie Recipe!
Get ready to make these delightful Christmas sugar cookies a staple in your annual holiday baking tradition. This tried-and-true recipe consistently produces impeccably soft, tender, and richly buttery cookies. They are robust enough for gifting and decorating, yet delicate enough to melt in your mouth.
Whether you’re preparing for a festive cookie exchange, assembling a beautiful platter for holiday guests, or simply leaving a special treat for Santa on Christmas Eve, these cookies are absolutely perfect for every occasion. Here’s why you’ll fall in love with them:
- Exceptional Flavor Profile: Infused with a delicate hint of pure vanilla and a touch of almond extract, these cookies boast a subtly sweet foundation. This balanced sweetness allows you to lavish them with as much vibrant royal icing and sparkling sprinkles as your festive heart desires, without becoming overly sweet.
- Beginner-Friendly & Foolproof: Even if you’re new to baking, this recipe is designed for success. By following our clear, easy-to-understand step-by-step instructions and incorporating our expert tips, you’re guaranteed to achieve perfect results every time. We’ve simplified the process to ensure a joyful baking experience.
- Wonderful for Family Fun: Baking is a cherished holiday activity, and these sugar cookies are ideal for involving the whole family. Kids will adore helping with every stage, from mixing the dough and rolling it out to cutting festive shapes and, of course, the most exciting part: decorating!
- No Chilling Required for Dough: One of the biggest time-savers is that our cookie dough doesn’t require refrigeration. This means you can whip up the dough, roll it, cut your shapes, bake, and even decorate all in the same day! It’s perfect for spontaneous baking sessions or when you’re short on time.
This recipe truly takes the stress out of holiday baking, allowing you to focus on the joy of creating delicious memories.
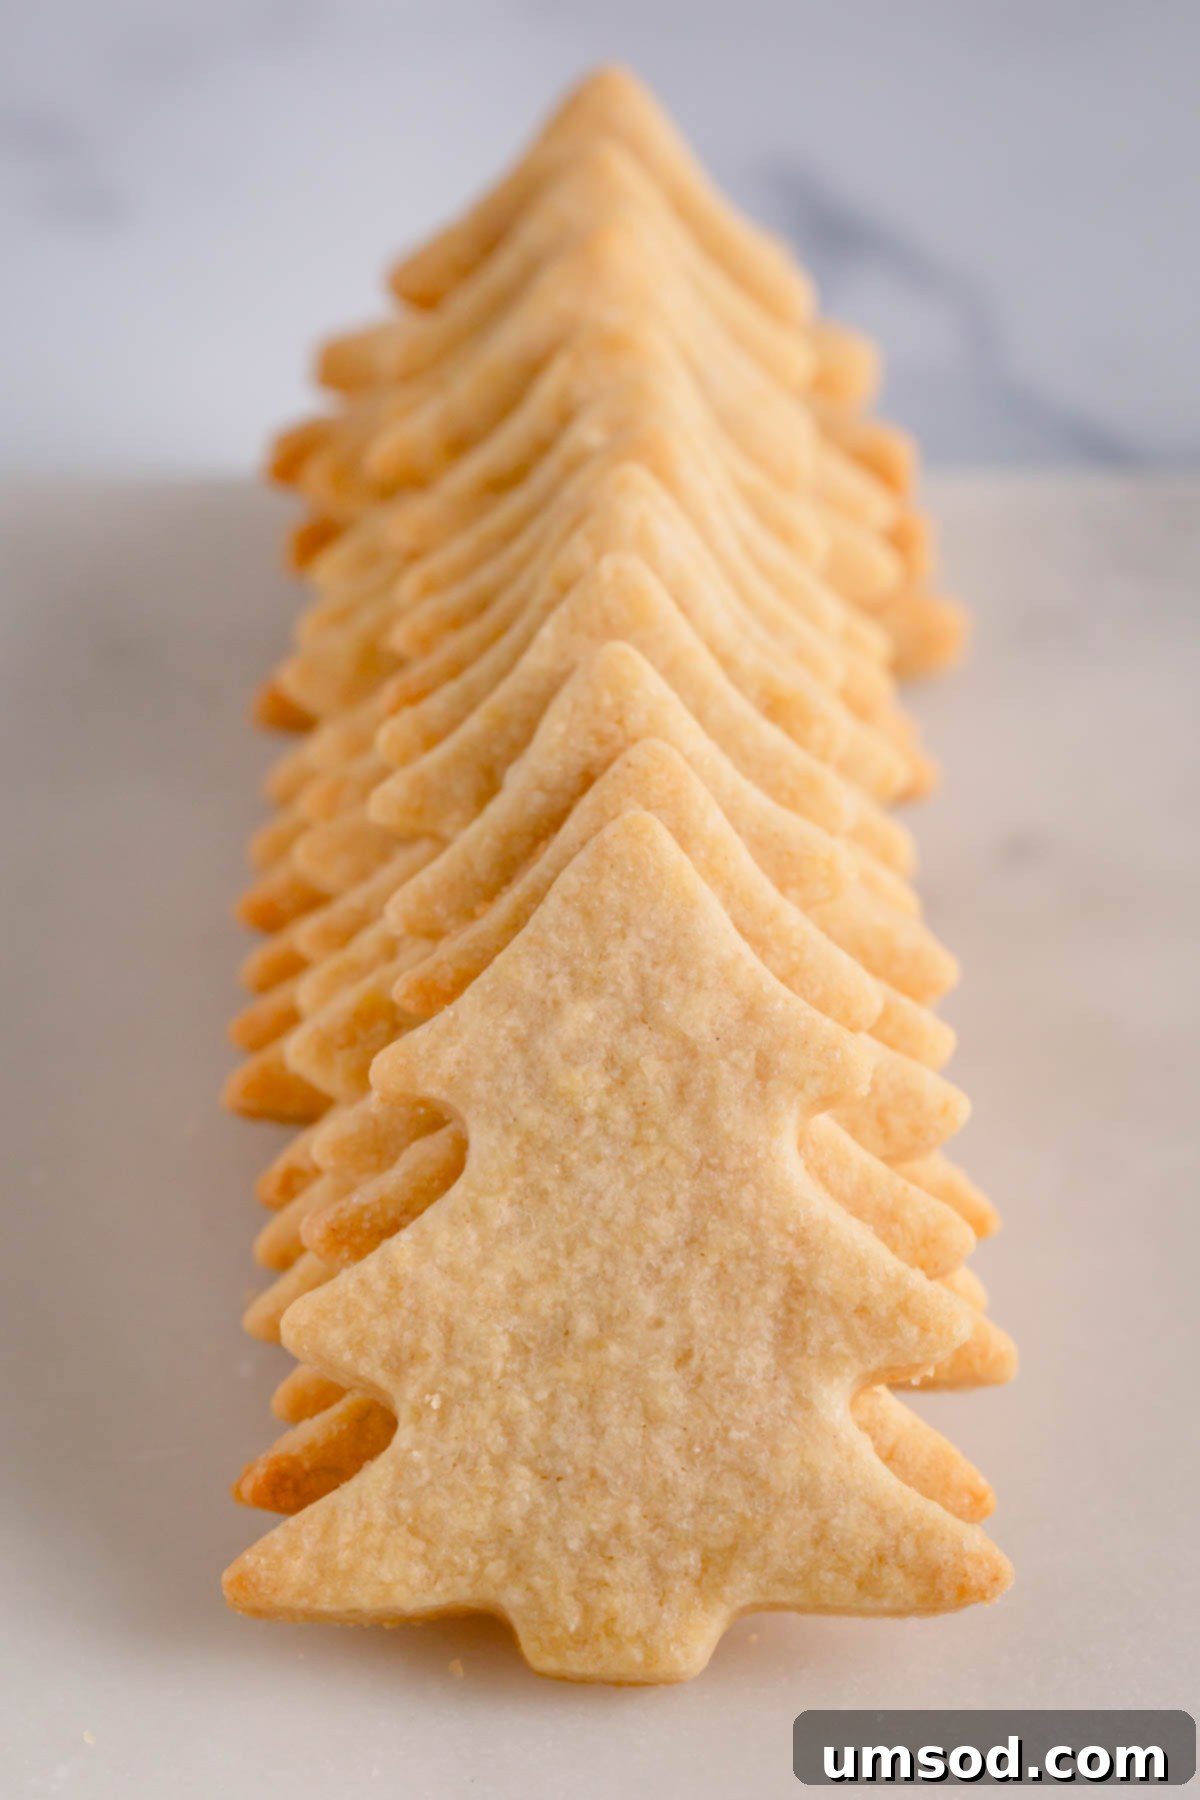
Key Ingredient Notes for Perfect Holiday Cookies
Crafting the perfect Christmas sugar cookie begins with understanding the role each ingredient plays. Here’s a closer look at the essential components for your cookie dough:
Essential Ingredients for the Cookie Dough
- All-Purpose Flour: For these cookies, accuracy in flour measurement is paramount. You’ll need three cups, and it’s crucial to measure it using the spoon and level method. This involves spooning the flour into your measuring cup and then leveling off the top with a straight edge, avoiding packing it down. For ultimate precision, a kitchen scale is highly recommended – it’s both easier and far more accurate, ensuring consistent results every time.
- Granulated Sugar: Often referred to as white sugar or table sugar, granulated sugar is more than just a sweetener here. It plays a vital role in achieving the moist, tender texture and subtle sweetness that defines these Christmas sugar cookies.
- Brown Sugar: This ingredient is key to adding depth of flavor and an extra layer of softness to your cookies. Remember to pack it tightly into your measuring cup. While both light and dark brown sugars can be used, we recommend light brown sugar as dark brown sugar can result in a slightly darker cookie, which might alter your desired festive look.
- Cornstarch: The secret weapon for exceptionally soft sugar cookies! Cornstarch helps to tenderize the dough, preventing the cookies from becoming dry or crumbly. It ensures that desirable melt-in-your-mouth texture that everyone loves.
- Baking Powder: When fresh and active, baking powder provides a delicate lift, contributing to a light and airy texture without causing the cookies to puff up excessively. This is crucial for maintaining those perfectly flat tops, which are ideal for intricate icing designs. Always ensure your baking powder isn’t expired for best results.
- Kosher Salt: A pinch of coarse kosher salt balances the sweetness and enhances all the other flavors in the cookie. We prefer Diamond Crystal kosher salt for its consistent grain, but any brand you typically use will work wonderfully.
- Unsalted Butter: For a truly rich, buttery flavor and the right dough consistency, your unsalted butter must be at room temperature. This means it should be soft enough to leave a slight indentation when gently pressed with your finger (around 67°F or 19°C), but not melted or greasy. Room temperature butter creams beautifully and incorporates evenly into the dry ingredients.
- Large Egg: Just like the butter, the egg should also be at room temperature. A quick 30-minute sit on the kitchen counter is usually enough. Room temperature eggs emulsify better with other ingredients, creating a smoother, more uniform dough.
- Pure Vanilla Extract & Almond Extract: These extracts are the heart of the cookie’s flavor. Pure vanilla extract provides that classic, comforting warmth, while a small amount of almond extract adds a subtle, intriguing depth that elevates the overall taste profile. You might not explicitly identify the almond flavor, but you’ll certainly miss its absence if you omit it – it perfectly rounds out the cookie’s deliciousness. Consider making your own DIY vanilla extract for an even more special touch!
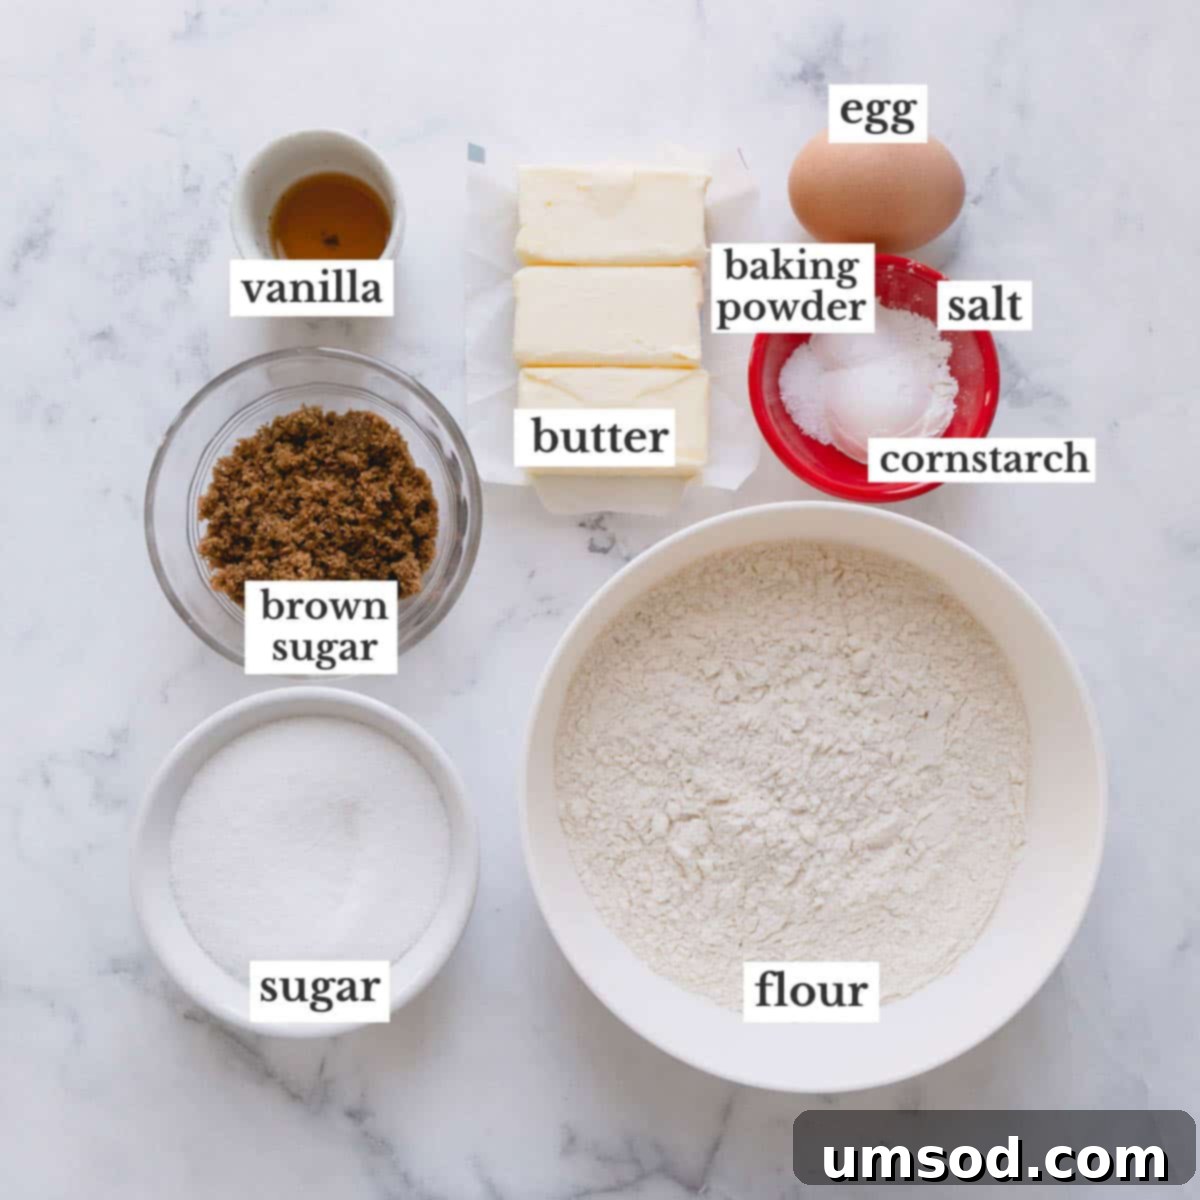
For Decorating Your Festive Cookies
- Royal Icing: The star of cookie decoration! Prepare a full batch of our easy royal icing, which dries to a beautiful, hard finish, perfect for stacking and gifting. You’ll want to divide and dye it into a spectrum of vibrant Christmas colors – think classic reds, lush greens, snowy whites, and even a touch of festive blue.
- Fun Toppings: Unleash your creativity with a variety of holiday-themed sprinkles and colored sugar. From glittering edible stars and delicate snowflakes to classic nonpareils and festive jimmies, these toppings add sparkle, texture, and undeniable holiday cheer to your decorated cookies.
Simple Steps to Craft Your Christmas Sugar Cookies
Follow these straightforward instructions to create a batch of perfect Christmas sugar cookies that are sure to impress. Remember, precision in baking often leads to the best results!
1. Master the Dough with the Reverse-Creaming Method
This recipe utilizes the reverse-creaming method, a technique crucial for achieving perfectly flat, tender cookies that don’t puff up – ideal for decorating!
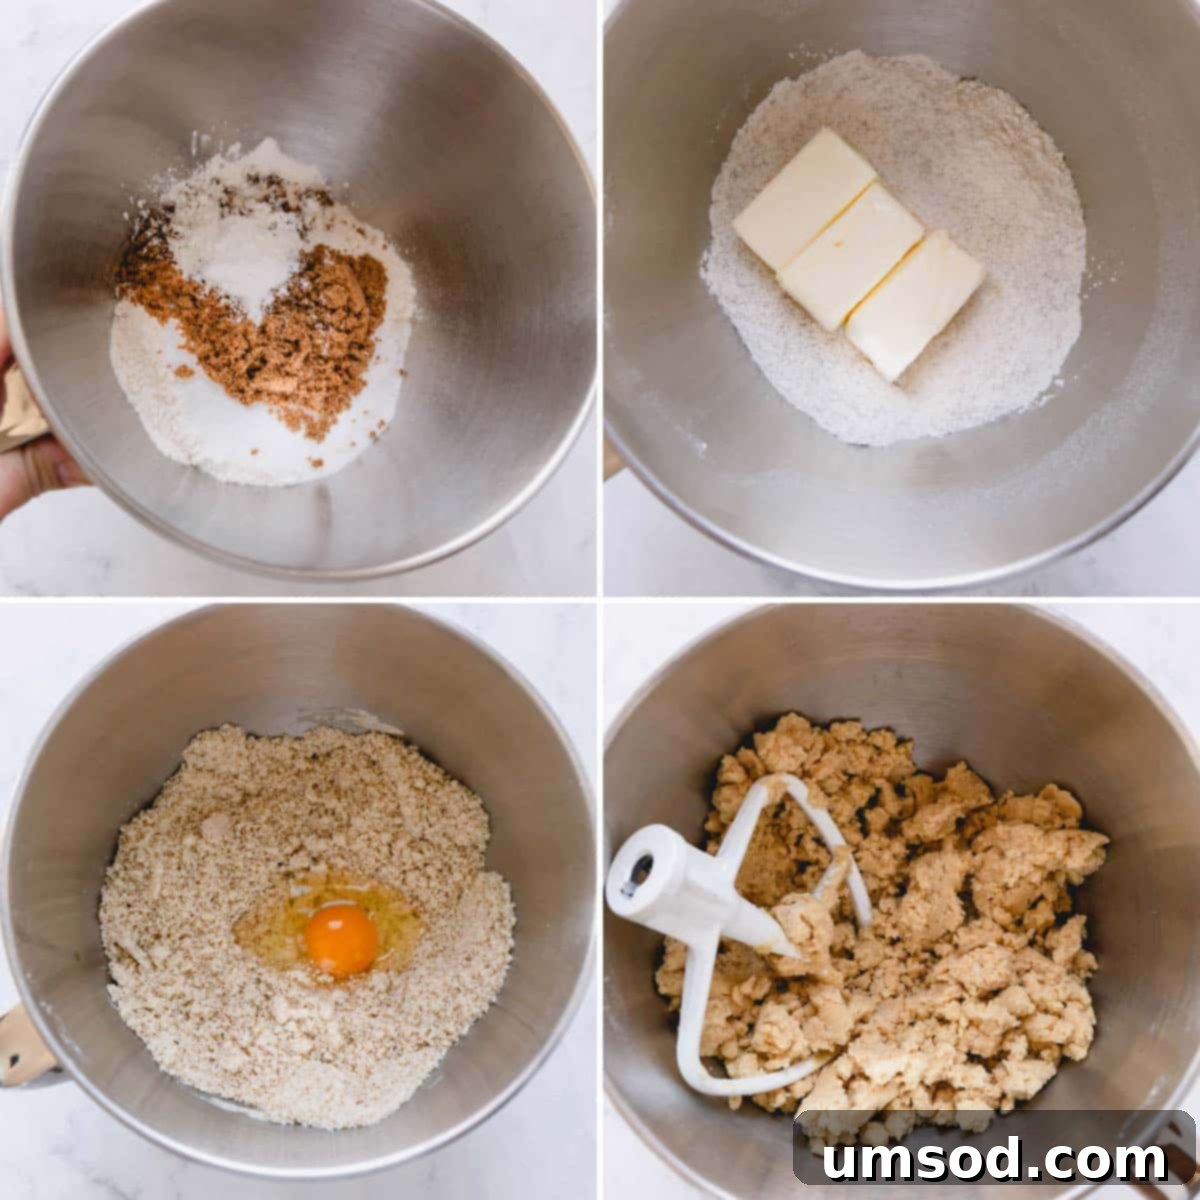
- Combine Dry Ingredients: In the bowl of a stand mixer fitted with a paddle attachment, measure and combine your all-purpose flour, granulated sugar, packed brown sugar, cornstarch, baking powder, and kosher salt. Mix on low speed for about 30 seconds until all ingredients are thoroughly blended. This ensures an even distribution of leavening and flavor.
- Incorporate Butter: Add the room temperature unsalted butter to the dry mixture. Mix on low speed for 1-2 minutes until the flour mixture is evenly moistened and resembles wet, coarse sand. This step coats the flour particles with butter, inhibiting gluten development and contributing to the cookies’ tenderness.
- Add Wet Ingredients: Introduce the room temperature large egg, pure vanilla extract, and almond extract to the bowl. Continue mixing on low speed for approximately 30 seconds, just until combined. The dough will appear crumbly at this stage, but if you squeeze a handful, it should easily stick together. Be careful not to overmix, as this can develop too much gluten, leading to tougher cookies.
- Form Dough Balls: Gently divide the crumbly dough into two equal portions. Use your hands to lightly knead each portion until it comes together into a smooth, cohesive ball.
Pro Tip: Prepare the Dough in Advance!
If your schedule calls for it, you can easily prepare this dough ahead of time. Simply wrap the dough balls tightly in plastic wrap or place them in sealed plastic bags, and refrigerate for up to 3 days. For longer storage, the dough can be frozen for up to 3 months. Thaw frozen dough overnight in the refrigerator before use. Allow chilled dough to come to room temperature for 15-30 minutes before rolling for best results.
2. Shape and Bake Your Festive Creations
Before you begin shaping, preheat your oven to 350°F (175°C). Prepare 2-3 baking sheets by lining them with parchment paper or silicone baking mats. This ensures your cookies won’t stick and will bake evenly.
- Roll the Dough: Place each dough ball onto a silicone mat or a lightly floured surface. Using a rolling pin, roll the dough evenly into a ¼-inch thick disk. An adjustable rolling pin can be a real game-changer here, helping you achieve uniform thickness across all your cookies, which is key for even baking.
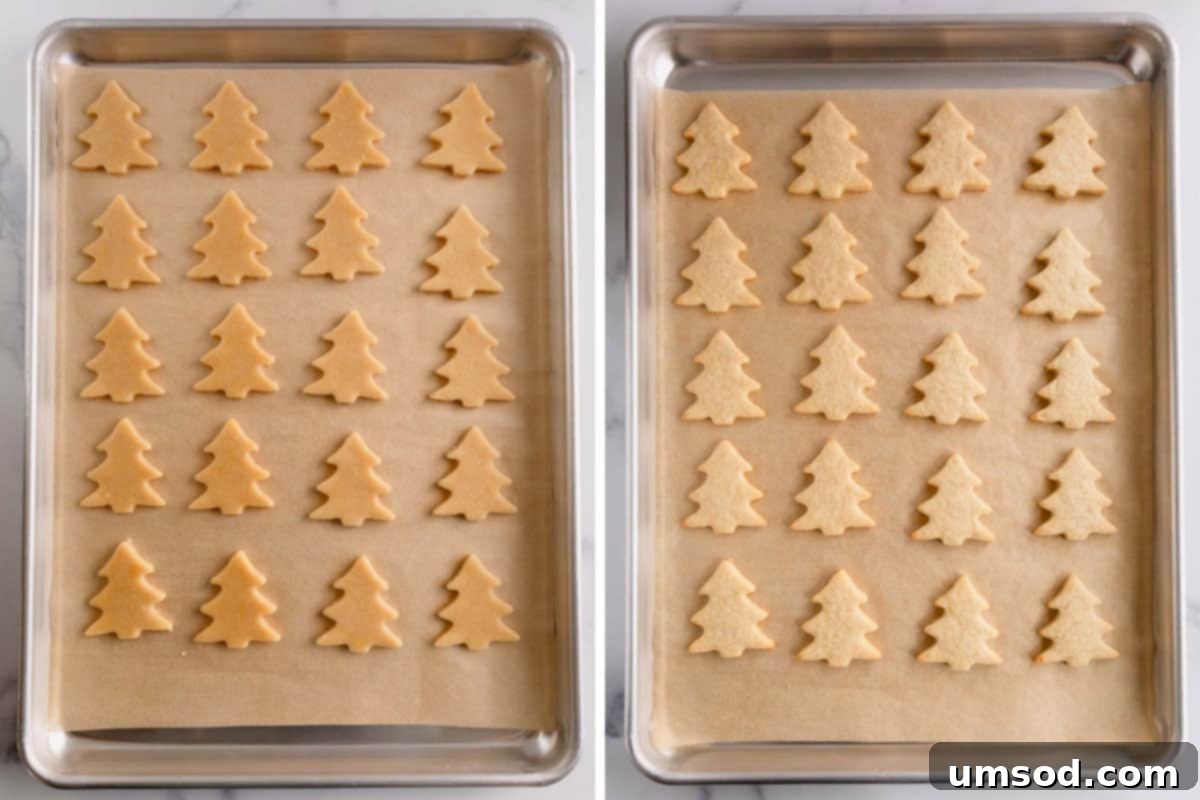
- Cut Out Shapes: This is where the holiday magic truly begins! Use your favorite Christmas cookie cutters – think stars, trees, snowflakes, bells, or candy canes – to cut out festive shapes from the rolled dough. Carefully transfer the cut cookies to your prepared baking sheets, leaving about 1 inch between each cookie.
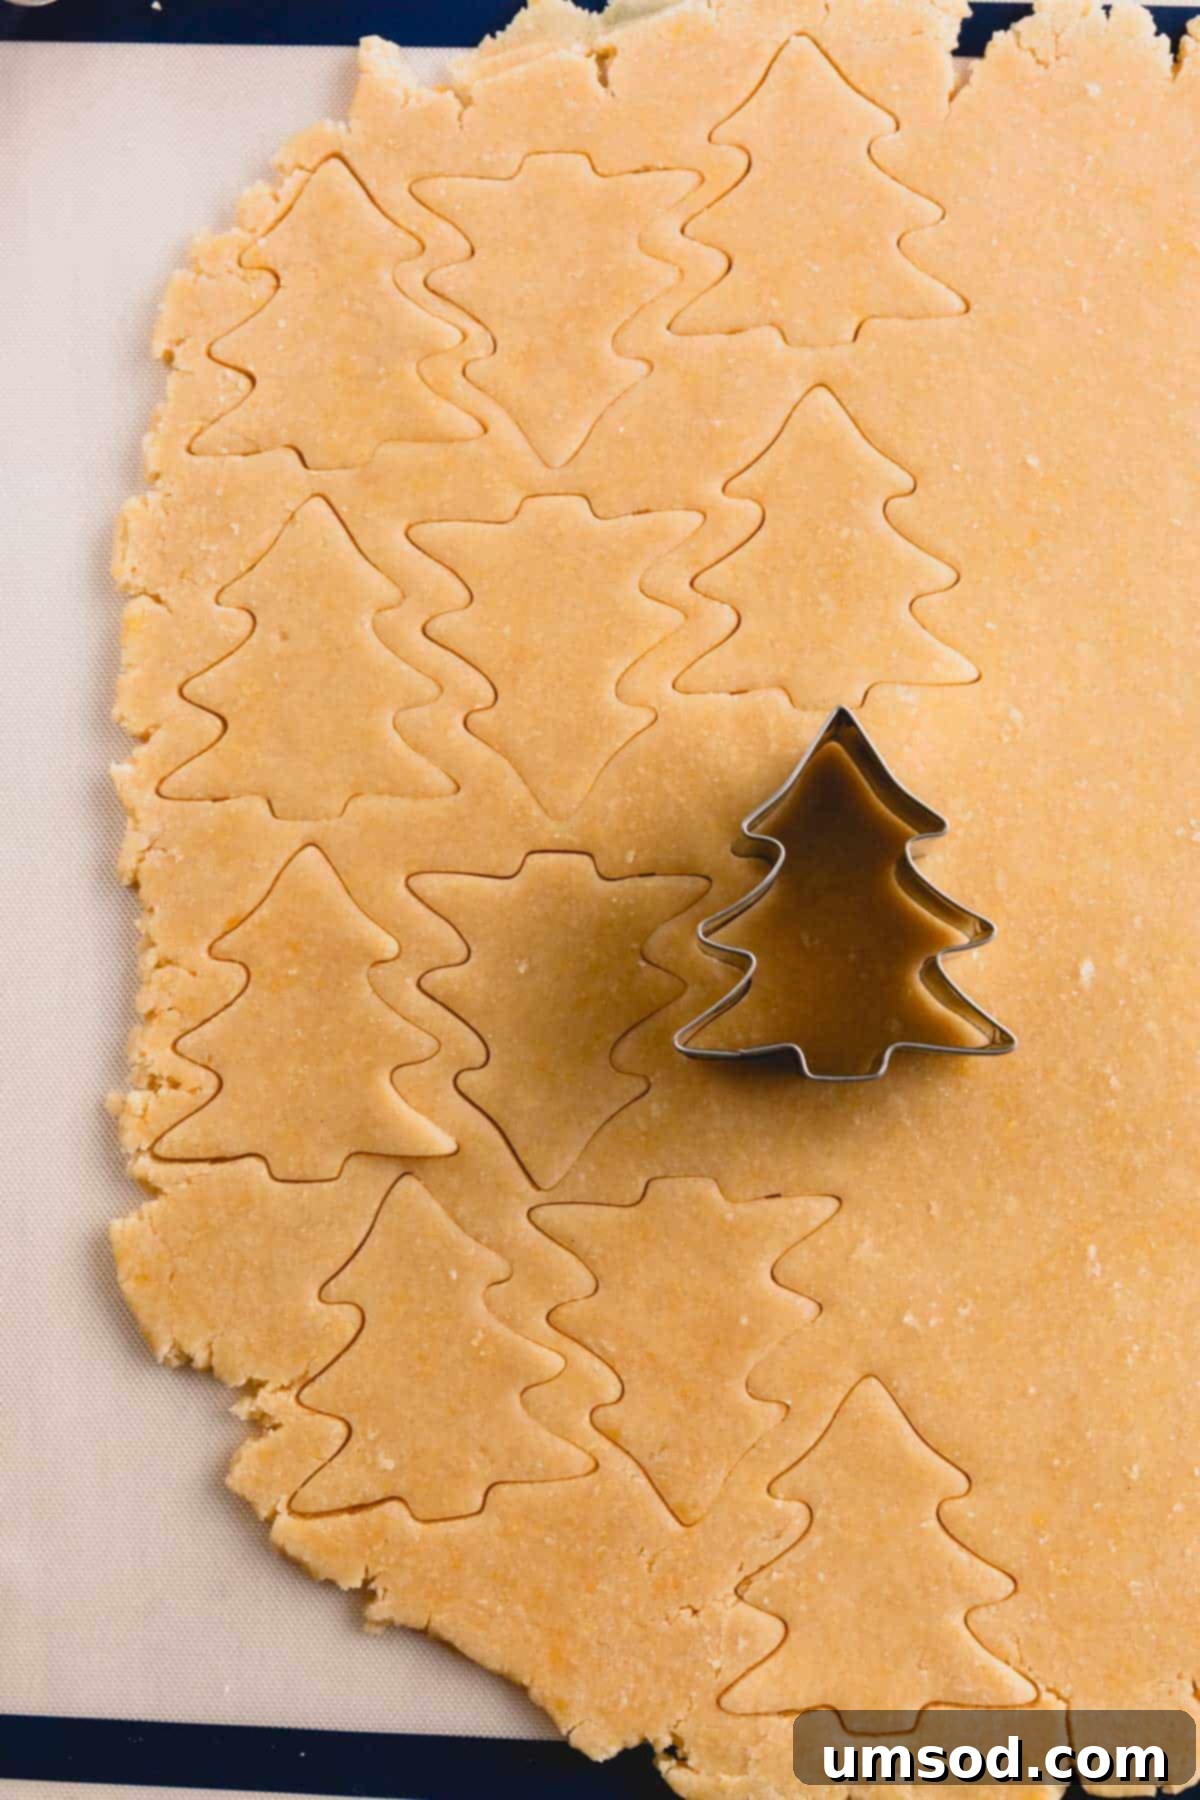
- Re-Roll Scraps: Gather any dough scraps, gently press them together, and re-roll the dough. Continue cutting out cookies until all the dough has been used. Avoid overworking the dough, as this can make the cookies tough.
- Bake to Perfection: Bake the cookies for 10-13 minutes, or until the edges begin to turn a very light golden color. The centers should still appear soft. Keep a close eye on them, as baking times can vary slightly depending on your oven and cookie thickness.
- Cooling Process: Once baked, allow the cookies to cool on the baking sheet for about five minutes. This helps them firm up slightly before you move them. Then, carefully transfer them to a wire cooling rack to cool completely. Ensuring they are fully cool is essential before you begin decorating.
3. Unleash Your Creativity: Decorating Your Cookies!
Once your cookies are completely cooled, it’s time for the most enjoyable part – decorating! Gather your royal icing and festive toppings.
- Prepare Royal Icing: Begin by preparing a batch of our simple 4-ingredient royal icing recipe. This icing is perfect for creating beautiful, defined designs that set firm.
- Color the Icing: Divide the prepared royal icing into 3-4 separate bowls. Use gel food coloring to dye the icing into traditional festive shades such as vibrant red, lush green, and perhaps a lovely blue. Crucially, remember to reserve one bowl of icing in its pure, snowy white state – perfect for snow, outlines, or delicate details.
- Fill Piping Bags: Carefully spoon each colored icing into separate tipless piping bags. These bags are fantastic for precise decorating. Snip a tiny bit off the end of each bag to create a small opening for piping. Now, let your imagination run wild as you transform your plain cookies into edible works of Christmas art!
Expert Tips for Decorating with Royal Icing
Achieving beautifully decorated cookies with a flawless finish is easier than you think. Follow these tried-and-true techniques for working with royal icing:
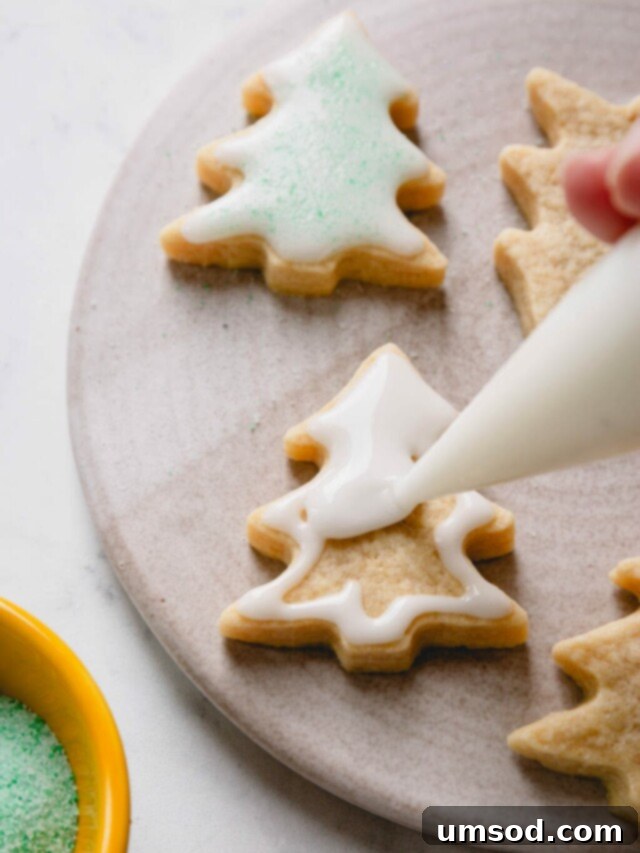
- Outline Your Cookies: Using a piping bag with a small opening (or a tipless bag with a tiny snip), carefully pipe an outline around the edges of each cookie. This creates a barrier that will hold in the flood icing. Allow the outline to set for a few minutes until it forms a crust.
- Flood the Cookies: Once the outline is set, switch to a slightly thinner consistency of royal icing (often referred to as “flood” icing). Fill the outlined area by gently squeezing the piping bag and guiding the icing with a scribe tool or toothpick to ensure it reaches all edges and fills evenly. For a detailed guide, check out this video on how to flood a cookie.
- Add Sparkle and Sprinkles: Immediately after flooding a cookie, while the icing is still wet, liberally sprinkle on your colored sugar, festive sprinkles, or edible glitter. This ensures the decorations adhere beautifully to the wet icing.
- Allow Icing to Fully Set: This is arguably the most crucial step for durable, gift-worthy cookies. Royal icing needs ample time to dry and harden completely. Depending on humidity levels, this can take anywhere from 12 to 48 hours. Ensure the cookies are left undisturbed in a single layer on a cooling rack in a cool, dry place. Do not stack them until the icing is rock-hard to the touch, or your beautiful designs could be smudged or ruined.
Achieve Perfection: Top Tips for Christmas Sugar Cookies
Elevate your cookie-making game with these invaluable tips designed to ensure your Christmas sugar cookies are nothing short of spectacular, from dough consistency to post-bake softness:
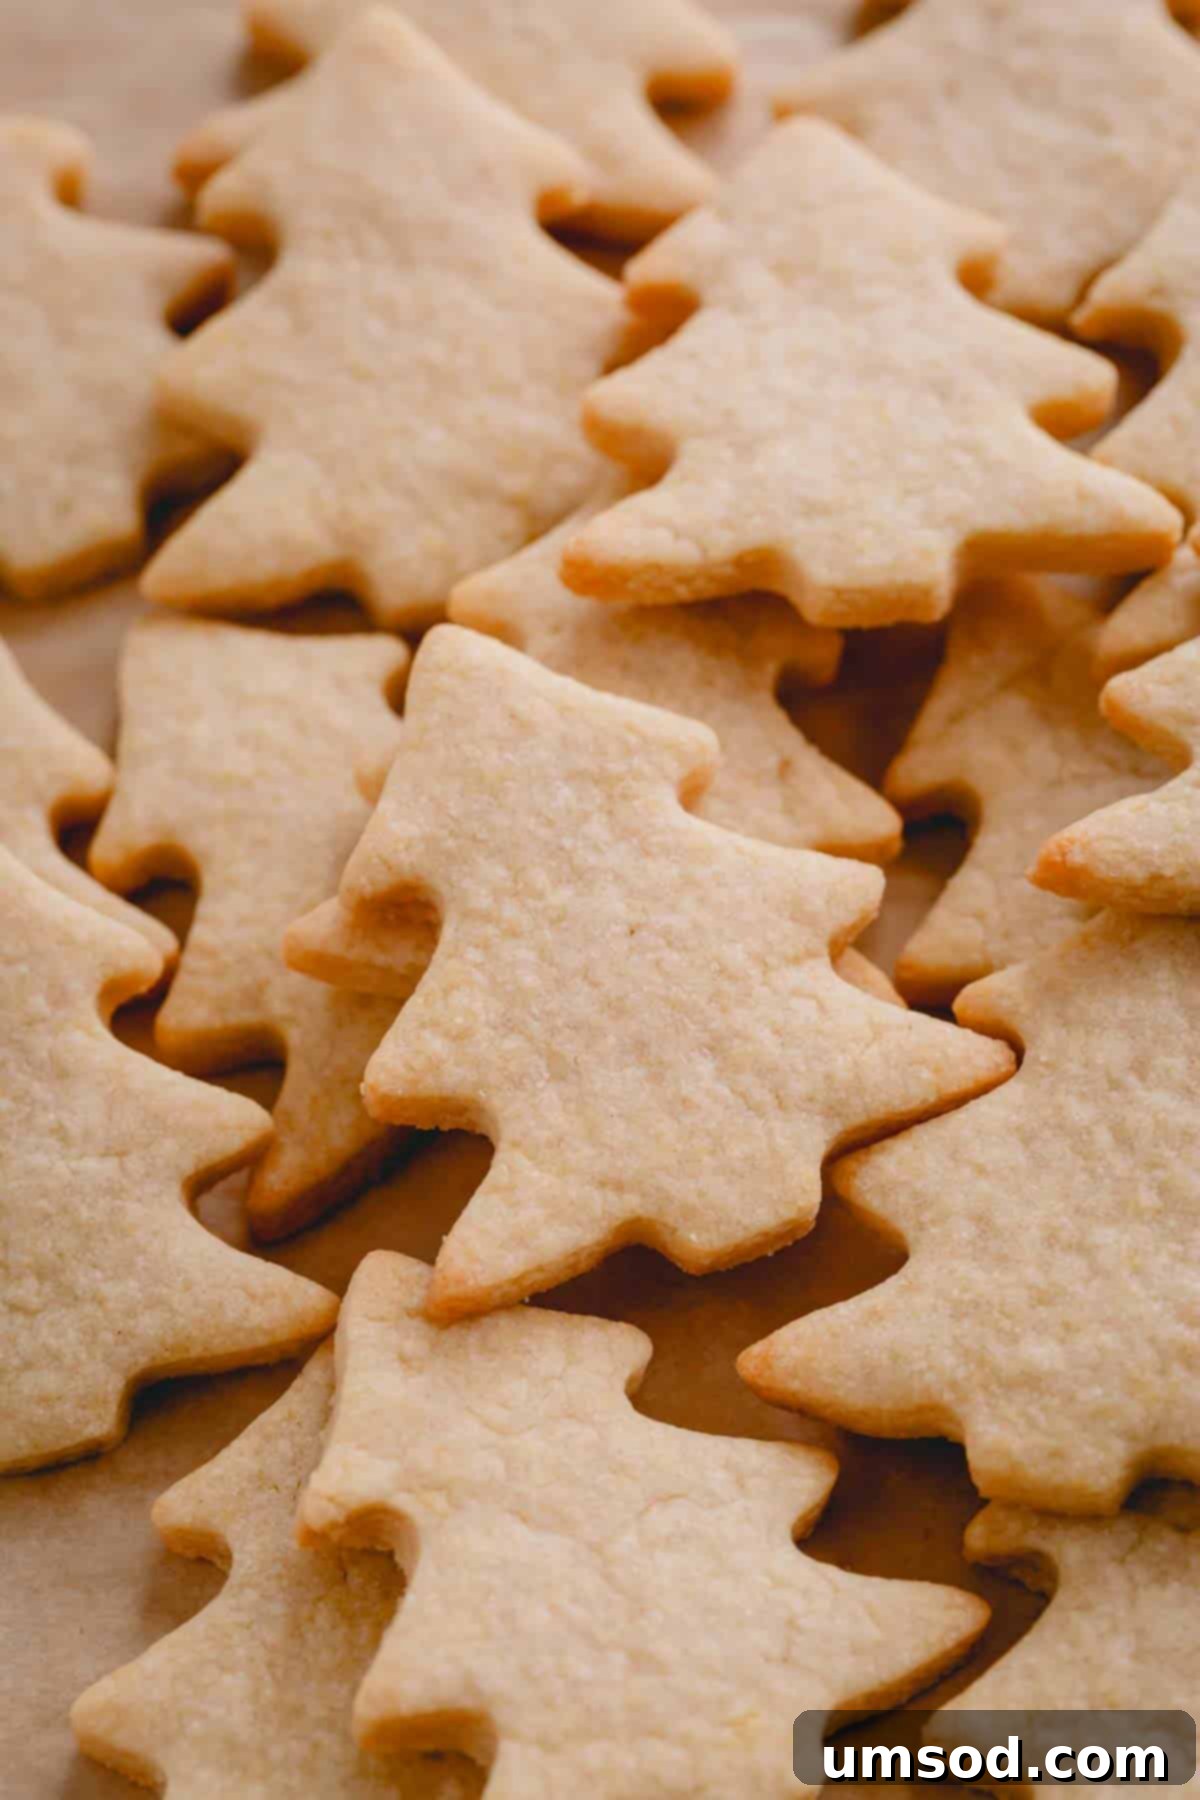
- Embrace the Reverse-Creaming Method: This technique is the cornerstone of our recipe’s success. Unlike traditional methods that cream butter and sugar together first, the reverse-creaming method involves mixing sugar with the dry ingredients (flour, baking powder, etc.) before incorporating the butter. This unique approach coats the flour in fat, inhibiting gluten development, which results in remarkably tender cookies that stay flat and don’t puff up. Flat cookies are your best friend for smooth, beautiful decorations!
- Avoid Refrigerating Cut-Out Cookies: Once you’ve cut your cookie shapes, resist the urge to refrigerate them before baking. Placing them in the fridge, whether decorated or not, can cause the cookies to dry out. Furthermore, if they’re decorated, condensation can form when they come back to room temperature, potentially ruining your intricate royal icing designs.
- Properly Fill Piping Bags: When decorating with royal icing, it’s tempting to fill your piping bags to the brim, but this can lead to messy spills and difficulty controlling the icing. For optimal control and to prevent icing from oozing out the top, only fill your piping bags about two-thirds of the way. This leaves enough room to twist the top securely and apply pressure comfortably.
- Maintain Softness with a Marshmallow Trick: Want to keep your sugar cookies incredibly soft for days? Here’s a clever baker’s secret: spread a single layer of mini marshmallows on the bottom of an airtight container. Place a wire cooling rack directly on top of the marshmallows. Arrange your cooled cookies on the wire rack, close the lid tightly, and store them at room temperature. The marshmallows release just enough moisture to keep your cookies wonderfully tender without making them sticky. This trick works beautifully for both decorated and undecorated cookies.
Smart Make-Ahead Strategies for Stress-Free Holiday Baking
To truly enjoy the festive process of decorating, consider preparing some components of your Christmas sugar cookies in advance. This thoughtful planning ensures that when cookie decorating day arrives, you can dive straight into the fun, creative parts without any last-minute rush.
- Cookie Dough Preparation: You can prepare the cookie dough up to 3 days ahead of time if storing in the refrigerator. Simply wrap the dough tightly in plastic wrap to prevent it from drying out, and keep it chilled. For longer-term planning, the dough freezes beautifully for up to 3 months. When ready to use, thaw frozen dough overnight in the refrigerator. Before rolling and shaping, allow the chilled dough to sit at room temperature for 15-30 minutes; this makes it much more pliable and easier to work with.
- Royal Icing Preparation: Your royal icing can also be made well in advance! It will keep fresh in an airtight container at room temperature for up to 2 weeks, or you can freeze it for up to 2 months. If frozen, thaw it in the refrigerator overnight. Always allow the icing to warm to room temperature and give it a good stir before using it to decorate your cookies; you may need to add a few drops of water to achieve the perfect consistency if it has thickened slightly.

How to Store Your Christmas Sugar Cookies to Keep Them Fresh
Proper storage is essential to keep your delicious Christmas sugar cookies fresh and beautiful for as long as possible. Here are our best tips for maintaining their perfect texture and appearance:
- Room Temperature Storage: Once your cookies are completely cool (and any royal icing is fully set!), they can be stored on the counter at room temperature for up to 1 week. Place them in an airtight container, using sheets of parchment paper between layers to prevent sticking and protect your beautiful decorations.
- Freezer Storage: For extended freshness, these cookies freeze wonderfully. Undecorated cookies can be stored in a freezer-safe airtight container for up to 3 months. If your cookies are already decorated with royal icing, they can be frozen for up to 1 month. Ensure they are completely dry and firm before freezing to prevent damage.
- Thawing Frozen Cookies: To thaw frozen cookies, simply transfer the airtight container from the freezer to your counter. Allow them to thaw at room temperature for 8-12 hours WITHOUT opening the lid. This is a crucial step! Keeping the lid closed prevents condensation from forming on the cookies, which can cause decorated icing to bleed or become sticky, preserving their pristine condition.
Christmas Sugar Cookies: Your Questions Answered
How far in advance can I make Christmas sugar cookies?
You can certainly get a head start on your holiday baking! Baked sugar cookies can be prepared up to 3 months before Christmas if stored properly in the freezer (undecorated). Decorated cookies will maintain their quality in the freezer for about 1 month. For freshly baked cookies stored at room temperature, they will remain delicious for approximately 1 week, though they’re often devoured much sooner!
How long do sugar cookies last with royal icing?
The addition of royal icing doesn’t significantly alter the storage duration of your sugar cookies. Since royal icing itself is shelf-stable at room temperature for up to 2 weeks (once applied and dried), your decorated cookies will still last for about 1 week when stored in an airtight container at room temperature. Just ensure the icing is completely set before storing.
What are some popular Christmas cookie shapes?
The holiday season offers a wonderful array of classic and beloved cookie shapes! Among the most popular for Christmas sugar cookies are charming candy canes, twinkling stars, festive gingerbread men (and women!), delicate snowflakes, and iconic Christmas trees. These shapes provide a perfect canvas for creative decorating.
Explore More Festive Christmas Cookie Recipes
If you’re expanding your holiday baking repertoire, be sure to check out these other fantastic Christmas cookie recipes:
- Almond Spritz Cookies – Delicate, buttery, and perfect for pressing into intricate shapes.
- Ultimate Butter Cookie Dough – A versatile dough base for endless cookie possibilities.
- Classic Pecan Sandies – Rich, crumbly, and nutty, a timeless favorite.
- Russian Tea Cakes (Snowball Cookies) – Melt-in-your-mouth cookies dusted with powdered sugar, resembling snowballs.

Christmas Sugar Cookies
By Shinee Davaakhuu
These nostalgic Christmas sugar cookies are made in just one hour, leaving you plenty of time to decorate with icing and sprinkles. They stay soft and tender without puffing up and don’t need to be chilled!
Comment
Print Recipe
Ingredients
For sugar cookies:
- 3 cups (375g) all-purpose flour (measured with spoon & level method)
- ½ cup (100g) granulated sugar
- ¼ cup (50g) packed light brown sugar (Note 1)
- 1 tablespoon cornstarch
- ½ teaspoon baking powder
- ¼ teaspoon coarse kosher salt
- 1 ½ sticks (170g) unsalted butter, at room temperature
- 1 large egg, at room temperature
- 2 teaspoons pure vanilla extract
- ¼ teaspoon almond extract (optional, Note 3)
For decorating:
- 1 batch of royal icing
- Sprinkles and colored sugar
Equipment
- 1 stand mixer fitted with a paddle attachment
- Christmas cookie cutters
- 1 adjustable rolling pin
- Tipless piping bags (or piping bags with small round tips)
- Baking sheets and parchment paper or silicone mats
- Wire cooling racks
Instructions
TO PREPARE THE DOUGH:
- In a mixing bowl with a paddle attachment, combine flour, granulated sugar, brown sugar, baking powder, cornstarch, and salt. Mix on low speed until well combined.
- Add the room temperature unsalted butter and mix on low speed for 1-2 minutes until the mixture is evenly moistened and resembles wet sand.
- Add the room temperature egg, vanilla extract, and almond extract. Mix until just combined, about 30 seconds. The dough will appear crumbly but should stick together when squeezed.
- Divide the dough into 2 equal parts and gently knead each into a smooth ball.
- The dough can be shaped and baked immediately, or refrigerated in plastic bags for up to 3 days, or frozen for up to 3 months.
TO SHAPE AND BAKE COOKIES:
- Preheat your oven to 350°F (175°C). Line 2-3 baking sheets with parchment paper or silicone mats.
- Place each dough ball on a silicone mat or lightly floured surface and roll it out evenly to ¼-inch thickness.
- Use Christmas cookie cutters to cut out shapes and arrange them on the prepared baking sheets.
- Gather dough scraps, gently re-roll, and cut out more cookies until all dough is used.
- Bake for 10-13 minutes, or until the edges begin to turn a light golden color.
- Cool cookies on the baking sheet for 5 minutes, then transfer them to a wire cooling rack to cool completely.
TO DECORATE THE COOKIES:
- Prepare your royal icing. Divide it into 3-4 bowls and dye it into festive colors (red, green, blue), keeping some white.
- Place each colored royal icing into tipless piping bags (or piping bags with small round tips) and decorate your cooled cookies creatively with icing, sprinkles, and colored sugar.
- Allow the decorated cookies to fully set at room temperature (12-48 hours) before stacking or storing.
Tips & Notes
- Note 1: Light brown sugar is preferred for a subtle flavor and softer texture, and results in a lighter-colored cookie compared to dark brown sugar.
- Note 3: Almond extract subtly enhances the overall flavor profile, making the cookies irresistible.
- Make Ahead: Dough can be refrigerated for up to 3 days or frozen for 3 months. Royal icing can be stored at room temperature for 2 weeks or frozen for 2 months.
- Storing: Store cooled cookies in an airtight container at room temperature for up to 1 week. Place parchment paper between layers. Freeze decorated cookies for 1 month, or undecorated for 3 months. Thaw frozen cookies in their sealed container to prevent condensation.
Nutrition Information (per serving)
- Servings: 1 serving (approx. 1 cookie)
- Calories: 110 kcal
- Carbohydrates: 21g
- Protein: 1g
- Fat: 2g
- Sugar: 12g
- Sodium: 48mg
Course: Dessert
Cuisine: American

Did you make this?
Leave a rating and your feedback. Thank you!
