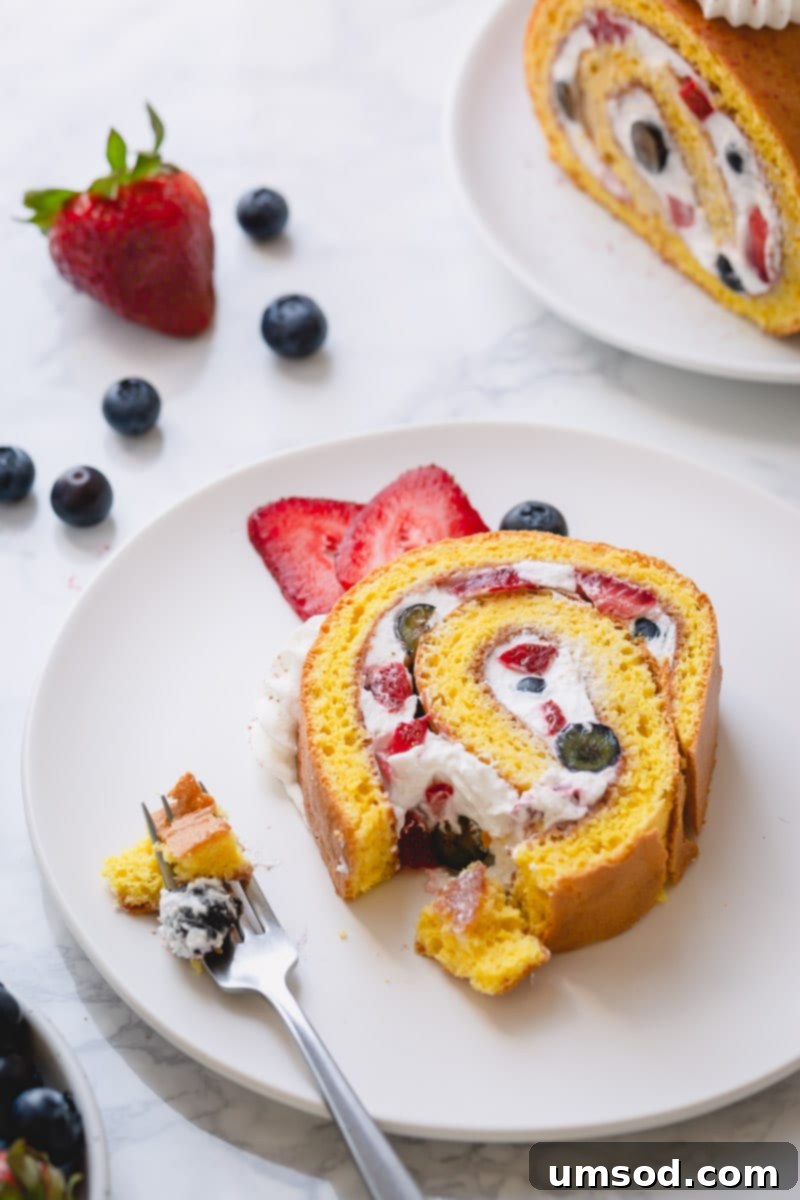
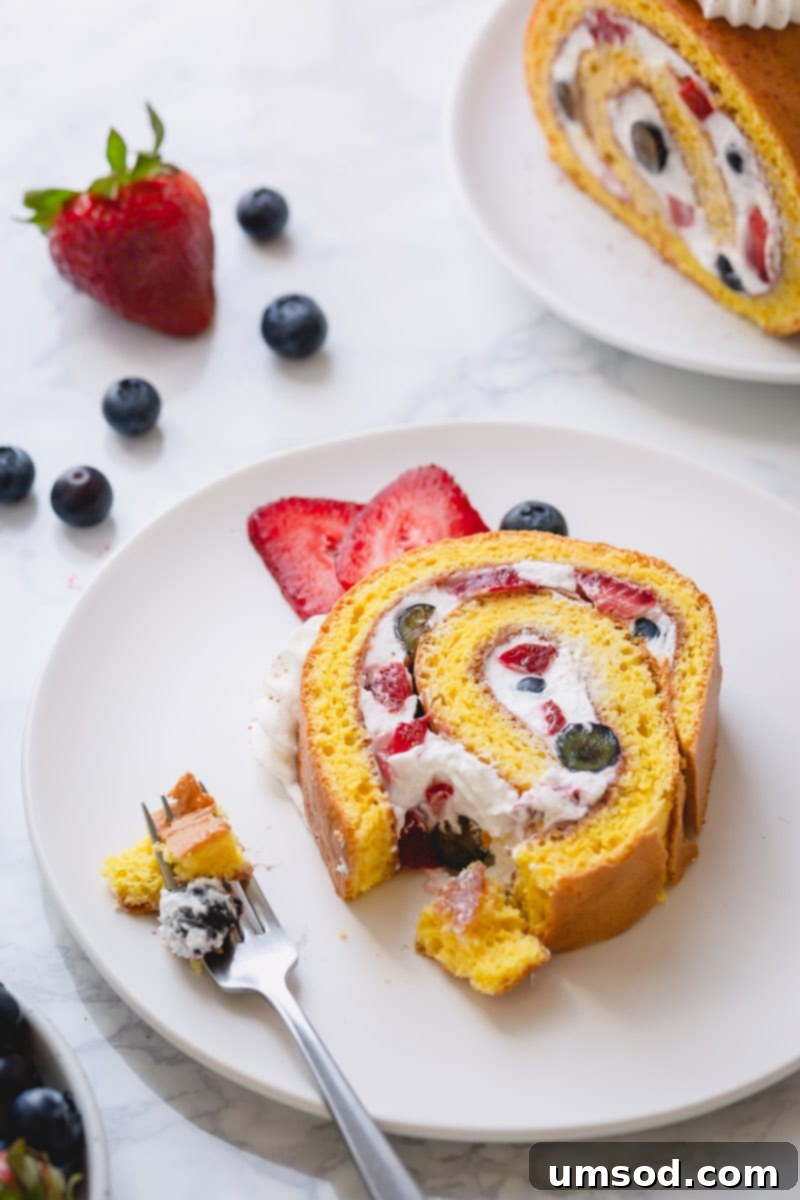
Welcome to the ultimate guide for creating a spectacular roll cake, the simpler way. Gone are the days of anxiously rolling a hot cake, fearing inevitable cracks! This revolutionary recipe features a uniquely springy and incredibly pliable sponge cake that effortlessly rolls without any signs of breakage, even when completely cooled. It’s the secret weapon for achieving bakery-quality results right in your home kitchen, making it perfect for both novice and experienced bakers.
Prepare to impress your guests and delight your family with this stunning yet surprisingly straightforward dessert. We’ll delve into all the essential tips, clever tricks, and precise techniques required for guaranteed success, ensuring your roll cake is always perfect.
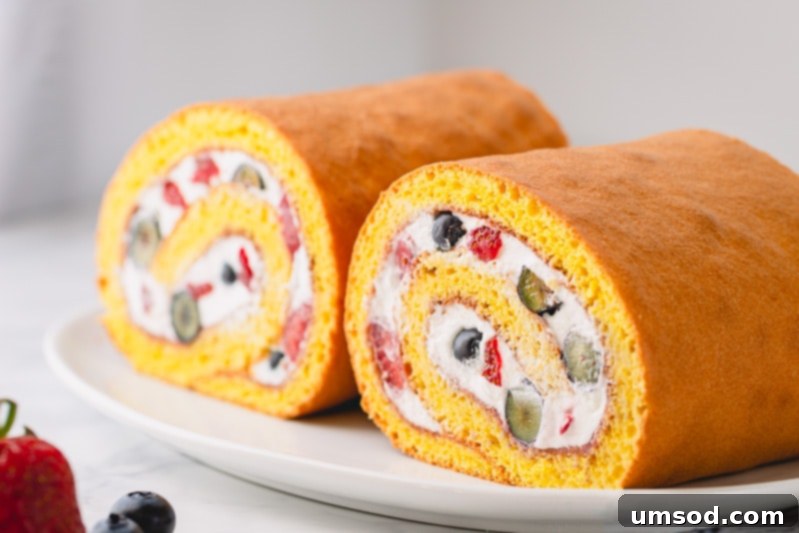
Mastering the Effortless Roll Cake: Your Go-To Impressive Dessert Solution
Many home bakers find the idea of preparing a roll cake (often recognized as a Swiss roll or a delicate roulade) quite intimidating. Common fears include the cake cracking during rolling or ending up with a dry, unappealing texture. However, I am thrilled to share a game-changing recipe that proves a roll cake can be significantly easier and far quicker to assemble than most traditional layer cakes. Say goodbye to complex stacking and endless frosting layers!
My earliest baking memories are vividly intertwined with making “roulets” (рулет) – a beloved Russian term for roll cakes. This simple, delightful dessert always brought immense joy and admiration. The inherent elegance and versatility of a roll cake always captivated me. To this day, it remains my absolute go-to dessert when I crave something truly impressive but have limited time for an elaborate baking project. The visual appeal of a perfectly spiraled cake, coupled with its exquisite taste, is genuinely unmatched, often proving even more captivating than multi-tiered creations.
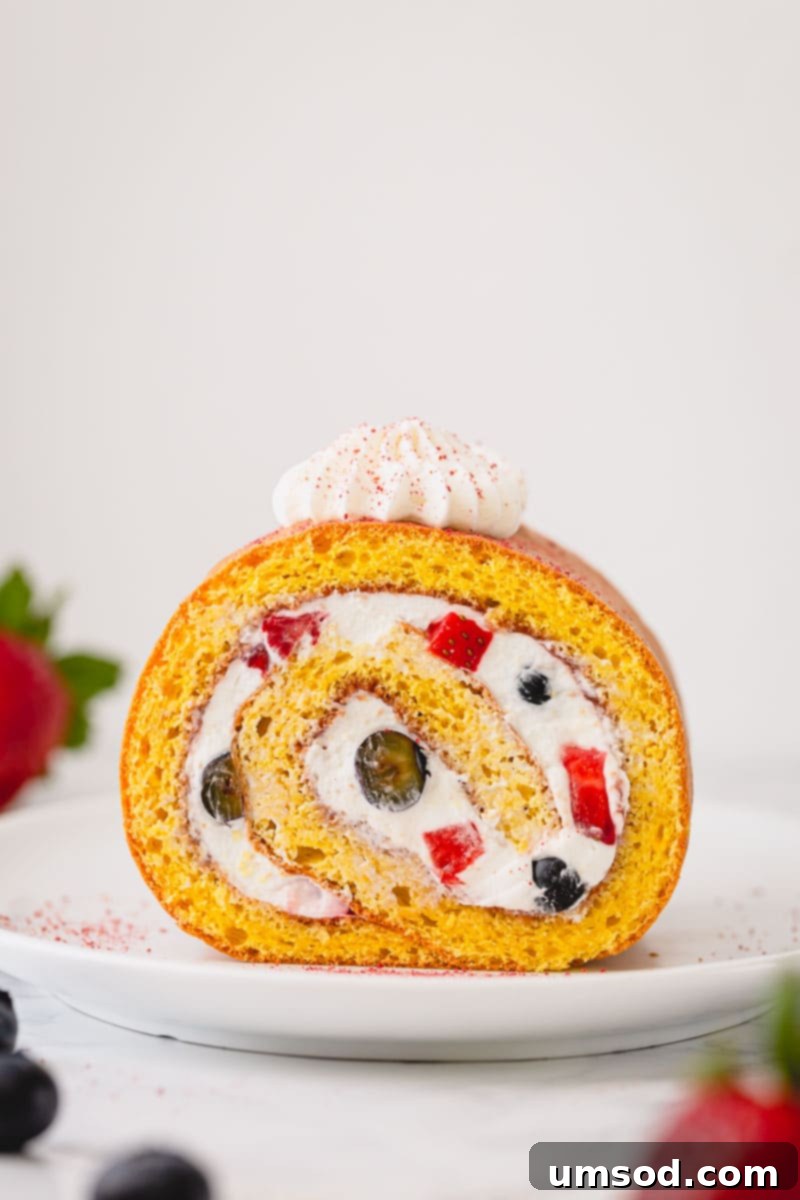
In this comprehensive guide, I’m revealing my tried-and-true, foolproof roll cake recipe. You will be utterly amazed by the incredible flexibility and inherent resilience of this sponge cake. We’ll elevate its natural deliciousness with a vibrant, sweet layer of your favorite jelly, enhance its airiness with a cloud-like, luscious homemade whipped cream, and infuse every bite with bursting freshness from assorted seasonal fruits. This harmonious combination promises a symphony of flavors and textures, making each slice a delightful experience.
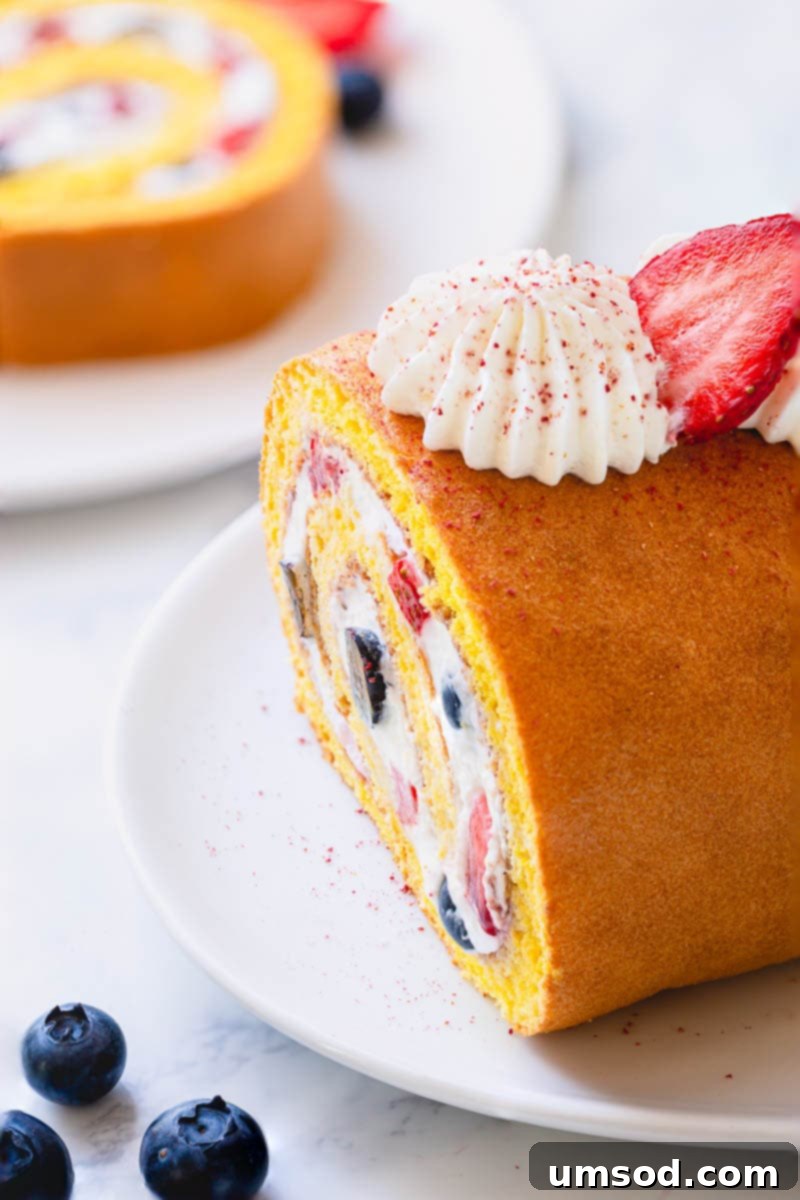
Essential Ingredients for a Perfect Roll Cake Sponge
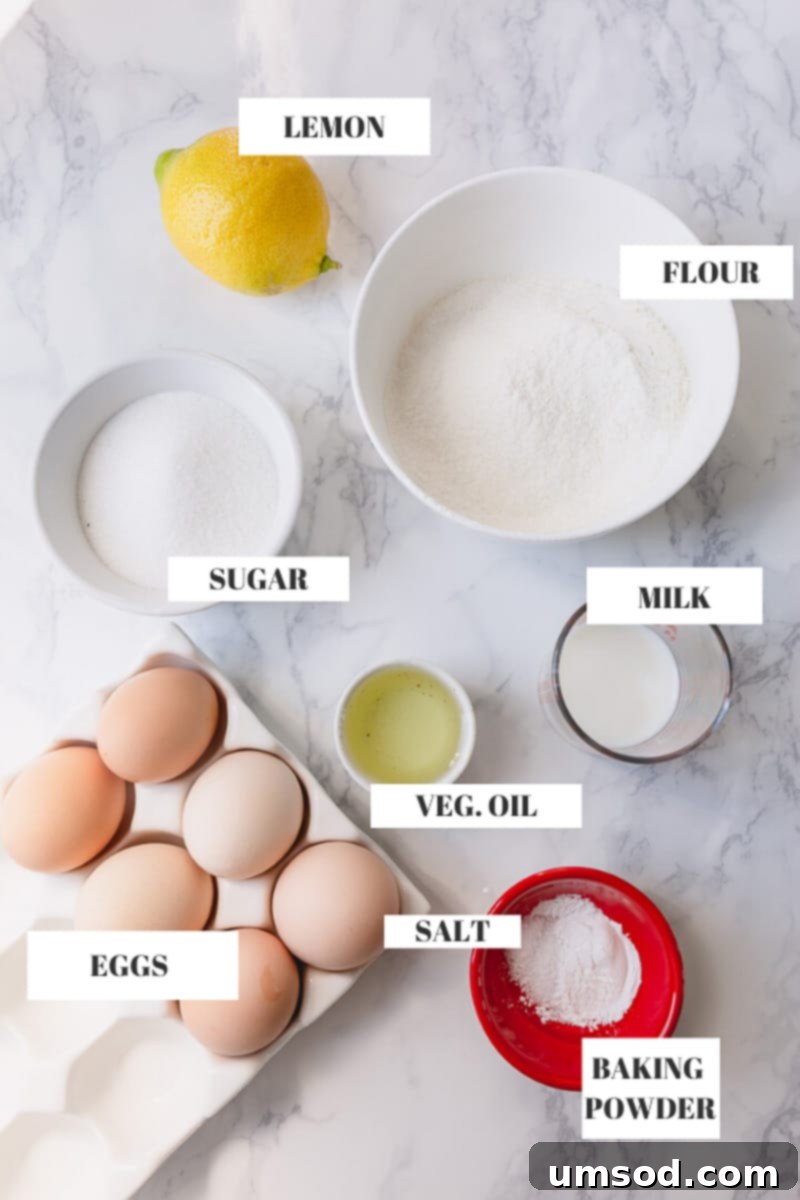
Crafting that coveted springy, light, and crack-free sponge cake requires just a handful of fundamental ingredients. Each component plays a crucial and specific role in achieving the cake’s unique tender texture and its remarkable ability to roll without resistance. Here’s a detailed breakdown of what you’ll need and the science behind their importance:
- Eggs: The very heart of our sponge cake! We meticulously separate egg yolks and whites to leverage their distinct properties – the yolks for richness and emulsification, the whites for unparalleled lightness and structure. For the cleanest and easiest separation, crack your eggs while they are still cold, directly from the refrigerator. However, for maximum volume and stability, always allow the egg whites to come to room temperature (approximately 30 minutes on the counter) before whipping. Room temperature egg whites incorporate significantly more air, leading to a much lighter, fluffier cake volume.
- Cake Flour: This specialized flour is a secret weapon for achieving the softest, most tender cake crumb imaginable. Cake flour boasts a lower protein content compared to standard all-purpose flour, which actively minimizes gluten development, resulting in a delicate texture that is less prone to cracking. Given its fine consistency, cake flour tends to clump easily, so sifting it thoroughly is an absolutely essential step to ensure a smooth, lump-free batter and an evenly textured cake.
Pro Tip: Homemade Cake Flour! Don’t have cake flour readily available? No need to worry! You can effortlessly create your own substitute at home. For every 1 cup of all-purpose flour, remove precisely 2 tablespoons, and then replace that exact amount with 2 tablespoons of cornstarch. Sift this homemade mixture together several times – ideally 3-4 times – to ensure the cornstarch is perfectly and evenly distributed throughout the flour. This ingenious trick effectively mimics the low-protein characteristics of commercial cake flour.
- Granulated Sugar: More than just a sweetener, sugar is a multifunctional ingredient in baking. It contributes significantly to the cake’s structural integrity, enhances moisture retention, and helps achieve that desirable golden-brown crust. I strongly advocate for using fine granulated sugar, as its smaller crystals dissolve much more quickly and uniformly into the egg mixtures. This results in a smoother, more stable batter, which in turn yields a superior, consistently fluffy cake.
- Salt: A mere pinch of salt is truly a baker’s secret weapon, often overlooked but incredibly impactful! It masterfully enhances and balances all the other flavors present in the cake, cutting through the sweetness and adding crucial depth and complexity. Never skip this small but mighty ingredient, even in the sweetest of desserts.
- Baking Powder: While the majority of the magnificent lift in a classic sponge cake comes from the meticulously whipped eggs, a small measure of baking powder acts as a reliable insurance policy. It provides that extra chemical boost of leavening, ensuring a consistently light, airy, and evenly risen texture throughout the cake.
- Milk: The type of milk you use is quite flexible; any kind will integrate beautifully into this recipe. Whether you prefer whole milk, 2%, or even a non-dairy alternative like almond or soy milk, its primary role is to impart a touch of essential moisture and richness. This subtle addition contributes significantly to the cake’s tender and succulent crumb.
- Vegetable Oil: This is a cornerstone ingredient for achieving our signature springy and remarkably pliable cake! In contrast to solid fats like butter, which can make cakes dense and firm when chilled, vegetable oil remains liquid at room temperature. This crucial property ensures the cake stays wonderfully soft and flexible, even after refrigeration. This inherent pliability is absolutely vital for successfully rolling the cake without encountering a single crack. Always opt for a flavorless and odorless oil, such as standard vegetable oil or canola oil, to avoid imparting unwanted flavors. While coconut oil can be technically used, be mindful that it might lend a subtle coconut flavor, which may or may not be desired. I strongly advise against using olive oil, as its distinct and robust aroma and flavor can easily overpower the delicate nuances of this cake.
- Lemon Zest: (Optional, but highly recommended!) The inclusion of fresh lemon zest introduces a wonderfully bright, zesty aroma and a subtle citrusy flavor. This beautifully complements the sweetness of both the cake and its filling, adding a refreshing counterpoint. While it’s perfectly fine to omit if you don’t have a lemon on hand, its addition truly elevates the overall flavor profile and brightness of the dessert.
Step-by-Step Guide to Baking Your Flawless Roll Cake
You’ll be absolutely delighted to discover just how straightforward it is to create this impressively elegant roll cake. From the initial mixing of ingredients to the final assembly, the entire process takes less than 90 minutes. While I wholeheartedly recommend allowing the finished cake to chill in the refrigerator for at least an hour (and ideally 2-3 hours) before slicing for the cleanest cuts and optimal texture, let’s be honest – the irresistible temptation of a freshly made roll cake often makes waiting a true test of willpower!
Let’s meticulously walk through each stage of this recipe together, step by step, to ensure your roll cake turns out perfectly ethereal and delicious every single time.
Step 1: Preparing the Pliable Sponge Cake Batter
Our journey to a unique and delightful roll cake begins with the careful preparation of a modified sponge cake batter. We are building upon the foundational principles of a classic light sponge cake, but with a crucial and ingenious twist: the strategic addition of a small amount of neutral vegetable oil and milk. These two seemingly simple ingredients are the secret protagonists behind our cake’s extraordinary qualities – ensuring it is beautifully moist, incredibly pliable, and remarkably resistant to cracking during the delicate rolling process. This thoughtful adaptation makes all the difference, consistently guaranteeing a perfectly flexible and resilient cake every single time.
*(For an in-depth exploration of tips and techniques to achieve the absolute fluffiest sponge cake possible, be sure to refer to the comprehensive “Essential Tips for a Foolproof, Fluffy Roll Cake” section further down!)
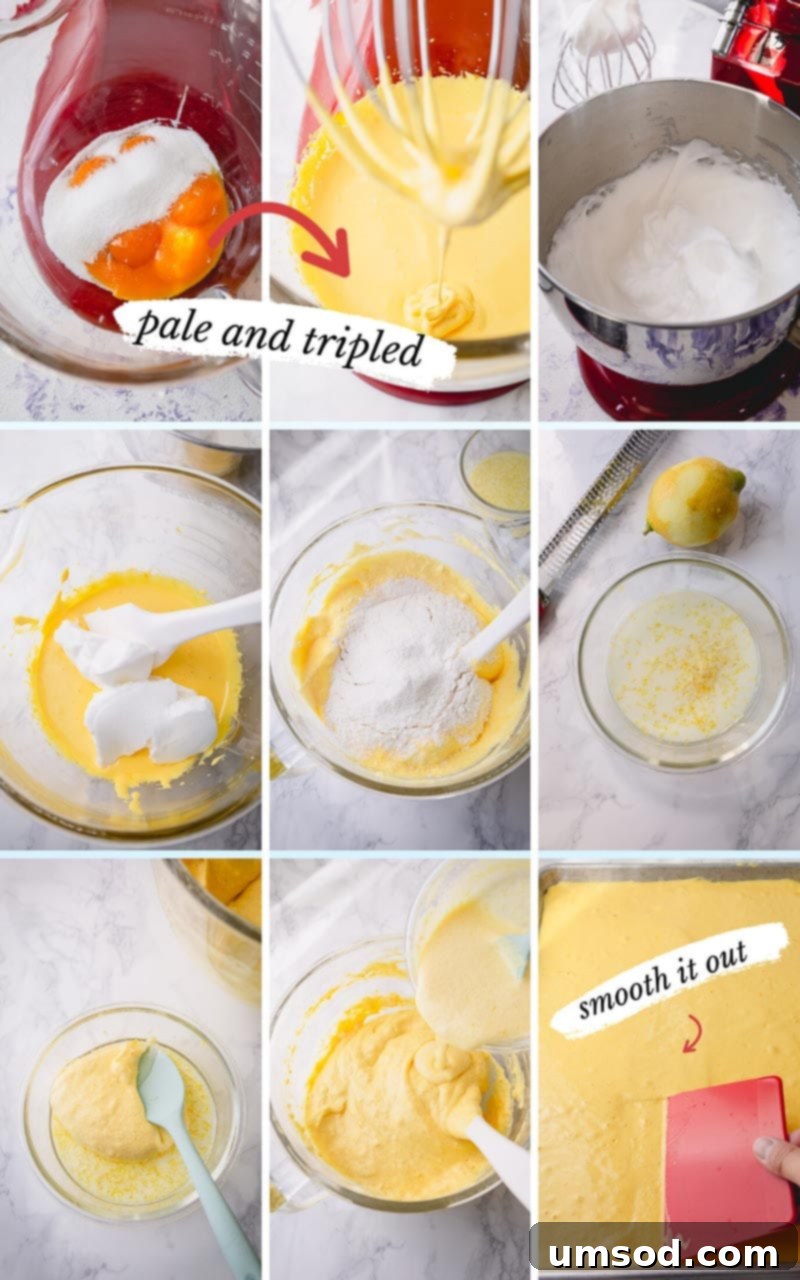
Crucial Pan Size Information for Success: The exact dimensions of your baking pan are incredibly important and directly impact the success of this recipe. I consistently achieve perfect results using my reliable 12x17x1-inch half-sheet baking pan for this cake (it’s such a versatile workhorse, I honestly own about five of them for various baking and cooking endeavors!). Using a pan that is significantly larger than this recommended size is strongly discouraged, as it will inevitably result in a cake that is too thin, fragile, and potentially brittle, making successful rolling extremely challenging. For optimal thickness, moisture, and flexibility, it is paramount to stick closely to the recommended pan dimensions.
- Conversely, avoid using any pan that is smaller than 11x17x2-inches. A thicker cake, which would result from a smaller pan, will be much more difficult to roll without cracking and may not bake evenly, leading to a doughy interior or dry edges.
Step 2: Expertly Trimming the Cake for a Flawless Roll
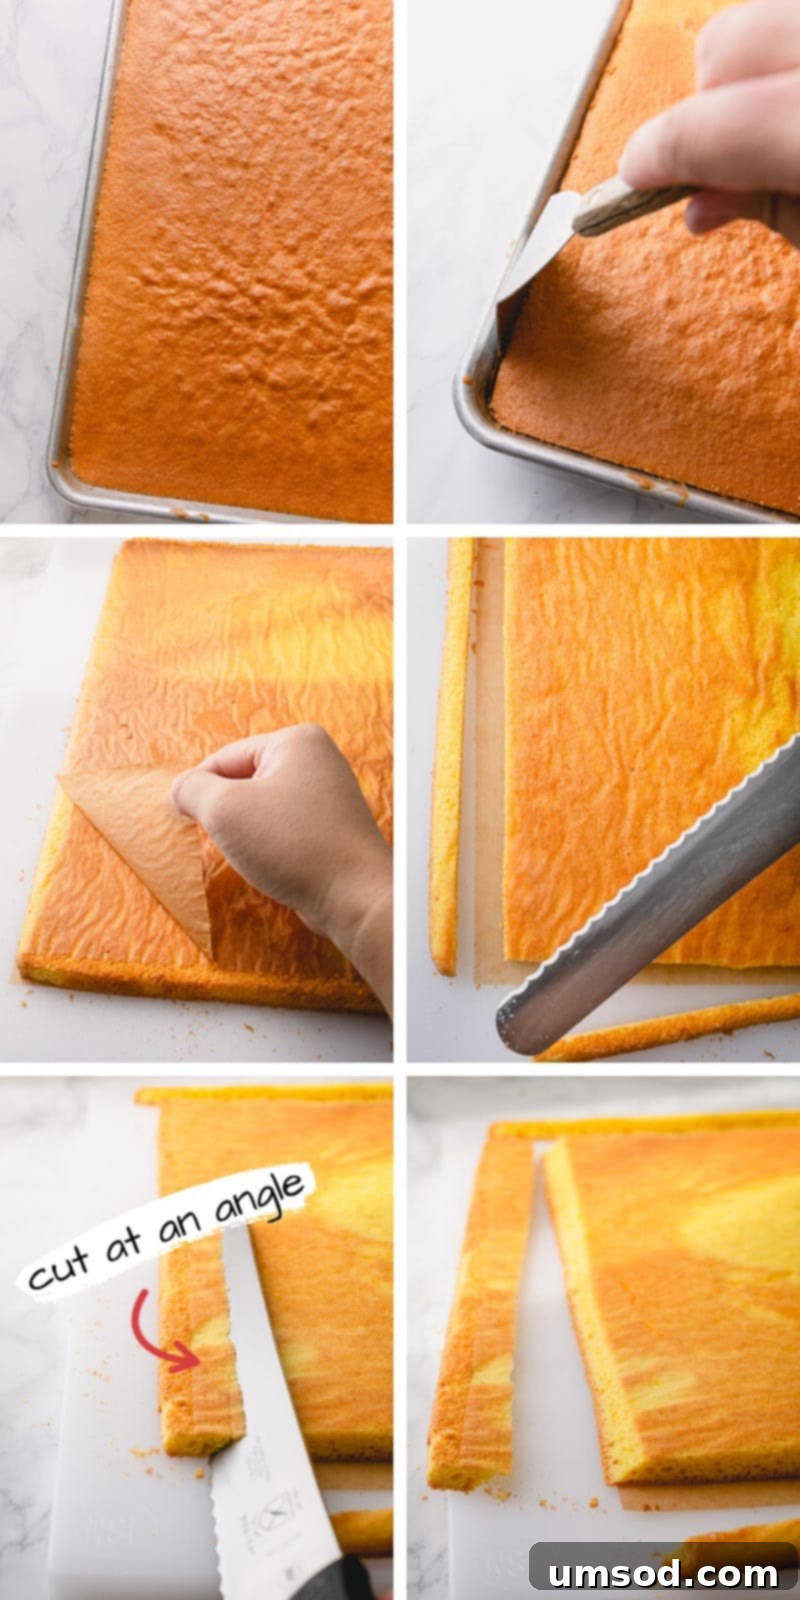
Once your perfectly baked sponge cake has had a chance to cool slightly, a vital step for a professional finish is to meticulously trim its edges. The perimeter of any cake tends to be slightly drier and firmer than the moist, tender center. These tougher edges, if left untrimmed, can impede a smooth, crack-free roll and detract from the final aesthetic. Trimming them off ensures a neater, more refined, and truly professional-looking finished product. Trust me, this seemingly small preparatory step makes an enormous difference in both the ease of rolling and the ultimate visual appeal of your cake.
For the cleanest, most precise cuts that glide through the delicate sponge without tearing, a sharp knife is absolutely indispensable. I’ve found that this specific serrated knife is particularly excellent and effective for slicing through tender cakes and pastries, providing impeccable results every time.
Smart Trimming Tip for Presentation: Before you even think about applying any filling, take a moment to cut one of the short ends of the cake at a slight, gentle angle, precisely as depicted in the accompanying instructional images. This thoughtfully angled edge will serve a dual purpose: it will form the seamless bottom of your beautifully rolled cake, providing an incredibly stable base that helps the finished roll sit perfectly flat and prevents any undesirable wobbling when you cut into it. It’s a simple, yet highly effective, trick for achieving a much more polished and impressive presentation.
Step 3: Filling and Gently Rolling Your Masterpiece
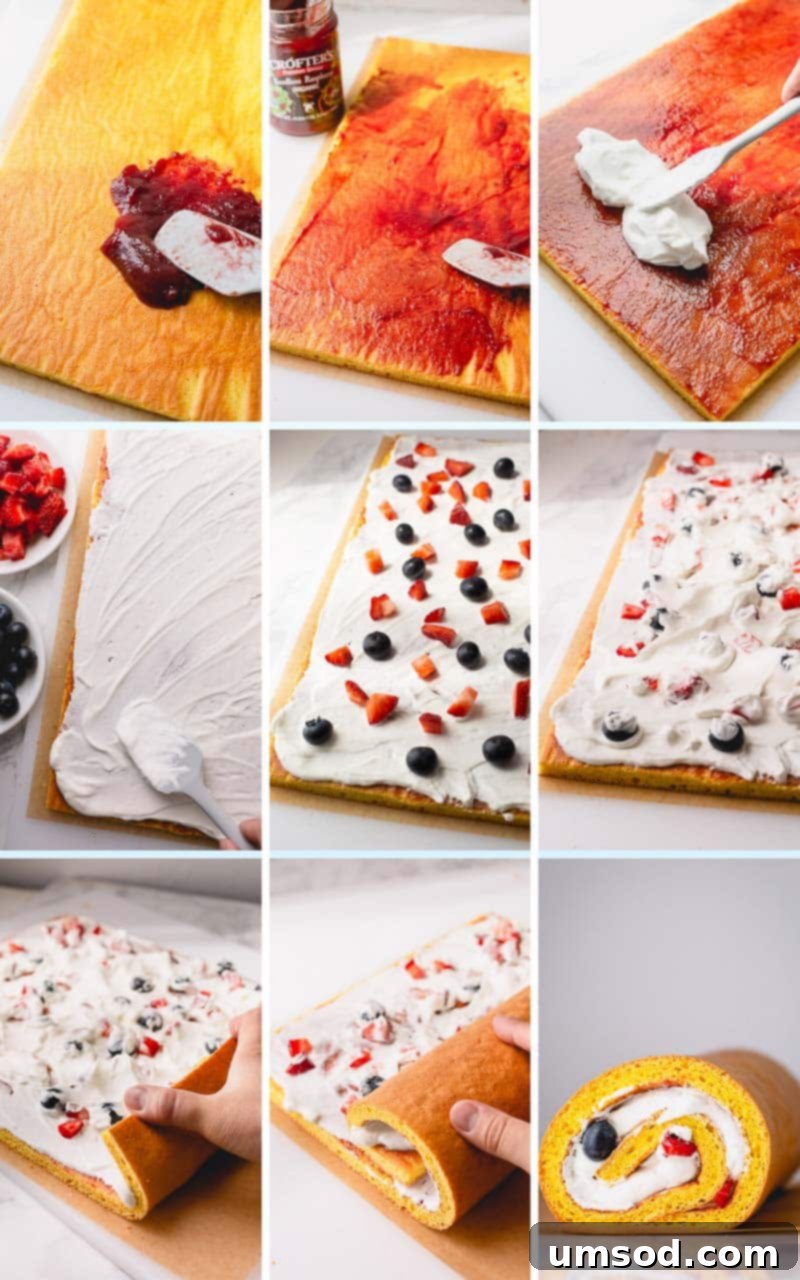
Now that we’ve successfully created a gorgeous, perfectly pliable sponge cake, it’s time for the truly exciting part: elevating it with a special and utterly delicious filling. Nothing complements a light, airy sponge better than a generous layer of fluffy, ethereal homemade whipped cream! It’s surprisingly simple to prepare and adds an incredible richness and delightful airiness that perfectly balances the cake. For an extra burst of vibrant sweetness and a pleasant fruity tang, I also adore spreading a thin, even layer of your favorite fruit jelly or jam over the cake before adding the cream. This combination is simply irresistible.
Crucial Timing Tip for Perfect Pliability: It is highly advisable to plan ahead and prepare your homemade whipped cream either before you even begin baking the cake, or while the cake is comfortably baking in the oven. The critical factor here is not to allow the baked sponge cake to cool for an extended period after it emerges from the oven. While this specific recipe liberates you from the need to roll it piping hot, letting the cake become completely cold and dry will unfortunately diminish its natural flexibility and significantly increase its susceptibility to cracking when you attempt to roll it. A cake that is slightly warm to the touch (but certainly not hot) is the ideal state for a smooth, crack-free roll.
Essential Tips for a Foolproof, Fluffy Roll Cake
Achieving a truly light and airy sponge cake fundamentally relies on maximizing the amount of air incorporated into the batter. Therefore, precision and careful execution in certain key steps are absolutely paramount. Follow these expert tips closely for optimal results and a consistently perfect roll cake:
- Egg Separation Prowess: When diligently separating egg yolks from whites, exercising extreme care is paramount. Even the tiniest speck of egg yolk contamination can fatally prevent egg whites from whipping into stable, voluminous peaks. Always ensure you use impeccably clean, grease-free bowls and utensils. Ideally, opt for glass or stainless steel bowls, as porous plastic can sometimes retain imperceptible grease residue, which is detrimental to meringue stability.
- Whip Egg Yolks Thoroughly: Resist the urge to rush through the process of beating the egg yolk mixture with sugar. It is critically important for this mixture to transform from a simple liquid into a thick, pale yellow, and significantly increased in volume. A good visual indicator is when it has tripled in size and forms ribbons when the whisk is lifted. This thorough beating creates a robust, stable emulsion that provides essential structural support for the entire cake.
- Gentle Folding is Pure Gold: Once you begin combining the ethereal whipped egg whites with the prepared egg yolk mixture, and subsequently incorporate the sifted flour, always remember to fold the batter with the utmost gentleness. Aggressive or hasty mixing will inevitably deflate the carefully incorporated air, leading directly to a denser, heavier, and significantly less pliable cake that is much more prone to cracking. Use a wide spatula and a light, deliberate hand, folding just until the ingredients are homogeneously combined.
- Avoid Over-Baking at All Costs: Over-baking is the absolute arch-nemesis of a tender, moist, and perfectly rollable sponge cake. A cake that is allowed to bake for too long will become excessively dry, brittle, and guaranteed to crack profusely when you attempt to roll it. Maintain a vigilant eye on your oven; the cake is perfectly done when a toothpick or thin skewer inserted into the very center comes out clean or with only a few moist crumbs attached. For a standard half-sheet pan, this critical window is usually around 13-15 minutes.
Smart Egg Management Tip Revisited: To reiterate a crucial point, remember that separating eggs is significantly easier and cleaner when they are cold, directly out of the refrigerator. However, to achieve maximum volume, stability, and fluffy peaks when whipping, egg whites perform optimally at room temperature. Therefore, strategize by separating your eggs cold, then allow the egg whites to gently warm up on the counter for approximately 30 minutes before proceeding with whipping!
Roll Cake FAQs: Your Questions Answered
Should I Roll My Swiss Roll While Hot or Cold?
This is undeniably one of the most frequently asked questions when it comes to roll cakes, and for *this specific recipe*, the answer is a liberating no! You are not required to roll the cake while it is piping hot. Many traditional recipes instruct bakers to do this in order to “train” the cake into its spiral shape, but our uniquely formulated, pliable sponge cake completely eliminates that necessity. However, it is equally crucial not to allow the cake to cool for an excessively long period after baking. If the cake becomes completely cold and dry, it will inevitably lose its inherent flexibility and will be significantly more prone to cracking when you attempt to roll it.
The ideal cooling window is just until the cake is no longer warm to the touch. This sweet spot typically occurs about 15-20 minutes after taking it out of the oven. At this temperature, the cake retains just enough warmth and moisture to be perfectly pliable and cooperative for a seamless roll.
The Ultimate Guide to Preventing Roll Cake Cracks
Cracking is, without a shadow of a doubt, the single most frustrating and common issue encountered when baking roll cakes. Many aspiring bakers often find themselves wondering, “How on earth do professional bakers achieve those perfect, smooth, unblemished rolls?” Fear not! With this meticulously developed recipe and adherence to these crucial tips, you will successfully banish cracks from your roll cakes for good:
- Start with the Right Recipe: This foundational step cannot be overstated. You absolutely need a recipe that is specifically engineered and designed to consistently produce a soft, moist, and inherently springy cake. Congratulations – your search ends here! Our unique inclusion of vegetable oil and milk actively contributes to making this sponge exceptionally flexible and robust against cracking.
- Do Not Over-Bake: This vital instruction cannot be stressed enough. Over-baking is the arch-nemesis of a tender, pliable, and rollable sponge cake. A cake that is baked for too long will inevitably dry out, become brittle, and is virtually guaranteed to crack profusely upon rolling. For a standard half-sheet pan (measuring approximately 12×17 inches), your cake will typically reach perfect doneness in about 13-15 minutes. It is prudent to begin checking for doneness at the 13-minute mark. If you happen to be using a slightly smaller pan, it might require an extra minute or two, but always rely on the visual and tactile “toothpick test”: it should emerge clean, or with only a few moist crumbs attached, indicating perfect doneness.
- Avoid Prolonged Cooling: While this recipe cleverly bypasses the need to roll the cake when it’s hot, it is equally important not to let the cake sit out and cool for an excessive amount of time. Allowing the cake to cool for more than 30 minutes can significantly dry out your delicate sponge, dramatically increasing its likelihood of cracking during the crucial rolling process. Aim to cool it just until it’s no longer warm to the touch – typically a window of 15-20 minutes – then proceed immediately with trimming and filling.
How to Achieve Perfect Slices: Cutting Your Roll Cake
For the cleanest, most aesthetically pleasing, and structurally sound slices of your beautifully crafted roll cake, it is absolutely essential to chill it thoroughly first. Refrigerating the entire cake for at least 1 hour, and ideally a more generous 2-3 hours, allows both the delicate sponge and the luscious filling to firm up properly. This crucial chilling period makes it significantly easier to cut through the cake without any squishing, tearing, or deformation of its elegant spiral.
Once again, a high-quality, impeccably sharp knife is your most trusted companion in the kitchen. This particular serrated knife, with its fine-toothed edge, excels at effortlessly cutting through delicate cakes and creamy fillings, ensuring consistently nice and clean cuts every single time, showcasing your baking prowess.
Storing Your Delicious Roll Cake for Freshness
Proper storage is absolutely paramount to maintaining the exquisite freshness, delightful texture, and overall quality of your homemade roll cake. Because this particular recipe utilizes a delicate, dairy-based whipped cream filling, it is imperative to keep the finished cake refrigerated at all times. Always store it in an airtight container or tightly wrapped in several layers of plastic wrap to prevent it from drying out, becoming stale, or absorbing any unwanted odors from other foods in the refrigerator.
However, if you choose to opt for a filling that does not contain dairy, such as a simple fruit jam or jelly without any cream, then you have the flexibility to store your roll cake on the counter at cool room temperature for a day or two, provided it is well-covered to protect its freshness.
Can You Freeze a Roll Cake?
When considering whether to freeze your roll cake, the specific type of filling used is the deciding factor. Since delicate whipped cream does not typically freeze and thaw well – it can become watery, separate, or lose its desirable fluffy texture – I generally do not recommend freezing a roll cake that contains a whipped cream filling. The quality upon thawing would likely be compromised.
However, if your roll cake features a more stable and resilient filling, such as a simple fruit jelly or jam, a rich buttercream frosting, or a luscious cream cheese frosting, then absolutely! You can confidently freeze it just as you would any other standard layer cake. For optimal preservation, wrap the cake tightly in plastic wrap, then an additional layer of aluminum foil, and store it in an airtight container or freezer bag for up to 1-2 months. When you’re ready to enjoy it, simply thaw it slowly and gently in the refrigerator before slicing and serving.
Roll Cake, Swiss Roll, Roulade, Jelly Roll: What’s the Difference?
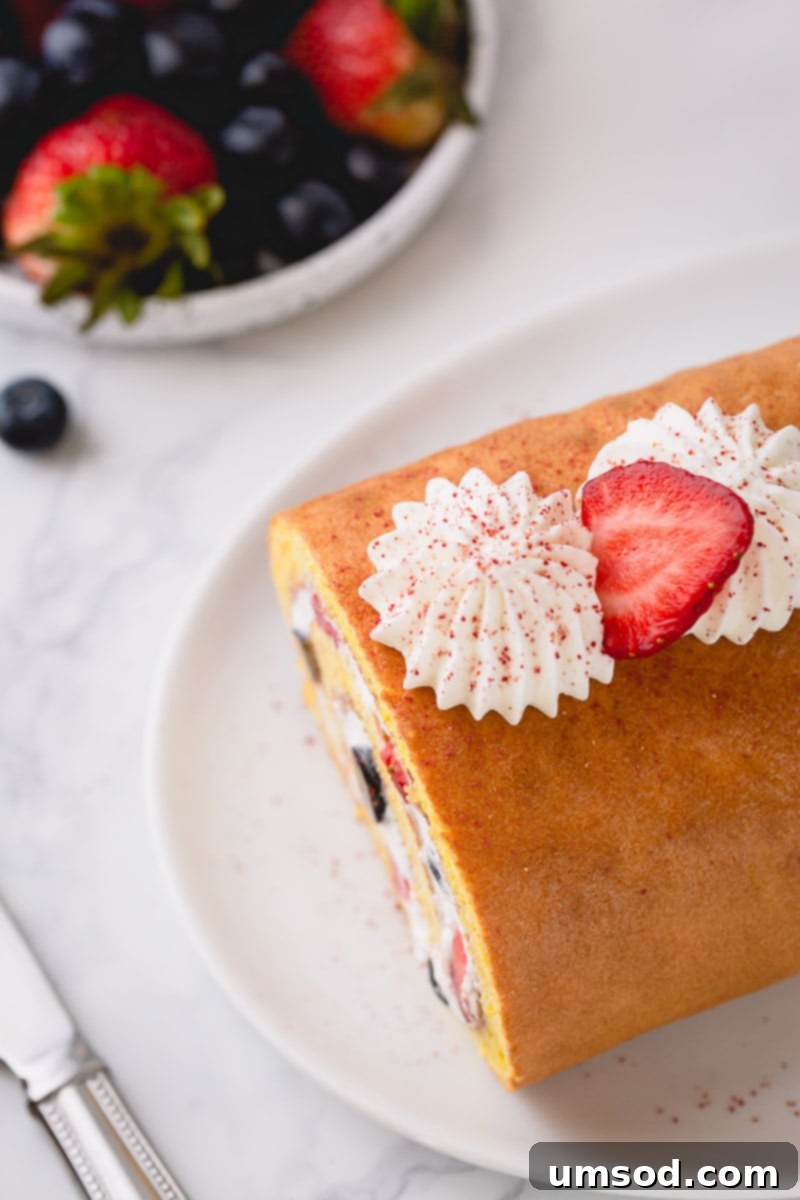
It’s perfectly understandable to get a bit tangled in the various names attributed to this delightful and visually appealing dessert! The question, “What exactly should I call this cake?” is one that many bakers and enthusiasts ponder. From extensive culinary research and common usage, it appears that “roll cake,” “Swiss roll,” “roulade,” and “jelly roll” largely refer to the same fundamental type of dessert: a thin, airy sponge cake that is baked in a flat sheet pan, then evenly spread with a sweet filling, and meticulously rolled into a tight, elegant spiral. The differing names often stem from historical origins, regional culinary variations, or simply widespread common usage over time across different cultures and languages.
So, feel absolutely free to call it whatever name resonates most with you! For me personally, it will always hold a special, sentimental place as a “roulade” – a fond nod to my own cherished baking heritage and memories. Regardless of its nomenclature, the sheer joy and deliciousness it brings are truly universal and transcend any geographical or linguistic boundaries.
I sincerely hope that you’ll be inspired to take the opportunity to bake this incredibly easy, forgiving, and rewarding roll cake very soon. It’s an especially perfect choice for bright summer gatherings, celebratory occasions, or any moment that calls for a fresh, light, and utterly charming sweet treat. And here’s a friendly word of expert advice: if you happen to be making it for company, consider the wise decision of baking two. Trust me, this magical cake has a peculiar way of disappearing in mere minutes!

Berrylicious Roll Cake: An Easy No-Crack Recipe
Shinee Davaakhuu
40
15
1
30
8
servings
Comment
Print Recipe
Ingredients
For the Pliable Sponge Cake:
-
6
large eggs (Note 1: Separate cold, whip whites at room temp for best volume) -
2/3 cup
(130 g) fine granulated sugar (divided) -
1 cup
(125 g) cake flour (Note 2: Sifted; see notes for homemade alternative) -
1 teaspoon
baking powder -
¼ teaspoon
coarse kosher salt -
3 tablespoons
(50 g) vegetable oil (flavorless, odorless) -
3 tablespoons
(50 g) milk (Note 3: Any type will work) - Zest of 1 lemon (optional, for enhanced flavor)
For the Fresh Berry & Cream Filling:
-
¾ cup
(180 g) heavy whipping cream (well chilled) -
2-3 tablespoons
(30-45 g) granulated sugar (adjust to taste) -
1 teaspoon
pure vanilla extract -
1 cup
assorted fresh berries (plus more for decoration, if desired, cut into small pieces) -
½ cup
your favorite jelly (Note 4: Seedless raspberry works wonderfully)
Instructions
- 1. Prepare the Batter Components: Carefully separate the egg yolks and egg whites into two separate, impeccably clean, and grease-free mixing bowls. Set both aside. (PRO TIP: Eggs are easiest to separate when cold, directly from the fridge. For optimal whipping, allow your egg whites to come to room temperature for about 30 minutes before beating.)
- 2. Preheat Oven & Prep Pan: Preheat your oven to 375°F (190°C). Line a 12x17x1-inch baker’s half baking sheet with parchment paper, ensuring there’s a slight overhang on the longer sides to assist with easy handling later.
- 3. Sift Dry Ingredients: In a small, clean bowl, thoroughly sift together the cake flour and baking powder. Sifting is crucial to prevent lumps and ensures an airy, smooth cake texture.
- 4. Whip Egg Yolks: In a large mixing bowl, using a whisk attachment (or a reliable hand mixer), vigorously whisk the egg yolks, vanilla extract, and 1/3 cup of the granulated sugar. Continue beating until the mixture transforms into a pale yellow, thick, and significantly increased in volume (it should roughly triple in size). This can take 5-7 minutes of consistent beating.
- 5. Beat Egg Whites: In a separate, very clean mixing bowl (ensure it’s grease-free!) with a whisk attachment, beat the room temperature egg whites on medium speed until they become light and frothy.
- 6. Form Soft Peaks: Gradually add the remaining 1/3 cup of sugar to the frothy egg whites, incorporating it one tablespoon at a time while continuously beating. Increase the mixer speed to medium-high and continue to beat until soft, glossy peaks form. Be vigilant not to over-beat the whites to stiff, dry peaks, as this can make the batter difficult to fold.
- 7. Fold Whites into Yolks (First Half): Gently spoon about half of the prepared whipped egg whites into the beaten egg yolk mixture. Using a flexible spatula, carefully fold them together until the mixture is mostly smooth and streaks of white are no longer prominent. Then, add the remaining whipped egg whites and continue to gently fold until just combined and smooth. Overmixing at this stage will deflate the precious air, leading to a denser cake.
- 8. Incorporate Dry Ingredients: Gradually add the sifted flour and baking powder mixture into the batter. Using the same gentle folding technique, incorporate the dry ingredients until no dry flour streaks are visible. Again, avoid overmixing to preserve the cake’s airy texture.
- 9. Prepare Oil & Milk Mixture: In a small, separate bowl, combine the vegetable oil, milk, and the optional lemon zest. Stir them together until well blended.
- 10. Temper Oil & Milk: Scoop approximately ½ cup of your main cake batter into the oil-milk mixture and gently mix until smooth. This step, known as tempering, effectively lightens the denser oil-milk mixture, making it much easier to incorporate into the main batter without causing significant deflation.
- 11. Final Fold: Pour the lightened oil-milk mixture back into the main cake batter. Continue to gently fold it until all ingredients are just well combined and the batter is homogeneous. (IMPORTANT TIP: Always maintain a very gentle folding motion throughout these steps to preserve as much air as possible in the batter, which is essential for a truly light and pliable sponge.)
- 12. Spread Batter: Carefully pour the finished cake batter into your prepared baking sheet. Use an offset spatula or a bench scraper to meticulously spread the surface evenly, ensuring a consistent thickness across the entire pan. This uniform thickness is critical for even baking and easy rolling.
- 13. Bake the Cake: Bake the cake for approximately 13-15 minutes, or until a toothpick inserted into the center of the cake comes out clean. The cake should appear lightly golden and spring back gently when lightly touched. Remember: Do not over-bake, as this will lead to a dry, crack-prone cake!
- 14. Initial Cooling & Release: Once baked, promptly remove the cake from the oven and allow it to cool on a wire rack for 5-10 minutes while still in the pan. After this initial cooling, run a thin, flat spatula or a butter knife along all the edges of the cake to gently loosen it. Carefully invert the cake onto a clean work surface (or a fresh, large piece of parchment paper). Gently and slowly peel off the parchment paper from the bottom of the cake.
- 15. Trim & Finish Cooling: Using a sharp serrated knife, carefully trim off any slightly drier or uneven edges of the cake. For an improved presentation, specifically cut one of the short sides at a slight angle, precisely as demonstrated in the article’s images. This angled cut will help the finished roll cake sit beautifully stable. Allow the cake to cool for another 10-15 minutes, until it’s no longer warm to the touch, but critically, not completely cold and dry.
- 16. Prepare the Whipped Cream: In a well-chilled mixing bowl fitted with a whisk attachment, beat the heavy whipping cream, granulated sugar, and pure vanilla extract on medium speed until soft, billowy peaks form. It’s important not to over-beat, or the cream will become grainy and separate.
- 17. Prepare the Fruits: Wash and thoroughly dry your assorted fresh berries and fruits. For even distribution and easy rolling, cut any larger fruits into small, manageable pieces that will spread smoothly within the cake.
- 18. Assemble – Jelly Layer: Place the slightly cooled, trimmed cake on your clean work surface (or a fresh piece of parchment paper if you prefer). Evenly spread a thin, consistent layer of your favorite fruit jelly across the entire surface of the cake. Leave a small border (about ½ inch) on the far short end of the cake, as this will be the final edge of your roll.
- 19. Assemble – Cream & Fruit Layers: Next, gently and evenly spread half of the prepared whipped cream over the jelly layer. Arrange the cut fresh fruits uniformly over the cream. Then, lightly spread the remaining half of the whipped cream over the fruits, creating a fluffy bed for them.
- 20. Roll the Cake: Starting from the short end of the cake with the straight edge (the one opposite the angled cut), begin to roll the cake somewhat tightly but with consistent, gentle pressure. Use the parchment paper beneath it to assist in guiding and tightening the roll as you go. Once fully rolled, wrap the entire cake tightly in the same piece of parchment paper or fresh plastic wrap. Refrigerate for at least 1 hour (ideally 2-3 hours) before attempting to slice and serve. This chilling firms up the filling and cake, ensuring clean cuts.
- 21. Creative Decoration Ideas: For a simple yet elegant finish, lightly dust the chilled roll cake with powdered sugar just before serving. For a more elaborate touch, pipe decorative patterns, rosettes, or swirls with any leftover whipped cream on top, and adorn with extra fresh berries, mint leaves, or chocolate shavings.
- 22. Storage Guidelines: To ensure optimal freshness and safety, store any leftover roll cake tightly covered in an airtight container or plastic wrap in the refrigerator. Due to its delicate whipped cream filling, it is best enjoyed within 2-3 days of preparation.
⭐️ Did you make this recipe?
We’d love to hear from you! Please leave a review and let us know how you liked it.
Video Guide
Pro Tips & Notes
Note 2: Cake Flour Details: Cake flour is fundamental for achieving a tender, delicate cake crumb. Always sift it thoroughly to prevent any clumps and ensure an even batter. If you don’t have commercial cake flour on hand, you can easily make a substitute: measure 1 cup of all-purpose flour, remove 2 tablespoons, and replace that exact amount with 2 tablespoons of cornstarch. Sift this mixture 2-3 times to combine the cornstarch and flour perfectly.
Note 3: Milk Choice: Any type of milk works beautifully for this recipe and contributes to the cake’s moistness and tender texture. I’ve had consistent success using both whole milk and 2% milk, so feel free to use whichever you have readily available in your kitchen.
Note 4: Jelly Selection: For the filling, I personally prefer using a store-bought seedless raspberry jelly due to its vibrant flavor and wonderfully smooth texture, which spreads effortlessly. However, feel absolutely free to use your favorite fruit jelly or jam! A homemade option, such as my homemade raspberry jelly, would also be an absolutely delicious and highly recommended choice.
Nutrition Information
374kcal
49g
7g
17g
33g
188mg
Dessert
American

Did you make this?
Leave a rating and your feedback. Thank you!
This recipe was originally published on June 9th, 2014, and updated on July 6th, 2020, with enhanced tips and instructions for a foolproof baking experience.
