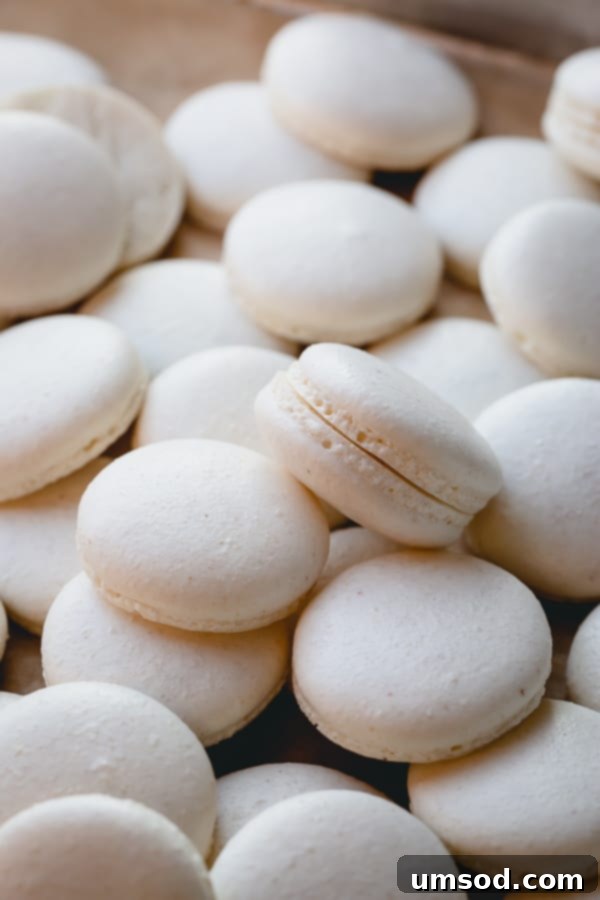
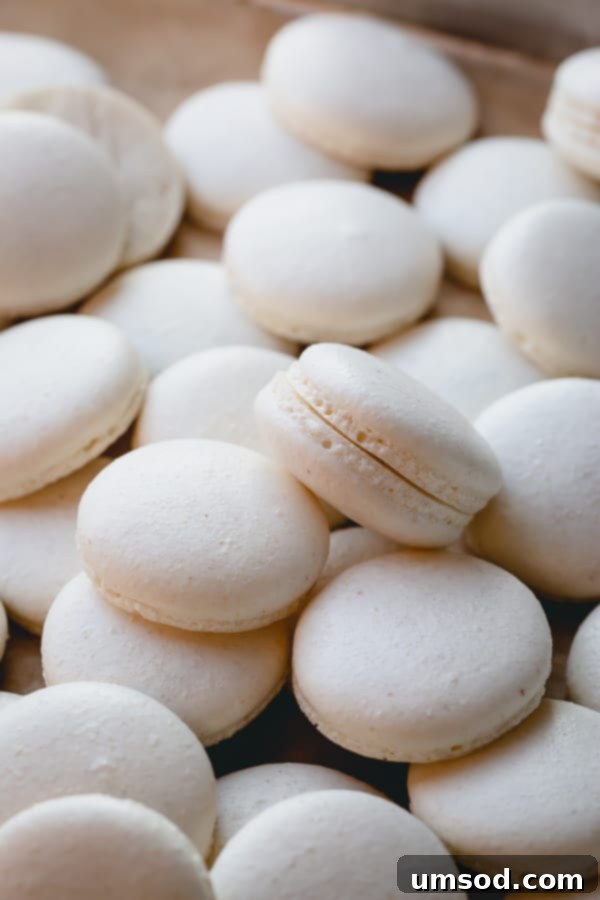
These exquisite white macarons, generously filled with a velvety smooth white chocolate ganache, are an absolute dream for every macaron enthusiast. Embark on a delightful baking journey with our meticulously tested recipe notes to achieve these coveted, flawlessly white macarons.
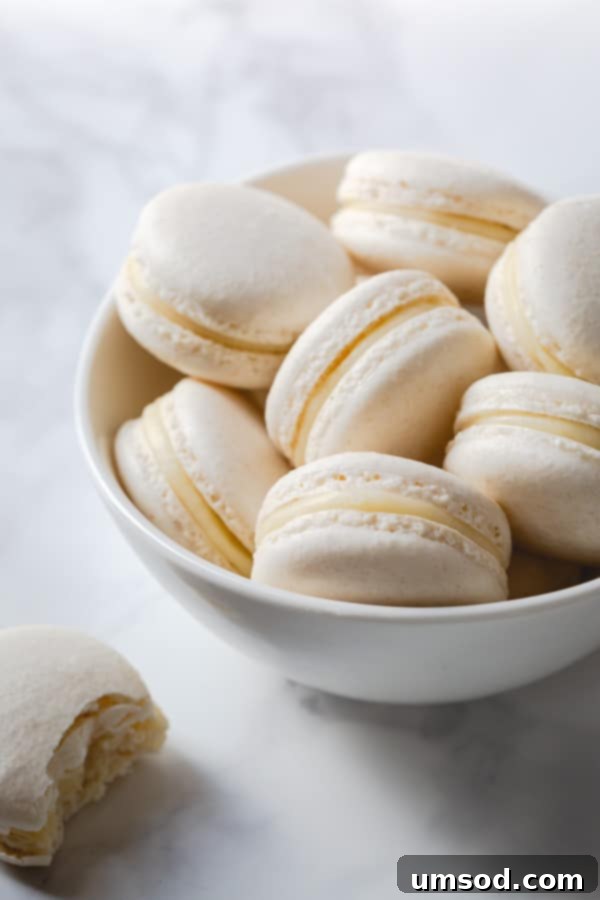
Since sharing my very first basic French macaron recipe, I’ve delved into countless flavored macaron variations. While the path to macaron perfection isn’t always smooth – and yes, even experienced bakers face disastrous batches sometimes! – the reward is undoubtedly worth the effort. Regardless of their appearance, macarons consistently deliver an irresistible taste. Moreover, any “failed” macarons can always be transformed into another delightful treat, like these amazing macaron brownie cookies!
The sheer joy and satisfaction of baking a batch of perfect macarons is truly addictive, pushing you to master this delicate art.
Today, however, we’re focusing on a seemingly simple macaron: the pure white macaron. Don’t let its unassuming color fool you; achieving truly white macaron shells without any browning is considered one of the most significant challenges for macaron bakers worldwide. This guide will reveal the secrets to overcoming this hurdle.
The Quest for Pure White Macarons: Recipe Testing Notes
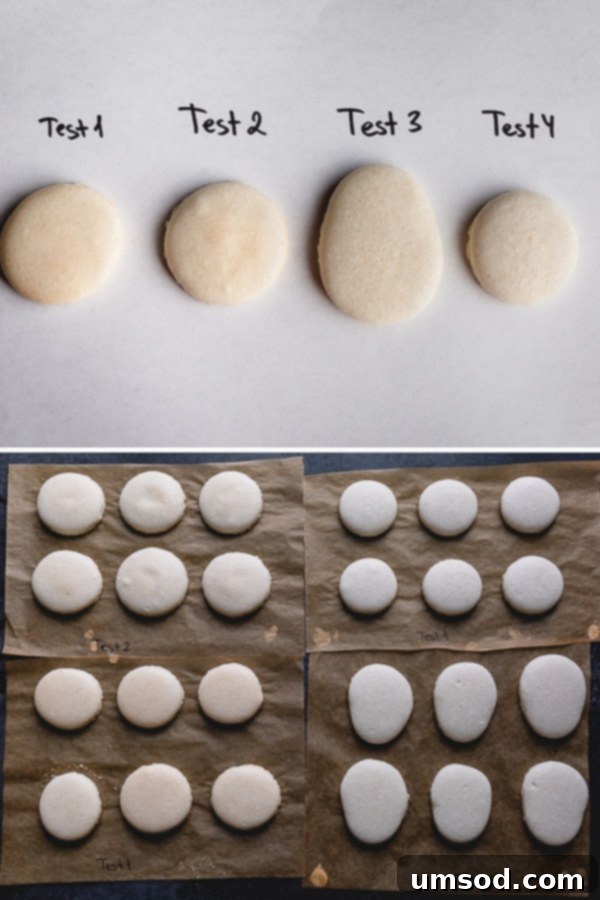
The pursuit of pristine white French macarons led me to rigorously test four distinct baking methods. Browning is a common issue when baking light-colored macarons, as the sugar can caramelize under direct heat. My goal was to find a technique that minimized or entirely eliminated this undesirable discoloration, ensuring a truly pure white finish for our delicate shells.
- TEST #1: Standard Baking. Baked macarons as usual, on the middle rack of the oven, for 18 minutes at 300°F (150°C). This served as our control group.
- TEST #2: Parchment Paper Shield. Macarons baked on the middle rack for 18 minutes at 300°F (150°C), but with a piece of parchment paper placed directly over the macarons after the initial 10 minutes of baking. The idea was to shield them from direct top heat once the shells had partially set.
- TEST #3: Empty Baking Sheet Shield. Baked macarons on the middle rack for 18 minutes at 300°F (150°C), with an empty baking sheet placed on the top rack to act as an indirect heat shield. This creates a buffer zone above the macarons without direct contact.
- TEST #4: White Gel Food Coloring + Empty Baking Sheet. Added white gel food coloring to the macaron batter and baked on the middle rack, also with an empty baking sheet placed on the top rack. This combined a coloring agent with the heat-shielding method.
Test Results Unveiled: The Path to White Perfection
Our comprehensive testing yielded clear insights into achieving pure white macaron shells:
Test 1 Notes: As anticipated, the macarons from Test #1, baked without any special measures, showed the most significant browning. The tops developed a light golden hue, which, while appealing for some recipes, was not the pure white we aimed for. This confirmed the need for heat management.
Test 2 Notes: Placing parchment paper directly on the macarons midway through baking did reduce browning compared to Test #1. However, this method introduced a new problem: the slight weight of the parchment paper created noticeable dimples in the center of the shells. Even though the shells were partially set, they were still delicate enough to be affected, compromising their smooth, domed appearance.
Test 3 Notes: This method showed a dramatic improvement. By placing an empty baking sheet on the top rack, the direct overhead heat was effectively diffused, resulting in almost no browning on the macaron shells. The shells maintained their beautiful, unblemished color much better than the first two tests.
Test 4 Notes: The combination of adding white gel food coloring to the batter and shielding the top heat with an empty baking sheet proved to be the absolute winner! The white food coloring significantly enhanced the brightness of the macaron shells, making them appear even whiter than their natural state. Coupled with the protective baking sheet, these macarons achieved a truly flawless, vibrant white color. This method ensured both visual perfection and structural integrity.
Conclusion: Your Keys to Pure White Macaron Success
Based on our rigorous testing, here are the two critical steps for achieving stunningly pure white macaron shells every time:
- Incorporate White Gel Food Coloring: A small amount of white gel food coloring in your meringue batter significantly brightens the shells, counteracting any potential dullness or slight discoloration.
- Shield Top Heat During Baking: Always place an empty baking tray on the top rack of your oven. This clever technique acts as a barrier, preventing direct overhead heat from browning your delicate macaron shells.
Embrace these two simple yet powerful tips, and you’ll be well on your way to baking macarons that are not only delicious but also visually spectacular in their pristine white glory.
How to Make Pure White Macaron Shells: A Step-by-Step Guide
If you’re new to the art of macaron making, I highly recommend checking out my easy macaron recipe for beginners. It provides in-depth explanations of each technique, laying a solid foundation for your macaron journey. For our white macarons, we’ll focus on the specific nuances.
1. Meringue Mastery: Building a Stable Base
For home bakers, the French meringue method is often the most accessible and reliable technique. Once you master creating a stable French meringue, consistent excellent results will follow. The key is patience and precision.
- Prepare Ingredients: In a large, impeccably clean bowl, combine your room temperature egg whites, super fine granulated sugar, a pinch of salt, and cream of tartar (if using). Ensure your bowl and whisk attachment are grease-free, as any fat can prevent the meringue from whipping properly.
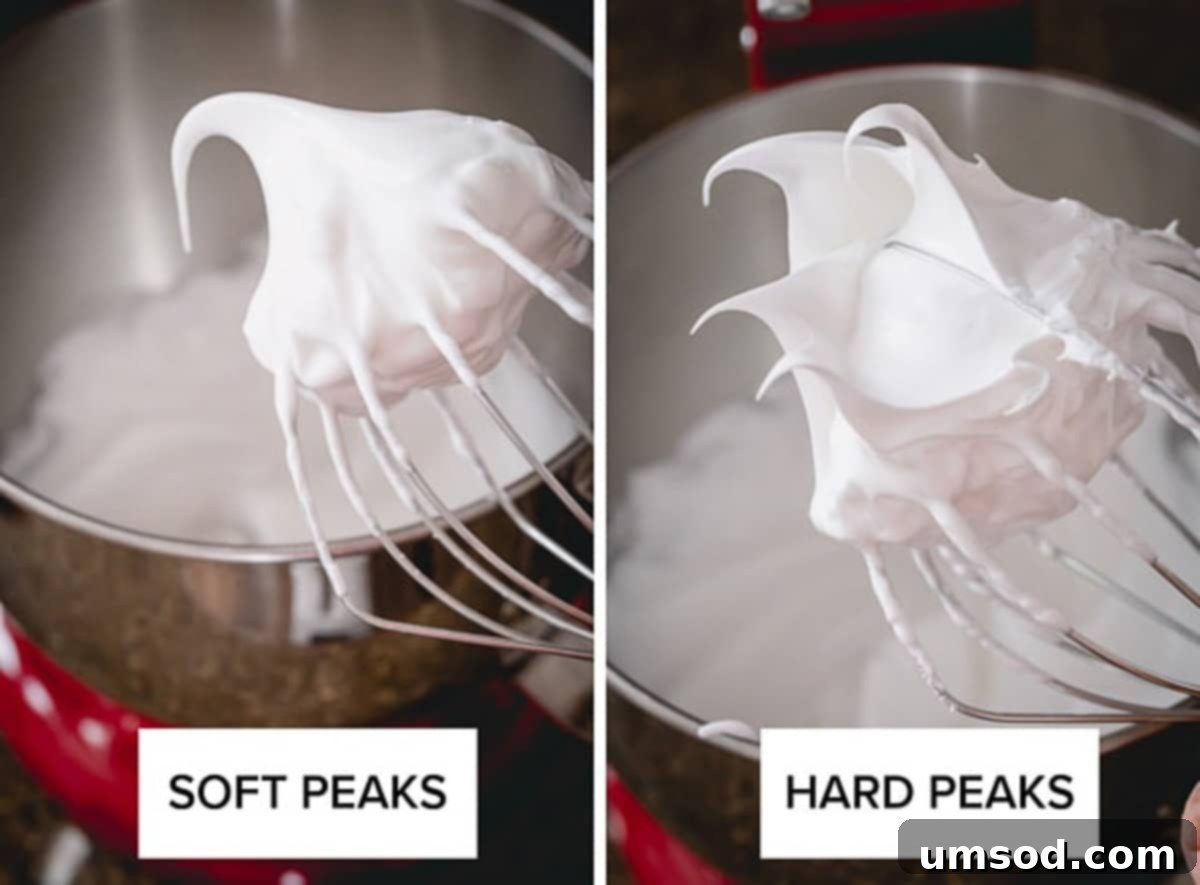
- Whip to Soft Peaks: Begin whisking the mixture at a consistent medium-low speed. This slower speed allows the sugar to fully dissolve into the egg whites, creating a more stable meringue. Continue whisking until the meringue reaches the soft peak stage – it should hold a gentle curl when the whisk is lifted, typically taking around 20 minutes for optimal stability.
- Add White Gel Food Coloring: At the soft peak stage, carefully incorporate the white gel food coloring. This ensures even distribution and vibrant color without compromising the meringue’s structure.
- Achieve Stiff Peaks: Continue whisking at the same medium-low speed. Do not rush this process. The meringue is ready when it forms stiff, glossy peaks that stand upright without collapsing when you lift the whisk. The meringue should also cling firmly to the whisk attachment and have distinct “ribs” inside the bowl.
2. Sifting for Smoothness: The Dry Ingredients
Properly prepared dry ingredients are crucial for achieving those coveted smooth macaron tops. This step cannot be overlooked.
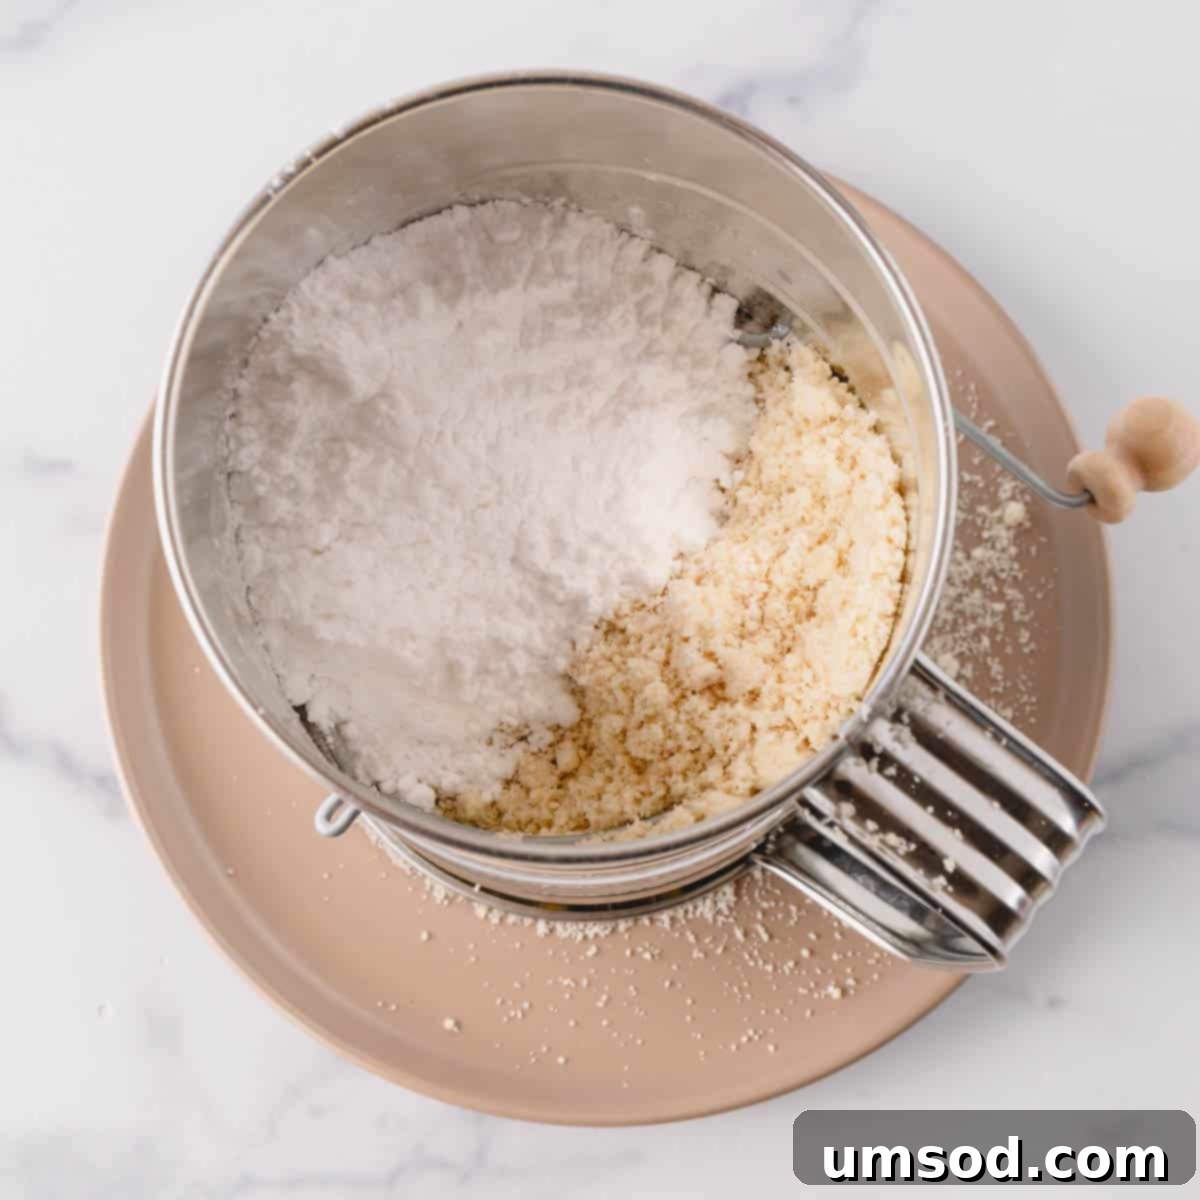
- Triple Sift: Sift together your almond flour and powdered sugar at least three times. This process breaks down any lumps, ensures a fine, uniform consistency, and incorporates air, which contributes to lighter shells. I often complete this step while the meringue is whipping in the stand mixer to save time.
3. The Art of Macaronage: Mixing the Batter
Macaronage is arguably the most critical step in macaron making. It’s the process of folding the dry ingredients into the meringue until the batter reaches the perfect “lava-like” consistency. This consistency is key for smooth, feet-forming shells.
- Initial Folding: Gently sift the almond flour mixture directly into your stiff meringue. Using a large silicone spatula, begin folding the dry ingredients into the meringue. Use a motion that involves scraping the sides of the bowl, pushing the batter from the bottom up, and then folding it over. Continue until the dry ingredients are just fully incorporated.
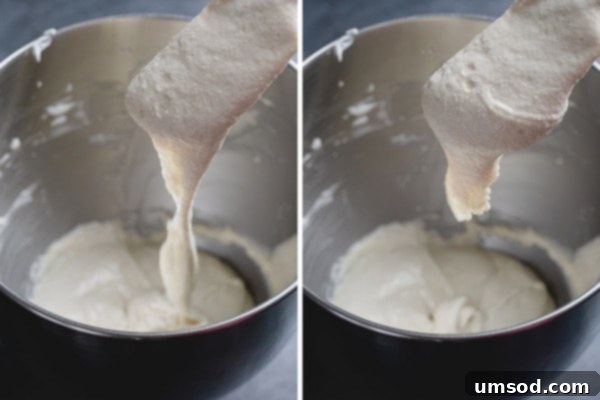
- Achieving Lava-Like Consistency: Now, continue to fold the batter until it reaches the ideal “lava-like” consistency. This means the batter should be thick enough to hold some shape, yet fluid enough to flow slowly and continuously off your spatula in a ribbon. It should be a controlled, gentle flow, not a fast pour.
Mastering the Macaronage Consistency Test
The term “lava-like consistency” can be ambiguous for many. Here’s a precise way to gauge if your macaron batter is perfectly mixed:
The Ribbon Test: Scoop a portion of the batter with your spatula and let it drop back into the bowl. The batter should fall in a continuous, uninterrupted ribbon. Observe the ribbon: if its edges slowly dissolve back into the main batter within approximately 10 to 15 seconds, your batter is perfectly macaronaged! If it dissolves too quickly, it’s overmixed; if it holds its shape for too long, it’s undermixed. This visual cue is your best friend in this crucial stage.
4. Piping Flawless Macaron Shells
Consistent piping is essential for uniform macarons that bake evenly and pair beautifully.
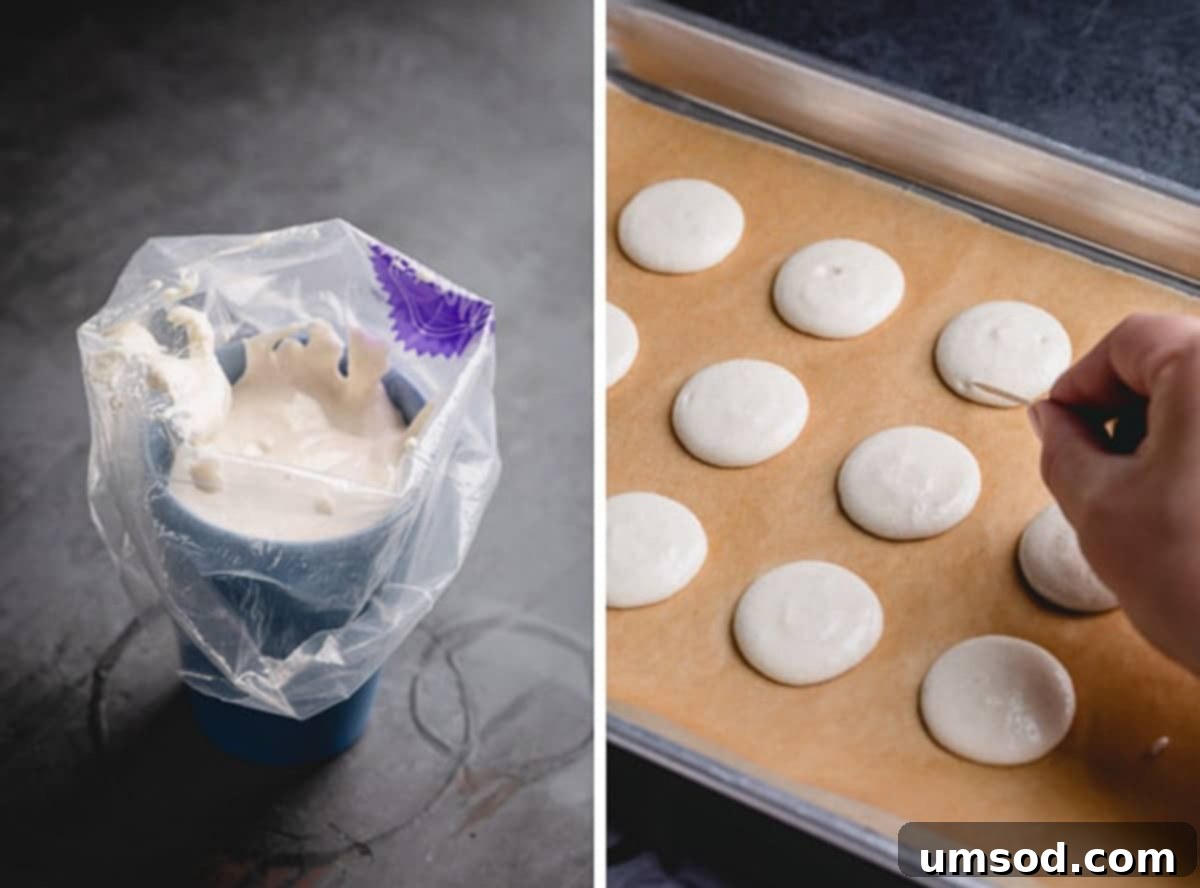
- Prepare Piping Bag: Transfer your perfectly macaronaged batter into a piping bag fitted with a round tip. I highly recommend using a Wilton 2A tip for ideal 1.5-inch macaron shells.
- Pipe Uniform Rounds: Line two baking sheets with either teflon sheets or parchment paper. Hold the piping bag perpendicular (at a 90° angle) to the baking surface and pipe 1.5-inch rounds, ensuring they are spaced about an inch apart to allow for spreading.
- Eliminate Air Bubbles: This step is non-negotiable for smooth tops. Firmly tap the baking sheet against your counter a few times, or firmly slap the bottom of the tray with your hand. This action forces trapped air bubbles to rise to the surface and pop. For any stubborn, larger bubbles that remain, gently pierce them with a toothpick. This critical step ensures your macaron shells will have perfectly smooth, unblemished tops.
Download Your FREE Macaron Template!
To assist you in piping perfectly sized and uniform macarons, I’ve created a custom template. Subscribe to my e-mail list to download this custom macaron template for FREE. This template is perfectly designed for this recipe and incredibly user-friendly!
5. Rest and Bake for the Perfect “Foot”
Patience during the resting phase and precise baking are paramount for developing the signature “feet” of your macarons.
- Resting the Shells: Allow your piped macaron shells to rest at room temperature for at least 15 to 30 minutes before baking. The exact time will depend on your humidity. The shells are ready when they develop a slight “skin” – when gently touched, the batter should not stick to your finger. This skin prevents cracking and promotes the formation of perfect feet.
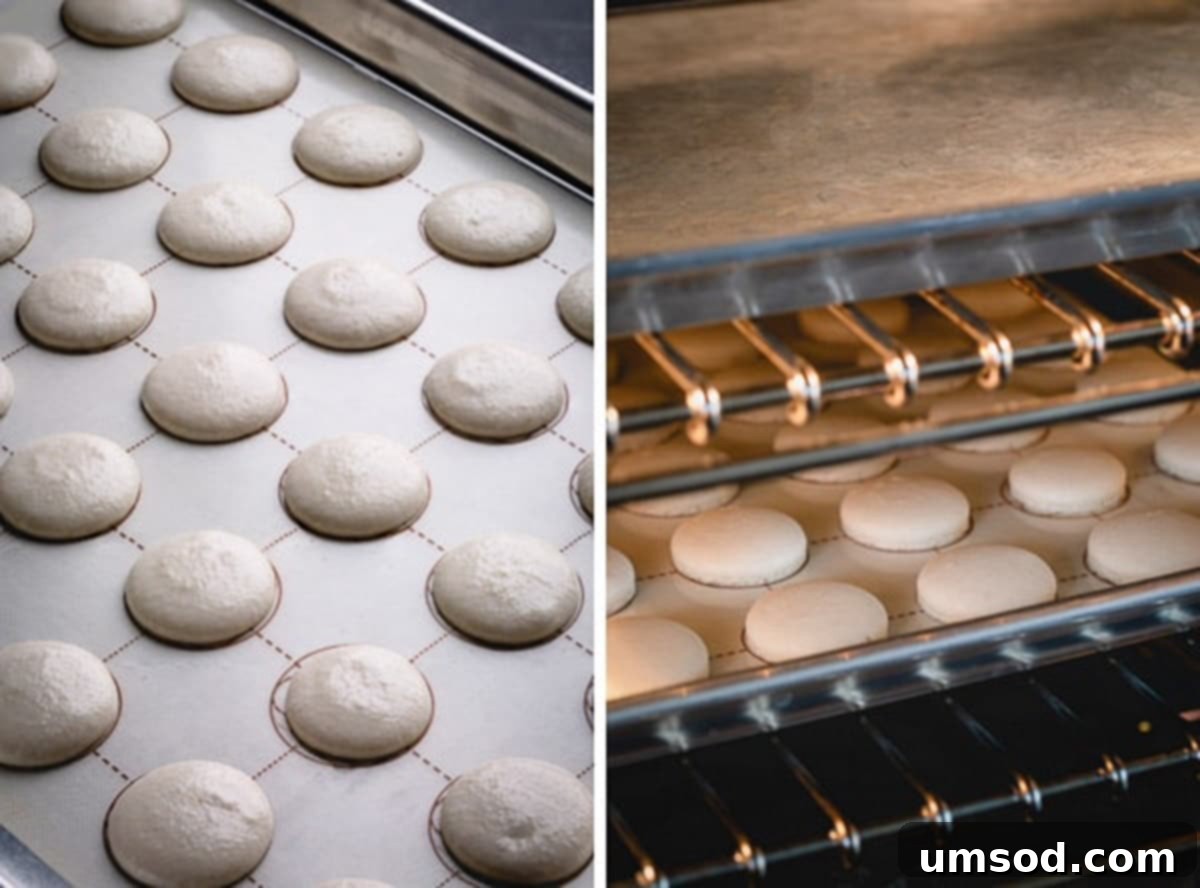
- Baking with a Heat Shield: Preheat your oven to 300°F (150°C). Remember our winning test: place an empty baking sheet on the top rack to shield the macarons from direct overhead heat. Bake one baking sheet of macarons at a time on the middle rack for 15-18 minutes. Avoid using convection settings, as they can cause uneven baking and browning. My oven heats from both the top and bottom. Baking time may vary slightly based on your oven and macaron size.
- Checking for Doneness: To test if your macarons are properly baked, gently touch a shell and try to wiggle it. If it slides or wobbles on its “foot,” it needs another minute or two. A perfectly baked macaron shell will be firm to the touch and its base should not move from the baking surface.
6. Cooling and Pairing Your Beautiful Shells
Once baked, proper handling ensures your delicate shells remain intact and ready for filling.
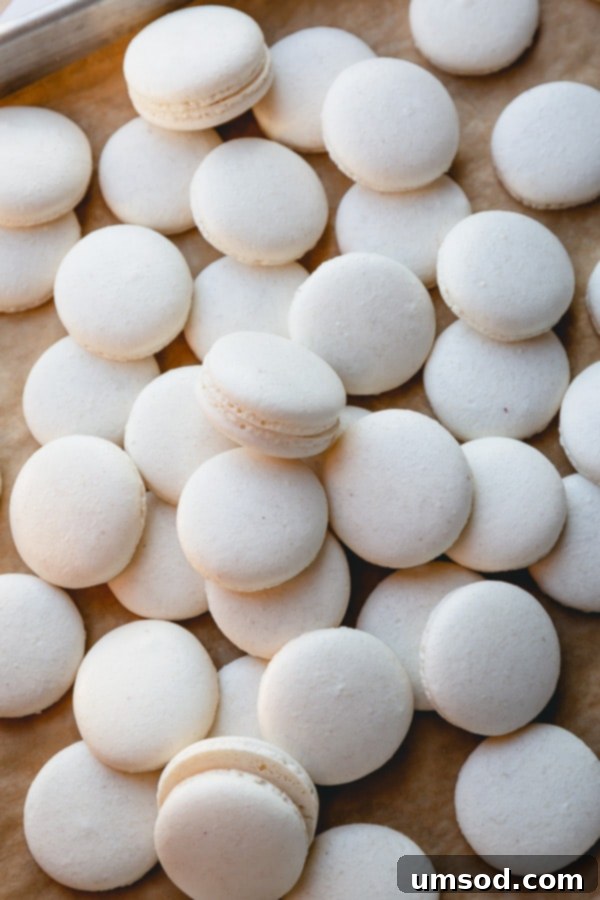
- Complete Cooling: Allow the macaron shells to cool completely on the baking sheet before attempting to remove them. If they are still warm, they are more prone to breaking or sticking to the baking surface. Patience here is key! If shells still seem stuck, they might be slightly underbaked, or simply need more cooling time.
- Pairing by Size: Once cooled, gently peel the shells from the baking surface. Arrange them on a wire rack or another clean baking sheet, pairing them by similar size. Place one shell bottom-side up, ready for the ganache. This ensures a consistent and aesthetically pleasing final product.
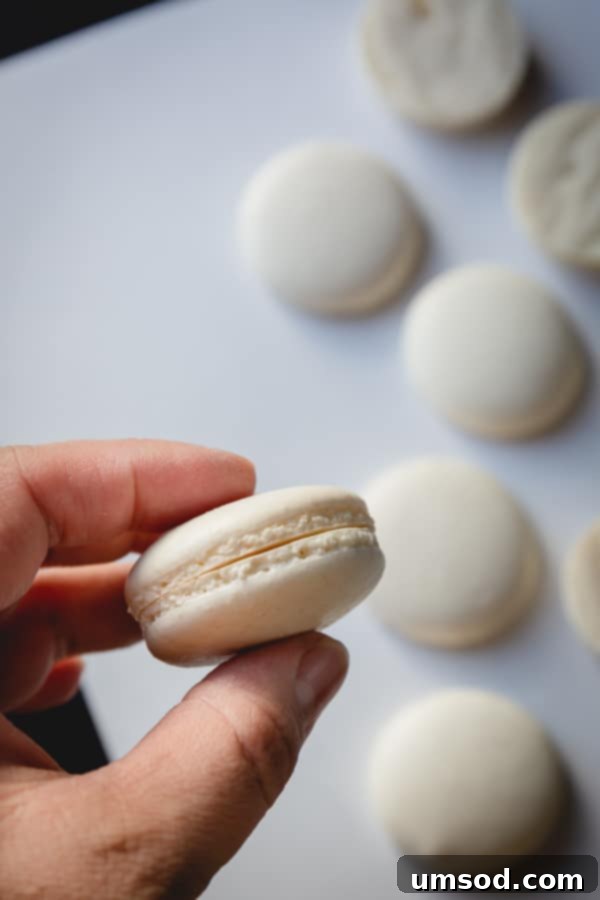
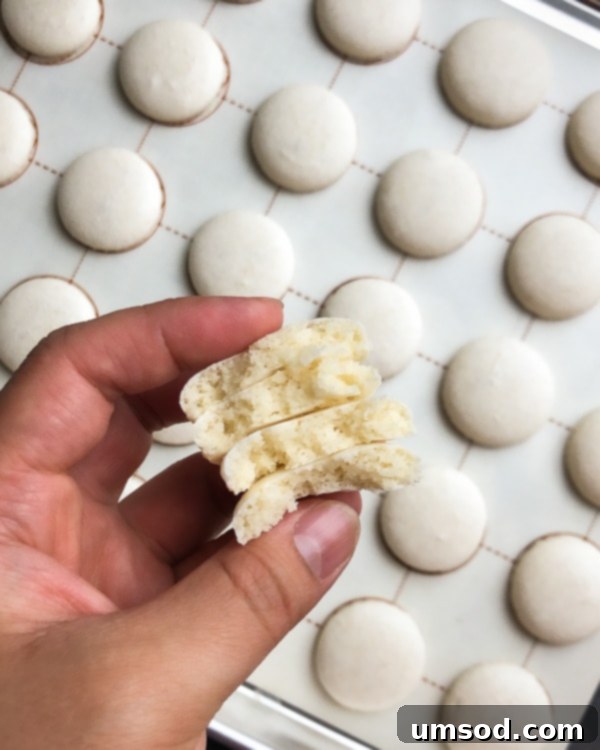
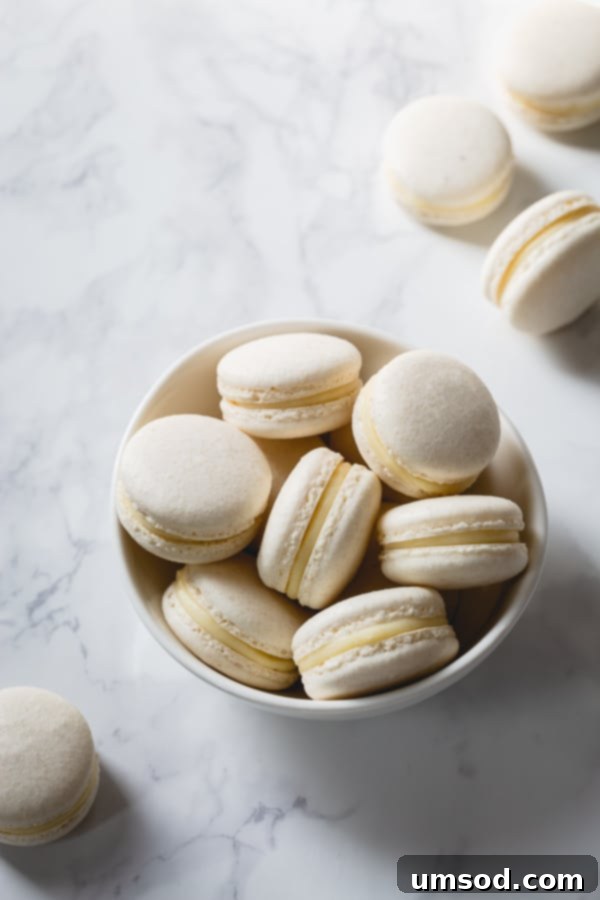
Just look at that perfectly fluffy and full interior! The delicate crunch of the shell giving way to a soft, chewy center is the hallmark of a truly great macaron.
Macaron 101: A Comprehensive Guide
Ready to dive deeper? Master the art of French macarons and confidently create your signature flavors with my comprehensive guide!
How to Make Silky White Chocolate Ganache Filling
This simple yet divine white chocolate ganache is the perfect complement to our white macaron shells. It’s incredibly silky smooth, wonderfully creamy, and richly indulgent, providing a beautiful contrast in texture and a delightful sweetness.
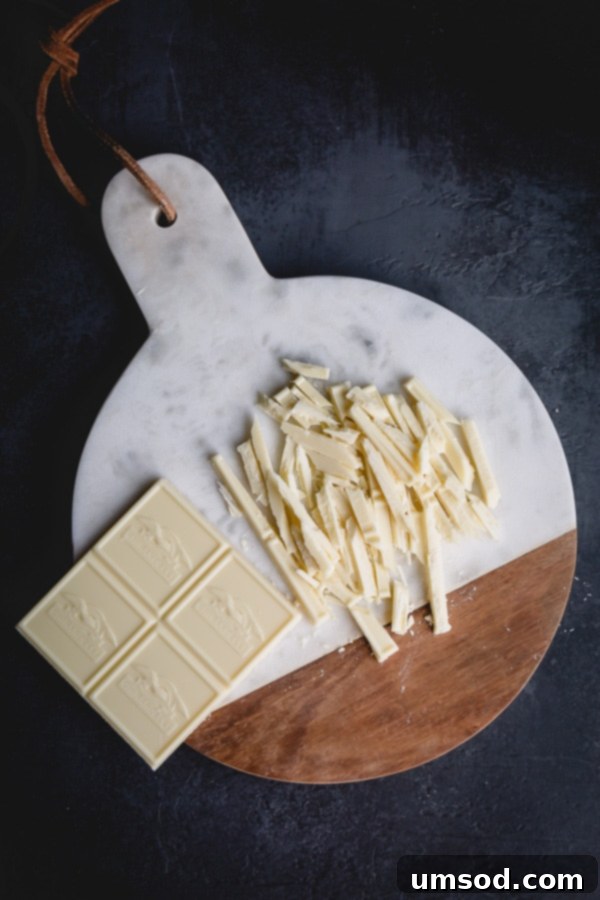
1. Precision Chopping: The White Chocolate
For a ganache that melts evenly and achieves ultimate smoothness, precise preparation of your white chocolate is key.
Chop your high-quality white chocolate into very small, uniform pieces. This ensures that the chocolate melts quickly and thoroughly when the hot cream is added, preventing any stubborn lumps and promoting a perfectly emulsified ganache. Place the chopped chocolate in a heat-resistant bowl.
2. Heating Cream and Emulsifying the Ganache
The magic of ganache lies in the proper fusion of hot cream and chocolate, followed by thorough emulsification and chilling.
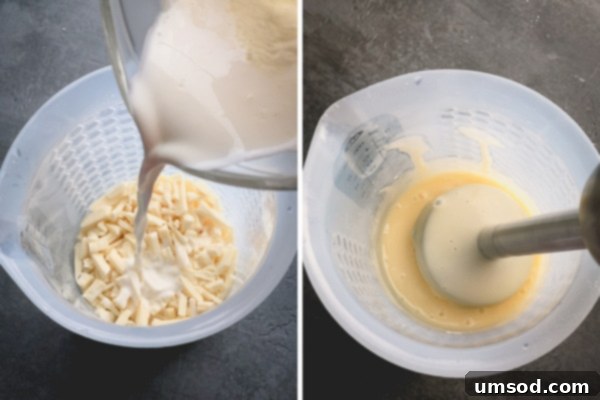
- Heat Heavy Cream: Gently heat your heavy cream until it’s steamy and hot, but not boiling. A quick microwave for about 1 minute often suffices. Immediately pour the hot cream over the chopped white chocolate in the bowl.
- Rest and Stir: Let the mixture stand undisturbed for 2 minutes. This allows the heat from the cream to begin melting the chocolate. After 2 minutes, begin stirring gently from the center outwards until the chocolate is completely melted and the mixture appears smooth.
- Achieve Silky Smoothness: For a truly luscious and emulsified ganache, use an immersion blender. Blend the mixture directly in the bowl until it becomes perfectly silky smooth and uniform. This step ensures proper emulsification, preventing separation and creating that desirable creamy texture. If you don’t have an immersion blender, a sturdy silicone spatula can be used for vigorous mixing, ensuring all chocolate is incorporated.
- Chill and Stabilize: Cover the surface of the ganache directly with plastic wrap to prevent a skin from forming. Refrigerate for a minimum of 5 hours, or ideally, overnight. This crucial chilling time allows the ganache to thicken and stabilize, ensuring it holds its shape beautifully when piped onto your macaron shells. A well-chilled ganache will be thick, firm, and easy to work with.
Expert Tips for a Perfect White Chocolate Ganache Filling
The secret to a beautifully stable, creamy, and flavorful white chocolate ganache lies in three fundamental principles:
- Quality White Chocolate: The foundation of exceptional ganache begins with high-quality white chocolate. Unlike milk or dark chocolate, white chocolate has a higher cocoa butter content and requires careful handling. Using a good quality white chocolate bar (such as Ghirardelli, which I highly recommend) ensures superior flavor, better melting properties, and a more stable emulsion. Avoid chocolate chips, as they often contain stabilizers that can hinder a smooth melt.
- Precise Ratio of Ingredients: The balance between white chocolate and heavy cream is absolutely critical for achieving the correct consistency. White chocolate ganache typically requires a higher ratio of chocolate to cream than dark chocolate ganache due to its different composition. Adhering strictly to the specified measurements will prevent a ganache that is too runny or too stiff, ensuring it’s perfect for piping and holds its shape beautifully between macaron shells.
- Proper Emulsification and Stabilization: After melting the chocolate in the warm cream, the mixture needs to be thoroughly emulsified. This process combines the fat and liquid components into a stable, homogenous mixture, resulting in that indulgent, creamy smooth texture. Mix vigorously until completely smooth, but be mindful not to incorporate excessive air – an immersion blender is ideal here as it blends without aerating. If using a spatula, stir consistently until fully combined. Finally, the importance of letting the ganache set for at least 5 hours (or preferably overnight) in the refrigerator cannot be overstated. This chilling period allows the cocoa butter to re-crystallize and the ganache to thicken and stabilize, making it perfectly pipable and preventing it from oozing out of your macarons.
Assemble Your Dreamy White Macarons
Now that you’ve successfully baked pristine white macaron shells and crafted a perfectly smooth, creamy white chocolate ganache, it’s time for the most satisfying step: assembling your beautiful macarons.
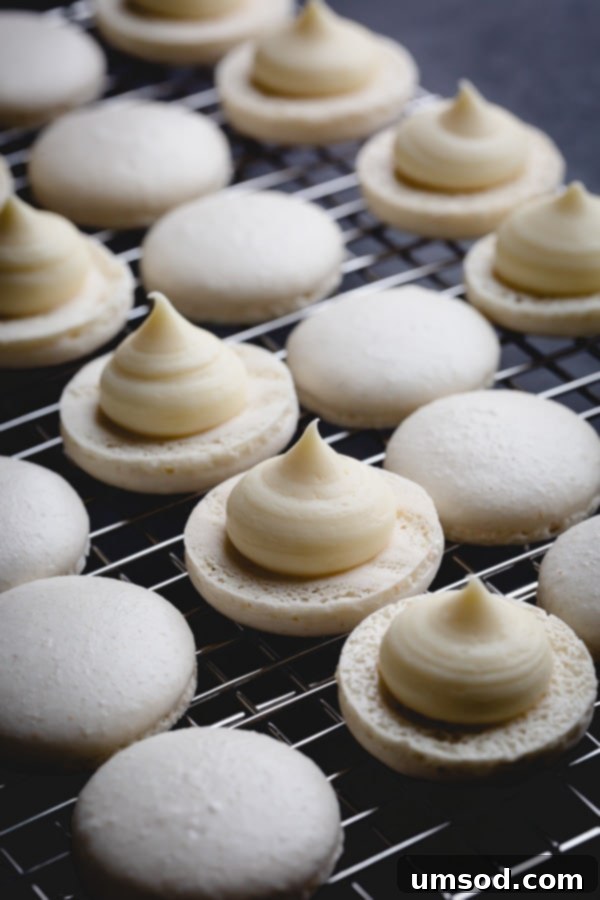
- Prepare for Piping: Transfer your chilled and stabilized white chocolate ganache into a piping bag. You can fit it with a round piping tip (a Wilton 1A or 2A works well) for a neat finish, or simply snip a small hole at the end of the bag for a more rustic look.
- Fill the Shells: Take one macaron shell, placing it bottom-side up. Pipe a generous dollop of ganache onto its center. Then, gently place a second, matching macaron shell on top, creating a delicate sandwich. Press very lightly until the filling just reaches the edges of the shells, ensuring a neat and full appearance.
More Macaron Recipes & Resources for Your Baking Journey
Continue to hone your macaron skills and explore new flavors with these helpful guides and recipes:
- How to Fix Hollow Macarons: If you’re encountering the frustrating issue of hollow macaron shells, this guide provides 7 essential tips to help you achieve full, perfectly filled shells.
- Visual Troubleshooting Guide: Cracked, lopsided, or wrinkled macarons? Don’t despair! This comprehensive visual guide will help you diagnose common macaron problems and equip you with solutions for your next batch.
- My Go-To Macaron Tools: Discover the essential tools every macaron baker needs. This detailed guide offers an honest review of 9 crucial tools, product recommendations, and explanations of why each item is indispensable for macaron success.
- Easy Macarons Recipe for Beginners: A foundational, in-depth tutorial to the basic macaron recipe, with step-by-step explanations of every technique, perfect for those just starting out.
- Chocolate Macarons Recipe: Ready for a new challenge? Indulge your chocolate cravings with my rich and decadent chocolate macaron recipe!
Pure White Macarons with White Chocolate Ganache Filling
These gorgeous white macarons, filled with silky smooth and creamy white chocolate ganache, are a pure dream for every macaron lover! Follow my recipe testing notes to achieve these pure white macarons.
Ingredients
For white chocolate ganache:
- 8 oz (227 g) white chocolate
- ½ cup (130 ml) heavy whipping cream
For white macaron shells:
- 100 g almond flour (Note 1)
- 65 g powdered sugar (Note 2)
- 70 g egg whites at room temperature (Note 3)
- 75 g super fine granulated sugar (Note 4)
- ¼ teaspoon cream of tartar (optional Note 5)
- ¼ teaspoon salt
- ½ teaspoon white gel food coloring
Instructions
To make the ganache filling:
- Since the ganache filling requires a long chilling time, we’ll begin with this step.
- Chop white chocolate into small pieces and place them in a heat-resistant bowl.
- Heat heavy cream until it’s nice and hot (microwave for about 1 minute). Pour the hot cream over the white chocolate. Let it stand for 2 minutes, then stir until the chocolate is fully melted and smooth.
- Using an immersion blender, blend the mixture until it is silky smooth and completely emulsified. Cover the ganache with plastic wrap, ensuring it touches the surface to prevent a skin from forming. Refrigerate for at least 5 hours, or preferably overnight, to allow the ganache to thicken and stabilize. After chilling, the ganache should be thick enough to hold its shape when piped!
To make macaron shells:
- Preheat the oven to 300°F (150°C). Line 2 baking sheets with parchment paper, a Teflon sheet, or a silicone mat. Place an empty baking sheet on the top rack of your oven to act as a heat shield.
- To prepare dry ingredients, sift together almond flour and powdered sugar twice. (Note: If you have up to 2 tablespoons of chunky dry ingredients left in the sifter, you don’t need to replace them. Simply discard these bits.)
- To make meringue, in a clean mixing bowl with a whisk attachment, combine egg whites, granulated sugar, cream of tartar, and salt. Beat the mixture on medium speed until soft peaks form. (I use speed 4 on my KitchenAid stand mixer. This slower speed helps create a very stable meringue and may take 30-40 minutes, but it’s crucial for full shells.)
- Add white gel food coloring when the meringue reaches the soft peak stage.
- Continue beating the meringue at the same medium speed until hard peaks form. Visual cues: The meringue should ball up inside the whisk, and when you lift the whisk, it should hold a pointy end and have sharp, distinct ribs.
- To make batter (macaronage), sift the almond flour mixture into the meringue. Using a silicone spatula, gently fold the dry ingredients into the meringue until just incorporated. Then, continue to fold the batter until it reaches a “lava-like” consistency, meaning it’s fluid enough to draw a figure eight continuously. To test: Scoop a small amount of batter and drop it into the bowl. If the edges of the ribbon dissolve into the batter on its own within about 10 seconds, the batter is ready. If not, fold a couple more times and retest. Be careful not to over-fold the batter. (TIP: Making French macarons is all about technique. This is the most crucial step. To describe the folding motion: run the spatula clockwise from the bottom, up around the sides, and cut the batter in half. For beginners, count every fold. It typically takes about 50 folds to reach the proper consistency. After 50 folds, start testing the batter, and continue testing after every couple of folds.)
- To pipe macaron shells, transfer the batter into a pastry bag fitted with a round tip (I use Wilton 2A tip).
- Hold the pastry bag at a straight 90° angle and pipe approximately 1.5-inch rounds, about an inch apart, onto the prepared baking sheets. (TIP 2: Download my free macaron template to pipe perfectly sized shells by filling the inner circle.)
- Tap the baking sheets firmly on the counter (or slap the bottom of the baking sheet with your hand) a few times to release any trapped air bubbles. Use a toothpick to burst any large, stubborn bubbles. This step ensures smooth, unblemished macaron tops.
- Let the macarons rest on the counter for 15-30 minutes before baking. They are ready when a slight skin forms and they are no longer sticky to the touch.
- To bake, bake the macarons for 15-18 minutes, one baking sheet at a time, on the middle rack. The empty baking sheet on the top rack will shield them from browning. Larger macarons may require slightly longer baking. To test for doneness: Gently touch a macaron. If it slides or wobbles, bake for another minute or so. Cooked macarons should be firm to the touch, and the shell should not move from its base.
- Cool the macarons completely on the baking sheets before attempting to remove them from the baking surface. (TIP: Do not remove shells while warm, as they may break or stick.)
To assemble macarons:
- Transfer the chilled ganache into a pastry bag with a round tip or a cut hole.
- Pair the macaron shells by size and arrange them on a wire rack, with one shell bottom-side up.
- Pipe a dollop of white chocolate ganache filling onto the bottom shells. Place the top shell over the filling and gently press lightly so the filling spreads evenly to the edges.
- Refrigerate the filled macarons in an airtight container for at least 24 hours to mature. This allows the filling to soften and impart its flavor to the shells, resulting in a superior texture and taste.
- To serve, bring the macarons out about 30 minutes prior to serving to allow them to come to room temperature for the best texture and flavor.
⭐️ Did you make this recipe?
Please leave a review and let us know how you liked it!
Video
Tips & Notes
Note 1: It’s best to use super fine almond flour to ensure smooth tops. Always weigh your ingredients accurately before sifting.
Note 2: I do not recommend making your own powdered sugar for macarons, as commercial powdered sugar contains cornstarch, which contributes to the desired texture of the shells.
Note 3: I’ve had consistent success using carton egg whites (specifically Bob Evans brand, #notsponsored). You will need approximately 1/3 cup of egg whites.
Note 4: Using super fine granulated sugar for your meringue is important as it dissolves quicker, resulting in a more stable meringue. Caster sugar (also known as baker’s sugar) is an excellent alternative.
Note 5: Cream of tartar is optional but highly recommended. It acts as a stabilizer for egg whites, helping to create a sturdier meringue and offering extra insurance against collapse.
Note 6: This macaron recipe can easily be doubled if you wish to make a larger batch.
GOT MACARON TROUBLE? Check out my macaron troubleshooting guide for solutions to common issues.
Freezing Instructions: You can freeze filled macarons in an airtight container for up to 2 weeks. To thaw, transfer the frozen macarons to the refrigerator and allow them to thaw slowly for at least 1 hour. Then, bring them out 30 minutes before serving for optimal texture and flavor.
Nutrition
Calories: 52kcal
Carbohydrates: 7g
Protein: 1g
Fat: 2g
Sugar: 7g
Sodium: 30mg
Course: Dessert
Cuisine: French
Did you make this?Leave a rating and your feedback. Thank you!
