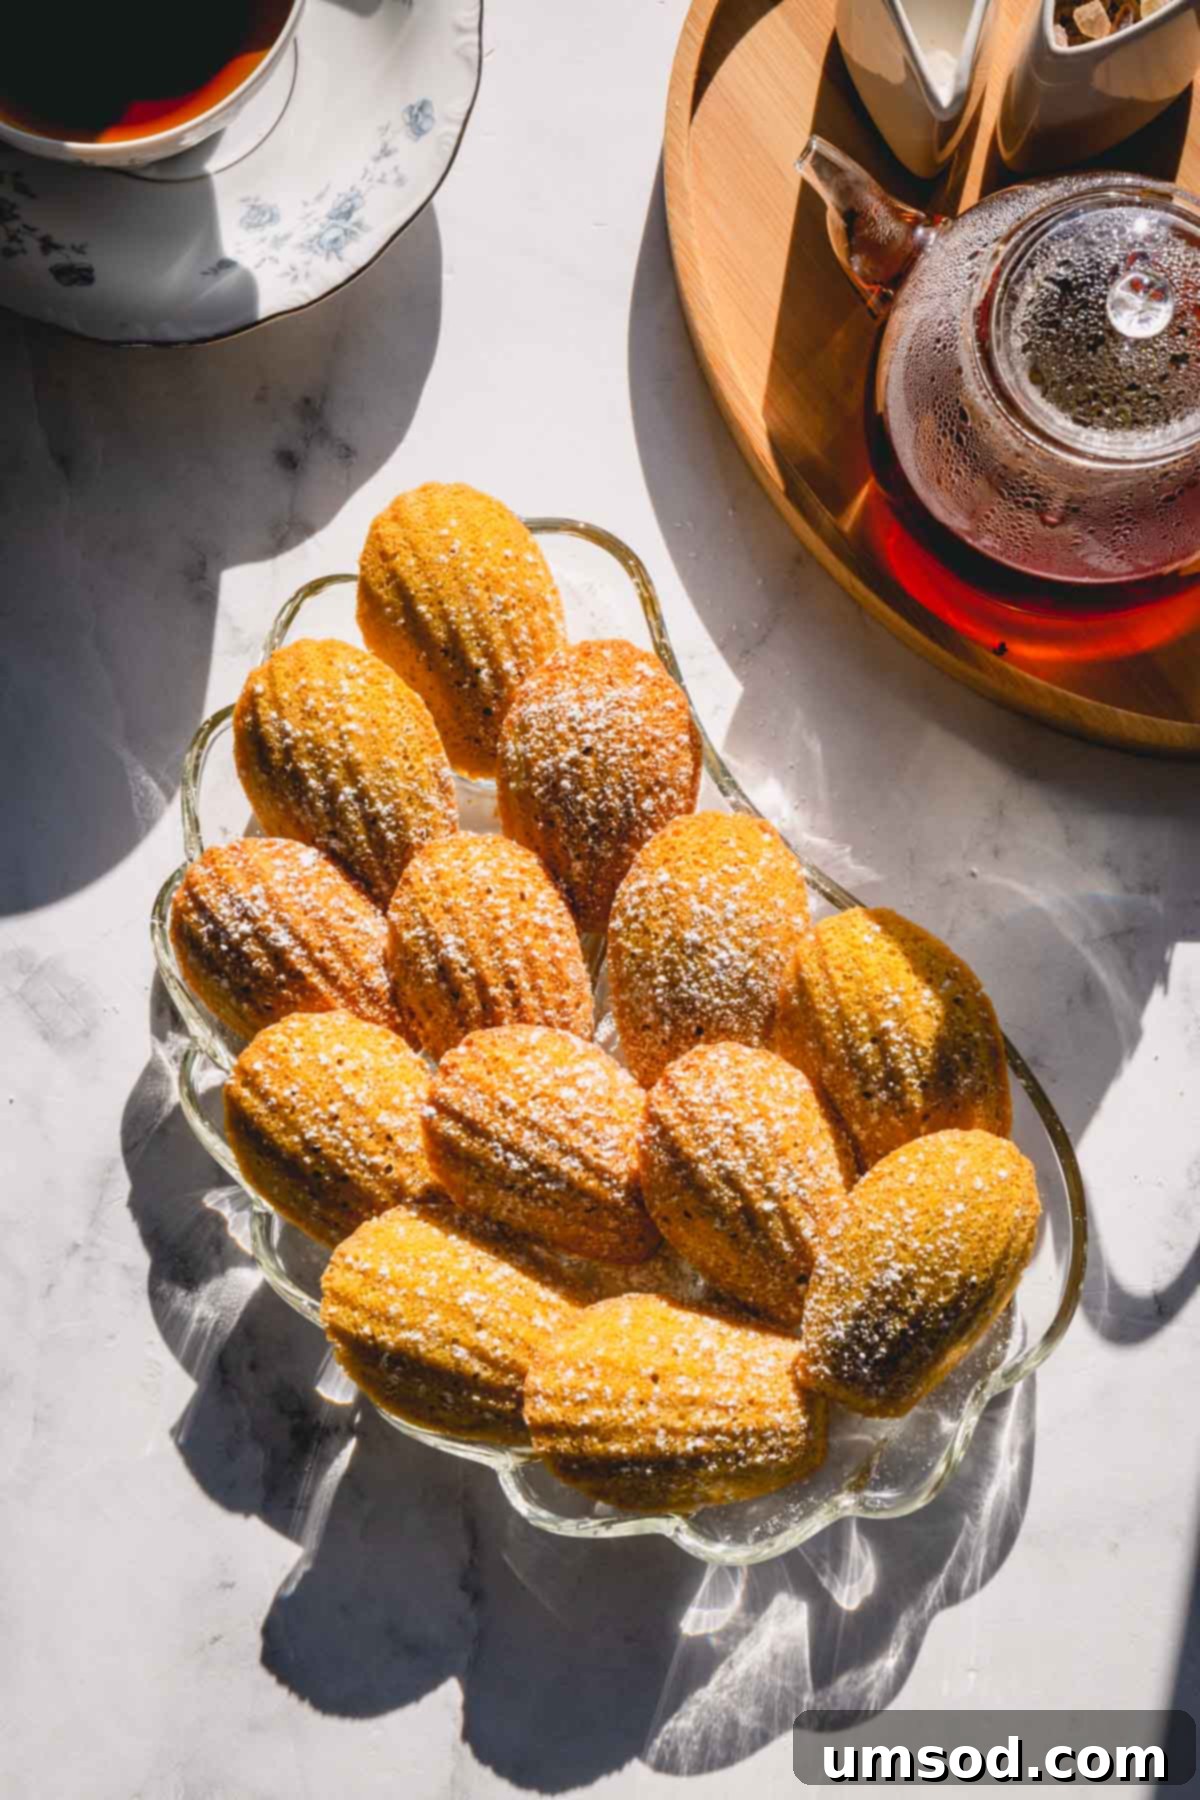
Transport yourself to a chic Parisian patisserie with every bite of these elegant **Earl Grey Lemon Madeleines**. These delightful mini cakes take the beloved traditional French butter cake and elevate it with a sophisticated tea infusion, perfectly complemented by a vibrant, zesty lemon curd filling. Imagine a pillowy-soft interior, subtle floral and citrus notes from the fragrant Earl Grey, and a bright burst of tangy lemon – a truly irresistible combination. They are surprisingly easy to master, making them perfect for enchanting afternoon tea gatherings or simply indulging in a moment of refined sweetness.
What Exactly are Madeleines? A Journey into French Patisserie
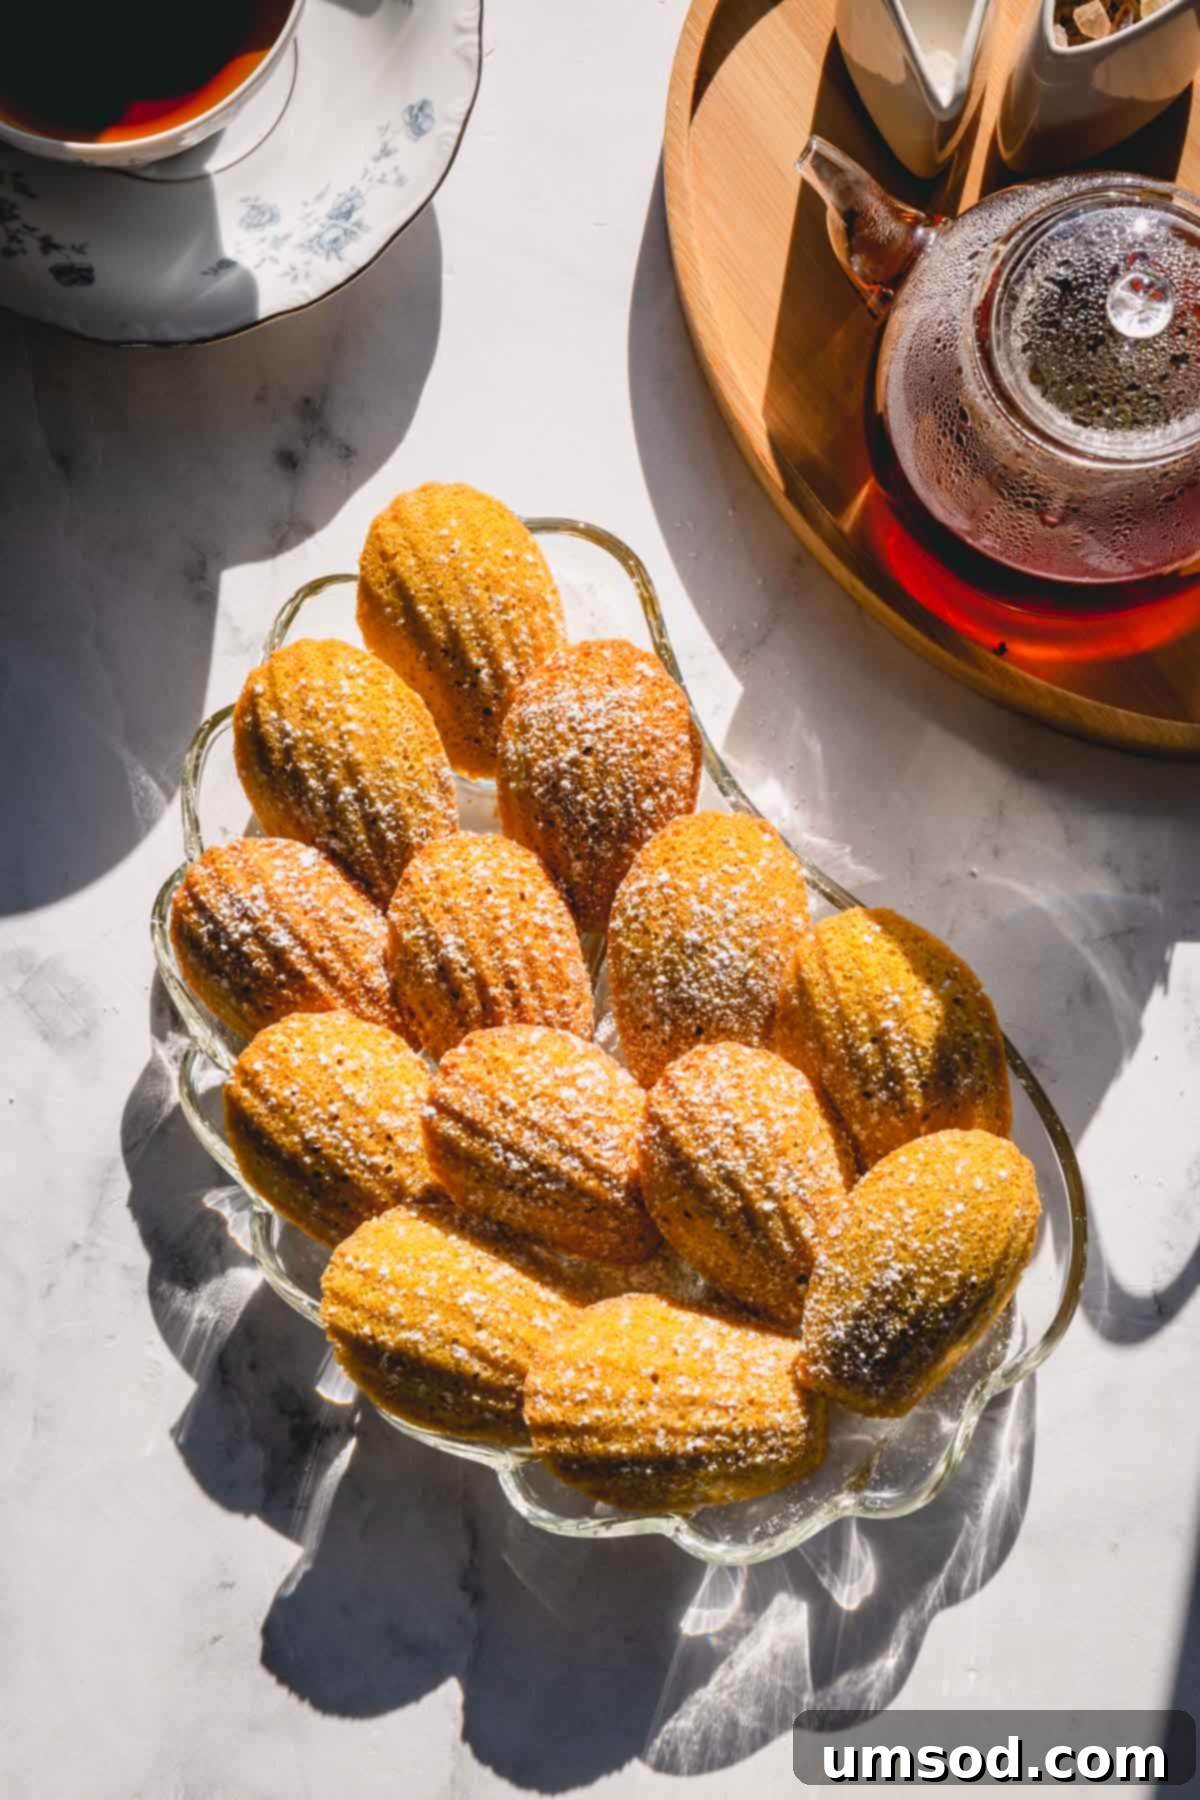
Madeleines are quintessential French mini sponge cakes, instantly recognizable by their distinctive seashell shape and delicate, airy texture. Originating from the charming Lorraine region of France, these petite treats are famously baked in a special madeleine pan. This unique mold is responsible for their signature scalloped edges and, most notably, the charming “hump” on one side, which is a hallmark of a perfectly baked madeleine.
While often mistaken for cookies due to their individual size, madeleines possess a more refined, cake-like crumb. They boast a rich, buttery flavor that gracefully melts in your mouth, offering a delightful contrast to their slightly crisp exterior. They strike a perfect balance, being more substantial than a typical cookie yet lighter and more delicate than a conventional cake. Traditionally, madeleines are subtly sweet and often enhanced with a hint of lemon zest, providing a versatile canvas for various flavor innovations. This recipe celebrates that classic foundation, infusing it with the aromatic essence of Earl Grey tea to create a truly unique and memorable culinary experience.
Why You’ll Adore These Elegant Earl Grey Lemon Madeleines
This recipe offers an enchanting and modern twist on the classic French madeleine, infusing it with layers of sophisticated flavor that are sure to captivate and impress. Here’s why these delicate little cakes are destined to become your new favorite:
- **A Symphony of Unforgettable Flavors:** Experience an exquisite culinary fusion where the subtle yet distinctive notes of bergamot from the Earl Grey tea create an aromatic and floral foundation. This tea-infused butter is then perfectly complemented by the bright, tangy sweetness of vibrant homemade lemon curd. The result is a balanced, sophisticated taste profile that is truly extraordinary and stands out from traditional madeleines.
- **Elegance Achieved with Surprising Simplicity:** Despite their undeniably fancy and impressive appearance, these madeleines are remarkably straightforward to prepare. You don’t need a plethora of specialized gadgets; the essential tools are a good quality madeleine pan, a mixing bowl, and a whisk. This makes them an accessible baking project for home bakers of all skill levels, from beginners to seasoned enthusiasts.
- **The Quintessential Tea-Time Companion:** Light, airy, and beautifully balanced in flavor, these madeleines are the absolute quintessential accompaniment to a warm, comforting cup of Earl Grey tea, a robust coffee, or even a glass of sparkling wine. They effortlessly transform any ordinary afternoon break into a moment of pure, unadulterated indulgence and quiet luxury.
- **Crafted with Wholesome & Fresh Ingredients:** This recipe prioritizes the use of readily available pantry staples, emphasizing quality ingredients to ensure the finest possible flavor and delicate texture. You’ll appreciate the fresh, authentic taste that shines through in every delicate bite, far superior to store-bought alternatives.
- **No Stand Mixer Required – Just a Whisk!:** Forget about the hassle of lugging out heavy kitchen appliances. This madeleine recipe relies primarily on simple, accessible whisking techniques. It’s a wonderful reminder that extraordinary desserts can be created without complex tools, offering a more hands-on, meditative, and ultimately rewarding baking experience.
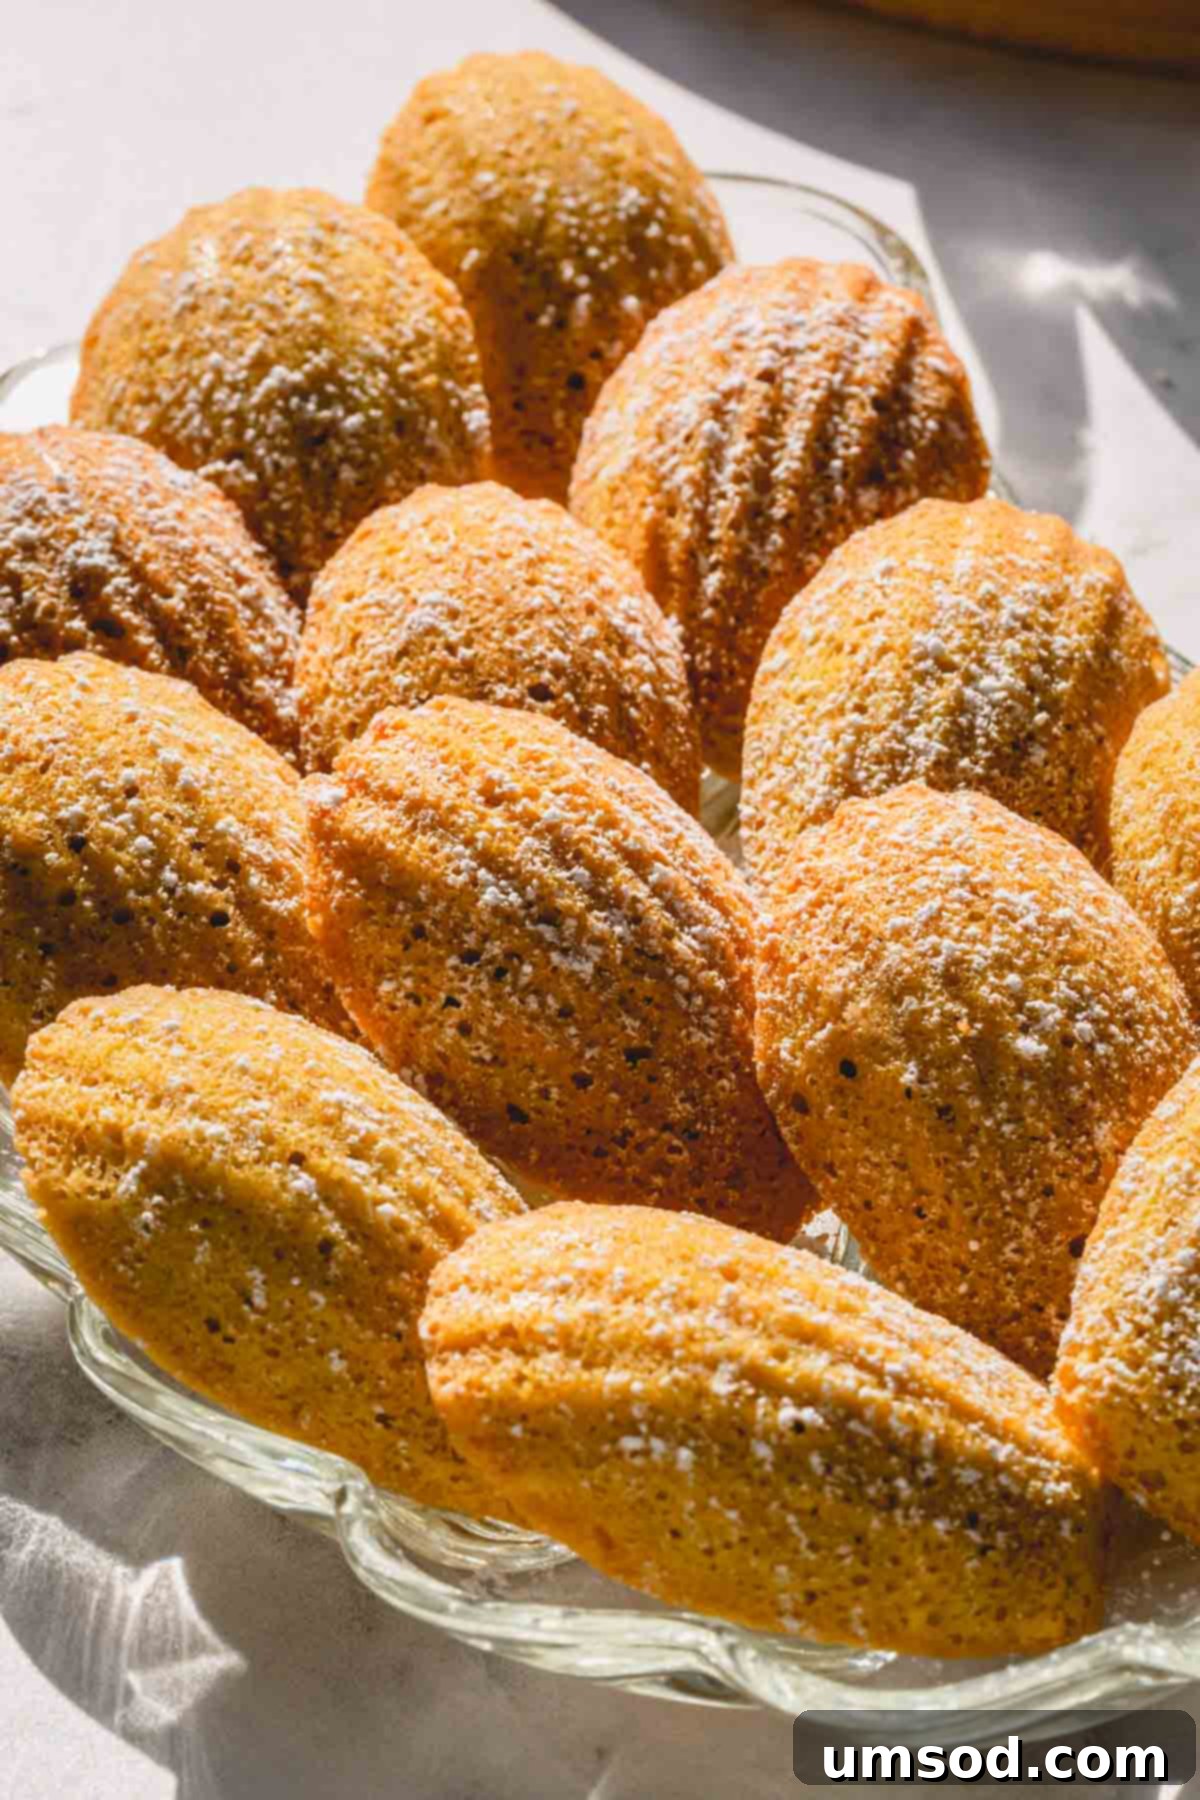
- **Impressive Presentation for Any Occasion:** The iconic seashell shape, golden-brown caramelized edges, and the charming “hump” make these madeleines visually stunning. They are ideal for elegant gifting, impressing guests at a dinner party, enhancing a special brunch spread, or simply elevating your everyday dessert experience to something truly special.
Prepare to delight your senses and impress your palate with these exquisite Earl Grey Lemon Madeleines – a harmonious blend of cherished French baking tradition and aromatic, innovative flavor.
Mastering Your Madeleines: Essential Ingredient Insights
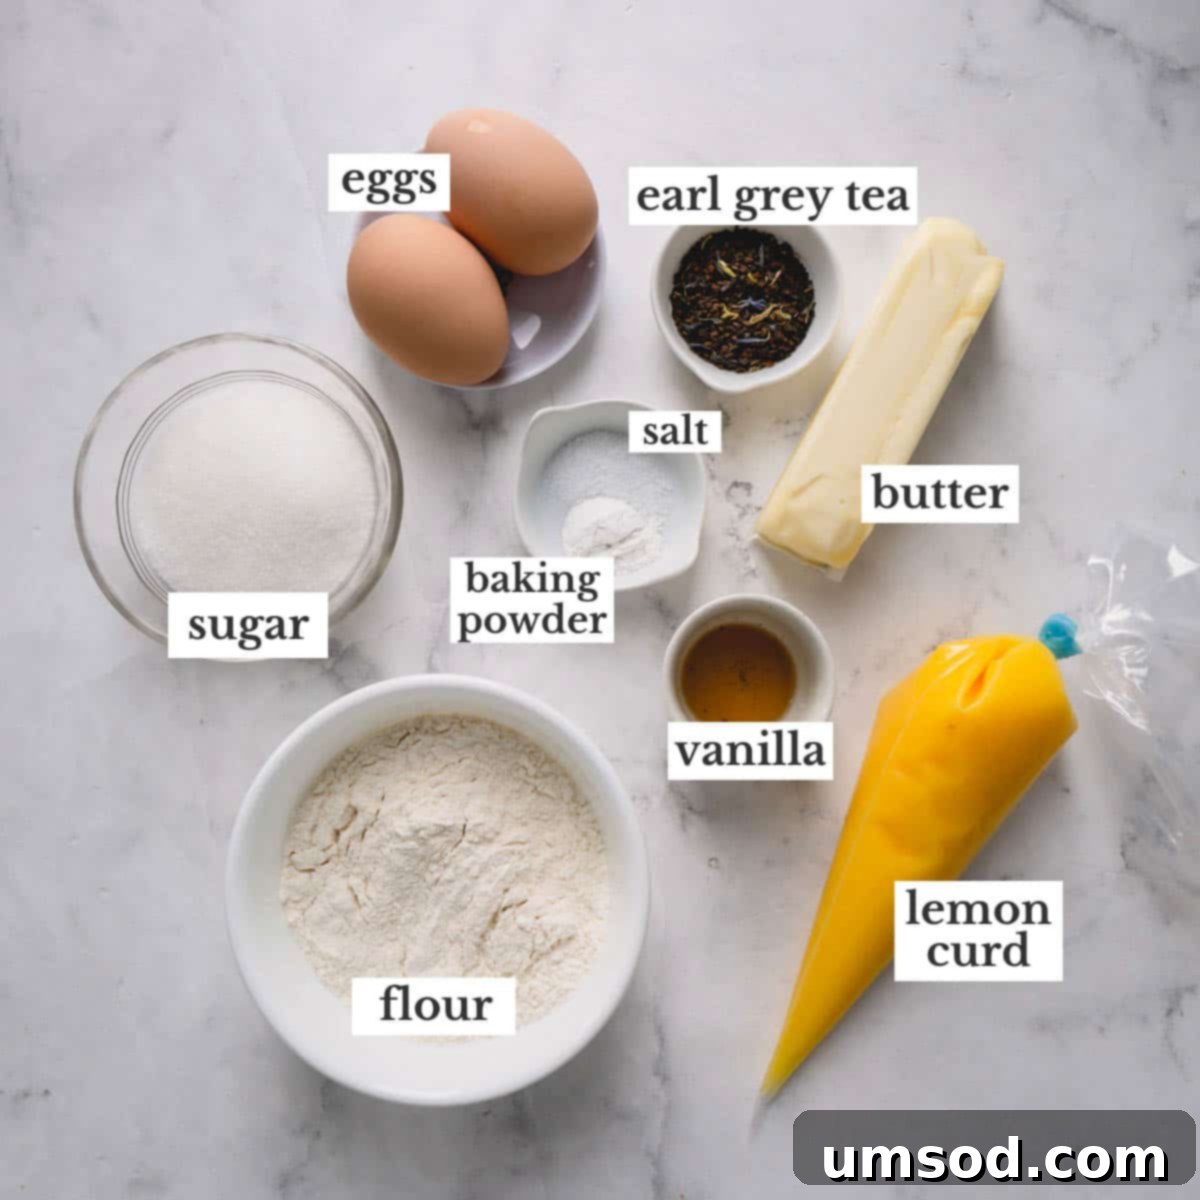
The success of these delicate madeleines hinges significantly on understanding the role of each ingredient and selecting them wisely. Here’s a detailed look at each component and why it’s critical for achieving madeleine perfection:
- **Earl Grey Tea:** This classic black tea blend is famously infused with the distinctive oil of bergamot, a citrus fruit that imparts a unique floral and citrusy aroma and flavor. For the most profound and authentic tea infusion, we highly recommend using high-quality loose leaf Earl Grey tea. My personal favorite brand, Tea Forte, consistently delivers exceptional quality and flavor. If Earl Grey isn’t to your taste, you can easily omit it for classic lemon madeleines, or experiment with other aromatic loose leaf teas like lavender, chamomile, or chai for a completely different yet equally delightful twist.
- **Unsalted Butter:** As the cornerstone of any exquisite French pastry, butter is paramount. Using unsalted butter grants you precise control over the overall saltiness of your madeleines, ensuring a beautifully tender crumb and a rich, authentic buttery flavor that shines through. If salted butter is your only option, simply omit the additional pinch of salt specified in the recipe. The initial step of melting and infusing the butter with tea is a crucial technique for thoroughly developing and integrating the Earl Grey flavor throughout the madeleines.
- **Eggs (Room Temperature):** This is perhaps the most critical ingredient note for achieving that signature light, airy, and delicate texture. You’ll need two large eggs, and it is absolutely vital that they are at room temperature. Cold eggs are significantly more resistant to whipping, leading to less volume and a noticeably denser cake. Room temperature eggs, however, whip up beautifully, incorporating a maximum amount of air, which is the secret to a gorgeously light, fluffy madeleine with a pronounced hump.
- **Granulated Sugar:** Madeleines are designed to be subtly sweet, ensuring that the butter, tea, and lemon flavors are perfectly complemented rather than overpowered. Half a cup of granulated sugar provides just the right amount of sweetness while also playing a structural role in the delicate crumb of the cakes and aiding in the browning process.
- **All-Purpose Flour:** Accurate flour measurement is essential for consistent baking results. For the most precise outcome, I highly recommend using a kitchen scale to weigh your flour (125g for 1 cup). If a scale isn’t available, employ the “spoon and level” method: gently spoon the flour into your measuring cup until it overflows, then level it off with the flat edge of a knife. Avoid scooping directly from the bag, as this compacts the flour and can lead to a dry, heavy, and dense madeleine.
- **Baking Powder:** Working in conjunction with the meticulously whipped eggs, baking powder is the leavening agent responsible for giving the madeleines their characteristic “hump.” It provides that essential lift and ensures a light, open, and airy crumb, contributing to their delicate texture.
- **Salt:** A small but vital pinch of salt plays a critical role in balancing and enhancing the overall sweetness of the madeleines. It meticulously brings out the rich depth of the butter and brightens the delicate tea and lemon flavors, ensuring a well-rounded taste experience.
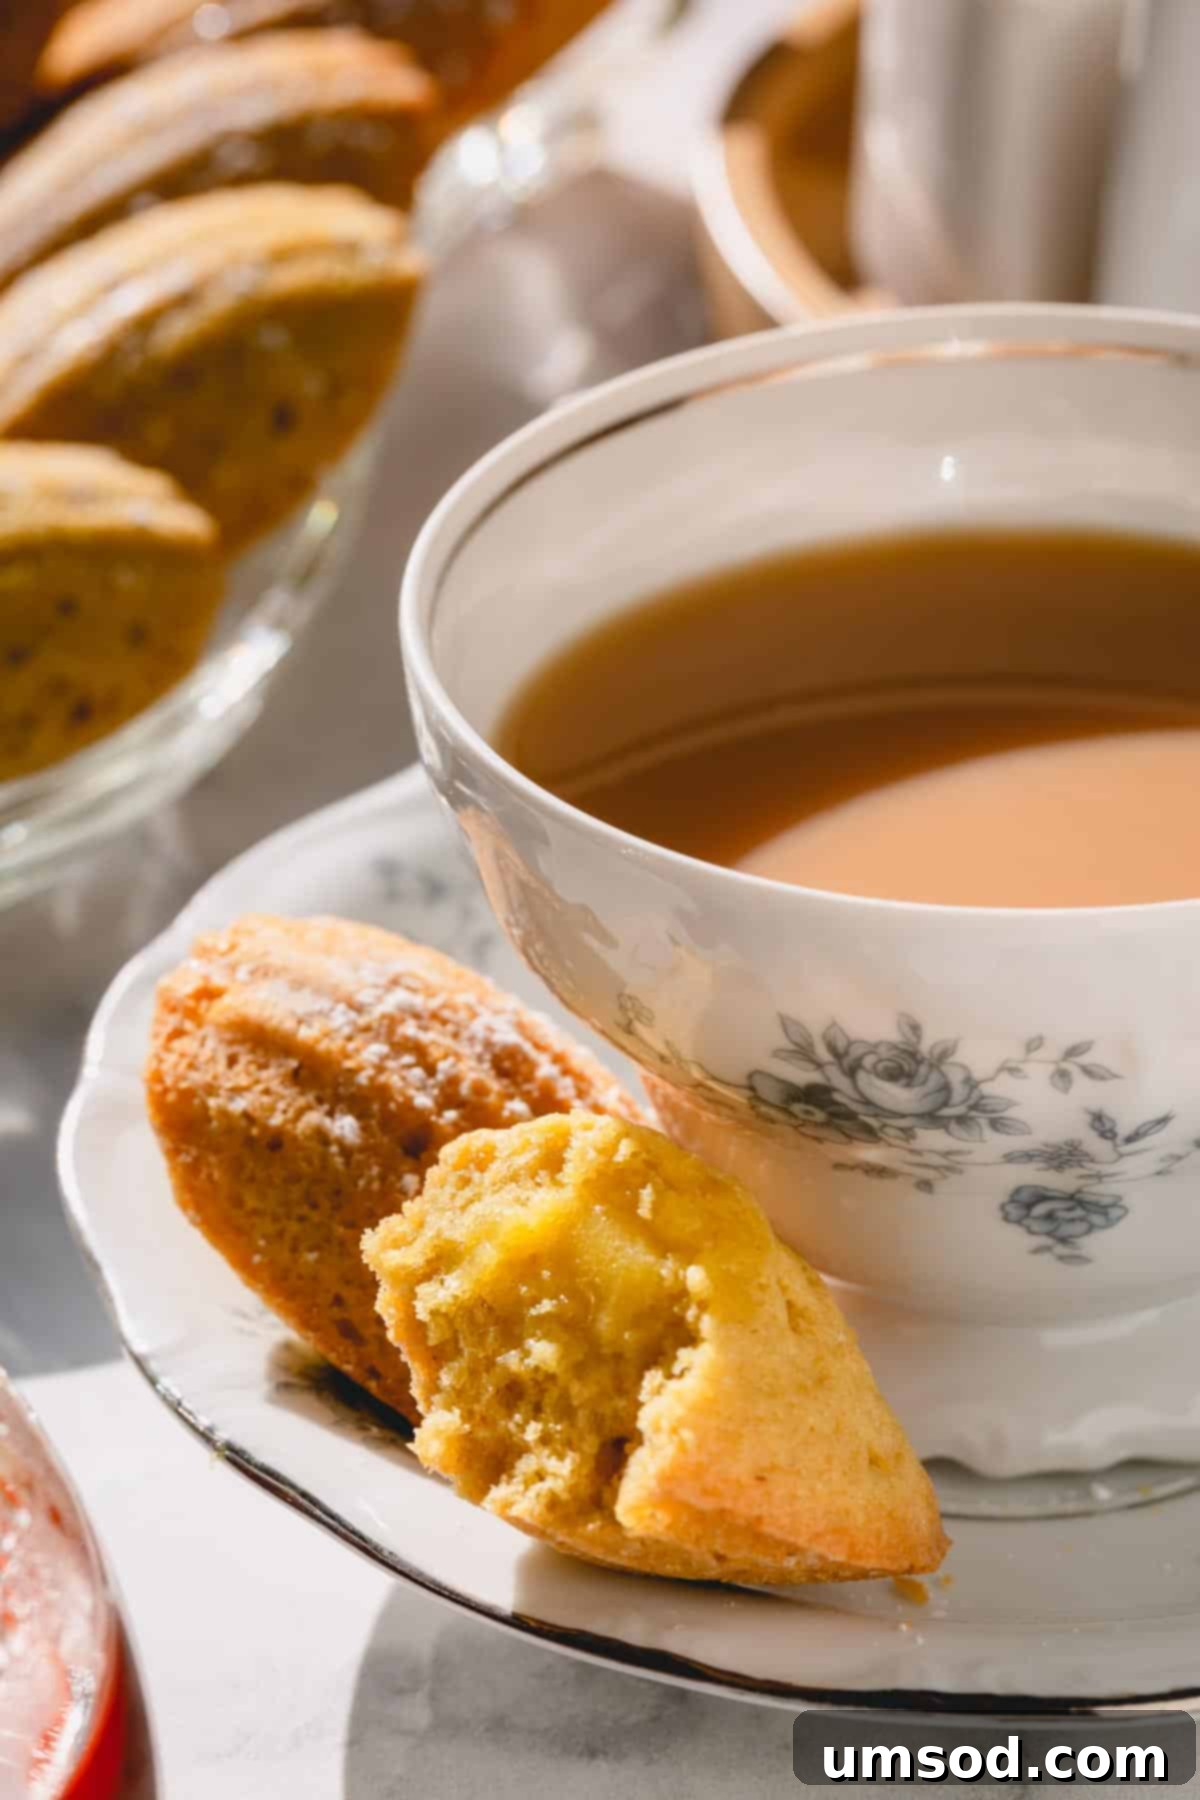
- **Lemon Curd:** This is where the vibrant, zesty lemon flavor truly comes alive and takes center stage! Nothing quite compares to the bright, sweet, and tangy complexity of homemade lemon curd. Its silky-smooth, creamy texture provides a wonderful and irresistible contrast to the soft, delicate cake. If you prefer to omit the filling for a simpler madeleine, you can easily add 1-2 tablespoons of fresh lemon zest directly into the batter along with the vanilla extract for an equally delicious, pure lemon madeleine. High-quality store-bought lemon curd can also be used in a pinch.
Crafting Your Earl Grey Lemon Madeleines: A Detailed Step-by-Step Guide
Don’t be intimidated by the elegant appearance of madeleines; they are surprisingly straightforward to bake, especially with these clear instructions. Follow each step carefully to achieve perfectly shaped, beautifully flavored treats with that desirable “hump”:
Before you begin the batter, preheat your oven to a precise 400°F (200°C). This initial high heat is absolutely crucial for initiating the rapid rise that forms the iconic madeleine hump. While the oven preheats, generously spray your madeleine pan with a high-quality nonstick cooking spray. I find this method works perfectly, providing excellent release and eliminating the need for the often messy and time-consuming process of buttering and flouring the molds.
1. Melt and Infuse the Butter with Earl Grey
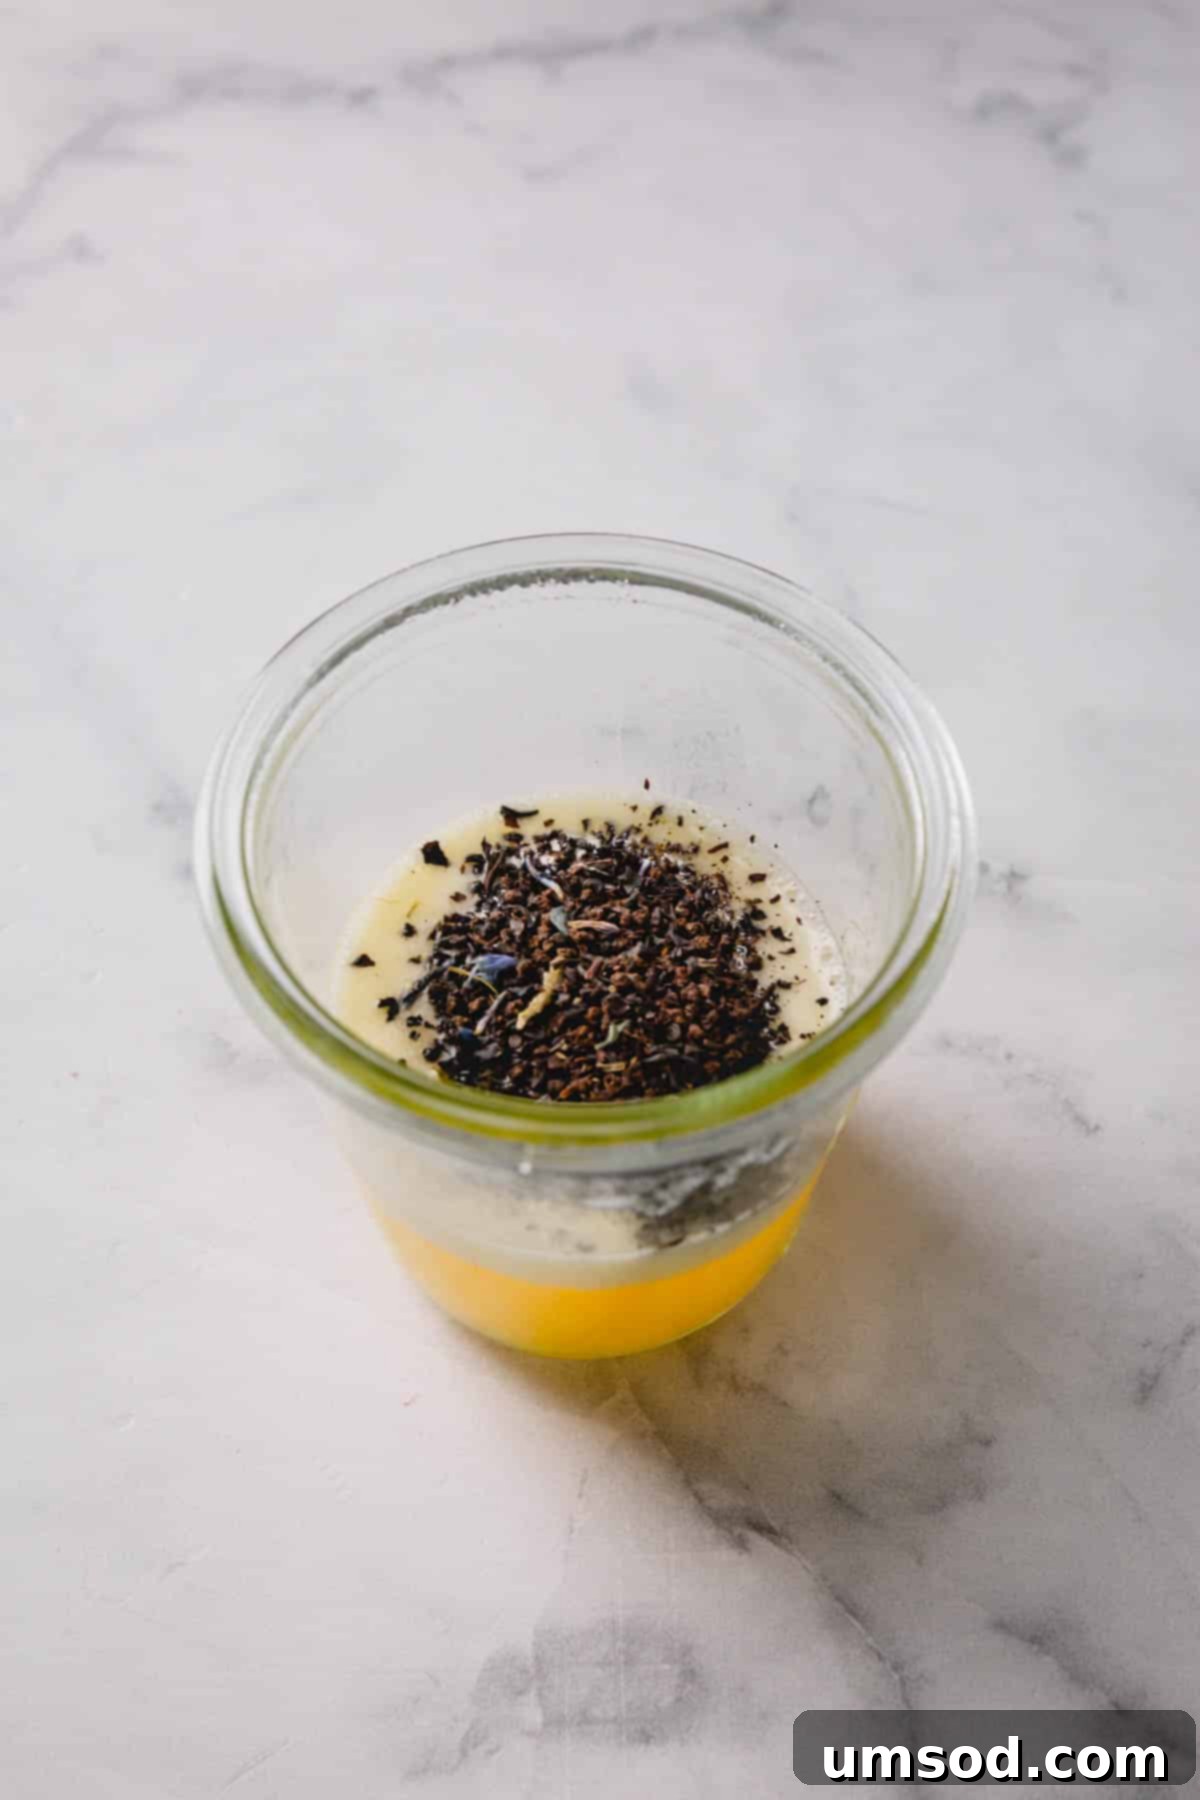
- In a small saucepan, gently melt the unsalted butter over low heat until it is completely liquid.
- Once melted, remove the saucepan from the heat and immediately stir in the loose leaf Earl Grey tea. The residual heat from the butter will begin to extract the beautiful, fragrant bergamot flavor from the tea leaves, creating a subtle yet distinctive infusion.
- Allow the butter to steep and cool slightly while you proceed with preparing the rest of the madeleine batter. This infusion process is a crucial step for achieving that delicate, aromatic tea flavor without it becoming overpowering in the finished cakes.
2. Achieve the Perfect “Ribbon Stage” with Eggs and Sugar
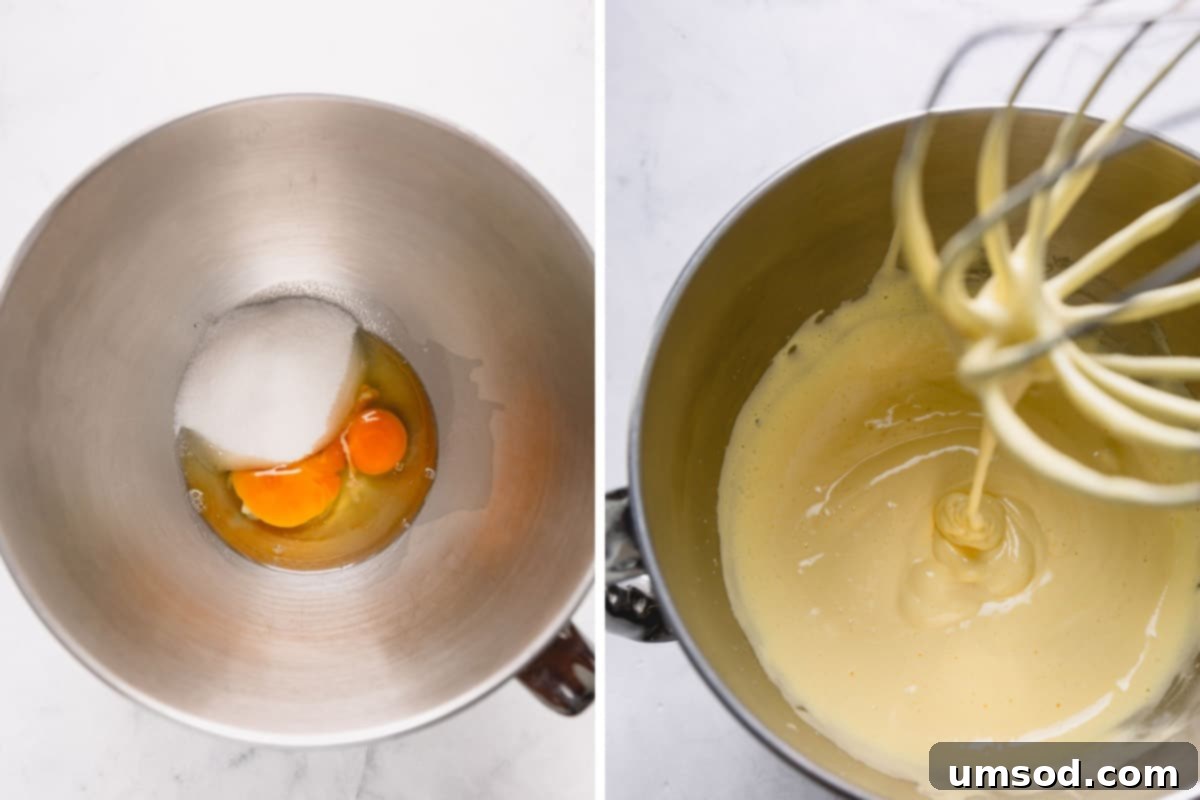
- In a large mixing bowl, combine the room temperature large eggs and granulated sugar. Using a sturdy whisk (or a hand mixer on medium-high speed for ease, though a whisk works perfectly and is part of the charm), begin beating the mixture vigorously.
- Continue beating for approximately 5 minutes, or until the mixture undergoes a significant transformation: it should become thick, notably pale yellow in color, and have substantially increased in volume. When you lift the whisk, the mixture should fall back into the bowl in a thick stream that forms a distinct “ribbon” on the surface, which slowly dissolves after a few seconds. This “ribbon stage” is absolutely vital because it signifies maximum air incorporation, which is the secret to the madeleines’ characteristic light, airy, and delicate texture.
- Once the ribbon stage is achieved, gently mix in the pure vanilla extract to add a lovely aromatic depth that complements the Earl Grey.
Expert Tip: The Ribbon Stage Demystified
The “ribbon stage” is more than just a visual cue; it’s a fundamental aeration technique. It indicates that the egg and sugar mixture is thick enough to suspend air bubbles, leaving a visible trail (or “ribbon”) on the surface when the whisk is lifted. This abundant incorporation of air is the primary secret behind a madeleine’s delightfully light, airy, and delicate crumb. Be patient and persistent; do not cut this whisking step short, as it directly impacts the final texture.
3. Gently Fold in the Dry Ingredients to Maintain Air
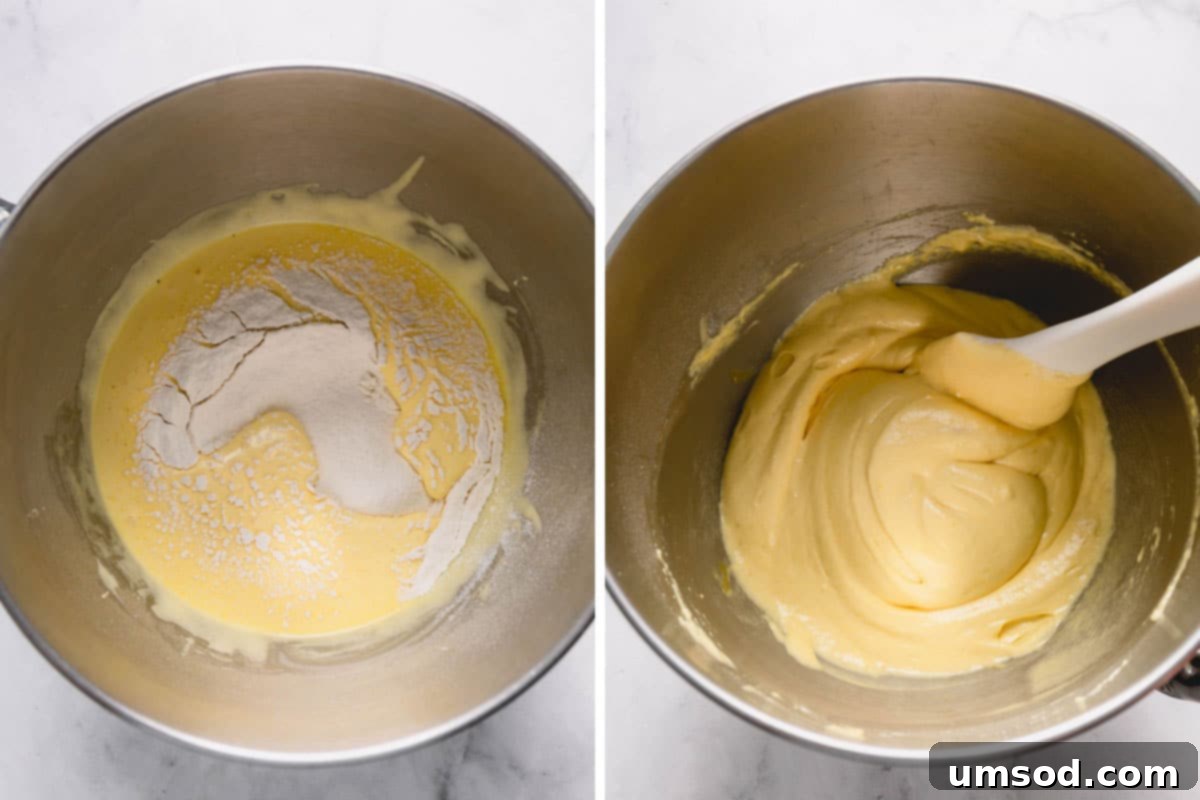
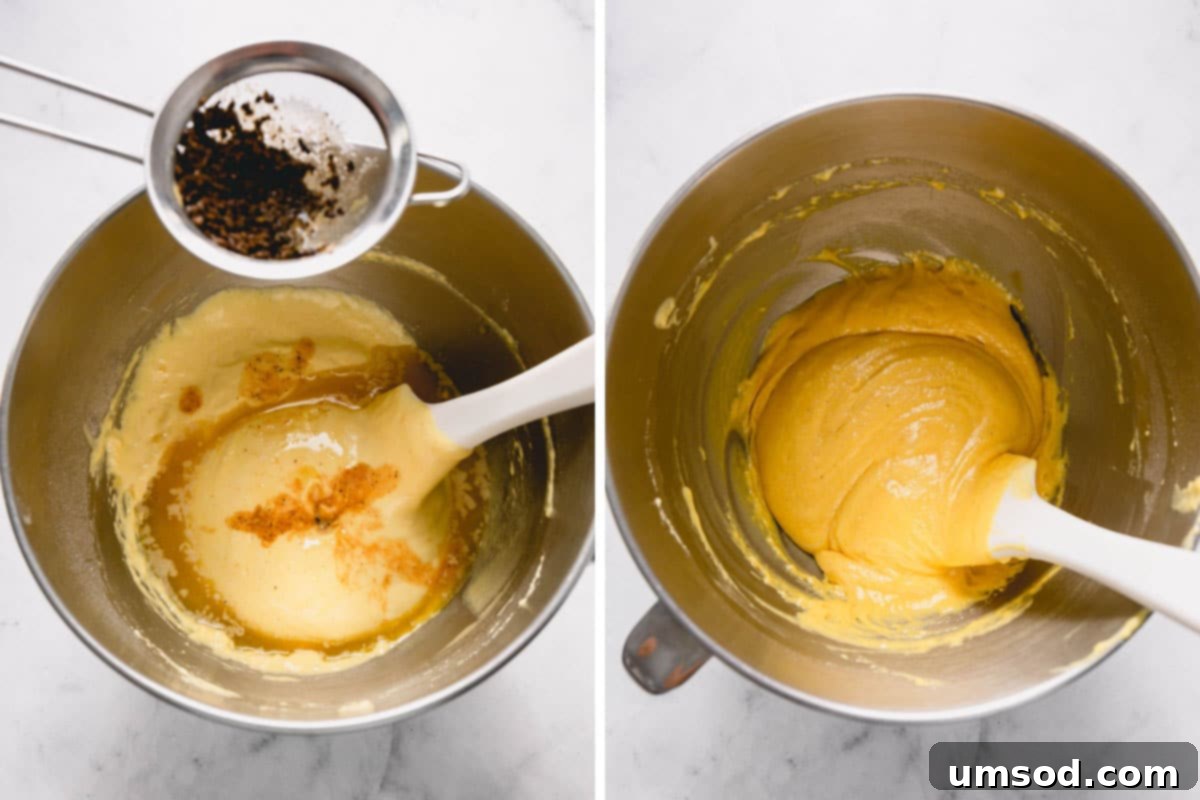
- Using a fine-mesh sieve, sift the all-purpose flour, baking powder, and salt directly over the meticulously whipped egg mixture. Sifting is crucial as it prevents lumps from forming in the batter and ensures that the dry ingredients are evenly distributed for a smooth, consistent texture.
- With a rubber spatula, begin to very gently fold the sifted dry ingredients into the airy egg mixture. Use broad, sweeping motions, carefully turning the bowl as you work. Continue until the dry ingredients are just combined and no streaks of dry flour are visible. The primary goal here is to incorporate the flour without deflating the precious air you’ve worked so diligently to whip into the eggs.
Critical Folding Technique
It cannot be stressed enough: resist the powerful urge to stir or whisk the flour into the eggs vigorously! This common mistake will rapidly deflate the beautifully aerated eggs, which is the opposite of what you want. Deflated batter will result in madeleines that are dense, heavy, and lack their characteristic light crumb. Always use a delicate, patient folding motion to preserve the air.
4. Incorporate the Fragrant Infused Butter
- Once the Earl Grey infused butter has cooled sufficiently (it should still be liquid but no longer hot to the touch), strain it through a fine-mesh sieve directly into the madeleine batter. This step ensures a wonderfully smooth batter, free of any tea leaf particles, while retaining all the lovely, aromatic Earl Grey flavor you’ve worked to create. Discard the spent tea leaves from the sieve.
- Again, using your rubber spatula, very gently fold the strained butter into the batter until it is just combined and no streaks of butter remain. Be mindful not to overmix at this stage, as excessive handling can develop the gluten in the flour, leading to a tougher rather than tender madeleine. The batter should ideally remain light, airy, and full of volume.
5. Fill the Molds and Bake for the Perfect Hump
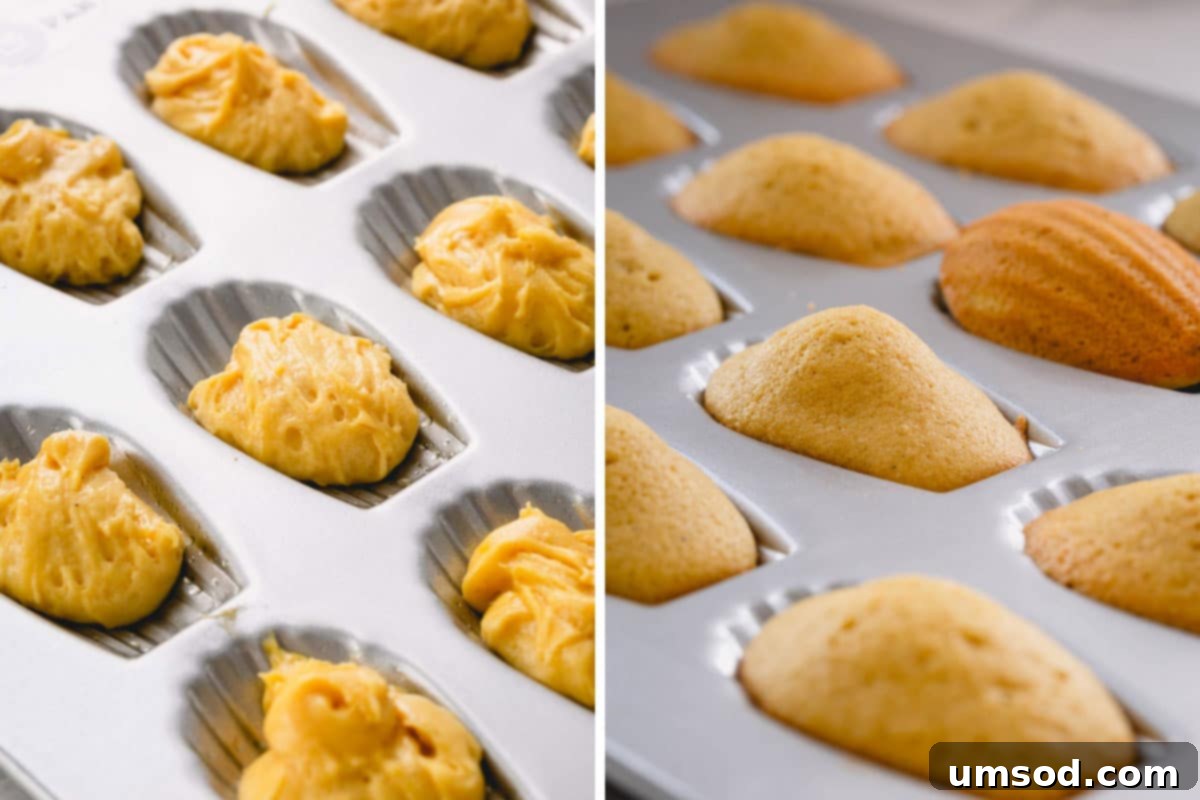
- Carefully spoon the prepared madeleine batter into each well of your greased madeleine pan. Aim for approximately one heaping tablespoon of batter per well. It is critically important not to overfill the wells; doing so will cause the madeleines to spread too much, become oversized, and prevent them from achieving their characteristic hump and delicate seashell shape. Leaving a little room allows them to rise beautifully.
- Place the pan into the preheated 400°F (200°C) oven and bake for precisely 3 minutes. This initial, intense burst of high heat is the celebrated secret to rapidly setting the exterior and forcing the internal batter upwards, thus developing that iconic, perfect madeleine hump.
- After exactly 3 minutes, reduce the oven temperature to 350°F (175°C) and continue baking for an additional 7 minutes, or until the edges of the madeleines are beautifully golden brown and their centers spring back lightly when gently touched. Avoid overbaking to maintain moisture.
- Once baked to perfection, remove the pan from the oven and allow the madeleines to cool in the pan for at least 3 minutes. This crucial resting period allows them to firm up slightly, making them much easier to gently transfer to a wire rack to cool completely without breakage.
The Scientific Secret to the Madeleine Hump
That initial blast of high temperature (400°F/200°C) is not just a suggestion – it’s the scientific key! This high heat rapidly sets the outer crust of the madeleine, creating a firm exterior shell. As the batter in the center continues to heat and expand, it has nowhere to go but upwards, consequently pushing into that delightful, signature “hump” on top. This temperature fluctuation is essential for authentic madeleine results, so remember to follow it precisely!
6. Finish with Luscious Lemon Curd Filling
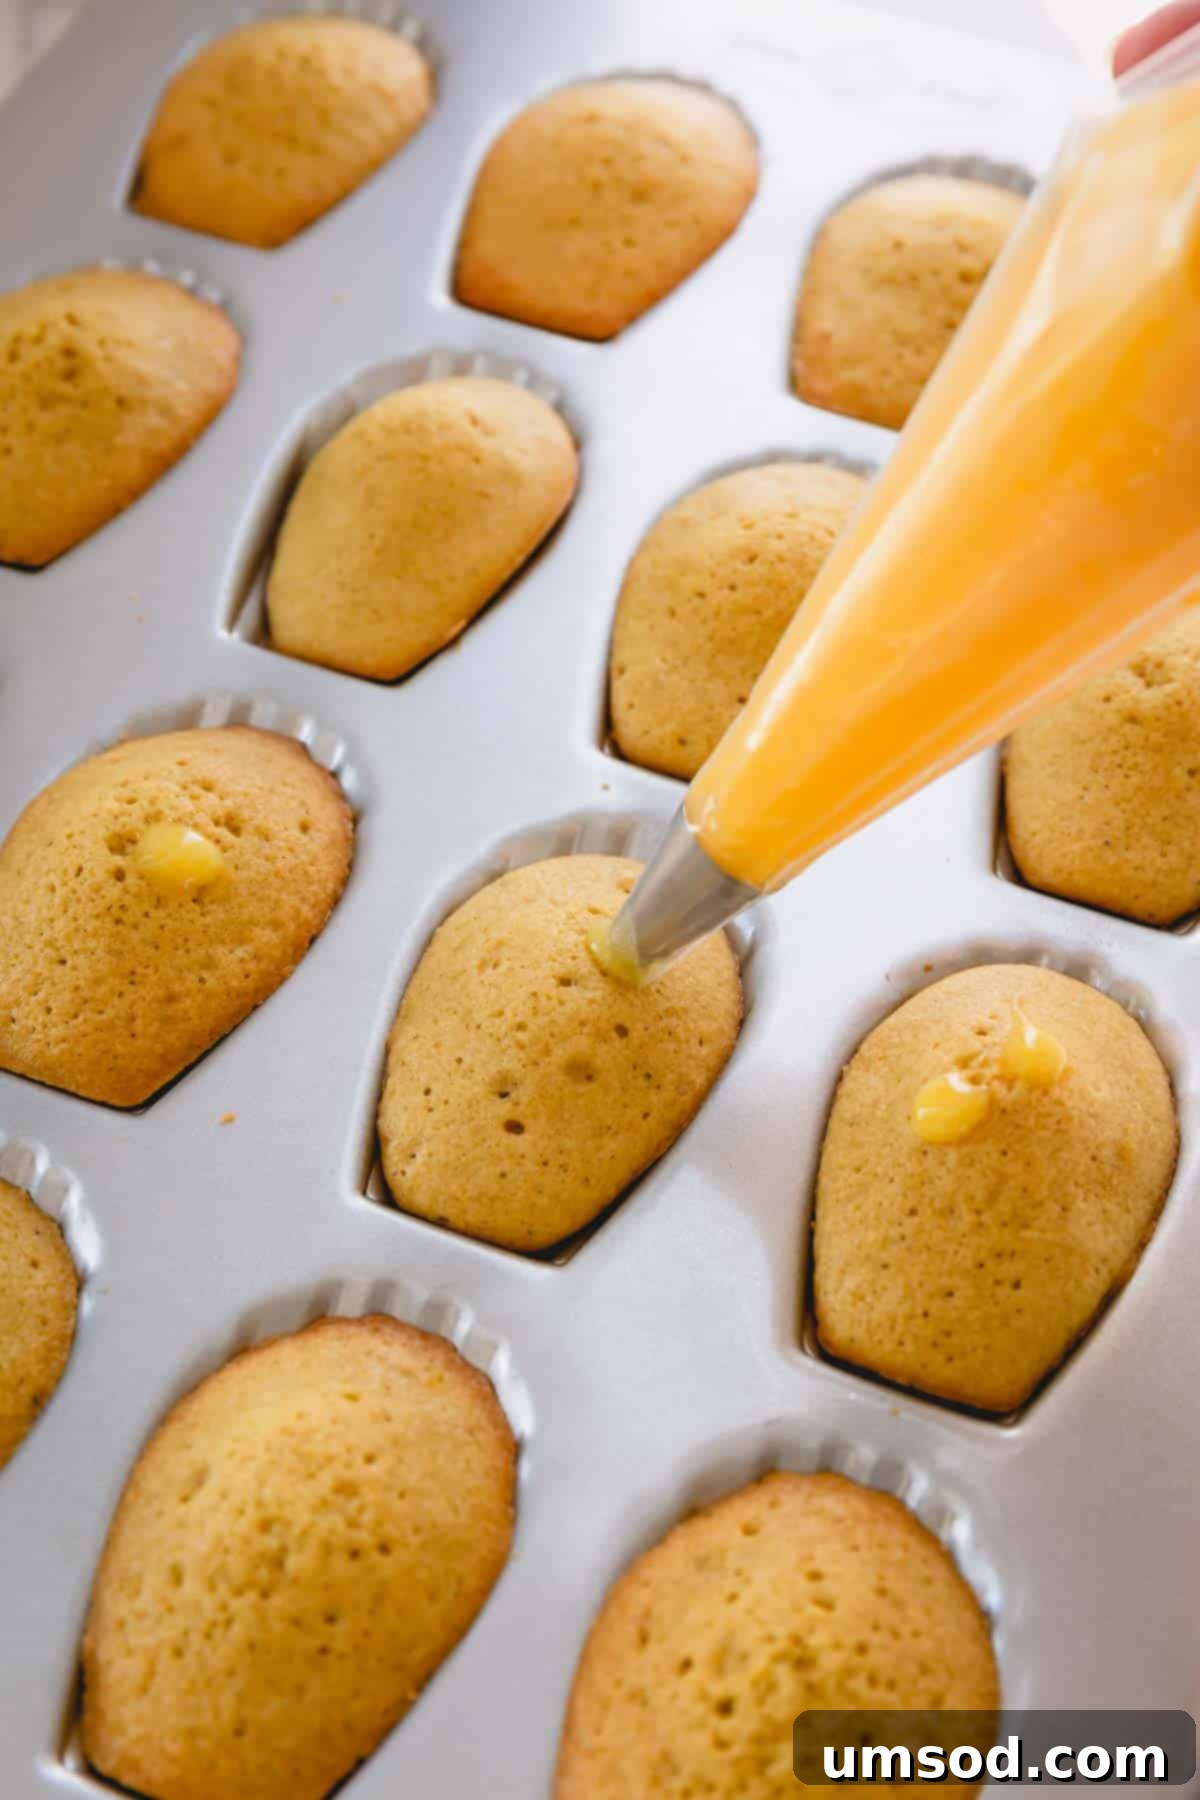
- Once your madeleines have completely cooled to room temperature, it’s time for the delightful lemon curd filling. Scoop your homemade (or a high-quality store-bought) lemon curd into a piping bag. For precision, fit the bag with a small, round piping tip.
- Gently insert the tip into the flatter side of each madeleine (the side opposite the iconic hump) and carefully pipe a small amount of curd into the center until it just begins to show at the opening. This creates a hidden burst of tangy flavor.
- Alternatively, for a different presentation, you can pipe a dollop of curd onto the flat side of one madeleine and gently top it with another, creating a charming sandwich effect. Or, simply serve the lemon curd alongside the madeleines for a delightful dipping experience.
Essential Pro Tips for Madeleine Mastery and Perfection
Achieving truly perfect madeleines, with their delicate texture and iconic hump, is entirely within your reach with these expert, tried-and-true tips. Pay close attention to these details for exceptional results:
- **A Madeleine Pan is an Investment, Not an Option:** While you can technically bake madeleine batter in a mini muffin tin, it simply won’t yield the same results. A true madeleine pan is absolutely indispensable for achieving the classic scalloped seashell shape, the desirable crisp, caramelized edges, and the signature hump that define these French delicacies. A good quality non-stick pan will serve you well for many years of delightful baking.
- **Room Temperature Eggs are the Undisputed Key:** This is arguably the single most crucial tip for madeleine success. Cold eggs are denser and will not whip up to the same volume as eggs that have been allowed to come to room temperature. The more air you skillfully incorporate into your eggs during the whipping stage, the lighter, fluffier, and more exquisitely delicate your madeleines will be. Plan ahead and take your eggs out of the refrigerator at least 30 minutes to an hour before you intend to start baking.
- **Master the Art of Gentle Folding, Never Stirring:** When it’s time to incorporate the flour and then the melted butter into your beautifully whipped egg mixture, use a gentle folding technique with a rubber spatula. Vigorous stirring or whisking will quickly and effectively deflate all the precious air you’ve meticulously built into the eggs, inevitably leading to dense, heavy madeleines. Work slowly, patiently, and gently until the ingredients are just combined, without overworking the batter.
- **No Chilling Required for This Streamlined Recipe:** Many traditional madeleine recipes often call for chilling the batter, sometimes for several hours or even overnight, to help with the hump formation. However, with this specific recipe and its carefully developed technique, you can joyfully skip the chilling step entirely! Your madeleines will still rise beautifully and achieve that perfect hump, saving you valuable time without any compromise on quality or texture.
- **Resist the Urge to Overfill the Wells:** Precision matters greatly when filling the madeleine pan. A generous (heaping) tablespoon of batter per well is typically the ideal amount. Overfilling the molds will cause the madeleines to spread excessively, becoming oversized and potentially losing their iconic hump. Less is often more for achieving that elegant, perfectly formed shell shape.
- **Leverage the High-Heat Trick for the Signature Hump:** Always remember to begin baking your madeleines at a higher temperature (400°F / 200°C) for the first few minutes before reducing the oven heat. This initial burst of intense heat creates a rapid expansion and sets the exterior crust quickly, thereby forcing the expanding batter in the center to push upwards into the delightful and sought-after “hump.”
- **Beware of Overbaking:** Madeleines are small and cook quickly due to their delicate nature. Overbaking is a common pitfall that will lead to dry, crumbly cakes, losing their tender moistness. Keep a very close eye on them; they are perfectly done when their edges turn a beautiful golden brown and the center springs back lightly when gently touched.
Storing Your Earl Grey Lemon Madeleines: Keeping Them Fresh
Madeleines are truly a treat best enjoyed on the very day they are baked. Their delicate, airy texture is at its peak when fresh, as they tend to dry out relatively quickly. However, with proper storage techniques, you can certainly extend their deliciousness for a few days:
- **Short-Term Storage for Filled Madeleines:** Because these particular madeleines contain a luscious lemon curd filling, they absolutely must be refrigerated to maintain both freshness and food safety. Store them in an airtight container in the refrigerator for up to 3 days. For the best texture and flavor experience, allow them to come to room temperature for about 15-20 minutes before serving.
- **Short-Term Storage for Unfilled Madeleines:** If you choose to make unfilled madeleines (perhaps with lemon zest incorporated directly into the batter), these can be stored safely at room temperature in an airtight container for up to 2-3 days. Ensure they are completely cool before storing to prevent condensation.
- **Revitalizing Day-Old Leftovers:** Madeleines that are a day or two old, especially if they have dried out slightly, are still wonderfully delicious! They are absolutely perfect when gently dunked into a warm cup of Earl Grey tea, coffee, or even hot chocolate. The liquid helps to re-moisten them and creates a delightful textural experience.
- **Long-Term Storage (Freezing for Extended Freshness):** For longer storage durations, madeleines freeze exceptionally well. Once they are completely cooled to room temperature, carefully transfer the Earl Grey Madeleines (whether filled or unfilled, though unfilled tend to fare slightly better during freezing) to a freezer-safe container or an airtight freezer bag. If layering them, place sheets of parchment paper between the layers to prevent sticking. They can be frozen for up to 3 months.
- **Properly Thawing Frozen Madeleines:** To enjoy your frozen madeleines, transfer them from the freezer to the refrigerator and allow them to thaw overnight. Once thawed, let them sit on the counter for about 30 minutes to an hour to reach room temperature before serving. For an extra touch of warmth and to refresh their delicate texture, you can gently warm them in a low oven (around 250°F / 120°C) for 5-7 minutes.
Frequently Asked Questions About Earl Grey Lemon Madeleines
An Earl Grey Lemon Madeleine offers a truly delightful and multi-layered sensory experience. It tastes primarily like a very tender, light, and airy butter cake, but with the added complexity of aromatic Earl Grey tea and bright, zesty lemon. You’ll first notice the rich, comforting buttery flavor, followed by the subtle, floral, and citrusy notes of bergamot from the Earl Grey. The tangy lemon curd then provides a vibrant burst of sweetness and acidity. When baked correctly in its special pan, the edges are delicately caramelized and slightly crisp, offering a wonderful textural contrast to the soft, spongy, and moist interior. It’s a sophisticated flavor profile that is both comforting and elegantly refreshing.
Madeleines gracefully straddle the line between cookies and cakes, often best described as mini sponge cakes. They are fundamentally made using a genoise-style batter, a classic French technique that relies heavily on meticulously whipped eggs and sugar for their primary aeration, much like traditional sponge cakes. This particular baking method gives them their remarkably light, delicate, and exceptionally airy texture. While their individual portion size often leads them to be casually categorized with cookies, their distinct baking method, tender crumb texture, and higher moisture content align them far more closely with cakes than with crisp cookies.
Technically, yes, you can certainly bake the madeleine batter in a mini muffin pan if you do not own a specialized madeleine pan. The resulting cakes will still be delicious and retain the flavors of the batter. However, they will not achieve the characteristic scalloped seashell shape, nor will they develop the iconic “hump” that is the hallmark of a traditional madeleine. They will essentially be small, round tea cakes. For an authentic appearance, texture, and baking experience, investing in a good quality madeleine pan is highly recommended. The unique shape genuinely contributes to their delicate structure and charming presentation.
Consistently achieving the perfect madeleine hump, which is a true sign of a well-baked madeleine, relies on two critical factors: a thoroughly aerated batter and a specific baking temperature strategy. Firstly, ensure your eggs and sugar are whipped meticulously to the “ribbon stage” (as described in the recipe steps) to incorporate the maximum amount of air possible into the batter. Secondly, implement the distinct two-stage baking temperature: bake the madeleines initially at a high temperature (400°F / 200°C) for the first few minutes (typically 3-5 minutes), then quickly reduce the oven temperature (to 350°F / 175°C) for the remainder of the baking time. This initial high-heat shock causes the edges of the madeleines to set rapidly, creating a firm exterior. As the batter in the center continues to heat and expand, it is forced to push upwards, thus creating that beautiful and distinctive hump.
While it’s generally recommended and ideal to bake madeleines with freshly made batter for the absolute lightest and airiest texture, you can prepare the batter a few hours in advance if your schedule demands it. If you choose to do so, immediately cover the bowl tightly with plastic wrap to minimize air exposure and refrigerate it. However, be aware that chilling the batter can slightly reduce the final volume and the prominence of the hump, as the delicate air whipped into the eggs can deflate over time. If using chilled batter, allow it to come to room temperature for about 15-20 minutes before baking, and stir it very gently (using a folding motion) before spooning it into the madeleine pan to minimize further deflation.
Absolutely! While Earl Grey provides a wonderful classic flavor, madeleines are incredibly versatile. You can certainly experiment with infusing the butter with other loose leaf teas. Consider using fragrant options like delicate Lavender tea for a floral note, robust Chai tea for warm spices, or even a soothing Chamomile tea for a milder, herbal essence. Always use high-quality loose leaf tea for the best flavor extraction. Adjust the amount to your taste, but a teaspoon per 8 tablespoons of butter is a good starting point.
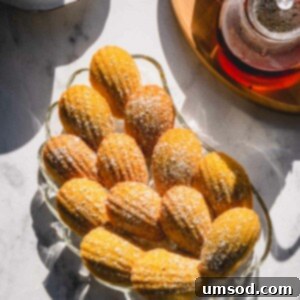
Lemon Earl Grey Madeleines
Shinee Davaakhuu
20
10
30
16 madeleines
Comment
Print Recipe
Ingredients
- 8 tablespoons (113 g) unsalted butter
- 1 teaspoon loose Earl Grey tea
- 2 large eggs at room temperature
- ½ cup (100 g) granulated sugar
- 1 teaspoon pure vanilla extract
- 1 cup (125 g) all-purpose flour
- ½ teaspoon baking powder
- ⅛ teaspoon table salt
- ¼ cup lemon curd for filling, (See Note 1 for details)
- powdered sugar for dusting (optional)
Equipment
- Madeleine Pan
Instructions
- Preheat oven to 400°F (200°C). Generously spray the madeleine pan with non-stick cooking spray, ensuring all indentations are covered.
- In a small saucepan, melt the unsalted butter over low heat. Remove from heat and stir in the loose Earl Grey tea. Allow the butter to steep and cool while you prepare the remaining batter components.
- In a large mixing bowl, combine the room temperature eggs and granulated sugar. Using a whisk (or hand mixer), beat on medium-high speed for about 5 minutes until the mixture is thick, pale, and forms a distinct “ribbon” when the whisk is lifted.
- Gently mix in the pure vanilla extract until just incorporated.
- Sift the all-purpose flour, baking powder, and salt directly over the whipped egg mixture. Using a rubber spatula, gently fold the dry ingredients into the batter until no streaks of dry flour remain. Be extremely careful not to deflate the aerated eggs.
- Strain the infused butter through a fine-mesh sieve directly into the batter, discarding the spent tea leaves. This ensures a smooth, tea-flavored butter.
- Using the spatula, gently fold the strained butter into the batter until it is just combined and fully incorporated, taking care to maintain the airy texture.
- Carefully spoon approximately one heaping tablespoon of batter into each well of the prepared madeleine pan. Avoid overfilling the wells to allow for proper rising and hump formation.
- Bake the madeleines at 400°F (200°C) for the initial 3 minutes. After this time, reduce the oven temperature to 350°F (175°C) and continue baking for another 7 minutes, or until they are golden brown around the edges and spring back lightly when gently touched.
- Remove the pan from the oven and allow the madeleines to cool in the pan for at least 3 minutes before carefully transferring them to a wire rack to cool completely.
- Once the madeleines are completely cooled, scoop the lemon curd into a piping bag fitted with a small round tip. Gently pipe the curd into the center of each madeleine’s flat side. Serve immediately, optionally dusting with a touch of powdered sugar for an elegant finish.
⭐️ Did you make this recipe?
Please leave a review and let us know how you liked it! Your feedback helps us improve!
Tips & Notes
Note 2: If desired, you may choose to omit the lemon curd filling entirely. Instead, for a pure lemon madeleine, stir in 1 tablespoon of fresh lemon zest into the batter along with the vanilla extract. This offers a simpler, yet equally delightful, citrus-forward option.
Storing Tips:
– Madeleines are truly at their absolute best when enjoyed on the same day they are baked. Their delicate, airy texture begins to dry out relatively quickly after baking.
– For leftover madeleines that are filled with lemon curd, it is imperative that they be stored in an airtight container in the refrigerator for food safety. They will keep well for up to three days. For optimal flavor and texture, allow them to come to room temperature before serving.
– Unfilled madeleines, however, can be stored in an airtight container at room temperature for up to two to three days.
– Day-old madeleines, especially if they have slightly dried, are particularly delightful when dunked into a warm cup of tea or coffee, which helps to re-moisten them.
– To extend their shelf life significantly, madeleines can be frozen for longer storage. Transfer the completely cooled Earl Grey Madeleines to a freezer-safe container or an airtight freezer bag (layering with parchment paper if stacking) and freeze for up to three months.
– To thaw, simply transfer them to the refrigerator overnight. Once thawed, let them sit on the counter for about 30 minutes to an hour to reach room temperature before enjoying. You can also gently warm them in a low oven (approximately 250°F / 120°C) for 5-7 minutes to refresh their texture.
Nutrition
