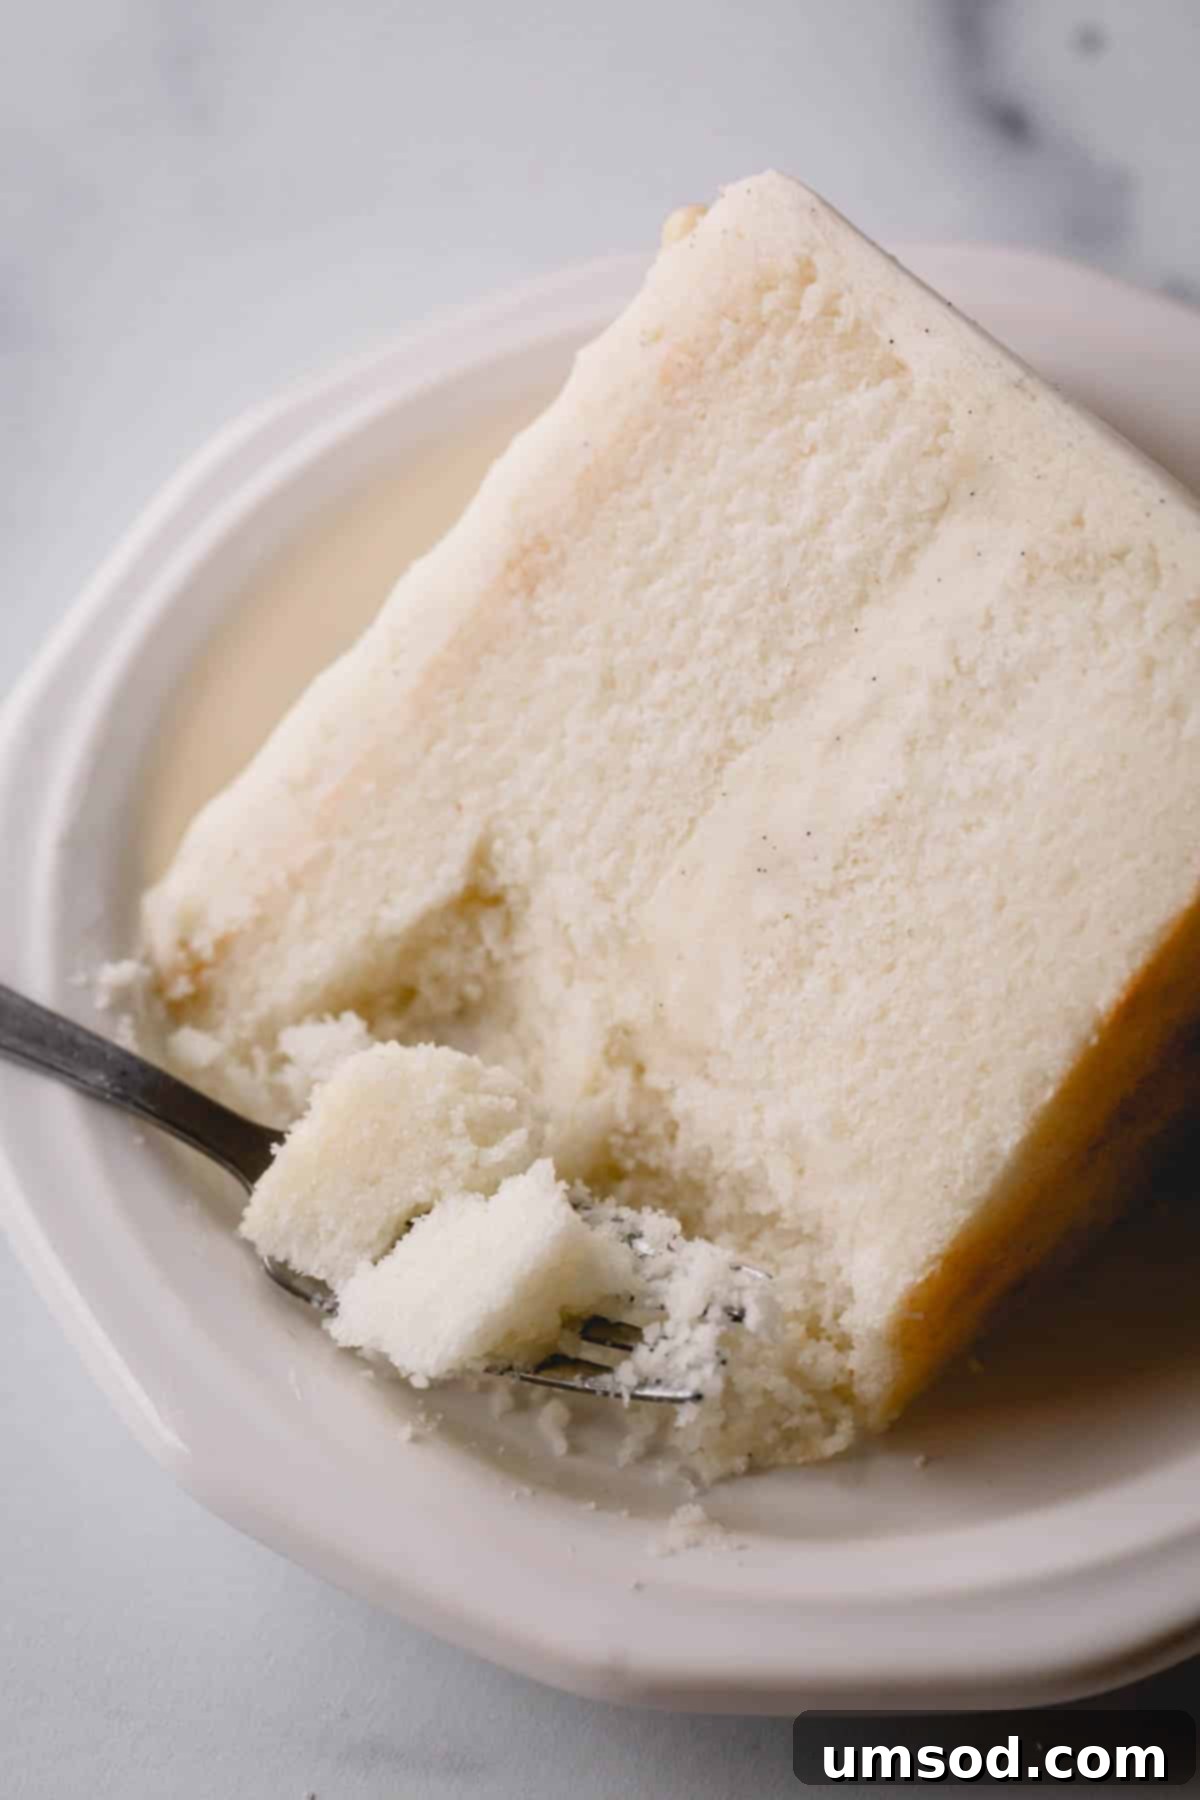
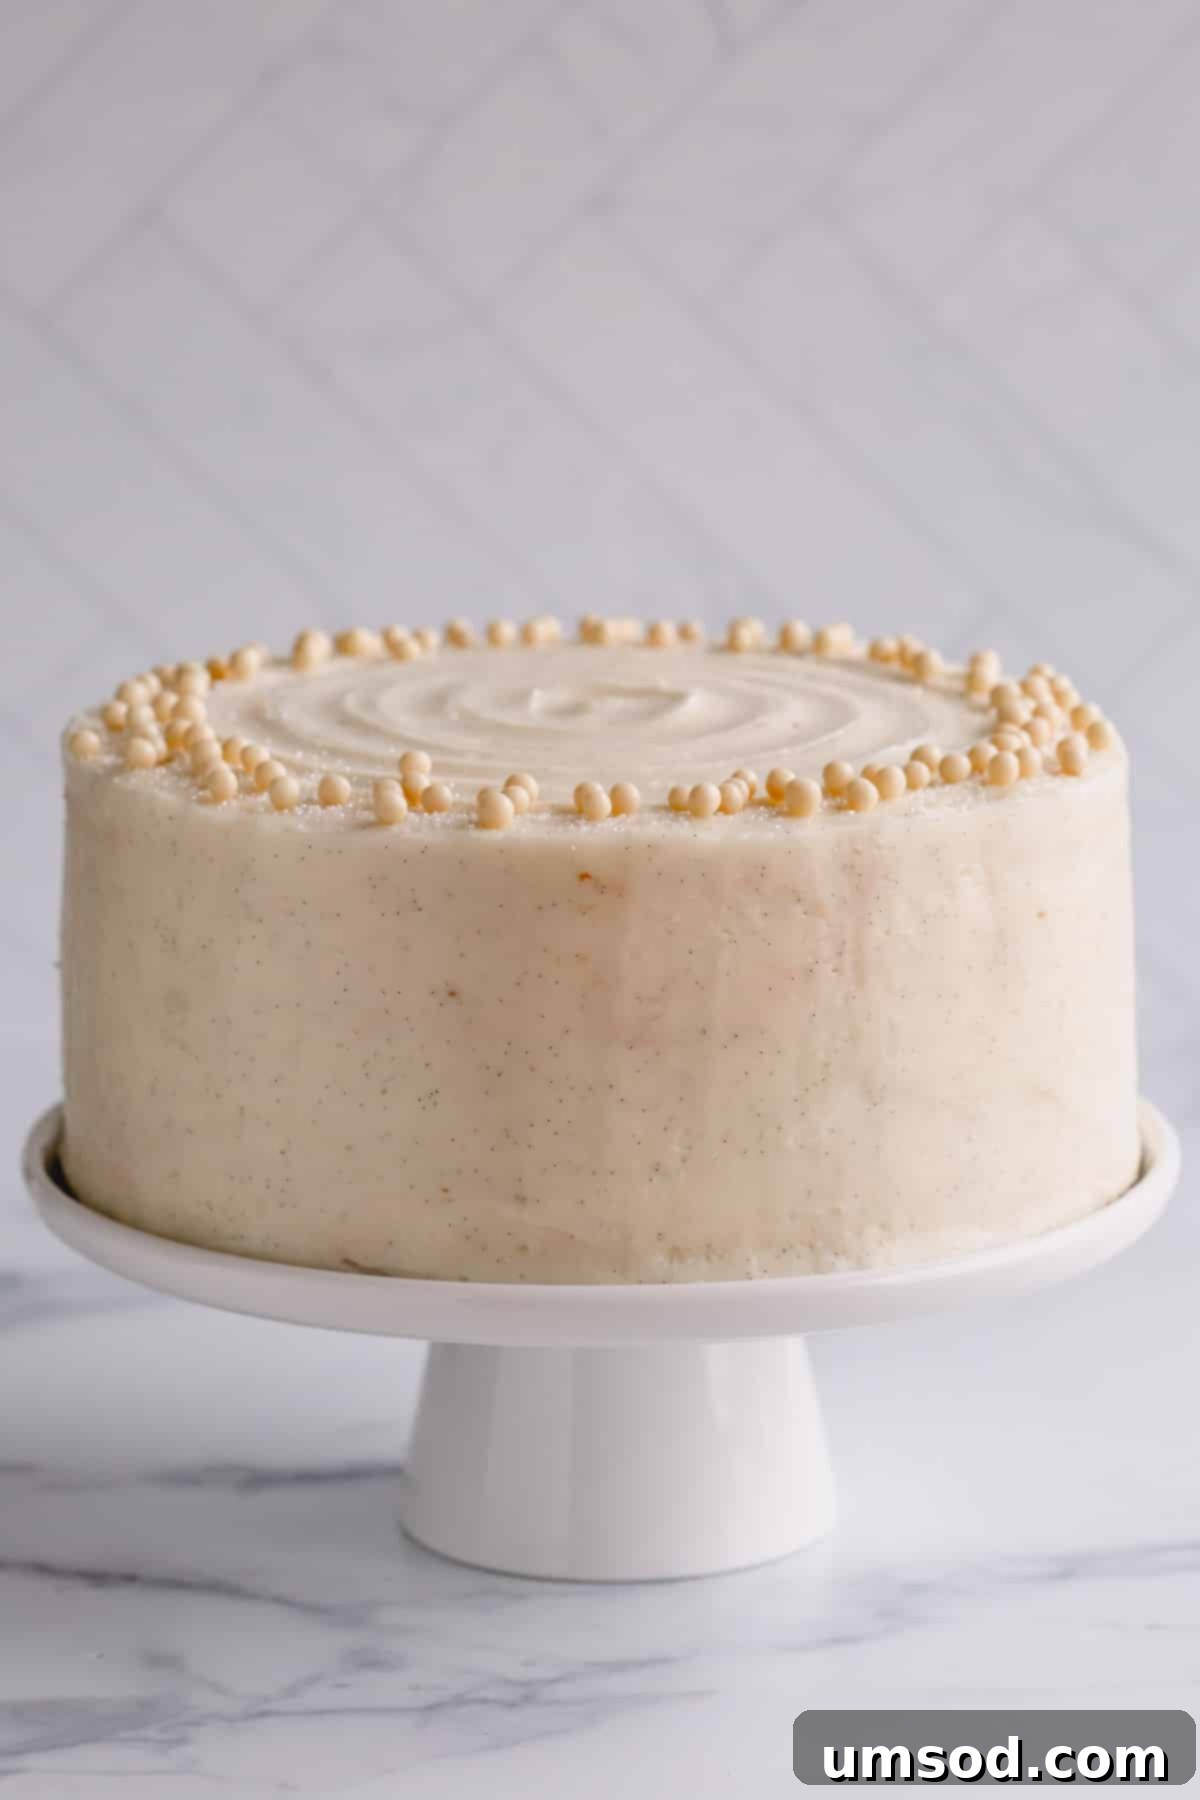
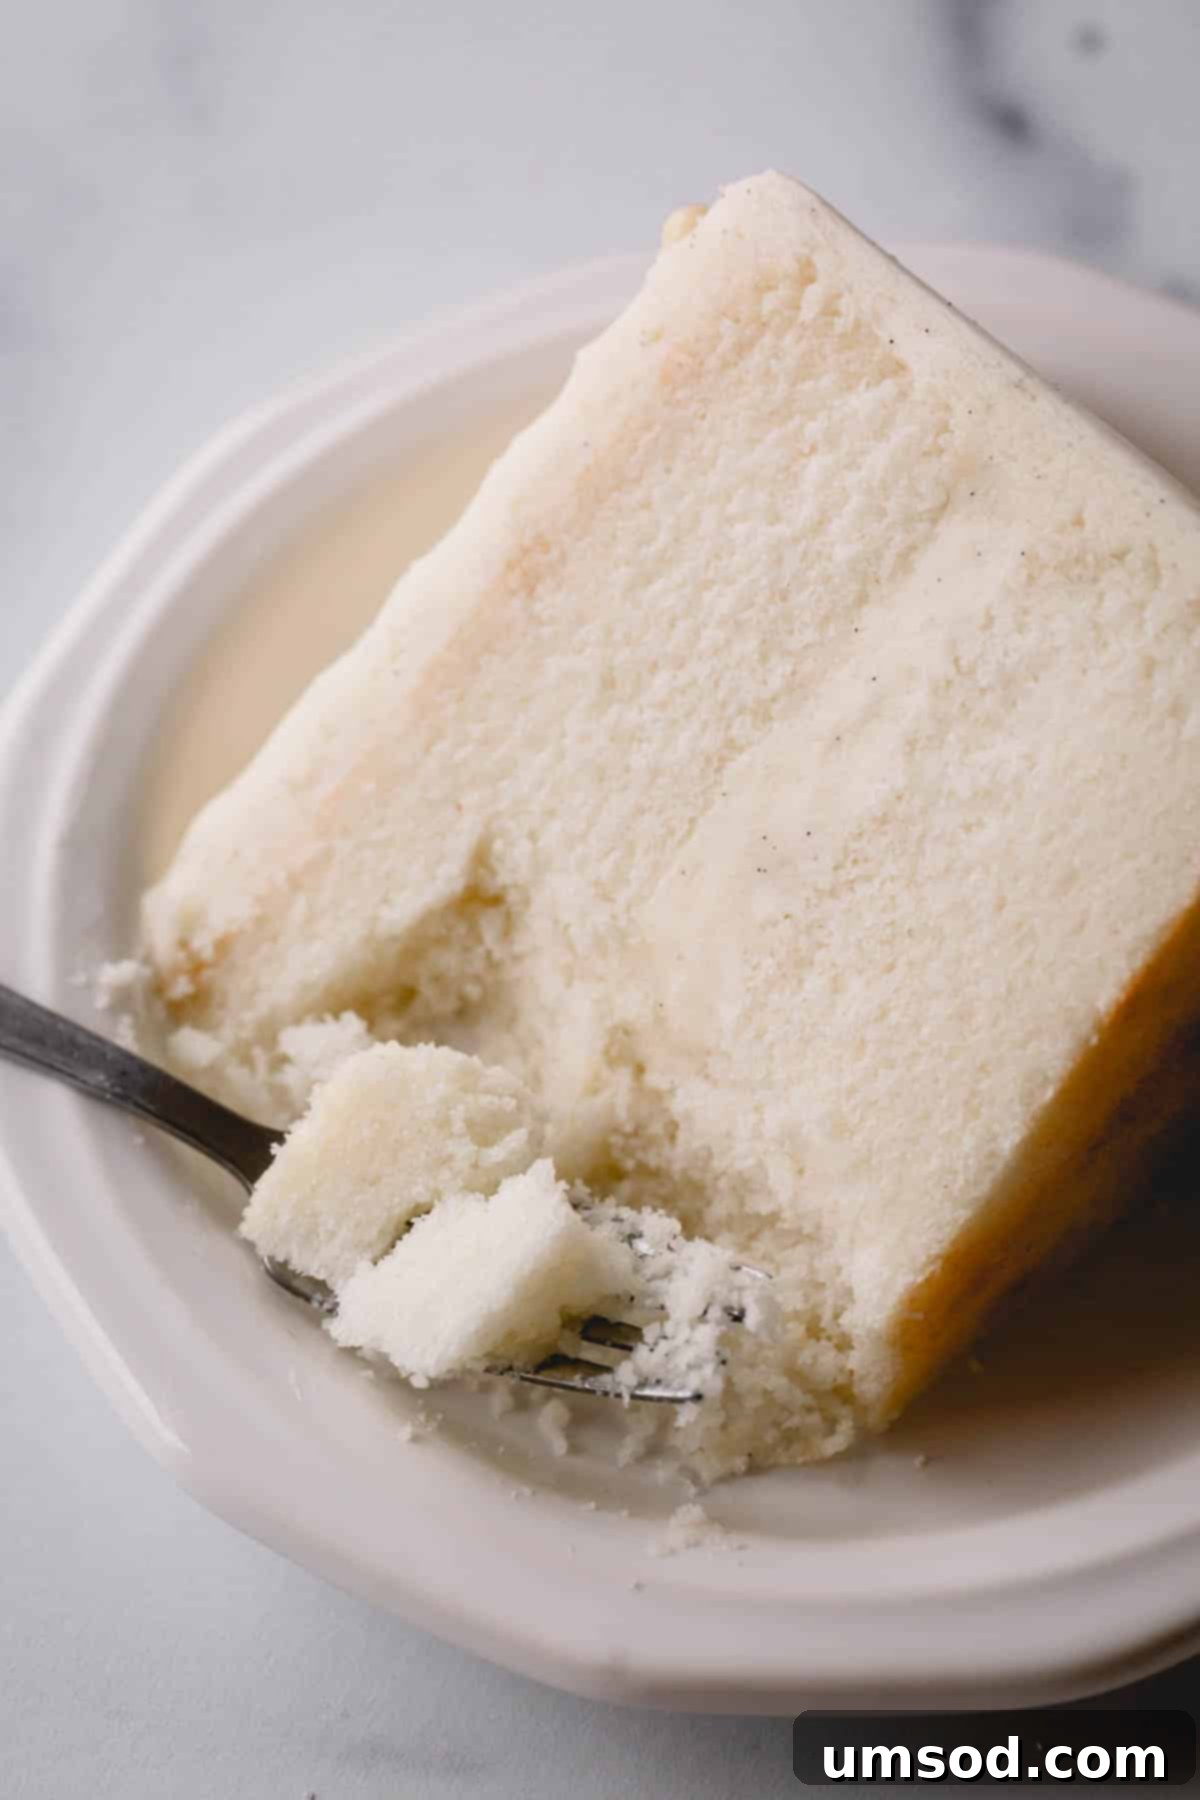
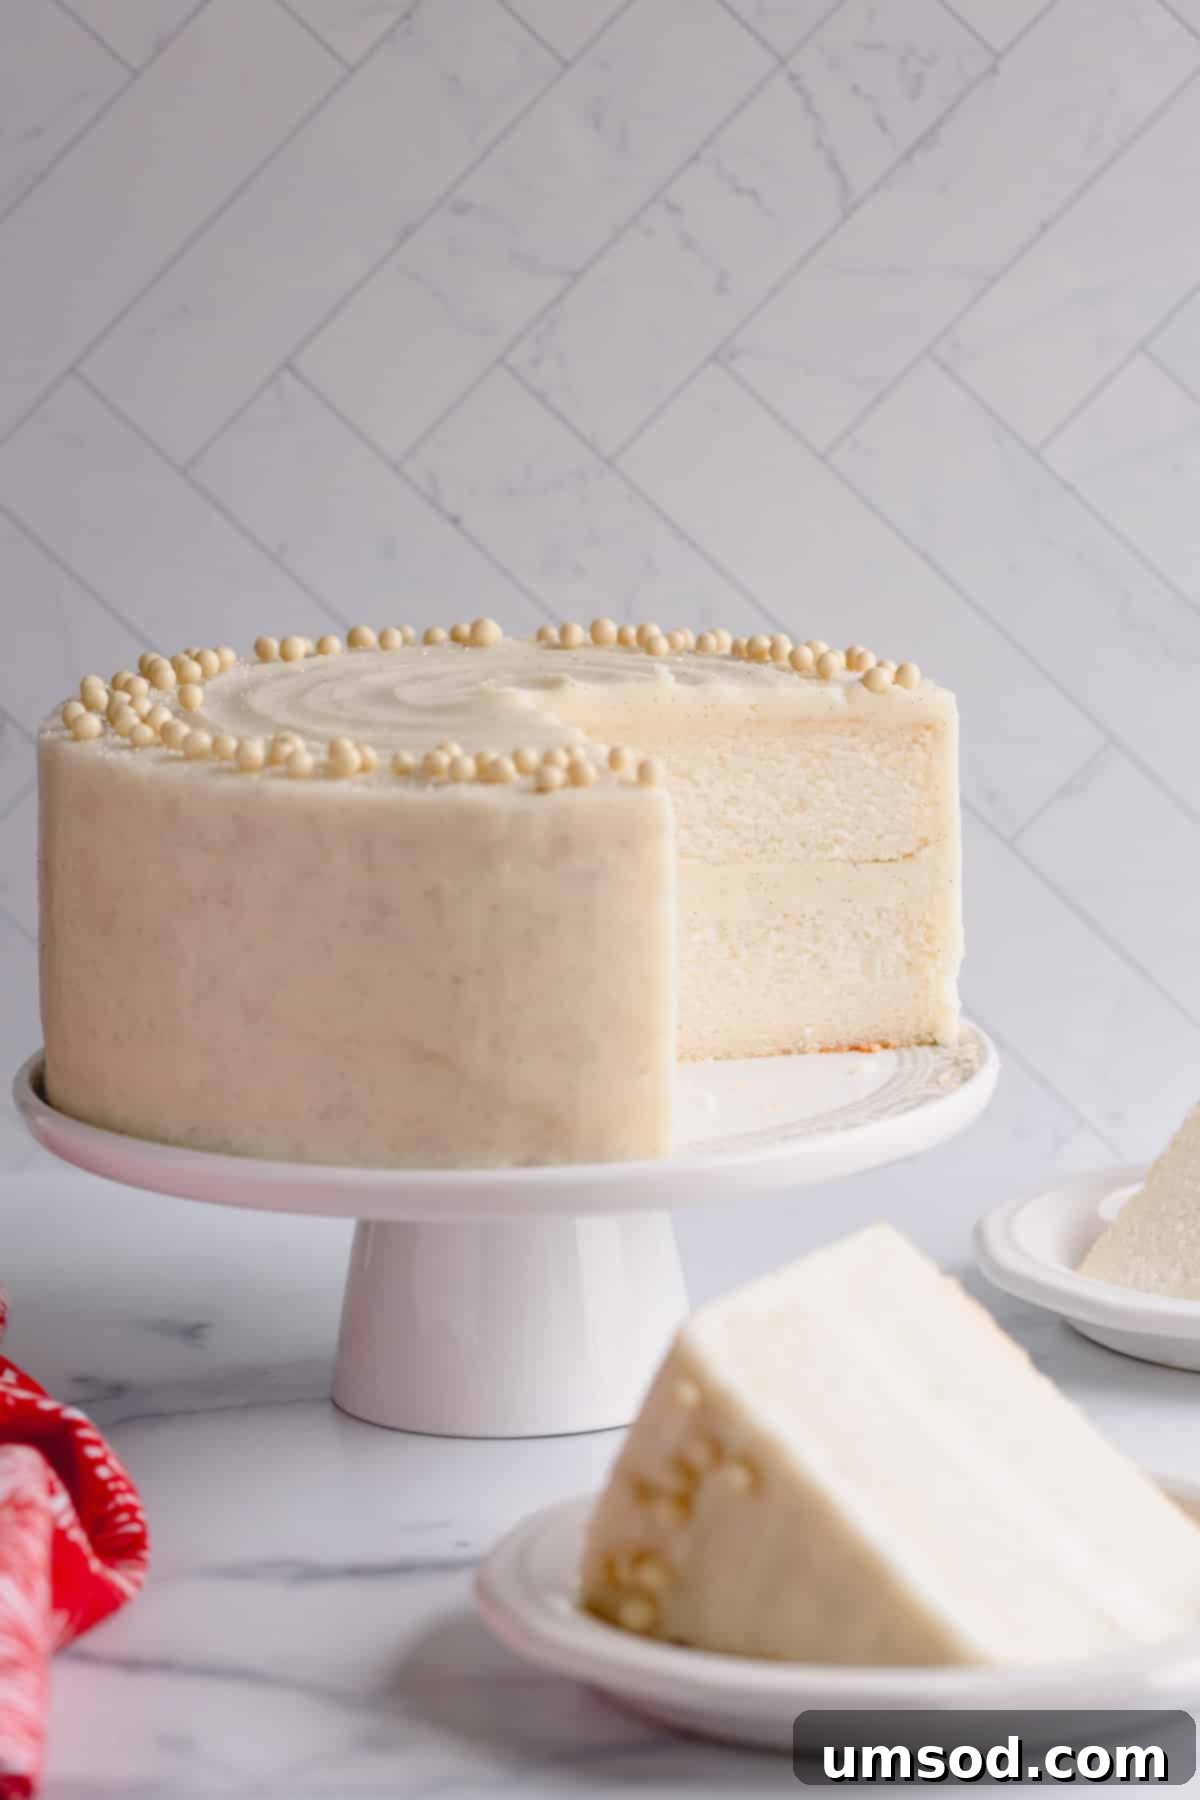
There’s nothing quite like a classic white cake to mark a special occasion. This recipe delivers a truly flawless white dessert, distinguished by its incredibly tight, even crumbs, a luxuriously soft and moist texture, and a sturdy foundation that makes it absolutely perfect for elegant layering. When generously covered in silky smooth vanilla Swiss meringue buttercream, this cake transforms into a magnificent, showstopping centerpiece that will impress every guest at your table. Whether you’re celebrating a wedding, anniversary, birthday, or simply indulging in a sweet craving, this ultimate white cake recipe is guaranteed to become a cherished favorite.
Pin this recipe now to find it later!
Pin It
Yellow Cake vs. Vanilla Cake vs. White Cake: Understanding the Delicious Differences
While all three cake varieties share a foundation of basic ingredients like flour, sugar, vanilla, eggs, and butter, the subtle distinctions in their preparation, particularly concerning the eggs, create vastly different flavor profiles and appearances. Understanding these differences can help you choose the perfect cake for any occasion.
- Yellow Cake: This beloved classic is characterized by its rich, deep yellow hue, which comes from using only egg yolks in the batter. The yolks not only impart a beautiful golden color but also contribute to a richer, denser texture and a more pronounced buttery flavor. Yellow cake is often associated with comfort and nostalgia, making it a staple for many family gatherings.
- Vanilla Cake: A true crowd-pleaser, vanilla cake is typically made using whole eggs – both yolks and whites. This combination results in a cake that is beautifully moist and tender, with a creamy yellow-white color. The presence of both egg components balances the richness and lightness, offering a versatile canvas for various frostings and fillings. Its prominent vanilla flavor makes it a universal favorite.
- Classic White Cake: As featured in this recipe, a classic white cake is uniquely prepared using only egg whites. This careful selection ensures a remarkably stark white crumb, ideal for elegant presentations like wedding cakes. The absence of egg yolks results in a lighter, more delicate texture and a clean, subtle sweet flavor where the vanilla and almond notes truly shine without any eggy richness. It’s the epitome of purity and sophistication in the baking world.
Each cake offers a distinct experience, but for a pristine, elegant, and perfectly balanced dessert, our classic white cake stands unparalleled.
Why You’ll Adore This Classic White Cake Recipe
A truly classic white cake transcends mere dessert; it’s an emblem of elegance and celebration. This particular recipe is meticulously crafted to be your go-to for weddings, bridal showers, milestone birthdays, and all special holidays. It embodies everything you could possibly desire in a homemade cake: elegance, pristine beauty, and an unforgettable taste that feels both sophisticated and comforting.
- Exquisite Flavor Profile: Prepare your taste buds for a delightful experience. This white cake boasts a beautifully mild vanilla flavor, perfectly complemented by a subtle hint of almond. It’s a harmonious blend that is utterly delicious without ever being overly sweet, allowing the quality ingredients to truly shine.
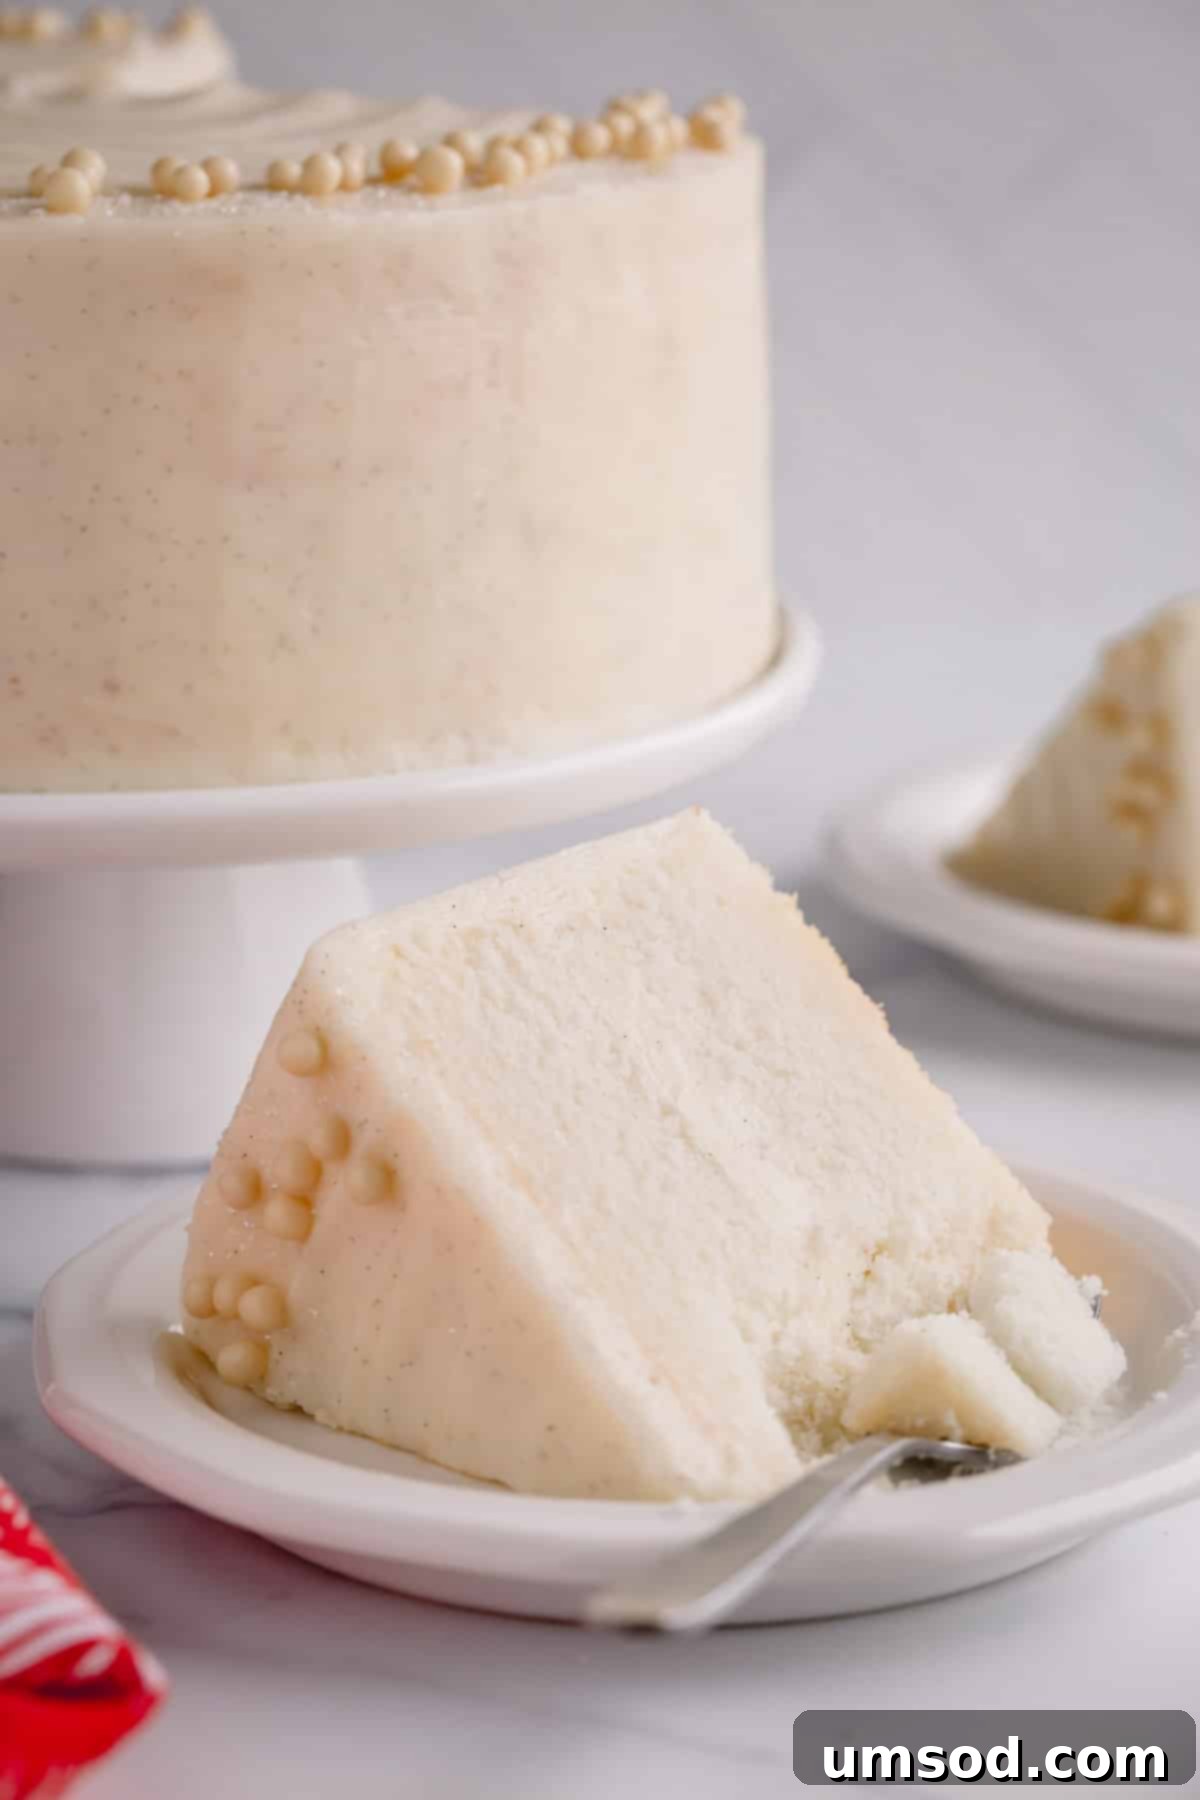
- Unmatched Texture: Each layer of this cake is a testament to perfection. You’ll find it incredibly moist and tender, with a dense, yet delicate crumb that melts in your mouth. The tight, even crumb structure ensures a pleasing mouthfeel and makes it an ideal base for stacking and decorating.
- Foolproof Simplicity (Thanks to Reverse Creaming): Don’t let its elegant appearance intimidate you! This recipe utilizes the reverse creaming method, a technique renowned for making cake baking surprisingly easy and virtually foolproof. It minimizes the risk of over-mixing and guarantees a consistently tender outcome every time.
My assistant and I have dedicated countless hours to meticulously testing and re-testing this white cake recipe, refining every detail to ensure perfection. I am thrilled to share all of our discoveries and expert tips in this post, empowering you to confidently bake a flawlessly elegant cake right in your own kitchen.
Mastering the Reverse Creaming Method for Superior Cakes
The reverse creaming method is a sophisticated yet simple mixing technique that revolutionizes cake baking, leading to an incredibly tender and fine-crumbed result. Unlike traditional creaming where butter and sugar are beaten first, this method begins by combining the fat (usually softened butter) with the dry ingredients before any liquids are introduced.
The science behind its effectiveness is fascinating: when the butter first coats the flour particles, it forms a protective barrier around them. This coating significantly reduces the amount of gluten development that occurs during mixing. Less gluten means a much more tender cake that won’t become tough or chewy, even if you mix the batter a little longer than usual. This makes it a forgiving method for bakers of all skill levels, freeing you from the common worry of over-mixing.
Furthermore, this mixing approach ensures an exceptionally even distribution of fat throughout the batter. This uniform emulsification is key to achieving a consistently moist texture and that desirable, perfectly even crumb structure that defines a truly premium cake. It’s the secret weapon for a cake that is both tender and sturdy enough for elaborate designs.
Essential Ingredient Notes for Your Perfect White Cake
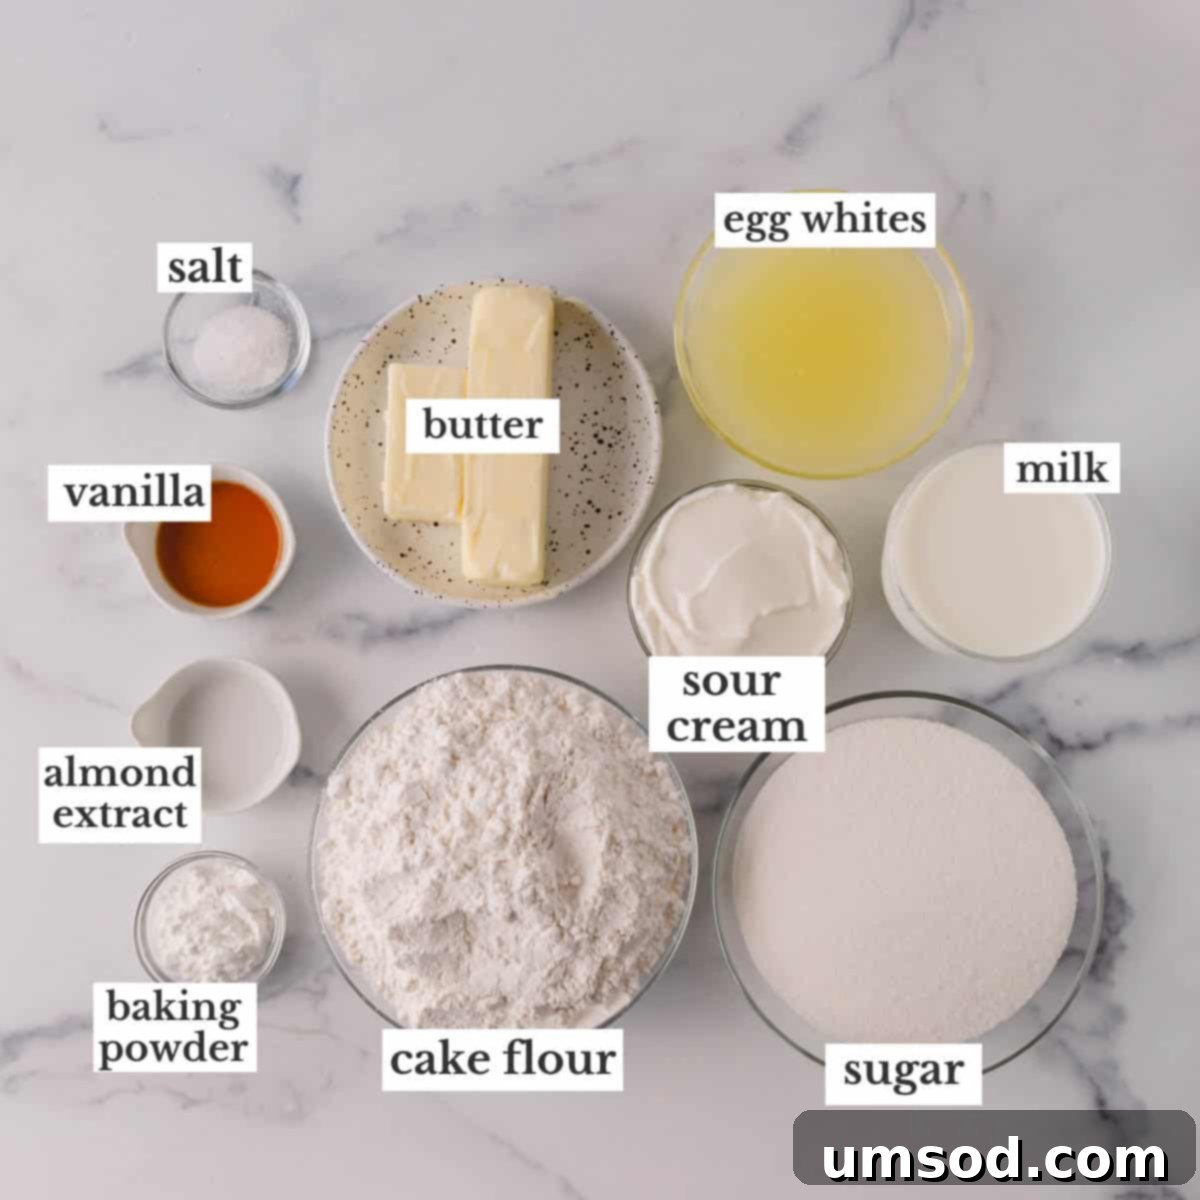
The quality and preparation of your ingredients are paramount to achieving the stunning results of this classic white cake. For optimal success, remember to let your milk, sour cream, and egg whites reach room temperature for approximately 30 minutes before you begin baking. This seemingly small step significantly impacts the batter’s consistency and the cake’s final texture.
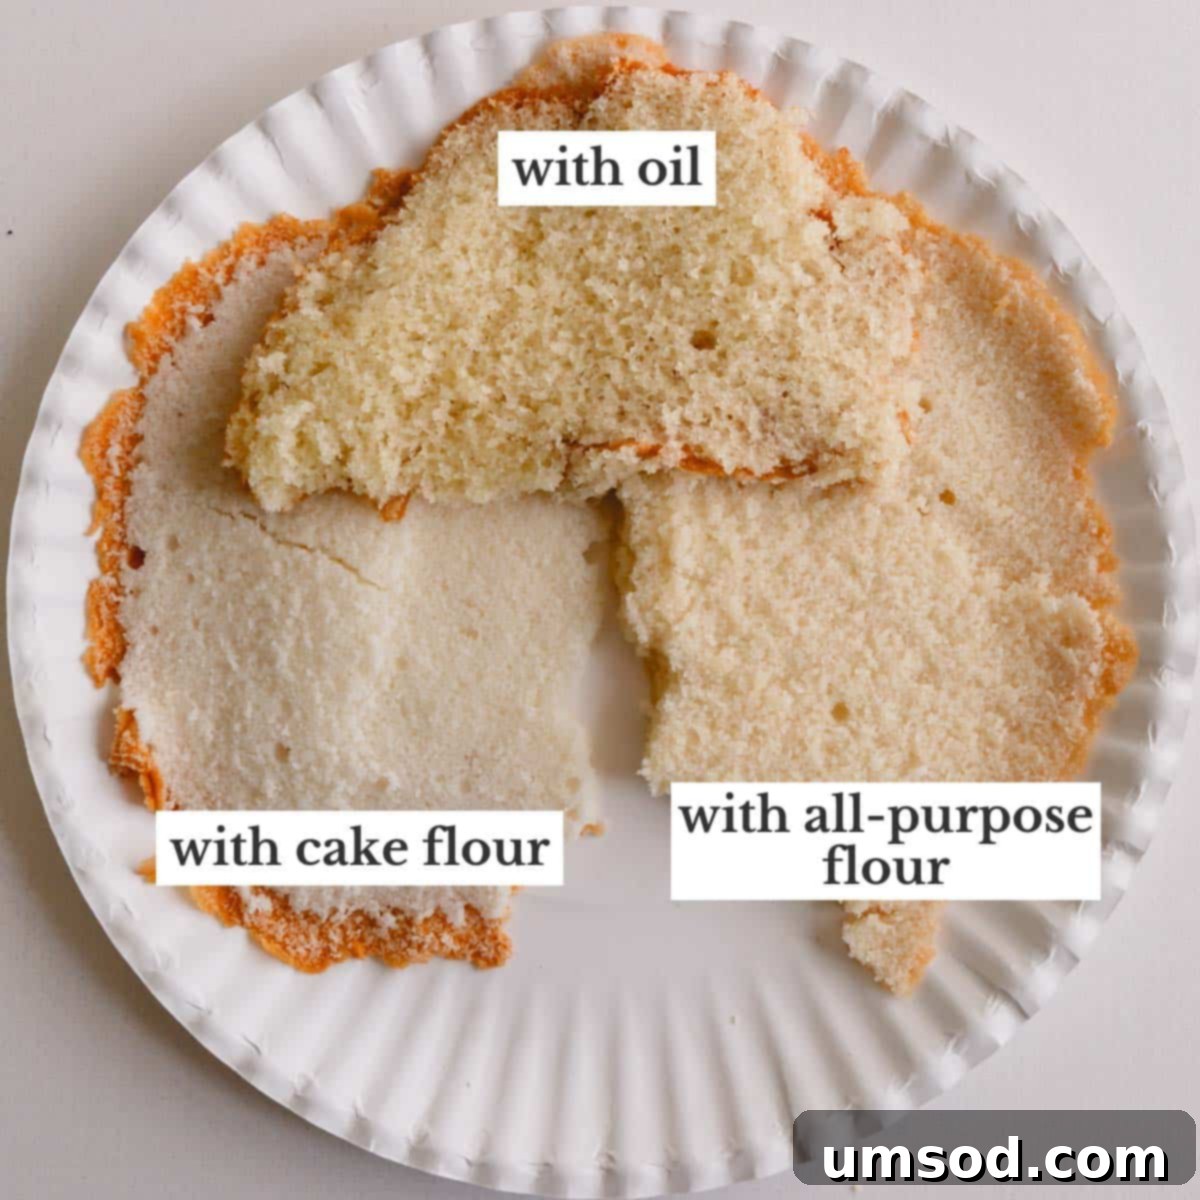
- Cake Flour: This is a non-negotiable ingredient for truly spectacular results! Cake flour, with its lower protein content, is the secret weapon for producing an incredibly tender cake with a fine crumb and that signature pristine white look. Attempting to substitute with all-purpose flour will lead to a noticeably coarser texture and a yellowish tint, diminishing the cake’s elegance.
- Sour Cream: Through extensive testing, we’ve found sour cream to be the ultimate ingredient for achieving the perfect texture in this cake. It lends an unparalleled moisture and contributes to those desirable tight, even crumbs. While buttermilk can result in a slightly crumbly cake and vegetable oil can make it heavy and oily, sour cream strikes the perfect balance for richness and tenderness.
- Milk: Crucial for adding essential moisture to the cake batter, ensuring a soft and pliable crumb. For the richest flavor and best results, we highly recommend using whole milk. Its fat content contributes to both texture and taste.
- Unsalted Butter: Using unsalted butter allows you to precisely control the salt content in your baked goods, which is vital for balanced flavor. Different brands of salted butter contain varying amounts of salt, making it harder to predict the outcome. If you must use salted butter, remember to omit the added salt from the recipe. Ensure it’s properly softened for the reverse creaming method.
- Egg Whites: The star ingredient for a truly white cake! Egg whites provide structure and lift without imparting any yellow color, which is essential for that pure white appearance. For convenience, you can easily substitute the 6 large egg whites with ¾ cup of carton egg whites.
- Pure Vanilla Extract: Essential for infusing the cake with a warm, inviting vanilla flavor. Although vanilla extract has a natural yellowish hue, rest assured it will not affect the final pristine white color of your cake. Opt for a high-quality pure extract for the best aroma and taste.
- Almond Extract (Optional, but Recommended): This is an optional addition, but one we strongly recommend if you have it. Just a hint of almond extract beautifully complements the vanilla, adding a subtle nutty depth without overpowering the delicate flavor profile of the cake. It elevates the overall taste experience.
- Baking Powder: As a leavening agent, baking powder is vital for helping the cake rise, contributing to its wonderfully light and fluffy texture. Always check that your baking powder is fresh; expired leavening agents will not perform effectively, potentially leading to a dense cake.
Pro Tip: How to Soften Butter Quickly and Perfectly
The ideal way to soften butter is to simply let it sit at room temperature for about 2 hours, allowing it to become pliable without melting. However, if time is not on your side, here’s a clever trick to achieve perfectly softened butter in minutes:
- Fill a tall glass with very hot water and let it sit for a few minutes to heat thoroughly.
- Carefully pour out the hot water, then immediately invert the now warm glass over your stick of butter on a plate.
- Allow it to sit for approximately 5 minutes. When you remove the glass, you’ll have perfectly soft butter that’s ready to be incorporated into your recipe!
DIY Cake Flour: Your Homemade Alternative for a Tender Crumb
While I always advocate for using store-bought cake flour for its consistent results in this recipe, it’s understandable that sometimes you might find yourself in a pinch without it. In such cases, you can easily create a workable homemade substitute from ingredients you likely already have in your pantry. This DIY version will still yield a cake with a noticeably finer and more tender crumb than using plain all-purpose flour alone.
For 1 cup DYI Cake Flour: Measure 1 cup (125g) of bleached all-purpose flour. Then, remove 2 tablespoons (15g) of that flour and replace it with 2 tablespoons (16g) of cornstarch. Whisk these two ingredients thoroughly to ensure they are fully combined. This mixture mimics the lower protein content of commercial cake flour.
For that coveted pristine white cake appearance, it is particularly important to use bleached all-purpose flour for your DIY version. Unbleached flour can impart a slight off-white or yellowish hue to your final product.
Step-by-Step Guide: How to Bake This Classic White Cake
Embark on your baking journey by preparing your equipment and ingredients. Before you even begin mixing, make sure to preheat your oven accurately to 350°F (175°C). This ensures a consistent baking temperature from the moment your cake enters the oven. Next, meticulously prepare two 8-inch round cake pans: line the bottom of each with a circle of parchment paper, and then thoroughly spray the pans with cooking spray. This crucial step guarantees that your perfectly baked cake layers will release effortlessly, preventing any sticking or tearing.
1. Crafting the Perfect White Cake Batter
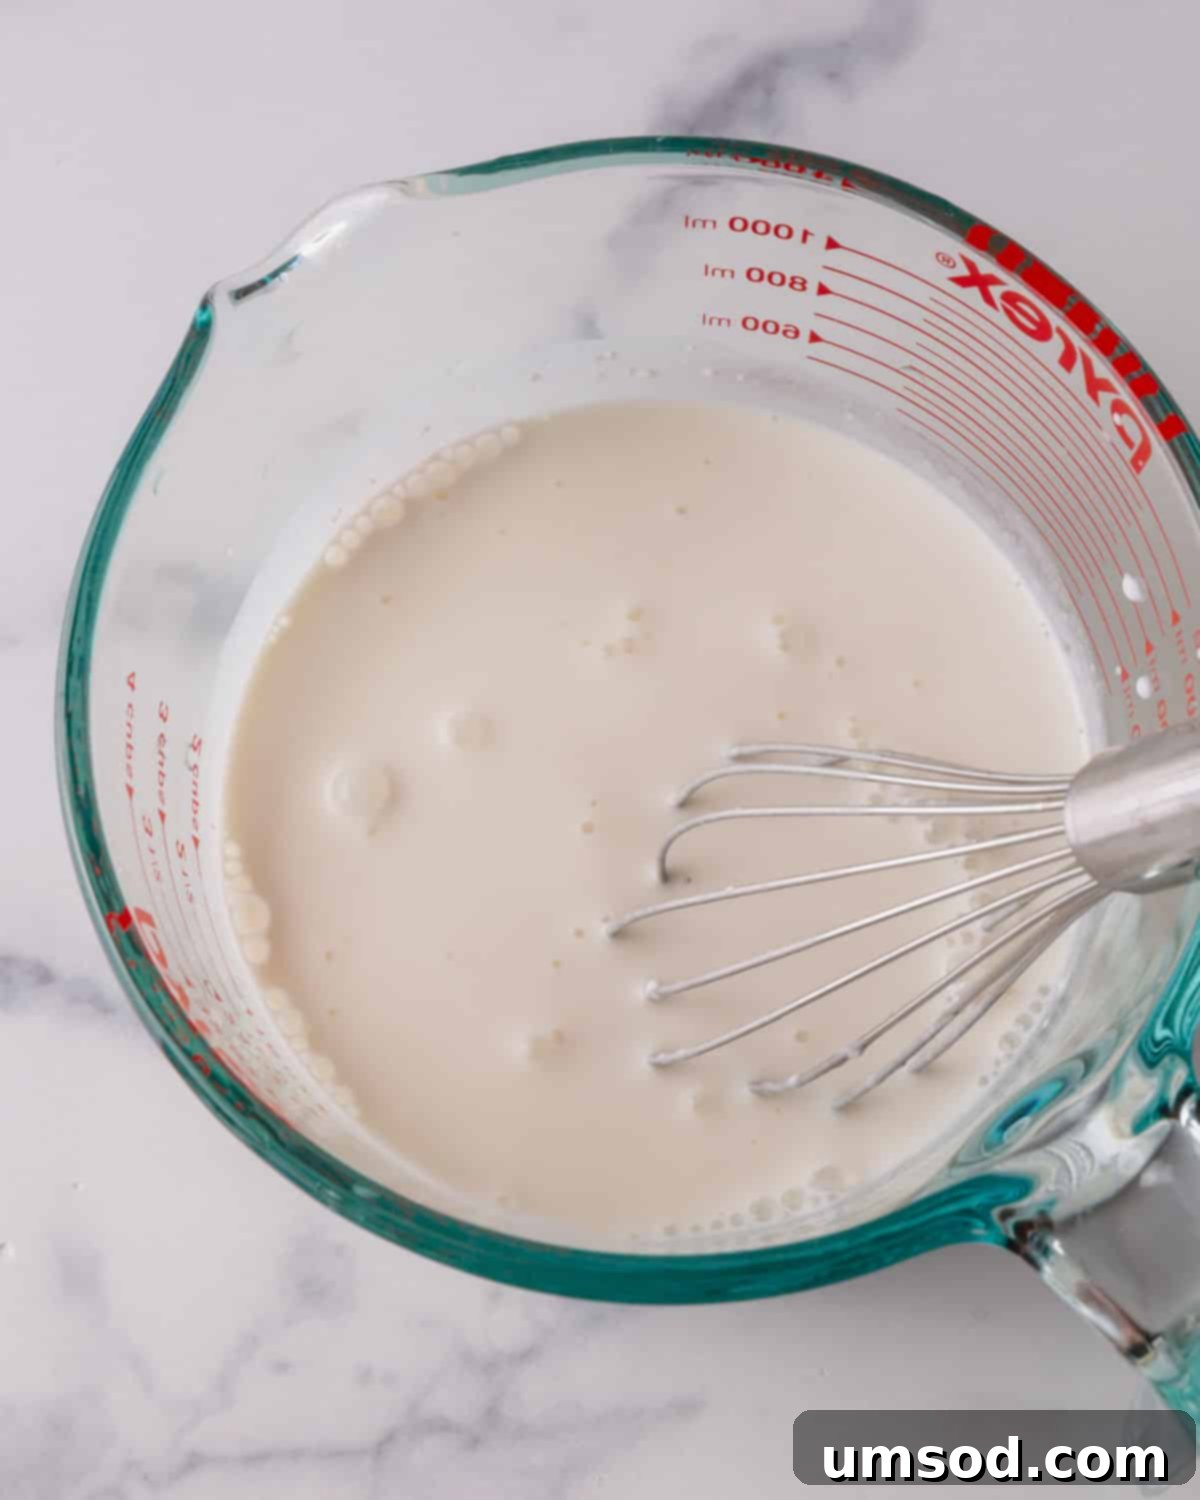
- Combine Wet Ingredients: In a medium-sized mixing bowl, gently whisk together your room-temperature milk, sour cream, pure vanilla extract, and the optional (but highly recommended) almond extract. Set this mixture aside. These liquids will hydrate your dry ingredients, contributing to the cake’s tender crumb.
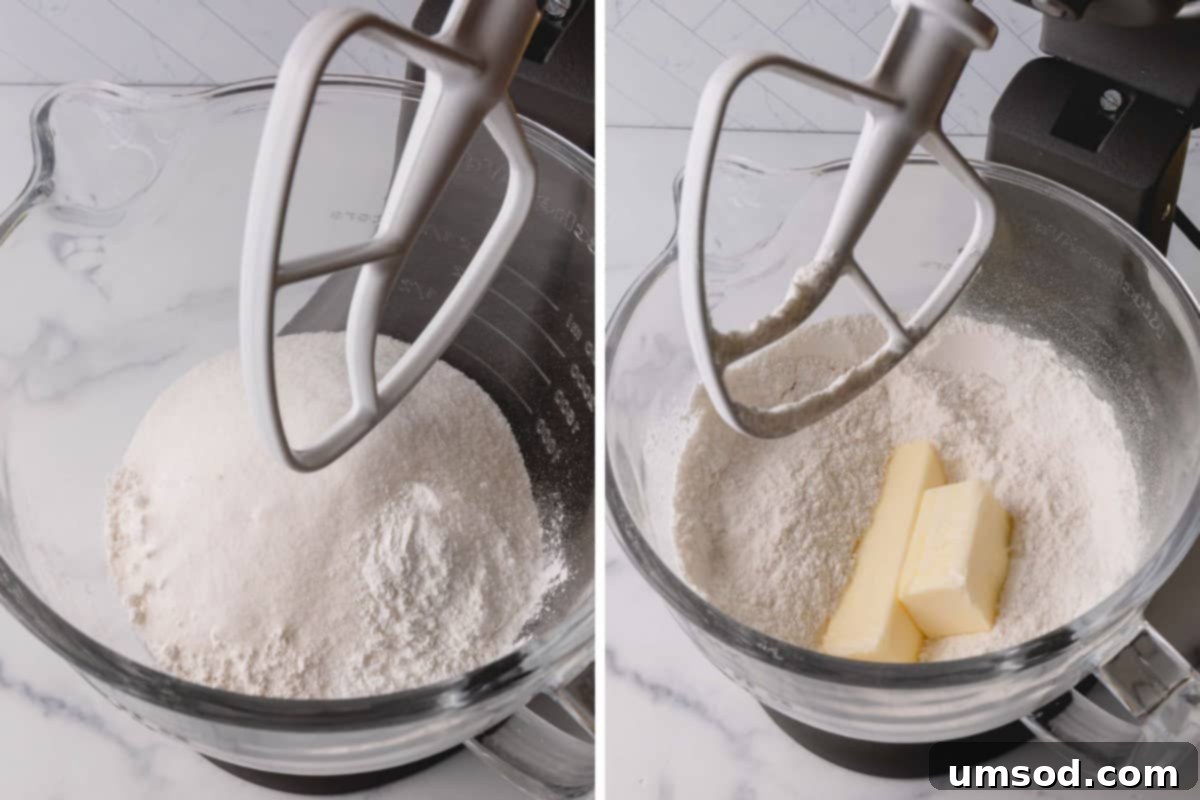
- Mix Dry Ingredients: In the bowl of an electric mixer fitted with a paddle attachment, combine the cake flour, granulated sugar, baking powder, and coarse kosher salt. Mix these dry ingredients on low speed until they are thoroughly combined and uniform.
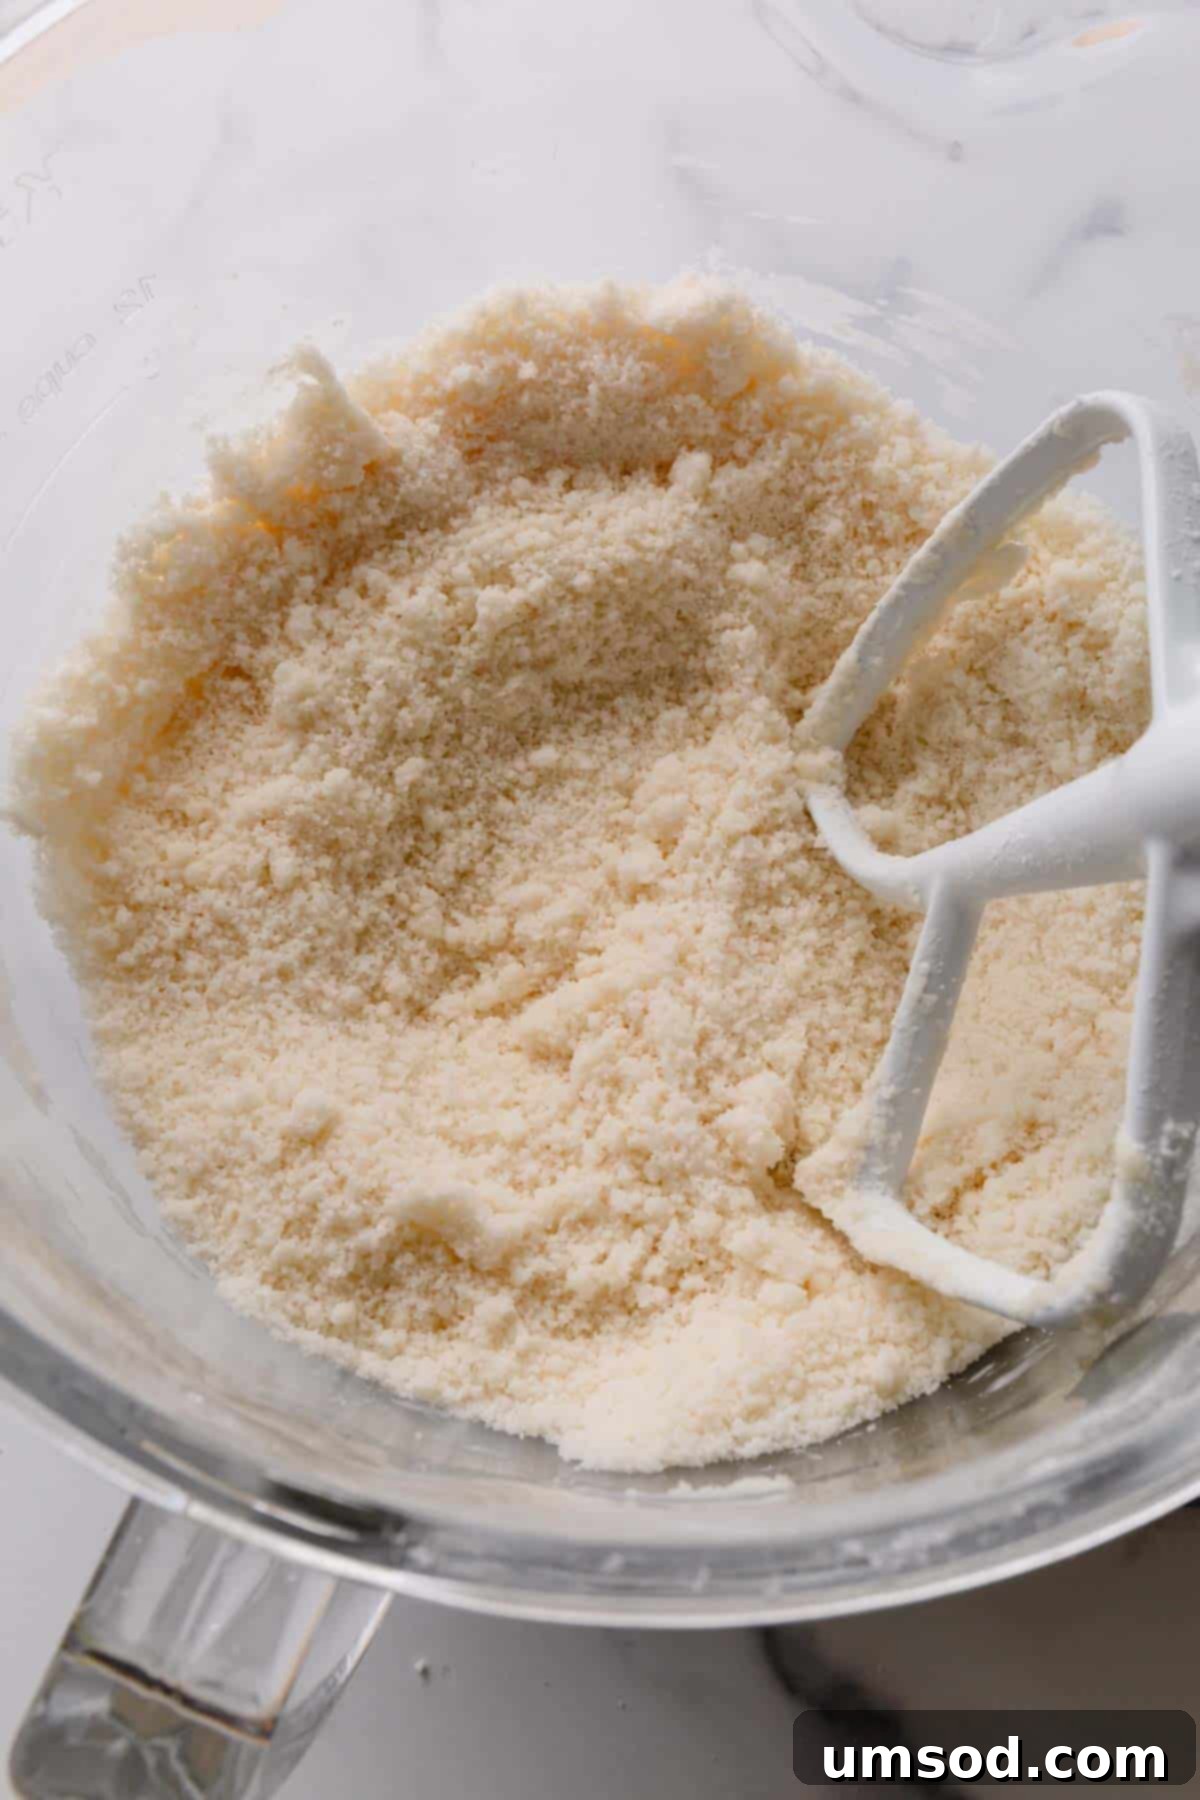
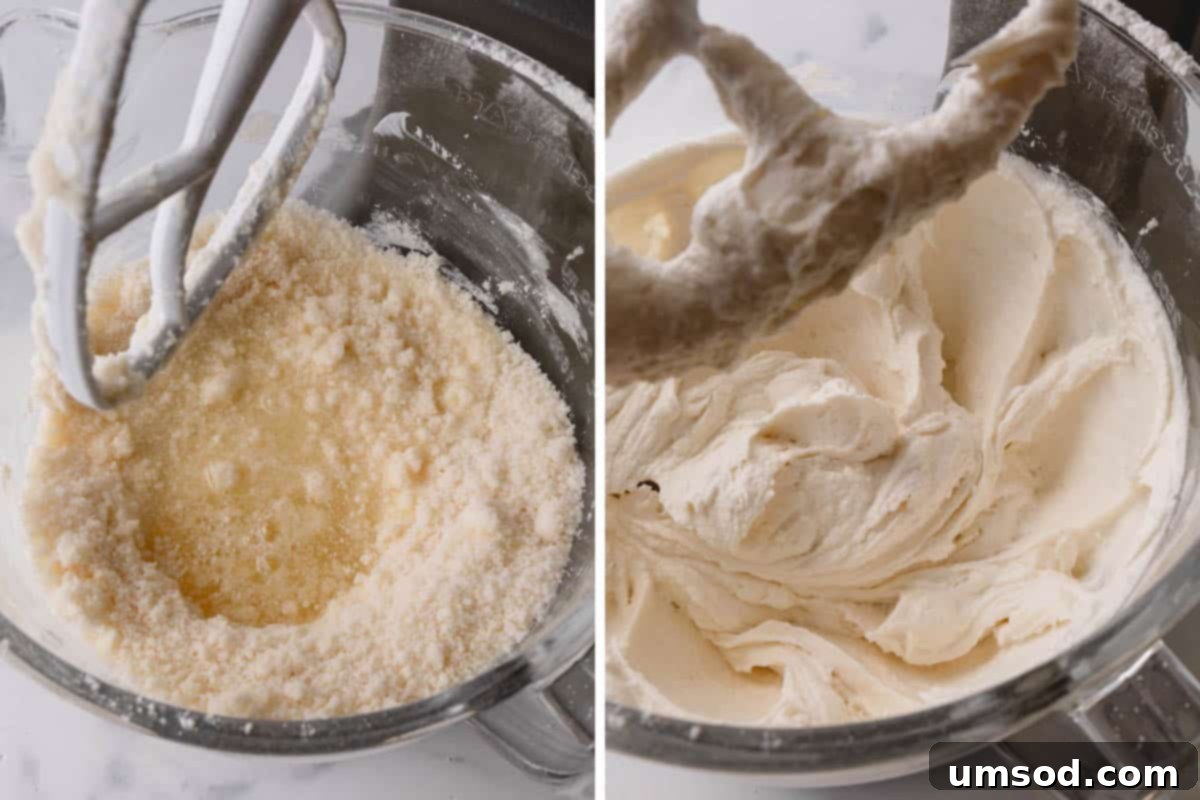
- Incorporate Butter (Reverse Creaming): Add the softened unsalted butter directly to the dry flour mixture. Continue to mix on low speed. The goal here is to evenly coat the flour particles with fat, preventing excessive gluten development. Mix until all the dry ingredients are fully moistened and the mixture resembles wet sand. There should be no visible chunks of butter.
Observe the mixture closely at this stage; it should have the consistency of wet sand, indicating that the butter has properly coated the flour, a key step in the reverse creaming method.
- Add Egg Whites: With the mixer on medium speed, gradually add the room-temperature egg whites to the butter and flour mixture. Continue to mix for about 1 minute, or until the egg whites are fully incorporated and the batter starts to become smooth.
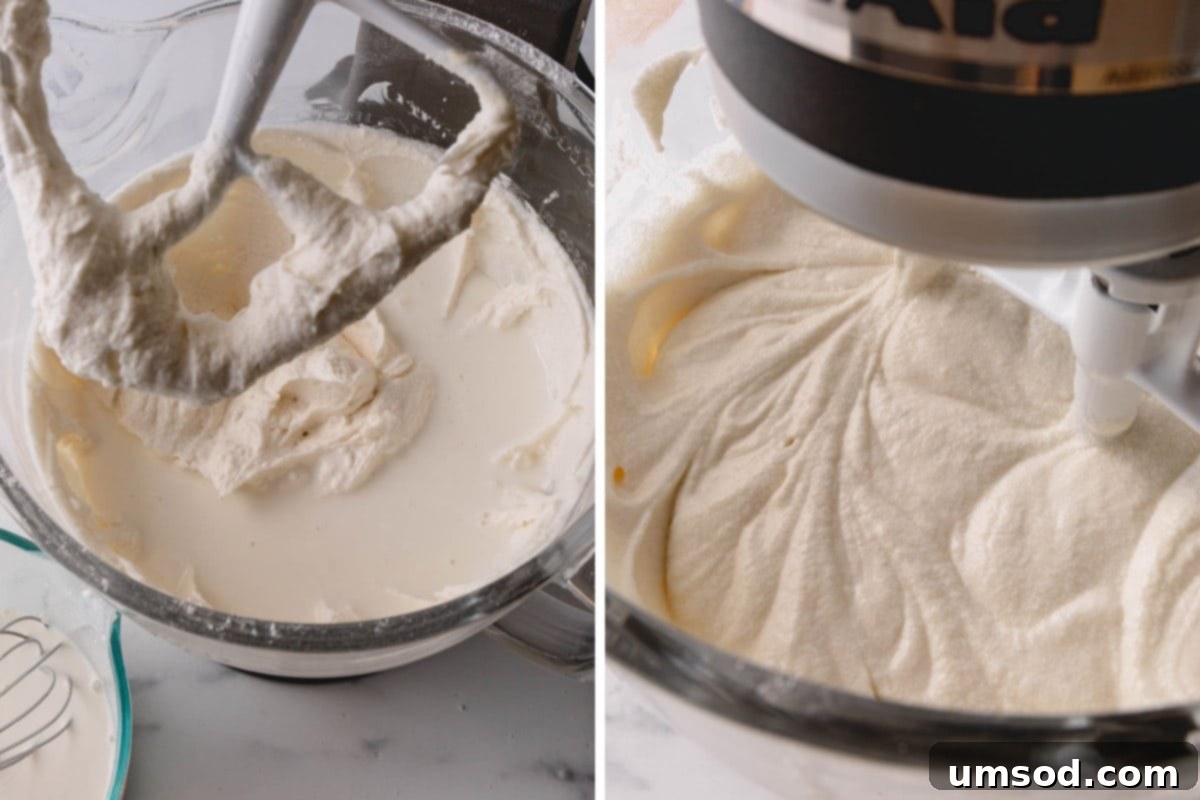
- Introduce Liquid Mixture (First Half): Pour half of the prepared milk mixture into the electric mixing bowl. Beat on medium speed for a precise 1 ½ minutes. This step hydrates the flour further and begins to build the batter’s emulsion.
- Add Remaining Liquid & Finish Mixing: Pour in the remaining milk mixture and continue to beat for another minute. Crucially, halfway through this final mixing step, pause to scrape down the sides and bottom of the bowl with a rubber spatula. This ensures all ingredients are thoroughly incorporated, leading to a uniformly textured batter and a consistent cake.
2. Baking and Cooling Your White Cake Layers
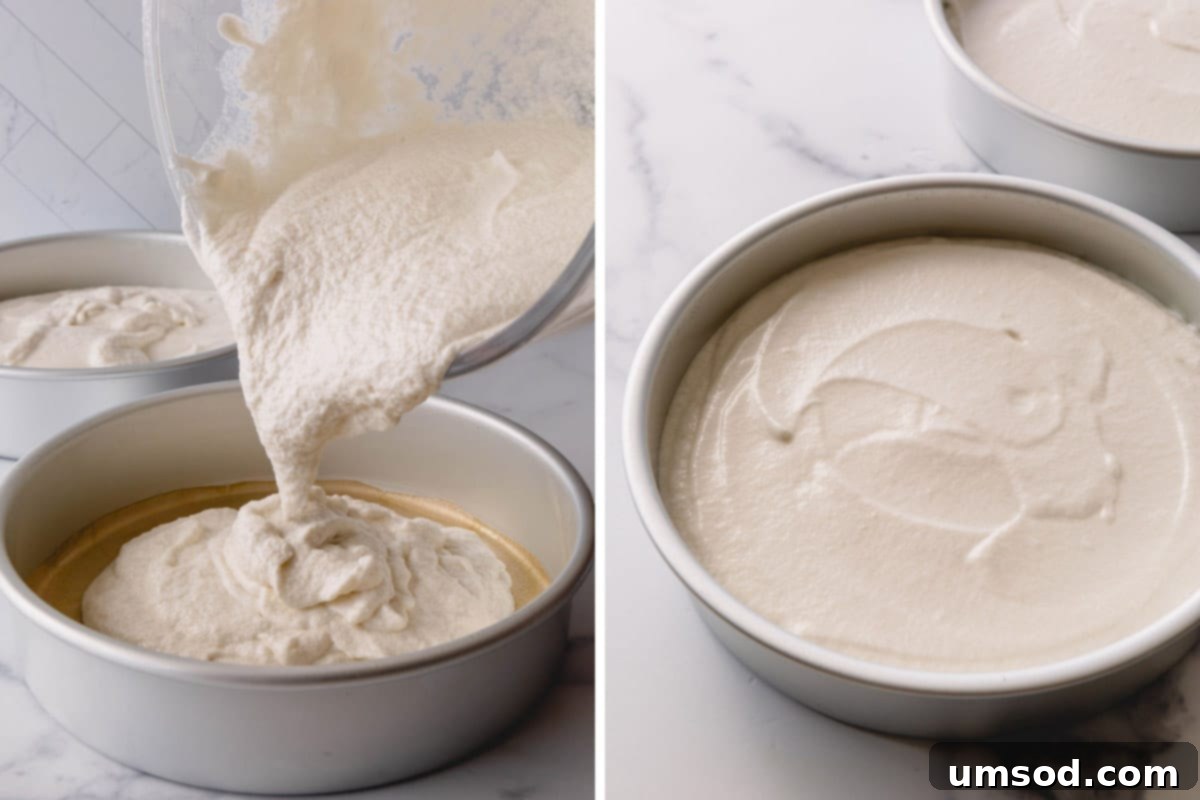
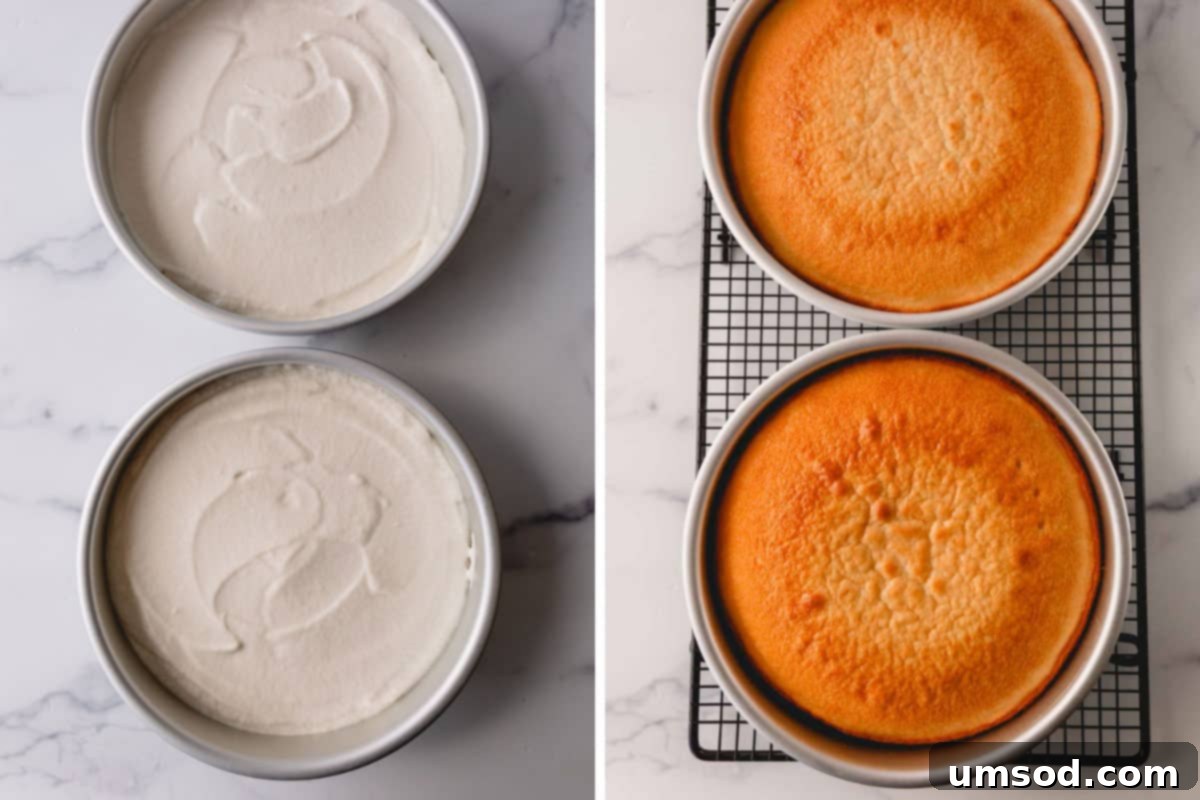
- Fill and Bake: Carefully transfer the prepared batter into the parchment-lined baking pans, dividing it as evenly as possible between the two pans. Smooth the tops gently with an offset spatula. Bake for 23-28 minutes, or until the cakes are lightly golden brown around the edges and a toothpick inserted into the center comes out clean. Be vigilant not to over-bake!
Expert Tip: Achieving Perfectly Even Cake Layers
For bakery-worthy, perfectly even cake layers, consider weighing the batter when dividing it between the cake pans. This simple technique ensures each layer bakes uniformly, creating a level foundation for easy assembly and a professional finish.
- Cooling Process: Once baked, allow the cakes to rest in their pans for exactly 3 minutes. This crucial resting period helps the cakes firm up slightly before handling. Then, gently loosen the edges with a thin knife or offset spatula, and carefully invert the cakes onto a wire rack to cool completely. Ensuring they are fully cool is vital before frosting.
3. Frosting and Assembling Your Masterpiece
- Trim for Pristine White: For a flawlessly white cake with no visible golden edges, use a sharp serrated knife to carefully trim off the golden-brown exterior from all sides, including the top and bottom. This step reveals the pure white crumb within and makes for a stunning presentation.
- Layer and Frost: Place your first trimmed cake layer onto your serving plate or cake stand. Spread an even, generous layer of frosting over the top, using approximately one-third of your total frosting. This ensures a balanced cake-to-frosting ratio.
- Stack and Decorate: Carefully place the second cake layer directly on top of the frosted first layer. Now, use the remaining frosting to evenly cover the entire cake – sides and top. Don’t be afraid to get creative here!
- Serve and Enjoy: Once frosted, add any additional decorations desired, such as sprinkles, fresh berries, or elegant piping. Slice into even servings, and delight in the beauty and taste of your homemade classic white cake!
Essential Tip for Easy Frosting and Assembly
To ensure a smooth, effortless frosting experience, it is absolutely crucial that your cake layers are completely cooled or even chilled in the refrigerator. Cool cakes are significantly sturdier and much easier to handle without crumbling or tearing. In fact, many professional bakers, myself included, prefer to bake cake layers 1-2 days in advance, allowing them to chill thoroughly. And always remember this golden rule: never, ever frost a warm cake! The heat will cause your beautiful frosting to melt right off, leading to a messy and frustrating outcome.
Top Tips for Baking a Flawless White Cake Every Time
Achieving bakery-quality results at home is entirely possible with these essential tips:
- Accurate Flour Measurement is Key: For consistent and tender results, always use the spoon and level method to measure your flour. This technique prevents over-packing the flour into your measuring cup, which can lead to a dense cake. For even greater precision, consider weighing your flour with a digital kitchen scale – it’s the most accurate method.
- Avoid the Dreaded Dry Cake: The most common mistake in cake baking is over-baking. Over-baking will inevitably result in a dry, crumbly cake, even with the best ingredients. Start checking for doneness a few minutes before the recipe’s minimum bake time. Insert a toothpick into the very center of the cake; if it comes out clean with no wet batter attached, your cake is ready.
- For that Pristine White Presentation: If you desire a perfectly pure white cake without any golden edges showing, take a moment to trim off the lightly browned top, bottom, and side edges with a sharp serrated knife before applying any frosting. This reveals the beautiful white crumb beneath.
- Never Frost a Warm Cake: This cannot be stressed enough! Attempting to frost a cake that is still warm to the touch will cause your frosting to melt and slide right off, creating a sticky, messy situation. Always allow your cake layers to cool completely to room temperature, or even chill them in the refrigerator, before beginning to frost.
- Stick to 8-inch Round Cake Pans: This recipe is specifically developed for two 8-inch round cake pans. Using smaller pans will result in thicker cake layers, which will require a significant increase in baking time and may affect the overall texture. If you must use different sized pans, adjust your baking time accordingly and monitor closely.
Smart Make-Ahead Tips for Stress-Free Baking
Baking cakes in advance is a fantastic way to streamline your process, especially when preparing for a big event. Not only does it reduce day-of stress, but chilled cake layers are also significantly easier to handle, stack, and frost without worrying about crumbling. Here’s how to perfectly prepare your cake layers ahead of time:
- Ensure Complete Cooling: After baking, allow your cake layers to cool completely on a wire rack. This is crucial for preventing condensation that can lead to sogginess once wrapped.
- Wrap Tightly: Once thoroughly cooled, individually wrap each cake layer tightly in plastic wrap. For extra protection against freezer burn, you can add a second layer of plastic wrap or aluminum foil.
- Storage Options:
- Room Temperature: Store your tightly wrapped unfrosted cake layers at room temperature for up to 1 day.
- Freezer: For longer storage, freeze the wrapped cake layers for up to 1 month. When ready to use, thaw them in the refrigerator overnight or at room temperature for a few hours before unwrapping and frosting.
Optimal Storing Tips for Your Frosted White Cake
Proper storage is key to maintaining the freshness and deliciousness of your frosted white cake. Follow these guidelines to enjoy your masterpiece for days to come:
- Room Temperature vs. Refrigerated:
- Countertop: A frosted cake can be stored on the counter at room temperature for 1-2 days, especially if your kitchen is cool.
- Refrigerator: For extended freshness, or if your kitchen is warm, refrigerate your frosted cake for up to 5 days.
To protect the cake from drying out and absorbing odors, cover it with an airtight cake container or loosely wrap it in aluminum foil.
- Freezing Frosted Cakes: Yes, frosted cakes freeze beautifully! This is an excellent option for saving leftovers or preparing a cake well in advance.
- Preparation: Wrap the entire frosted cake (or individual slices) tightly first in plastic wrap, ensuring no air gaps. Follow this with a layer of heavy-duty aluminum foil for double protection.
- Freezing Time: Freeze for up to 3 months.
- Thawing: When ready to enjoy, transfer the wrapped cake to the refrigerator and allow it to thaw slowly overnight. This gradual thawing helps prevent condensation and maintains the cake’s texture.
White Cake FAQs: Your Questions Answered
The primary difference lies in their complexity. A white forest cake, much like its darker counterpart, a black forest cake, is a multi-component dessert typically made with layers of vanilla cake, a rich cherry sauce, and a luscious white chocolate ganache, often topped with whipped cream and chocolate shavings. Vanilla and white cakes, on the other hand, are simpler celebrations of the cake itself, generally consisting only of cake layers and a complementary frosting, allowing the pure cake flavor to shine.
White cake offers a delicate and subtly sweet flavor, predominantly featuring a mild vanilla essence. Due to the exclusive use of egg whites and the absence of rich egg yolks, it is generally less rich and dense than a traditional vanilla cake, providing a clean, bright taste that is wonderfully refreshing and serves as a perfect canvas for various frostings and fillings.
For this classic white cake, my absolute favorite is vanilla Swiss meringue buttercream. Its velvety smooth texture and balanced sweetness perfectly enhance the delicate flavor of the cake without overpowering it. However, the versatility of white cake means it pairs beautifully with many options! For a fruity twist, consider strawberry Swiss buttercream, or for a richer indulgence, chocolate Swiss buttercream would also be divine choices.
Explore More Delicious Cake Recipes
If you’ve enjoyed baking this classic white cake, you’ll love exploring these other fantastic cake creations from our kitchen:
- The Best Simple Chocolate Cake
- Zesty Lemon Layer Cake with Lemon Curd
- Super Tall Red Velvet Layer Cake
- Luscious Raspberry Layer Cake with Cream Cheese Frosting
Classic White Cake Recipe
Pin Recipe
Comment
Print Recipe
Ingredients
- 1 cup (240 ml) whole milk at room temperature
- ½ cup (120 g) sour cream at room temperature
- 2 teaspoons pure vanilla extract
- 1 teaspoon almond extract optional, but recommended
- 2 ½ cups (310 g) cake flour Note 1, or DIY cake flour
- 1 ½ cups (300 g) granulated sugar
- 4 teaspoons baking powder
- 1 teaspoon coarse kosher salt
- 12 tablespoons (170 g) (1 ½ sticks) unsalted butter softened, at room temperature
- 6 (210 g) large egg whites at room temperature, Note 2
For the Frosting:
- 1 ½ batches Vanilla Swiss Meringue Buttercream
Equipment You’ll Need
- 2 8-inch (21 cm) round cake pans
- 1 Stand mixer fitted with a paddle attachment (or a large mixing bowl and electric hand mixer)
- 1 Sharp serrated knife
- Parchment paper
- Wire rack
Detailed Instructions
- Begin by preheating your oven to 350°F (175°C) to ensure it reaches the correct temperature before baking.
- Prepare your cake pans by lining the bottom of two 8-inch round cake pans with parchment paper circles. Then, generously spray the pans with cooking spray to ensure the cakes do not stick.
- In a medium bowl, whisk together the milk, sour cream, vanilla extract, and almond extract until well combined. Set this wet mixture aside.
- In the bowl of a stand mixer fitted with a paddle attachment (or using a large bowl with a hand mixer), combine the cake flour, granulated sugar, baking powder, and coarse kosher salt. Mix these dry ingredients on low speed until they are just uniformly combined.
- Add the softened unsalted butter to the dry flour mixture. Continue to mix on low speed until there are no dry spots left and the mixture resembles wet sand, with all the flour coated in butter.
- Increase the mixer speed to medium and add the room-temperature egg whites to the butter and flour mixture. Mix until everything is well combined and the batter is smooth, approximately 1 minute.
- Pour in half of the reserved milk mixture into the mixing bowl. Beat on medium speed for 1 ½ minutes, allowing the liquids to fully emulsify with the batter.
- Next, add the remaining milk mixture and continue to beat for another minute. During this final mixing stage, be sure to scrape down the sides and bottom of the bowl thoroughly with a rubber spatula halfway through to ensure all ingredients are perfectly incorporated.
- Divide the batter evenly between the two prepared cake pans (weighing for even layers is recommended!). Smooth the tops gently. Bake for 23-28 minutes, or until the cakes are lightly golden around the edges and a toothpick inserted into the center comes out clean.
- Allow the cakes to rest in their pans for 3 minutes before unmolding. If needed, gently loosen the edges with a knife. Invert the cakes onto a wire rack to cool completely. (At this stage, cooled cake layers can be wrapped tightly and stored at room temperature for up to 1 day, or frozen for up to 1 month.)
To Assemble and Frost Your Cake:
- For a flawlessly white appearance, use a sharp serrated knife to carefully trim off any golden-brown edges from the sides, top, and bottom of each cake layer. (PRO TIP: Cake layers are significantly easier to handle and trim once they are completely cooled and/or chilled in the fridge.)
- Place one trimmed cake layer on your serving platter. Spread about one-third of the prepared Vanilla Swiss Meringue Buttercream evenly over the top. Carefully place the second cake layer on top, then use the remaining frosting to cover the entire cake – both the top and sides.
- Once frosted, your beautiful cake can be stored for up to 5 days in the refrigerator. Allow it to come to room temperature for optimal flavor and texture before serving.
⭐️ Did you make this recipe?
Please leave a review and let us know how you liked it!
Important Tips & Notes
Note 2: Egg White Alternatives. If you prefer, you can use carton egg whites for convenience; approximately ¾ cup will be equivalent to 6 large egg whites.
Storing Your Beautiful Cake:
– Frosted Cake: Store your frosted cake on the counter at room temperature for 1-2 days, or extend its freshness by refrigerating it for up to 5 days. Always cover the cake with an airtight cake container, or loosely wrap it in foil to prevent it from drying out.
– Freezing Frosted Cakes: Frosted cakes freeze exceptionally well! For best results, wrap the cake tightly in plastic wrap, followed by an additional layer of aluminum foil. This dual protection helps prevent freezer burn. Freeze for up to 3 months, then thaw slowly in the refrigerator before serving.
Nutrition Information
This classic white cake recipe is more than just a dessert; it’s a celebration of simplicity and elegance. With its moist crumb, delicate flavor, and stunning appearance, it promises to be the highlight of any gathering. By following our detailed instructions and expert tips, you’re now equipped to bake a truly unforgettable cake that will be cherished by all who taste it. Happy baking!
