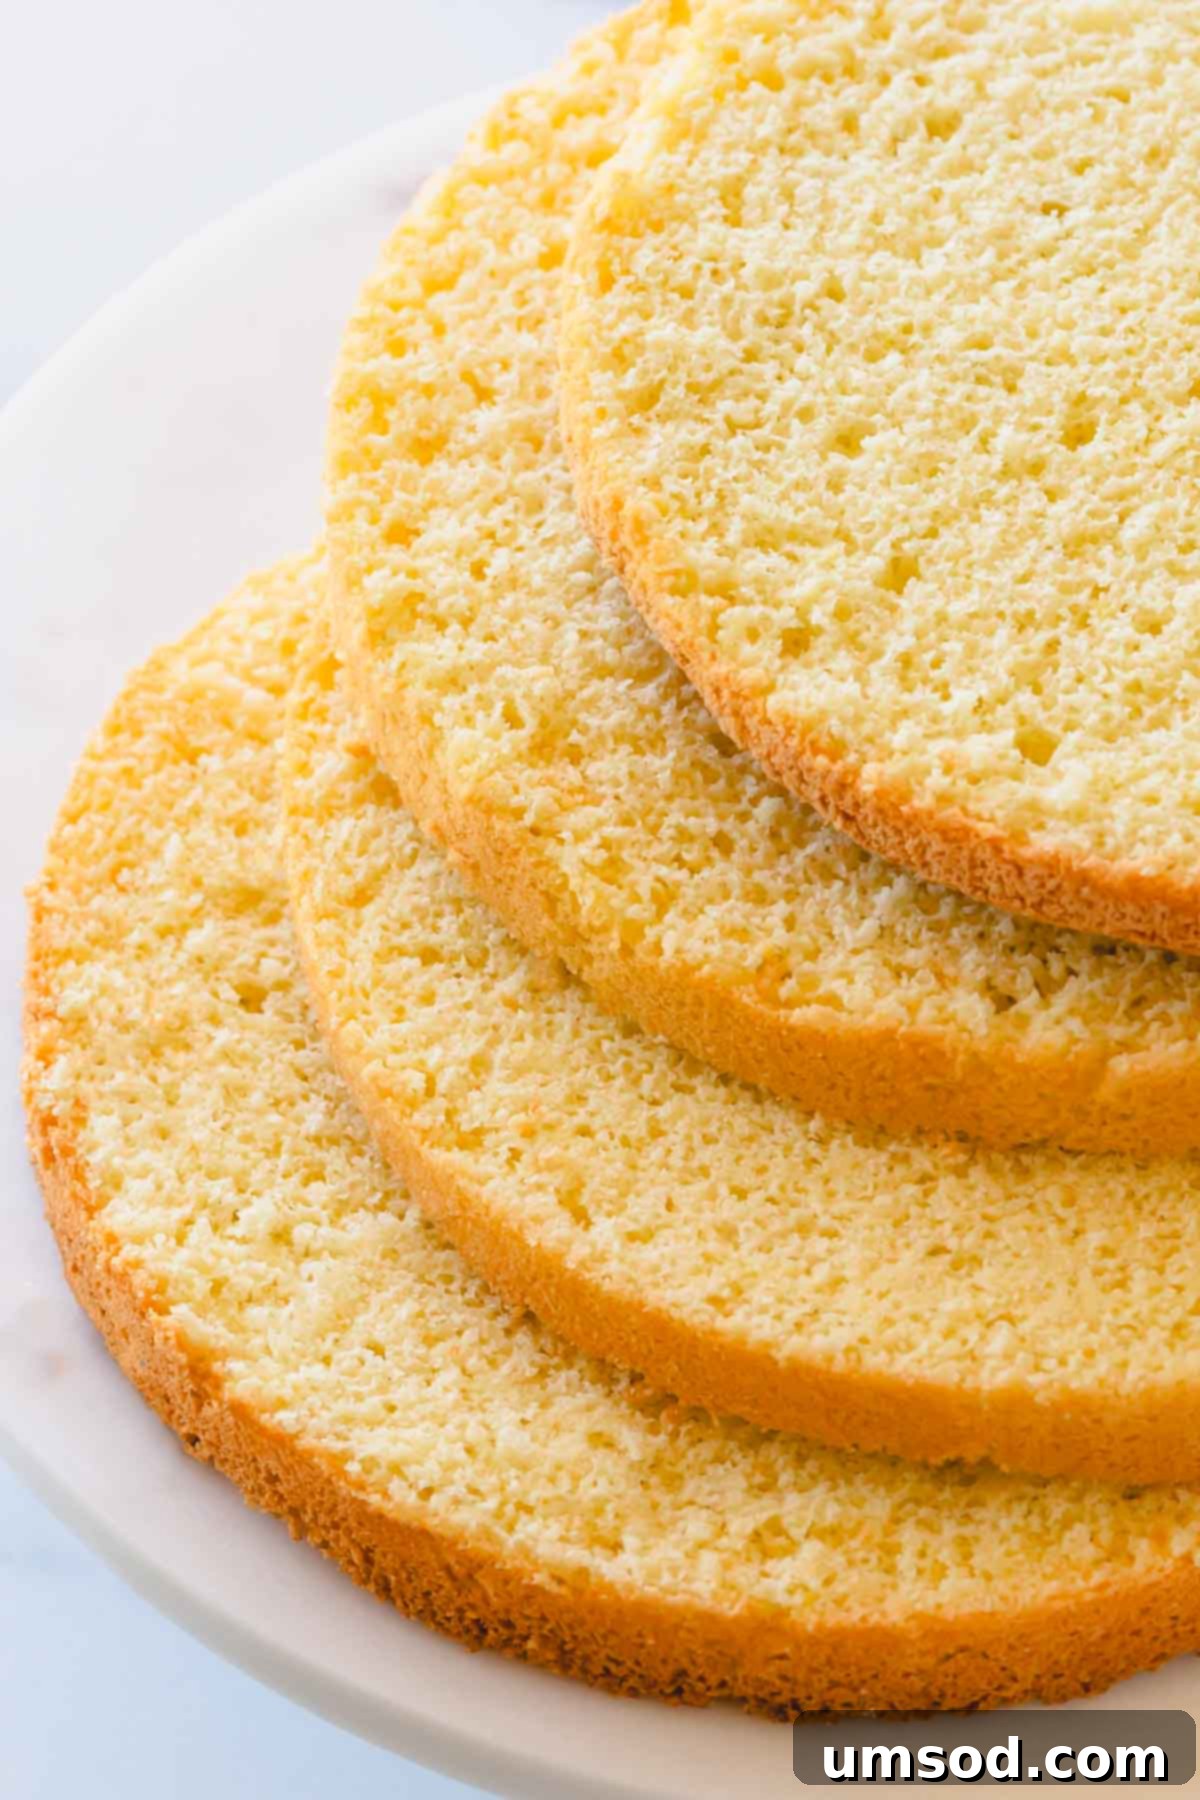
Discover the ultimate recipe for a classic sponge cake – a dessert renowned for its incredibly light, airy texture and remarkable versatility. Crafted with just three fundamental ingredients, this cake serves as a pristine canvas for an array of delightful toppings, from vibrant fruit sauces and rich liqueurs to simple syrups. Embark on a baking journey that simplifies elegance, guided by our comprehensive step-by-step instructions, essential expert tips, and inspiring photos, ensuring a perfect bake every time.
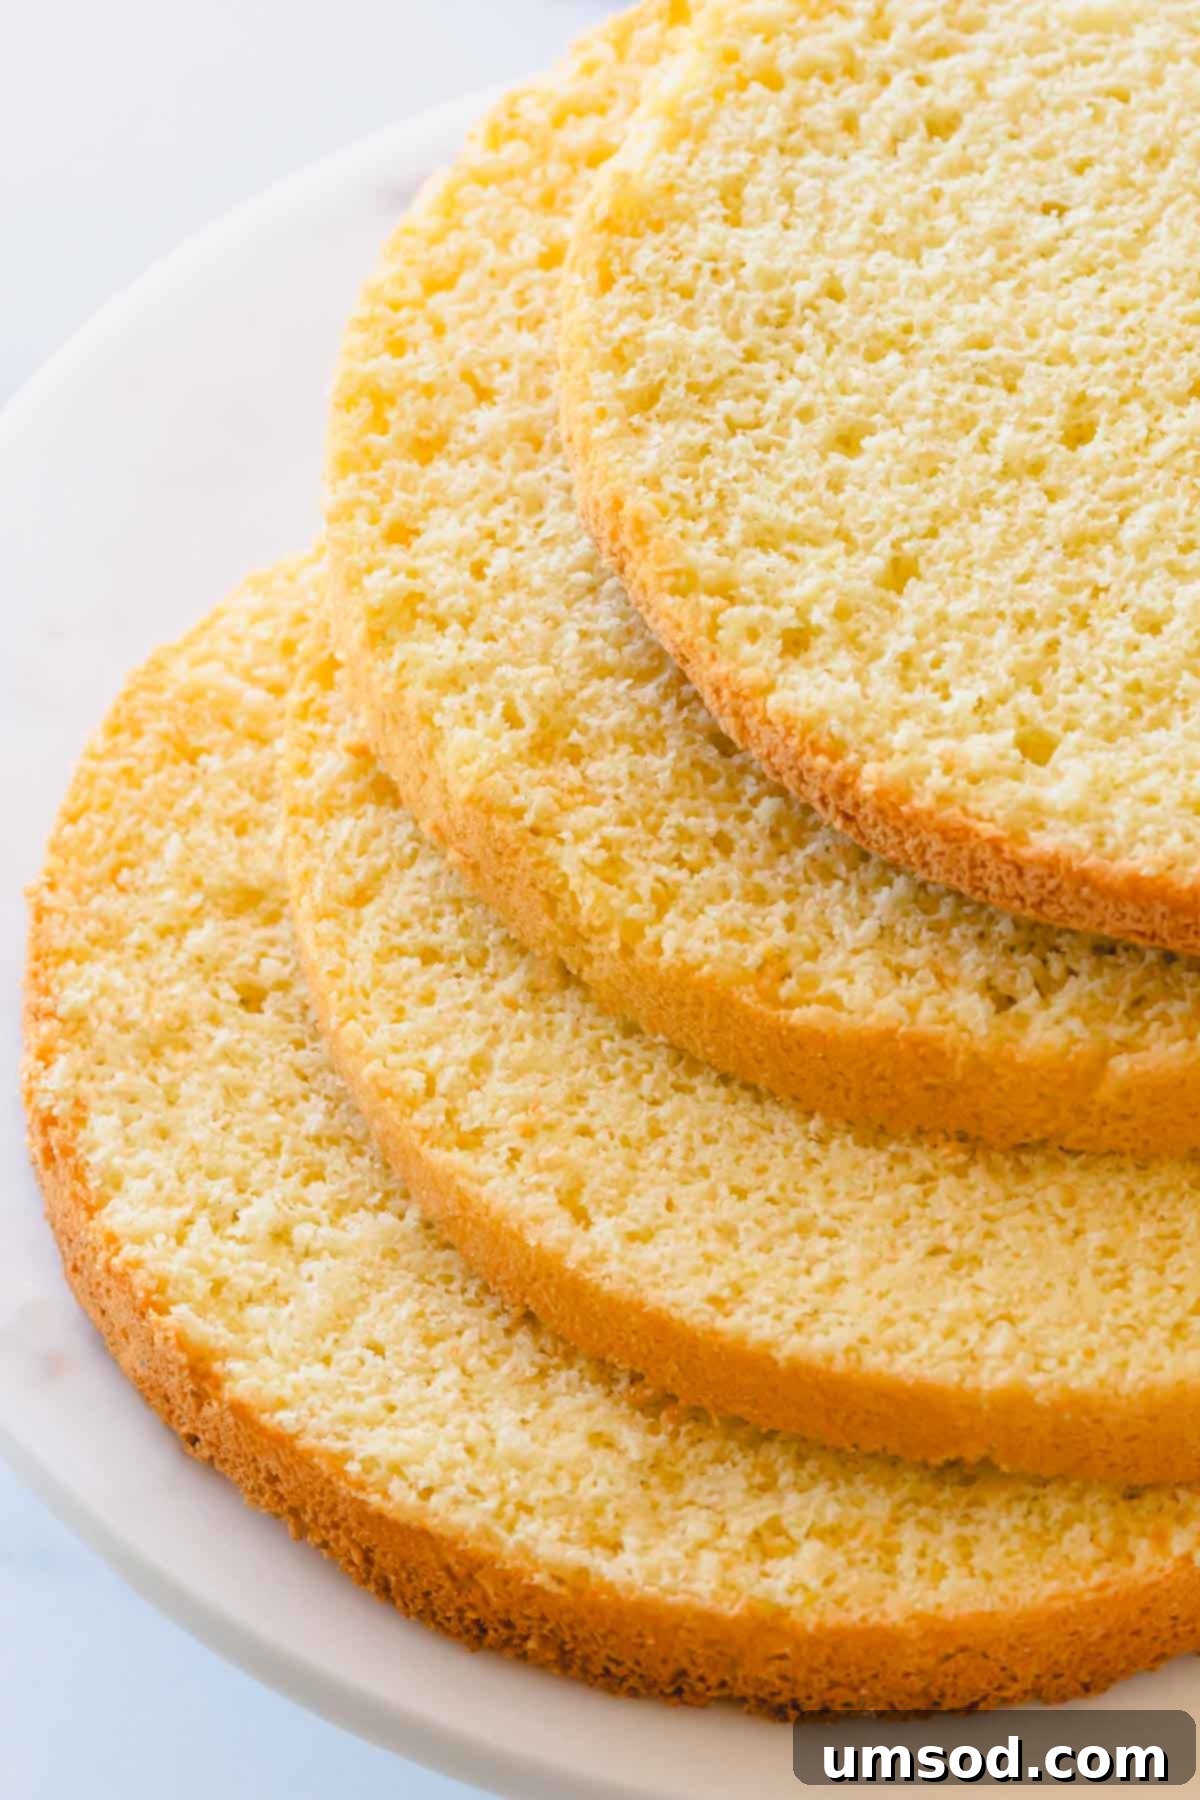
Pin this delicious recipe to your board!
Pin It for Later
Why This Easy 3-Ingredient Sponge Cake Will Be Your New Favorite
This remarkable classic sponge cake stands out with its impressive height, delicate fluffiness, and unparalleled lightness. Unlike many conventional cakes that rely on chemical leaveners like baking soda or baking powder, a true sponge cake achieves its airy, foam-like structure solely through the magic of meticulously whipped eggs. This method not only results in an exceptionally light texture but also contributes to its distinct character.
Furthermore, traditional sponge cakes, including this very recipe, are celebrated for being virtually fat-free. The absence of butter or oil in the batter means there’s nothing to weigh down its delicate structure, allowing it to rise beautifully and maintain its ethereal quality. This makes it a healthier alternative and a fantastic option for those seeking a lighter dessert.
- While sponge cake naturally tends to be on the drier side, this characteristic is actually a huge advantage! Its porous layers are perfectly designed to readily absorb and infuse with moisture and flavor from various syrups, fruit purees, and luscious sauces, creating a melt-in-your-mouth experience.
- This is truly a beginner-friendly and exceptionally easy recipe, requiring only three core ingredients: fresh eggs, granulated sugar, and fine cake flour. Its simplicity makes it accessible to bakers of all skill levels, delivering impressive results with minimal effort.
- This simple yet elegant sponge cake acts as an ideal foundation for countless layered dessert creations. Imagine it as the base for a vibrant tangy lemon layer cake with lemon curd, a tropical pineapple layer cake, or any other flavor profile you can dream up.
Beyond its deliciousness, sponge cakes are an excellent choice for make-ahead baking. They actually benefit from being baked at least a day in advance, as chilling makes them easier to handle and slice into perfect layers. This foresight also extends to your fillings and sauces, most of which can be prepared ahead of time, streamlining your dessert assembly process.
Understanding Your Key Ingredients for the Perfect Sponge Cake
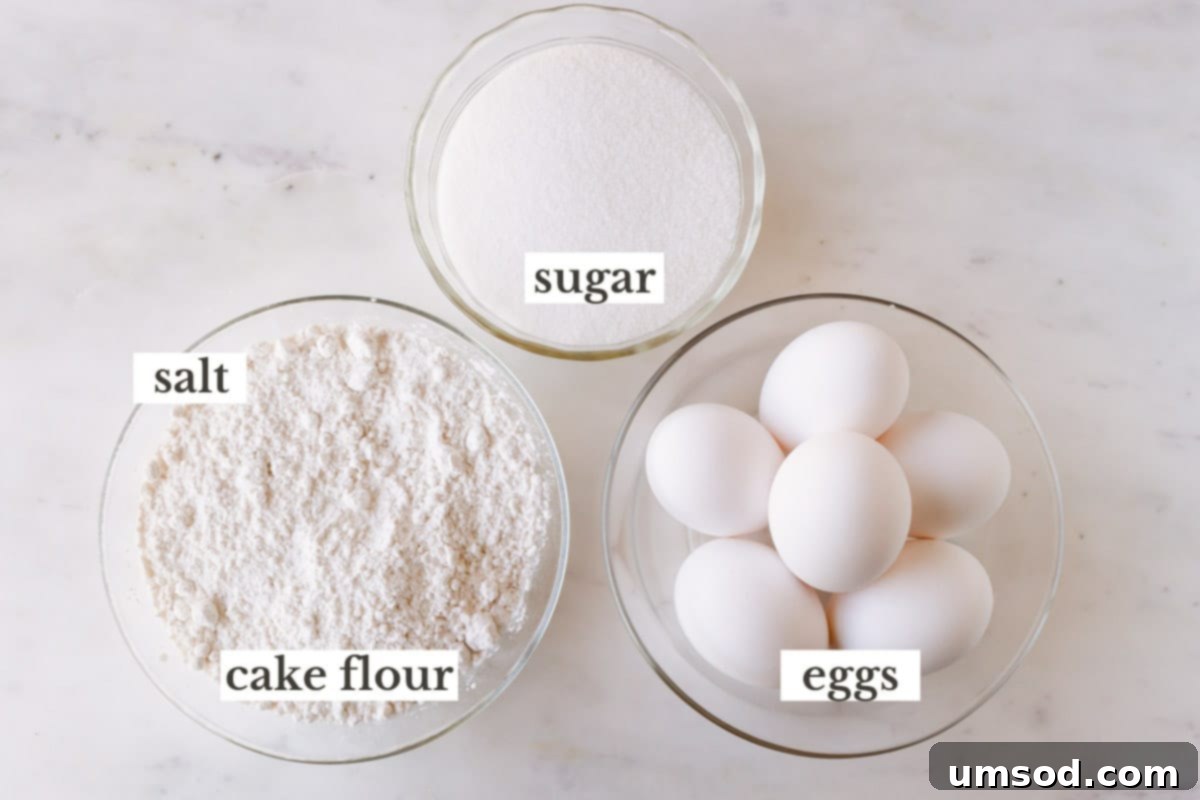
Achieving a light and airy sponge cake depends significantly on the quality and preparation of your core ingredients. Here’s what you need to know:
- Eggs: The Backbone of Your Sponge – Always ensure your eggs are at room temperature. Cold eggs have tighter proteins, which makes it considerably harder to whip air into them. Room temperature eggs, on the other hand, produce a much more voluminous and stable foam, which is crucial for the cake’s lift and delicate structure.
- Sugar: The Sweet Stabilizer – Superfine sugar, often referred to as caster sugar, is the ideal choice for sponge cakes. Its finely ground crystals dissolve much more quickly and evenly into the egg mixture compared to regular granulated sugar. This quick dissolution prevents a grainy texture and contributes to a smoother, more stable meringue.
- Cake Flour: For That Tender Crumb – Cake flour is specifically milled to have a lower protein content and less gluten than all-purpose flour. This composition results in a significantly lighter, more tender, and delicate crumb structure, which is the hallmark of a superior sponge cake. It minimizes gluten development, preventing a tough texture.
No Cake Flour? No Problem! Here’s a Simple Substitute:
If you find yourself without cake flour, don’t let it deter your baking plans! You can easily create a suitable substitute at home. Simply measure out 1 ½ cups of all-purpose flour. From this amount, remove 3 tablespoons of flour. Then, replace those 3 tablespoons with cornstarch. Sift this mixture thoroughly at least two to three times before incorporating it into your batter. This simple trick mimics the lower protein content of cake flour, helping you achieve a similarly soft and tender crumb.
Sponge Cake Demystified: Understanding Different Foam Cakes
The world of foam cakes is rich and varied, with each type offering a unique texture and flavor profile. At its core, a sponge cake is distinguished by being leavened solely by whipped eggs, meaning it contains no chemical leavening agents like baking powder or baking soda. This stands in contrast to regular butter cakes, which depend heavily on these agents for their rise and tender crumb.
- Angel food cake, a cousin to the traditional sponge, takes the fat-free concept even further by exclusively using egg whites. This results in an incredibly light, cloud-like cake with a distinctly chewy texture, often considered the purest form of foam cake. Traditional sponge cakes, however, utilize both the egg whites and yolks, contributing to a slightly richer flavor and more golden hue.
- Génoise and Gâteau are also types of foam cakes, originating from French and European baking traditions, respectively. While they share the light structure achieved through whipped eggs, a key differentiator from classic sponge cakes is the inclusion of a small amount of melted butter (or sometimes oil) in their batter. This addition lends a subtle richness and a slightly denser, more moist crumb than a pure sponge cake, without compromising its overall airiness. The butter in génoise is typically folded in carefully to avoid deflating the batter.
- Chiffon cake, another popular foam cake, combines the richness of butter cakes with the lightness of sponge cakes. It incorporates vegetable oil and often both egg yolks and whites, creating a cake that is exceptionally moist, tender, and incredibly airy, bridging the gap between delicate foam cakes and more robust butter cakes.
Understanding these subtle differences helps appreciate the unique qualities of a classic 3-ingredient sponge cake, which prides itself on its simplicity and pure, airy texture, making it an ideal canvas for soaking up other flavors.
Step-by-Step Guide: Crafting Your Classic 3-Ingredient Sponge Cake
Baking a perfect sponge cake is an art that requires attention to detail, but with these clear instructions, you’ll achieve fantastic results. Follow these steps meticulously to create a light and fluffy masterpiece.
Preparation Essentials:
- Preheat Your Oven: Begin by preheating your oven to a precise 350°F (177°C). A consistent oven temperature from the start is vital for the cake to rise properly.
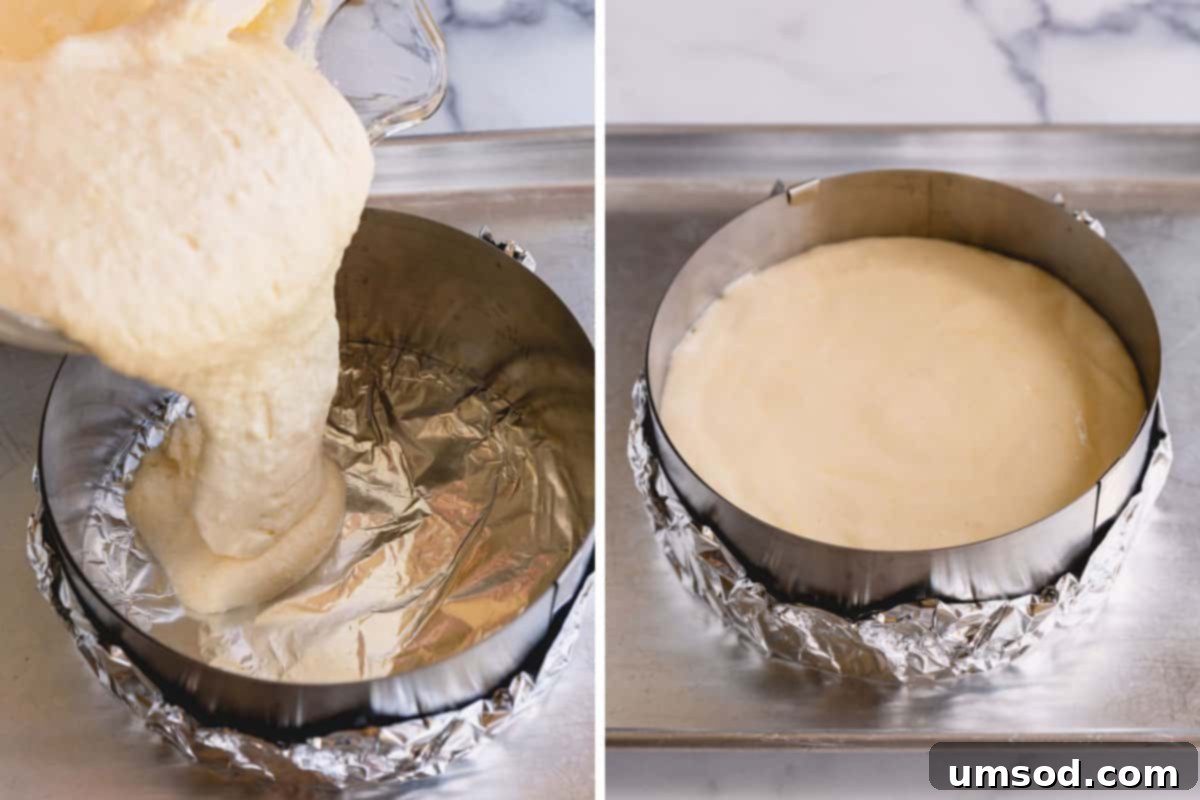
- Prepare Your Pan: Line the bottom of one 9-inch springform pan (which should be at least 3 inches tall) with parchment paper. Alternatively, you can use two standard 8 or 9-inch cake pans, also lined with parchment paper. Crucially, there is no need to grease the sides of the pan. Sponge cake batter needs to “climb” the ungreased sides to achieve its characteristic height.
- Separate Eggs Meticulously: Carefully separate the egg whites from the yolks. This step is paramount: even a minuscule drop of egg yolk (which contains fat) in the whites can prevent them from whipping up properly into stiff peaks. Use separate bowls for whites and yolks to minimize risk.
Pro Tip: Separate Eggs While Cold!
It’s significantly easier to separate egg yolks from whites when the eggs are cold, straight out of the refrigerator. The yolks are firmer and less likely to break. Once separated, allow the whites to come to room temperature for at least 30 minutes before whipping, as room temperature whites achieve better volume.
1. The Art of Mixing Egg Yolks and Sugar for a Creamy Base
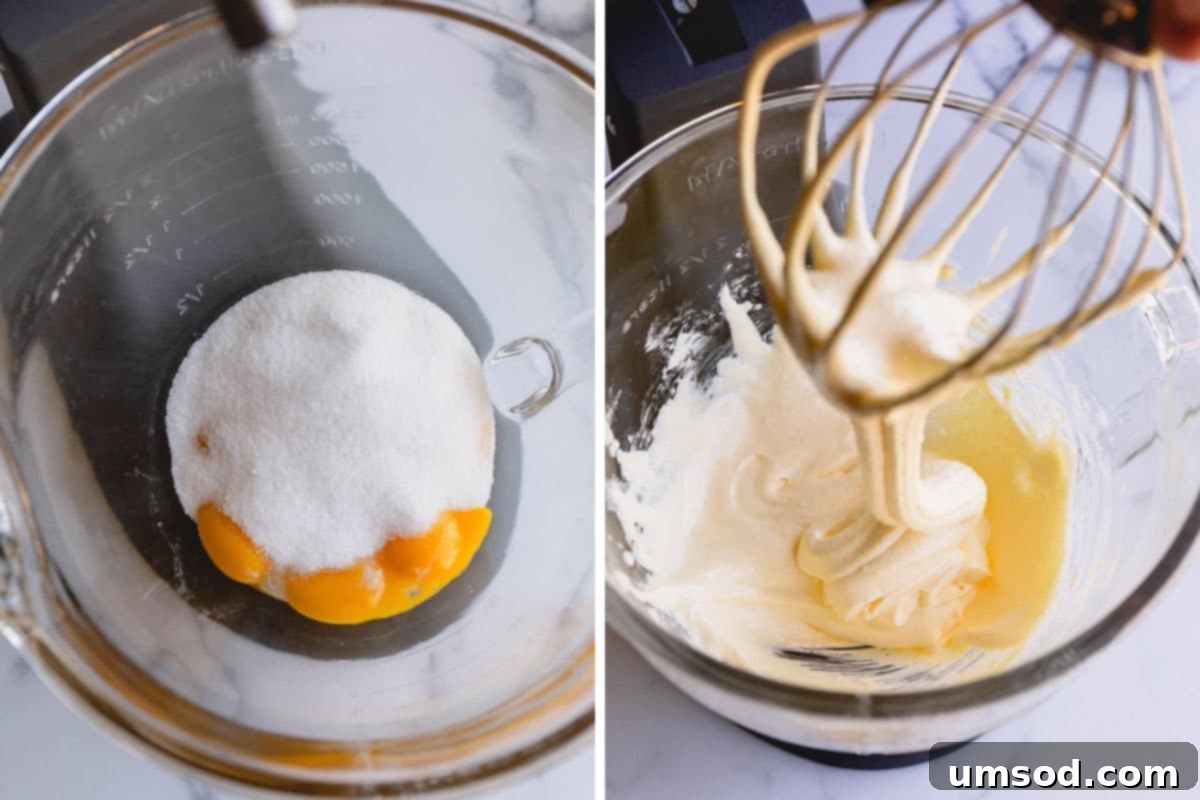
- Whisk the Egg Yolks: In a clean mixing bowl fitted with a whisk attachment (preferably a stand mixer), combine the egg yolks with ½ cup of the granulated sugar. Whisk continuously at medium-high speed until the mixture becomes notably pale yellow, thick, and has tripled in volume. This process typically takes about 5 minutes. The aeration here is key to starting the cake’s light structure.
2. Preparing the Flour: The Secret to an Airy Crumb
- Meanwhile, as your egg yolks are whisking, take this opportune moment to sift together your cake flour and a pinch of salt (if using).
- **Do NOT skip this crucial step!** Sifting the cake flour isn’t just about removing lumps; it’s about aerating it. By introducing air into the flour before it even meets the batter, you further contribute to the cake’s light texture and ensure a taller, more evenly risen sponge. Fine, light flour integrates more smoothly into the delicate egg mixture without weighing it down.
3. Mastering Whipped Egg Whites: The Primary Leavener
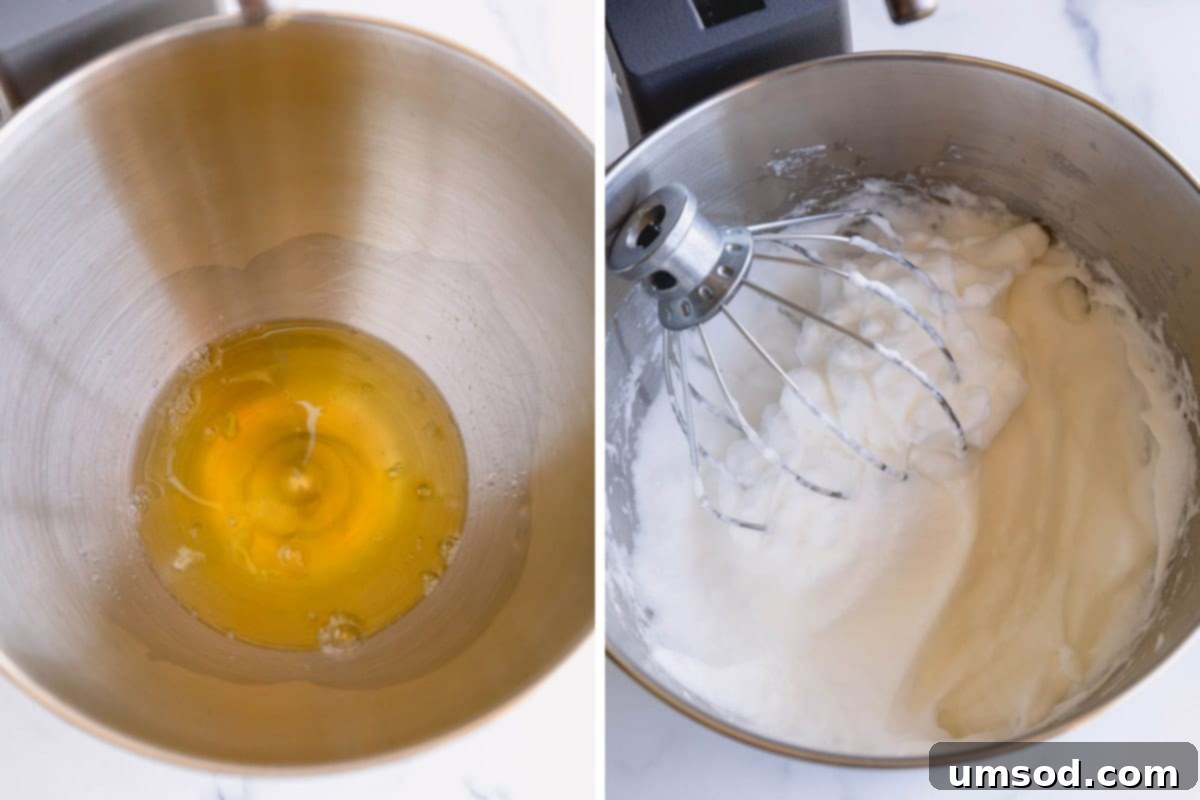
- In a separate, absolutely clean and grease-free mixing bowl (this is vital!), fitted with a clean whisk attachment, beat the room-temperature egg whites at medium-low speed until they become foamy and opaque.
- Once foamy, gradually add the remaining ½ cup of sugar, one tablespoon at a time, while continuously whisking. This slow addition allows the sugar to dissolve properly, creating a stable meringue. Continue to whisk, gradually increasing the speed to medium-high, until soft, glossy peaks form. When you lift the whisk, the peaks should hold their shape but still have a slight curl at the tip. This process can take about 7-10 minutes, depending on your mixer and egg temperature. Properly whipped whites are the primary source of lift for your sponge cake, so take your time here.
4. Gently Combining the Batter: Preserving the Airiness
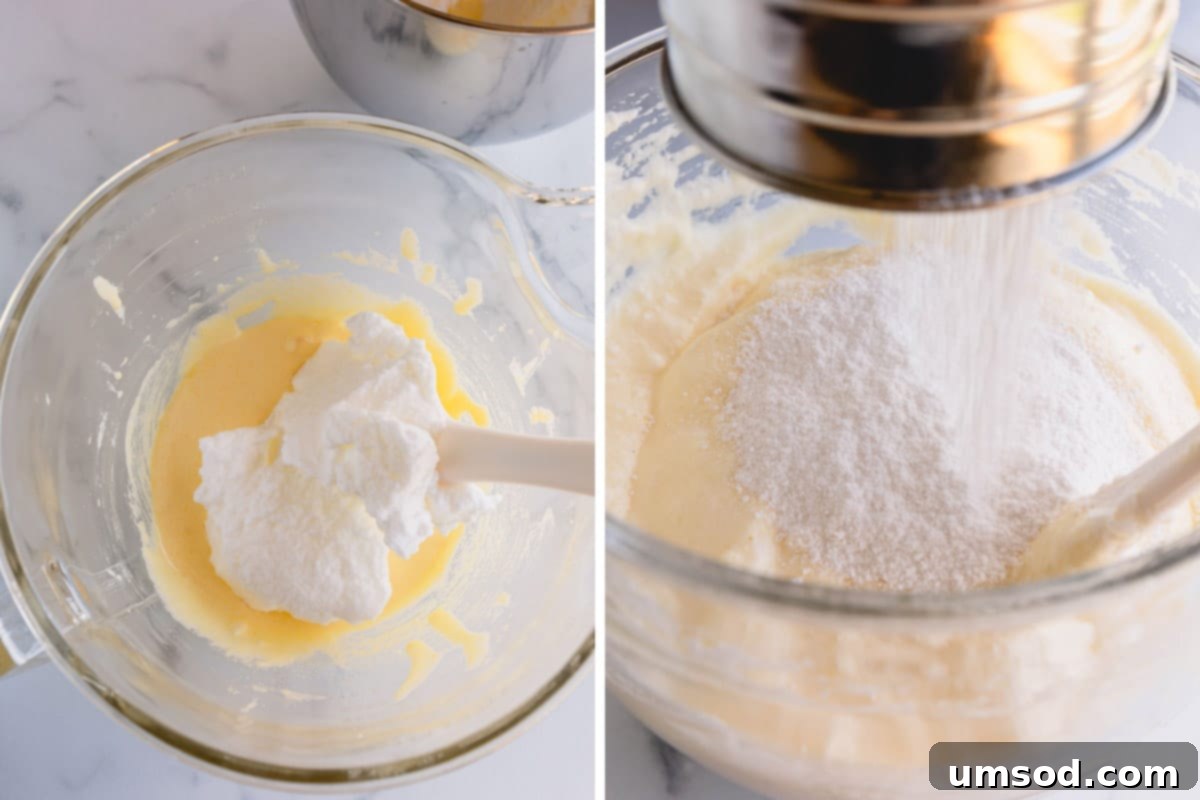
- First Fold: Carefully take about ⅓ of your whipped egg whites and gently fold them into the egg yolk mixture. Use a spatula and a light, cutting motion, bringing the mixture from the bottom up and over. Continue until the mixture is mostly smooth and lightened. This step helps to lighten the yolk mixture, making it easier to incorporate the rest of the delicate whites without deflating them.
- Second Fold: Now, add the remaining whipped egg whites to the bowl. Continue to gently fold until the batter is uniformly smooth and there are no streaks of white. Be patient and gentle; overmixing will cause the air to escape, resulting in a dense cake.
- Incorporating Flour: Finally, add the sifted flour into the batter in three separate stages. After each addition, gently whisk the batter until the flour is just incorporated. The goal is to mix just enough to combine, avoiding any heavy-handed stirring that would deflate your carefully built air pockets.
5. Baking Your Sponge Cake to Golden Perfection
- Prepare for Baking: Gently pour the delicate batter into your previously prepared baking pan. Using a spatula, smooth the top evenly. Avoid tapping the pan on the counter, as this can also release precious air bubbles.
- Bake with Care: Transfer the pan to your preheated oven and bake for approximately 40 minutes. The cake is done when a wooden toothpick or skewer inserted into the center comes out clean. An important rule: avoid opening the oven door for at least the first 30 minutes of baking! Doing so can cause a sudden temperature drop, leading the delicate sponge to deflate and collapse.
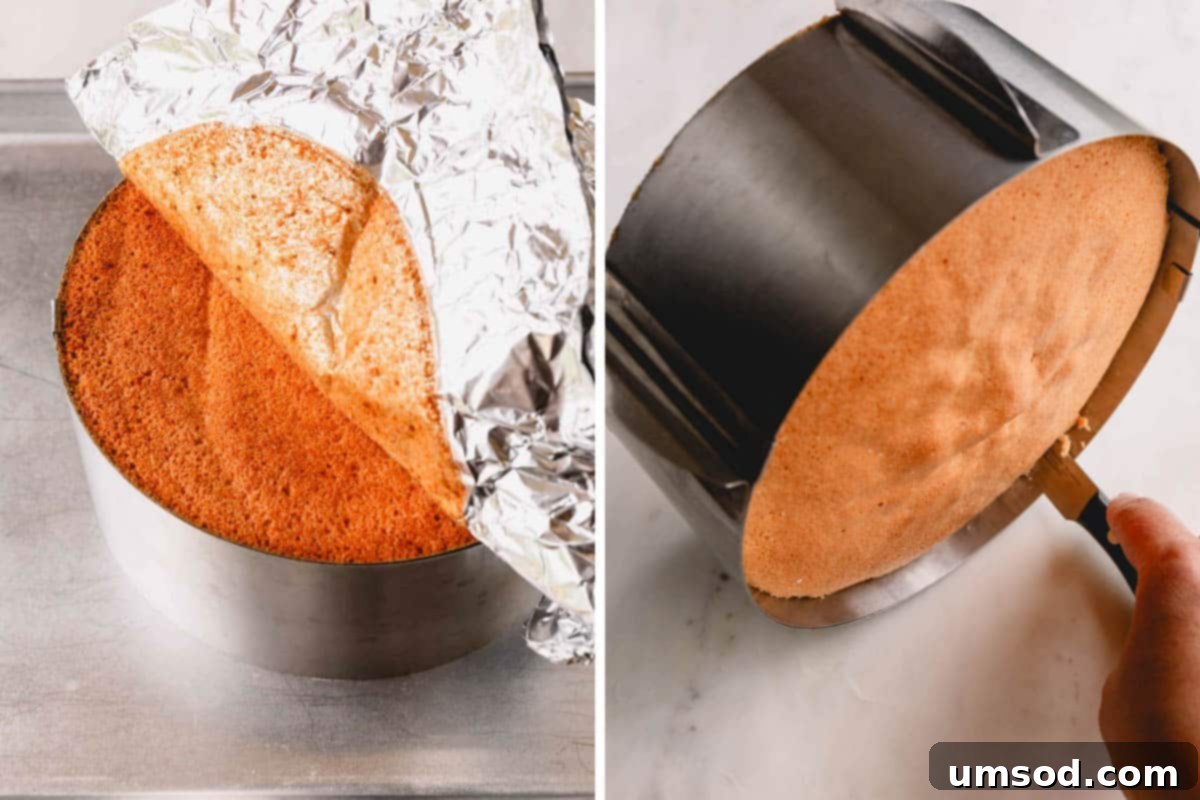
- Cooling and Chilling: Once baked, remove the cake from the oven and let it cool completely in the pan on a wire rack. This gradual cooling prevents the cake from shrinking too rapidly. After it’s completely cool, carefully run a thin knife around the edges of the pan to loosen the cake before removing it.
- The Secret to Perfect Layers: For best results, wrap the cooled cake tightly in plastic wrap and refrigerate it for at least 8 hours, or ideally, overnight, and up to 1 week. This chilling process makes the cake much firmer and significantly easier to cut into precise, even layers without crumbling or tearing. This is why sponge cake is a fantastic make-ahead option!
Expert Tips for Sponge Cake Success: Avoid Common Pitfalls
Baking a perfect sponge cake, while simple in ingredients, requires precision and a few key techniques. These expert tips will help you achieve a consistently light, airy, and beautifully risen cake:
- Flawless Egg Separation is Non-Negotiable: Be extremely meticulous when separating egg whites and yolks. Any trace of fat, whether from a tiny bit of yolk or even residual grease in your mixing bowl, will inhibit the egg whites from whipping into stiff, stable peaks. Fat interferes with the protein structure of the egg whites. I highly recommend using the three-bowl method (one to crack into, one for whites, one for yolks) and the shell-to-shell technique for clean separation. For a detailed guide, see how to separate egg whites and yolks effectively.
- Temperature Matters: Cold for Separation, Room Temp for Whipping: For the easiest egg separation, use cold eggs straight from the fridge; the yolks are firmer and less likely to break. However, once separated, allow the egg whites to come to room temperature for at least 30 minutes before you begin whipping them for the sponge cake. Room temperature egg whites whip up with significantly more volume and stability.
- The Meringue is Your Lifeline: Properly whipped egg whites are the single most important factor for a successful sponge cake. Since we’re not using any chemical leaveners, all the cake’s lift comes from the air incorporated into the egg whites. It’s crucial to whisk them to the correct consistency – soft, glossy peaks that hold their shape. Overwhipping can make them dry and brittle, while underwhipping won’t provide enough lift. Explore this meringue 101 post for more in-depth tips and tricks on achieving the perfect meringue.
- Recognizing Perfect Peaks: You’ll know your egg whites are perfectly whipped when they are glossy, hold firm peaks when the whisk is lifted, and you can even carefully invert the bowl without the whites sliding out. They should still be pliable and not dry or crumbly.
- Optimal Egg Yolk Mixture: The egg yolks and sugar should be whisked until they are light, creamy pale, and have at least tripled in size. This initial aeration also contributes to the overall lightness and emulsifies the mixture beautifully.
- Bake Immediately: As soon as your batter is combined, pour it into the prepared pan and bake. Don’t let the batter sit for too long, as the delicate meringue can start to deflate, leading to a denser cake.
- Never Grease the Cake Pan Sides: This is a common mistake for sponge cakes. Like angel food cake, sponge cake batter needs to “grip” the sides of the pan as it rises in the oven. Greasing the sides will cause the cake to slip down and collapse, preventing it from achieving its full, tall height.
- Resist the Urge to Peek: Do not open the oven door for at least the first 20-30 minutes of baking. A sudden rush of cold air can cause the delicate, rising sponge to deflate irrevocably. Trust your oven and the timing.
- Chill for Pristine Layers: It cannot be stressed enough: it is significantly easier to cut a sponge cake into even, clean layers when it is thoroughly chilled, preferably overnight. A freshly cooled cake is very tender and prone to tearing and crumbling, making it difficult to slice thinly. This characteristic makes sponge cake an ideal make-ahead dessert.
- Embrace Flavorful Toppings: A classic sponge cake has a relatively plain flavor and a slightly dry texture by design. It’s meant to act like a “sponge”! To truly elevate it, always brush the cake layers generously with a simple syrup, flavored syrup, liquor, or fruit sauce when assembling. This adds crucial moisture and infuses the cake with incredible flavor, transforming it into a moist and delicious dessert. Sponge cakes absorb flavors beautifully, making them incredibly versatile.
Make-Ahead & Storage Solutions for Your Sponge Cake
While the delicate nature of sponge cake batter means it cannot be prepared in advance (it needs to be baked immediately after mixing to retain its airiness), a baked sponge cake is wonderfully suitable for making ahead. This makes it a perfect dessert for entertaining or for enjoying throughout the week.
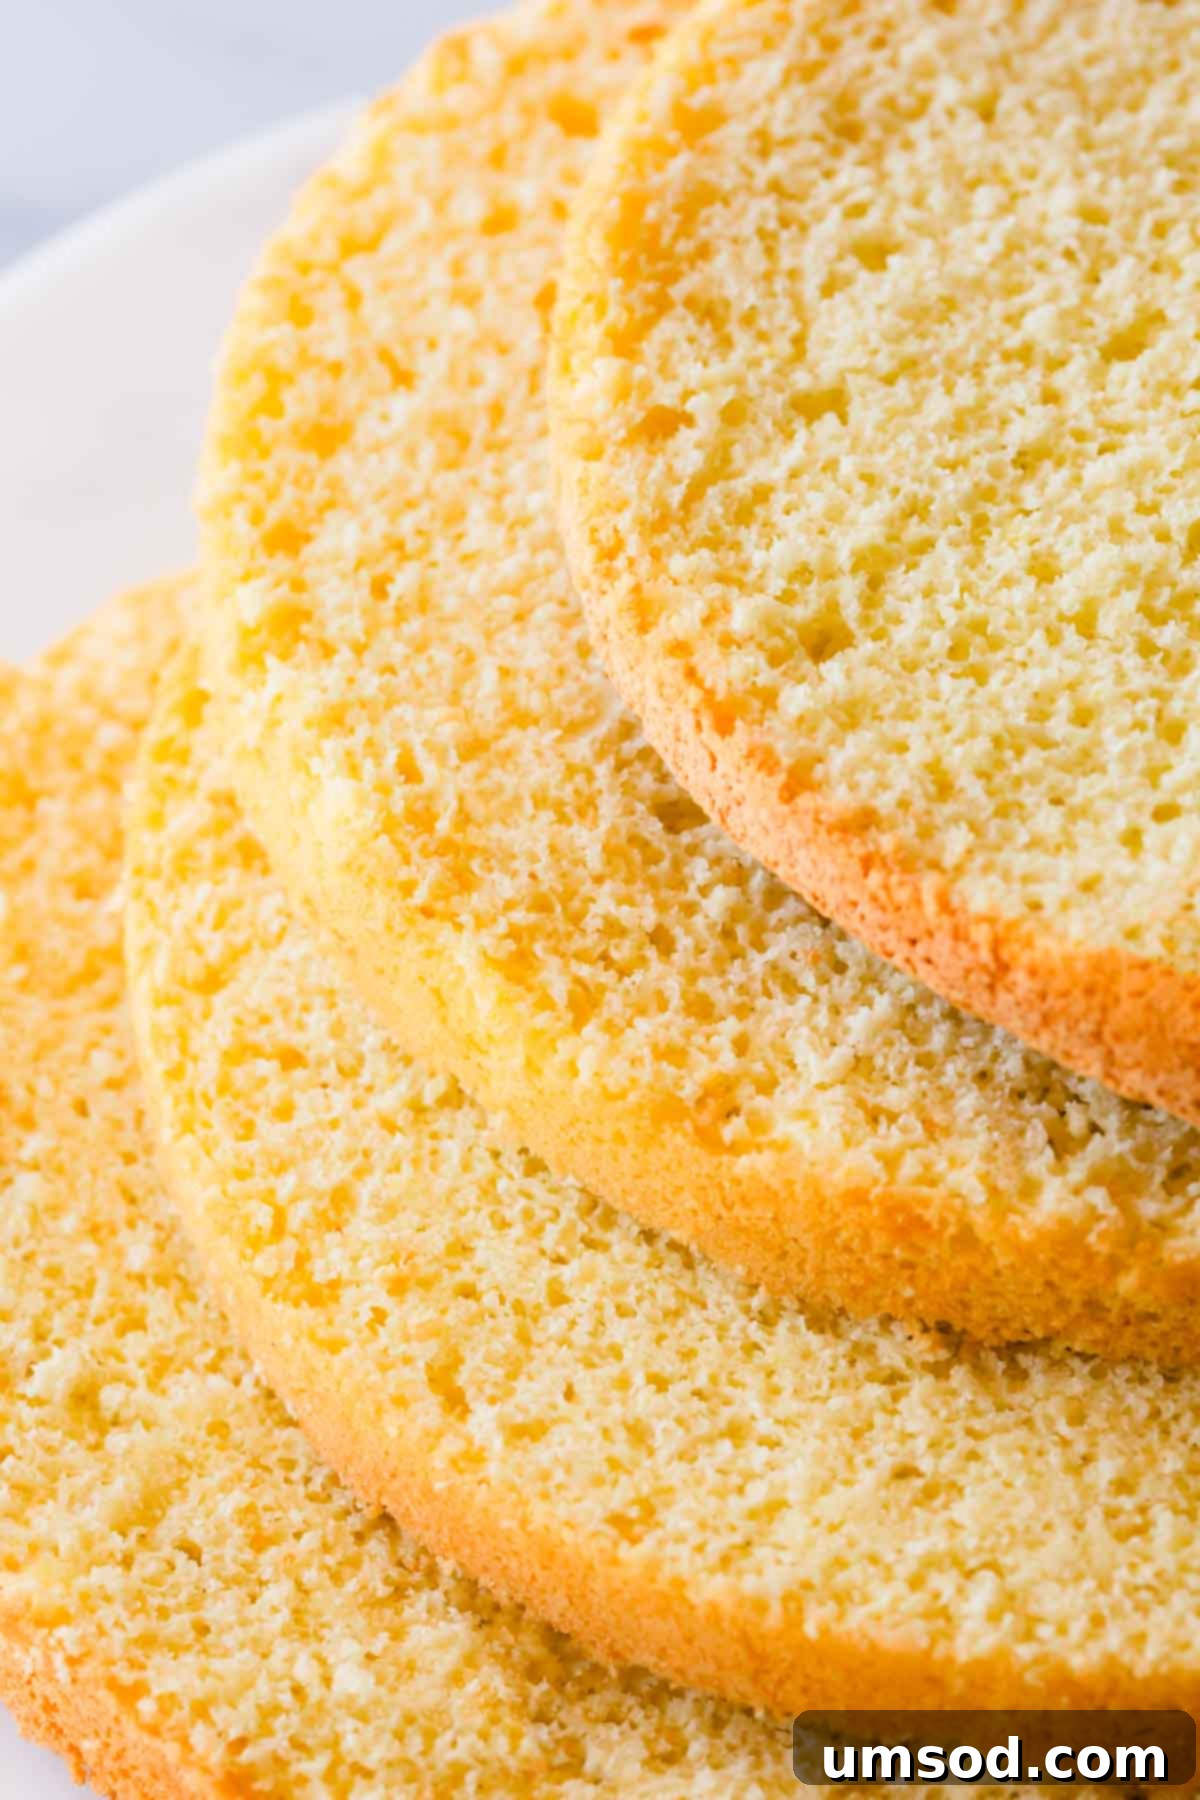
Once your sponge cake is fully baked and has cooled completely, wrap it tightly in several layers of plastic wrap. This prevents it from drying out and absorbing refrigerator odors. Store the well-wrapped cake in the refrigerator for up to 1 week. It will firm up beautifully, making it much easier to slice and assemble when you’re ready to decorate.
To further streamline your dessert preparation, you can also make any of the following delicious sponge cake toppings ahead of time. This way, you’ll be perfectly poised to decorate your cake as soon as it emerges from the fridge:
- Peach Simple Syrup: A delightful way to add moisture and a hint of fruity sweetness.
- Strawberry Sauce Topping or Seedless Raspberry Sauce: Bursting with berry flavor, perfect for layering or drizzling.
- Lemon Curd or Pineapple Curd: Tangy and creamy, these curds add a luxurious filling.
- Whipped Cream Topping: Light and ethereal, it complements the sponge cake’s texture perfectly.
Storing Your Baked Sponge Cake for Optimal Freshness
Proper storage is key to maintaining the texture and flavor of your sponge cake. Here’s how to keep it fresh:
- Refrigeration: Allow the baked sponge cake to cool completely to room temperature. Then, wrap it snugly in at least two layers of plastic wrap to create an airtight seal. Store it in the refrigerator for up to 1 week. Chilling makes it firm, ideal for slicing and handling.
- Freezing: For longer storage, the unfrosted sponge cake can be frozen. Once completely cooled and tightly wrapped in plastic wrap (and optionally an additional layer of aluminum foil), it can be stored in the freezer for up to 1 month. Thaw overnight in the refrigerator before using.
- Frosted Cake Storage: If your sponge cake is already frosted or filled, storage duration will depend on the ingredients of your frosting and fillings. Generally, a frosted sponge cake will keep well in the refrigerator for up to 5 days. Ensure it’s covered to prevent drying and absorption of other food odors.
Frequently Asked Questions (FAQs) About Classic Sponge Cake
Achieving an exceptional sponge cake hinges on several critical factors. First, the meticulous whipping of egg whites until they are thick, glossy, and have formed soft peaks is paramount; this provides the primary lift. Second, extreme gentleness is required when folding the sifted flour into the aerated batter to avoid deflating the precious air bubbles. Lastly, adjusting your baking time and temperature based on your specific cake pan size and oven calibration is crucial for an even bake and golden finish. A larger, single springform pan will naturally require more baking time than multiple smaller cake pans.
A cake is classified as a sponge cake primarily by its leavening method. A true basic sponge cake recipe relies solely on the air incorporated into whipped eggs (both whites and yolks, or sometimes just whites) for its rise, rather than chemical leaveners like baking powder or baking soda. The fundamental ingredients typically include eggs, sugar, and flour. Due to its unique airy and somewhat dry texture, sponge cakes are intentionally designed to absorb flavor and moisture from syrups, fruit purees, and various frostings and fillings, which complement their delicate structure perfectly.
The world of sponge cakes is diverse, with a few prominent variations. A traditional sponge cake typically uses eggs, sugar, and flour, incorporating both egg yolks and whites for richness and structure. Angel food cake is a specific type that uses only egg whites, sugar, and flour, resulting in an incredibly light and pure white cake. Génoise sponge cake, a French variant, adds a small amount of melted butter to the batter, contributing a slightly richer flavor and finer crumb. Lastly, Chiffon cake is a hybrid that includes egg yolks and vegetable oil along with egg whites, creating an exceptionally moist, tender, and airy cake that bridges the gap between butter and foam cakes.
The name “sponge cake” derives from two key characteristics. Firstly, its internal texture closely resembles that of a natural sea sponge – porous, light, and airy, filled with tiny air pockets. Secondly, and perhaps more importantly for its culinary purpose, a sponge cake is designed to literally “soak up” moisture and flavor from various sugar syrups, fruit syrups, liqueurs, and sauces, much like a sponge absorbs liquid. This ability to beautifully absorb additional flavors and moisture is central to its appeal and versatility in desserts.
More Inspiring Sponge Cake Creations to Try
Once you’ve mastered this classic 3-ingredient sponge cake, the possibilities for delicious desserts are endless. Here are some more fantastic sponge cake-based recipes to expand your baking repertoire:
- Tiramisu Layer Cake: A decadent dessert featuring coffee-soaked sponge layers.
- Berry Chantilly Cake: A visually stunning and delicious cake with fresh berries and whipped cream.
- Homemade Angel Food Cake with Strawberry Sauce: Experience the purest form of foam cake with a sweet topping.
- Orange Blossom Angel Food Cake: A fragrant and delicate variation on the classic angel food cake.
Easy 3-Ingredient Classic Sponge Cake Recipe
Shinee Davaakhuu
50
40
1
30
8
servings
Comment
Print Recipe
Ingredients
- 6 large eggs at room temperature
- 1 cup (200 g) granulated sugar divided Note 1
- 1 ½ cups (180 g) plain cake flour
- ½ teaspoon salt optional
Instructions
- Preheat the oven to 350°F (177°C). Line the bottom of one 9-inch springform pan (at least 3 inches tall). Do not grease the pan.
- Separate egg whites and yolks carefully, ensuring no yolk gets into the whites. (TIP: It’s easier to separate eggs when they’re cold.)6 large eggs
- In a mixing bowl with a whisk attachment, whisk together egg yolks and ½ cup of sugar until pale and tripled in volume, about 5 minutes.1 cup granulated sugar (first ½ cup)
- Meanwhile, sift flour and salt together.1 ½ cups plain cake flour,
½ teaspoon salt - In another clean mixing bowl with a whisk attachment, beat egg whites at medium-low speed until foamy.
- Add the remaining ½ cup of sugar one tablespoon at a time. Continue to whisk until soft, glossy peaks form, gradually increasing the speed to medium-high, 7-10 minutes.
- Using a spatula, add ⅓ of the whipped egg whites into the egg yolk mixture and gently fold until mostly smooth. Then, add the remaining egg whites and gently fold until smooth and fully combined.
- Add the sifted flour into the batter in 3 stages, gently whisking the batter well after each addition until just combined.
- Pour the batter into the prepared pan and gently smooth the top with a spatula.
- Bake the cake until a toothpick inserted into the center comes out clean, about 40 minutes. Do not open the oven door for at least the first 30 minutes!
- Let the cake cool completely in the pan on a wire rack. Then, run a knife around the edges to loosen and carefully invert onto a cooling rack. Wrap the cooled cake tightly with plastic wrap and refrigerate overnight. It will be significantly easier to cut into layers when thoroughly chilled.
- The sponge cake, tightly wrapped in plastic wrap, can be refrigerated for up to 1 week, or frozen for up to 1 month.
⭐️ Did you make this recipe?
Please leave a review and let us know how you liked it!
Video
Tips & Notes
CAKE PANS & COOKING TIMES:
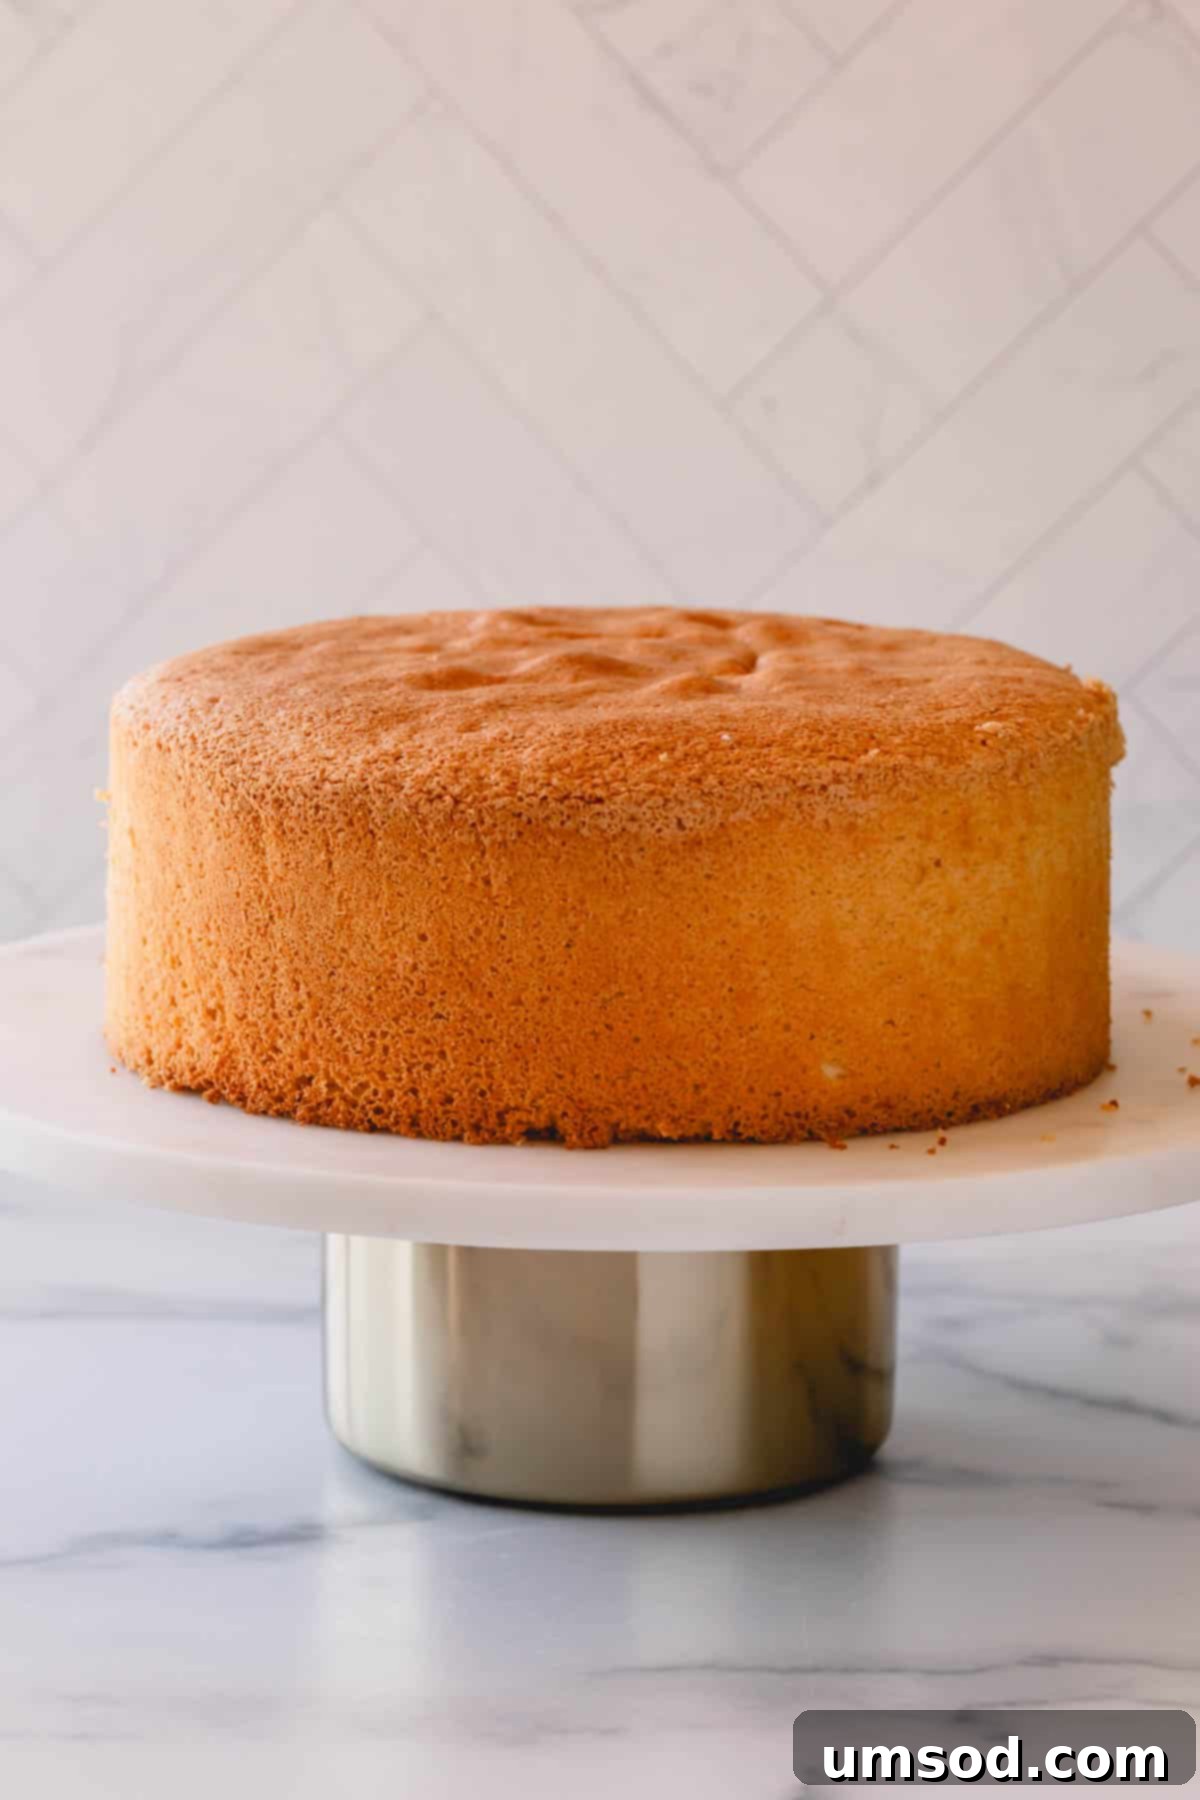
This versatile recipe can be adapted for various cake pan sizes. I’ve successfully tested it in one 9-inch springform pan (at least 3 inches tall), two standard 8 or 9-inch cake pans (at least 2 inches tall), and three smaller 6 or 7-inch cake pans (at least 2 inches tall). When baked in a single 9-inch springform pan, the cake typically comes out approximately 2 ¼ inches tall, which is perfect for slicing into three even layers for a multi-layered dessert. Adjust baking times accordingly:
- 1 (8 or 9-inch) cake pan – approximately 40 minutes
- 2 (8 or 9-inch) cake pans – 25-30 minutes
- 3 (6 or 7-inch) cake pans – 25-30 minutes
Nutrition
1
serving
229kcal
42g
7g
4g
25g
193mg
Dessert
American
Did you make this?
Leave a rating and your feedback. Thank you!
This recipe was originally published on February 20, 2019, and has been updated for clarity and comprehensiveness.
