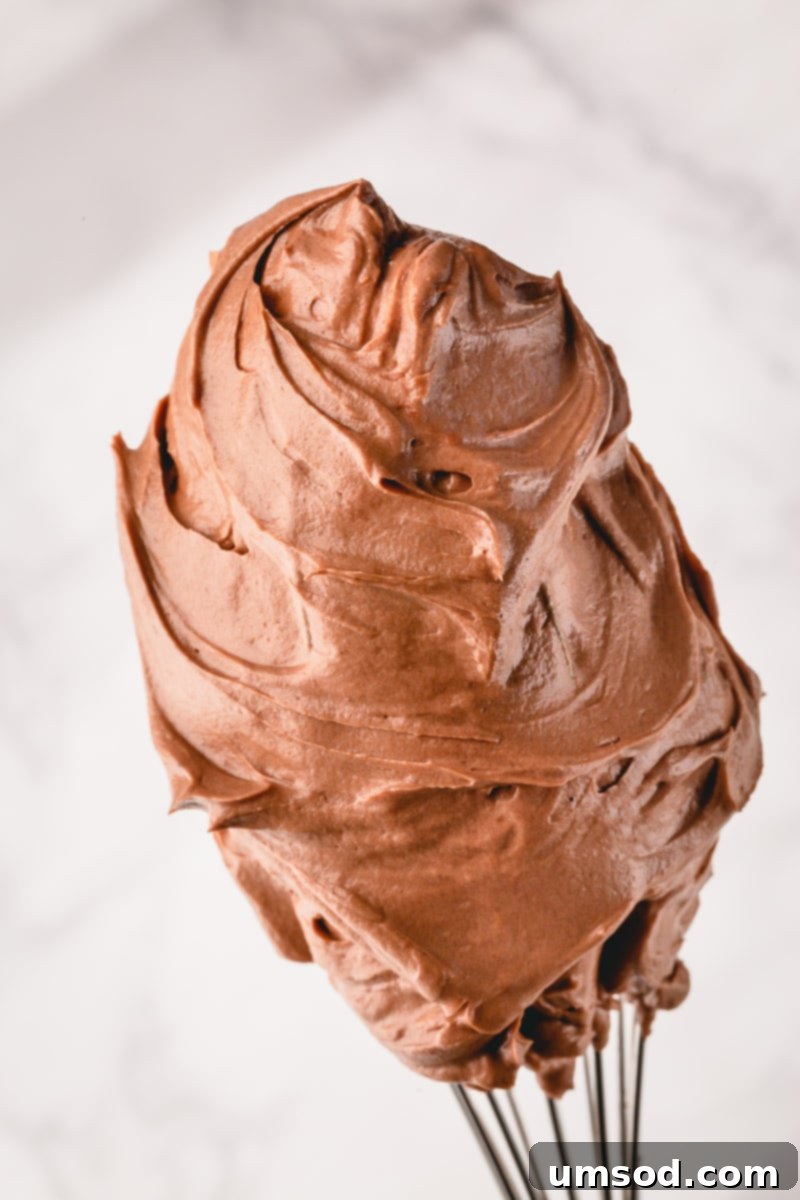
Unlock the secret to bakery-quality desserts with this comprehensive guide to making ultra-smooth, light, and incredibly stable chocolate Swiss meringue buttercream. Unlike many overly sweet frostings, this recipe delivers a delicate balance of rich chocolate flavor and a luxurious, silky texture, making it perfect for adorning cakes, cupcakes, and even delicate macarons. With step-by-step instructions and expert tips, you’ll master this elegant frosting and impress everyone with your baking prowess!
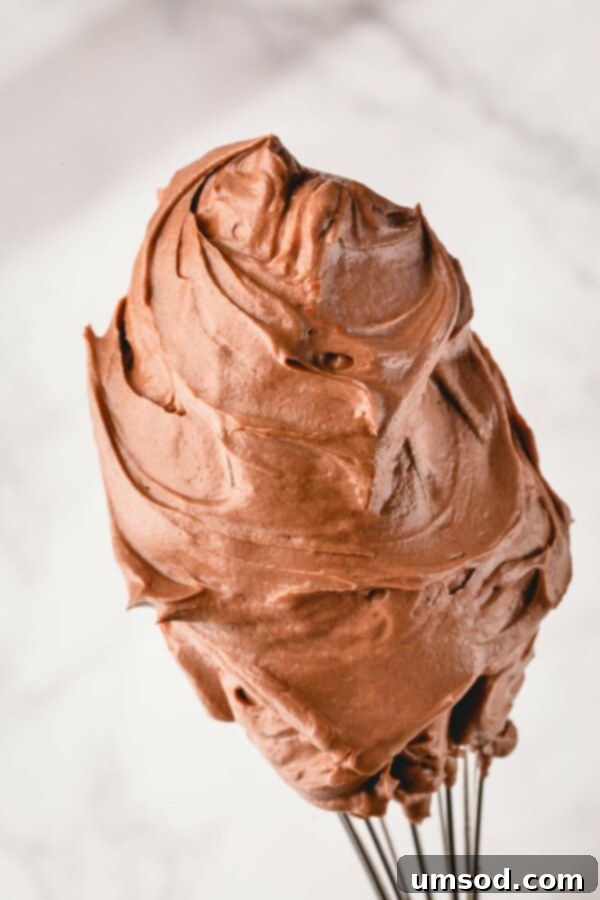
What Exactly is Swiss Meringue Buttercream (SMBC)?
Swiss meringue buttercream, often affectionately known as SMBC, is a premium frosting celebrated for its exceptional smoothness, remarkable stability, and notably moderate sweetness. Its foundation lies in Swiss meringue, which is a unique preparation of egg whites and granulated sugar. Unlike other meringue methods, in the Swiss technique, the egg whites and sugar are gently heated together over a double boiler until the sugar completely dissolves and the mixture reaches a safe temperature. This careful cooking process achieves two crucial goals: it ensures the meringue is food-safe by pasteurizing the egg whites, and it creates a highly stable, glossy meringue with a robust structure.
Once this cooked meringue is whipped to voluminous, stiff, and glossy peaks and then cooled down, softened unsalted butter is gradually incorporated. This emulsification transforms the airy meringue into a rich, creamy, and wonderfully spreadable frosting. The resulting buttercream is significantly less sweet than traditional American buttercream, allowing the true flavors of your dessert to shine through. Furthermore, its inherent stability makes it a dream for intricate piping work and ensures your decorated creations hold up beautifully, even in warmer environments, surpassing the delicate nature of French meringue or the often-temperamental Italian meringue.
The Irresistible Appeal of Chocolate Swiss Meringue Buttercream
Elevating a classic Swiss meringue buttercream with the addition of high-quality chocolate transforms it into an intensely indulgent yet surprisingly light frosting. This particular variation stands out for its deep, rich chocolate flavor that perfectly balances the ethereal texture of the SMBC base. Many chocolate buttercreams can feel heavy, dense, and overly sugary, but chocolate SMBC maintains a beautiful airiness, allowing the nuanced notes of your chosen chocolate to truly sing without being cloying.
Professional bakers and passionate home cooks alike adore this frosting for its versatility and elegant performance. Its exceptional stability is a game-changer, ensuring that your intricately decorated cakes and cupcakes remain pristine, resisting sagging or melting even after extended periods at room temperature. The consistently smooth and velvety texture of chocolate SMBC makes it incredibly easy to work with, whether you’re aiming for perfectly sharp edges on a tiered cake, delicate swirls on cupcakes, or a sophisticated filling for macarons. This frosting pipes like a dream, holding its shape beautifully, which means achieving professional-looking finishes is well within reach for anyone. Once you experience the refined taste and superior handling of this chocolate Swiss meringue buttercream, it’s highly likely to become your absolute favorite for all your chocolate dessert needs.
Mastering Chocolate Swiss Meringue Buttercream: A Detailed Step-by-Step Guide
While the process of creating chocolate Swiss meringue buttercream might initially appear more involved than making a basic American buttercream, it is remarkably straightforward once you understand and adhere to a few fundamental techniques. Precision, particularly with temperatures, and a bit of patience are your best friends in this endeavor. The reward is a truly superior frosting that will elevate any dessert it graces. For those keen to deepen their understanding of meringue, we highly recommend exploring comprehensive guides on meringue preparation to grasp the underlying science.
Step 1: Crafting the Silky Swiss Meringue Base
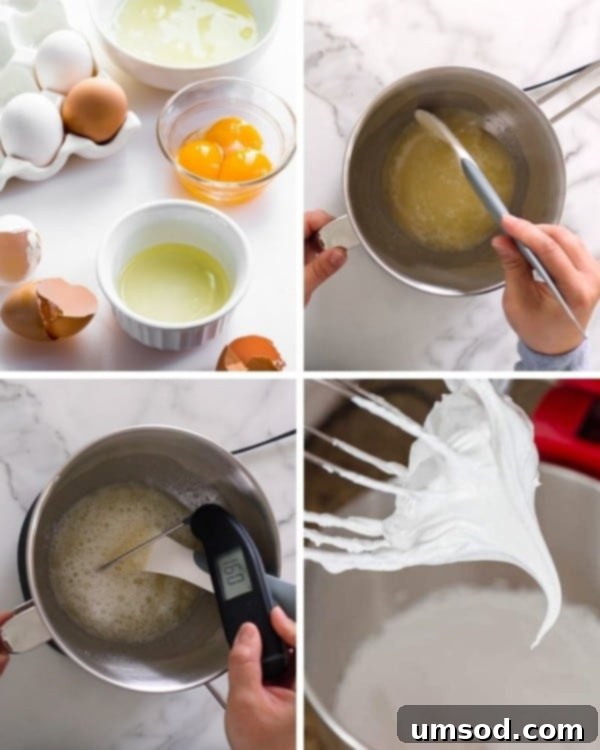
- Prepare Your Double Boiler: Begin by filling a small saucepan with a few inches of water and bring it to a gentle simmer over medium-low heat. It is crucial to ensure that when your mixing bowl is placed over the saucepan, the bottom of the bowl does not make direct contact with the simmering water. This setup, known as a bain-marie or double boiler, allows for gentle, indirect heating of the egg whites, preventing them from scrambling.
- Combine and Heat Egg Whites and Sugar: In a meticulously clean, heat-proof bowl (stainless steel or glass is ideal, such as the bowl of your stand mixer), combine the granulated sugar and egg whites. Place this bowl over your simmering water. Continuously whisk the mixture by hand. This constant motion is vital to ensure the egg whites heat evenly and the sugar dissolves completely without cooking the eggs. Continue whisking until the mixture reaches a temperature of 160°F (70°C) on an instant-read thermometer. An even more practical test is to rub a small amount of the mixture between your fingertips; you should feel absolutely no sugar granules remaining. This heating process typically takes about 5 to 7 minutes.
- Whip the Meringue to Stiff Peaks: Carefully remove the bowl from the heat. Attach the bowl to your stand mixer (using the whisk attachment) or use a powerful hand mixer. Start whisking on medium speed for about one minute, then gradually increase the speed to medium-high. Continue whipping vigorously until the meringue forms stiff, glossy peaks and the outside of the mixing bowl feels completely cool to the touch. This can take anywhere from 8 to 15 minutes, depending on the power of your mixer and the ambient temperature. A fully cooled meringue is a non-negotiable step before proceeding to add the butter.
Essential Meringue Tips for Unwavering Success
The foundation of a perfect meringue relies heavily on a grease-free environment. Ensure your mixing bowl and whisk attachment are impeccably clean and completely devoid of any fat residue. Even the tiniest speck of grease—whether from leftover cooking oils, soap, or a minute amount of egg yolk—can fatally prevent your egg whites from whipping up into the desired stable foam. Stainless steel or glass bowls are highly recommended for meringue making due to their non-porous surfaces, which are easier to clean thoroughly. Furthermore, exercise extreme caution when separating your eggs; any intrusion of egg yolk into the whites will compromise the meringue’s structure. If contamination occurs, it’s best to start with a fresh batch of egg whites to guarantee success.
Got Leftover Egg Yolks? Don’t Waste Them!
Don’t let those precious egg yolks go to waste after making your Swiss meringue! Egg yolks are incredibly versatile and can be used to enrich a variety of delicious recipes. Consider making a rich custard, a decadent crème brûlée, homemade ice cream, or even adding them to fresh pasta dough for a richer texture and color. Planning ahead for your leftover yolks ensures nothing goes unused in your kitchen.
Step 2: Incorporating Butter for Luxurious Creaminess
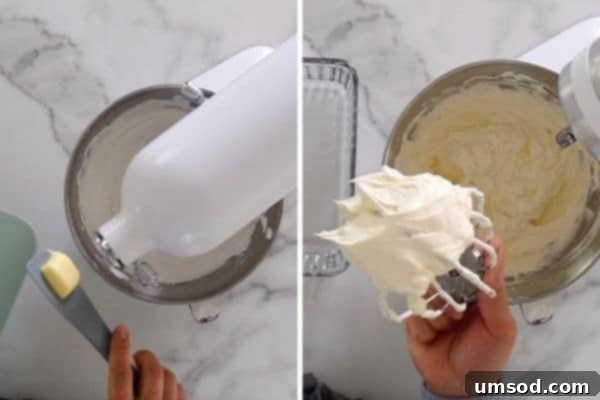
- Gradually Add Room Temperature Butter: Once your meringue has achieved stiff peaks and is completely cool, reduce your mixer’s speed to medium-low. Begin adding the softened, room temperature unsalted butter, one tablespoon at a time. This gradual addition is critical; allow each piece of butter to be fully incorporated into the meringue before adding the next. This controlled process is key to building a stable and smooth emulsion.
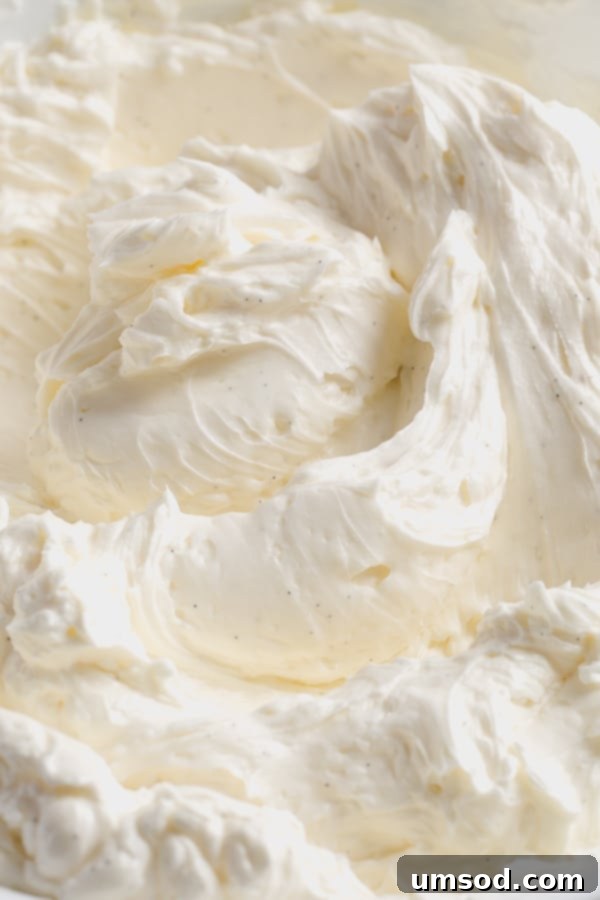
- Whip Through the “Ugly Duckling” Phase: As you continue to add butter and whisk, the mixture might undergo a dramatic transformation. It is entirely normal for the buttercream to appear curdled, lumpy, or even soupy at this stage – often humorously referred to as the “ugly duckling stage.” Do not be alarmed or stop whisking! Persistence is paramount here. Keep whipping the buttercream on medium-high speed. The mixture will eventually come together, transforming from its unappealing state into a cohesive, light, fluffy, and smooth buttercream. This critical stage typically requires an additional 5 to 10 minutes of whipping after all the butter has been added. The final buttercream should be notably lighter in color and have a beautifully airy texture.
The Critical Role of Room Temperature Butter
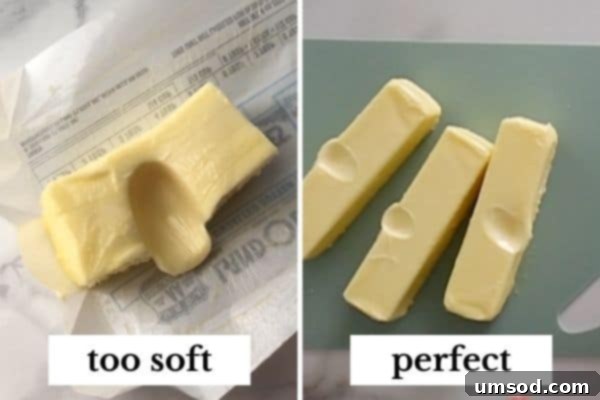
The temperature of your butter is arguably the most crucial factor for achieving a flawless Swiss meringue buttercream. It must be at true “room temperature,” which means it’s soft enough to yield easily when pressed with your finger, but still holds its shape and isn’t greasy or melted. If your butter is too cold, it will resist emulsifying with the meringue, resulting in a chunky, curdled, or separated frosting. Conversely, if the butter is too warm or partially melted, your buttercream will turn soupy and lack the necessary structure to hold its form. To ensure perfect consistency, plan to remove your butter from the refrigerator at least one to two hours before you begin your baking project, allowing it to soften naturally.
Troubleshooting Greasy or Overly Buttery Buttercream
If, after adding all the butter, your buttercream still tastes distinctly greasy or excessively buttery, it’s a clear indication that it is under-mixed. Do not be hesitant to continue beating it! The mechanical action of the mixer is essential for properly aerating the butter and meringue, transforming it into the characteristic light, clean, and ultimately delicious frosting. Keep whipping on medium-high speed for several more minutes, potentially an additional 5-10 minutes. This continued mixing will gradually incorporate more air, lighten the texture, and mellow the rich, buttery flavor into a delicate, balanced profile that is the hallmark of a perfectly made Swiss meringue buttercream.
Step 3: Infusing with Rich Chocolate Flavor
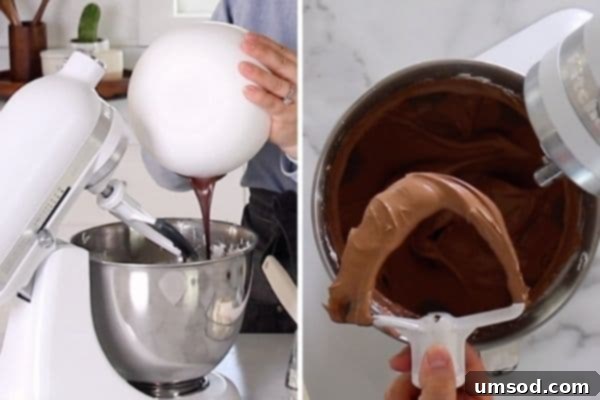
- Melt and Cool the Chocolate: Before embarking on this step, it is absolutely essential that your chocolate is not only properly melted but, more importantly, completely cooled to room temperature. Introducing warm or hot melted chocolate into your meticulously prepared buttercream will cause it to melt and separate, ruining its delicate structure.
- Add Cooled Melted Chocolate: With your mixer set to a low speed, slowly and steadily pour the completely cooled melted chocolate into the buttercream.
- Combine Thoroughly with Paddle Attachment: Once the chocolate is added, switch your mixer attachment from the whisk to the paddle. Beat the frosting on medium speed until the chocolate is fully incorporated, and the buttercream is uniformly colored, smooth, and lump-free. This final mixing with the paddle attachment typically takes about one minute and helps to remove any residual air bubbles, resulting in an even silkier, denser, and more stable finish, perfect for piping and spreading.
How to Properly Melt Chocolate for Your Buttercream
Melting chocolate can sometimes be a delicate process, as overheating can cause it to seize or burn, making it unusable. Here’s a tried-and-true method, especially effective when using a microwave, ensuring your chocolate melts smoothly and without issue:
- Preparation is Key: Begin with high-quality dark or semi-sweet chocolate, which will yield the best flavor for your buttercream. If you’re using a chocolate bar, chop it into small, uniform pieces to ensure even melting. While chocolate chips can be used, be aware that they often contain stabilizers that can make them slightly more resistant to melting into a perfectly smooth consistency. Place your prepared chocolate in a clean, microwave-safe bowl.
- Initial Gentle Microwave Burst: Place the bowl in the microwave and heat it for 1 minute at 50% power. This lower power setting is crucial for preventing the chocolate from overheating. (If you know your microwave has a significantly higher or lower wattage than the average 1000W, you may need to adjust the power setting or timing accordingly).
- Stir and Continue Heating: Remove the bowl from the microwave and stir the chocolate thoroughly with a spatula. Even if the chocolate pieces don’t appear fully melted yet, stirring helps to distribute the latent heat and encourages melting. Return the bowl to the microwave for another 30 seconds at 50% power.
- Short Increments for Smoothness: Stir again. Then, continue to microwave the chocolate in very short 15-second intervals at 50% power, stirring diligently after each interval. Repeat this step until all the chocolate pieces are completely smooth and melted. Patience is key here; resist the urge to use high power or long intervals, as melted chocolate retains heat and can continue to cook and seize even after it’s out of the microwave.
- Crucial Cooling Step: Once your chocolate is perfectly melted and smooth, set the bowl aside and allow it to cool completely to room temperature. It should still be in a liquid state but should no longer feel warm to the touch. This step is critical before incorporating it into your buttercream.
Troubleshooting Common Swiss Meringue Buttercream Issues
Even experienced bakers can occasionally encounter challenges when making Swiss meringue buttercream. Don’t be discouraged if yours doesn’t come out perfectly on the first try! Here are quick, actionable solutions for the most common issues:
- Soupy or Liquid Buttercream: If your buttercream resembles a thin liquid, the most common culprit is that the meringue was not sufficiently cooled before the butter was added, or your butter was too warm (perhaps melted). To fix this, place the entire mixing bowl containing the soupy buttercream into the refrigerator for 10-15 minutes. Once the edges begin to firm up slightly, return it to the mixer and re-whip it on high speed. The chilling will help the butter firm up, allowing it to re-emulsify with the meringue.
- Curdled or Lumpy Buttercream: This often occurs if the butter was too cold when added or if it was added too quickly in large chunks. The good news is that this is usually fixable by simply continuing to whip! The friction generated by the mixer will gently warm the butter, helping it to properly emulsify with the meringue. If it remains stubbornly curdled, a gentle application of heat can help: either briefly pass a kitchen torch around the outside of the bowl while mixing, or place the bowl over a double boiler for just 10-20 seconds (until only the very edges begin to soften), then immediately return it to the mixer and whip vigorously.
- Greasy or Overly Buttery Taste: As highlighted in our tips, a greasy taste is almost always a sign of under-mixing. The buttercream needs thorough aeration to achieve its light, clean, and non-greasy texture. Continue whipping the buttercream on medium-high speed for several more minutes beyond when it initially appears smooth. This extra whipping time will incorporate more air, transforming the texture and flavor into the delicate balance you’re aiming for.
For an even more comprehensive guide and in-depth troubleshooting tips to resolve any specific issues you might encounter with Swiss meringue buttercream, we encourage you to explore our dedicated tutorial:
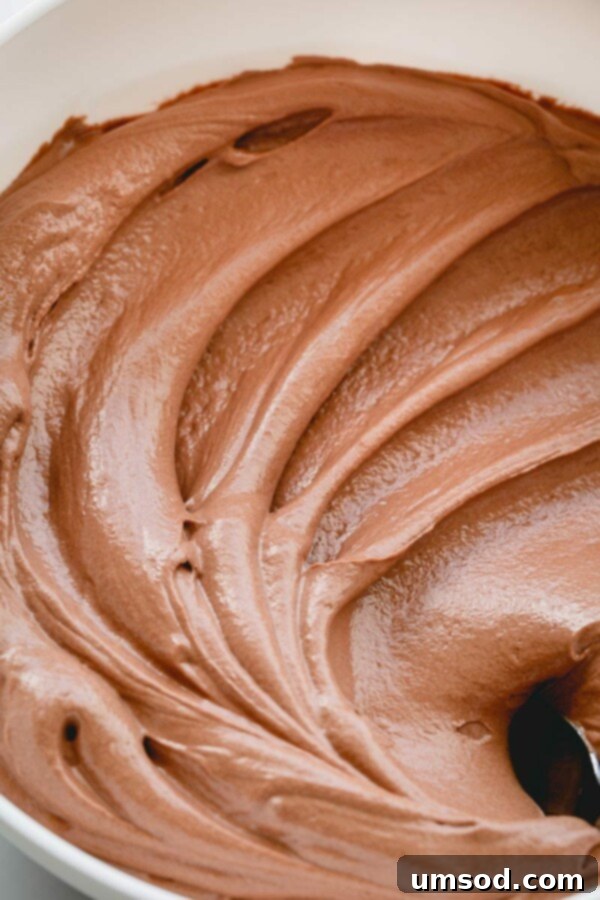
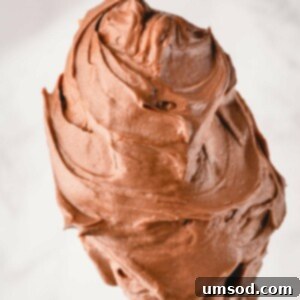
Chocolate Swiss Meringue Buttercream
By Shinee Davaakhuu
Experience the ultimate in frosting perfection with this ultra-smooth, light, and incredibly stable chocolate Swiss meringue buttercream. Not overly sweet, it’s ideal for decorating cakes, cupcakes, and even delicate macarons with ease and elegance.
Yields: Approximately 4 cups
Comment
Print Recipe
Ingredients
- 6 large egg whites (Note 1)
- 1 ½ cups (300g) granulated sugar
- ½ teaspoon coarse kosher salt
- 1 ½ cups (340g) unsalted butter, at room temperature (Note 2)
- 8 oz semi-sweet chocolate (Note 3)
Instructions
- In a small saucepan, bring a small amount of water to a gentle simmer. Ensure the water level is low enough so that your mixing bowl, when placed on top, does not touch the simmering water.
- In a medium heat-proof bowl (such as your stand mixer bowl), whisk together the egg whites and granulated sugar. Place this bowl over the saucepan with simmering water, creating a double boiler.
- Cook the egg white mixture, stirring continuously, until all the sugar is completely melted and the mixture reaches 160°F (70°C) on an instant-read thermometer. This typically takes about 5 minutes.
- Remove the bowl from the heat. Using a stand mixer fitted with the whisk attachment, whisk on medium speed for one minute, then slowly increase the speed to medium-high. Beat until stiff, glossy peaks form and the meringue is completely cool to the touch (this usually takes about 10 minutes, but can be longer with a hand mixer).
- Meanwhile, melt the chocolate using the detailed microwave directions provided earlier in this article, or follow your chocolate package directions for melting. Allow the melted chocolate to cool completely to room temperature before proceeding.
- Once the meringue has formed stiff peaks and is cool, scrape down the sides of the bowl with a spatula and add the coarse kosher salt.
- Turn on the mixer to medium speed. Begin adding the softened, room temperature butter, one tablespoon at a time. Ensure that each piece of butter is fully incorporated into the meringue before adding the next piece. (NOTE: It is normal for the buttercream to appear curdled or lumpy partway through this process. Keep adding the butter and continue mixing.)
- Continue whisking the buttercream on medium-high speed until it becomes smooth, light, and fluffy in texture, typically for an additional 10 minutes after all butter has been added.
- Now, switch your mixer attachment to the paddle. With the mixer on low speed, add the completely cooled melted chocolate. Beat the buttercream until the chocolate is thoroughly combined, and the frosting is uniform in color and texture (about one minute).
⭐️ Did you make this recipe?
Please leave a review and let us know how you liked it!
Tips & Notes
- Yield: This recipe typically yields approximately 4 cups of chocolate Swiss meringue buttercream. This quantity is generally sufficient for frosting a 3-layer 9-inch cake, or for generously frosting about 24 standard-sized cupcakes.
- Make-Ahead & Storage Tip: Chocolate Swiss meringue buttercream is excellent for making in advance. It can be stored in an airtight container in the refrigerator for up to 2 weeks, or frozen for up to 3 months. To use refrigerated buttercream, let it come to room temperature for a few hours, then re-whip it on medium-high speed in your stand mixer until it becomes light, fluffy, and smooth again. For frozen buttercream, thaw it overnight in the refrigerator, then bring it to room temperature on the counter before re-whipping.
- Note 1 (Egg Whites): While some brands of carton liquid egg whites can yield acceptable results, fresh egg whites are generally recommended for the most consistent and stable meringue. If you opt for liquid egg whites from a carton, you will need approximately 210g by weight.
- Note 2 (Butter Temperature): The temperature of your unsalted butter is critical. It must be at true room temperature, meaning it should be soft enough to leave a slight indentation when gently pressed with a finger, but it should still hold its shape and not appear greasy or melted.
- Note 3 (Chocolate Type): You have flexibility with your choice of chocolate. Any good quality dark chocolate or semi-sweet chocolate bar (chopped into small pieces) will work wonderfully. Chocolate chips can also be used. For detailed instructions on how to properly melt your chocolate without burning or seizing, please refer to the dedicated section above in this post.
Estimated Nutritional Information (Per Serving)
Please note that this nutritional information is an estimate based on the ingredients used:
- Calories: 209 kcal
- Carbohydrates: 18g
- Protein: 2g
- Fat: 15g
- Sugar: 16g
- Sodium: 64mg
Course & Cuisine
- Course: Dessert
- Cuisine: Swiss
Did you make this delicious recipe? We’d love to hear from you! Leave a rating and share your valuable feedback below. Thank you for baking with us!
Share Your Experience!
We’d be thrilled to hear about your experience making this chocolate Swiss meringue buttercream. Please leave a comment or review below and let us know how your frosting turned out and what delicious desserts you paired it with!
