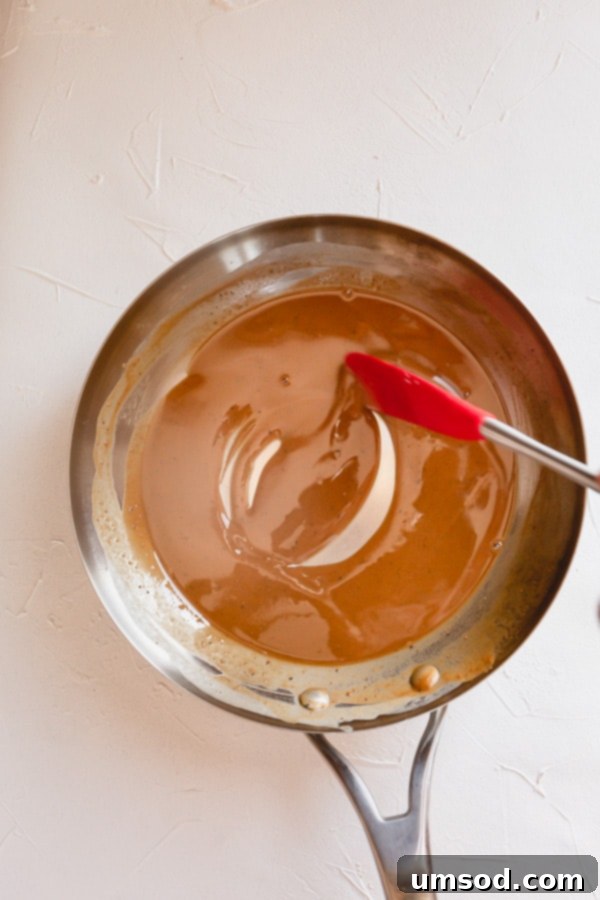
Embark on a culinary journey to master one of the most fundamental yet transformative techniques in cooking: making a roux. This comprehensive guide will equip you with all the knowledge and practical tips needed to create perfectly smooth, rich, and flavorful sauces, gravies, and soups. Whether you’re aiming for a classic béchamel, a hearty gumbo, or a silky gravy, understanding the nuances of roux is your key to elevating everyday dishes into extraordinary culinary experiences. We’ll delve into what a roux is, explore its three distinct types, uncover the ideal ingredient ratios, provide step-by-step cooking instructions, and share invaluable storage and freezing advice.
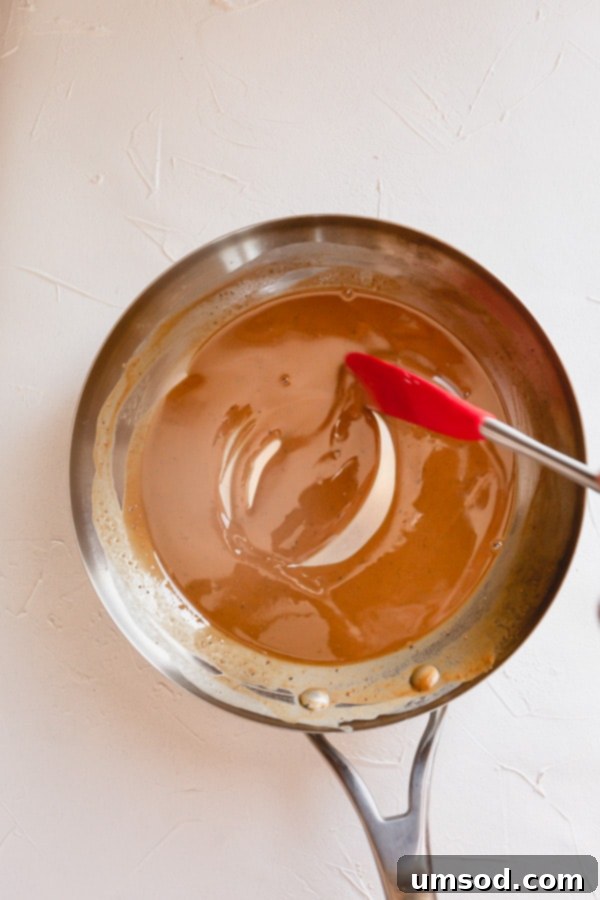
Mastering the Art of Roux: Your Essential Guide
Knowing how to create a flawless roux is truly a game-changer in the kitchen. It’s the secret weapon behind countless beloved dishes, providing not just thickness but also a depth of flavor that can’t be achieved with raw flour alone. Today, we’re going to demystify this classic ingredient and turn you into a roux expert, ready to tackle any recipe with confidence.
What Is Roux? A Culinary Foundation
At its core, a roux (pronounced “roo,” originating from French cuisine) is a simple yet powerful mixture of cooked fat and flour. These two humble ingredients, when combined and gently roasted, form a nutty paste that serves as a foundational thickening agent and flavor base for a vast array of dishes. It’s the unsung hero behind creamy béchamel sauce, rich gravies, hearty stews, comforting macaroni and cheese, and robust gumbos. Many home cooks have likely prepared a roux without even knowing its formal name, making it a familiar concept to anyone who’s thickened a sauce.
The magic of roux lies in its ability to transform liquids. When flour is cooked in fat, the starch granules in the flour absorb the fat, then swell and gelatinize when introduced to a hot liquid. This process creates a stable emulsion, resulting in a smooth, velvety texture without any lumps or a raw, doughy taste. This technique is far superior to simply adding raw flour to a liquid, which often leads to an uneven, pasty, and unappetizing consistency.
The Versatile Uses of Roux: Beyond Just Thickening
While often celebrated as a thickening agent, a roux offers much more than just viscosity. Its primary function is indeed to create smooth, lump-free cream sauces, rich gravies, and hearty soups. However, depending on how long it’s cooked, a roux also imparts unique flavor profiles to your dishes.
- Thickening Power: Roux prevents the formation of lumps that occur when raw flour is added directly to hot liquids. The fat coats the flour particles, ensuring they disperse evenly throughout the liquid, yielding a smooth and consistent texture every time.
- Flavor Development: The cooking process of flour in fat removes the raw starch taste, replacing it with a more complex, often nutty, and toasted flavor. Darker roux, in particular, contributes a profound, savory depth that is essential for dishes like authentic New Orleans-style gumbo, where its primary role is to build a robust flavor base rather than merely thicken. This flavor development is crucial for layering tastes in your culinary creations, offering a richness that simple thickeners cannot match.

How to Make a Roux: Step-by-Step Mastery
Making a roux is deceptively simple, requiring only two ingredients and a bit of patience. However, mastering the nuances will ensure a perfect result every time. The key lies in precise measurement, careful heat management, and continuous attention.
The Perfect Roux Ratio: Weight Over Volume
For consistent results, the ideal ratio of fat to flour in a roux is 1:1 by weight. While many recipes might suggest a 1:1 volume ratio, this can lead to vastly different outcomes due to the density differences between fat and flour. For instance, 1 cup of butter weighs differently than 1 cup of flour. Using a kitchen scale to measure equal weights, such as 56 grams of butter to 56 grams of all-purpose flour, will yield a perfectly smooth, thick, yet workable consistency for your roux. This precise measurement ensures optimal thickening power and prevents your roux from being too greasy or too dry.
Cooking Time and Unwavering Attention
Roux-making demands your full focus. Flour and butter can burn quickly, and once a roux burns, there’s no salvaging it – you’ll have to start over. This isn’t the time for distractions; your undivided attention is crucial. While there’s no universal “magic number” for cooking time, as it varies with the type of roux you’re aiming for (more on that below) and your specific stove and cookware, you’ll learn to recognize the visual and aromatic cues that signal perfection.
The Basic Roux Process in a Nutshell:
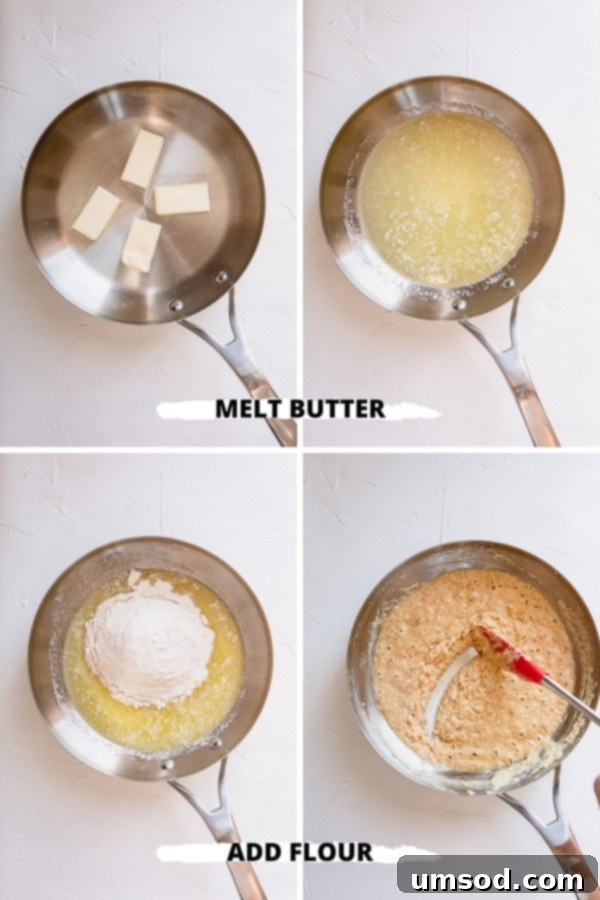
- Melt your chosen fat over medium-low heat.
- Gradually add the flour, whisking constantly to combine.
- Cook the mixture, stirring diligently, until it reaches your desired shade and aroma.
For best results, use a heavy-bottomed saucepan or skillet to ensure even heat distribution and prevent scorching. A sturdy whisk is also indispensable for breaking up any lumps and ensuring a smooth consistency.
The Three Shades of Roux: White, Blonde, and Brown
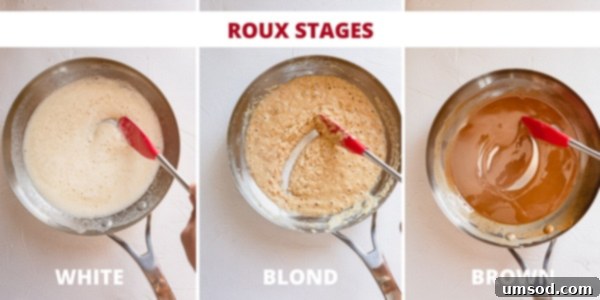
Roux comes in three primary types or shades: white, blonde, and brown. All are made with the same fundamental ingredients and ratios, but the duration of cooking dictates their color, flavor, and thickening capabilities.
White Roux: The Ultimate Thickener
- Cook Time: 1-2 minutes.
- Appearance: Remains very pale, almost white.
- Flavor: Neutral, with the raw flour taste just cooked out. It allows other ingredients in the sauce to shine.
- Thickening Power: Highest. Its starch granules are minimally cooked, retaining maximum thickening capacity.
- Uses: Ideal for white and creamy sauces like béchamel (the base for many gratins and cheese sauces), classic white gravies, and dishes such as macaroni and cheese, and scalloped potatoes. It ensures a smooth, rich consistency without altering the color of the final dish.
Blonde Roux: Balanced Flavor and Thickness
- Cook Time: 3-5 minutes.
- Appearance: Light golden-tan, reminiscent of peanut butter.
- Flavor: Develops a subtle, light nutty aroma and taste, adding a gentle depth.
- Thickening Power: High, though slightly less than white roux due to longer cooking.
- Uses: A versatile choice for many traditional gravies, velouté sauces (made with chicken, veal, or fish stock), and some lighter chowders or bisques. It adds a bit more character than a white roux without overpowering delicate flavors.
Tip for White and Blonde Roux: Pay close attention to the aroma. Initially, you’ll detect the distinct smell of raw flour. As it cooks, this raw scent will dissipate, replaced by a slightly roasted flour smell for white roux, and a wonderfully toasted, nutty fragrance for blonde roux. Your nose is a crucial tool here!
Brown Roux: Deep Flavor and Rich Color
- Cook Time: 6-15+ minutes, sometimes up to 20-30 minutes for very dark roux.
- Appearance: Deep brown, ranging from the color of milk chocolate to dark caramel.
- Flavor: Intense, robust, and profoundly nutty, adding significant savory depth and a unique toasted character.
- Thickening Power: Least. The prolonged cooking time breaks down many of the starch molecules, reducing its thickening capacity. It’s primarily used for flavor.
- Uses: The indispensable base for iconic dishes like gumbo, etouffée, dark gravies, and hearty stews where a rich, dark flavor is paramount.
Tip for Brown Roux: When aiming for a dark roux, it’s best to use oils (like vegetable or canola) or rendered fats such as bacon fat. Butter contains milk solids that can burn quickly and blacken before the flour has had enough time to achieve the desired deep brown shade, imparting an unpleasant bitter taste.
Exploring Other Fat Options for Making Roux
While butter is the classic choice for many roux applications, especially for white and blonde varieties, a variety of fats can be used, each contributing its own distinct flavor profile and characteristics to your roux and, consequently, your final dish.
- Bacon Fat: A personal favorite for its incredibly savory and smoky notes. Excellent for gravies, country-style dishes, and adding a flavorful base to bean soups or stews.
- Duck Fat: Offers a luxurious richness and a distinctive, slightly gamey flavor. Perfect for gourmet sauces, confit-inspired dishes, or adding depth to poultry-based gravies.
- Coconut Oil: A good plant-based option, particularly if you’re looking for a neutral flavor that can sometimes lend a subtle hint of sweetness, or a more pronounced coconut flavor if unrefined. Suitable for diverse culinary applications.
- Ghee (Clarified Butter): With its milk solids removed, ghee has a higher smoke point than regular butter, making it suitable for longer cooking times, especially for blonde or light brown roux. It imparts a delightful nutty flavor.
- Avocado Oil: A very high smoke point and neutral flavor make avocado oil an excellent choice for any type of roux, particularly darker ones where butter might burn. It’s also a healthier fat option.
- Canola Oil: Another neutral-flavored oil with a high smoke point, ideal for when you want the roux to thicken without adding its own distinct taste. Very versatile and economical.
- Lard or Vegetable Shortening: Traditional in some regional cuisines, these fats offer a neutral flavor and high smoke points, suitable for all roux types.
Storing and Freezing Roux: For Future Culinary Creations
One of the best ways to streamline your cooking is to prepare a larger batch of roux in advance. This foundational ingredient can be made ahead and stored, saving you precious time when preparing meals later on.
- How to Store Cooked Roux: Once your roux has reached your desired shade and cooled completely, transfer it to an airtight container. It can be safely refrigerated for up to 3 months. This is perfect for quick weeknight gravies or impromptu sauce needs.
- How to Freeze Roux: Freezing roux is an excellent way to extend its shelf life. Divide your cooled roux into convenient portions, such as 1 to 2 tablespoons each. An ice cube tray works perfectly for this; simply spoon the roux into the compartments and freeze until solid. Once frozen, pop the roux cubes out of the tray and transfer them to a freezer-safe bag or container. Frozen roux can be stored for 6 months to a year.
- Using Frozen Roux: There’s no need to thaw frozen roux. You can add the frozen cubes directly to hot liquids, where they will melt and seamlessly incorporate, thickening your sauce or soup.
- General Thickening Guideline: As a helpful rule of thumb, approximately 1 tablespoon of prepared roux (made from roughly equal parts fat and flour) will thicken about 1 cup of liquid to a medium consistency. Adjust this amount based on your desired thickness.
With these storage tips, you’ll always have a homemade roux on hand, ready to transform everyday ingredients into extraordinary dishes. Happy cooking!
If you master this recipe, please share your creations on Instagram and tag me @shineshka. I’d love to see your perfect roux!
How to Make a Roux
A complete guide on how to make a roux for sauces, gravies and soups. In this post, you’ll learn what is roux, 3 types of roux, all the tips to a perfect roux to make amazing sauces and dishes. Plus, storing and freezing tips!
By Shinee Davaakhuu
Cook: 10 mins | Total: 10 mins | Servings: 5 tablespoons
Ingredients
- 4 tablespoons (56g) butter (or other fat, see Note 1)
- 7 tablespoons (56g) all-purpose flour
Instructions
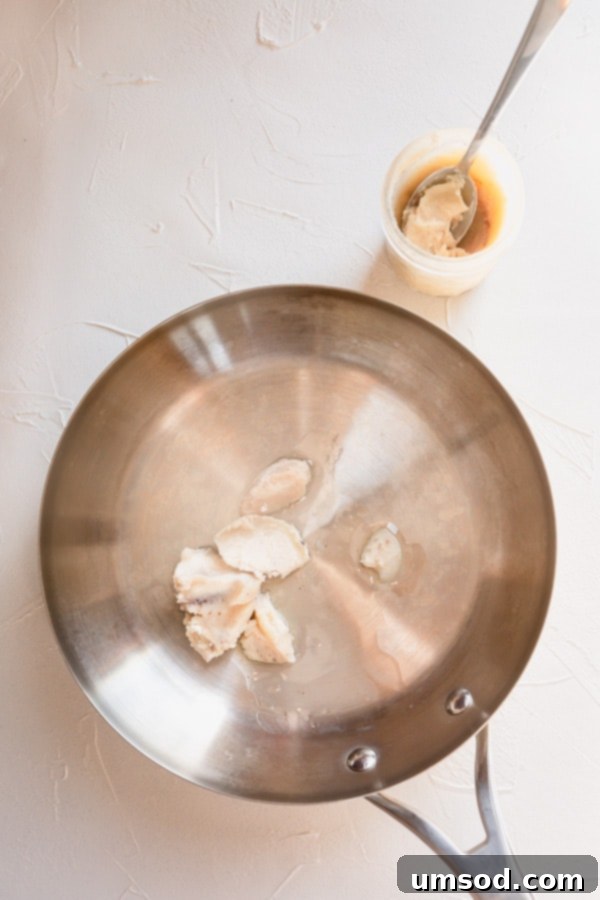
- In a heavy-bottomed stainless steel skillet or saucepan, melt butter (or chosen fat) over medium-low heat.
- Once melted, allow it to cook for about a minute to evaporate any excess moisture. Be careful not to brown the butter at this stage.
- Add the flour gradually, whisking constantly to ensure no lumps form and the mixture is smooth.
- Continue to cook the mixture, stirring occasionally but diligently, until the desired shade is reached.
TIP: When making white or blonde roux, keep smelling the mixture. Initially, you’ll smell raw flour; this scent will disappear, giving way to a slightly roasted flour smell. For blonde roux, it will develop a noticeably toasted and nutty aroma.
Estimated Cook Time by Roux Type:
- White Roux: 1-2 minutes
- Blonde Roux: 3-5 minutes
- Brown Roux: 6-15 minutes (or longer for very dark shades)
⭐️ Did you make this recipe?
Please leave a review and let us know how you liked it!
Tips & Notes
- Note 1 (Fat Options): In place of butter, you can use any suitable oil or shortening. Popular choices include bacon fat (highly recommended for savory dishes), duck fat, coconut oil, ghee, avocado oil, or canola oil. Choose based on desired flavor and smoke point.
- Note 2 (Yield): This batch of roux yields enough to thicken approximately 4 cups of liquid to a medium consistency.
- How to Store: Refrigerate cooled roux in an airtight container for up to 3 months.
- How to Freeze Roux: Divide the cooled mixture into roughly 1.5 tablespoon portions (or your desired serving size), place in an ice cube tray, and freeze until solid. Once frozen, transfer to a freezer-safe bag.
- Thickening Ratio: Generally, 1 tablespoon of prepared roux will thicken about 1 cup of liquid to a medium consistency. Adjust according to your preference.
Nutrition
- Calories: 119 kcal
- Carbohydrates: 8g
- Protein: 1g
- Fat: 9g
- Sugar: 1g
- Sodium: 80mg
Recipe Meta
- Course: Main Course
- Cuisine: French
Did you make this? Leave a rating and your feedback. Thank you!
