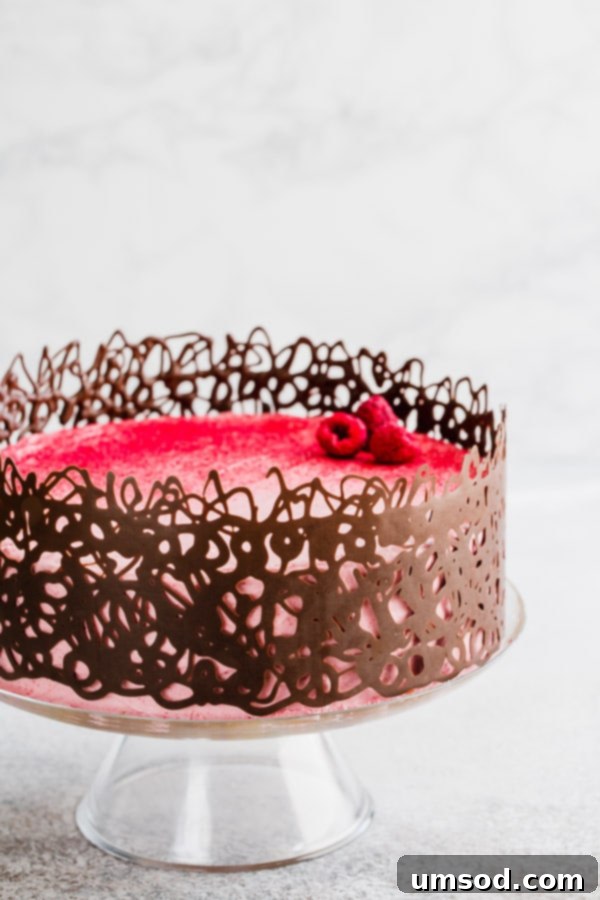
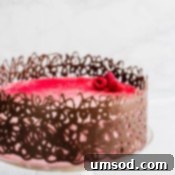
Are you looking for a simple yet incredibly effective way to elevate your homemade cakes? Discover the secret to creating a stunning chocolate cage – a show-stopping decoration that promises a professional look without requiring any special skills or fancy equipment. This comprehensive guide will walk you through every step, ensuring your next cake becomes an instant masterpiece, dazzling everyone with its intricate chocolate design.
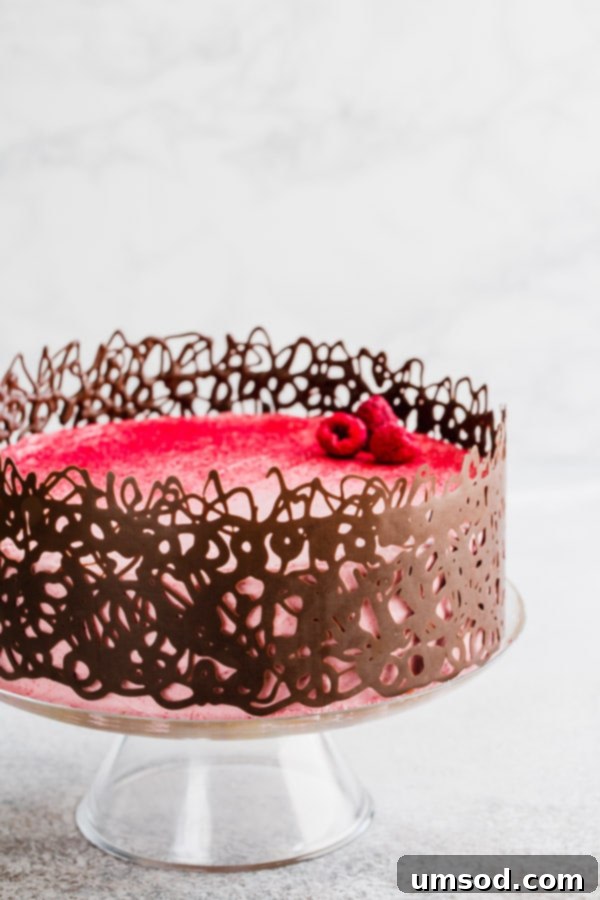
Why This Easy Chocolate Cake Cage Will Be Your New Go-To Decoration
As home bakers, we often seek ways to make our creations stand out, but elaborate cake decorating can feel intimidating. This easy chocolate cage technique is a game-changer for several reasons:
- Effortless Elegance: This design instantly adds a sophisticated touch, making even the simplest cake look like it came from a high-end patisserie.
- Hides Imperfections Flawlessly: Not a pro at frosting? No problem! The beautiful chocolate cage wraps around your cake, cleverly concealing any uneven frosting or minor imperfections. It’s like magic for your cake’s appearance!
- Minimal Ingredients, Maximum Impact: You only need ONE primary ingredient – chocolate – and less than 15 minutes of active preparation time to create this impressive effect.
- Unleash Your Creativity: While the basic technique is straightforward, there’s ample room to experiment with different patterns, textures, and even colors to match any occasion or theme.
- Perfect for Any Occasion: Whether it’s a birthday, anniversary, holiday, or just a weekend treat, a chocolate cage elevates any cake into a special celebration.
- Boost Your Baking Confidence: Achieve professional-looking results with minimal effort, building your confidence in the kitchen and impressing your friends and family.
Say goodbye to complicated piping and fondant work. This chocolate cage is all about achieving stunning results with minimal fuss, making it ideal for busy bakers and those new to cake decorating.
Essential Ingredients and Tools for Your Chocolate Cage
The beauty of this chocolate cage technique lies in its simplicity, requiring just a few common items you might already have in your kitchen. Choosing the right type of chocolate and working surface is key to success.
The Star Ingredient: Chocolate
- Dark Chocolate (Bittersweet or Semi-Sweet): This is your best friend for a successful chocolate cage. Dark chocolate contains a higher percentage of cocoa solids and cocoa butter, making it easier to temper and giving it a better snap and shine when set. Opt for a good quality bar of chocolate.
- Why Bar Chocolate Over Chips? Chocolate chips are specifically designed to hold their shape during baking due to their lower cocoa butter content and added stabilizers. This means they don’t melt as smoothly or temper as easily as baking bars. For a fluid, workable chocolate that sets perfectly, always choose a baking bar.
- Can I Use Milk or White Chocolate? Yes, but with caution. Milk and white chocolates have different compositions (more sugar, milk solids, and often less cocoa butter), making them more challenging to temper and prone to seizing or becoming grainy. If you choose to use them, melt them even more gently and carefully monitor the temperature.
Your Working Surface: Paper Power
- Wax Paper: This is my top recommendation. Its thinner composition and slightly waxy surface make it incredibly easy to peel away from set chocolate without tearing or sticking. It’s readily available and affordable.
- Parchment Paper: While thicker than wax paper, parchment paper can also work. However, some brands might adhere more strongly to chocolate, making removal a bit trickier. If using parchment, ensure it’s a non-stick brand.
- Clear Acetate Strips: For a professional finish, clear acetate sheets are excellent. They offer a perfectly smooth surface, resulting in glossy chocolate. They are reusable but might require a special purchase. If you frequently make chocolate decorations, these are a worthwhile investment.
Basic Tools You’ll Need
- Piping Bag: A disposable piping bag is convenient. Alternatively, a sturdy Ziploc bag with a corner snipped off can work in a pinch.
- Round Piping Tip: For elegant, consistent lines, a round piping tip is essential. I often use a Wilton #2 or #3 tip for delicate designs, but a slightly larger tip (like a #5 or #6) is great for bolder patterns or if you’re aiming for flowers or hearts, ensuring the design is sturdy enough.
- Ruler and Pen: For accurate measuring and drawing guidelines on your wax paper.
- Microwave-Safe Bowl or Double Boiler: For melting your chocolate gently.
- Rubber Spatula: For stirring the chocolate smoothly.
- Sharp Knife: For finely chopping your chocolate bar, which helps it melt more evenly.
Mastering the Art of Tempering Chocolate for a Perfect Cage
The secret to a beautiful, stable, and shiny chocolate cage lies in properly tempering your chocolate. Don’t let the word “tempering” scare you; for this technique, we’re focusing on a simplified, gentle melting approach that yields fantastic results without needing complex equipment.
What is Tempering and Why Does It Matter?
Tempering chocolate involves melting and cooling chocolate to specific temperatures to stabilize the cocoa butter crystals. When chocolate is properly tempered, it:
- Sets Quickly: Your chocolate design will firm up rapidly at room temperature.
- Has a Beautiful Sheen: It will look glossy and professional.
- Possesses a Satisfying Snap: The finished chocolate will be crisp and break cleanly, rather than crumbling or being soft.
- Is More Stable: It will be less prone to melting from handling and will maintain its shape.
Our Simplified “Gentle Melt” Tempering Method
For this chocolate cage, we aim to keep the chocolate in “temper” (or close to it) by melting it *gently* and avoiding overheating. The key is to never exceed 90°F (32°C) for dark chocolate.
- Chop Your Chocolate Finely: Start with finely chopped dark chocolate. Smaller pieces melt more evenly and quickly, reducing the chance of hot spots.
- Microwave Method (Recommended for Ease):
- Place chopped chocolate in a medium silicone or plastic bowl (these retain heat less than glass).
- Microwave at 50% power for 30 seconds.
- Stir thoroughly with a rubber spatula. Even if the chocolate doesn’t look melted, stirring helps distribute heat.
- Continue microwaving at 50% power in 15-second intervals, stirring vigorously after each interval.
- Stop microwaving when there are still a few small lumps remaining. The residual heat from the melted chocolate will melt these as you stir.
- Continue stirring until completely smooth and lump-free. The chocolate should feel warm to the touch, but not hot. Ideally, use a digital thermometer to ensure it doesn’t exceed 90°F (32°C).
- Double Boiler Method (Alternative):
- Place chopped chocolate in a heatproof bowl set over a saucepan of simmering water. Ensure the bottom of the bowl does not touch the water.
- Stir constantly until the chocolate is mostly melted, with a few small lumps remaining.
- Remove from heat and continue stirring until completely smooth. Monitor the temperature carefully to stay below 90°F (32°C).
Once your chocolate is smoothly melted and at the correct temperature, immediately transfer it to your piping bag to begin designing.
Step-by-Step Guide to Creating Your Elegant Chocolate Cage
Follow these detailed instructions to craft a beautiful chocolate cage that will impress everyone.
1. Prepare Your Wax Paper Strips
- Measure Your Cake: Use a flexible measuring tape to determine the circumference of your frosted cake. For easier handling, it’s best to work with two shorter strips of wax paper, each half the length of your cake’s circumference. For example, if your cake is 9 inches in diameter (approx. 28-30 inches circumference), you’ll need two 15-inch strips.
- Determine Height: Decide how tall you want your chocolate cage to be. Do you want it flush with the top of your cake, or slightly taller for a dramatic effect? Cut your wax paper strips to this desired height, adding an extra inch or two for ease of handling at the top and bottom.
- Draw Guidelines: Using a ruler and a pen (ensure the ink doesn’t bleed), draw two faint lines on the wax paper strips. These lines will serve as your top and bottom boundaries for piping, helping you maintain a consistent height and shape for your design.
2. Melt and Transfer the Chocolate
- Gentle Melting: Follow the “Simplified Gentle Melt” tempering method described above. Chop 4 oz (about 113g) of dark chocolate and melt it slowly, either in the microwave at 50% power in short bursts or over a double boiler. Stir frequently until smooth and shiny, ensuring the temperature does not exceed 90°F (32°C).
- Prepare Piping Bag: Fit your piping bag with your chosen round piping tip (e.g., Wilton #2 or #3 for fine details, #5 or #6 for bolder designs).
- Transfer Chocolate: Carefully scoop the melted chocolate into the piping bag. Twist the top of the bag to seal it and prevent chocolate from oozing out.
3. Pipe Your Chocolate Design
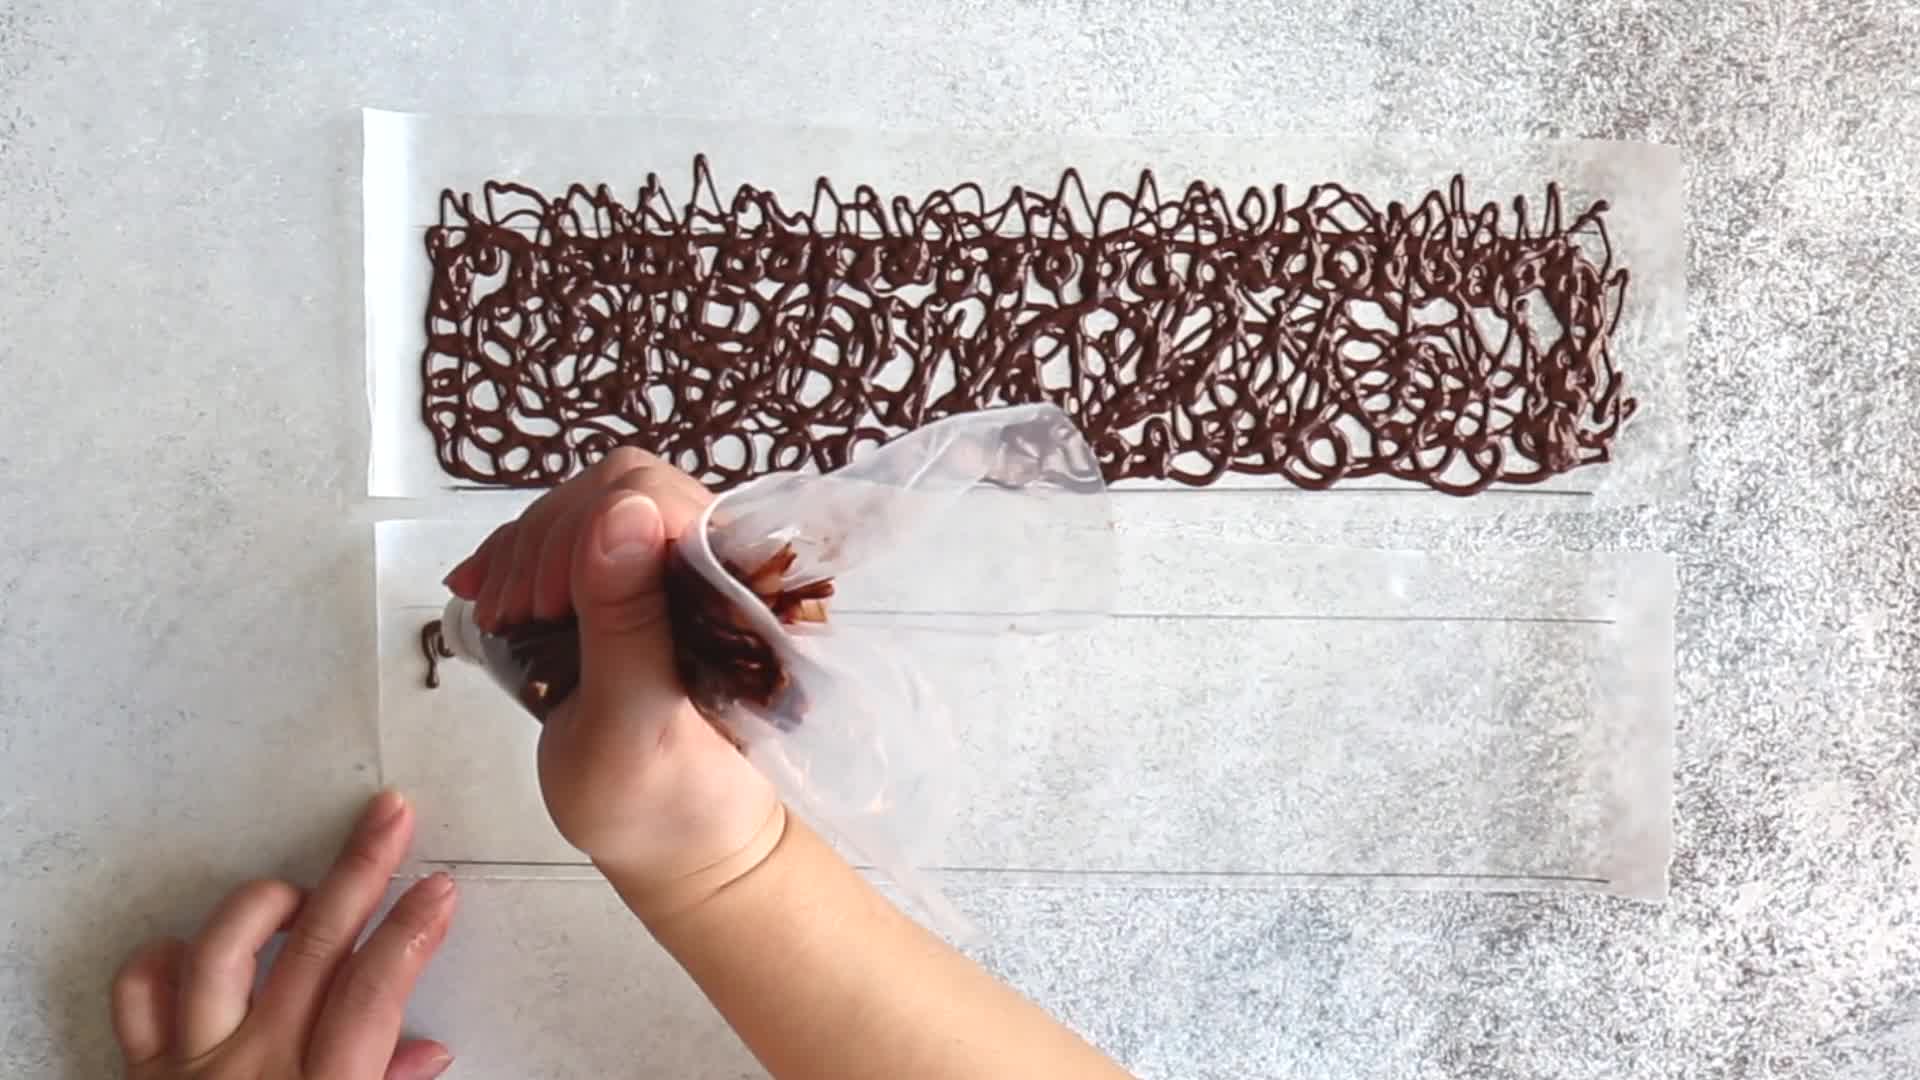
- Get Creative: On your prepared wax paper strips, begin piping your chosen design within the drawn guidelines. You can create intricate swirls, geometric patterns, vertical lines, criss-cross designs, or even abstract freehand art.
- Ensure Sturdiness: This is crucial! Make sure your lines and connections are thick enough to support the structure of the cage. Too-thin lines will be fragile and prone to breaking when handled or peeled. Overlapping lines at intersections adds strength.
- Work Quickly and Consistently: Piped chocolate can start to set quickly, especially if properly tempered. Work with a steady hand and maintain a consistent pressure on the piping bag for even lines.
4. Set the Chocolate
- Room Temperature Setting: Allow the piped chocolate to set at room temperature for about 3-5 minutes, or until it is firm to the touch but still pliable. If your chocolate was well-tempered, it should set relatively quickly.
- The “Pliable” Test: The chocolate should be firm enough that it doesn’t smudge when lightly touched, but flexible enough to gently bend around the cake without cracking.
- Troubleshooting Slow Setting: If the chocolate hasn’t set within 5 minutes, it likely means it was heated a bit too much and lost its temper. Don’t worry! Just wait an additional 10-15 minutes at room temperature. If it’s still too soft, carefully place it in the refrigerator for a few minutes. Check every minute or two to prevent over-firming, which can lead to breakage.
5. Apply the Chocolate Cage to Your Cake
- Careful Transfer: Once the chocolate is set but still pliable, gently lift one wax paper strip with its chocolate design.
- Wrap Around Cake: Carefully position and wrap the strip around the side of your frosted cake, pressing gently so the chocolate adheres to the frosting.
- Repeat: Take the second strip and wrap it around the remaining portion of the cake, aligning the ends of the chocolate design to create a seamless cage.
6. Peel Off the Wax Paper
- Patience is Key: Once both strips are in place, gently begin to peel off the wax paper from the chocolate design. Start at one end and slowly pull the paper away, parallel to the cake.
- If Chocolate is Too Soft: If the chocolate seems too soft and is sticking to the paper or threatening to break, place the entire cake in the refrigerator for 15-30 minutes. The chill will firm up the chocolate, making the paper removal much easier.
- Admire Your Work: With the wax paper removed, you’ll be left with a stunning, intricate chocolate cage surrounding your cake!
Troubleshooting Tips for a Flawless Chocolate Cage
Even with the simplest techniques, sometimes things don’t go exactly as planned. Here are some common issues and how to resolve them:
- Chocolate Doesn’t Set Firmly (Too Soft/Melting Easily):
- Cause: Most likely, the chocolate was overheated and lost its temper. This means the cocoa butter crystals are disorganized and won’t solidify properly at room temperature.
- Solution: Place the entire decorated cake (or just the chocolate strips before applying) in the refrigerator for 10-20 minutes to firm up. Check frequently to avoid over-chilling.
- Chocolate Breaks When Applying or Peeling Paper:
- Cause 1: The chocolate design was too thin or lacked sufficient connecting points.
- Solution 1: Ensure your piped lines are robust enough to withstand handling. For future attempts, make your design thicker.
- Cause 2: The chocolate was over-chilled in the fridge, making it brittle.
- Solution 2: If you refrigerated it, allow it to sit at room temperature for a minute or two to regain a slight pliability before peeling. Work gently and slowly.
- Cause 3: The chocolate wasn’t set enough and was still too soft to handle.
- Solution 3: If it feels too soft, chill the entire cake for an additional 15-30 minutes before attempting to peel the paper.
- Wax Paper Sticks to the Chocolate:
- Cause: The chocolate wasn’t fully set, or it might have been slightly warm when applied to the cake, causing it to soften further.
- Solution: Place the cake in the refrigerator for at least 30 minutes, or even longer, until the chocolate is firm. The cold will help the chocolate contract slightly, making it easier to peel away from the wax paper.
- Uneven or Messy Piping:
- Cause: Inconsistent pressure on the piping bag, unsteady hand, or chocolate being too warm/cold.
- Solution: Practice makes perfect! Try piping designs on an extra piece of wax paper first. Ensure your chocolate is at the ideal, smooth consistency. Take deep breaths and pipe with confidence.
Remember, practice is key, and even “imperfect” chocolate cages still taste delicious!
Chocolate Cage – Elegant Cake Decoration
Shinee Davaakhuu
15
1
cake
Comment
Print Recipe
Ingredients
-
4
oz
dark chocolate
(bittersweet or semi-sweet bar, see Note 1)
Tools you need:
-
Wax paper -
Piping bag -
Round piping tip -
Ruler and pen
Instructions
To prepare wax paper:
- Measure your cake’s circumference and cut two strips of wax paper, each half the length of the circumference. (For a 9-inch cake, two 15-inch strips are ideal. Adjust the height of the strips based on your desired chocolate design height, adding an extra inch for handling.)
- Using a ruler and a pen, draw two faint lines on your wax paper strips. These will guide your piping to ensure a consistent top and bottom edge for your design.
To melt chocolate:
- Finely chop the dark chocolate and place it in a medium silicone or plastic bowl.
- Microwave at 50% power for 30 seconds. Stir well. Continue microwaving in 15-second increments at 50% power, stirring thoroughly after each interval, until the chocolate is almost fully melted with only a few small lumps remaining. Remove from microwave and stir until completely smooth. Ensure the chocolate doesn’t exceed 90°F (32°C).
- Immediately transfer the melted chocolate into a piping bag fitted with your chosen round tip.
To draw the design:
- Begin piping your desired chocolate design onto the wax paper strips, staying within the drawn guidelines. Make sure your lines are thick enough to create a sturdy structure; thin lines will be too fragile and prone to breaking.
- Allow the chocolate to set at room temperature for approximately 3-5 minutes, or until it is firm enough to touch without smudging but still pliable enough to bend without cracking. (TIP: If your chocolate was properly tempered, it will set within 5 minutes. If it’s still soft, wait another 10-15 minutes at room temperature, or briefly chill in the fridge for a minute or two, checking frequently.)
To apply:
- Carefully lift one wax paper strip with the set chocolate design. Gently wrap it around the side of your frosted cake, pressing lightly to adhere the chocolate to the frosting. Repeat with the second strip, aligning the ends to complete the cage.
- Slowly and carefully peel off the wax paper from the chocolate cage. (TIP: If the chocolate still feels too soft or is sticking, place the cake in the refrigerator for 30 minutes or longer to firm it up, then try peeling the wax paper off again.)
⭐️ Did you make this recipe?
Please leave a review and let us know how you liked it!
Tips & Notes
Nutrition
678
kcal
52
g
9
g
48
g
27
g
23
mg
Dessert
American
Did you make this?
Leave a rating and your feedback. Thank you!
Creative Variations and Design Ideas
Once you’ve mastered the basic chocolate cage, the possibilities for customization are endless. Here are some ideas to spark your creativity:
- Pattern Play: Experiment with different designs – intricate lace patterns, bold geometric shapes, delicate swirls, or even themed designs like hearts for Valentine’s Day or snowflakes for winter.
- Two-Tone Elegance: Use a combination of dark and white chocolate to create a striking contrast. You could pipe a base layer of dark chocolate, let it set slightly, then add details with white chocolate (or vice versa).
- Colorful Creations: Melt white chocolate and tint it with oil-based food colorings to match your cake’s theme or a specific color palette.
- Sprinkle Magic: While your chocolate design is still wet on the wax paper, gently sprinkle on edible glitter, sprinkles, or finely chopped nuts for added texture and sparkle.
- Miniature Masterpieces: Scale down the technique to create small chocolate cages for cupcakes or individual desserts. Just cut smaller strips of wax paper and adjust your design.
- Flavor Infusions: Add a drop of food-grade essential oil (like peppermint or orange) or a pinch of chili powder to your melted chocolate for a unique flavor twist.
Serving and Storage Tips
- Serving: A chocolate cage adds a beautiful presentation to any cake. When serving, you can gently cut through the chocolate with a warm, sharp knife. The cage will likely break into pieces as you slice, which is perfectly normal and still delicious.
- Storage: Store your decorated cake in an airtight container at cool room temperature (below 70°F/21°C) if your kitchen isn’t too warm. For longer storage or in warmer climates, refrigerate the cake. Allow it to come to room temperature for about 15-30 minutes before serving for the best flavor and texture of both the cake and the chocolate.
- Humidity Alert: Chocolate is sensitive to humidity. In very humid environments, the chocolate cage might develop a slight “bloom” (a white, powdery film) or become sticky. This is harmless but can affect the appearance. Store in a cool, dry place if possible.
Frequently Asked Questions (FAQ)
Can I use chocolate chips instead of a bar?
While technically possible, it’s not recommended. Chocolate chips are formulated to hold their shape and contain less cocoa butter, making them harder to melt smoothly and temper correctly. A baking bar will give you far better results for a glossy, snapping chocolate cage.
What if I don’t have a piping bag or tips?
You can improvise! A sturdy Ziploc bag (or any freezer bag) can be filled with melted chocolate, and a tiny corner snipped off to create a makeshift piping bag. The control won’t be as precise, but it will work for simpler designs.
How far in advance can I make the chocolate cage?
You can pipe the chocolate designs onto wax paper a day or two in advance. Once fully set, carefully peel them off the wax paper and store them flat in an airtight container at cool room temperature. Then, apply them to your frosted cake just before serving or on the day of your event.
Can this technique be used on other desserts?
Absolutely! This method is versatile. You can create smaller chocolate wraps for individual pastries, tarts, or even wrap it around a bowl of mousse for an edible container. Just adjust the size of your wax paper strips accordingly.
Is it hard to cut the cake with the chocolate cage on?
No, it’s not hard. Simply use a sharp knife and cut through the chocolate cage as you would the cake. The chocolate will break into pieces, which adds a nice textural element to each slice.
Conclusion: Your Journey to Effortlessly Elegant Cakes
Creating an easy chocolate cage is a delightful and rewarding experience that instantly elevates any homemade cake from ordinary to extraordinary. With just a few basic ingredients, simple tools, and the gentle melting technique, you can achieve a sophisticated dessert that looks like it took hours of effort. Embrace this technique, unleash your inner cake artist, and get ready to impress with beautiful, elegant chocolate designs. Happy baking!
