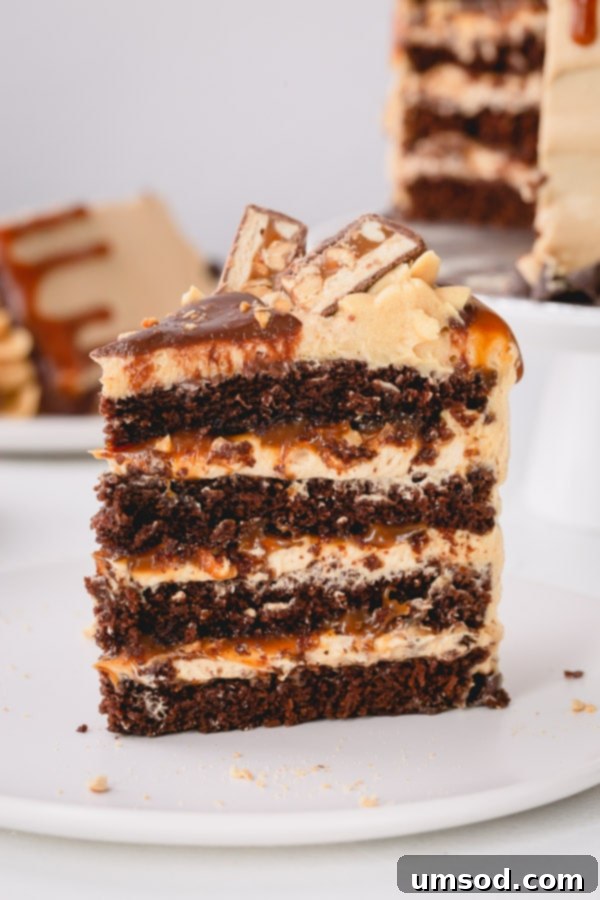
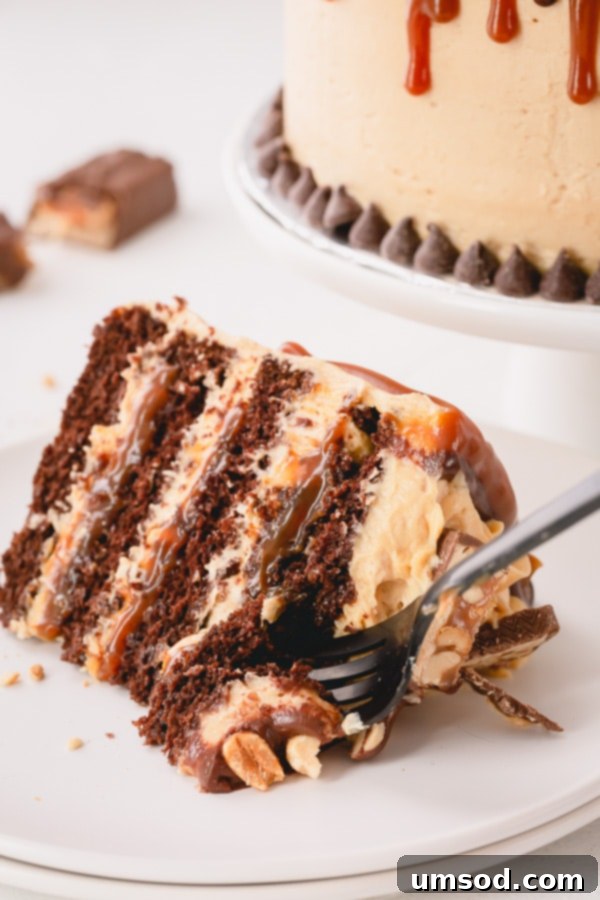
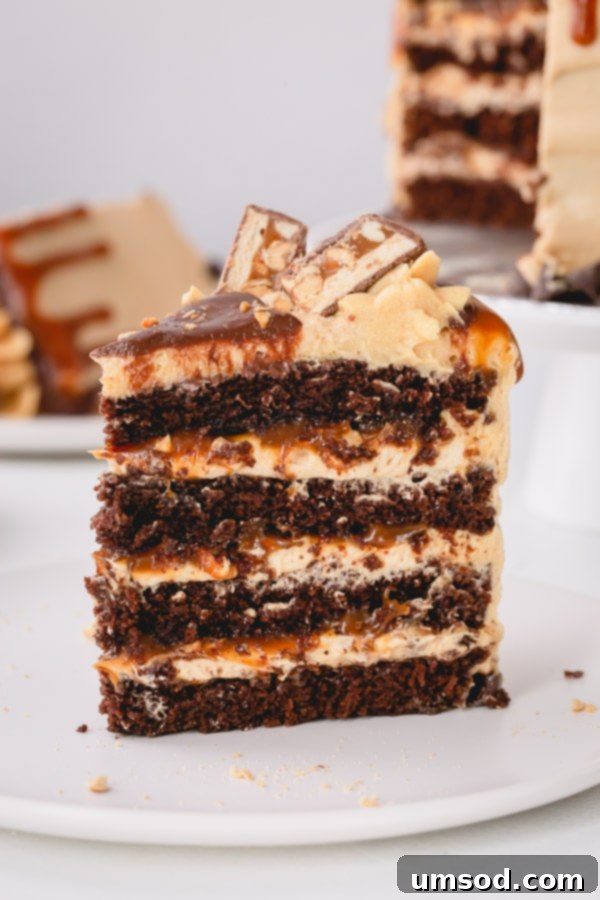
Prepare to be swept away by this truly irresistible Snickers Cake, a masterpiece crafted from layers of the softest, most decadent chocolate cake, generously frosted with luscious salted caramel buttercream and rich peanut butter buttercream. Each exquisite layer is further enhanced with a drizzle of homemade salted caramel and a lavish scattering of crunchy, crushed peanuts. This isn’t just a cake; it’s an experience.
To ensure your baking success, we’ve included comprehensive step-by-step photos and a detailed video demonstration, guiding you through every stage of creating this show-stopping dessert.
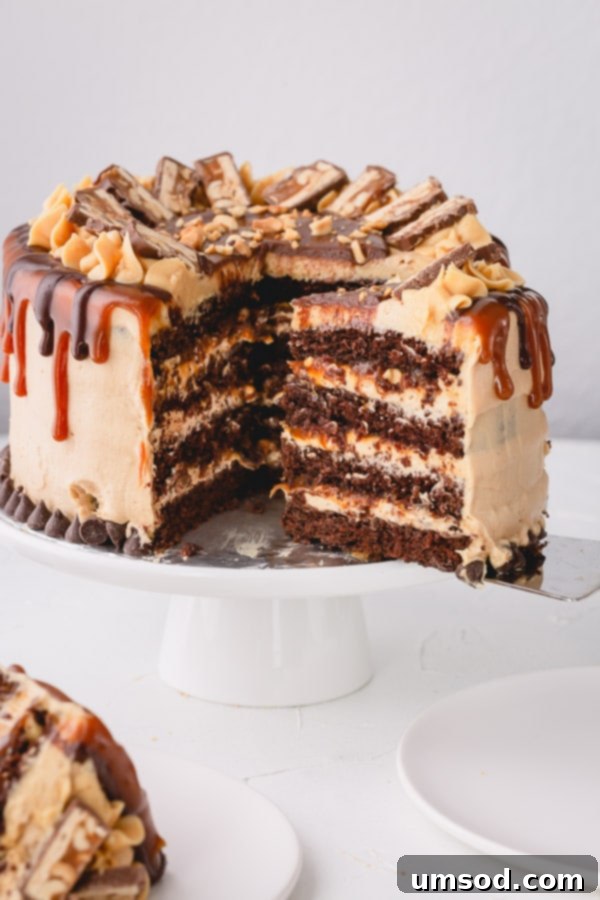
Indeed, this extraordinary cake is absolutely loaded with delectable goodies, creating an unparalleled level of indulgence that is undeniably worth every single calorie! It’s the perfect blend of sweet, salty, and nutty flavors, reminiscent of your favorite Snickers bar, elevated into an elegant, towering dessert. This recipe was perfected years ago, and we are absolutely thrilled to finally share this ultimate guide with fellow baking enthusiasts.
If the art of baking has become your sanctuary and source of joy, especially during challenging times, we wholeheartedly encourage you to add this magnificent Snickers Cake to your must-bake list. It promises not only a rewarding baking journey but also an unforgettable treat that will impress everyone fortunate enough to taste it.
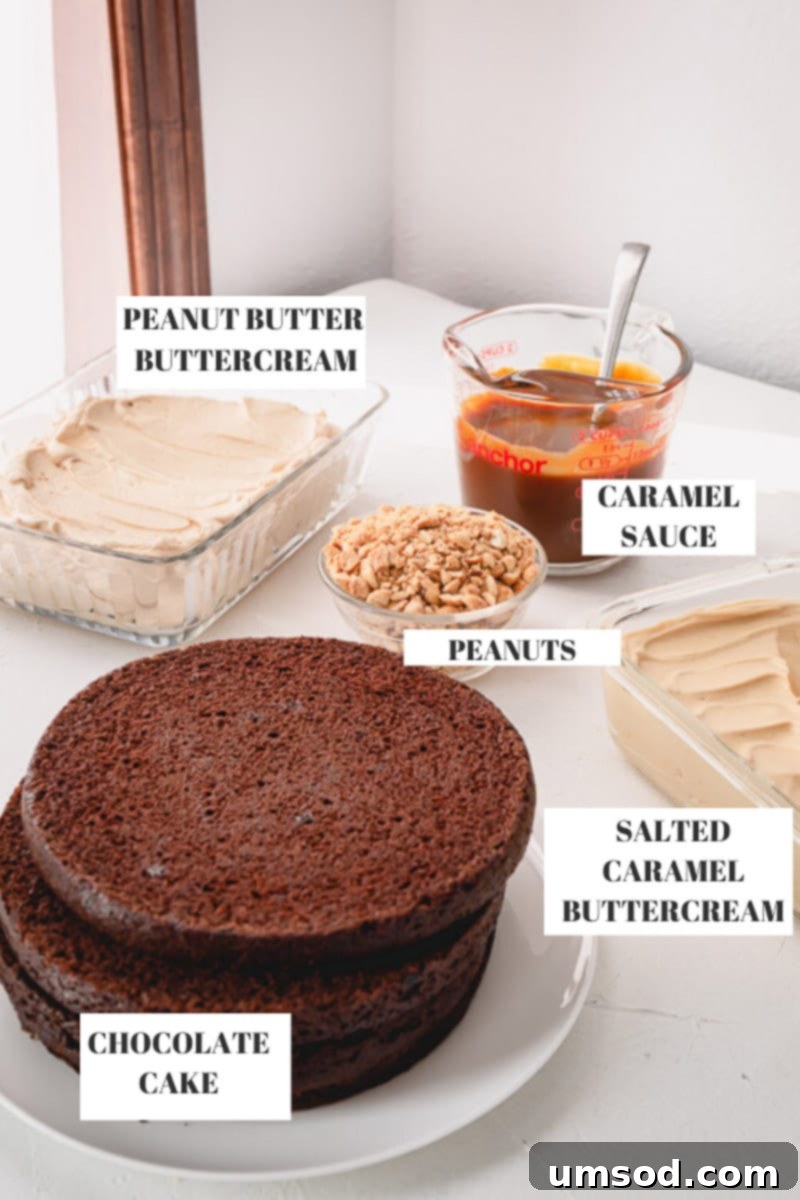
Essential Snickers Cake Components for Layered Perfection
One of the many charms of crafting this Snickers-inspired layer cake is the flexibility it offers. You can masterfully prepare all the individual components in advance, breaking down the baking process into manageable, enjoyable steps. This approach ensures a stress-free assembly day and a truly magnificent final product.
- The foundation of this dessert, the best simple chocolate cake, can be baked days or even months ahead of time. In fact, it is highly recommended to prepare the cake layers at least a day in advance.
PRO TIP: Chilled cake layers are significantly sturdier and much easier to slice horizontally, creating even, perfect layers. Additionally, chocolate cake freezes beautifully, making it an ideal candidate for advance preparation. - Both the velvety peanut butter buttercream and the exquisite salted caramel buttercream can be prepared in advance. They hold up wonderfully when refrigerated or frozen, allowing you to streamline your cake assembly.
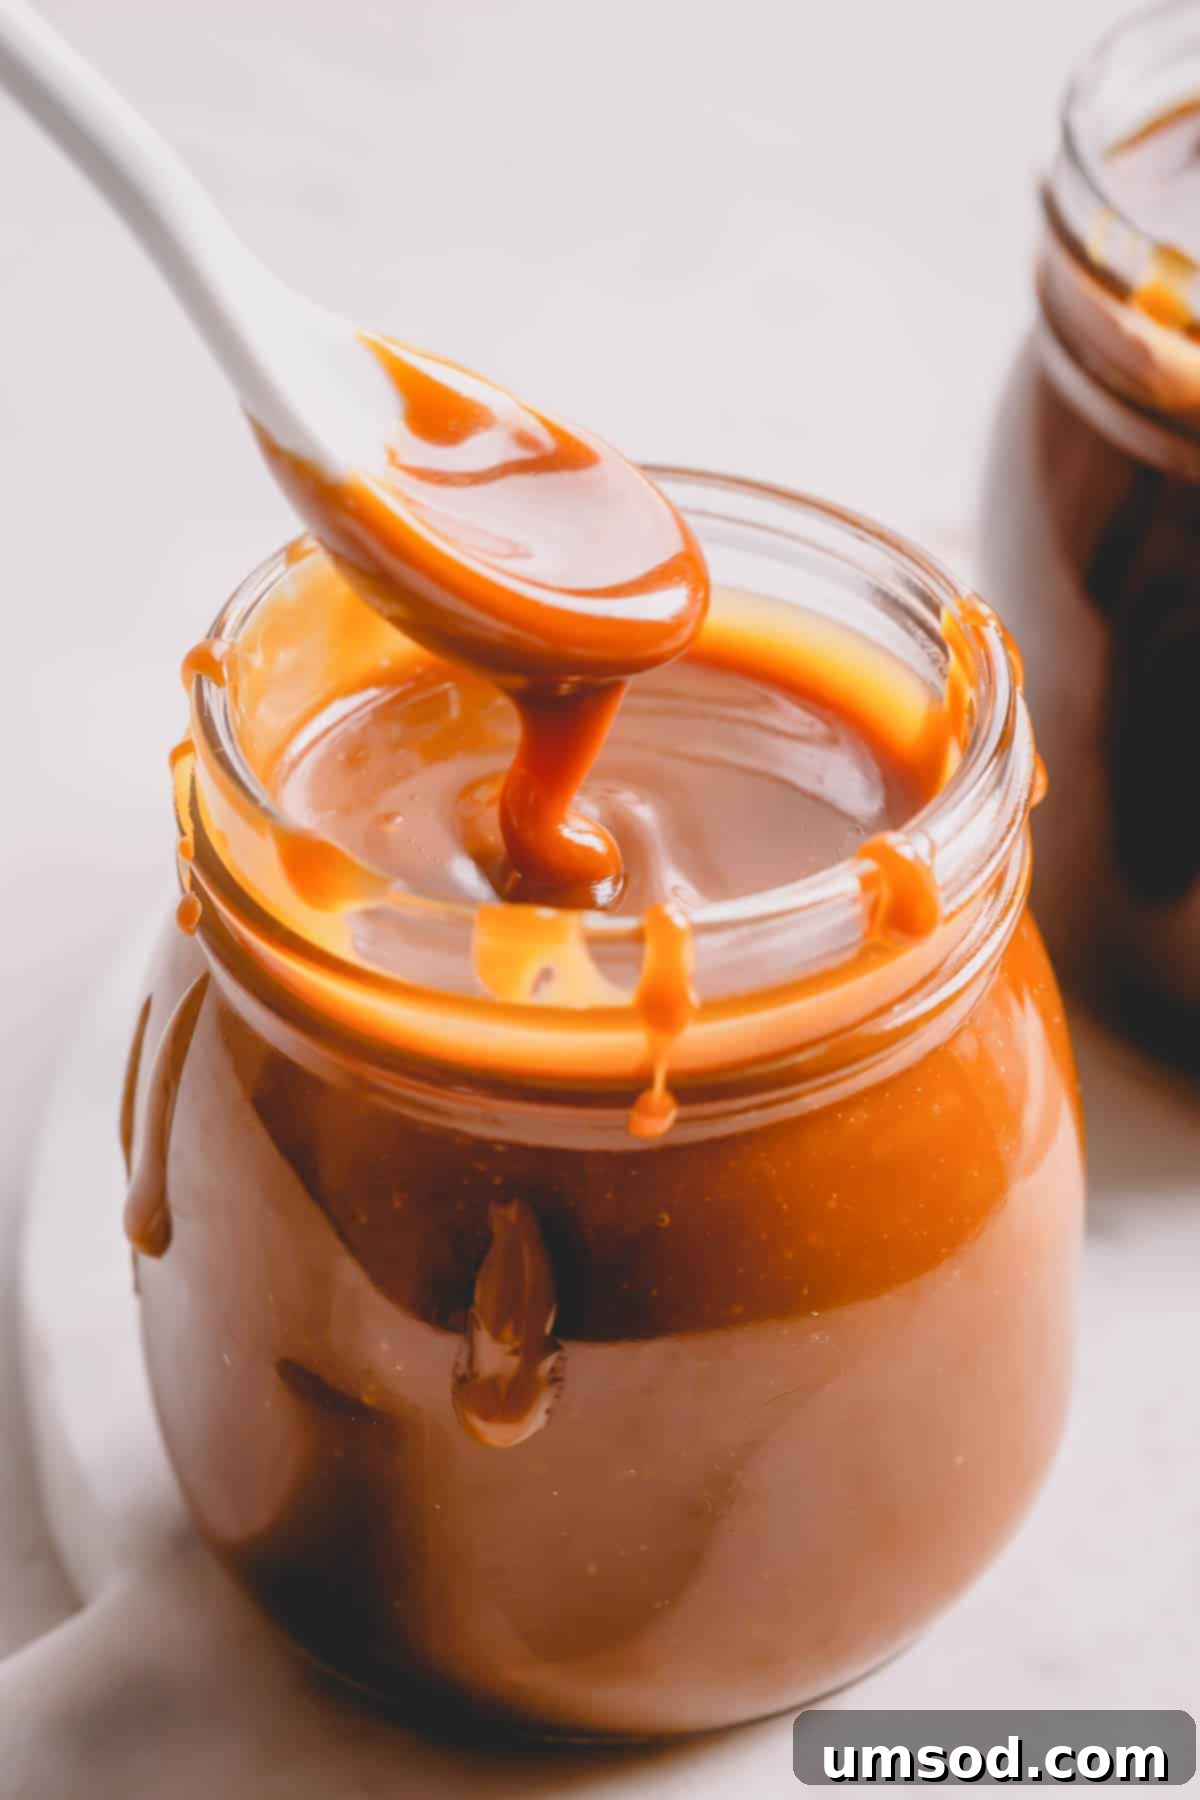
- Our delightful salted caramel sauce is incredibly easy to whip up from scratch and can also be made ahead of time. This ensures you have perfectly rich, gooey caramel ready to layer into your cake.
Crafting Your Masterpiece: A Step-by-Step Guide to Making Snickers Cake
Once all your delicious components are meticulously prepared, the real excitement begins! It’s time to bring everything together and assemble what will truly be the most epic Snickers Cake you’ve ever tasted. Follow these steps for a perfectly layered and stunning dessert.
Phase 1: Preparing Your Cake Components for Assembly
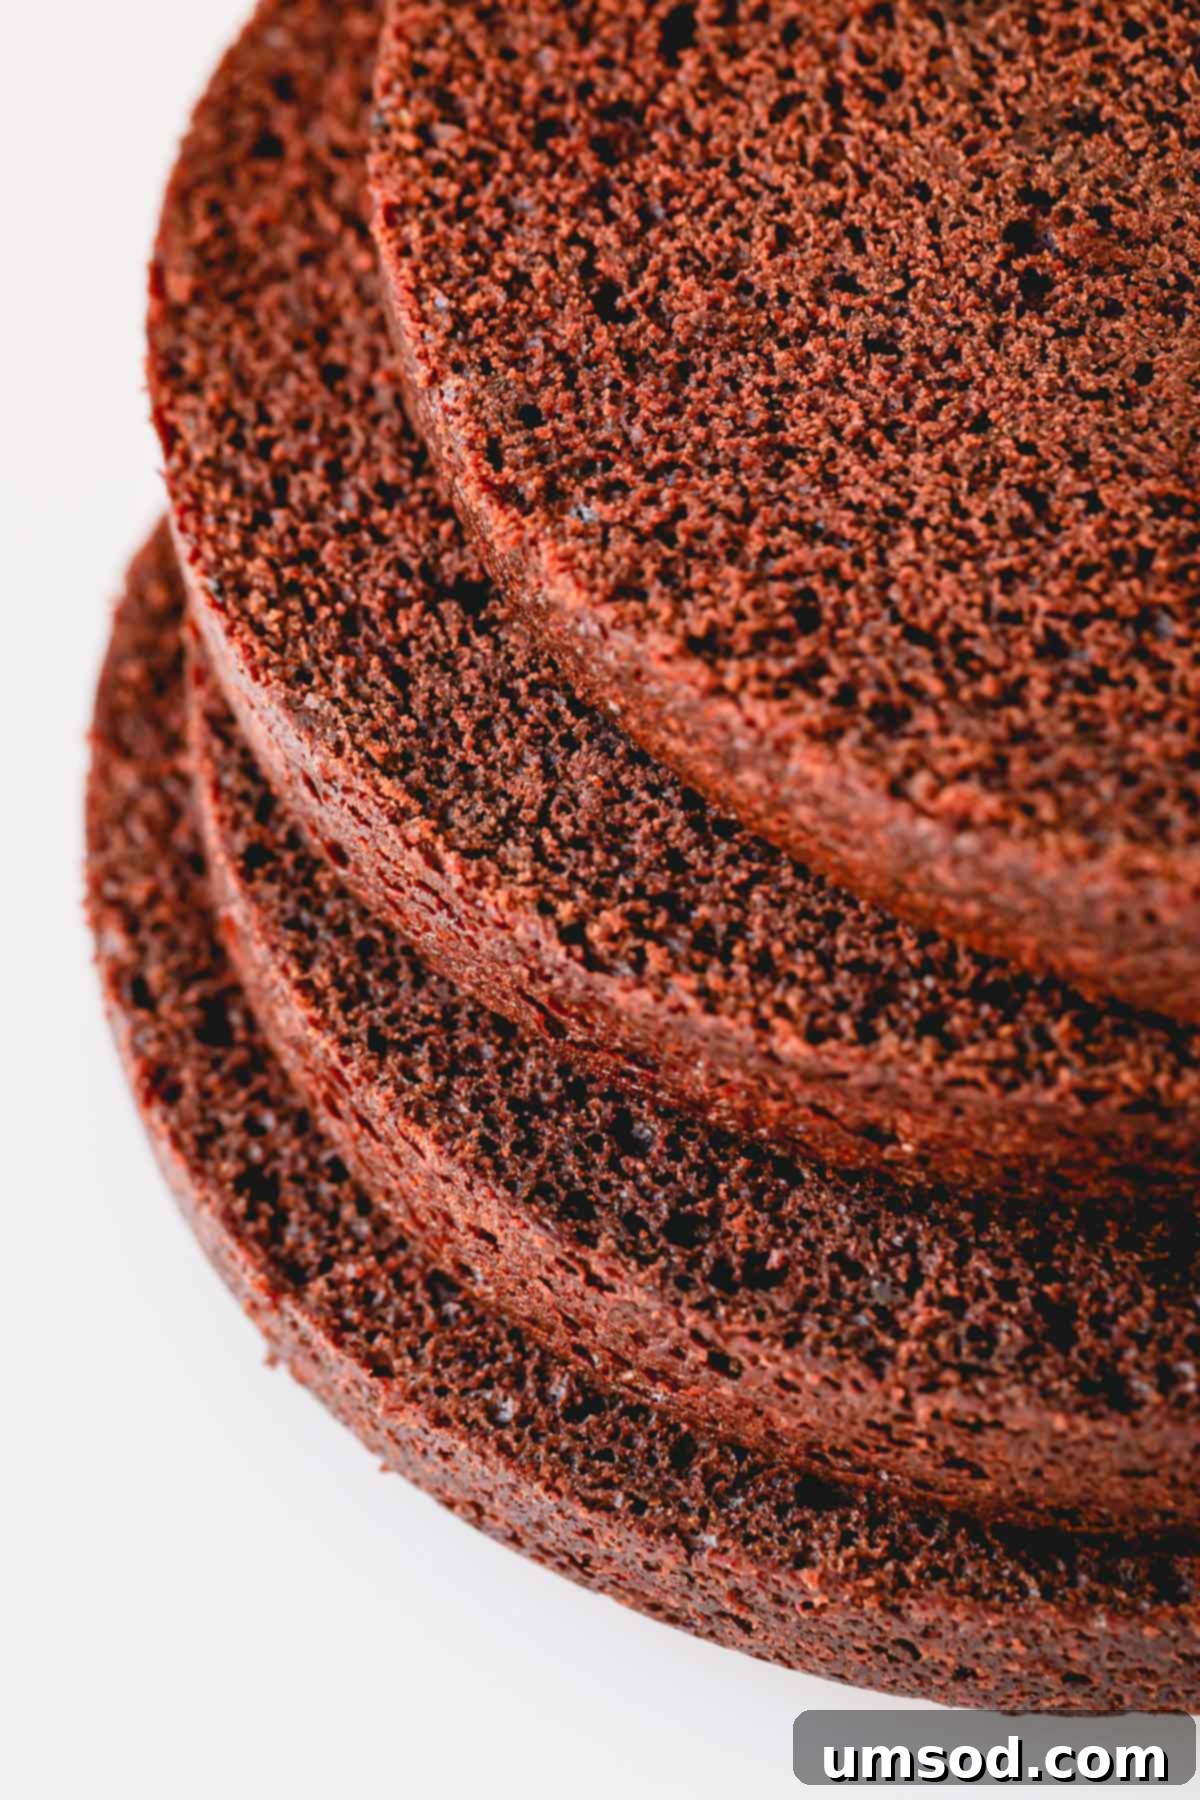
- Chocolate Cake Layers: Begin by baking your chocolate cake according to the recipe instructions. Once baked, allow the cakes to cool completely. For best results and easier handling, it’s advisable to refrigerate them, preferably overnight. Carefully slice each cake into 2 even layers, giving you a total of 4 decadent layers for your cake.
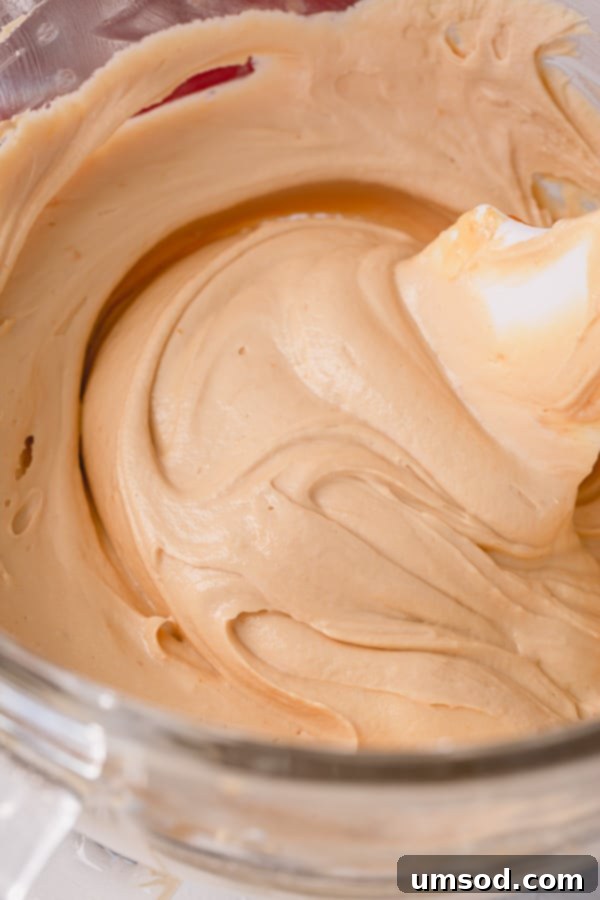
- Creamy Frostings: Prepare both the rich peanut butter buttercream and the sweet and salty caramel buttercream. For effortless and precise frosting application, transfer each buttercream into a large piping bag fitted with a plain round tip.
EXPERT TIP: Piping the frosting allows for much cleaner and more even layers, ensuring a professional finish. - Salted Caramel Sauce: Make your homemade salted caramel sauce. Allow it to cool completely to a pourable but not overly runny consistency before use. This prevents it from soaking too much into the cake layers.
- Crunchy Peanuts: Roughly chop your roasted peanuts. These will add the quintessential Snickers crunch and a lovely textural contrast to the soft cake and creamy frosting.
Phase 2: Assembling Your Magnificent Snickers Cake
The assembly phase is where your Snickers cake truly comes to life. This process can take approximately 1.5 hours, including a crucial 30-minute chilling period. Planning your time accordingly will ensure a smooth and enjoyable experience.
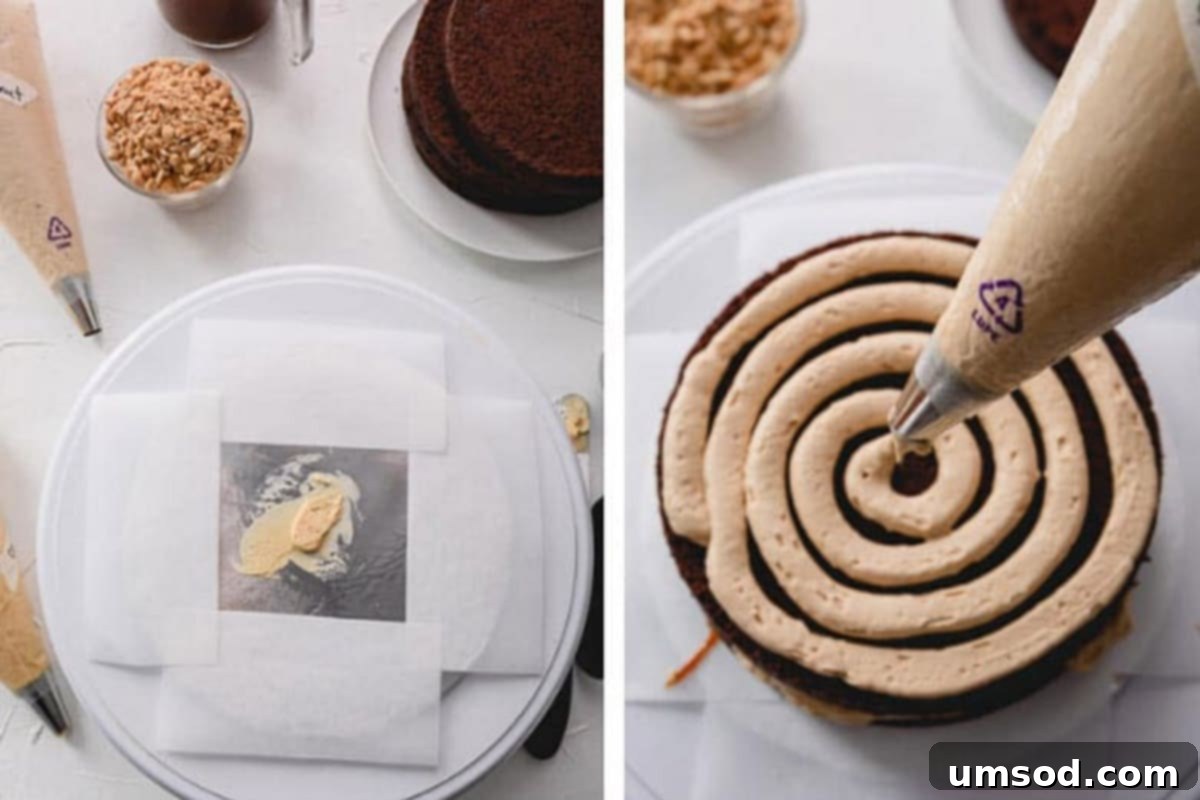
- Secure the Base: To prevent your cake from sliding during assembly, smear a small dollop of frosting in the very center of your cake board or serving platter. This creates a secure anchor.
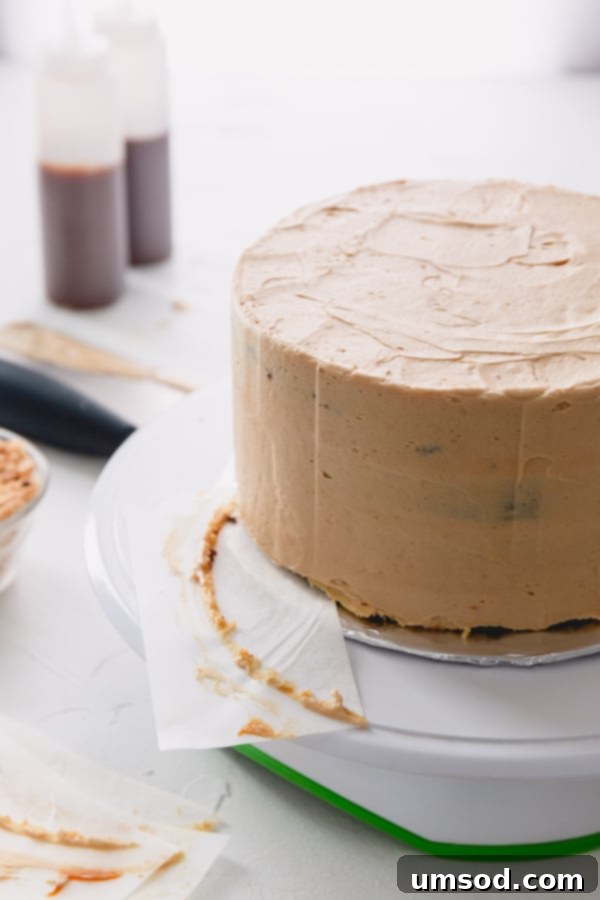
- Keep it Clean: Next, place four strips of parchment paper around the edges of the cake board. These strips will protect your board from frosting mishaps, allowing for a perfectly clean presentation when removed.
- First Layer: Carefully place one of your chocolate cake layers onto the prepared cake board.
- Pipe the First Frosting Layer: Using your piping bag, pipe an even layer of frosting (either peanut butter or salted caramel buttercream, as per your preference) all over the chocolate cake layer, working from the center outwards.
Essential Tip: Securing Your Cake on the Board
A simple yet effective trick to ensure your cake remains perfectly centered and stable during the entire decorating process is to apply a small amount of buttercream frosting directly to the middle of your cake board before placing the first layer. This acts as a gentle adhesive. For a pristine presentation, remember to arrange four strips of parchment paper around the edges of the board. These can be easily slipped out once the cake is fully frosted, leaving your cake board spotlessly clean.
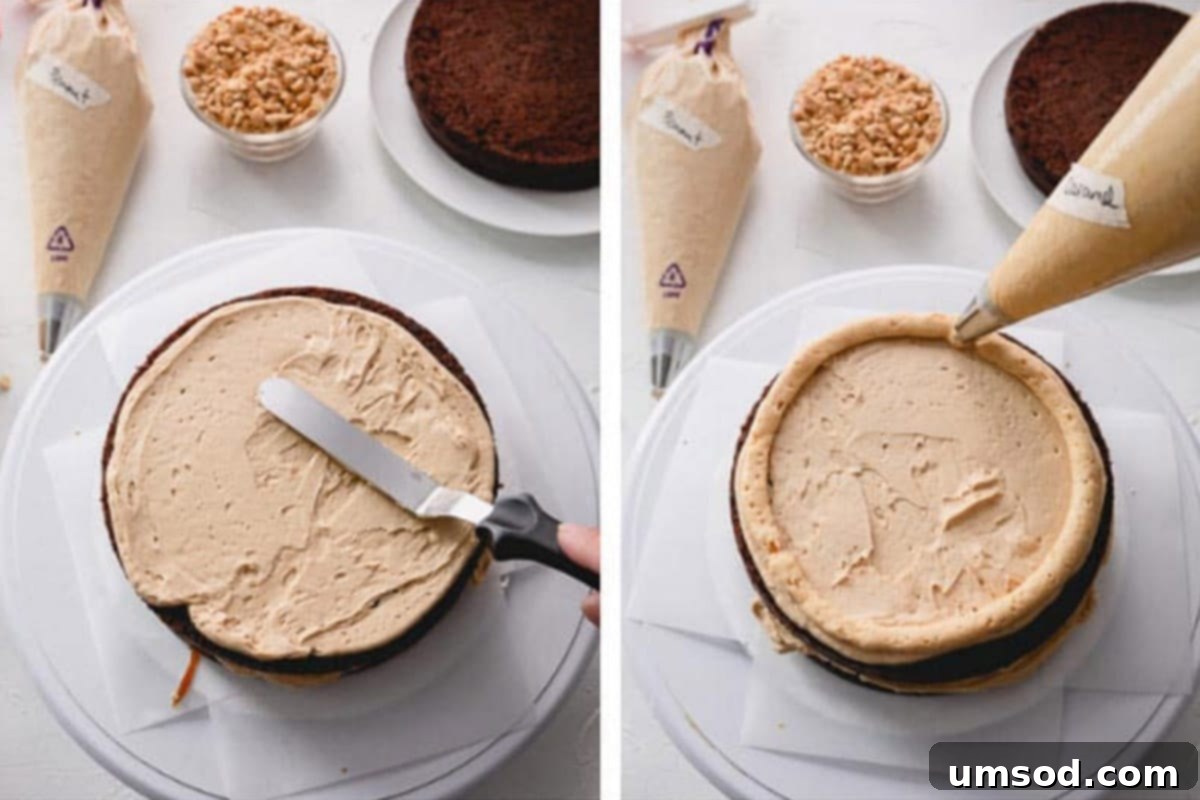
- Smooth the Frosting: Using a small offset spatula, gently spread and smooth the piped frosting across the cake layer, creating an even surface.
- Create a Border: With the same frosting, pipe a small border right around the edges of the cake layer. This “dam” will contain the caramel filling.
Choosing Your Frosting Flavors for Each Layer
For a dynamic flavor profile, you have a couple of fantastic options for alternating your peanut butter buttercream and salted caramel buttercream between the cake layers. You can choose to alternate the flavors with each layer, creating a delightful surprise in every bite. Alternatively, you might prefer to use peanut butter buttercream for all the internal layers and reserve the luscious salted caramel buttercream for the exterior of the cake, offering a primary caramel note on the outside with a consistent peanut butter joy within.
- Add the Caramel: Carefully pour approximately ¼ cup of your cooled salted caramel sauce into the middle of the frosted cake layer.
- Spread and Sprinkle: Gently spread the caramel evenly across the center, staying within the piped frosting border. Then, generously sprinkle a handful of crushed peanuts over the caramel layer.
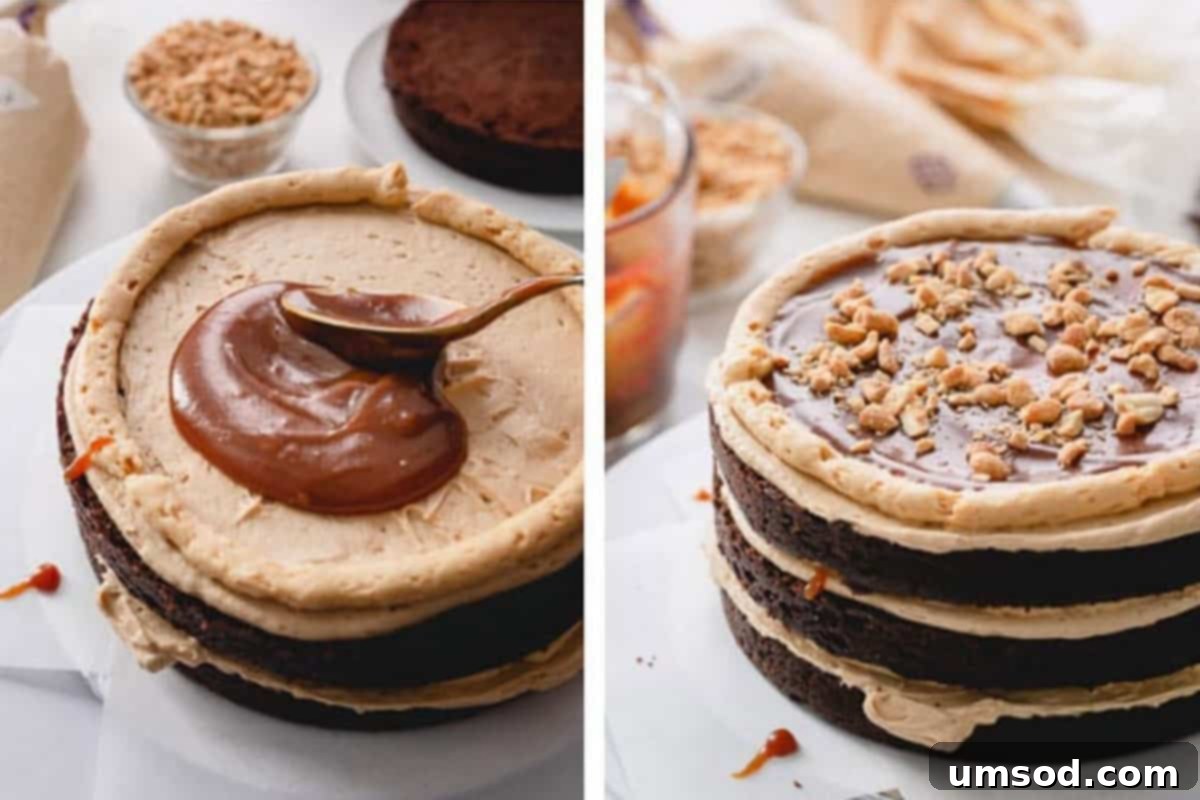
- Stack the Layers: Place another chocolate cake layer on top of the caramel and peanut filling. Repeat the frosting, caramel, and peanut steps until all cake layers are stacked.
- Crumb Coat Application: Now, it’s time for the crucial “crumb coat.” Apply a thin layer of frosting all around the entire cake, covering all sides and the top. This layer doesn’t need to be perfect; its main purpose is to trap any loose crumbs, ensuring a smooth final frosting layer.
- Chill for Stability: Refrigerate the crumb-coated cake for about 30 minutes, or until this initial layer of frosting has hardened and set. This step is vital for a flawless finish.
- Final Frosting Layer: Once chilled, apply a second, thicker layer of frosting to the cake. Use an offset spatula or, for best results, a bench scraper to achieve beautifully smooth sides and a sharp top edge.
- Remove Parchment: Carefully pull out the parchment paper strips from underneath the cake. You’ll be left with a perfectly clean cake board, enhancing the professional look of your dessert.
Phase 3: Decorating Your Stunning Snickers Cake
The final touch is where your cake truly becomes a work of art. These decoration steps will add visual appeal and an extra layer of flavor that echoes the classic Snickers bar.
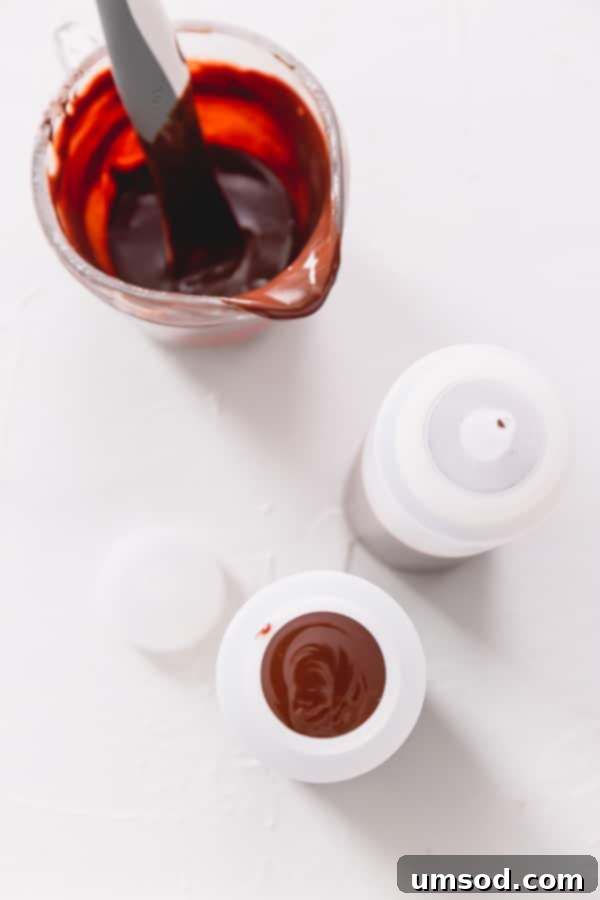
- Prepare Drizzles: Transfer your remaining salted caramel sauce into a condiment bottle. If you choose to add a luxurious touch, prepare a smooth chocolate ganache and transfer it into another condiment bottle for easy drizzling. Warm them slightly if they are too thick.
- Slice Snickers Bars: Carefully slice a few Snickers bars into even pieces.
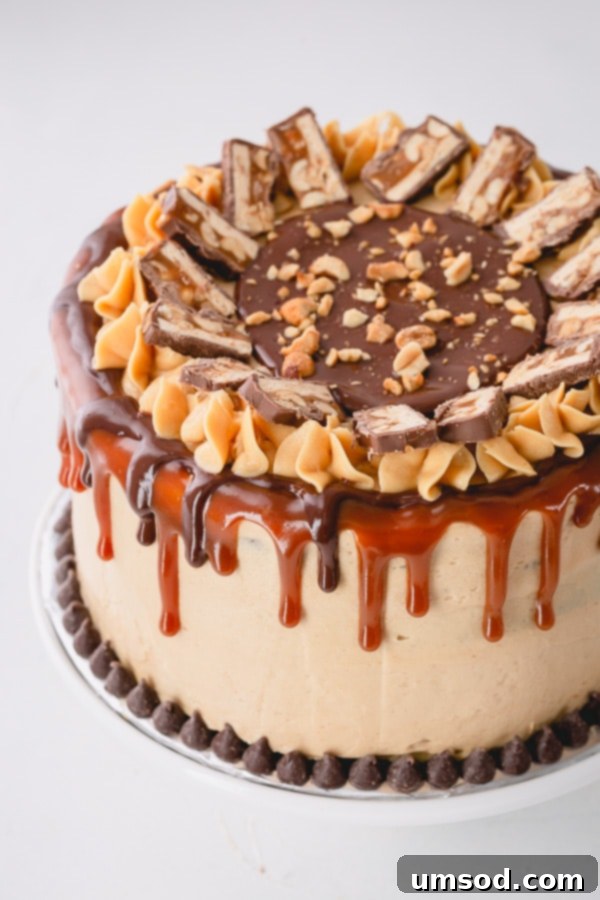
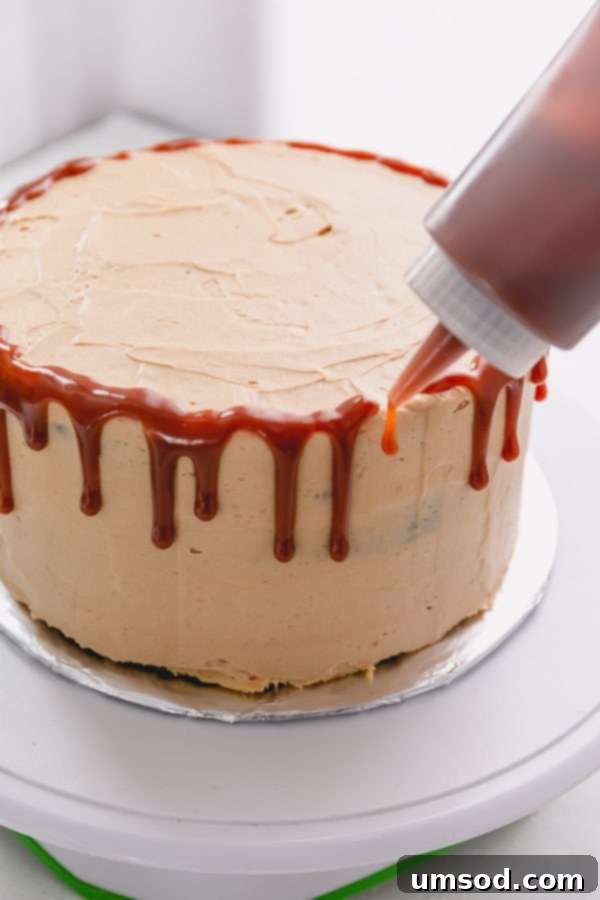
HELPFUL HINT: To achieve perfectly clean slices, run your knife under hot water, then dry it thoroughly before each cut. This prevents sticking and messy edges. - Drip Decoration: Hold the condiment bottle over the edge of the cake and allow the caramel sauce (and chocolate ganache, if using) to slowly drip down the sides, creating an elegant visual effect.
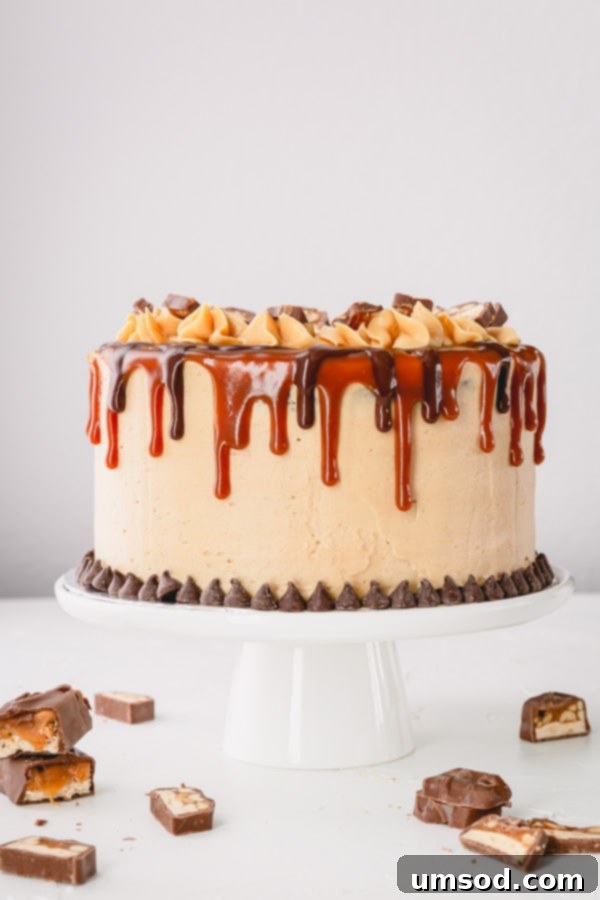
- Top Embellishments: With your remaining buttercream, pipe decorative designs around the top edges of the cake. For an extra touch of decadence, you can pour any leftover chocolate ganache into the center of the cake top, creating a smooth, glossy pool.
- Final Snickers Touch: Artfully arrange the sliced Snickers bar pieces on top of the cake. You can also sprinkle a few more crushed peanuts for added texture and visual interest.
Smart Make-Ahead Strategies for Effortless Baking
While it is possible to create this entire Snickers Cake from start to finish in approximately 5 hours if you work efficiently, the true joy and ease come from preparing its various components in advance. Tackling one element at a time transforms this grand baking project into a series of smaller, more enjoyable tasks, allowing you to savor the process without feeling overwhelmed.
- Cake Layers: Your delicious chocolate cake layers can be baked and frozen for up to a month ahead of your event, or simply refrigerated for up to a week. If frozen, remember to thaw the cake overnight in the refrigerator before assembly.
- Salted Caramel Sauce: This rich sauce can also be prepared up to a month in advance. Store it in an airtight container in the refrigerator and gently rewarm it when you’re ready to use.
- Buttercream Frostings: Both your peanut butter and salted caramel buttercreams can be made up to 3 days prior to assembly. Store them in airtight containers in the refrigerator. Before use, allow them to come to room temperature and then re-whip them briefly until light and fluffy again.
- Chocolate Ganache: For the freshest and most ideal consistency, it is best to prepare the chocolate ganache on the same day you plan to assemble and decorate the cake.
Once fully assembled, the cake can be stored in the refrigerator for 1 day, allowing the flavors to meld beautifully. For the best eating experience, bring the cake to room temperature for about 30-60 minutes before serving, allowing the cake layers to soften and the frostings to become perfectly creamy.
Maximizing Freshness: Storing Your Snickers Cake
Proper storage is key to preserving the deliciousness and texture of your Snickers Cake, ensuring you can enjoy its decadent flavors for days to come.
- Assembled Cake: Store the fully assembled and decorated cake in the refrigerator, ensuring it is well covered to prevent it from drying out or absorbing other odors. A cake dome or plastic wrap works well.
- Leftovers: Any leftover slices of cake can be refrigerated in an airtight container for up to 3 days. For longer storage, individual slices can be frozen in an airtight container for up to 3 months. Thaw in the refrigerator before bringing to room temperature and enjoying.
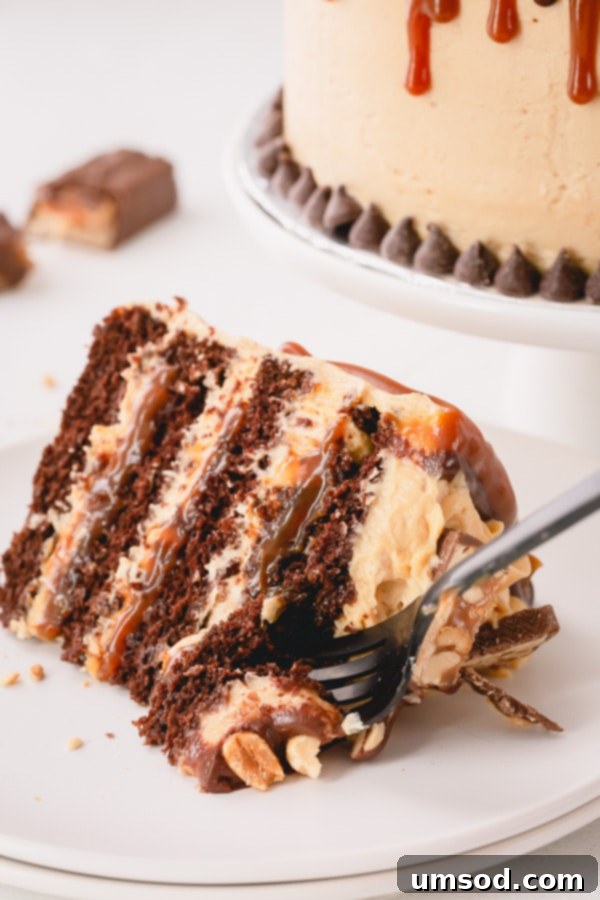
We absolutely love hearing from you! If you decide to embark on this delicious baking adventure and create your own Snickers Cake, please let us know how it turned out. Your feedback and personal touches are always a delight to see. If you share a photo of your magnificent creation on Instagram, don’t forget to tag us @shineshka!
Snickers Cake
Shinee Davaakhuu
Detailed step-by-step photos and a helpful video guide are included to ensure your baking journey is a resounding success!
5 hours
16
servings
Saved Recipe
Pin Recipe
Comment
Print Recipe
Ingredients
For the Rich Chocolate Cake Layers:
- 2 cups (250 g) all-purpose flour
- 1 ½ (300 g) granulated sugar
- ½ cup (60 g) unsweetened natural cocoa powder
- 1 teaspoon baking soda
- 1 teaspoon instant espresso powder Note 1
- ½ teaspoon table salt
- 1 cup (280 ml) whole milk + 2 tablespoons, at room temperature Note 2
- 2 large eggs at room temperature
- ¼ cup (60 ml) vegetable oil
- 4 tablespoons (56 g) unsalted butter, melted
- 1 teaspoon white vinegar Note 4
For the Luscious Salted Caramel Sauce:
- 1 cup (200 g) granulated sugar
- 1 cup (240 ml) heavy whipping cream warmed up
- 4 tablespoons (55 g) unsalted butter at room temperature
- ½ teaspoon coarse sea salt I like Maldon sea salt flakes
For the Creamy Peanut Butter Buttercream:
- 1 stick (113 g) unsalted butter at room temperature
- ½ cup (130 g) creamy peanut butter
- 1 cup (125 g) powdered sugar
- ½ teaspoon pure vanilla extract
- 1/8 teaspoon coarse kosher salt
For the Salted Caramel Buttercream:
- 1 stick (113 g) unsalted butter at room temperature
- ½ cup (100 g) salted caramel sauce (from the batch made above)
- 1 cup (125 g) powdered sugar
For the Decadent Chocolate Ganache:
- ¼ cup (60 ml) heavy cream
- 2 oz (55 g) bittersweet chocolate chopped
For Assembly and Decoration:
- 1 cup (140 g) dry roasted peanuts roughly chopped
- 2-3 snickers bars sliced
Instructions
- To make the chocolate cake layers, begin by lining two 7-inch round cake pans with parchment paper and lightly spraying them with baking spray. This ensures easy release.
- Preheat your oven to 350°F (175°C) to ensure it’s ready for baking.
- In a large mixing bowl fitted with a paddle attachment, combine the dry ingredients: all-purpose flour, granulated sugar, unsweetened natural cocoa powder, baking soda, instant espresso powder, and table salt. Mix on low speed for about 30 seconds, or until all components are thoroughly combined and no lumps remain.
- To the dry mixture, add the wet ingredients: whole milk, large eggs, vegetable oil, and melted unsalted butter. Mix the batter on low speed just until it becomes smooth, approximately 15 seconds. Be careful not to overmix.
- Finally, stir in the white vinegar and mix for another 10 seconds. The vinegar helps activate the baking soda, contributing to a light and fluffy cake texture.
- Divide the prepared batter evenly between your two lined baking pans. Bake for 35 minutes, or until a toothpick inserted into the center of the cakes comes out clean, indicating they are fully baked.
- Allow the cakes to cool completely in their pans on a wire rack. Once cool, carefully run a knife around the edges of each cake and invert them onto the wire rack. Wrap each cooled cake layer tightly with plastic wrap and refrigerate until ready to use, preferably overnight. Chilled cakes are significantly sturdier and easier to slice horizontally, though you can frost them as soon as they’ve cooled completely if time is short.
- To make the rich salted caramel sauce, please refer to this detailed recipe for best results. (Note 3: Remember to cool it completely before proceeding.)
- To make the creamy peanut butter buttercream, in a mixing bowl with a paddle attachment, combine room temperature unsalted butter and creamy peanut butter. Beat on medium-high speed for about 2 minutes, or until the mixture becomes visibly pale and delightfully fluffy. Halfway through, be sure to scrape down the sides and bottom of the bowl with a silicone spatula to ensure even mixing.
- Add the powdered sugar, pure vanilla extract, and coarse kosher salt to the butter-peanut butter mixture. Continue beating for approximately 2 more minutes, until the frosting is exceptionally smooth, light, and airy.
- To make the luscious salted caramel buttercream, in a clean mixing bowl with a paddle attachment, combine the room temperature unsalted butter and the cooled salted caramel sauce. Beat on medium-high speed for about 2 minutes, until the mixture is light in color and fluffy in texture. Again, scrape the sides and bottom of the bowl periodically with a silicone spatula.
- Incorporate the powdered sugar into the caramel buttercream mixture. Continue beating for another 2 minutes, ensuring the frosting is wonderfully smooth, airy, and consistent.
- To prepare the decadent chocolate ganache, heat the heavy cream in a microwave-safe bowl for approximately 45 seconds, or until it is hot and steamy but not boiling. Place the finely chopped bittersweet chocolate in a separate bowl and pour the hot cream directly over the chocolate. Allow it to sit undisturbed for 2 minutes, then stir gently until a smooth, glossy ganache forms. If the chocolate hasn’t melted completely, microwave the mixture in 15-second intervals, stirring after each, until the ganache is perfectly smooth and fluid. (ESSENTIAL TIP: For optimal consistency, make the ganache just before you begin assembling the cake, as it can thicken quickly.)
- To assemble your magnificent cake, first carefully cut your cooled cake layers horizontally into equal halves, creating four distinct layers. Transfer both the peanut butter buttercream and salted caramel buttercream into two separate piping bags. If you don’t have piping tips, simply snip off the ends of the bags to create an opening.
- Gather all your assembly tools and ingredients: the roughly chopped peanuts, your cake board, four strips of parchment paper (to keep your board clean), a small offset spatula, and a ¼ cup measuring cup or a large cookie scoop for the caramel.
- Center your cake board on a turntable (if using for easier frosting). Smear a small amount of frosting in the very middle of the board to act as an anchor for your cake. Then, arrange the four parchment paper strips around the edges of the cake board, ensuring they meet in the center, as demonstrated in the accompanying photos.
- Place your first chocolate cake layer onto the prepared cake board. Using one of your piping bags, pipe the peanut butter buttercream frosting evenly all over this cake layer. Then, gently spread and smooth the frosting with your small offset spatula.
- Next, pipe a border with the salted caramel buttercream frosting right around the edges of the peanut butter layer. This creates a “dam” to hold in the liquid caramel. Spoon approximately ¼ cup of the cooled salted caramel sauce into the center of this layer.
- Generously sprinkle a portion of the crushed peanuts over the caramel sauce. Carefully place the next layer of chocolate cake on top. Continue this layering process, alternating frostings if desired, until all cake layers are stacked and filled.
- To crumb coat the cake, apply a thin, even layer of frosting over the entire cake – top and sides. This initial layer traps any loose crumbs, creating a clean canvas for your final frosting. Smooth it out as best as you can. Refrigerate the cake for about 30 minutes, or until this crumb coat has completely set and hardened.
- While the cake chills, transfer your remaining salted caramel sauce and chocolate ganache into squeeze bottles. If either sauce has become too thick, microwave them in short 10-15 second bursts to thin them slightly. Ensure they are not too hot before you begin decorating the chilled cake.
- Transfer a small amount of any remaining buttercream into a piping bag fitted with your chosen decorative star tip (or other tip) for the final embellishments.
- To decorate the cake, apply a final, smooth layer of frosting over the entire cake. Achieve a professional finish by using an offset spatula and a bench scraper for perfectly smooth sides and sharp edges.
- Create beautiful drips around the edges of the cake by carefully squeezing the salted caramel sauce from your bottle, followed by the chocolate ganache (if using). Let the sauces cascade naturally down the sides.
- Pipe the remaining buttercream with your decorative tip around the top edges of the cake. Pour any additional chocolate ganache into the center of the cake top for an extra glossy finish, and sprinkle with more crushed peanuts. Finally, artfully arrange the sliced Snickers bars on top to complete your masterpiece.
⭐️ Did you make this recipe?
Please leave a review and let us know how you liked it! Your feedback is incredibly valuable.
Tips & Notes for Snickers Cake Perfection
Note 2: Milk Choice for Optimal Richness: We highly recommend using whole milk for the chocolate cake batter. Its higher fat content contributes to a noticeably richer, moister, and more tender crumb. While 2% milk can be used as a substitute, the full-fat option truly elevates the cake’s luxurious texture and flavor.
Note 3: The Importance of Cooling Salted Caramel: It is absolutely crucial to allow your homemade salted caramel sauce to cool completely to room temperature before you attempt to use it, both for creating the caramel buttercream frosting and for layering within the cake. Using warm caramel will melt your buttercreams and create a messy, unstable cake. Cool caramel achieves the perfect thick, gooey consistency needed for stability and flavor.
Note 4: Vinegar for a Tender Crumb: White vinegar works wonders in reactivating the baking soda, contributing to a lighter, more tender crumb in your chocolate cake. If white vinegar is unavailable, apple cider vinegar can be used as an effective substitute, delivering similar leavening benefits.
Make-Ahead Mastery: Simplifying Your Baking Process: This indulgent Snickers Cake, while impressive, doesn’t have to be a daunting single-day project. You can efficiently prepare all its individual components well in advance, transforming a complex recipe into an enjoyable, stress-free baking experience:
– Cake Layers: Bake your chocolate cake layers up to a month ahead and freeze them, tightly wrapped, or refrigerate for up to a week. Thaw frozen cakes in the refrigerator overnight before use.
– Salted Caramel Sauce: Your homemade caramel sauce can be made a month in advance. Store it in an airtight container in the fridge and gently warm when ready.
– Buttercream Frostings: Both the peanut butter and salted caramel buttercreams can be prepared up to 3 days in advance. Refrigerate them in airtight containers, then re-whip until fluffy before assembly.
– Chocolate Ganache: For the best consistency and appearance, it’s ideal to make the chocolate ganache on the day of cake assembly.
– Assembled Cake: You can assemble the entire cake 1 day in advance and store it, covered, in the refrigerator. For the perfect serving experience, allow it to come to room temperature for at least 30 minutes before slicing and serving.
Nutrition
609
kcal
57
g
9
g
41
g
34
g
432
mg
Dessert
American
Did you make this?
Leave a rating and your feedback. Thank you!
