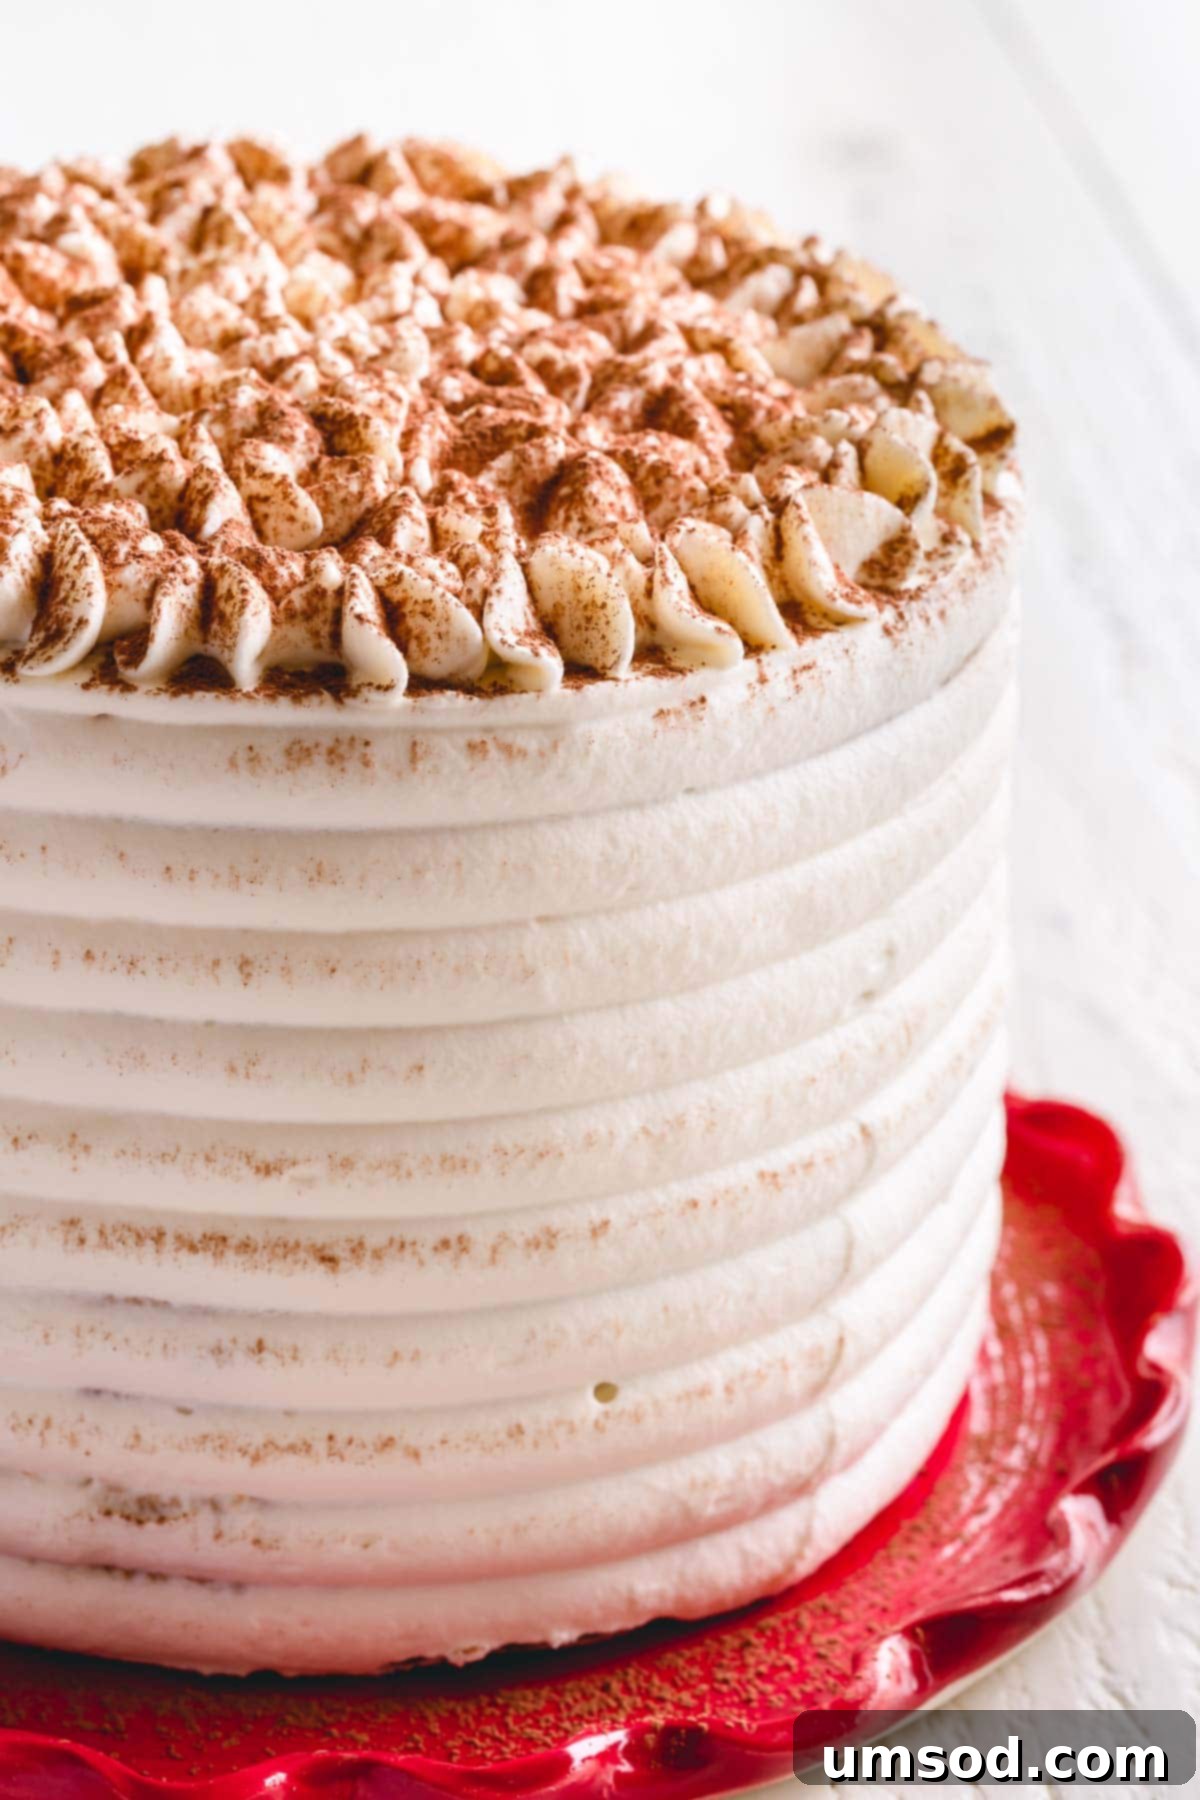
Prepare to be enchanted by our exquisite Tiramisu Layer Cake—a dessert that redefines indulgence. Imagine melt-in-your-mouth tender, impossibly light sponge cake layers, generously soaked in rich, aromatic espresso. These delicate foundations are then lovingly embraced by a cloud-like, fluffy eggless tiramisu cream, creating a symphony of textures and flavors in every bite. This isn’t just a cake; it’s a dreamy culinary experience, perfect for elevating any occasion, from intimate gatherings to grand celebrations. Its sophisticated appeal and irresistible taste make it a true showstopper that will leave a lasting impression on your guests.
Why You’ll Fall in Love with This Tiramisu Layer Cake:
This Tiramisu Layer Cake is more than just a dessert; it’s an experience that delights all the senses. Here’s why it’s destined to become your new favorite:
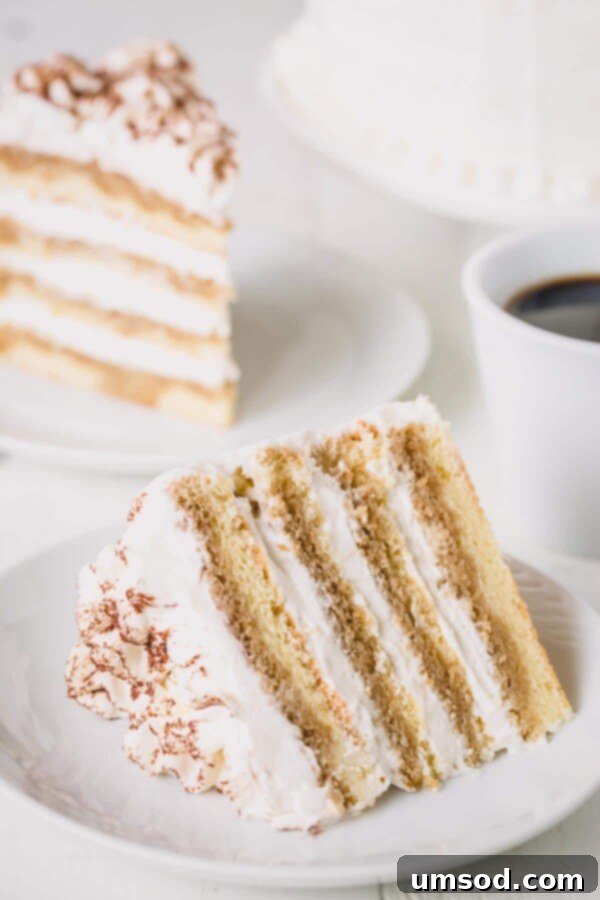
- Unforgettable Lightness and Delicate Texture: Forget heavy, dense cakes. Our sponge cake layers are engineered for ultimate lightness and airiness, practically dissolving on your tongue. The secret lies in the meticulous preparation of the sponge, which, when coupled with the generous espresso soak, transforms into a moist and tender delight. Each layer acts as a perfect canvas, absorbing the bold coffee flavor without becoming soggy, ensuring a sublime melt-in-your-mouth sensation that is utterly irresistible.
- The Star of the Show: Fluffy Eggless Tiramisu Cream: While traditional tiramisu often relies on raw eggs, our recipe features an unbelievably creamy and fluffy eggless mascarpone filling that is truly heavenly. This light-as-air cream is subtly sweet, rich without being heavy, and boasts a dreamy texture that perfectly complements the espresso-infused cake. It’s an innovative take on a classic, proving that an “authentic” label isn’t necessary for perfection when flavor and texture are this divine. Its smooth consistency and delicate flavor are what makes this tiramisu cake truly special.
- A Perfect Make-Ahead Dessert That Only Gets Better: One of the most convenient aspects of this Tiramisu Layer Cake is its incredible make-ahead potential. Unlike many desserts that demand last-minute assembly, this cake actually improves with time. Allowing it to chill for at least a day—or even two—gives the espresso-soaked sponge layers ample opportunity to fully absorb the rich flavors of the mascarpone cream. The ingredients meld together beautifully, resulting in a deeper, more harmonious taste that is simply unparalleled. This means less stress on your part, as you can prepare it in advance and simply enjoy the accolades when serving.
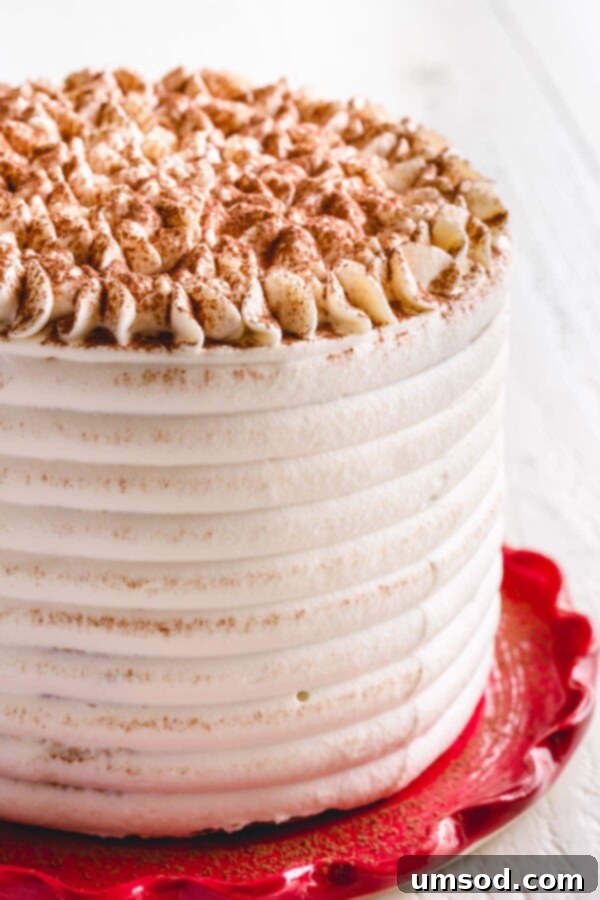
- Stunning Presentation: With its elegant layers and a dusting of cocoa, this Tiramisu Layer Cake is visually appealing and makes a striking centerpiece for any dessert table. It effortlessly combines rustic charm with sophisticated flair.
Key Ingredient Notes for Your Tiramisu Layer Cake Success:
Achieving the perfect Tiramisu Layer Cake relies on a few star ingredients. Here’s a closer look at what you’ll need and why:
- Espresso Powder: For that quintessential robust coffee flavor, instant espresso powder is your best friend. It dissolves effortlessly and provides an intense, concentrated coffee taste that regular brewed coffee often can’t match. This ensures every layer of your sponge cake is infused with that unmistakable tiramisu essence. While you can substitute with a very strong, freshly brewed coffee in a pinch, espresso powder truly delivers the most authentic and impactful flavor. Look for high-quality instant espresso powder in the baking aisle or specialty coffee stores for the best results.
- Amaretto Liqueur: This sweet Italian almond-flavored liqueur is absolutely crucial for the signature tiramisu flavor profile. Its warm, nutty notes and slight sweetness perfectly complement the bitterness of the espresso and the richness of the mascarpone cream. My personal favorite and go-to brand for its consistent quality and flavor is Disaronno. If you prefer to avoid alcohol, or are serving to children, you can substitute it with a non-alcoholic almond extract mixed with a little water or coffee for a similar aromatic hint. However, for the true classic experience, amaretto is highly recommended.
- Mascarpone Cheese: This soft, luxurious Italian cream cheese is the heart of our tiramisu cream filling. Mascarpone is known for its incredibly smooth, velvety texture and a subtle, slightly sweet flavor that is richer and less tangy than regular cream cheese. It contributes significantly to the cloud-like consistency and delicate taste of the filling. While I wholeheartedly recommend using mascarpone for the authentic flavor and texture, if you absolutely cannot find it, you may substitute with full-fat cream cheese. Be aware, however, that cream cheese has a tangier profile, which will subtly alter the overall taste of your tiramisu cake. Ensure your mascarpone is at room temperature to prevent lumps when mixing.
- Heavy Whipping Cream: This ingredient is vital for creating the light, airy volume in our eggless tiramisu cream. Make sure your heavy whipping cream is well-chilled before whipping to achieve stiff peaks, which will give the filling its characteristic fluffy texture.
- Sweetened Condensed Milk: This provides the perfect level of sweetness and an extra layer of richness and smoothness to the mascarpone cream, eliminating the need for granulated sugar in the filling.
How to Master This Delightful Tiramisu Layer Cake:
Crafting this stunning Tiramisu Layer Cake is a rewarding process, broken down into simple, manageable steps. Let’s walk through each component to ensure your dessert is nothing short of perfection.
1. The Foundation: Light and Airy Sponge Cake
Our journey begins with creating the perfect sponge cake layers. These layers are paramount, as their light and airy texture is robust enough to absorb the intense espresso soak without becoming mushy, forming the ideal foundation for this elegant layer cake. The beauty of these sponge cake layers is their versatility: they can be prepared well in advance, even up to a month ahead, and stored to simplify your baking process.
Since I have a comprehensive, dedicated post on crafting the classic sponge cake, complete with step-by-step photos and a detailed video tutorial, I’ll provide a brief overview here. The key is to separate egg whites and yolks carefully, whip the whites to stiff peaks, and the yolks with sugar until pale and voluminous. Then, gently fold the sifted dry ingredients into the egg yolk mixture, followed by the whipped egg whites. This careful folding technique is crucial for maintaining the delicate air pockets that give the sponge its characteristic lightness. Baking in prepared pans until golden and a toothpick comes out clean ensures a perfectly cooked cake. Cooling completely and chilling them thoroughly will make slicing much easier and cleaner.
2. The Star: Indulgent Mascarpone Cream Filling
This is arguably the most captivating element of the entire cake! I am absolutely enamored with this cloud-like filling—it strikes the perfect balance, being neither overly sweet nor excessively rich, instead offering an ultra-fluffy and incredibly light consistency. It’s the dreamy heart of our Tiramisu Layer Cake, bringing together all the flavors in a harmonious embrace.
To ensure maximum freshness and the ideal texture, this delicate filling is best prepared just before you plan to assemble the cake. Its fresh, airy quality is a key component of the tiramisu experience, making it worth the last-minute preparation.
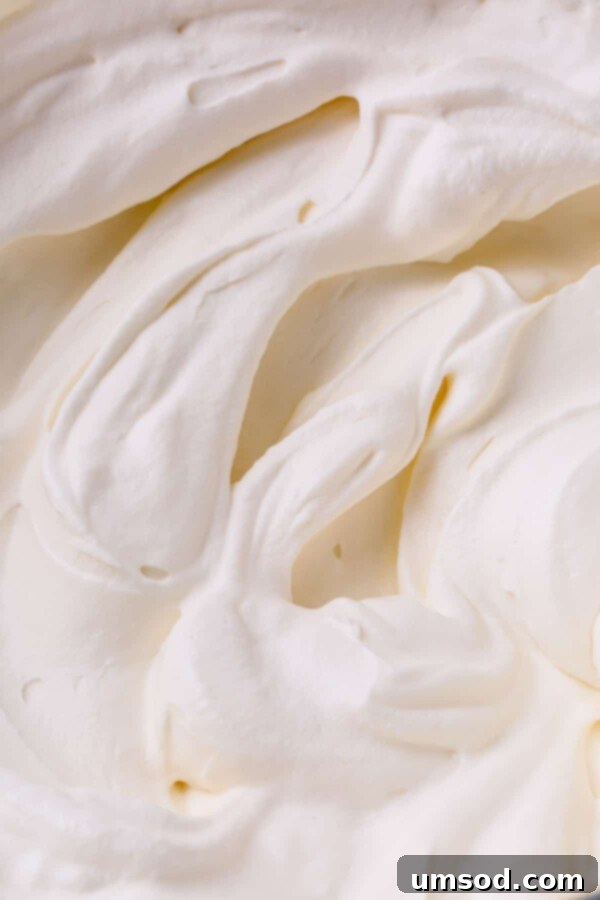
Here’s how to create this divine cream:
- In a large mixing bowl, combine the softened mascarpone cheese, sweetened condensed milk, and pure vanilla extract. Whisk these ingredients together until they are beautifully smooth and well combined. Be careful not to overmix, as mascarpone can curdle if beaten too vigorously.
- In a separate, thoroughly chilled bowl, whip the cold heavy cream using a whisk attachment (or an electric mixer) until stiff peaks brilliantly form. This means the cream will hold its shape firmly when the whisk is lifted.
- Carefully take about half of the whipped cream and gently fold it into the mascarpone mixture using a spatula. This step lightens the mascarpone base. Then, add the remaining whipped cream and continue to gently fold until the entire mixture is homogenous, light, and fluffy. Refrigerate immediately until you are ready to assemble the cake to maintain its perfect texture.
3. The Flavor Booster: Espresso Syrup
While we call it an “espresso syrup,” it’s more accurately a potent, flavorful soaking liquid that is absolutely essential for transforming a good cake into an unforgettable tiramisu. This mixture infuses the sponge layers with the iconic, robust coffee and liqueur notes.
- Begin by dissolving the instant espresso powder in ½ cup of hot water. Stir until the powder is completely dissolved, creating a strong coffee base.
- Next, stir in the amaretto liqueur. The amaretto adds a sweet, nutty aroma and depth of flavor that is characteristic of authentic tiramisu. Stir until fully combined. Allow this mixture to cool slightly before using.
4. Bringing It All Together: Assembling Your Tiramisu Layer Cake
The assembly is where the magic truly happens, transforming individual components into a cohesive, stunning Tiramisu Layer Cake. One of the best qualities of this cake is that it’s a fantastic make-ahead dessert; you can assemble it a day or two before serving. The flavors truly deepen and meld beautifully as the cake rests, allowing the sponge layers to soak up every nuance from the cream and espresso, resulting in an even more delicious final product.
- Once your sponge cakes are thoroughly chilled, carefully slice each cake horizontally into two even layers. You should have a total of four cake layers if you started with two cakes.
- To begin, place a small dollop of mascarpone filling on your cake board or serving platter. This acts as an anchor to prevent the cake from sliding. Carefully place your first cake layer on top.
- Using a pastry brush or a spoon, drizzle approximately ¼ of the prepared espresso mixture evenly all over this first cake layer. Ensure every part of the sponge gets a good soak without oversaturating it.
- Next, spread a generous amount of the fluffy mascarpone cream filling (about 1 cup) over the espresso-soaked cake layer. Use an offset spatula to spread it smoothly to the edges.
- Gently place the next cake layer on top of the cream. Repeat steps 3 and 4 until all four cake layers are stacked, each soaked with espresso and layered with cream.
- Once all the layers are stacked, take about half of the *remaining* filling and use it to lightly cover the entire cake – sides and top. This is known as a “crumb coat,” and it helps to seal in any loose crumbs and creates a smooth base for your final frosting. Refrigerate the cake for at least 1 hour (or longer) to allow this crumb coat to firm up.
- After chilling, retrieve the cake and frost it with the remaining mascarpone filling. Use an offset spatula to create a rustic, elegant finish, or pipe decorative elements as desired. Remember, since the filling is incredibly soft and fluffy, you won’t achieve a perfectly smooth, sharp-edged frosting typically seen with buttercream. Embrace its natural, cloud-like texture!
- For the perfect finishing touch, dust the entire top of the cake generously with unsweetened cocoa powder just before serving. Refrigerate the finished cake until you are ready to present and enjoy it.
Pro Baking Tips for Your Tiramisu Layer Cake:
- Enhance with Chocolate: For an extra layer of decadence, consider adding finely shaved dark chocolate in between the cream layers. It provides a delightful textural contrast and an additional depth of flavor that complements the coffee and mascarpone beautifully. While not strictly necessary, it’s a wonderful addition for chocolate lovers.
- Coffee Strength: Adjust the strength of your espresso soak to your preference. For a bolder flavor, use slightly more espresso powder or less water. For a milder touch, reduce the espresso.
- Chilling is Key: Don’t rush the chilling process at any stage. A well-chilled cake is not only easier to slice and handle but also allows the flavors to fully develop and marry, resulting in a superior taste experience.
- Room Temperature Ingredients: Ensure eggs (for sponge) and mascarpone cheese are at room temperature for optimal mixing and emulsification, leading to smoother batters and creams.
- Serving Temperature: While the cake needs to be chilled, allowing it to sit at room temperature for 15-20 minutes before serving can enhance the creaminess of the mascarpone filling.
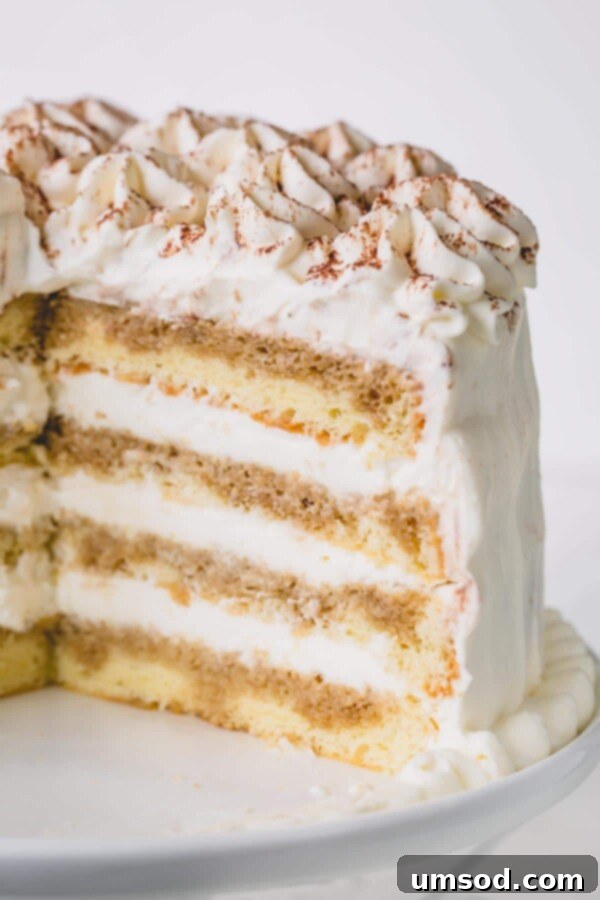
I sincerely hope you embark on the delightful journey of making this Tiramisu Layer Cake! It promises a harmonious blend of coffee, delicate sponge, and creamy mascarpone that is utterly irresistible. I assure you, with every forkful, you will discover why this dessert is a perennial favorite—you certainly won’t regret making it!
⭐
⭐
⭐
⭐️
Tiramisu Layer Cake
Shinee Davaakhuu
1 hour
30 minutes
30 minutes
3 hours
5 hours
10
servings
Comment
Print Recipe
Ingredients
For Sponge Cake:
- 6 large eggs at room temperature
- 1 cup (200 g) granulated sugar divided (Note 1)
- 1 ½ cups (180 g) cake flour
- ½ teaspoon salt
- 1 teaspoon pure vanilla extract
- ¼ teaspoon almond extract
For Espresso Syrup:
- ½ cup (120 ml) hot water
- 2 teaspoons instant espresso powder (Note 2)
- 3 tablespoons (45 ml) amaretto liqueur (Note 3)
For Tiramisu Cream:
- ½ cup (120 ml) sweetened condensed milk
- 8 oz (225 g) mascarpone cheese softened (Note 4)
- 1 teaspoon pure vanilla extract
- 2 cups (480 ml) heavy whipping cream cold
- 1 tablespoon (5 g) unsweetened cocoa powder for dusting, optional
Instructions
To Make Sponge Cake:
- Preheat your oven to 350°F (177°C). Prepare two 9-inch or 8-inch cake pans by lining the bottoms with parchment paper. There’s no need to grease the sides of the pans, as this helps the cake rise.
- Carefully separate the egg whites from the yolks. It’s crucial to ensure absolutely no egg yolk gets into the whites, as this will prevent them from whipping up properly. (TIP: Eggs are often easier to separate when they are cold, straight from the refrigerator.)
- In a large mixing bowl, using a whisk attachment (or an electric mixer), whisk together the egg yolks, ½ cup of the granulated sugar, vanilla extract, and almond extract. Beat this mixture for about 5 minutes, until it becomes pale yellow in color and has tripled in volume, becoming thick and airy.
- In a separate bowl, sift together the cake flour and salt. Sifting helps to aerate the flour and remove any lumps, ensuring a finer texture for the cake.
- In another clean mixing bowl with a clean whisk attachment, begin to beat the egg whites at a medium-low speed until they become foamy and bubbly.
- Gradually add the remaining ½ cup of granulated sugar to the egg whites, one tablespoon at a time, while continuing to whisk. Increase the speed to medium-high as you add the sugar. Continue whisking for 7-10 minutes, until the egg whites form stiff, glossy peaks. When you lift the whisk, the peaks should stand upright.
- Using a spatula, gently fold about one-third of the whipped egg whites into the egg yolk mixture. This helps to lighten the yolk mixture. Continue to fold gently until mostly smooth. Then, add the remaining whipped egg whites and carefully fold them in until the batter is smooth and no streaks of white remain, being careful not to deflate the mixture.
- Incorporate the sifted flour into the batter in three separate additions. After each addition, gently whisk or fold the batter until just combined. Overmixing will develop gluten and result in a tough cake.
- Divide the batter evenly between the two prepared cake pans and gently smooth the tops with your spatula.
- Bake the cakes for 25-30 minutes, or until a wooden skewer or toothpick inserted into the center comes out clean. It’s important not to open the oven door for at least the first 20 minutes of baking to prevent the cake from collapsing.
- Once baked, let the cakes cool in their pans for about 5 minutes. Then, run a thin knife around the edges of the pans and invert the cakes onto a wire cooling rack to cool completely. Once fully cooled, wrap each cake tightly with plastic wrap and refrigerate for at least 2 hours, or preferably overnight. Chilling the cake thoroughly makes it much easier to slice into even layers.
To Make Espresso Syrup:
- In a small bowl, dissolve the instant espresso powder in ½ cup of hot water. Stir until there are no granules remaining. Then, stir in the amaretto liqueur until well combined. Set aside to cool to room temperature.
To Make Tiramisu Cream Filling:
- In a clean mixing bowl with a whisk attachment, beat the softened mascarpone cheese, sweetened condensed milk, and vanilla extract together. Mix on low speed until just combined and smooth, being careful not to overmix.
- In a separate, thoroughly chilled bowl, whip the very cold heavy cream on high speed until hard peaks form. The cream should be firm and hold its shape.
- Gently fold about half of the whipped cream into the mascarpone cheese mixture using a spatula. Then, add the remaining whipped cream and continue to gently fold until the entire mixture is well combined, light, and fluffy. Do not overmix. Refrigerate the cream filling immediately until you are ready to assemble the cake.
To Assemble the Cake:
- Once the sponge cake layers are completely cooled and thoroughly chilled (preferably overnight), carefully slice each cake horizontally into 2 even layers. You should have 4 layers in total.
- Place a small dollop of the mascarpone filling onto your chosen cake board or serving plate. This will act as an adhesive to keep your first cake layer in place. Carefully position the first cake layer on top.
- Drizzle approximately ¼ of the prepared espresso mixture evenly over the entire surface of this cake layer. Ensure even saturation for consistent flavor.
- Next, spread a generous amount of the tiramisu cream filling (roughly 1 cup) over the espresso-soaked cake layer. Spread it smoothly right to the edges using an offset spatula.
- Carefully place the next cake layer on top of the cream. Repeat steps 3 and 4 for the subsequent layers until all four cake layers are stacked with cream in between.
- Once all layers are stacked, take about half of the *remaining* cream filling and use it to apply a thin “crumb coat” to the entire cake – both the sides and the top. This layer seals in any loose crumbs and creates a smooth base for your final frosting. Refrigerate the cake for at least 1 hour to allow the crumb coat to firm up.
- After the crumb coat has chilled, frost the entire cake with the remaining tiramisu cream filling. Decorate as desired; for a classic look, you can use an offset spatula for swirls or a piping tip (like Wilton 1M) for decorative borders on top. NOTE: Due to the super soft and fluffy nature of this cream filling, you will not achieve the perfectly smooth and firm finish of a traditional buttercream. Embrace its delicate, cloud-like aesthetic!
- For the final touch, generously dust the entire top of the cake with unsweetened cocoa powder. Refrigerate the finished Tiramisu Layer Cake until you are ready to serve, allowing the flavors to meld beautifully.
⭐️ Did you make this recipe?
Please leave a review and let us know how you liked it!
Tips & Notes
Note 1: Sugar Type: Fine granulated sugar or caster sugar is highly recommended for the sponge cake. Their finer consistency allows them to dissolve more quickly and evenly into the egg mixture, contributing to a smoother, more stable batter and a more tender cake.
Note 2: Espresso Powder vs. Coffee: I use an instant espresso powder for its convenience and the intense coffee flavor it imparts. This yields the most authentic tiramisu taste. If you don’t have espresso powder, you can substitute with ½ cup of very strong, freshly brewed coffee. Ensure it is cooled before mixing with amaretto.
Note 3: Liqueur Choices: Amaretto is a sweet and nutty liqueur that provides the classic, unmistakable tiramisu flavor. My top choice for a quality amaretto is Disaronno. If amaretto is unavailable or you prefer a different flavor, you could substitute with Kahlua (for a coffee-flavored liqueur) or even dark rum. For a non-alcoholic option, use almond extract in a bit of water or coffee to mimic the nutty notes.
Note 4: Mascarpone Alternatives: Mascarpone is a soft, luxurious Italian cheese with a unique, subtle, and creamy flavor profile. While I strongly recommend sticking with mascarpone for the best results, you can use full-fat cream cheese as a substitute if absolutely necessary. However, please be aware that cream cheese is tangier than mascarpone, which will result in a slightly different, more pronounced flavor in your tiramisu cream. Ensure mascarpone is softened to room temperature before mixing.
Make-Ahead & Storage Tips:
– The baked sponge cake layers, once completely cooled, can be tightly wrapped in plastic wrap and stored in the refrigerator for up to 1 week. For longer storage, they can be frozen for up to 1 month. Thaw in the refrigerator before assembling.
– The assembled Tiramisu Layer Cake is wonderfully adaptable. It can be made and assembled 1-2 days in advance of serving. In fact, the flavors deepen and meld beautifully during this resting period, making it even more delicious. Store the finished cake, loosely covered, in the refrigerator.
Nutrition
1 slice
517kcal
46g
9g
32g
30g
206mg
Dessert
American, Italian-inspired
Did you make this?
Leave a rating and your feedback. Thank you!
This recipe was originally published on June 17th, 2013, and has been updated for clarity and enhanced instructions.
