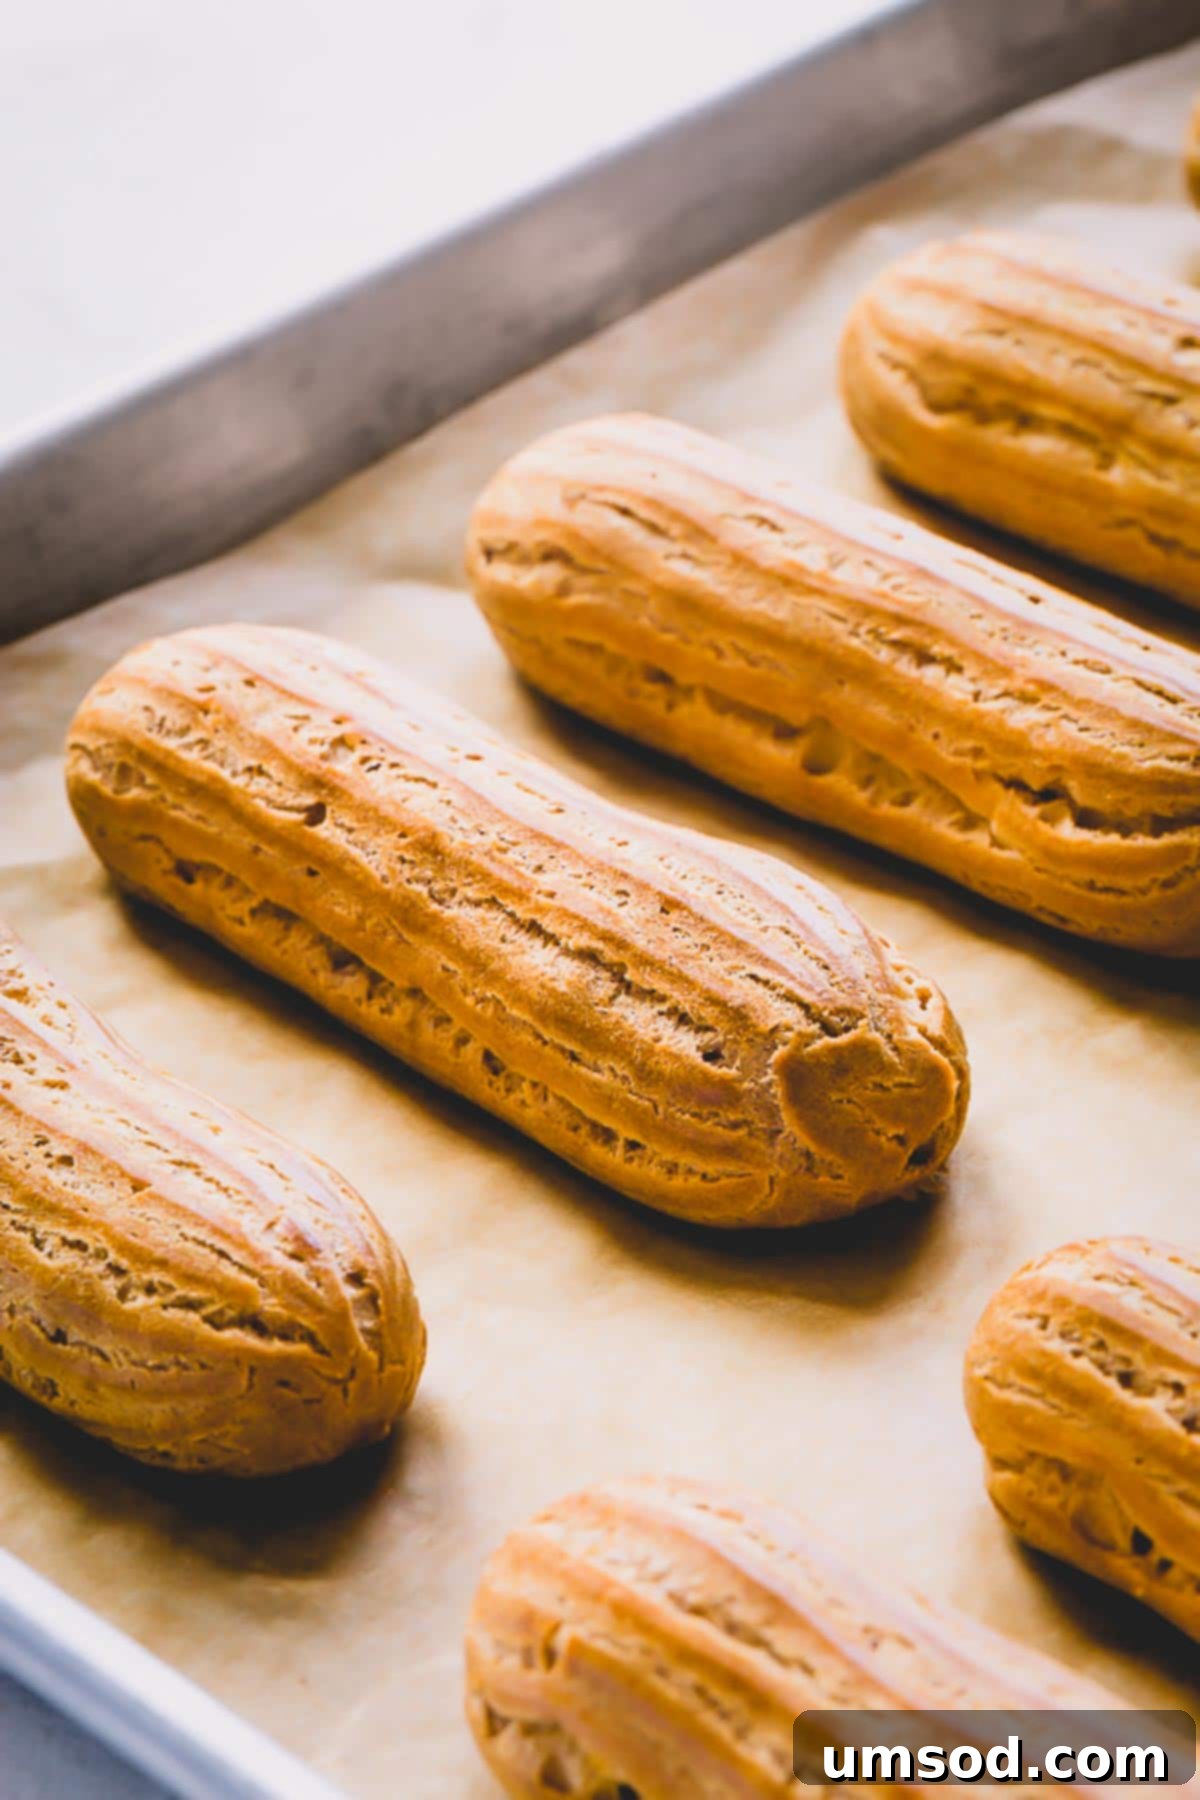
Welcome to your definitive guide for mastering choux pastry, the versatile French dough that forms the foundation of many beloved desserts and savory treats. Here, we’re sharing all the nitty-gritty details, proven tips, and professional tricks to help you create foolproof pastry shells with a light, airy interior and a delightfully crisp exterior every single time. Get ready to bake stunning eclairs, delicate cream puffs, and savory gougères with confidence!
What is Choux Pastry (Pâte à Choux)?
Choux pastry, pronounced “shoo” (from its French name pâte à choux, meaning “cabbage paste” due to its rough, cabbage-like appearance after piping), is a unique twice-cooked pastry dough that originated in France. Unlike flaky or leavened doughs, choux pastry relies on steam to puff up and create its signature hollow interior.
This incredibly versatile dough serves as a foundational element for a wide array of exquisite pastries. From classic desserts like eclairs, elegant cream puffs, and miniature profiteroles, to savory appetizers such as cheesy gougères, choux pastry offers endless culinary possibilities. Its crisp outer shell and airy, hollow center make it perfect for holding decadent creams, custards, or savory fillings.
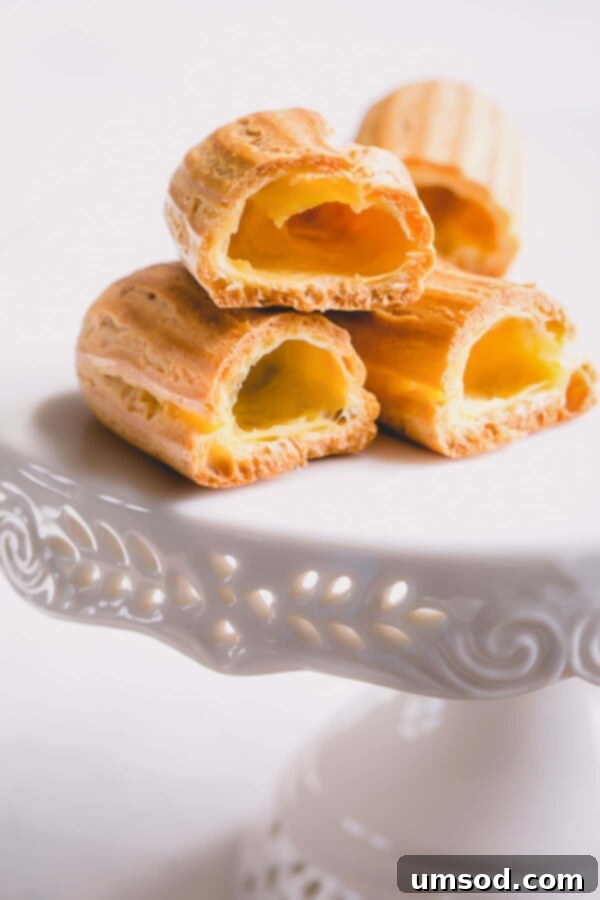
Why You’ll Love This Foolproof Choux Pastry Recipe:
- Effortlessly Simple & Accessible: Despite its gourmet reputation, this choux pastry dough is surprisingly simple and easy to prepare. It requires only basic pantry staples, making it accessible for home bakers of all skill levels.
- A Time-Tested Path to Success: Our guide provides a meticulously tested recipe, complete with clear step-by-step photos and a detailed video tutorial. We’ve refined this method over countless batches to ensure your success, offering a reliable foundation for all your choux creations.
- Mastery Through Troubleshooting: We understand that baking can sometimes present challenges. That’s why this post includes a comprehensive troubleshooting guide designed to address common issues like flat or deflated shells, irregular cracks, or soggy interiors. Learn the ‘why’ behind each problem and discover precise solutions to achieve perfect results every time.
This is a long and detailed guide, so grab a cup of coffee, settle in, and let’s delve into everything you need to know to master the art of choux pastry!
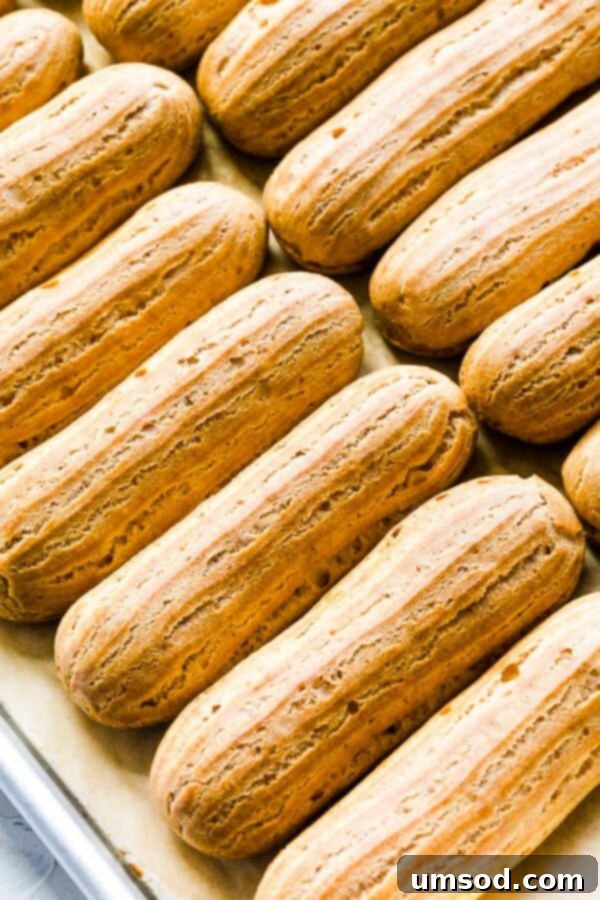
Essential Ingredients for Perfect Choux Pastry:
As mentioned, choux pastry relies on a handful of basic ingredients. However, understanding the role of each component is key to achieving consistent, professional-quality results.
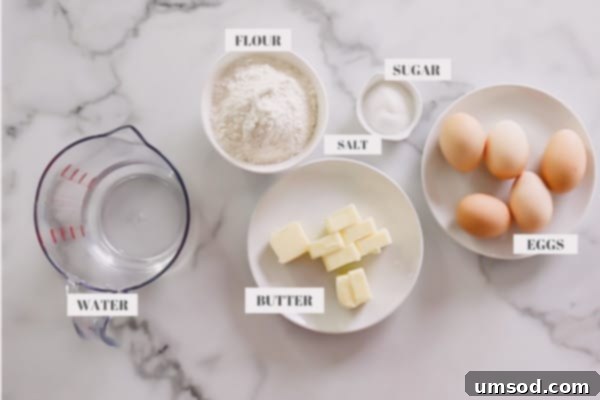
- Liquid (Water/Milk): You have the option to use water, milk, or a combination of both. Water generally produces slightly crisper pastry shells, ideal for those seeking a pronounced crunch. Milk, on the other hand, contributes a richer flavor and results in a more tender crumb. A 50/50 mix offers a lovely balance.
- Flour: The type of flour influences the final texture. For exceptionally crispy pastry, a high-protein flour like bread flour is recommended as it develops more gluten. However, standard all-purpose flour works perfectly fine for most applications, yielding delicious results. Ensure it’s sifted to prevent lumps.
- Butter: We recommend using unsalted butter as it allows for precise control over the overall saltiness of the dough. If you opt for salted butter, remember to completely omit the additional salt from the recipe. Butter provides richness and aids in creating the desired crispness.
- Sugar: A small amount of granulated sugar serves multiple purposes. It subtly enhances the flavor, contributes to a beautiful golden-brown color during baking, and stabilizes the dough. While optional, it’s highly recommended for sweet choux preparations.
- Eggs: Eggs are perhaps the most crucial ingredient in choux pastry. They act as the primary leavening agent. As the eggs heat in the oven, their moisture turns to steam, causing the pastry to puff up dramatically and create its characteristic hollow, airy interior. They also provide structure and richness.
Step-by-Step Guide to Making Perfect Pâte à Choux:
1. The Panade: The Foundation of Your Choux
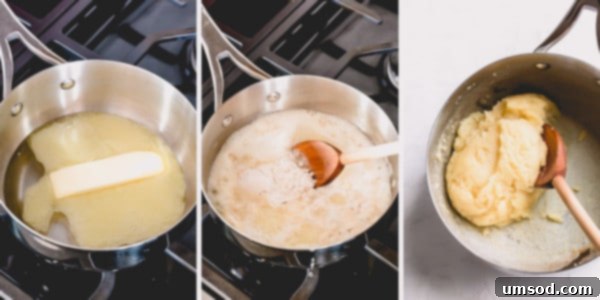
- Combine & Heat: In a medium saucepan, gently combine your chosen liquid (water/milk), butter, sugar, and salt. Heat the mixture slowly over medium-low heat, stirring occasionally. The objective here is to fully melt the butter and dissolve both the sugar and salt before the mixture reaches a vigorous boil. This ensures even distribution of flavor and texture.
- Sift the Flour: While the liquid mixture is heating, take a moment to sift your flour. Sifting is a vital step as it removes any lumps, aerates the flour, and ensures it incorporates smoothly and uniformly into your dough.
- Incorporate Flour Off Heat: Once the butter is melted and sugar/salt are dissolved, remove the saucepan from the heat. Immediately add all the sifted flour into the hot liquid mixture at once. Stir vigorously with a wooden spoon or spatula until all the flour is fully absorbed and a cohesive dough ball forms. This rapid incorporation is key to preventing lumps.
- Cook the Panade: Return the saucepan to medium heat. Continuously stir and “cook” the dough for approximately 3-5 minutes. You’ll notice the dough forming a single ball, pulling away from the sides of the pan, and a thin film or crust developing on the bottom of the saucepan. The ideal temperature for the panade is around 175°F (80°C). This crucial “cooking out” step serves to dry out the dough, gelatinize the starches in the flour, and allow the dough to absorb more eggs later, which is essential for maximum puff.
Expert Tip
Avoid boiling your liquid mixture for too long before adding the flour. Excessive boiling will evaporate too much water, altering the critical wet-to-dry ingredient ratio and potentially leading to a stiff dough that won’t puff properly.
2. Incorporating Eggs: The Leavening Powerhouse
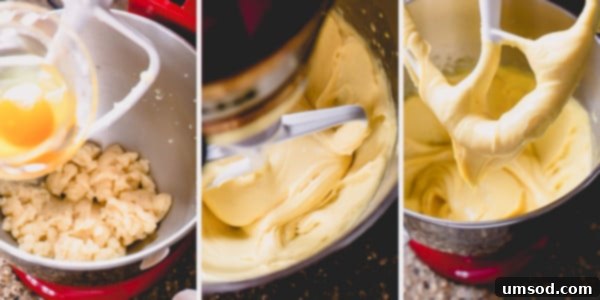
Important Note on Cooling
When cooling the dough, avoid beating it for an extended period or at a high speed. Over-beating can cause the fat (butter) to separate from the dough, which may lead to large, undesirable cracks in your baked pastry shells.
- Cool the Dough: Before adding any eggs, it’s essential to cool the panade. The dough should be warm to the touch, but not hot enough to cook the eggs. You can achieve this by simply letting it rest for about 10-15 minutes, or by beating it in a stand mixer with a paddle attachment on low speed for 2-3 minutes.
- Gradual Egg Addition: Add the eggs one at a time. After each egg, mix the dough thoroughly until it is fully absorbed and the mixture comes back together. Initially, the dough may appear to break or look curdled, but continue mixing; it will eventually emulsify and become smooth again. This gradual addition ensures proper hydration and emulsification.
- Monitor Consistency Closely: The number of eggs can vary slightly depending on factors like flour type, egg size, and how much moisture evaporated during the panade cooking. After the 4th egg, pause and check the consistency of the dough carefully. You may not need the entire 5th egg, or even any more at all. Too much egg will result in a runny dough that won’t hold its shape and will produce flat, deflated pastry shells.
Crucial Consistency Check
Achieving the proper batter consistency is paramount for successful choux pastry. A batter that is too runny will yield flat, collapsed shells, while a batter that is too thick will be difficult to pipe and result in dense, heavy pastries.
Achieving the Perfect Batter Consistency
The ideal choux pastry batter should be smooth, thick, and beautifully glossy. To test, lift your beater or wooden spoon; the dough should slowly fall back into the bowl in a thick ribbon. Crucially, it should form a distinct “V” shape or a soft peak at the end before breaking off. This indicates the perfect balance of moisture and structure for optimal puff.
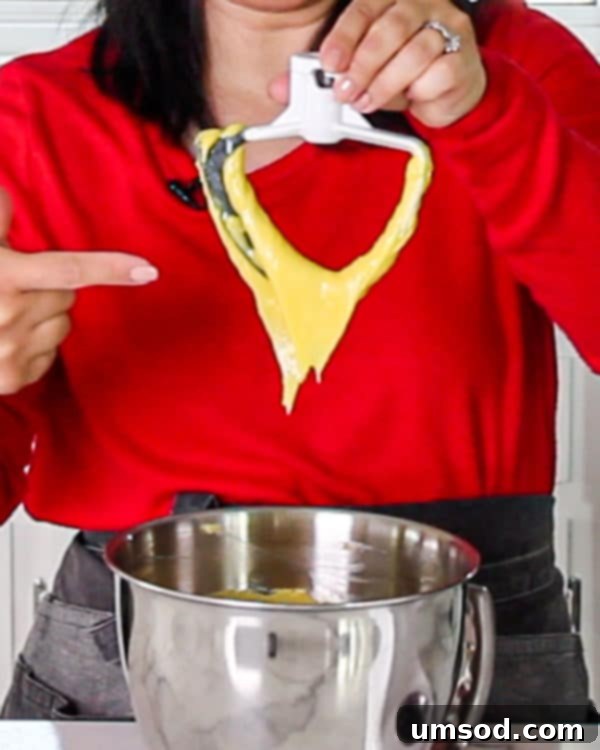
Several factors can influence the exact number of eggs your choux dough requires:
- Panade Cooking Time: A longer cooking time for the panade means more moisture has evaporated, requiring slightly more egg.
- Egg Size: The size of your eggs (large vs. extra-large) will naturally affect the overall liquid content. Always use room-temperature large eggs for consistency.
- Flour Type: More glutenous flours, like bread flour, tend to absorb more liquid and may require slightly more egg compared to all-purpose flour.
3. Shaping Your Choux Pastries: Precision for Presentation
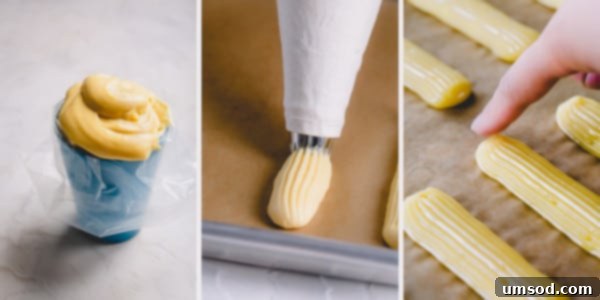
Pro Tip for Filling Pastry Bags
For a much easier and cleaner way to fill your pastry bag, place it inside a tall glass, folding the top edges over the rim. This creates a stable opening, as shown in the image above!
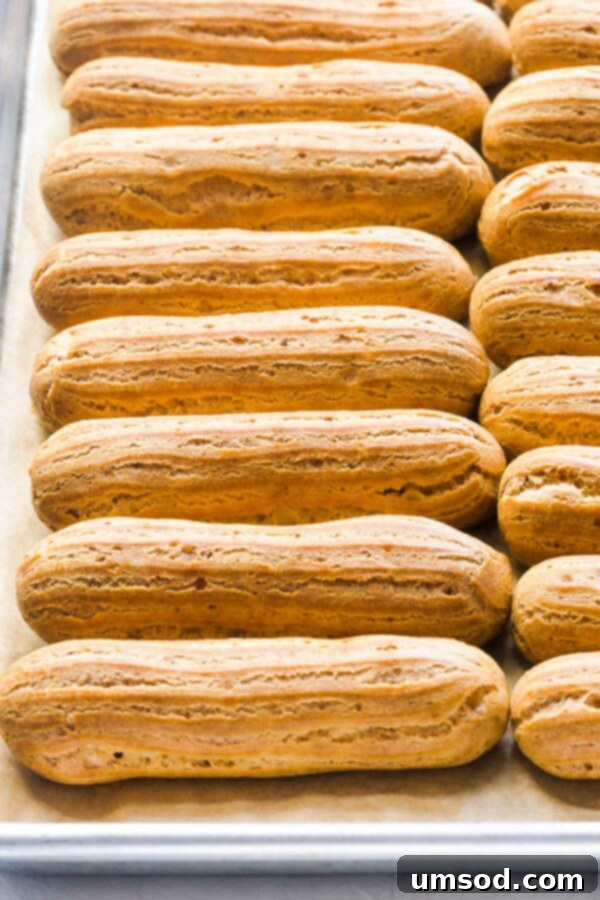
- Prepare Your Pastry Bag: Insert your preferred piping tip into a large pastry bag. For classic cream puff rounds, a round tip works best. For elegant eclairs, a star tip provides a beautiful ridged finish. You can also find a special French pastry star tip specifically designed for eclairs.
- Transfer the Dough: Carefully transfer your prepared choux dough into the pastry bag. We recommend using a sturdy bag, such as 16″ disposable pastry bags or an 18″ reusable canvas pastry bag.
- Rest the Batter (Optional but Recommended): For optimal results and easier piping, allow the piped batter to rest for at least 30 minutes to an hour at room temperature before baking. This helps the dough stabilize.
- Pipe with Confidence: Hold the pastry bag at a consistent 45° angle to your baking sheet. Apply even and consistent pressure as you pipe to create uniformly shaped pastries. This may take a little practice, so don’t be discouraged if your first few aren’t perfect – they will still taste delicious!
- Smooth Pointy Ends: After piping, use a wet fingertip to gently flatten any small peaks or pointy ends that may have formed. Simply dip your finger in a bowl of water to prevent the dough from sticking. This step is important because unflattened peaks can burn quickly in the oven and detract from the pastry’s aesthetic.
Make-Ahead Advantage
Uncooked choux pastry dough is wonderfully convenient! It can be stored in the fridge for up to 2 days. For best results, pipe the dough into a pastry bag, securely close both ends, and refrigerate until you’re ready to pipe and bake.
4. Baking Your Choux Pastries: The Magic of Puff
- Preheat Thoroughly: Always preheat your oven to 375°F (190°C) for at least 20-30 minutes before baking. A consistently hot oven is crucial for immediate steam generation and optimal puff.
- Bake One Sheet at a Time: For the most consistent and best results, bake one baking sheet of choux pastry at a time. While you can technically bake two sheets, rotating them halfway through, this increases the risk of uneven baking or even collapsing shells due to temperature fluctuations and steam loss.
- Resist the Urge to Open the Oven Door! This is perhaps the most critical rule for choux pastry. Do NOT open the oven door for at least the first 20-25 minutes of baking, or until the shells are visibly puffed, set, and golden brown. Choux pastry relies heavily on the steam trapped within the oven to expand and set its shape. Opening the door prematurely allows this precious steam to escape, leading to deflated, sad-looking pastries.
RECIPE TESTING NOTES: Many recipes suggest baking choux pastry at a high temperature initially, then lowering the temperature for the remainder of the bake. Through extensive testing, we’ve found that baking choux pastry at a consistent temperature (375°F or 190°C) yields equally, if not more, reliable and excellent results, simplifying the process without compromising quality.
Whew, are you still with us? Kudos to you for sticking through this comprehensive guide! Again, our aim for this post is to be your ultimate go-to resource for mastering choux pastry. By walking you step-by-step through the entire process and sharing all our knowledge, we hope these detailed tips and tricks empower you to achieve beautiful, professional-looking choux-based desserts and appetizers in your own kitchen.
Pâte à Choux Troubleshooting Guide: Common Issues & Solutions
Cause: You’ve likely added too much egg, which over-hydrates the dough and prevents it from holding its structure.
FIX #1 (Corrective Action): Do NOT simply add raw flour to thicken runny dough, as this will result in a dense, chewy pastry that won’t puff correctly. Instead, prepare a half batch of panade (water/milk, butter, sugar, salt, flour – but no eggs) on the stovetop. Once the new panade is cooked and cooled slightly, gradually mix it into your overly runny choux pastry dough until the desired consistency is achieved.
FIX #2 (Preventative Measure): For future batches, add eggs one at a time and meticulously check the dough’s consistency after the 3rd or 4th egg. Stop adding eggs as soon as the perfect “V” ribbon consistency is reached.
Causes & Fixes:
1. Undissolved Ingredients: Dry ingredients (sugar, salt) weren’t fully dissolved or flour wasn’t properly incorporated.
FIX: Ensure sugar and salt are completely dissolved before the liquid boils. Always sift flour to prevent lumps, and mix the panade vigorously to ensure smooth incorporation.
2. Over-beaten Dough: The dough was beaten for too long or at too high a speed before adding eggs, causing fat separation.
FIX: Next time, cool the panade by beating on low speed for no longer than 2-3 minutes, or allow it to cool naturally.
3. Oven Temperature Too High: Pastry shells baked at an excessively high temperature can rise too rapidly and crack.
FIX: Ensure your oven temperature is accurate (a thermometer helps!) and bake at a consistent temperature, as outlined in our recipe.
4. Uneven Piping: Any wavy ripples or inconsistent pressure during piping will create weak points that crack upon rising.
FIX: Practice piping smooth, even shells with consistent pressure. Using a star tip for eclairs can also help create a more uniform rise and shape.
Causes & Fixes:
1. Runny Dough: An over-hydrated choux pastry dough cannot maintain its structure.
FIX: Refer to the “Too runny choux pastry dough” section above for corrective measures.
2. Premature Oven Door Opening: You opened the oven door too soon during baking, releasing critical steam.
FIX: This is a cardinal rule for choux pastry. Do NOT open the oven door for at least the first 25 minutes of baking. Only open it when the pastry shells are fully puffed, firm, and beautifully golden brown.
3. Under-baked Pastry: The shells weren’t baked long enough to fully dry out and set their structure.
FIX: If your shells deflate after cooling, they were likely under-baked. You can often salvage them by returning the baking sheet to the oven and baking for an additional 5-10 minutes until they are crisp and golden.
Cause: The internal steam was not allowed to escape during the final stages of baking, leaving the interior moist and uncooked.
FIX: After the initial baking period (around 30 minutes), quickly open the oven door, make a small 0.5-inch slit on the side of each pastry shell using a sharp paring knife. This simple action allows the trapped steam to escape, promoting a dry, crisp interior. Continue baking for another 5 minutes before removing the baking sheet from the oven.
Frequently Asked Questions About Choux Pastry:
- Why do some recipes call for a combination of water and milk?
- Using a blend of water and milk allows you to achieve a balanced texture and flavor. Milk contributes richness and makes the pastry shells more tender, while water helps create a crisper exterior. A combination is often preferred when making delicate cream puffs or profiteroles, offering the best of both worlds.
- Can I make choux pastry dough in advance?
- Absolutely! Uncooked choux pastry dough is quite stable. You can prepare the dough and store it in an airtight container (or keep it in a pastry bag with both ends tightly sealed) in the refrigerator for up to 2 days. This makes it a great make-ahead option for entertaining.
- Can I freeze baked, unfilled pastry shells?
- Yes, baked choux pastry shells freeze beautifully! Once completely cooled and unfilled, place them in a single layer in a freezer-safe ziplock bag or airtight container. They can be frozen for up to 3 months. To use, simply thaw the shells in the refrigerator, then crisp them up by baking at 300°F (150°C) for 8-10 minutes before filling.
Watch the Video Tutorial:
Explore More Recipes from Sweet & Savory:
- Classic Chocolate Eclair Recipe
- Flaky All-Butter Pie Crust
- Perfect Glaze for Spiral Ham
- Simple 3-Ingredient Sponge Cake
- Garlic Rosemary Baked Steak Fries
How to Make Choux Pastry
Pin Recipe
Comment
Print Recipe
Ingredients
- 1 cup (240 ml) water Note 1
- ½ cup (115 g) unsalted butter Note 2
- 1 tablespoon granulated sugar
- ¼ teaspoon salt
- 1 cup (125 g) all-purpose flour sifted Note 3
- 4-5 large eggs at room temperature Note 4
Instructions
- In a medium saucepan, combine water, butter, sugar, and salt. Slowly heat the mixture over medium heat, stirring frequently to dissolve sugar and melt the butter. Once sugar is dissolved and butter is melted, increase the heat to medium-high and bring the mixture to a boil.
- When the mixture comes to a boil, remove the saucepan from heat and add all the sifted flour at once. Quickly mix the mixture until all the flour is absorbed and a cohesive dough (panade) forms.
- Replace the saucepan back on the burner and reduce the heat to medium. Cook the dough, continuously mixing with a wooden spoon for 3-4 minutes, until a light crust forms on the bottom of the pan. This step is crucial for drying out the panade.
- Transfer the dough into a mixing bowl with a paddle attachment (or use a wooden spoon if mixing by hand). Beat on low speed for 2-3 minutes until the mixture cools to room temperature.
- Add eggs one at a time, beating well after each addition until fully absorbed. This gradual process ensures proper emulsification. Do not add more than two eggs at a time. After the 4th egg, check the dough’s consistency; it should be smooth, shiny, and slowly fall into a thick ribbon, forming a “V” shape at the end. You may not need the entire 5th egg. (Refer to the visual cues in the post above, or the video!)
- Transfer the batter into a large pastry bag fitted with your chosen tip. For best results, allow the batter to rest for at least 1 hour at room temperature before piping. Uncooked dough can also be refrigerated for up to 2 days in an airtight container.
- Preheat oven to 375°F (190°C) at least 20-30 minutes prior to baking. Line 2 baking sheets with parchment paper or a silicone mat.
- To cook pastry shells: Pipe the batter into your desired shape. For eclairs, pipe 4-inch strips. For cream puffs, pipe 2-inch rounds, spaced 3 inches apart.
- Gently flatten any peaked tops with a wet fingertip to prevent burning.
- Bake one baking sheet at a time for 30-35 minutes, or until the shells are puffed up, set, and golden brown. (Important: Do not open the oven door for the first 25 minutes of baking.)
- After the initial 30-35 minutes, quickly open the oven door and make a small slit (approximately 0.5-inch) on the side of each shell using a small, sharp paring knife. This allows internal steam to escape, helping to dry out the pastry’s interior. Close the oven door and bake for another 5 minutes, or until the shells are crisp and deeply golden brown.
- Transfer the baked shells onto a wire rack and allow them to cool completely before filling with your favorite creams or custards.
⭐️ Did you make this recipe?
Please leave a review and let us know how you liked it!
Tips & Notes
Note 2 (Butter): Unsalted butter is preferred for precise salt control. If using salted butter, omit the added salt from the recipe.
Note 3 (Flour): Bread flour yields a crisper pastry due to its higher protein content. All-purpose flour also works well. Always sift your flour.
Note 4 (Eggs): You may not need all 5 eggs. Crucially, check the batter’s consistency after 4 eggs and add the last egg gradually, or only a portion of it, until the perfect ribbon consistency is reached.
Make-Ahead & Storage Tips:
The prepared choux pastry dough can be made and refrigerated in an airtight container or pastry bag for up to 2 days. Baked, unfilled shells can be stored at room temperature in an airtight container for 1 day, or frozen for up to 3 months. To serve frozen shells, thaw in the fridge and crisp them in a 300°F (150°C) oven for 8-10 minutes.
Nutrition Facts
