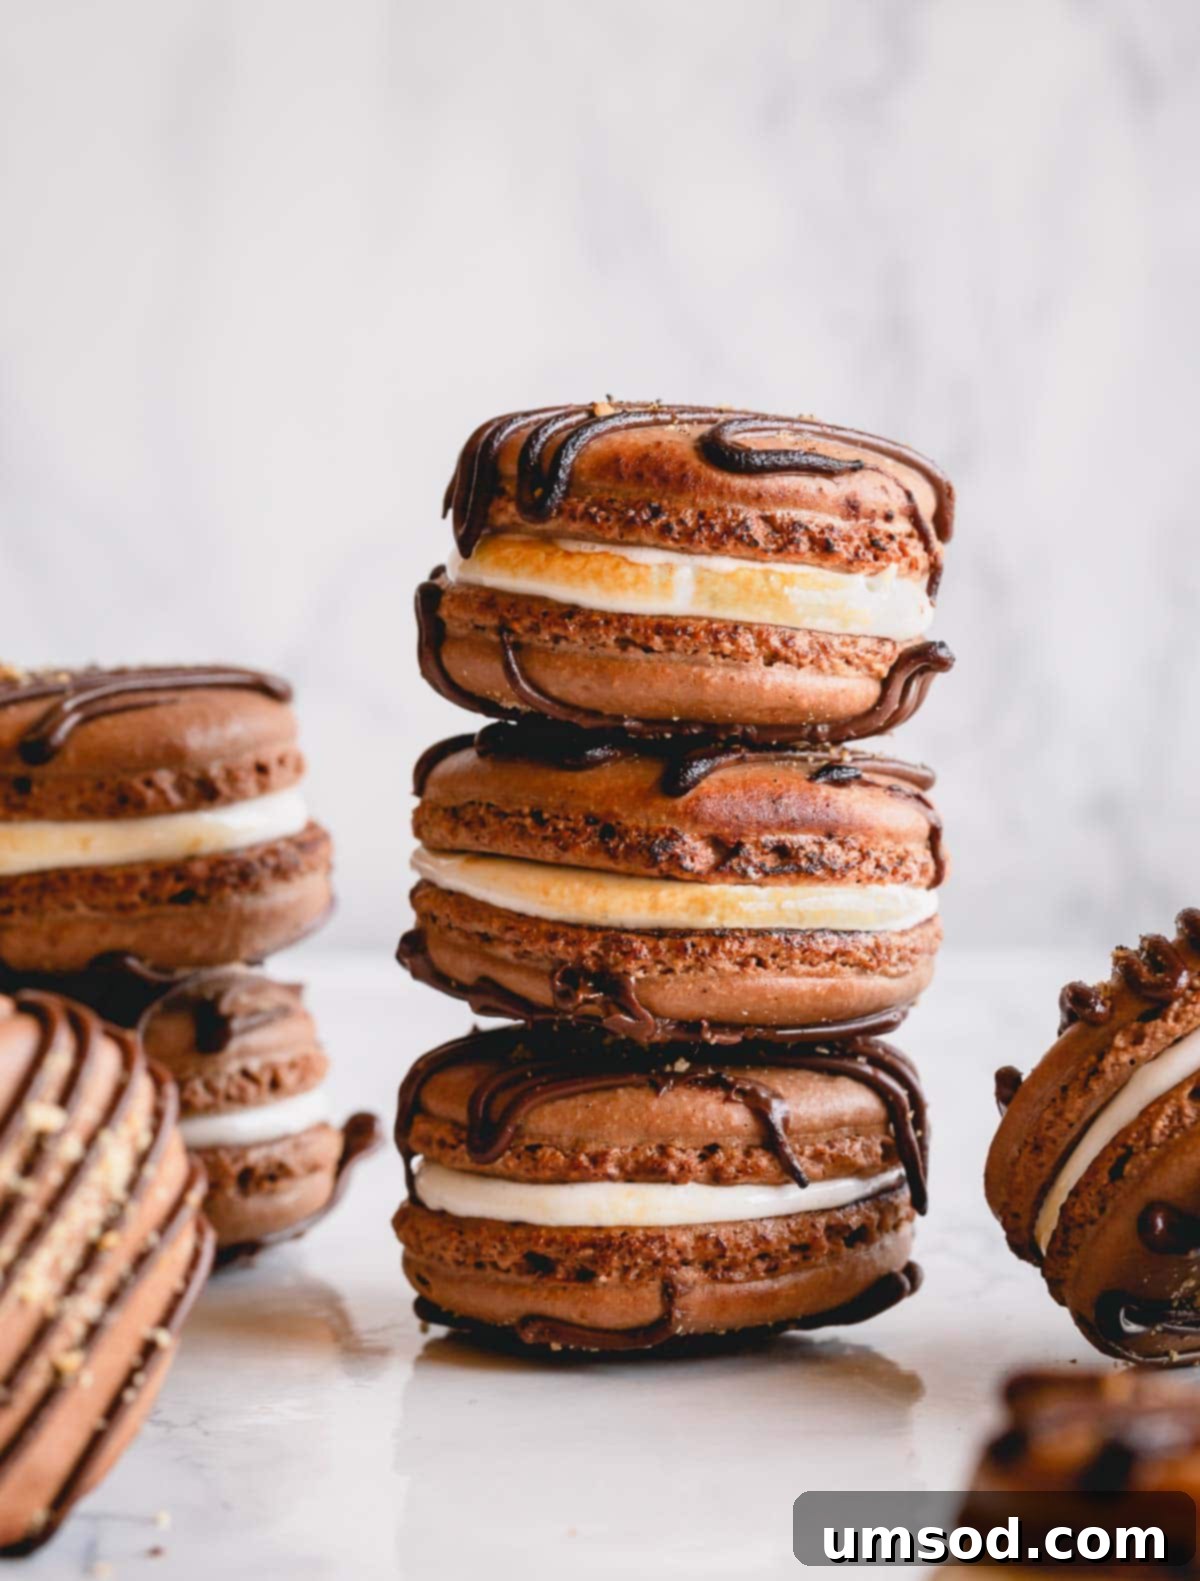
Prepare to transform your favorite campfire treat into an elegant, gourmet French pastry! These **S’mores Macarons** feature delicate chocolate shells, a rich chocolate drizzle, a sprinkle of crunchy graham cracker crumbs, and are generously filled with luscious, toasted marshmallows. It’s the ultimate summer dessert experience, reimagined for sophisticated palates, and boasts an incredibly simple, **one-ingredient filling** that will truly amaze you!
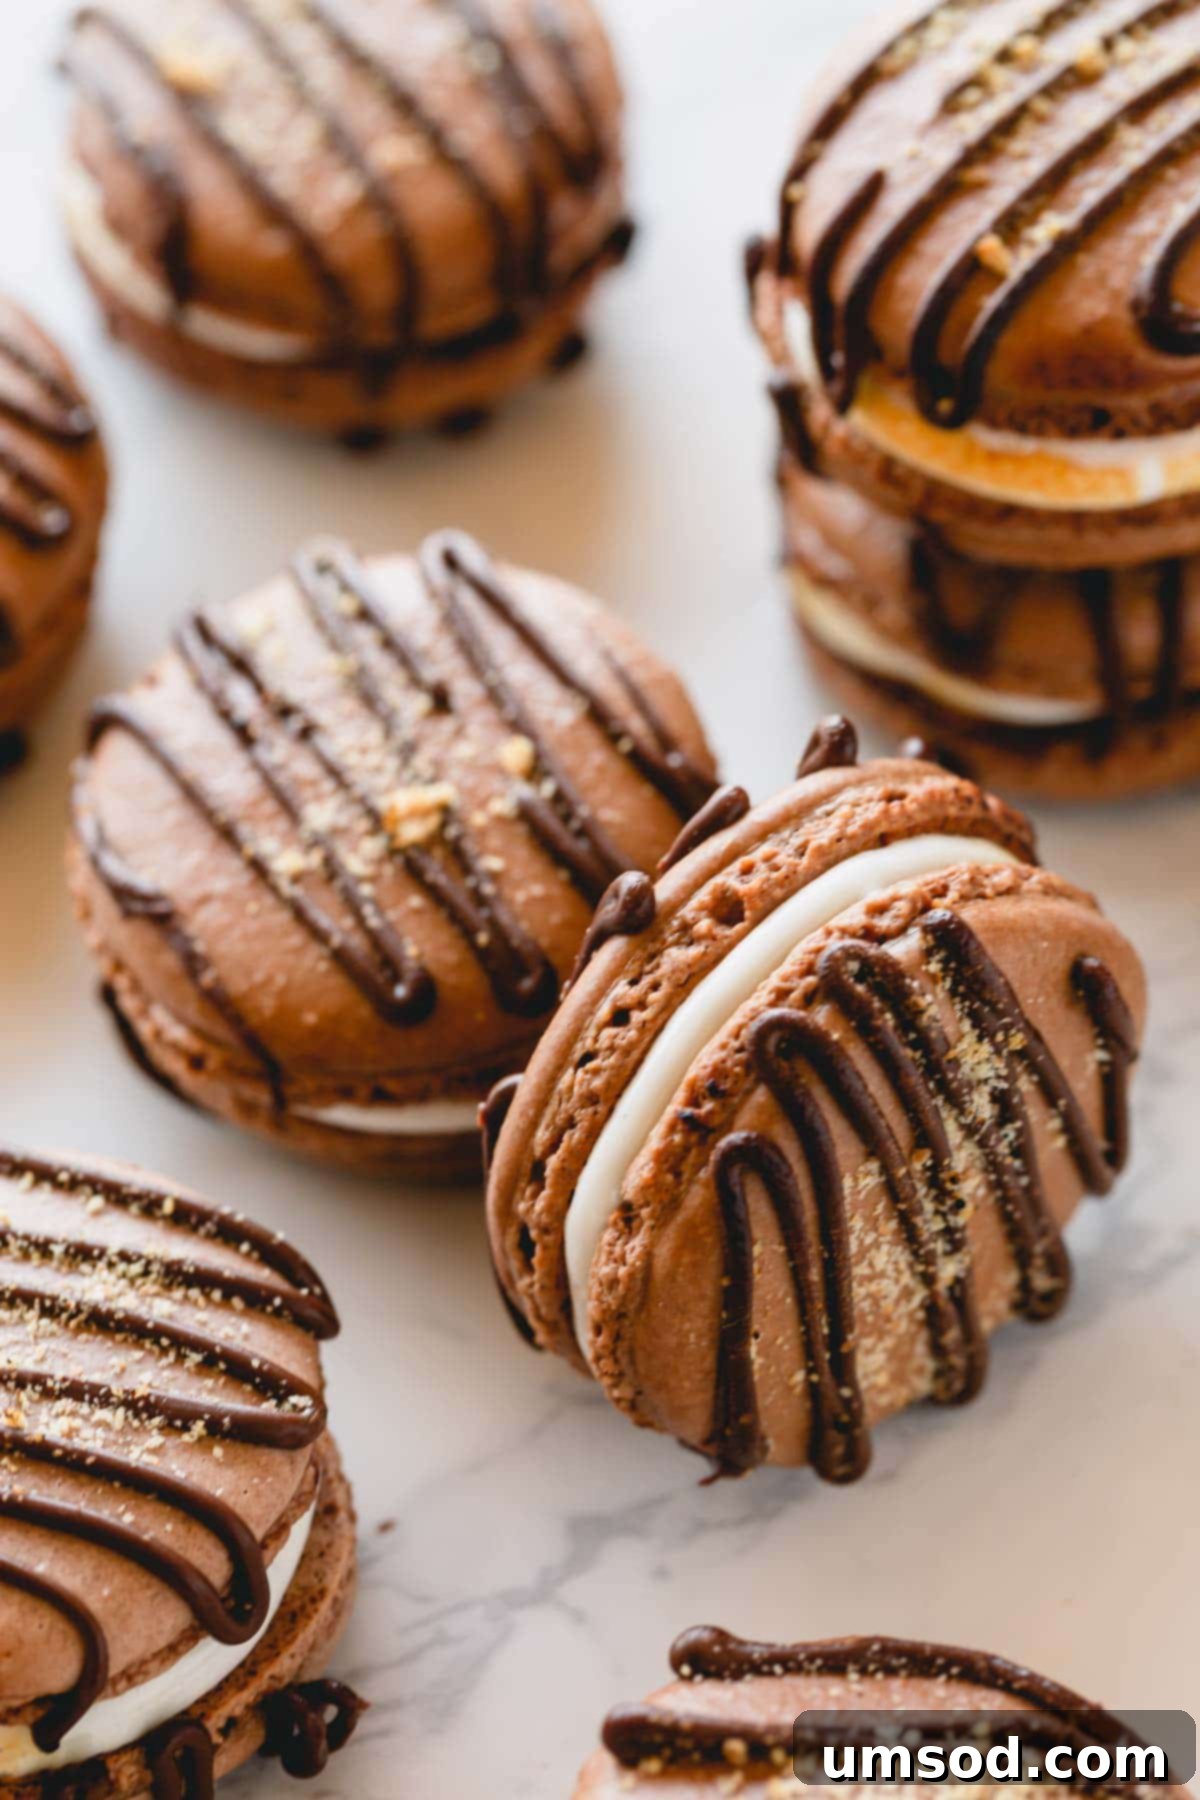
Discover Why These S’mores Macarons Will Become Your New Favorite French Pastry
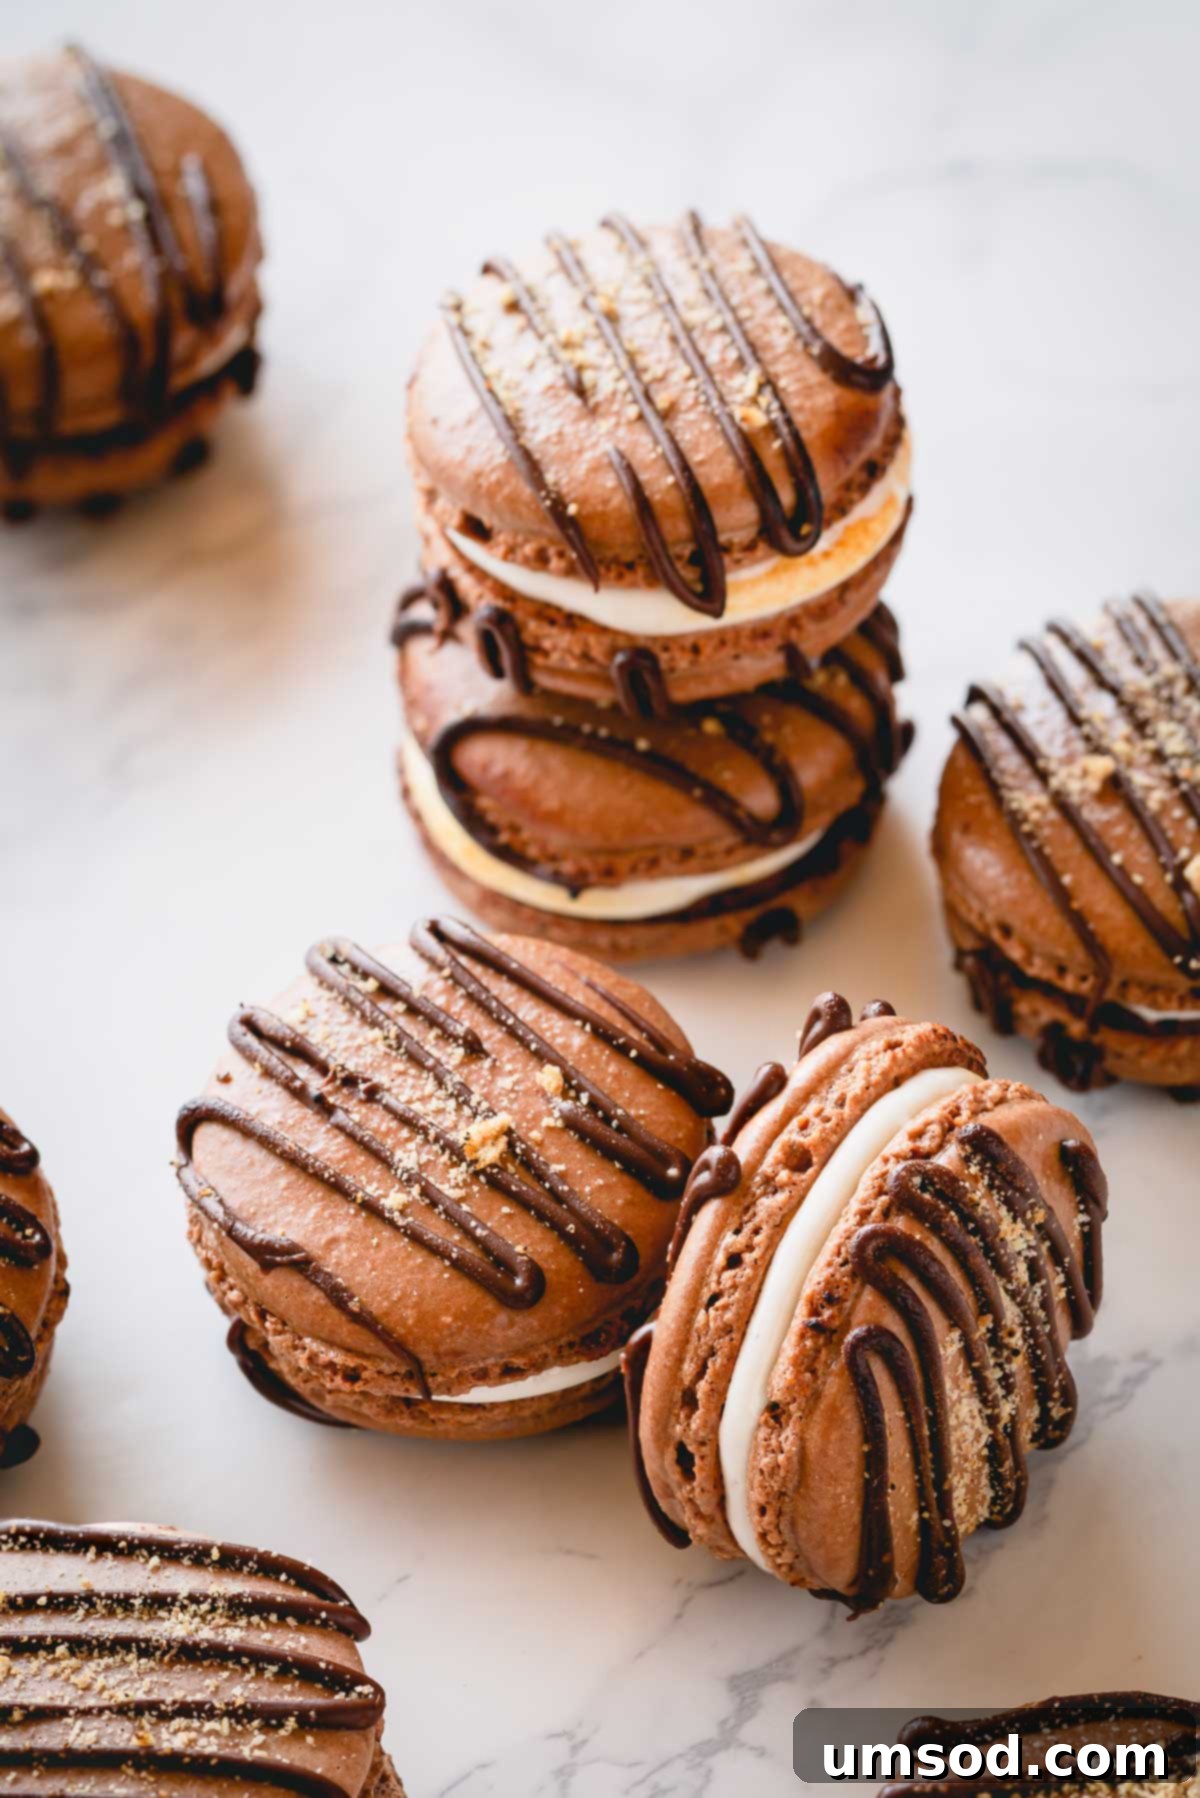
If you’ve ever dreamt of combining the classic comfort of s’mores with the refined elegance of French macarons, your dream has just come true. This recipe offers a delightful culinary adventure, allowing you to elevate a beloved nostalgic flavor into a truly impressive dessert. Once you’ve mastered the art of chocolate macarons, you’ll find yourself eager to experiment with this extraordinary summer-inspired flavor combination. Our S’mores Macarons encapsulate all the cherished elements of a traditional s’mores experience:
- **Crispy, delicate shells:** Experience the delightful crisp exterior of perfectly baked macaron shells, which not only provide that signature macaron ‘crunch’ but also subtly mimic the texture of a classic graham cracker, offering a sophisticated foundation for our s’mores creation.
- **Rich, decadent chocolate:** Indulge in the deep, intense flavor of premium chocolate, thoughtfully incorporated into the macaron shells and artfully drizzled over each pastry, enhancing the overall s’mores profile.
- **Irresistibly toasted marshmallows:** The star of the show! Revel in the gooey, subtly caramelized sweetness of toasted marshmallows, providing that iconic campfire essence that makes s’mores so universally adored.
The magic begins with the macaron shells themselves. Crafted with cocoa powder, they deliver a wonderful chocolate flavor. Their perfectly crisp texture and subtle sweetness perfectly echo the graham cracker component of a traditional s’more, creating a cohesive and delightful bite. This ingenious design ensures that every aspect of the s’mores experience is present within each delicate macaron.
But arguably, the most exciting feature of this recipe is its incredibly simple yet utterly delicious **marshmallow filling**! Forget the complexities of making homemade marshmallow fluff from scratch, or wrestling with overly sweet and often unstable marshmallow fluff frostings. For this recipe, we embrace simplicity and efficiency. We are straight up using regular, readily available marshmallows, melted to perfection! And trust us, it works like an absolute charm, creating a wonderfully gooey, stretchable, and delightful filling that perfectly complements the chocolate shells.
As a final touch, a delicate sprinkle of crushed graham crackers adorns the tops of these macarons. While primarily for aesthetic appeal, adding a rustic charm that is simply adorable, these crumbs also contribute a subtle textural contrast and a hint of authentic graham cracker flavor. It’s a small detail that makes a big impact on both the visual appeal and the overall experience of these exceptional s’mores macarons.
Step-by-Step Guide to Crafting Perfect S’mores Macarons
Creating these exquisite S’mores Macarons involves a few distinct stages, each crucial for achieving the perfect balance of flavor and texture. Don’t be intimidated; with our clear instructions, you’ll be well on your way to baking these delightful treats.
Preparing Your Exquisite Chocolate Macaron Shells
The foundation of any great macaron is a perfectly baked shell. For our s’mores variation, we’re using rich chocolate macaron shells that provide a sturdy yet delicate base. Planning ahead is key for macaron success.
- **Bake Your Chocolate Macaron Shells:** Begin by preparing your chocolate macaron shells according to a trusted recipe. This is the stage that often requires the most practice, so don’t be discouraged if your first batch isn’t perfect. We encourage you to make the shells days, or even weeks, in advance to streamline your baking process. Baked macaron shells store exceptionally well; they can be kept in an airtight container in the fridge for up to a few days, or frozen for several months without compromising their quality. This flexibility makes macaron baking much more manageable for busy schedules.
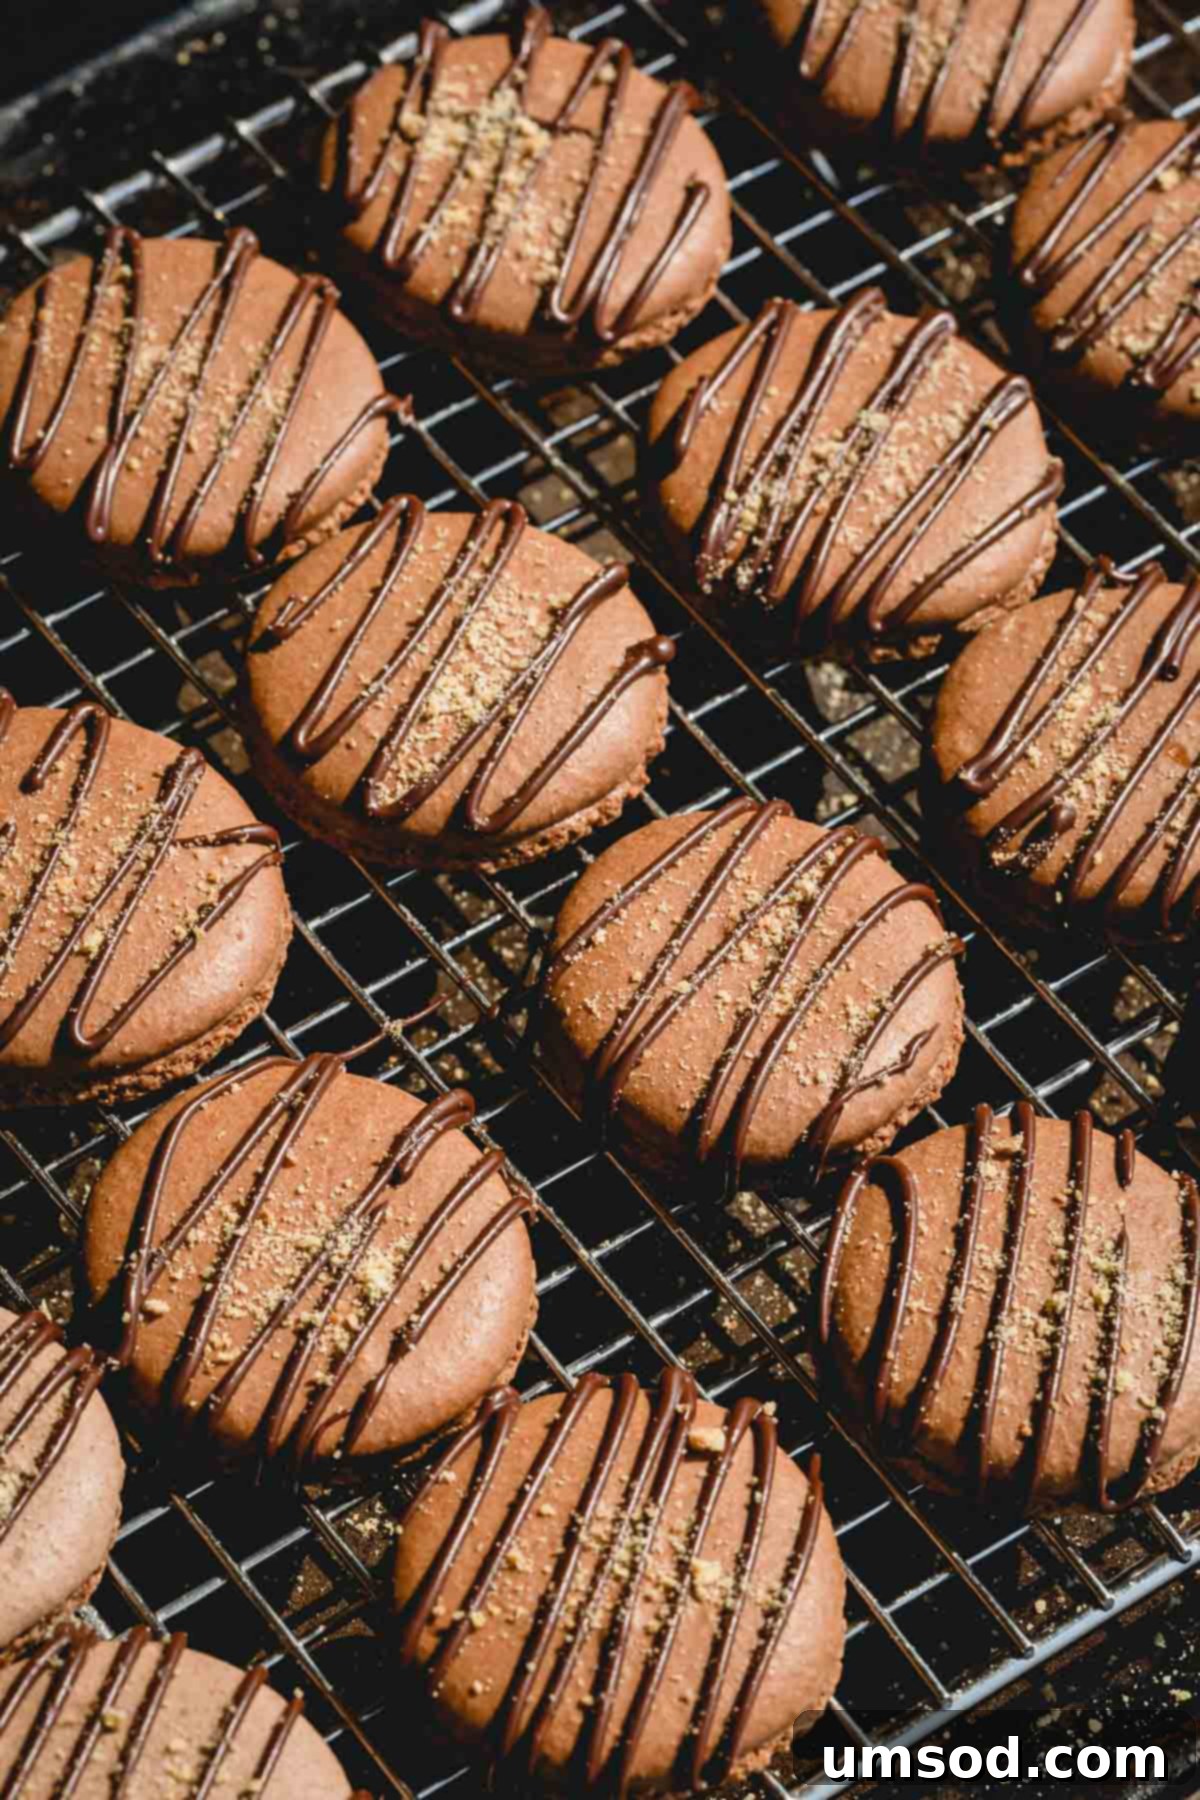
- **Decorate the Shells:** Once your chocolate macaron shells are completely cooled, it’s time to add the signature s’mores flair. Carefully pair the shells by size, ensuring each top shell matches a bottom shell for even assembly. Arrange the paired shells on a clean tray or wire rack. Next, gently drizzle melted semi-sweet chocolate over the tops of the shells in a decorative pattern – feel free to get creative with your swirls and lines! Immediately after drizzling, sprinkle a generous amount of finely crushed graham crackers over the still-wet chocolate. This ensures the crumbs adhere beautifully. Allow the chocolate to set completely at room temperature, or expedite the process by briefly popping them into the fridge for about 10-15 minutes. This step is essential as it prevents smudging during filling.
- **Prepare for Filling:** With your perfectly decorated shells ready and the chocolate set, the next crucial step is to prepare our unique marshmallow filling. Ensure all your tools are clean and ready, as working with melted marshmallows requires efficiency.
Mastering the Melty Marshmallow Filling: A Simple Technique
The secret to our incredibly easy and delicious s’mores macaron filling lies in a simple melting technique for regular marshmallows. This method ensures a smooth, glossy, and perfectly pipeable consistency without any complicated ingredients or processes. Here’s how to achieve marshmallow perfection:
- **Set Up a Double Boiler:** To melt marshmallows gently and evenly, a double boiler is your best friend. Place your marshmallows along with a mere touch of water (just 1 tablespoon for this recipe) in a heatproof bowl. Position this bowl over a pot of simmering water, ensuring that the bottom of the top bowl *does not* touch the simmering water. The steam from the simmering water will provide indirect, gentle heat, preventing the marshmallows from scorching or seizing.
- **Melt and Stir:** As the steam begins to warm the marshmallows, they will gradually soften and melt. Stir frequently with a clean silicone spatula. Continuous stirring helps to achieve a smooth, lump-free consistency and ensures even melting throughout. Be patient; it might take a few minutes for them to fully break down.
- **Cool Slightly for Optimal Consistency:** Once the marshmallows are completely melted and appear perfectly smooth and glossy, remove the bowl from the heat. Let the melted marshmallow cool slightly for approximately 3 minutes, continuing to stir occasionally. This brief cooling period is vital as it allows the mixture to thicken slightly, making it easier to handle and pipe. You’re looking for a consistency that is still fluid but not overly hot or runny.
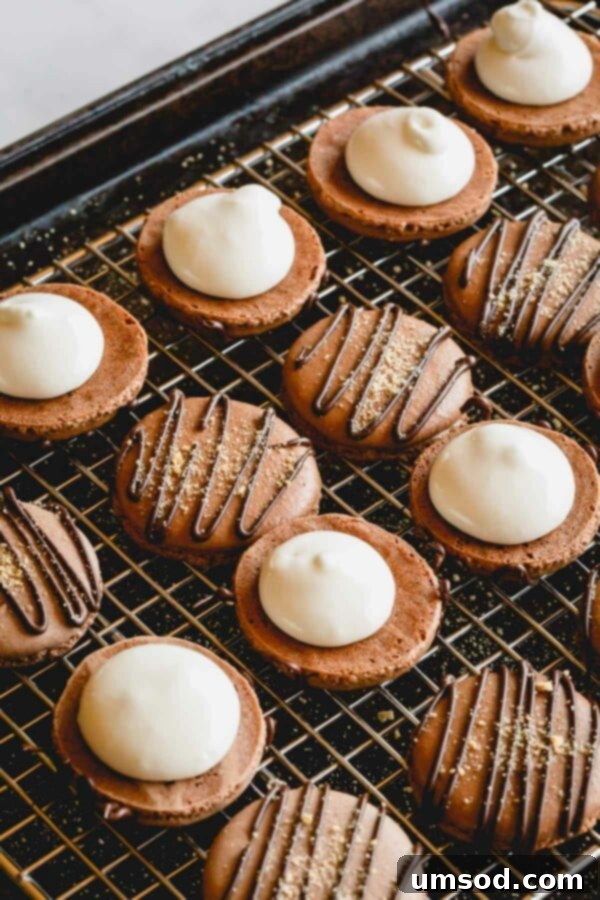
- **Transfer to Piping Bag:** Immediately transfer the warm, melted marshmallow into a piping bag fitted with a round tip (a Wilton Extra Large Round Tip #1 or similar large round tip works perfectly). Work quickly at this stage, as marshmallow sets relatively fast as it cools.
- **Expert Piping Technique:** Now for the fun part: piping! The marshmallow filling is inherently sticky and stringy, which can make detaching it from the piping bag a bit challenging at first. Here’s a proven technique to master it: Pipe a generous dollop of filling onto one macaron shell. Once you’ve piped what you deem enough filling for one shell, gently lift the piping bag straight up without squeezing. Then, quickly swirl the tip of the piping bag around the top edge of the piped marshmallow mound before lifting completely. This swirling motion helps to neatly break the stringy marshmallow strand, leaving a clean finish.

Crucial Tip: Working Efficiently with Melted Marshmallows
When working with melted marshmallows, speed is of the essence. You will discover that you have a relatively small window of time to pipe and fill your macarons once the marshmallows have been melted and slightly cooled. While the melted marshmallows are beautifully runny and pliable right off the heat, they begin to set and firm up quite rapidly as they cool down to room temperature.
This rapid setting time is precisely why meticulous preparation is paramount. It is absolutely crucial to have all your chocolate macaron shells fully prepared, decorated, and neatly arranged for filling *before* you even begin the process of melting the marshmallows. By doing so, you minimize the risk of the marshmallow filling becoming too stiff to pipe smoothly, ensuring a seamless and enjoyable assembly process for your delightful s’mores macarons.
Assembling Your S’mores Macarons & The Art of Maturation
Once the marshmallow filling is piped, these macarons transform from individual components into a cohesive, delightful dessert. The final steps involve assembly and the essential maturation period, which allows the flavors and textures to meld beautifully.
- **Toast and Assemble:** After you’ve successfully piped all the marshmallow fillings onto the bottom shells, grab your culinary torch! This step is highly recommended as toasting the marshmallows is what truly brings the authentic s’mores experience to life. The torch creates a beautiful golden-brown char, adding a smoky, caramelized flavor and a slightly crisp exterior to the otherwise gooey marshmallow. This textural contrast is simply amazing. Carefully toast each marshmallow dollop until lightly browned, then immediately place the matching top macaron shell over the toasted marshmallow to assemble your delicious macarons.
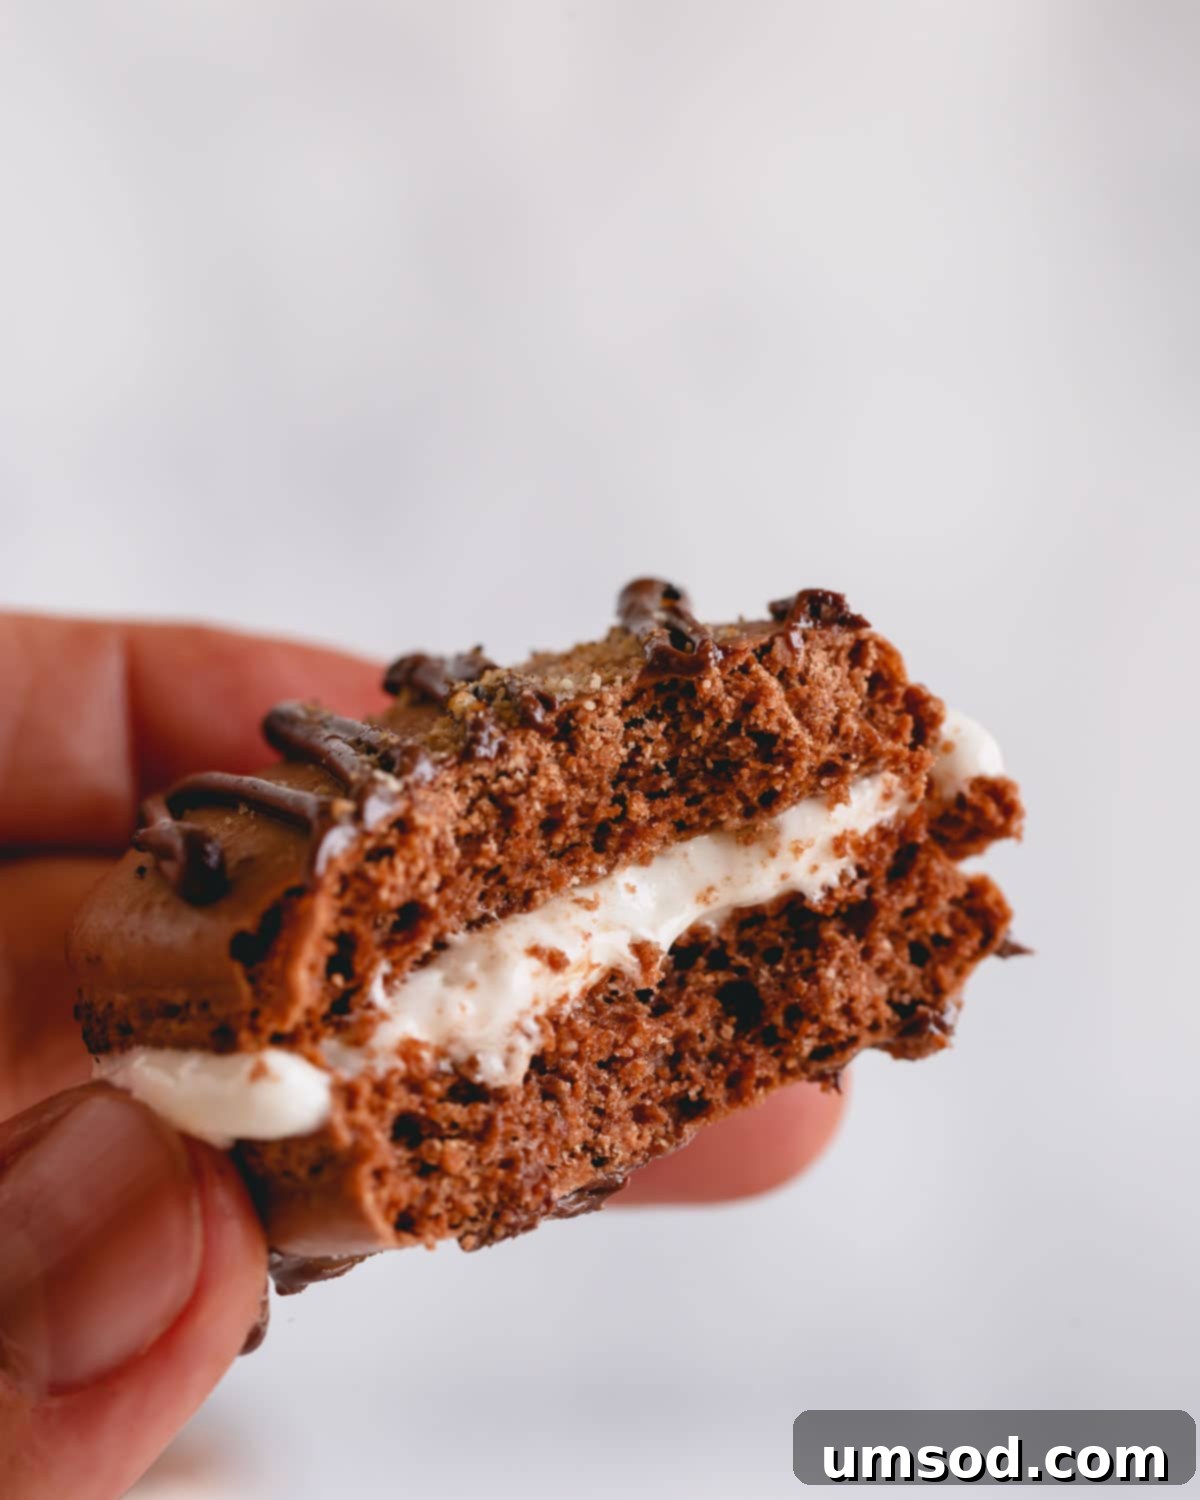
- **The Maturation Process:** Now, for a step that requires patience but is absolutely critical for the perfect macaron texture and flavor integration: maturation. It is genuinely important to allow your filled s’mores macarons to mature in the fridge for approximately 48 hours. This might seem like a long wait, but it’s essential. These particular macarons require a slightly longer maturation period compared to those with wetter fillings because the marshmallow filling itself isn’t very moist. During maturation, the moisture from the filling (minimal as it is) slowly migrates into the shells, softening them to that ideal chewy consistency. If you find yourself in a rush and need to serve the macarons sooner, there’s a little trick you can employ: lightly brush a small amount of milk onto the flat bottom of the macaron shells before adding the filling. This extra moisture will help the shells soften more quickly during maturation. However, I personally adore the slightly crispy shells that mimic the texture of graham crackers, which is achieved with the full 48-hour maturation period without the added milk. This preference highlights the perfect balance of classic s’mores elements within this elegant French pastry.
For those embarking on their first macaron-making journey, don’t let the detailed steps intimidate you. Macaron baking is a rewarding skill, and with patience and practice, perfect macarons are absolutely achievable. For an even more in-depth, comprehensive tutorial, please consult my basic macarons for beginners guide. It covers common pitfalls and provides extensive visual troubleshooting tips to ensure your success. I promise, making beautiful, delicious macarons is not as difficult as it seems!
Unlock Macaron Mastery: Get Your “Macaron 101” Cookbook Today!
Master the art of French macarons and unlock your creativity to craft your unique signature flavors!

S’mores Macarons Recipe
Shinee Davaakhuu
1 hour
18 minutes
1 hour 20 minutes
25 filled macarons
Comment
Print Recipe
Ingredients
For macaron shells:
- 100 g super fine almond flour Note 1
- 65 g powdered sugar Note 2
- 10 g unsweetened cocoa powder Note 3
- 70 g egg whites at room temperature
- ¼ teaspoon cream of tartar Note 4
- ¼ teaspoon coarse kosher salt
- 75 g granulated sugar Note 5
- ½ teaspoon pure vanilla extract
For marshmallow filling:
- 85 g marshmallows Note 6
- 1 tablespoon water
For decoration:
- 55 g semi-sweet chocolate
- 1 graham cracker
Helpful Equipment:
- Pastry bag with Wilton Extra Large Round Tip #1
- Culinary Torch
Instructions
To make macaron shells:
- Preheat your oven to 300°F (150°C). Prepare two baking sheets by lining them with parchment paper, a non-stick Teflon sheet, or a silicone mat.
- **Prepare dry ingredients:** In a medium bowl, sift together the almond flour, powdered sugar, and cocoa powder twice to ensure there are no lumps and the mixture is super fine. (Note: If you have up to 2 tablespoons of chunky dry ingredients left in the sifter, simply discard these bits; you do not need to replace them.)
- **Make meringue:** In a clean, grease-free mixing bowl, preferably of a stand mixer fitted with a whisk attachment, combine the room temperature egg whites, granulated sugar, cream of tartar, and salt. Begin beating the mixture on medium speed until soft peaks form. (Using a KitchenAid stand mixer, I typically set it to speed 4. This whipping process can take 30-40 minutes, but this extended whipping time is crucial for achieving a stable meringue that results in beautiful, full macaron shells.)
- Continue beating the egg whites on the same medium-low speed until hard, stiff peaks form. **Visual cues:** The meringue should gather and ball up inside the whisk, and when you lift the whisk, the meringue should hold a sharp, pointy end and display distinct, firm ribs, indicating it is fully whipped and stable.
- **Make macaron batter (macaronage):** Gently sift the prepared almond flour mixture into the stiff meringue. Using a silicone spatula, begin to fold the dry ingredients into the meringue. Start by incorporating the dry ingredients until just combined, then continue to fold the batter until it reaches the correct “lava-like” consistency, which is runny enough to slowly draw a figure eight continuously without breaking. **To test for doneness:** Scoop a small amount of batter with your spatula and drop it back into the bowl. If the small peaks that form dissolve back into the main batter on their own within approximately 10 seconds, your batter is ready. If not, perform a couple more gentle folds and test again. Be extremely careful not to over-fold the batter, as this is one of the most common causes of macaron failure. (TIP: The macaronage technique is paramount for French macarons. To aid beginners, envision running your spatula clockwise from the bottom of the bowl, up along the sides, and then cutting through the center of the batter. Count your folds; it typically takes around 50 folds to achieve the proper consistency for beginners. After 50 folds, start testing the batter after every couple of additional folds until it’s perfect.)
- **Pipe macaron shells:** Transfer the prepared macaron batter into a pastry bag fitted with a large round tip (such as a Wilton 2A tip). Hold the pastry bag directly vertical, at a straight 90° angle to your baking sheet. Pipe approximately 1.5-inch rounds, leaving about an inch of space between each macaron. (TIP: For perfect, uniform shells, you can utilize a macaron template placed under your parchment paper; simply pipe the batter to fill the inner circle.)
- Once piped, firmly tap the baking sheets on your counter (or gently hit the bottom with your hand) a few times. This crucial step helps to release any trapped air bubbles from the batter, which can cause hollow or cracked shells. For any large, visible air bubbles, use a toothpick to gently burst them. This ensures smooth, unblemished tops on your macarons.
- Allow the piped macarons to rest on the counter for 15 minutes before baking. This resting period, often called “curing,” helps to form a slight skin on the shells, which is essential for developing the characteristic “feet” (frilly edges) during baking.
- **To bake:** Working with one baking sheet at a time, place a tray of macarons on the middle rack of your preheated oven. Bake for approximately 15-18 minutes. Larger macarons may require a slightly longer baking time. **To test for doneness:** Gently touch a macaron lightly and attempt to move it. If it slides or wobbles on its “feet,” it needs a minute or so longer in the oven. Properly cooked macarons should be firm to the touch, and the base should not move when gently nudged. (TIP: It is almost always better to slightly over-bake macarons than to under-bake them, as under-baked shells will be too soft and stick to the mat.)
- Once baked, remove the baking sheets from the oven and allow the macarons to cool completely on the sheets. Once cooled, gently peel them off the parchment paper or baking mats; they should come off easily if properly baked.
To decorate the shells:
- Once macaron shells are completely cooled, pair them by size, matching a top shell with a bottom shell, and arrange them on a baking sheet lined with a wire rack.
- Melt the semi-sweet chocolate in a microwave-safe bowl according to package directions, typically in 30-second intervals, stirring in between, until smooth. Transfer the melted chocolate into a small pastry bag with a very small round tip, or a ziplock bag with a tiny corner snipped off.
- Drizzle the melted chocolate artfully all over the tops of the macaron shells in your desired pattern. Immediately after drizzling, sprinkle finely crushed graham cracker crumbs over the wet chocolate. Allow the chocolate to set completely. To speed up this process, you can place the tray in the fridge for about 10-15 minutes.
To make the marshmallow filling:
- Place the marshmallows along with one tablespoon of water in a heatproof bowl. Set this bowl over a pot of simmering water to create a double boiler. Ensure that the bottom of the top bowl containing the marshmallows does not touch the simmering water below, as this provides gentle, indirect heat.
- Melt the marshmallows slowly, stirring frequently with a silicone spatula to ensure they melt evenly and become completely smooth without any lumps.
- Once the marshmallow mixture is entirely melted and smooth, remove it from the heat. Allow it to cool slightly for about 3 minutes, stirring occasionally during this time. (Note: It’s crucial to work quickly after melting. The marshmallow will be slightly runny off the heat, but it will rapidly begin to set and thicken as it cools, so be prepared to fill your macarons promptly.)
- Immediately transfer the warm, melted marshmallow into a pastry bag fitted with a round piping tip (such as Wilton Extra Large Round Tip #1).
- Without delay, pipe the marshmallow filling onto the flat side of half of your macaron shells. The marshmallow filling is inherently very stringy, which can make it seem impossible to detach neatly. Here’s a helpful technique: Once you have piped a sufficient amount of filling onto a shell, lift the piping bag straight up without squeezing, then quickly swirl the tip around the top edge of the piped filling before lifting away completely. This motion helps to create a clean break in the marshmallow strand.
- Once all the marshmallow fillings are piped onto the shells, use a culinary torch to toast the tops of the marshmallow. Toasting is highly recommended as it imparts an incredible smoky flavor and a slightly crisp, caramelized texture to the gooey filling, significantly enhancing the s’mores experience. After toasting, carefully place the remaining top shells onto the toasted marshmallow filling to assemble your macarons.
- Now, it’s absolutely essential to allow the filled macarons to mature in an airtight container in the fridge for approximately 48 hours. These particular macarons require a slightly longer maturation period because the marshmallow filling is not very wet, thus it takes more time for its moisture to soften the shells to the ideal chewy texture. If you need to serve the macarons sooner, you can lightly brush some milk on the bottom of the macaron shells before filling; this will help the shells soften more quickly. However, I personally prefer the subtly crisp shells, which wonderfully imitate the texture of graham crackers, and this is best achieved with the full, unassisted maturation.
- Store the assembled and matured macarons in an airtight container in the fridge for up to 5 days for optimal freshness. For longer storage, you can freeze the filled macarons in an airtight container for up to 3 months.
- **To serve:** For the best flavor and texture, remove the macarons from the fridge about 30 minutes prior to serving. Macarons are truly at their most delightful when served at room temperature.
⭐️ Did you make this recipe?
Please leave a review and let us know how you liked it!
Tips & Notes for Macaron Success
**Note 2: Powdered Sugar:** It’s best to use commercially prepared powdered sugar, as it typically contains cornstarch. This cornstarch acts as a stabilizer and contributes positively to the texture of your macaron shells. Homemade powdered sugar often lacks this crucial additive.
**Note 3: Unsweetened Cocoa Powder:** While Hershey’s natural cocoa powder is a great choice, you are welcome to use any brand or type you prefer, including Dutched cocoa powder. If you notice your macarons coming out wrinkly or your batter seems overly thick in subsequent attempts, consider reducing the almond flour by 1-2 tablespoons in your next batch.
**Note 4: Cream of Tartar:** Cream of tartar is an optional ingredient and can be omitted if you don’t have it. However, it plays a beneficial role in stabilizing egg whites during whipping, resulting in a sturdier and more reliable meringue. Think of it as a little extra insurance for perfect peaks!
**Note 5: Granulated Sugar for Meringue:** Using fine granulated sugar (or caster sugar, also known as baker’s sugar) is important for the meringue. Its finer crystals dissolve more quickly and evenly into the egg whites, contributing to a smooth and stable meringue.
**Note 6: Marshmallow Type:** This recipe works beautifully with either large or mini marshmallows for the filling. Choose whichever is most convenient for you.
**Note 7: Doubling the Recipe:** This macaron recipe can be easily doubled if you wish to make a larger batch for entertaining or gifting.
**Got macaron trouble?** Don’t fret! Check out my comprehensive visual troubleshooting guide post for solutions to common macaron challenges.
Nutrition Information
1 filled macaron
75kcal
11g
1g
3g
9g
35mg
Dessert
French

Did you make this?
Leave a rating and your feedback. Thank you!
This recipe was originally published on August 4th, 2016, and thoroughly updated on September 5th, 2021, to provide you with the most current and helpful instructions for perfect S’mores Macarons.
