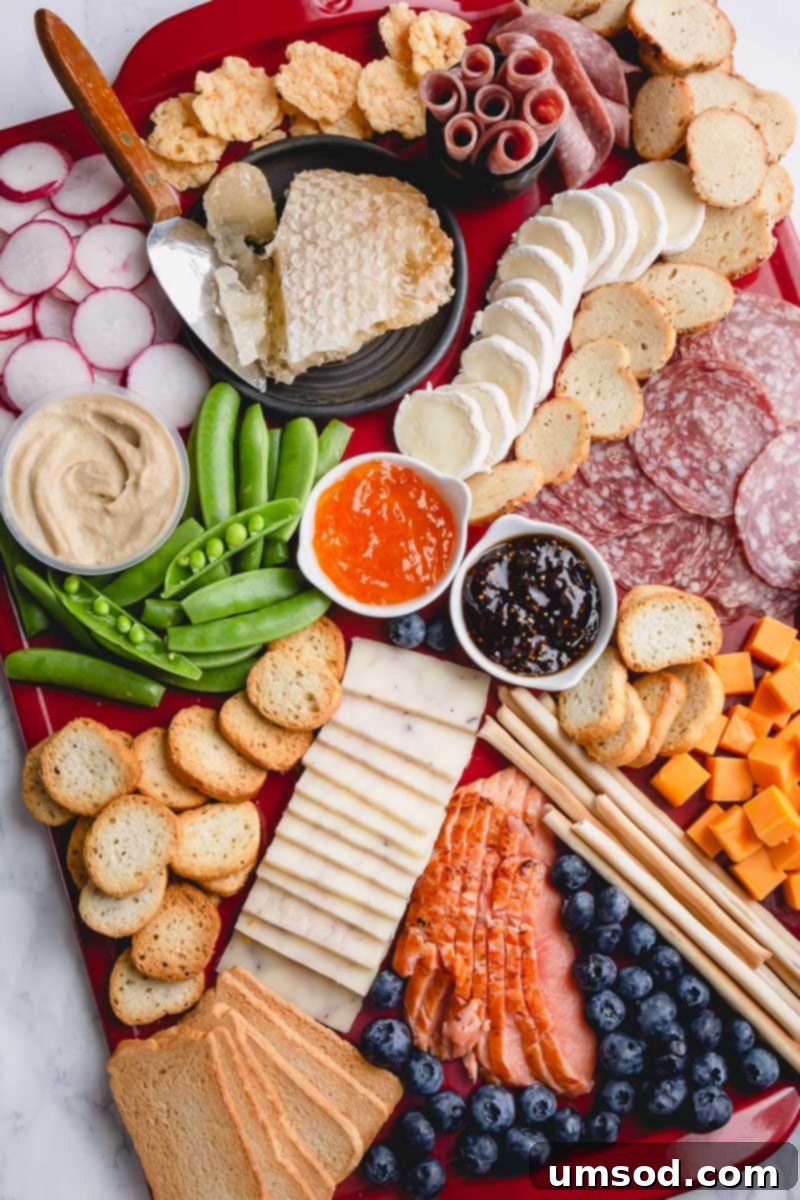
Crafting the Perfect Spring Charcuterie Board: Your Guide to Effortless Entertaining
Elevate your entertaining with a stunning charcuterie board, perfectly tailored for spring. Learn the simple art of assembly and create a masterpiece that delights guests in under 20 minutes!
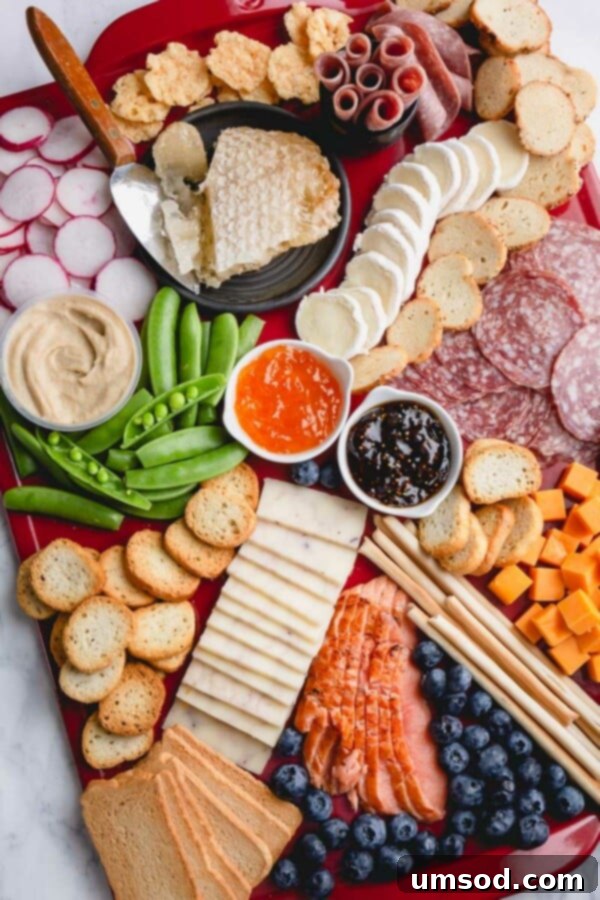
What Exactly is a Charcuterie Board?
The term “charcuterie” (pronounced “shar-koo-tu-ree”) traditionally refers to a French branch of cooking dedicated to preparing and curing various pork products, such as ham, bacon, pâtés, sausages, and terrines. Over time, and especially in modern culinary contexts, the concept of a “charcuterie board” has broadened significantly. While still featuring a delightful array of cured meats, it has evolved to encompass a beautiful and diverse spread of accompanying elements like cheeses, fresh fruits, vegetables, crackers, spreads, nuts, and more.
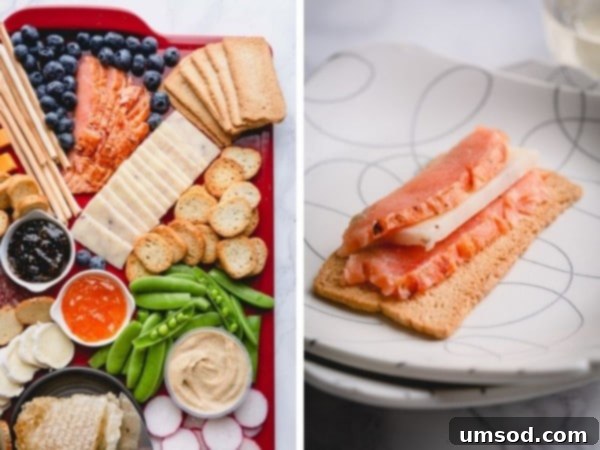
Think of it as an edible work of art – a culinary canvas where each ingredient plays a crucial role in creating a harmonious balance of flavors, textures, and colors. It’s not just about the food; it’s about the experience of sharing, grazing, and discovering new taste combinations. For a truly authentic touch, you might include classics like thinly sliced prosciutto, robust salami, or spicy chorizo. However, don’t shy away from incorporating personal favorites. For example, my go-to cured meats often include a savory white wine salami, delicate prosciutto, and unexpectedly, cold smoked salmon, all of which found a place on my spring board today.
Why a Charcuterie Board is Perfect for Spring
Spring embodies freshness, renewal, and vibrant colors – qualities that translate beautifully into a charcuterie board. As the weather warms and nature blooms, our palates often crave lighter, brighter flavors. A spring charcuterie board allows you to celebrate the season’s bounty with crisp vegetables, sweet berries, and floral notes. It’s an ideal choice for:
- Garden Parties and Outdoor Gatherings: Easy to transport and enjoy outdoors.
- Mother’s Day Brunch: A sophisticated yet simple centerpiece.
- Easter Celebrations: Offers a delightful array of nibbles for all ages.
- Light Lunches or Dinners: Perfect for a casual yet elegant meal.
- Any Occasion Celebrating Freshness: The bright colors and seasonal ingredients are instantly inviting.
The key is to lean into ingredients that evoke the season: think bright reds of strawberries, vibrant greens of snap peas, and the delicate blush of radishes. These elements not only add beautiful aesthetics but also contribute a refreshing crispness and sweetness that balances the rich cheeses and savory meats.
Essential Components for an Exceptional Charcuterie Board
Building an outstanding charcuterie board is about balance and variety. Aim for a mix of textures, flavors (salty, sweet, tangy, savory), and visual appeal. Here’s a breakdown of the core elements to consider:
The Star Players: Cheeses
A diverse selection of cheeses is paramount. Aim for at least 3-5 different types to offer a range of flavors and textures. Consider these categories:
- Soft Cheeses: Brie, Camembert, fresh goat cheese (chèvre). These are creamy and spreadable, pairing well with fruits and jams.
- Semi-Hard Cheeses: Cheddar (like a smoky or even a blueberry cobbler cheddar for an unexpected twist!), Gouda, Havarti. These are versatile and crowd-pleasing.
- Hard Cheeses: Parmesan, aged Gruyère, Manchego. Often nutty and sharp, they add depth and can be shaved or cubed.
- Blue Cheeses (Optional): Roquefort, Gorgonzola, Stilton. For those who appreciate a bolder, pungent flavor. Offer it in a small bowl to contain its strong aroma.
Varying the shapes and cuts of your cheeses adds visual interest. Cubes, wedges, slices, and crumbles can all coexist beautifully on the board. For detailed guidance on selecting cheeses, you might explore specific cheese board tutorials.
The Savory Stars: Cured Meats
These are the traditional heart of charcuterie. Choose 2-4 varieties that offer different textures and spice levels.
- Prosciutto: Thinly sliced, delicate, and salty. Drapes beautifully.
- Salami: Available in many varieties (e.g., Genoa, Calabrese, white wine salami, soppressata). Offers a firmer texture and rich, savory notes.
- Chorizo: Spicy and flavorful, often with a smoky kick.
- Pâtés or Terrines: For a more gourmet touch, these rich spreads pair wonderfully with crusty bread.
- Smoked Salmon: A fantastic addition, especially for a spring or brunch-themed board, offering a lighter, oceanic flavor.
Presentation matters: fold, roll, or fan your meats to create volume and visual appeal on the board.
The Carriers: Crackers and Breads
Offer a selection of vehicles for your cheeses and meats, varying in texture and flavor.
- Crisp Crackers: Water crackers, flatbreads, rye crackers.
- Toasted Breads: Crostini, bruschettini, baguette slices.
- Soft Breads: Small rolls or slices of artisanal bread.
- Specialty Options: Bagel chips, parmesan chips, thin breadsticks.
Ensure there’s enough variety to complement both mild and strong flavors on the board.
Freshness & Color: Fruits and Vegetables
Especially for a spring board, fresh produce is essential for brightness, color, and a refreshing counterpoint to richer items.
- Seasonal Berries: Strawberries, blueberries, raspberries are perfect for spring.
- Crisp Veggies: Snap peas, sliced radishes, cucumber, cherry tomatoes, baby carrots.
- Grapes: Always a classic, offering a sweet burst.
- Dried Fruits: Figs, apricots, cranberries add chewiness and concentrated sweetness.
Sweet & Savory Enhancements: Spreads and Dips
These add moisture, extra flavor, and opportunities for unique pairings.
- Jams/Preserves: Fig jam, pepper jam, apricot preserves. Pair well with cheeses.
- Honey: Especially raw honeycomb, offers natural sweetness and visual drama.
- Hummus: A savory dip that works well with veggies and crackers.
- Mustards: Dijon or whole grain mustards can complement meats.
Texture & Savory Bites: Nuts and Olives
These are perfect for filling in gaps and adding additional layers of flavor and crunch.
- Nuts: Almonds, walnuts, pistachios, candied pecans.
- Olives: Marinated olives, Kalamata, Castelvetrano.
The “Surprise” Element: Elevating Your Board
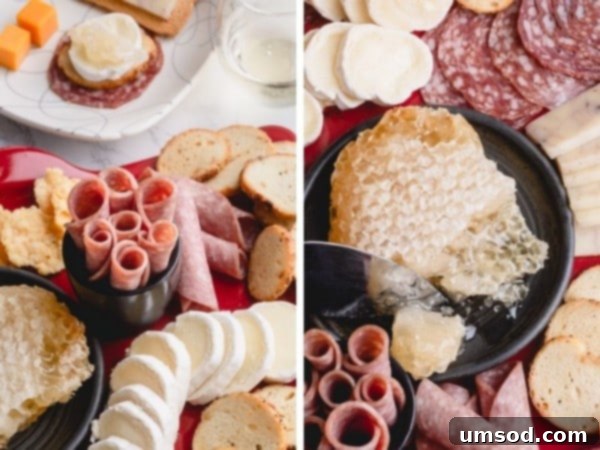
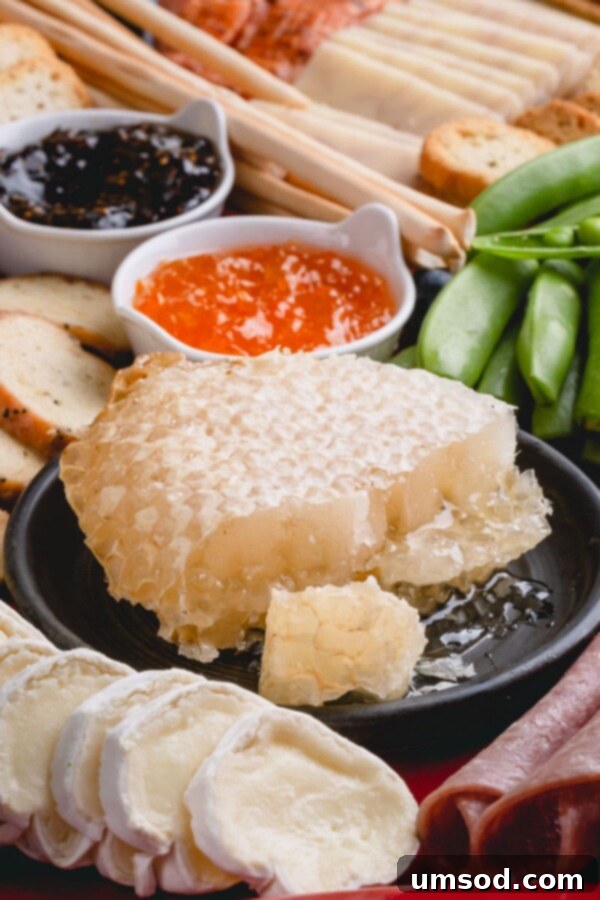
A truly memorable charcuterie board often includes one unexpected or luxurious item that sparks conversation. For my board, raw honeycomb is a showstopper. Its natural beauty and edible wax and honey offer a unique textural and sweet experience that pairs exquisitely with many cheeses.
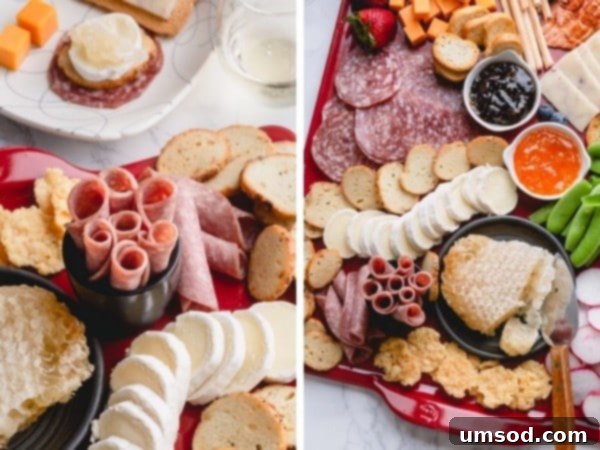
Yes, the entire honeycomb (wax and all) is completely edible and adds an incredible touch of gourmet flair. Other ideas for a “surprise” could be a unique artisan jam, a specialty pickled vegetable, or even edible flowers for a very spring-specific touch.
Step-by-Step Guide: Building Your Dream Charcuterie Board in Under 20 Minutes
Creating a beautiful charcuterie board doesn’t have to be complicated or time-consuming. Follow these simple steps for a stunning and delicious display.
Step 1: Select Your Foundation (The Platter)
You don’t need a fancy, expensive cheese board. Any large, food-safe surface will do! Consider:
- A large wooden cutting board
- A spacious ceramic serving platter
- A clean baking sheet
- Even a baking stone, as I’ve used here!
The goal is to have ample space to spread out your ingredients, creating a sense of abundance. The material and shape can influence the aesthetic, but functionality comes first.
Step 2: Curate Your Ingredients & Prep
Before you begin arranging, gather all your chosen ingredients. This crucial step saves time and helps visualize your board. Take everything out of the fridge and onto your counter about 30-60 minutes before serving, allowing cheeses to come to room temperature for optimal flavor and texture. During this time:
- Unwrap all cheeses.
- Slice hard and semi-hard cheeses into different shapes – cubes, triangles, thin slices, or even crumbles. Varying cuts adds visual appeal.
- Prepare any fruits and vegetables by washing and slicing them.
- Open packages of meats, crackers, and nuts.
Pre-cutting cheeses can even be done a day in advance and stored in an airtight container in the refrigerator to save time on the day of your event.
Step 3: Strategically Place Your Cheeses
Begin by placing your cheeses on the empty board. Distribute them evenly across the platter, aiming for a visual balance. Don’t crowd them together; leave space around each cheese for other elements. Think of this as establishing the anchor points of your board.
Expert Tip
For an elevated experience, arrange cheeses from mildest to strongest flavor, either from left to right or in a clockwise pattern. This guides your guests through a taste journey. Don’t forget to label your cheeses with small markers or flags – especially helpful for unique or artisan varieties!
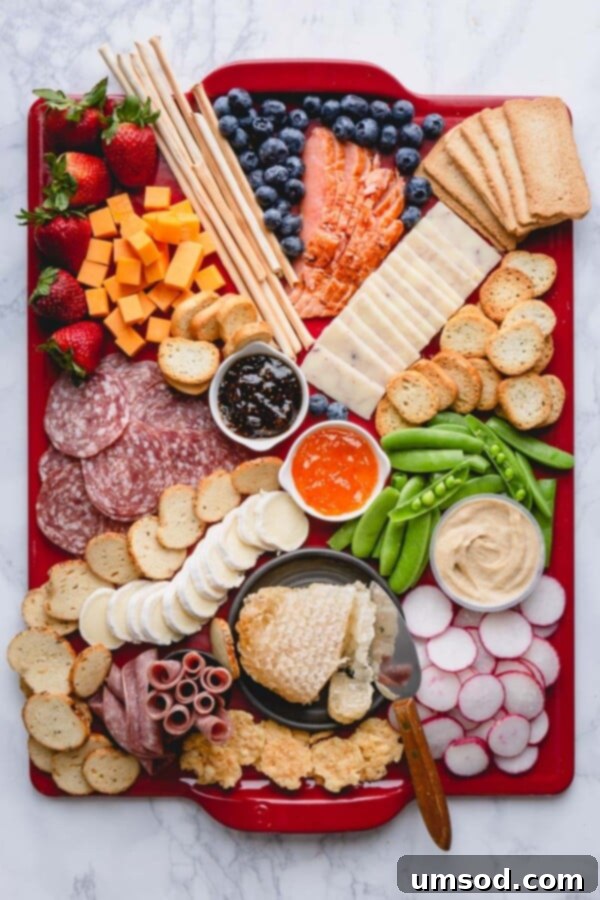
Step 4: Artfully Arrange the Meats
Next, it’s time for the cured meats. Place them around the cheeses, using different folding and rolling techniques to create texture and height. You can:
- Fold: Create a loose fold or fan with slices of prosciutto.
- Roll: Roll salami slices into small cylinders.
- Pile: Stack smaller pieces of meat for volume.
Spread the meats out, ensuring they are accessible from various points on the board and are not directly touching every cheese.
Step 5: Introduce Bowls & Spreads
Before adding smaller, loose items, place any small bowls onto your board. These might contain:
- Olives
- Jams (fig, pepper)
- Honey (especially if not using honeycomb)
- Dips (hummus, mustard)
- Blue cheese or other crumbly cheeses that need containment.
Placing these bowls early helps define spaces and provides structure for the remaining ingredients.
Step 6: Integrate Fresh Produce
Now, artfully arrange your fruits and vegetables. Scatter them around the cheeses, meats, and bowls, focusing on creating pockets of color and freshness. For a spring board, this is where snap peas, sliced radishes, strawberries, and blueberries truly shine. Their vibrant hues will instantly brighten your presentation and offer a refreshing contrast.
Step 7: Add Crackers and Breads
Place your chosen crackers and breads next. Again, avoid clumping them together. Distribute different varieties in various areas of the board to encourage movement and offer diverse pairing options. Fan them out, stack them loosely, or lay them flat in inviting rows.
Step 8: Fill the Gaps & Garnish
This is the final, satisfying step that brings the entire board together. Use smaller items like nuts, dried fruits, and remaining olives to fill in any remaining empty spaces. This creates a lush, abundant look. Don’t be afraid to tuck items under and over each other slightly to build texture. For an ultimate flourish, add fresh herb garnishes like rosemary sprigs or small mint leaves for extra aroma and visual appeal.
Remember, while these are guidelines, the best charcuterie boards reflect your personal style and creativity. Get inspired by these rules, then feel free to break them and arrange your board in a way that makes sense to you. I promise, the outcome will be delicious and enjoyable no matter what!
Additional Tips for a Picture-Perfect Charcuterie Board
- Balance Colors and Textures: Distribute bright colors and different textures across the board for visual dynamism.
- Create Height: Use small bowls, stacked cheeses, or artfully folded meats to add varying heights.
- Don’t Be Afraid to Overlap: A slightly crowded board often looks more abundant and inviting than a sparse one.
- Consider Quantity: As an appetizer, plan for about 2-3 ounces of cheese and 2-3 ounces of meat per person. For a main course, increase those amounts.
- Include Utensils: Provide small knives for cheese, spoons for spreads, and toothpicks for easy picking.
Seasonal Charcuterie Beyond Spring
While this guide focuses on spring, the principles of charcuterie board building are adaptable year-round:
- Summer: Think lighter cheeses, grilled vegetables, stone fruits like peaches and plums, and fresh herbs.
- Autumn: Incorporate pumpkin or apple butter, hearty breads, seasonal apples and pears, figs, and warmer spices.
- Winter/Holiday: Focus on robust cheeses, rich pâtés, cranberries, pomegranates, roasted nuts, and festive garnishes like cinnamon sticks or star anise.
Frequently Asked Questions About Charcuterie Boards
- How much food should I prepare per person?
- If serving as an appetizer, aim for about 2-3 ounces of cheese and 2-3 ounces of meat per person. For a lighter meal, you might increase that slightly, adding more crackers and fruits.
- Can I make a charcuterie board ahead of time?
- Partially, yes! You can slice cheeses, wash and cut vegetables, and prepare dips a day in advance. Store everything separately in airtight containers in the refrigerator. Assemble the board no more than 1-2 hours before serving to ensure freshness, especially for crackers and delicate fruits.
- What drinks pair well with a charcuterie board?
- Wine is a classic choice: a light-bodied red like Pinot Noir, a crisp white like Sauvignon Blanc, or a sparkling wine can all work beautifully. Craft beers, ciders, and even non-alcoholic sparkling juices or artisanal sodas are also great options, depending on the board’s ingredients.
- What if I don’t have a specific charcuterie or cheese board?
- No problem at all! As mentioned, a large cutting board, a clean baking sheet, a ceramic platter, or even a large flat plate can serve as your base. The beauty is in the arrangement, not necessarily the specific vessel.
More Cheese Board Inspirations
Looking for more ideas to inspire your next gathering? Explore these other delightful cheese and charcuterie board tutorials:
- Charcuterie and Cheese Board – This in-depth tutorial guides you through building an epic charcuterie and cheese board. A must-read for enthusiasts!
- Summer Cheese Board – Discover wonderful inspirations for a summer cheese platter, highlighting the season’s best fruits!
- Cheese Platter for Two – Master my top 8 tips for creating an intimate cheese platter perfect for two!
The BEST Charcuterie Board (Spring Edition)
Here’s how to build a delightful spring charcuterie board in less than 20 minutes! Learn simple rules and create your masterpiece with ease, perfect for any spring gathering.
Prep Time: 20 mins | Total Time: 20 mins | Servings: 8 servings | By: Shinee Davaakhuu
Comment
Print Recipe
Ingredients
Cheeses:
- Smoky cheddar cheese
- Blueberry cobbler cheddar
- Brie
Meats:
- White wine salami
- Uncured soppressata
- Cold smoked salmon
Crackers:
- Bruschettini
- Bagel chips
- Crostini toasts
- Thin breadsticks
- Parmesan chips
Fruits and Veggies:
- Snap peas
- Radishes (sliced)
- Strawberries
- Blueberries
Other:
- Fig jam
- Pepper jam
- Honeycomb
- Hummus
Instructions
- Choose a large platter or serving board as your base.
- Slice all cheeses and prepare other ingredients. (Cheeses can be sliced a day in advance and kept in an airtight container in the fridge).
- Arrange the cheeses on the platter first, distributing them visually. Then add the cured meats around and between the cheeses.
- Place any small bowls containing accompaniments like jams, hummus, or olives onto the platter.
- Next, arrange the crackers and breads. Finally, fill in any remaining gaps with fruits, vegetables, nuts, and other smaller items to create a full and abundant look.
⭐️ Did you make this recipe?
Please leave a review and let us know how you liked it! Your feedback is greatly appreciated.
Course: Appetizer
Cuisine: American
