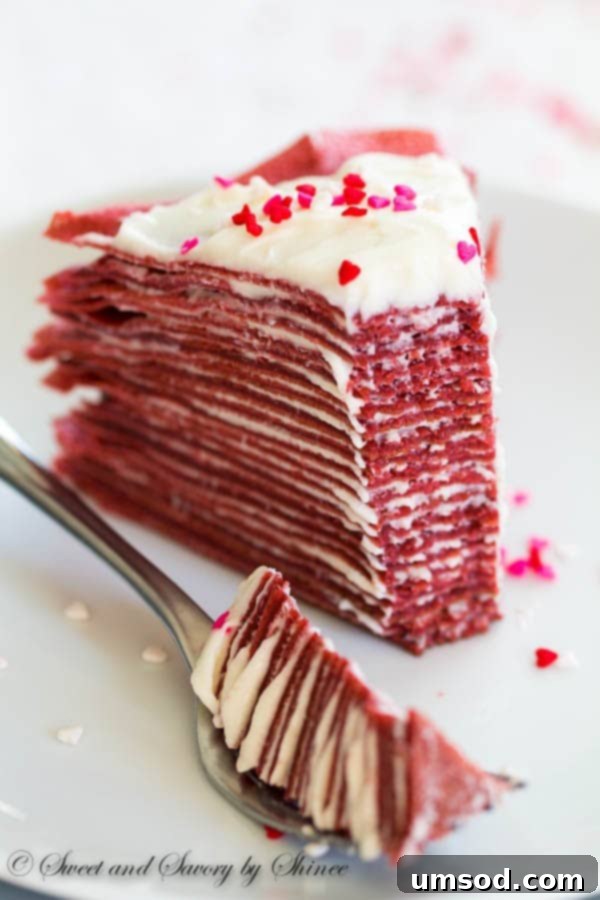
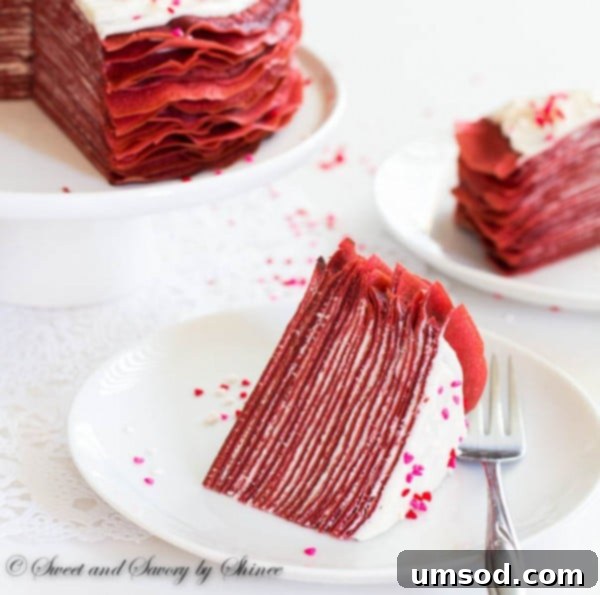
Prepare to be enchanted by this show-stopping Red Velvet Crepe Cake, a dessert that truly looks as magnificent as it tastes! Featuring delicate layers of vibrant red velvet crepes generously filled with a rich, tangy cream cheese frosting, this cake is an absolute dream come true. It’s the perfect elegant treat to celebrate Valentine’s Day, an anniversary, or any special moment you want to make extra memorable.

The Irresistible Allure of Red Velvet Crepe Cake
For years, I’ve been captivated by the magic of crepe cakes, ever since creating my first one. There’s something uniquely charming about the delicate, stacked layers, each thin crepe providing a soft, tender texture that’s entirely different from traditional cake sponges. And when you combine that elegance with the classic flavor profile of red velvet? Pure culinary bliss! This particular Red Velvet Crepe Cake was a vision I had in my mind, and watching it come to life, layer by perfect layer, was nothing short of exhilarating. It’s not every day a recipe turns out exactly as you’ve imagined, but this one certainly did.
The beauty of this dessert lies not just in its taste but also in its breathtaking presentation. Imagine a tower of thinly stacked, ruby-red crepes, each separated by a swirl of creamy white frosting. It’s a feast for the eyes before it even touches your palate! I found myself unable to stop taking pictures, mesmerized by its sheer gorgeousness. And honestly, for a moment, I just wanted to admire it. But once I took that first decadent bite, resistance was futile. The combination of the tender crepes and the bright, tangy filling is truly addictive!

Don’t Be Intimidated: Crepe Cakes are Easier Than You Think!
I often hear comments that crepe cakes, with their intricate appearance, must be incredibly difficult to make. Let me assure you, nothing could be further from the truth! While they may look like a pastry chef’s creation, assembling a crepe cake is surprisingly straightforward and requires no special skills. Unlike frosted layer cakes that demand perfect crumb coats and smooth finishes, a crepe cake embraces its natural beauty. The slight imperfections of individual crepes simply add to the charming, ruffled texture once they’re stacked. The process is more about patience than precision, making it a truly rewarding baking project for any home cook. So, shed those inhibitions and get ready to create something truly spectacular!

Crafting the Perfect Red Velvet Crepes
The heart of this cake lies in its glorious layers – approximately 20 thin, tender red velvet crepes that are a match made in dessert heaven with the tangy cream cheese filling. To achieve that quintessential red velvet flavor and vibrant hue, I start with a classic crepe batter and infuse it with carefully balanced ingredients. A touch of cocoa powder provides the subtle chocolate undertone characteristic of red velvet, while a generous splash of pure vanilla extract enhances the overall sweetness and aroma. For that signature tang and unbelievably tender texture, I incorporate buttermilk into the batter. This is a key ingredient that sets these crepes apart, lending a delicate moistness and a slight acidity that complements the richness of the cocoa.
Pro Tip for Tender Crepes: When mixing the batter, exercise caution not to over-mix once the flour is added. Overworking the gluten can lead to tough, rubbery crepes – and nobody wants that! Mix just until the ingredients are combined and no dry streaks of flour remain. Allow the batter to rest for at least 30 minutes, or even an hour, at room temperature. This resting period is crucial; it allows the flour to fully hydrate, resulting in a smoother batter and ultimately more pliable, tender crepes that are easier to cook and stack.

Cooking Your Crepes to Perfection
Cooking crepes might seem daunting at first, but with a little practice, you’ll be swirling and flipping like a pro. Start with a good quality 10-inch non-stick skillet – the exact base measurement is important for consistent crepe size, often around 7 inches. Heat it over medium-high heat. The key is to find the right temperature: hot enough to cook quickly, but not so hot that they burn. Lightly grease the pan between crepes if needed, using a paper towel dipped in a tiny bit of vegetable oil. Pour a small amount of batter (just under ¼ cup for a 7-inch crepe) into the center of the hot pan, then quickly tilt and swirl the pan to spread the batter thinly and evenly over the entire bottom surface. Cook for about 1 minute, or until the edges begin to lift easily from the pan. Then, with a gentle hand and a thin spatula, flip the crepe and cook for another 20-30 seconds on the second side. Stack the cooked crepes on a plate to cool completely. You should yield about 20 beautiful crepes, ready for layering. If you’re making them ahead, wrap the cooled stack tightly in plastic wrap and refrigerate for up to a day.
The Essential Tangy Cream Cheese Filling
No Red Velvet Crepe Cake would be complete without its signature cream cheese filling. This creamy, slightly tart frosting provides the perfect counterpoint to the subtle cocoa notes of the crepes. The secret to a perfectly smooth and luscious filling is using room temperature cream cheese and unsalted butter. This ensures they blend together seamlessly without lumps. Beat the cream cheese and butter until light and fluffy, then gradually add powdered sugar for sweetness and structure. A splash of milk helps achieve the desired spreadable consistency, while a generous amount of pure vanilla extract elevates the flavor, making it truly irresistible. Start mixing on low speed to prevent a cloud of powdered sugar, then increase to medium-high until smooth and creamy. This filling not only binds the layers but also adds a cooling, refreshing element to each bite.
Assembling Your Elegant Dessert
Assembling this multi-layered masterpiece is the most satisfying part. Once your crepes are completely cool and your cream cheese filling is ready, it’s time to build your cake. Place one crepe on your serving platter or cake stand. Spread a generous tablespoon of cream cheese filling evenly over the entire surface, extending almost to the edges. Don’t over-fill, as you want the layers to remain distinct. Carefully place another crepe directly on top, gently pressing down to secure it, then repeat the process with another spoonful of filling. Continue layering crepes and filling until all your crepes are used, creating a tall, impressive stack. For the final touch, you can add a sprinkle of festive decorations like red velvet crumbs, chocolate shavings, or colorful sprinkles, especially if it’s for Valentine’s Day. Once assembled, it’s best to chill the cake for at least an hour to allow the filling to firm up and the flavors to meld, making it easier to slice and serve. Bring the cake to room temperature briefly before serving for optimal texture and flavor. This impressive dessert is a sure way to wow your special date!

Red Velvet Crepe Cake
Shinee Davaakhuu
40 mins
20 mins
1 hr
6 – 8 servings
Ingredients
For crepes:
- 1 ¼ cups (155g) all-purpose flour
- 2 tablespoons (15g) unsweetened cocoa powder
- ½ teaspoon salt
- ¼ cup (50g) sugar
- 3 large eggs at room temperature
- 1 ½ cup (360ml) milk, at room temperature
- ½ cup (120ml) buttermilk, at room temperature
- 1 tablespoon pure vanilla extract
- ¼ teaspoon red gel food coloring
- 2 tablespoons vegetable oil
For cream cheese filling:
- 8 oz (225g) cream cheese, at room temperature
- ¼ cup (55g) unsalted butter, at room temperature
- 1 ½ cups (190g) powdered sugar
- 1-2 tablespoons milk
- 2 teaspoons pure vanilla extract
- Sprinkles for decoration if desired
Instructions
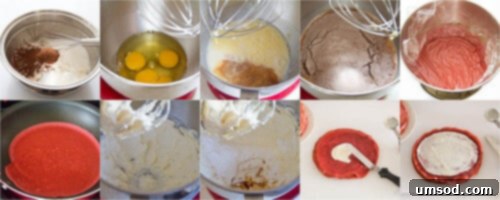
- To make the crepes, in a medium bowl, whisk together flour, cocoa powder, salt, and sugar.
- In a separate mixing bowl, using a whisk or electric mixer, beat the eggs for 1 minute until lightly frothy.
- Add milk, buttermilk, vanilla extract, and red gel food coloring to the eggs. Beat the mixture for 3 minutes until well combined and the color is even.
- Gradually add the dry flour mixture to the wet ingredients and beat on medium-low speed just until combined, about 1-2 minutes. Be careful not to overmix, as this can develop too much gluten and result in tough, rubbery crepes. Cover the batter with plastic wrap, ensuring it touches the surface, and let it rest for at least 30 minutes at room temperature. Just before frying, whisk in the vegetable oil.
- Heat a 10-inch non-stick skillet over medium-high heat. (Note: The bottom of a typical 10-inch pan measures about 7 inches, so your crepes will be approximately 7 inches in diameter.) Pour a little less than ¼ cup of batter into the hot pan, quickly swirling the pan to evenly coat the bottom. Cook for about 1 minute, or until the edges of the crepe begin to pull away from the pan. Using a thin spatula, carefully flip the crepe and cook for another 30 seconds or so. Stack the finished crepes on a plate to cool completely. You should get about 20 crepes. Cooled crepes can be wrapped in plastic and refrigerated for up to one day.
- To make the cream cheese filling, in a medium mixing bowl, beat the softened cream cheese and unsalted butter with an electric mixer until smooth and creamy.
- Add the powdered sugar, vanilla extract, and 1 tablespoon of milk. Start mixing on low speed to incorporate the powdered sugar, then gradually increase to medium-high speed. Beat until the filling is smooth, light, and fluffy, adding the second tablespoon of milk if a thinner consistency is desired.
- To assemble the cake, place one cooled crepe on your serving plate. Spread a generous tablespoon (or slightly more) of the cream cheese filling evenly over the crepe. Place another crepe on top and spread another heaping tablespoon of filling. Repeat this layering process until all the crepes and filling are used, creating a beautiful tall stack.
- If desired, decorate the top of the cake with sprinkles or other embellishments. Serve the cake immediately, or for best results, refrigerate it in an airtight container for at least 1 hour to allow the filling to set and the flavors to meld. Bring the cake to room temperature for about 15-20 minutes before serving for optimal texture.
⭐️ Did you make this delightful recipe?
Please leave a review and let us know how much you enjoyed it!
Nutrition

