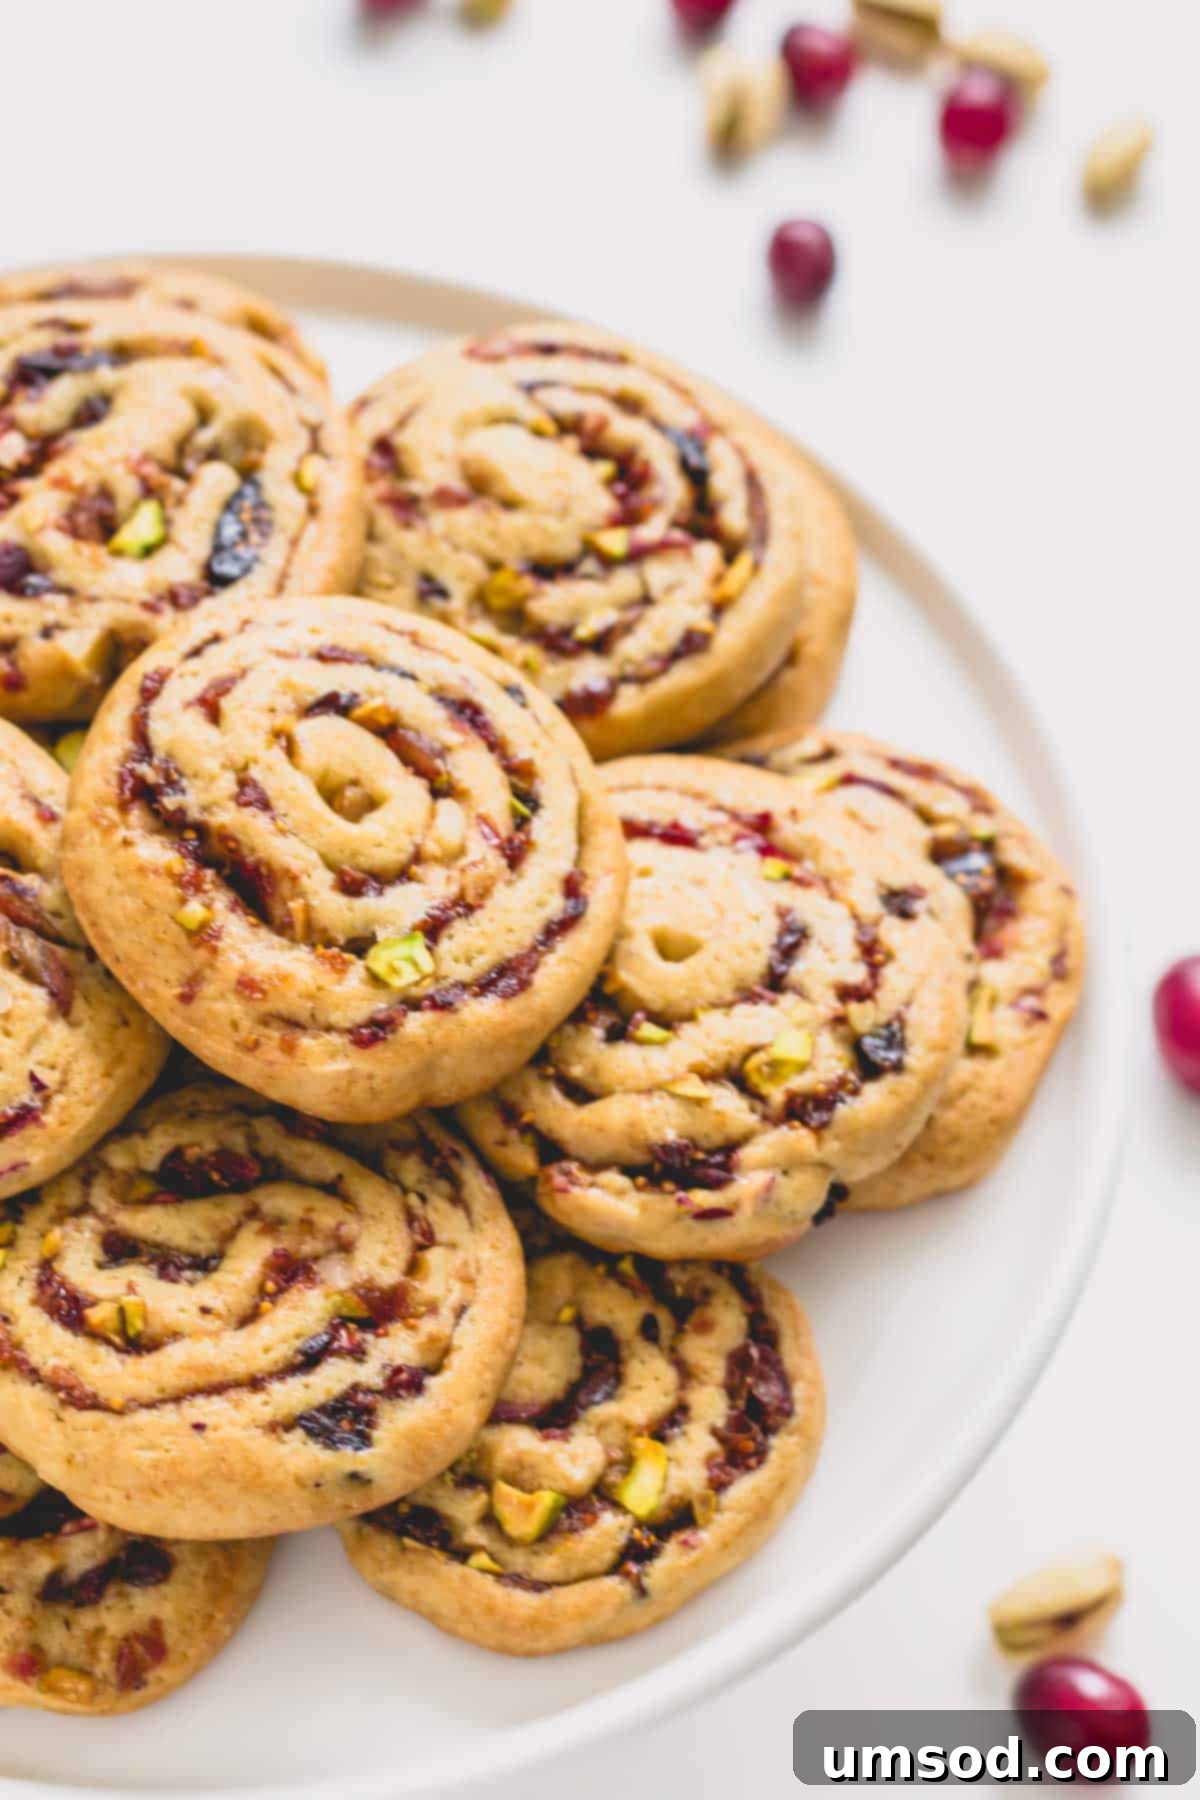
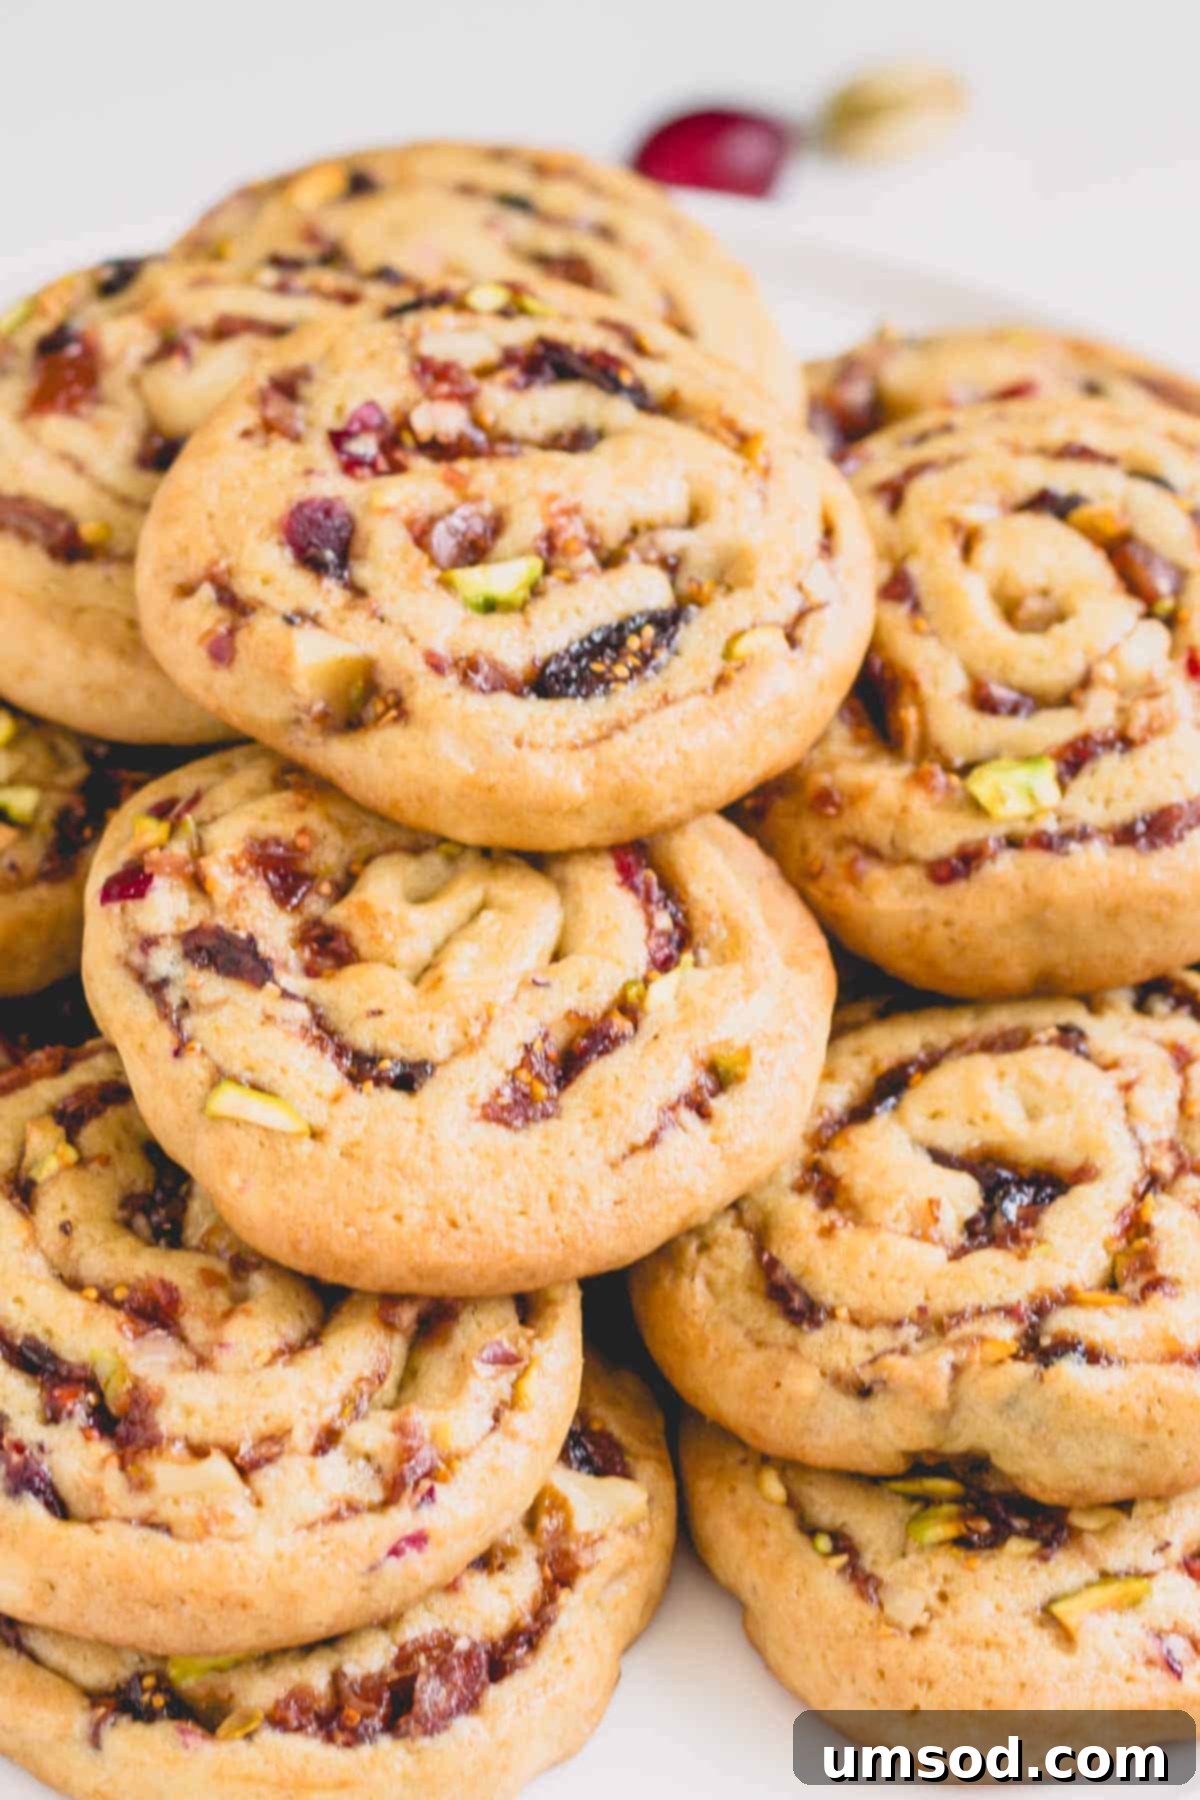
Embark on a delightful baking journey with these exquisite **Fig, Cranberry, and Date Pinwheel Cookies**. Soft, chewy, and bursting with a vibrant, sweet-tart fruit and nutty filling, these cookies are more than just a dessert—they’re a celebration in every bite. Their charming pinwheel design and irresistible flavor make them an absolute crowd-pleaser, especially cherished during the festive holiday season. Whether you’re planning a holiday gathering, a cozy family evening, or looking for the perfect homemade gift, this recipe promises to deliver delicious results that will be remembered and requested year after year. Let’s dive into creating these beautiful and flavorful treats that blend traditional charm with a touch of modern baking artistry.
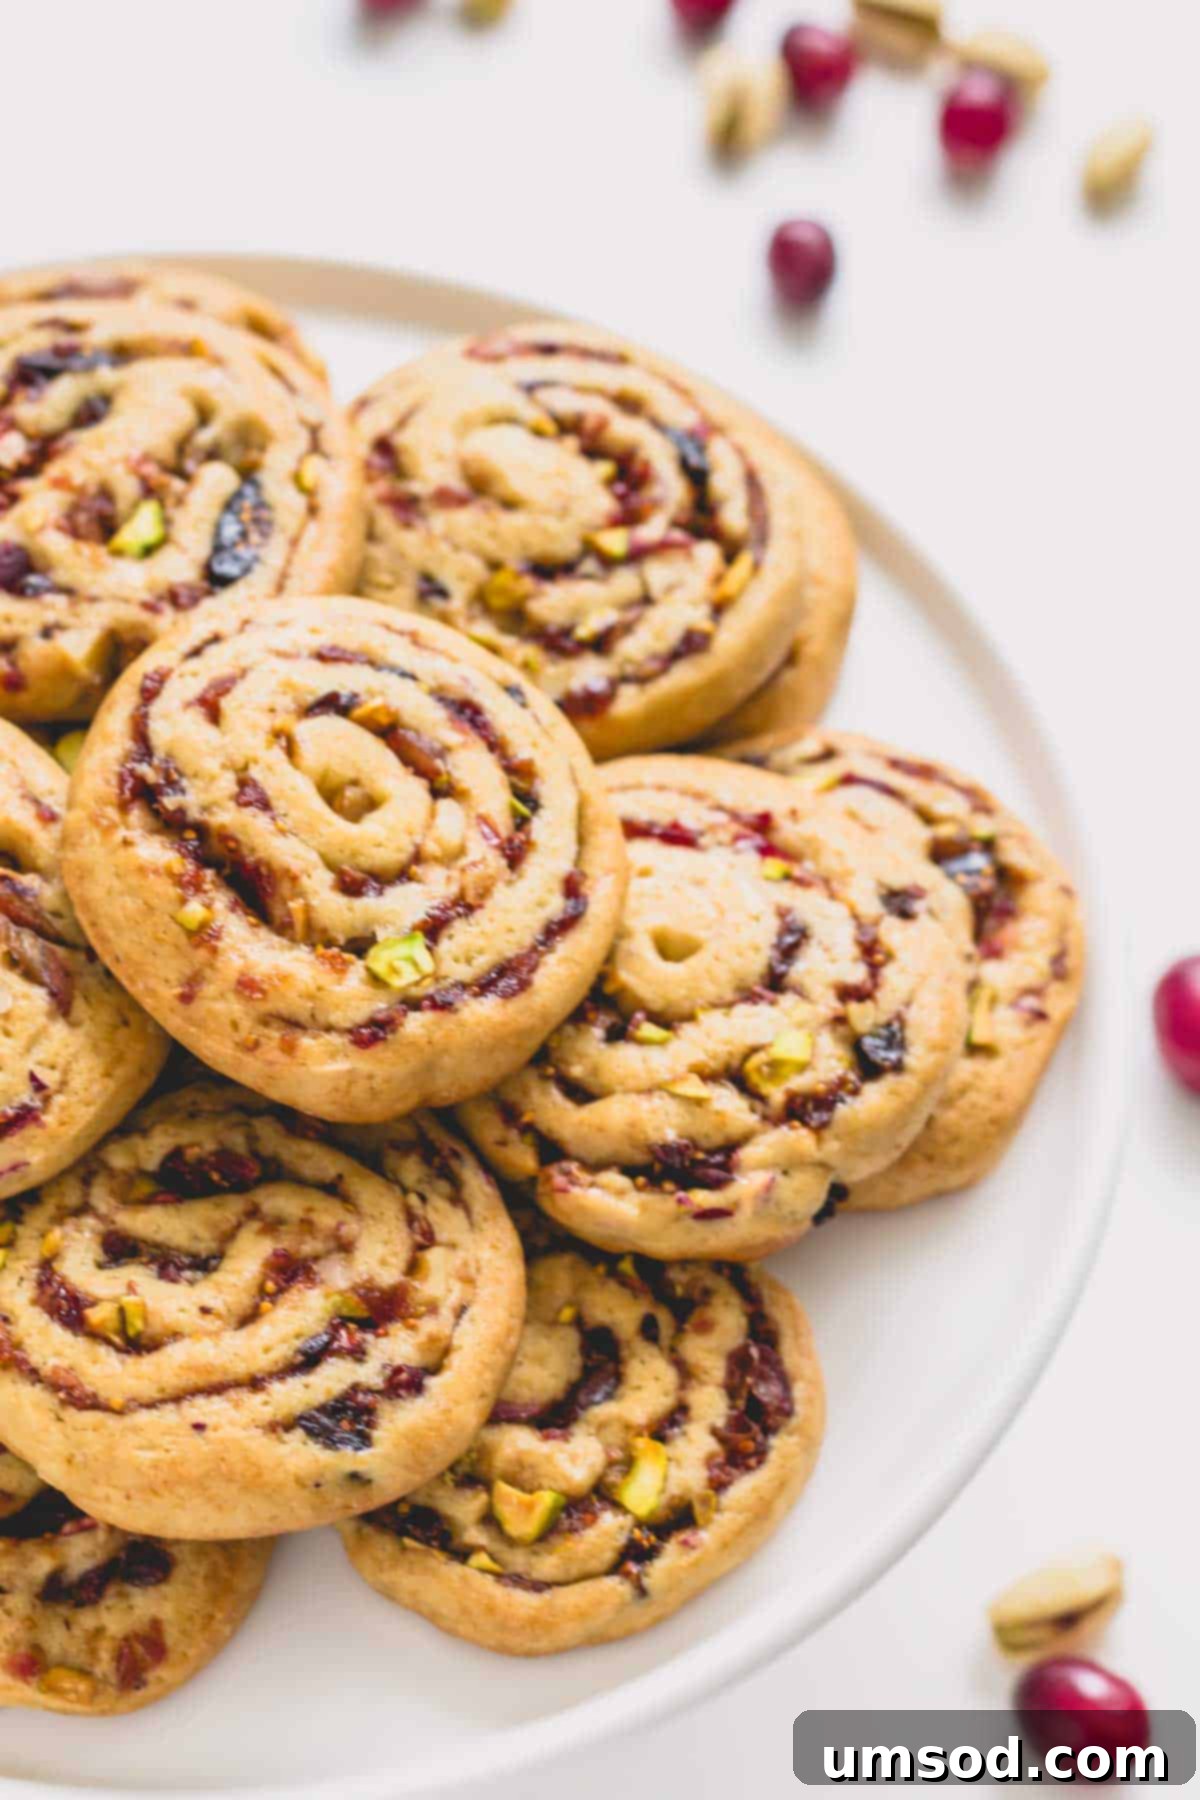
Craving these delicious pinwheel cookies? Save this recipe now!
Pin It
Why These Fig, Cranberry, and Date Pinwheel Cookies Are a Must-Bake
These delightful Christmas pinwheel cookies hold a special place in our family’s traditions, cherished for many years. They’ve even received the highest compliment: a comparison to my husband’s grandmother’s legendary cookies, a testament to their comforting, nostalgic appeal. Beyond family sentiment, there are countless reasons why these cookies will become your new favorite holiday staple:
- Unforgettable Flavor Profile – Each bite delivers a harmonious symphony of sweet dates and figs, tangy cranberries, and rich, crunchy nuts, all perfectly balanced within a buttery, soft cookie base. It’s a complex yet comforting taste that truly captures the spirit of the holidays. The interplay of fruit and nut creates a depth of flavor that’s both intriguing and incredibly satisfying.
- Irresistible Texture Contrast – The cookie dough itself bakes up incredibly soft and satisfyingly chewy, providing a delightful foundation. This tender texture is beautifully contrasted by the sticky, jam-like fruit filling and the added crunch from the chopped nuts, creating a multi-dimensional eating experience that keeps you coming back for more.
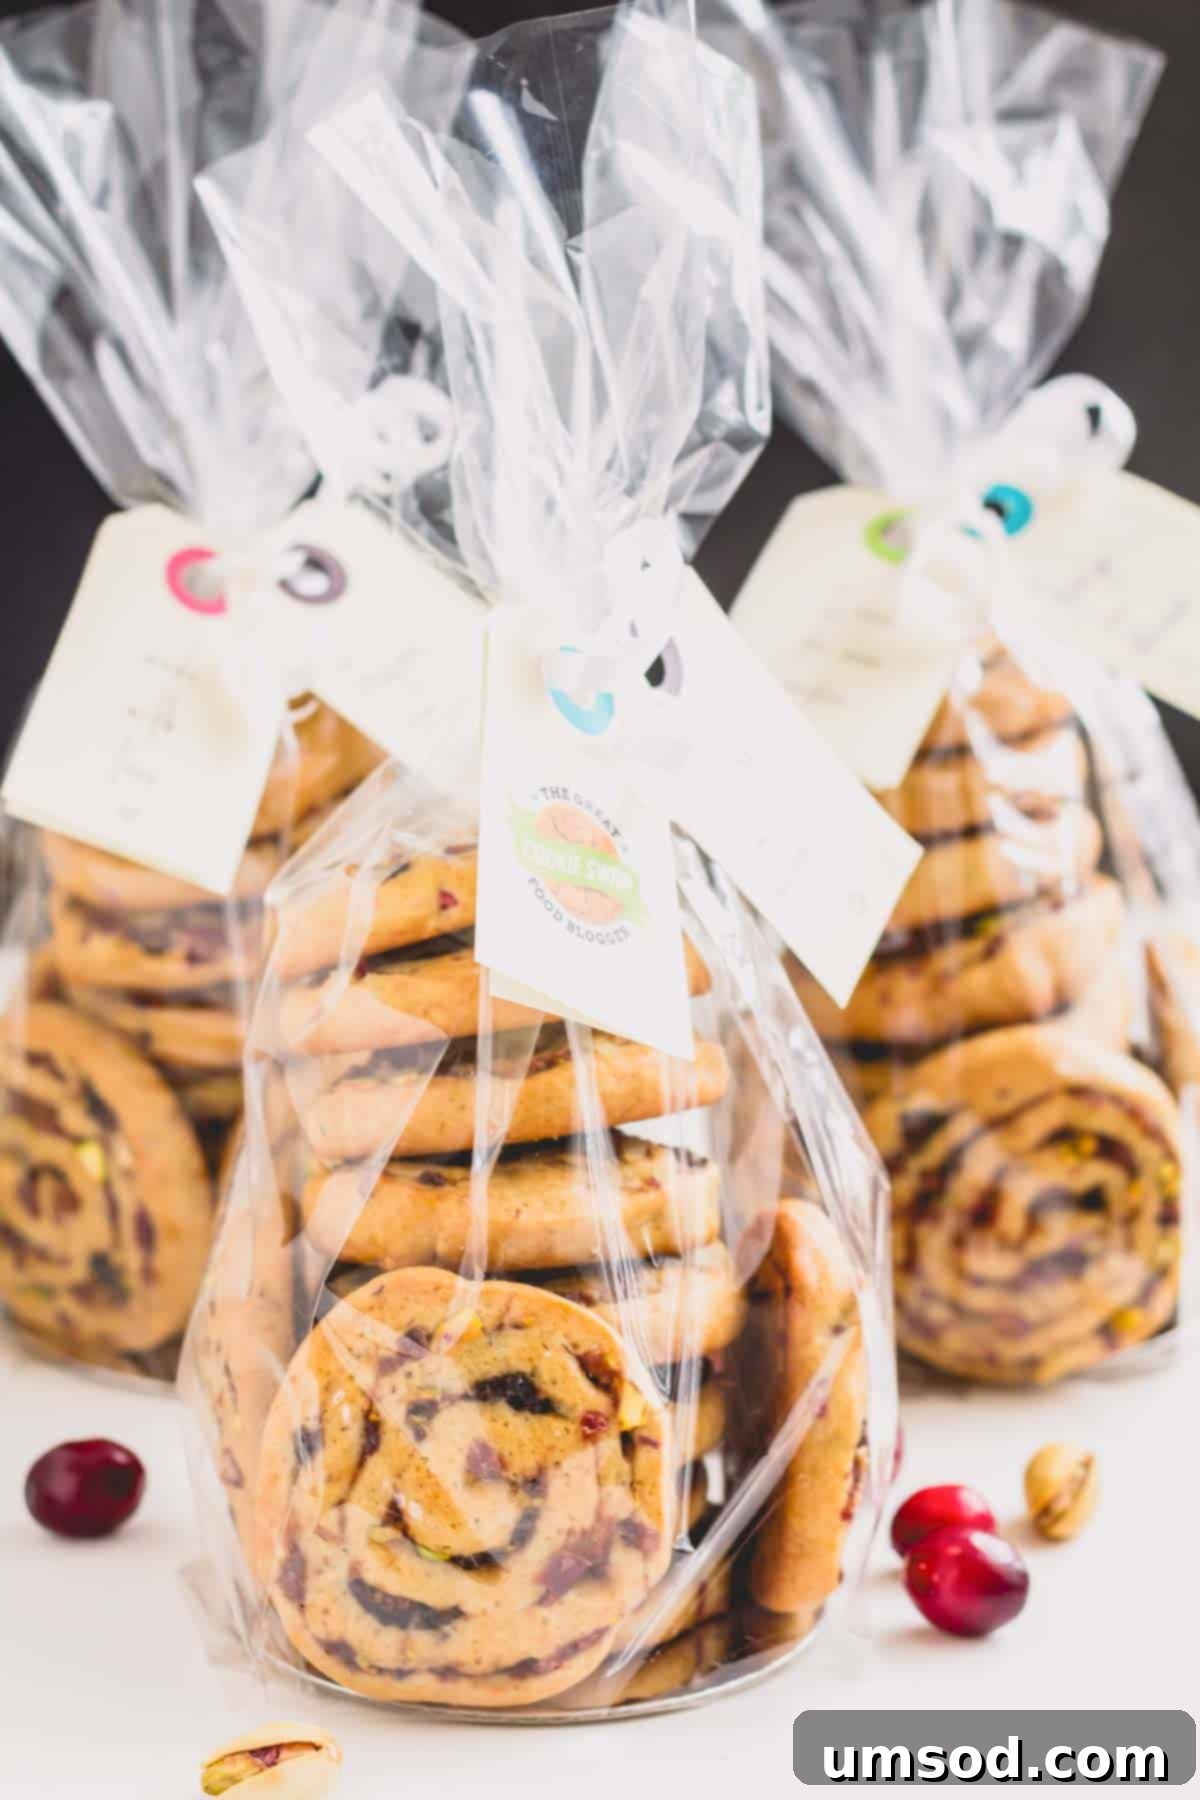
- Perfect for Any Occasion: A Large Batch Recipe – This recipe generously yields an impressive 48 servings, making it exceptionally ideal for various events. Whether you’re contributing to a bake sale, hosting a grand holiday gathering, preparing thoughtful homemade gifts for friends and family, or simply stocking up your cookie jar, this batch size ensures you’ll have plenty to share and savor.
- Rewarding Baking Experience – While date pinwheel cookies do require some dedicated chilling time, which necessitates a bit of planning, the actual preparation steps are wonderfully straightforward and come together with ease. The process itself is therapeutic, and the final outcome of these beautifully swirled, flavorful cookies is incredibly rewarding, making every moment spent worthwhile.
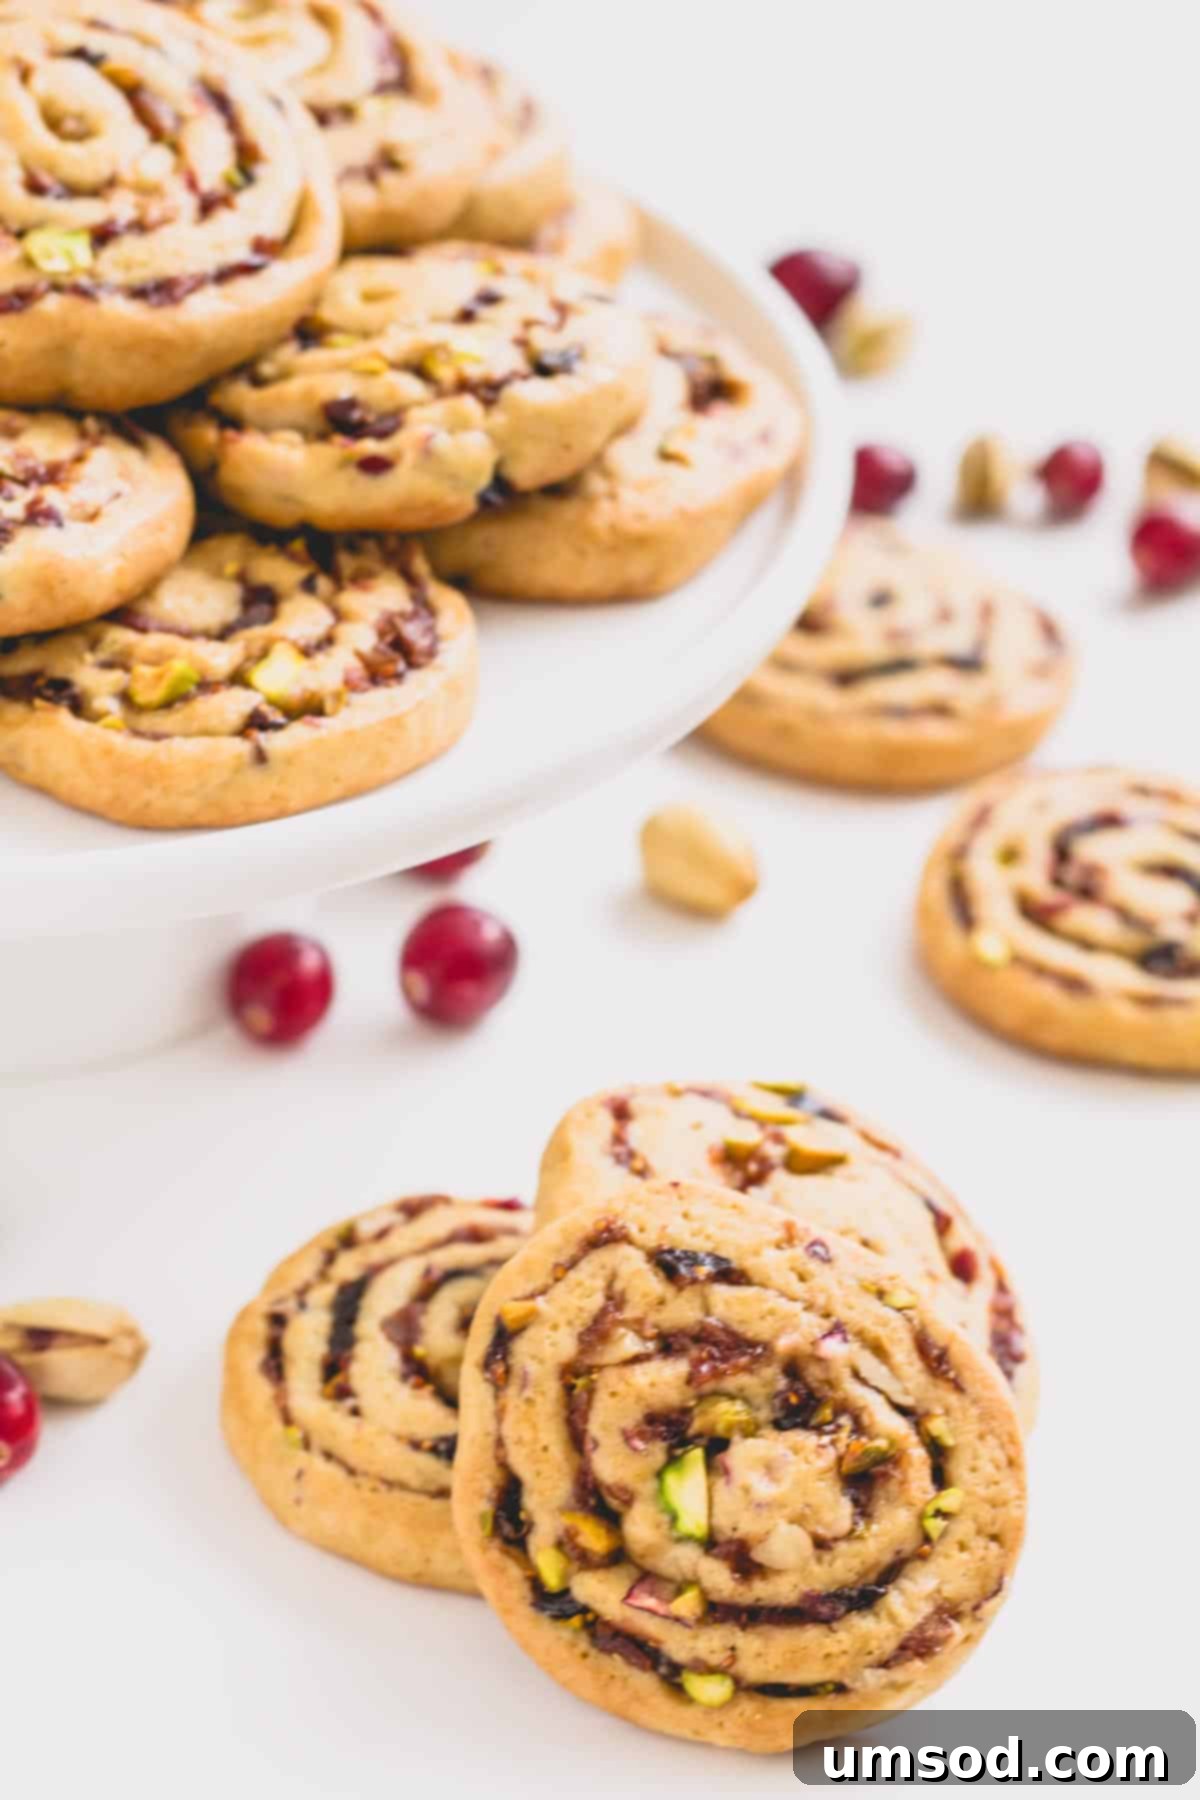
- Visually Stunning Presentation – The distinct spiral pattern created by rolling the dough and filling makes these cookies incredibly attractive. They stand out on any dessert platter, making them not just a treat for the palate, but also a feast for the eyes. Their festive appearance instantly elevates any holiday spread.
Embrace the joy of baking these traditional yet unique cookies that promise to bring warmth and cheer to your home. Their simple steps, combined with a little patience for chilling, culminate in a truly spectacular homemade treat.
Essential Ingredients for Perfect Pinwheel Cookies
Crafting these extraordinary pinwheel cookies begins with understanding the role each ingredient plays. Here’s a detailed look at the key components for both the tender cookie dough and the rich, flavorful filling, along with helpful tips for selection and preparation:
For the Soft & Chewy Cookie Dough
- Unsalted Butter: The foundation of rich flavor. Using unsalted butter gives you precise control over the salt content in your cookies. If salted butter is your only option, simply reduce or omit the extra salt called for in the dough recipe to maintain a balanced taste. Ensure it’s softened to room temperature for optimal creaming with sugar, leading to a light and fluffy dough.
- Brown Sugar: This is crucial for both sweetness and texture. Whether you opt for light or dark brown sugar, it imparts a deep, slightly caramelly sweetness and helps retain moisture, resulting in incredibly soft and chewy cookies. For best results, pack it firmly when measuring. If your brown sugar has hardened, check out our tips on how to soften brown sugar. Understanding the different types of sugars can also enhance your baking knowledge!
- Eggs: These act as a binder, providing essential structure and richness to the cookies. They help the dough hold its iconic pinwheel shape while contributing to a tender crumb. Always use large eggs at room temperature; this allows them to emulsify better with the butter and sugar, creating a smoother, more uniform dough.
- All-Purpose Flour: The primary structural component of the dough. It provides the necessary body and texture. While this recipe hasn’t been extensively tested with gluten-free alternatives, a 1:1 all-purpose gluten-free flour blend, especially one designed for baking, should likely yield satisfactory results for those with dietary restrictions.
- Baking Soda: A critical leavening agent that ensures your cookies achieve a slight lift and delicate texture. For optimal results, always make sure your baking soda is fresh. An old, inactive leavening agent can result in flat, dense cookies. You can test its freshness by adding a pinch to a small amount of vinegar; if it fizzes, it’s still good to go!
- Table Salt: A pinch of salt is vital in baking. It balances the sweetness of the sugar and fruit, enhancing all the other flavors in the dough and preventing the cookies from tasting overly sweet.
For the Sweet, Tangy & Nutty Filling
- Fresh Cranberries: These vibrant berries introduce a delightful tartness that perfectly cuts through the sweetness of the other fruits. It’s highly recommended to use fresh cranberries for their unique flavor and texture; dried or frozen varieties will alter the consistency and taste of the filling significantly.
- Dried Figs: Figs contribute a deep, earthy sweetness and a wonderful chewy texture to the filling. You can typically find them in the baking aisle or alongside nuts and trail mixes at your local grocery store. For the best flavor, look for plump, soft dried figs.
- Dates: A natural sweetener and binder for the filling, dates add an incredible depth of sweetness and a rich, caramel-like note. While any variety of dates will work, Medjool dates are highly recommended for their exceptionally sweet taste and soft, succulent texture. Regardless of your choice, ensure they are pitted before beginning preparation for ease of processing.
- Granulated Sugar: A small amount of granulated sugar is added to the fruit mixture to enhance and amplify the natural sweetness of the cranberries, figs, and dates, creating a more cohesive and deliciously sweet filling.
- Salt: Just a touch of salt goes a long way in this sweet filling. It’s essential for brightening the fruit flavors and preventing the filling from tasting flat. It acts as a counterpoint to the sugar, making every flavor pop.
- Nuts (Walnuts & Pistachios): A combination of chopped walnuts and shelled pistachios offers an ideal blend of textures and complementary flavors. Walnuts provide a classic, earthy crunch, while pistachios add a subtle, buttery richness and a beautiful green hue. Feel free to use one or the other, or substitute with your favorite nuts like pecans or almonds, depending on your preference.
Step-by-Step Guide: How to Make These Delicious Pinwheel Cookies
Creating these beautiful pinwheel cookies is a rewarding process. Follow these detailed steps to ensure perfectly soft, chewy, and flavor-packed treats every time.
1. Prepare the Pinwheel Cookie Dough
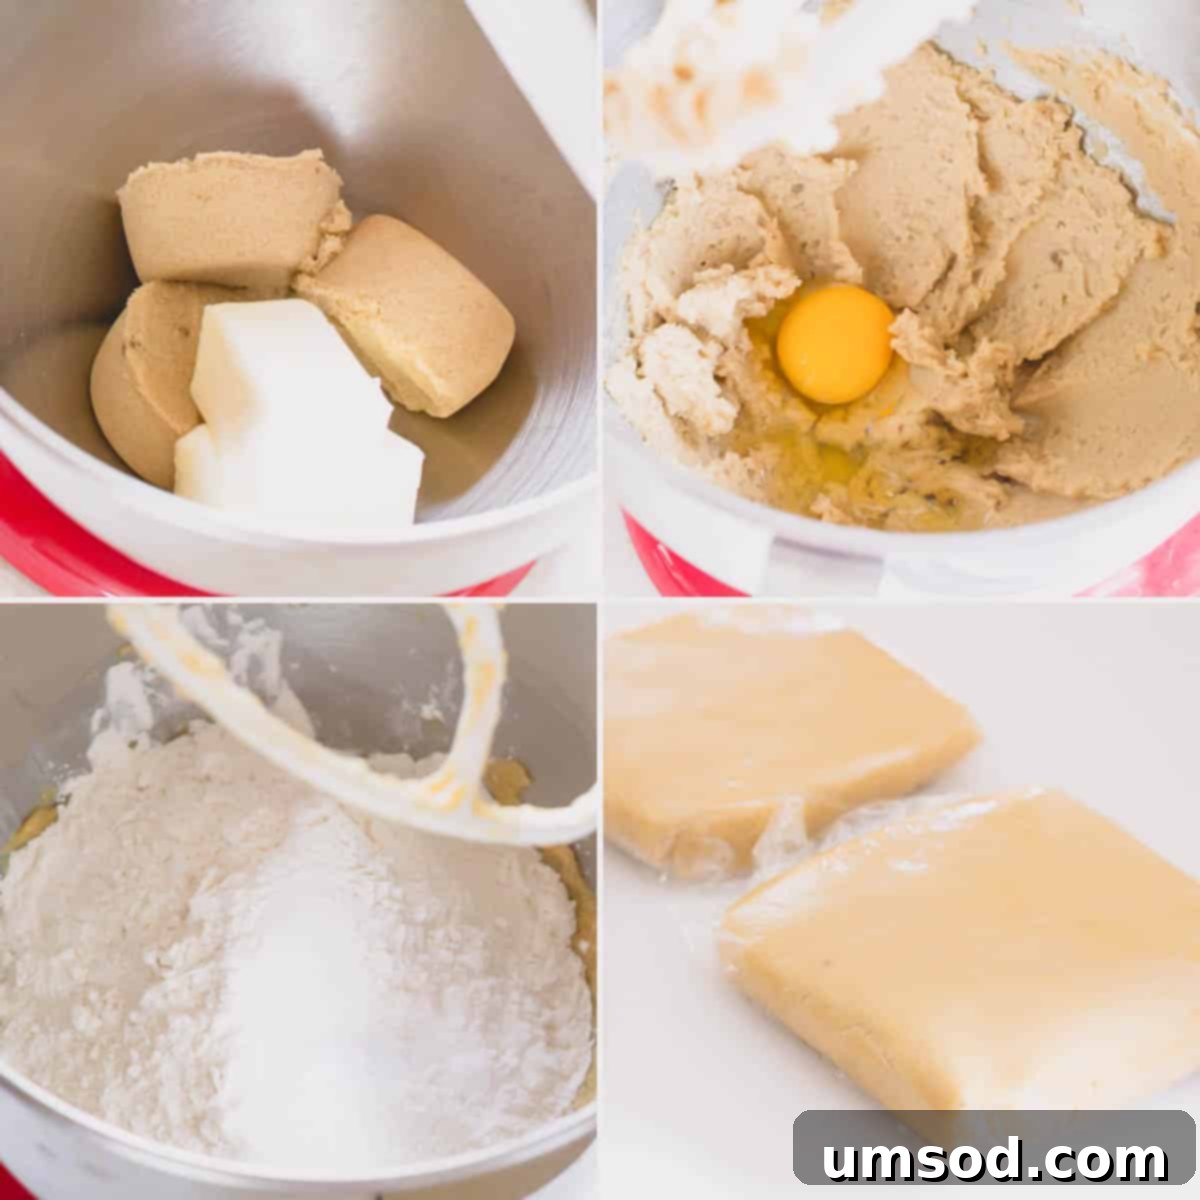
- Cream Butter and Sugar: In a large mixing bowl, preferably using a stand mixer fitted with a paddle attachment or an electric hand mixer, cream together the softened unsalted butter and brown sugar. Beat on medium speed for about 3 minutes until the mixture becomes light, fluffy, and pale in color. This creaming process incorporates air, which contributes to the cookies’ tender texture.
- Incorporate Eggs: Add the large eggs, one at a time, beating well after each addition. Ensure each egg is fully incorporated into the butter mixture before adding the next. This step helps create a smooth, emulsified dough.
- Add Dry Ingredients: Gradually stir in the all-purpose flour and table salt. Mix on low speed just until the ingredients are combined and no streaks of flour remain. Be careful not to overmix, as this can develop the gluten too much, leading to tough cookies. At this stage, the dough will be quite sticky, which is perfectly normal.
- Divide and Chill: Divide the sticky dough into two equal portions. Wrap each portion tightly in plastic wrap. Gently flatten each wrapped dough portion into a square or rectangular shape. This makes it easier to roll out later. Refrigerate the dough for at least one hour, or ideally, allow it to chill overnight. Chilling is crucial as it firms up the dough, making it much easier to handle and roll, and allows the flavors to meld beautifully.
2. Prepare the Flavorful Fruit and Nut Filling
- Prepare Dried Fruits: Begin by removing the stems from the dried figs. Ensure your dates are pitted.
- Process Fruits: Place the fresh cranberries, pitted dates, and stemmed dried figs into the bowl of a food processor. Pulse the mixture until the fruits are finely chopped and form a thick, paste-like consistency. This usually takes a minute or two.
- Cook the Filling: Transfer the finely chopped fruit mixture to a medium saucepan. Add the granulated sugar, table salt, and ½ cup of water. Bring the mixture to a boil over medium heat, stirring occasionally to prevent sticking.
- Thicken the Filling: Once boiling, reduce the heat to low-medium and continue to cook, stirring frequently, until the mixture thickens considerably and resembles a jam-like consistency. This process typically takes about 8-10 minutes. The filling should be able to hold its shape when a spoon is drawn through it.
- Add Nuts and Cool: Remove the saucepan from the heat and stir in the chopped walnuts and shelled pistachios. Mix thoroughly to evenly distribute the nuts. Set the filling aside to cool completely before spreading onto the dough. A cooled filling is much easier to spread and prevents the dough from becoming too warm and sticky.
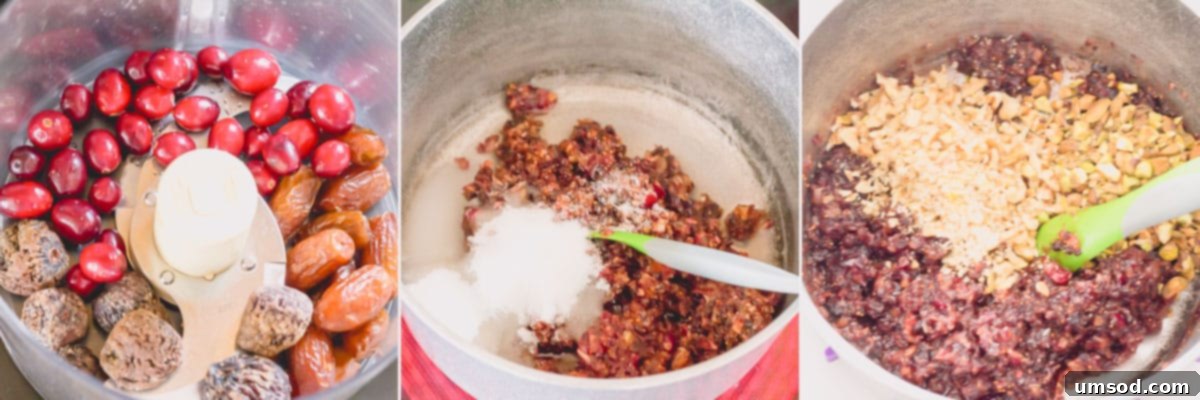
Pro Tip: Stabilize Your Food Processor
When processing the dried figs and dates, the mixture can be quite sticky and dense, causing the food processor to “jump” or move around. For safety and efficiency, keep one hand firmly on top of the food processor lid to hold it in place while pulsing.
3. Assemble and Layer the Pinwheel Cookies
- Prepare Work Surface: Once the cookie dough is thoroughly chilled and firm, it will be much easier to handle. Lightly flour a clean work surface with a small amount of all-purpose flour.
- Roll Out Dough: Unwrap one portion of the chilled dough and place it on the floured surface. Using a rolling pin, roll the dough evenly into a rectangle approximately 14×11 inches (35x28cm). Aim for a consistent thickness across the entire rectangle.
- Spread Filling: Take half of the cooled fruit and nut filling and spread it evenly over the rolled-out dough rectangle, leaving about a ½-inch border around all the edges. This border helps prevent the filling from oozing out during rolling and baking.
- Roll into a Log: Starting from one of the short ends (the 11-inch side), carefully and tightly roll the dough into a log. Aim for a compact roll without air pockets, which helps maintain the pinwheel shape.
- Repeat and Chill Again: Repeat the entire process with the second portion of dough and the remaining fruit and nut mixture. Once both logs are formed, wrap them tightly in plastic wrap. Return the wrapped dough logs to the refrigerator to chill for an additional 30 minutes, or up to overnight. This second chill is crucial for firming up the logs, making them easier to slice cleanly without distorting their shape.
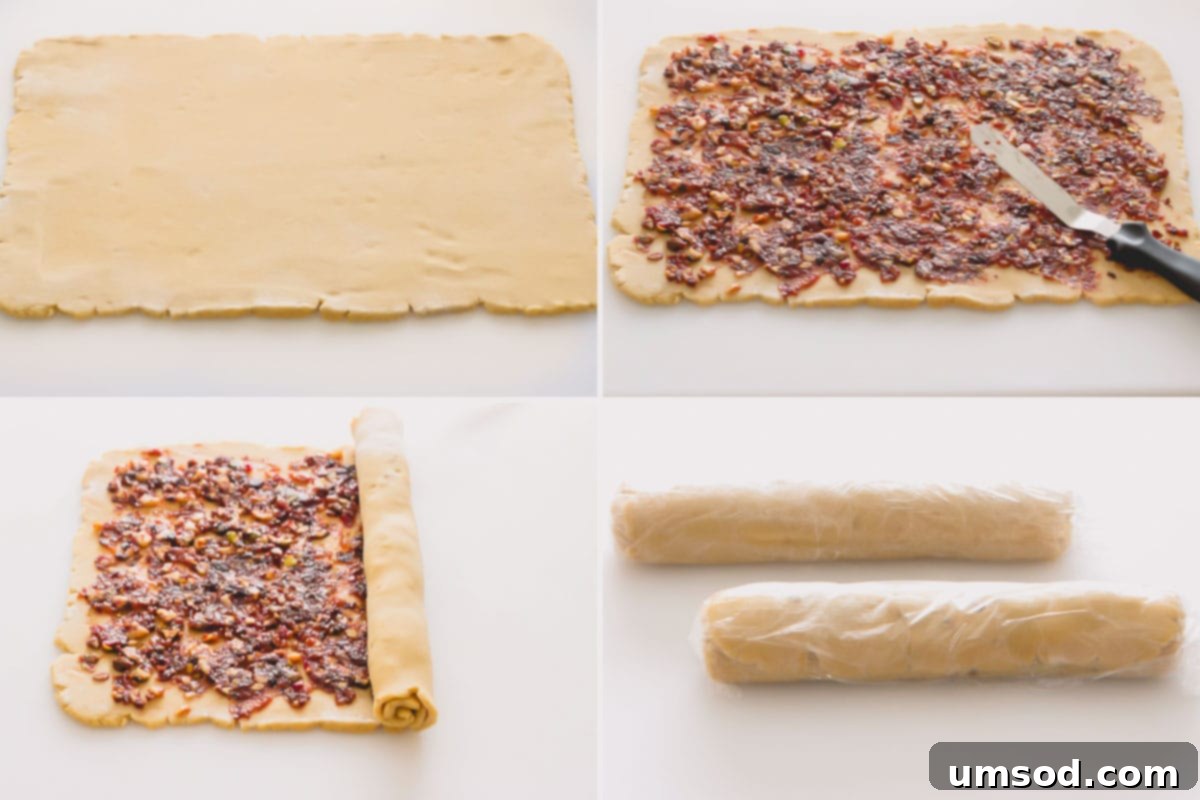
4. Bake Your Beautiful Pinwheel Cookies
- Preheat Oven: Preheat your oven to 350°F (175°C). Line a baking sheet with parchment paper or a silicone mat to prevent sticking and ensure even baking.
- Slice the Logs: Carefully unwrap one chilled dough log. Using a sharp, non-serrated knife or even unflavored dental floss, slice the log into ¼-inch (0.5 cm) thick discs. Maintain an even thickness for consistent baking.
- Arrange on Baking Sheet: Place the sliced cookies on the prepared baking sheet, leaving at least an inch of space between each piece to allow for slight spreading.
- Adjust Shape (Optional): If any of your cookie discs have flattened slightly on one side during slicing or chilling, gently reshape them back into a round form with your fingers before baking.
- Bake to Perfection: Bake the cookies for approximately 15 minutes, or until the edges are lightly golden and the centers are set. Avoid overbaking to keep them soft and chewy.
- Cool Completely: Allow the baked date pinwheel cookies to cool slightly on the baking sheets for about 3-5 minutes. This helps them firm up before handling. Then, carefully transfer them to a wire rack to cool completely. Enjoy the delightful aroma and prepare to savor your homemade masterpieces!
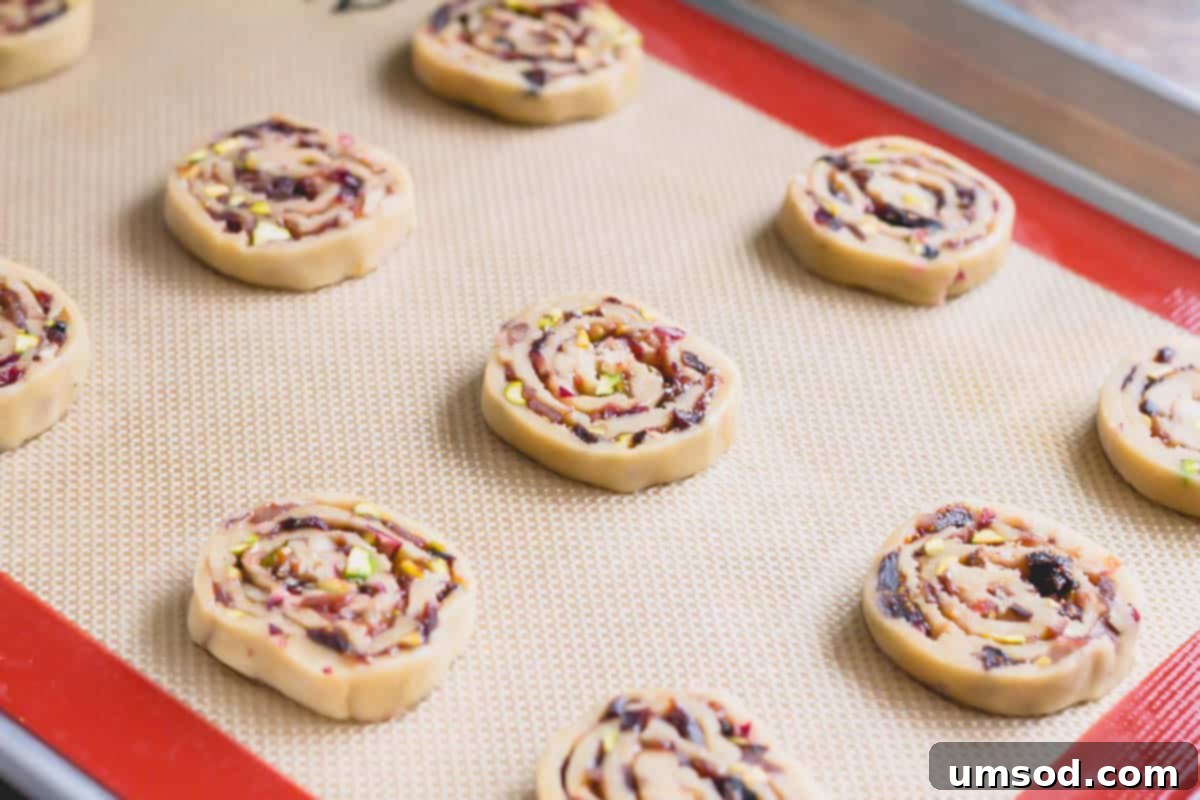
Refining Your Pinwheel Cookie Shape
Don’t fret if your dough logs get a little flattened during chilling or slicing. Before baking, simply use your fingers to gently press and reshape the discs back into a perfectly round pinwheel form. This small step ensures a beautiful presentation.
Expert Tips for Pinwheel Cookie Perfection
- Avoid Overmixing the Dough: This is a golden rule in baking, especially for cookies. Once you add the flour, mix just until the ingredients are combined and smooth. Overmixing develops the gluten in the flour excessively, which can lead to dense, tough, and less tender cookies. A light hand will yield a perfectly soft and chewy texture.
- Prioritize Chilling Time: The dough for these pinwheel cookies is intentionally soft and sticky, making proper chilling non-negotiable. Don’t rush this step! Adequate chilling not only makes the dough much easier to handle, preventing frustration and overworking, but also allows the gluten to relax. More importantly, it gives the flavors a chance to fully develop and absorb, resulting in incredibly flavorful, soft, and chewy cookies.
- Maintain a Filling Border: When spreading the delicious fruit and nut filling over the rolled-out dough, ensure you smooth it into an even layer while leaving a small border of about half an inch (approximately 1.25 cm) around all the outer edges of the dough. This crucial step creates a seal, making the dough much easier to roll into a tight log and effectively prevents the filling from oozing out during the baking process, ensuring neat, beautiful pinwheels.
- Slice Cookies Evenly: For consistent baking and a uniform appearance, it’s vital to slice your cookie logs into thin, even pieces, ideally ¼ inch (about 0.5 cm) in thickness. A sharp, clean, non-serrated knife works best for this. Alternatively, unflavored dental floss can be a fantastic tool: slide it under the log, cross the ends over the top, and pull to slice cleanly.
- Monitor Oven Temperature: An accurate oven temperature is key to perfect cookies. Consider using an oven thermometer to ensure your oven is truly at 350°F (175°C). An oven that runs too hot can lead to burnt edges and raw centers, while one that’s too cool might result in flat, overly spread cookies.
- Don’t Overcrowd the Baking Sheet: Give your cookies space! Arranging them with at least an inch between each piece allows for proper air circulation, ensuring they bake evenly and prevent them from merging into one giant cookie.
- Cool on a Wire Rack: After a few minutes on the hot baking sheet, transfer your cookies to a wire rack to cool completely. This prevents the bottoms from becoming soggy due to residual heat and helps maintain their crisp edges and soft centers.
Smart Make-Ahead Strategies for Pinwheel Cookies
These Fig, Cranberry, and Date Pinwheel Cookies are an excellent choice for make-ahead baking, perfect for reducing stress during busy holiday seasons. Here’s how you can prepare them in advance:
- Prepare Dough in Advance: You can prepare the cookie dough fully, divide it into two rectangles, wrap each tightly in plastic wrap, and store them in the refrigerator for up to 1 day. When you’re ready to bake, simply proceed with the recipe as normal, rolling out the dough and spreading the filling. This is a great way to break up the baking process.
- Form and Chill Cookie Logs: For even greater convenience, you can complete the entire assembly process by preparing the cookie dough logs with the filling already rolled inside. Wrap these logs securely in plastic wrap and store them in the refrigerator for up to 1 day. This means that when you’re ready for freshly baked cookies, all that’s left to do is slice the logs into discs and pop them into the oven!
- Filling: Not Recommended for Standalone Pre-preparation: While the dough is perfectly suited for make-ahead, it is generally not recommended to prepare the fruit and nut filling far in advance and store it on its own in the fridge. The filling tends to stiffen considerably when chilled, which can make it very difficult to spread smoothly onto the dough later, potentially compromising the neatness of your pinwheels. It’s best to prepare the filling shortly before you intend to roll the cookies.
Optimal Storing Tips for Freshness
Ensuring your delicious Fig, Cranberry, and Date Pinwheel Cookies stay fresh and flavorful is simple with these storage guidelines:
- Room Temperature Storage: For immediate enjoyment, store leftover baked pinwheel cookies in an airtight container at room temperature. They will remain wonderfully fresh and chewy for 4-5 days. Keep them away from direct sunlight or heat sources.
- Refrigeration: If you need to extend their shelf life slightly, transfer the cookies to an airtight container and refrigerate them for up to 1 week. The colder temperature helps maintain their freshness.
- Freezing for Long-Term Enjoyment: These cookies freeze beautifully! Once completely cooled, arrange them in a single layer on a baking sheet and freeze until they are solid (this prevents them from sticking together). Then, transfer the frozen cookies to a freezer-safe airtight container or a heavy-duty freezer bag, separating layers with parchment paper if stacking. They can be frozen for up to 1 month without losing quality.
- Thawing Frozen Cookies: To enjoy frozen cookies, simply transfer them from the freezer to the refrigerator to thaw overnight, or let them come to room temperature on the countertop for an hour or two. They will taste just as delicious as when freshly baked!
Frequently Asked Questions About Pinwheel Cookies
Pinwheel cookies are a charming and visually appealing type of cookie characterized by their distinctive spiral pattern. This signature look is achieved by layering two contrasting elements—either two different colors or types of cookie dough, or a layer of cookie dough with a sweet filling—then rolling them tightly into a log. Once chilled, this log is sliced into individual cookies, revealing the beautiful pinwheel effect, making them a festive and fun treat.
To achieve the perfect pinwheel effect, begin by rolling your dough out into an even, thin rectangle on a lightly floured surface. Once your filling is spread (remembering to leave a small border!), gently lift one of the shorter ends of the dough. Carefully and tightly roll the dough over itself, continuing this motion like you’re creating a snug log. The key is to keep the roll as tight and even as possible to ensure a well-defined spiral in your finished cookies.
For rolling out pinwheel cookie dough, a clean, smooth, and lightly floured surface is essential. Your kitchen countertop or a large pastry board works perfectly. Simply dust the surface with a small amount of all-purpose flour to prevent the dough from sticking as you roll it to your desired dimensions and thickness. Avoid excessive flour, as it can make your dough tough.
Absolutely! While figs, cranberries, and dates with walnuts and pistachios offer a fantastic flavor profile, this recipe is quite versatile. Feel free to experiment with other dried fruits like apricots, prunes, or cherries, or different nuts such as pecans, almonds, or even hazelnuts. Just ensure the total quantity remains similar to maintain the filling’s consistency and balance with the dough.
Discover More Irresistible Holiday Cookie Recipes
If you’ve enjoyed baking these festive pinwheel cookies, you’ll love exploring these other delightful holiday treats:
- Classic Christmas Sugar Cookies – Perfect for decorating and customizable for any holiday theme.
- Zesty Orange Cranberry Shortbread Cookies – A delicate, buttery cookie with bright, seasonal flavors.
- Elegant Almond Spritz Cookies – Beautifully pressed cookies with a subtle almond essence, ideal for cookie presses.
- Traditional Honey Cookies (Heirloom Recipe) – A timeless recipe that brings a touch of old-world charm to your holiday spread.

Date, Fig and Cranberry Pinwheel Cookies
Shinee Davaakhuu
1 hr 35 mins
25 mins
2 hrs
48 cookies
Comment
Print Recipe
Ingredients
For the cookie dough:
- ½ cup (113 g) unsalted butter, softened
- 1 cup (200 g) brown sugar
- 2 large eggs, at room temperature
- 2 ½ cups (315 g) all-purpose flour
- 1 teaspoon table salt
- ½ teaspoon baking soda
For the fruit and nut filling:
- ½ cup (50 g) fresh cranberries
- ½ cup (85 g) dried figs, stems removed
- ½ cup (70 g) dates, pitted
- ½ cup (100 g) granulated sugar
- ½ cup (120 ml) water
- ¼ teaspoon table salt
- ½ cup chopped walnuts
- ½ cup chopped shelled pistachios
Instructions
Prepare the cookie dough
- In a large mixing bowl with a paddle attachment, or using an electric hand mixer, beat the butter and brown sugar until light and fluffy, about 3 minutes.
- Add the eggs one at a time, mixing until well combined after each addition.
- Stir in the flour and salt, mixing just until combined. The dough will be quite sticky at this point.
- Divide the dough into two equal parts and wrap each tightly in plastic wrap.
- Flatten each portion into a square and refrigerate for at least an hour, or preferably overnight.
Make the filling
- Remove the stems of the dried figs.
- Place cranberries, dates, and stemmed dried figs in the bowl of a food processor. Pulse until finely chopped, about 1-2 minutes. (Note: The processor may be a little jumpy due to the stickiness of the dried fruits.)
- In a medium saucepan, combine the chopped fruits, sugar, salt, and ½ cup of water. Bring to a boil over medium-high heat.
- Reduce the heat and cook until the mixture thickens, stirring occasionally, for about 8-10 minutes.
- Stir in the chopped nuts and allow the filling to cool completely.
Shape the cookies
- Once the cookie dough is chilled and easier to work with, unwrap one portion onto a lightly floured surface. Roll it into a 14×11 inch (35×28 cm) rectangle.
- Spread half of the cooled fruit filling evenly over the dough, leaving a small border around the edges. Roll the dough tightly from the short end into a log.
- Repeat the process with the other half of the dough and the remaining filling.
- Wrap both dough logs with plastic wrap again and chill for another 30 minutes, or up to overnight.
Bake the cookies
- Preheat your oven to 350°F (175°C). Line a baking sheet with parchment paper or a silicone mat.
- Cut the chilled logs into ¼-inch (0.5 cm) thick discs. Place the cookies at least an inch apart on the prepared baking sheet. If any rolls are flattened, gently reshape them into a round.
- Bake for 15 minutes, or until lightly golden at the edges and set.
- Cool the cookies on the baking sheets for 3-5 minutes, then transfer them to a wire rack to cool completely. Enjoy!
⭐️ Did you make this recipe?
Please leave a review and let us know how you liked it!
Tips & Notes
– Prepare the dough, divide it into two rectangles, wrap them in plastic wrap, and store them in the fridge for up to 1 day. Then, proceed with the recipe, rolling and filling the dough as normal.
– Alternatively, prepare the cookie dough logs with filling, wrap them in plastic wrap, and store for up to 1 day. This way, all you have to do is slice and bake!
– I don’t recommend preparing the filling in advance and storing it on its own, as it tends to become quite stiff when chilled, making it difficult to spread.
Storing Tips:
– Store leftover date pinwheel cookies in an airtight container at room temperature for 4-5 days, or in the refrigerator for up to 1 week.
– Freeze cooled cookies for up to 1 month. Freeze them on a baking sheet until solid, then transfer to a freezer-safe container.
– Thaw frozen cookies in the fridge or at room temperature before enjoying.
Nutrition
1 cookie
93kcal
14g
1g
4g
8g
77mg
Snack, Dessert
American, Holiday

