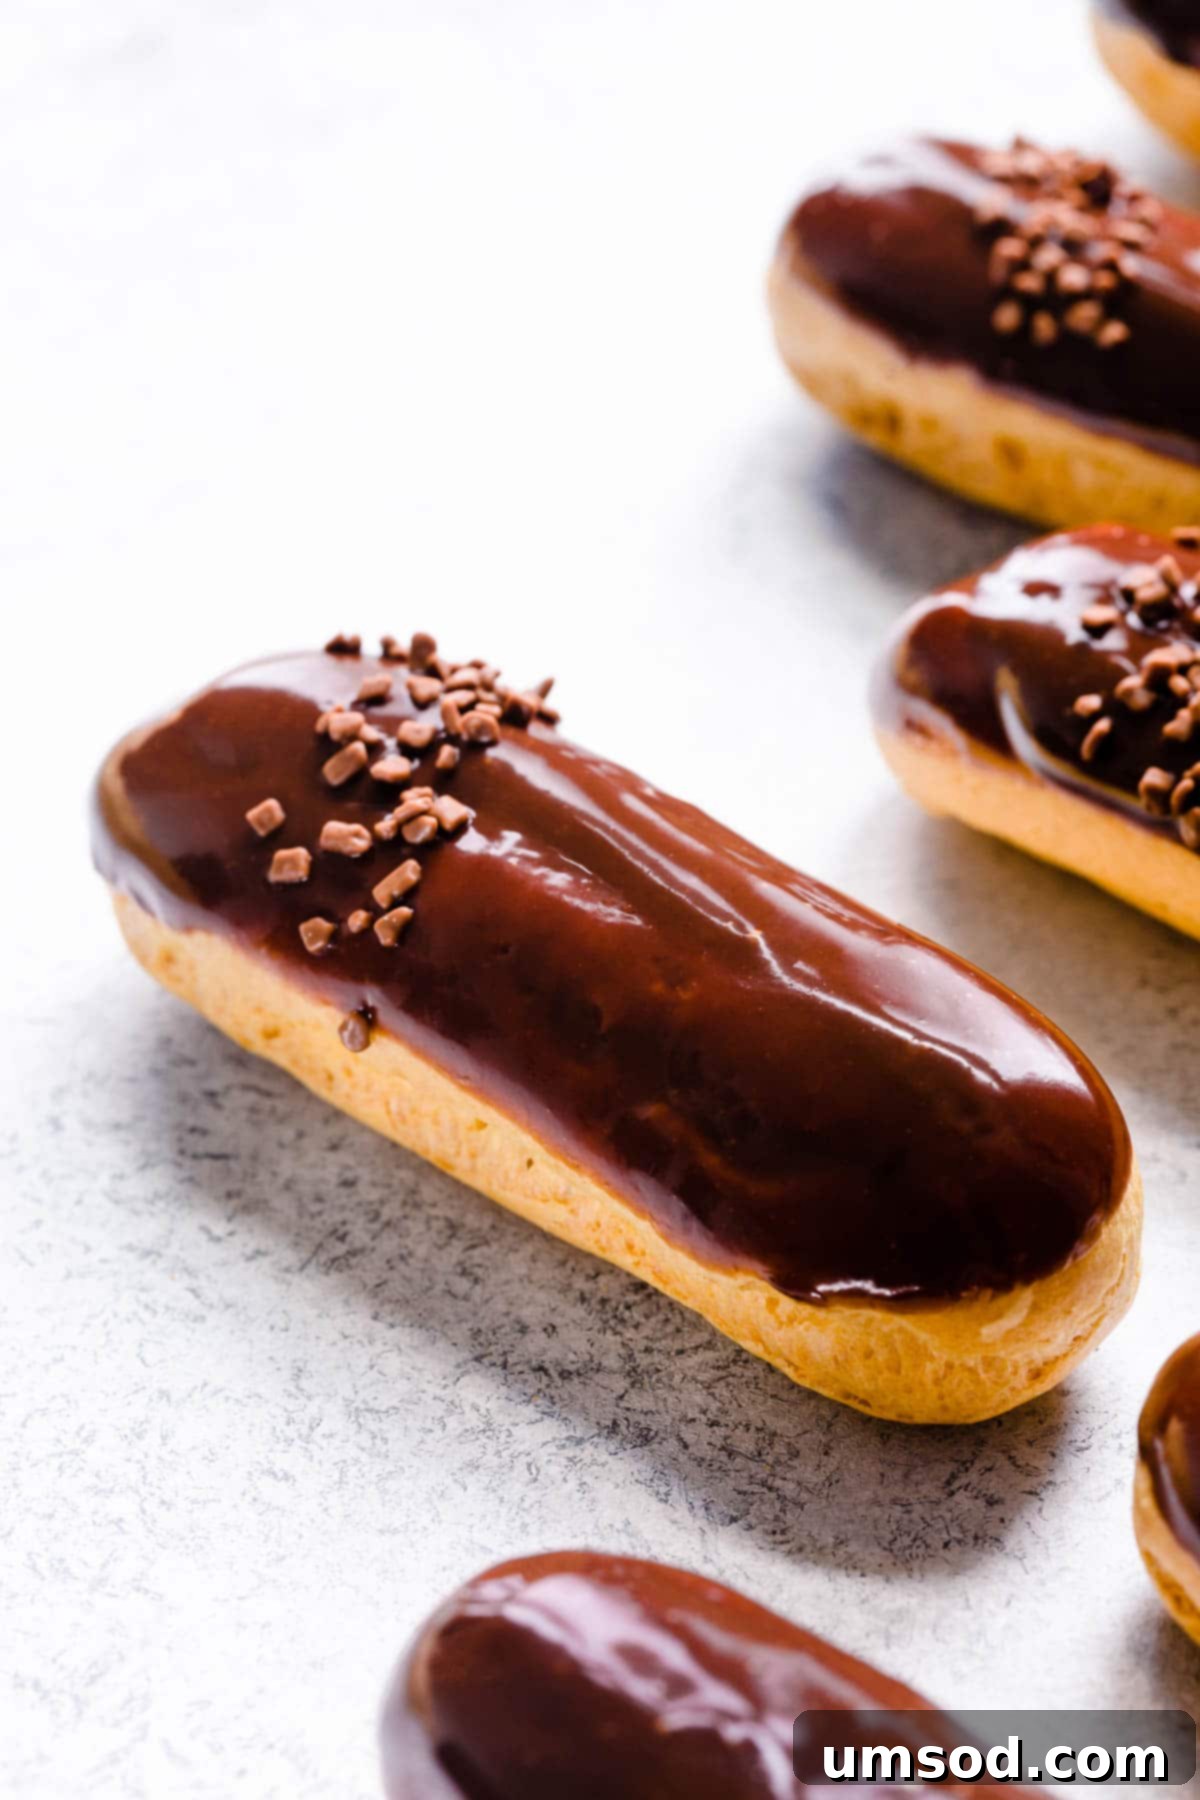
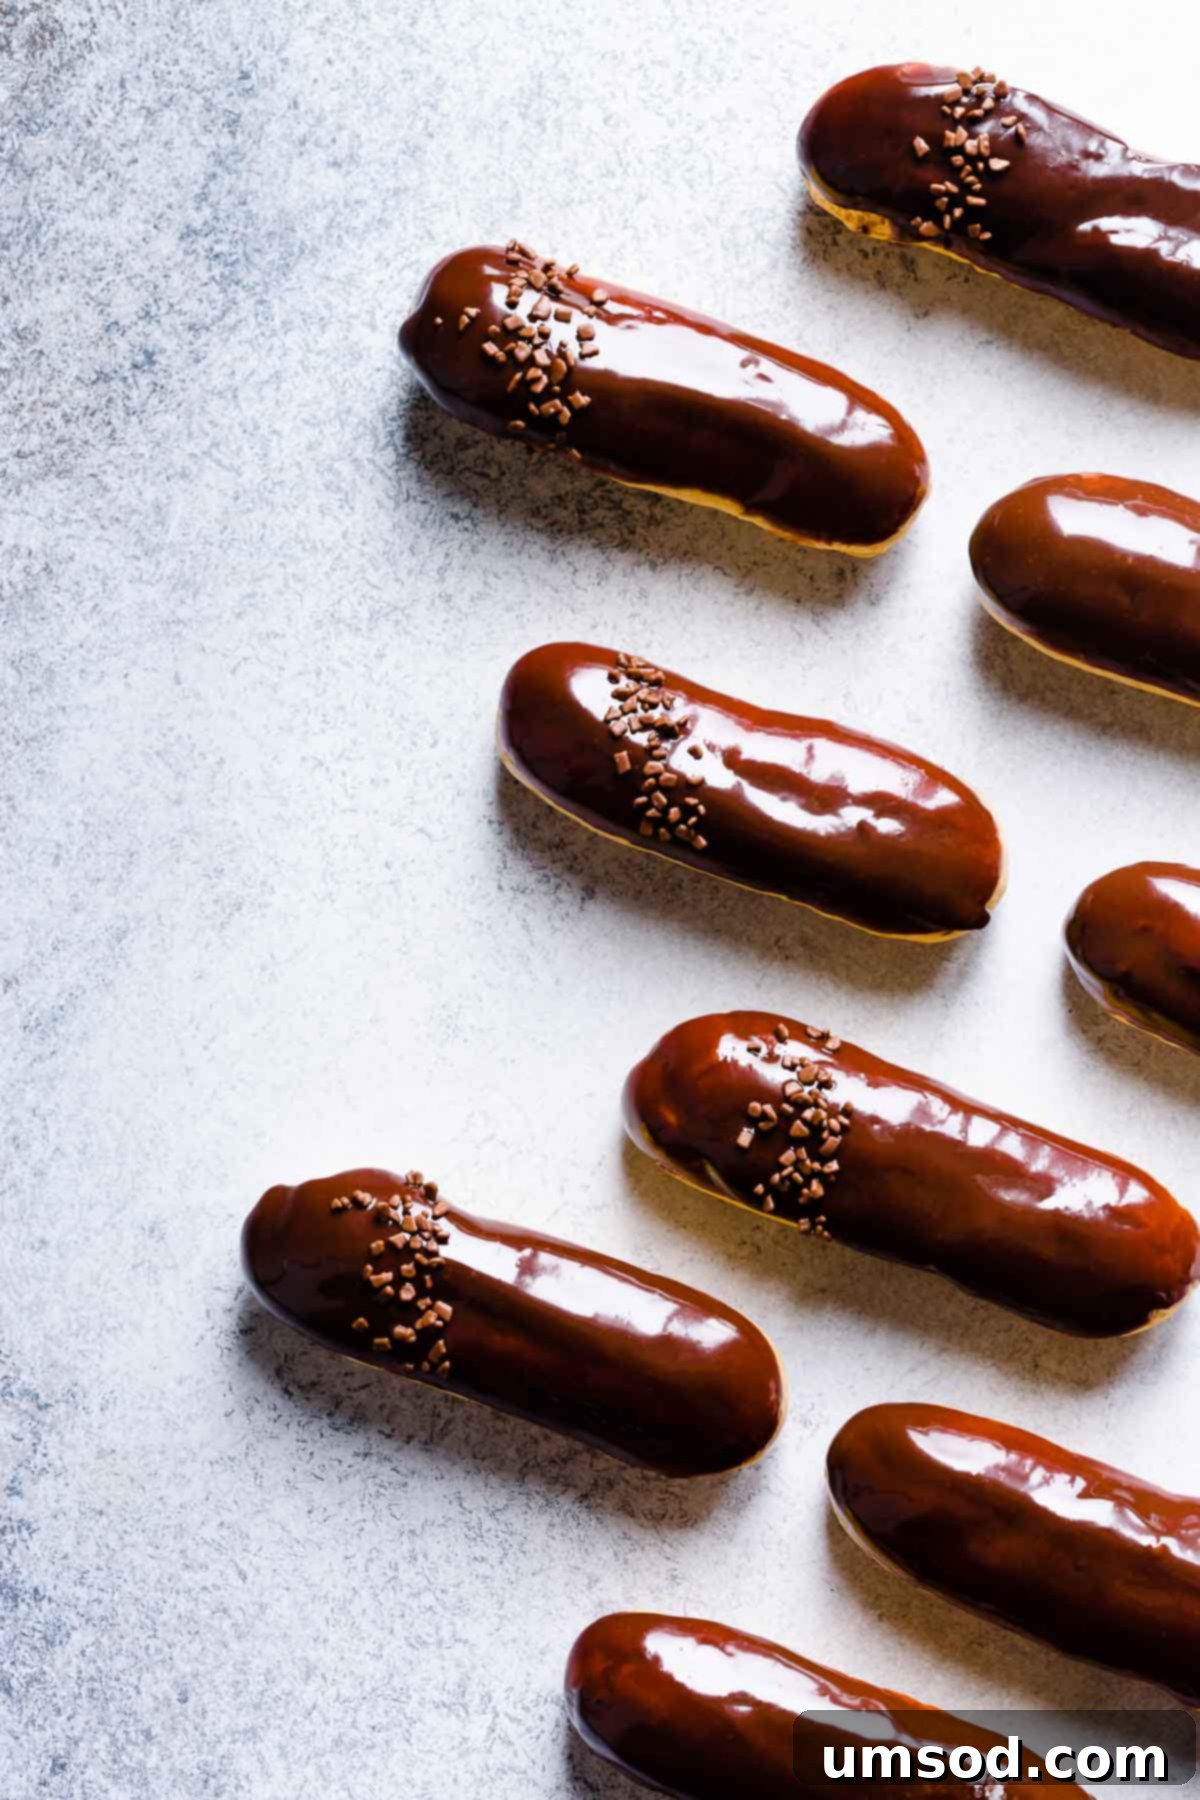
Ever dreamed of creating those elegant, bakery-style eclairs at home? Imagine the delicate crunch of a golden shell, yielding to a luscious, creamy filling, all crowned with a glossy chocolate glaze. It might sound daunting, but I promise you, this recipe makes it genuinely easy, using only the most basic ingredients you likely already have on hand. Get ready to embark on a delightful baking journey with a full video tutorial and 8 invaluable tips to ensure you achieve perfect eclair shells every single time!
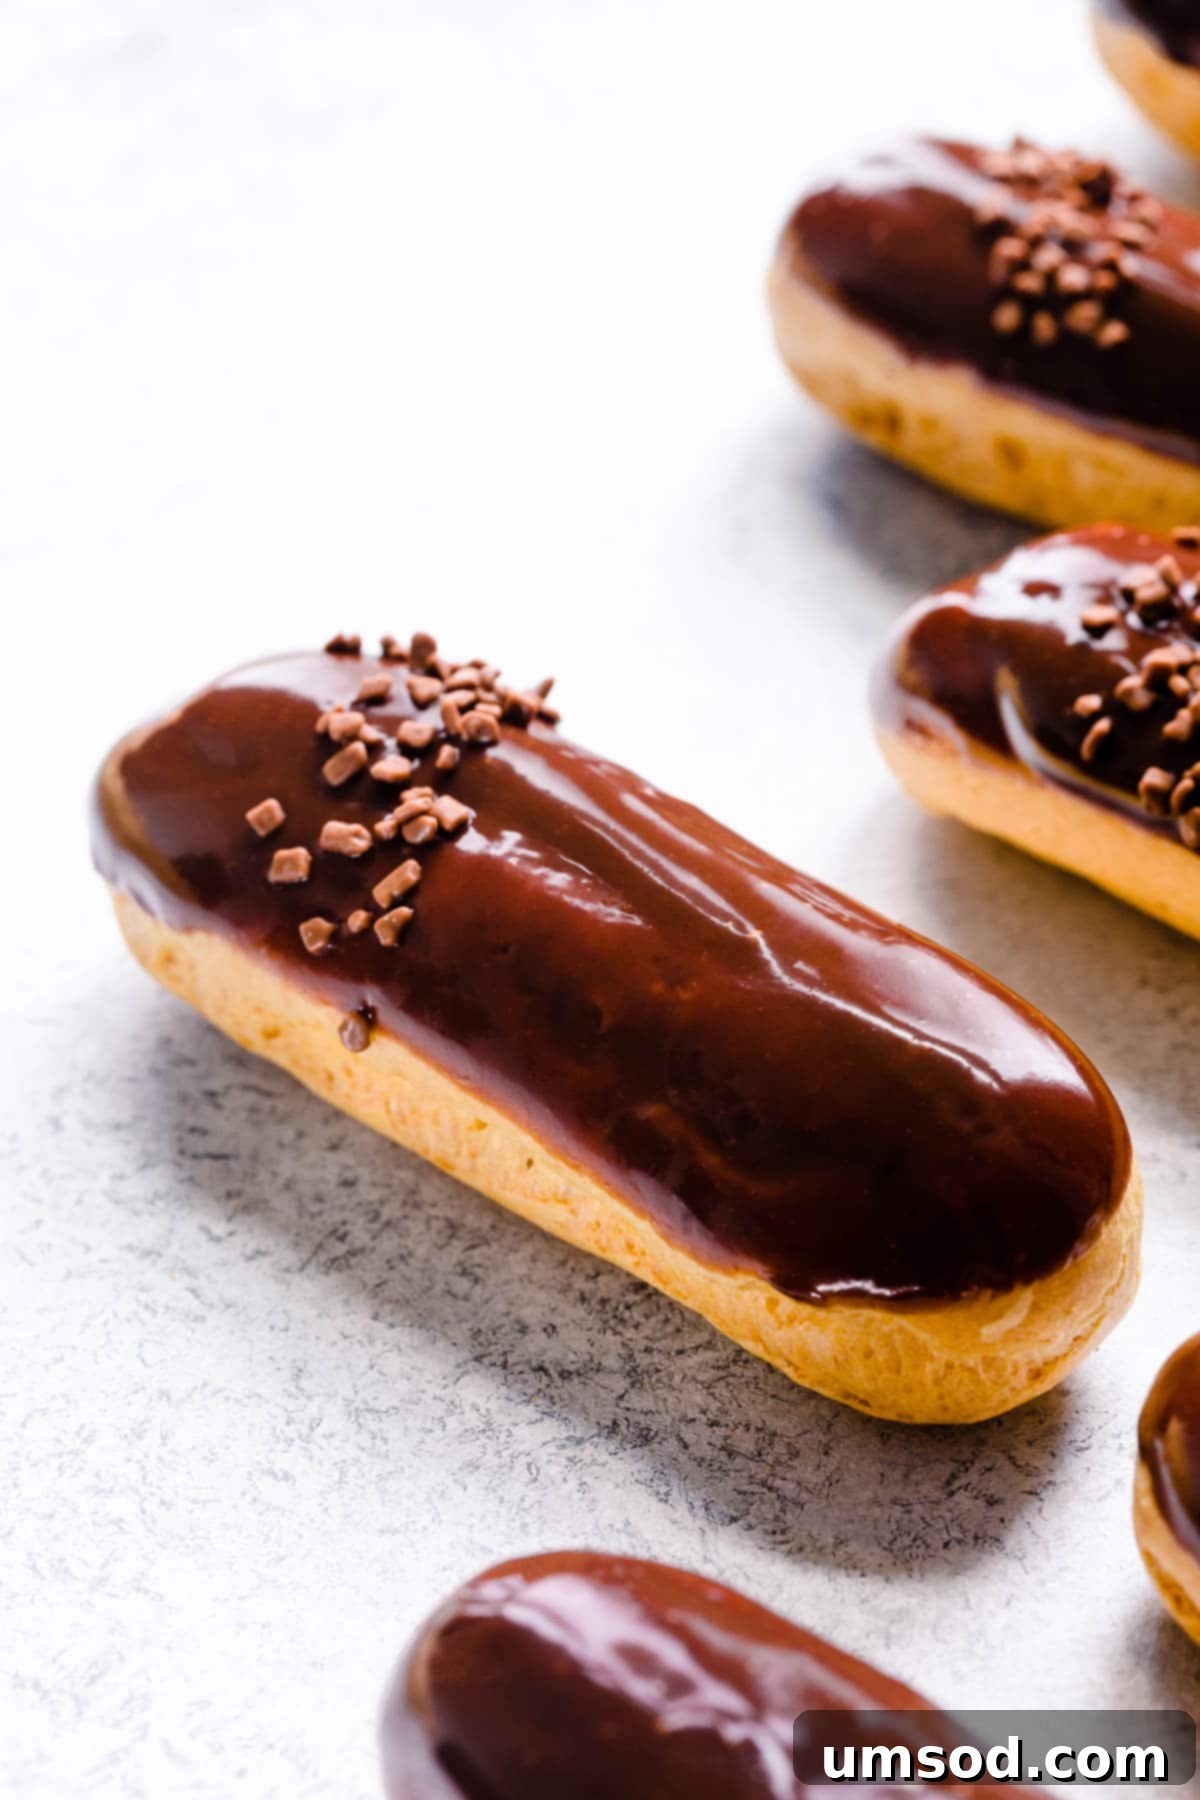
At its heart, a classic eclair is a masterpiece of three simple yet exquisite components: the light and airy choux pastry (also known as pâte à choux) shell, a rich and velvety pastry cream filling, and a luxurious chocolate ganache glaze. This timeless French dessert holds a special place in my heart, stirring up cherished childhood memories. Growing up, eclairs were my mom’s signature dessert, meaning this recipe isn’t just a guide; it’s a time-tested treasure, refined over years of experience and brimming with tips for achieving absolute perfection. Let’s create some new memories together!
Why This Eclair Recipe Will Become Your Favorite (The Magic of Eclairs Unveiled)
There’s a reason this classic French pastry has captivated palates worldwide for centuries: it’s sophisticated in appearance, yet surprisingly simple to create. You are truly going to LOVE every single bite of this delightful dessert. Don’t let the elegant name and polished look intimidate you. Making eclairs from scratch is an incredibly rewarding experience, and it’s much easier than you might imagine. In fact, it requires just a few basic ingredients that you likely already have stocked in your pantry and refrigerator.
This chocolate eclair recipe isn’t just another recipe; it’s my tried-and-true, go-to formula for achieving consistent success and incredible flavor. My hope is that it will quickly become your favorite too. It’s perfect for impressing guests, celebrating special occasions, or simply treating yourself to a moment of pure culinary bliss. Once you master the fundamentals of choux pastry with this guide, a world of sweet possibilities will open up!
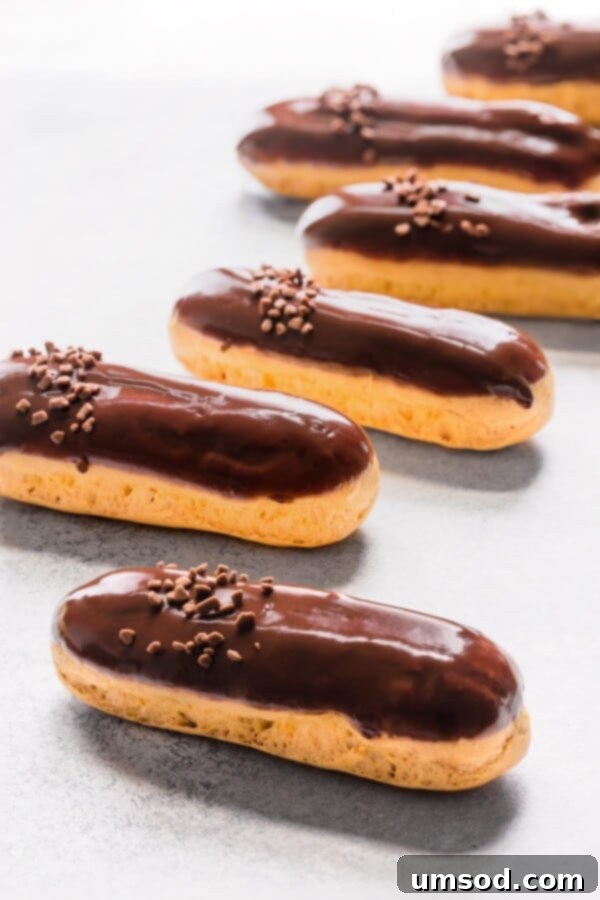
Essential Ingredients for Perfect Chocolate Eclairs
When I say you need basic ingredients for these phenomenal eclairs, I truly mean simple, everyday pantry staples! But knowing a little more about each one can make a big difference in your final result.
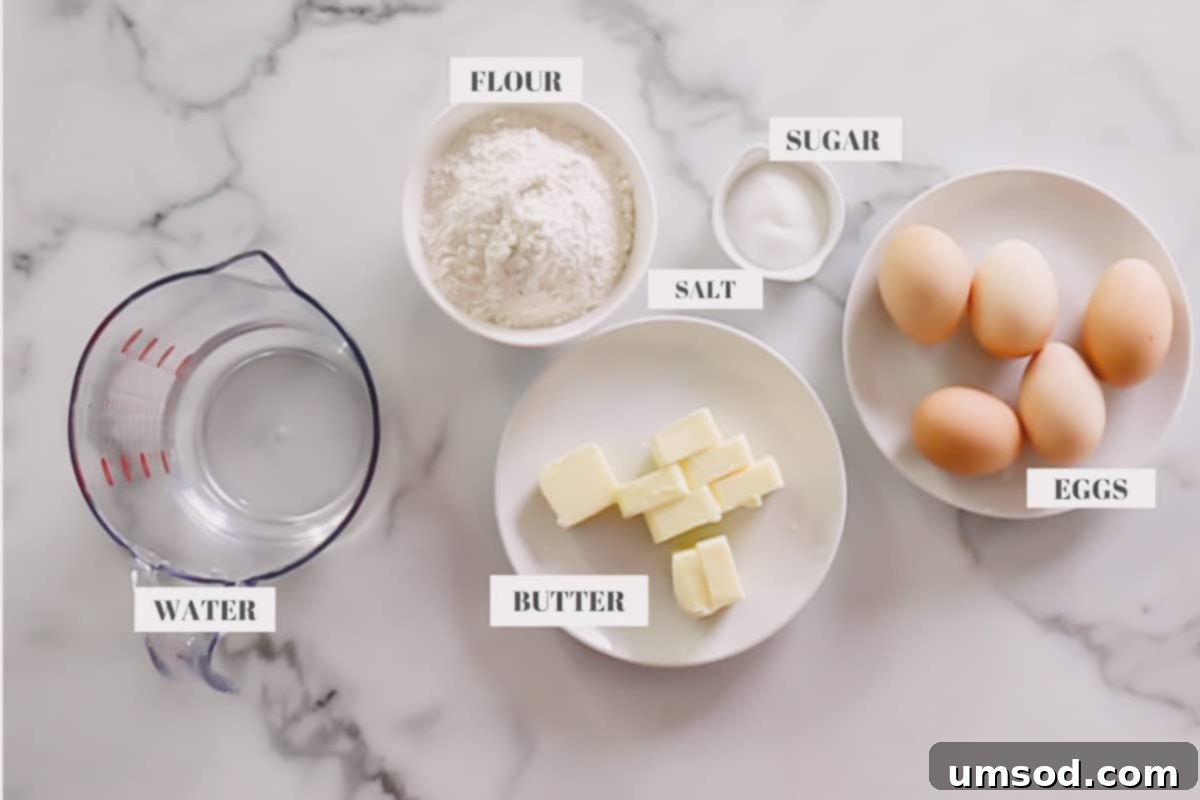
- Flour – While standard all-purpose flour will work adequately, using bread flour is highly recommended for choux pastry. Its higher protein content contributes to a stronger gluten structure, which in turn helps the pastry rise higher and achieve a crispier, more stable shell. Sifting your flour before use is also a crucial step to prevent lumps and ensure a smooth panade.
- Water – Many choux pastry recipes call for a combination of water and milk. For eclairs, however, I prefer to use all water. My experience shows that an all-water base yields exceptionally crispier shells, which is ideal for supporting the rich filling without becoming soggy too quickly. This crispness provides a wonderful textural contrast to the creamy interior.
- Butter – Unsalted butter is my preferred choice, as it gives you complete control over the salt content in your dough. If you opt for salted butter, be sure to omit or significantly reduce the amount of added salt in the recipe to avoid an overly salty flavor. Good quality butter also contributes to the richness and flavor of the pastry.
- Sugar – A small amount of granulated sugar is included in the choux pastry. Beyond simply adding a subtle touch of flavor, sugar plays an important role in promoting beautiful browning of the eclair shells during baking, giving them that appealing golden hue.
- Eggs – Eggs are absolutely critical in this recipe, serving as the main leavening agent that transforms the dense panade into light, airy, and hollow eclair shells. They provide structure and moisture. The recipe lists 4-5 large eggs because the exact amount can vary slightly based on factors like flour type, humidity, and how much moisture was evaporated during cooking the panade. My video tutorial will show you precisely what consistency to look for, ensuring you add just the right amount to achieve a perfectly pliable and pipeable dough. Always use room temperature eggs, as they incorporate more smoothly into the dough.
Crafting the Perfect Eclair Shells: A Step-by-Step Guide
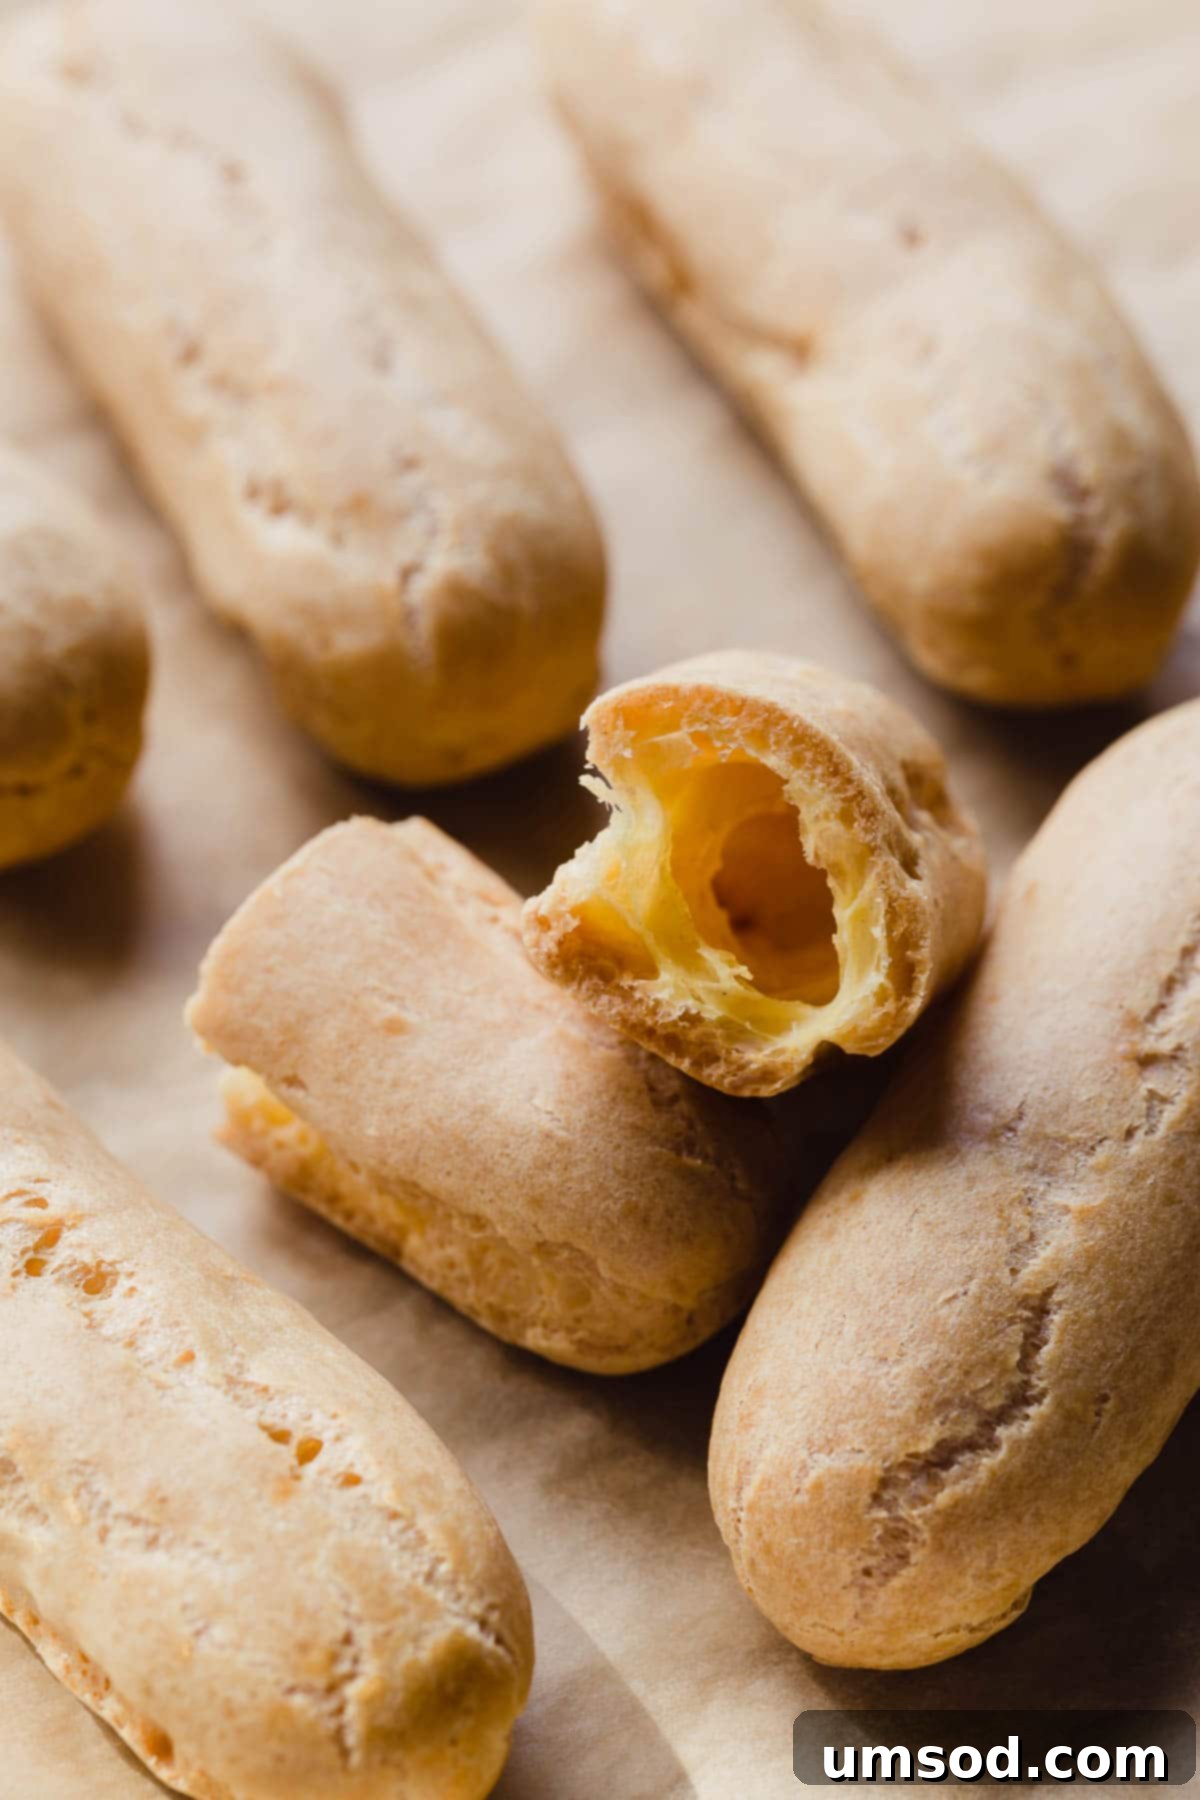
The foundation of any exquisite eclair is its shell, made from delicate choux pastry (pronounced “shoe” pastry). This versatile dough is the secret to its light, hollow interior. For even more in-depth tips and a troubleshooting guide, be sure to consult my comprehensive Choux Pastry 101 guide.
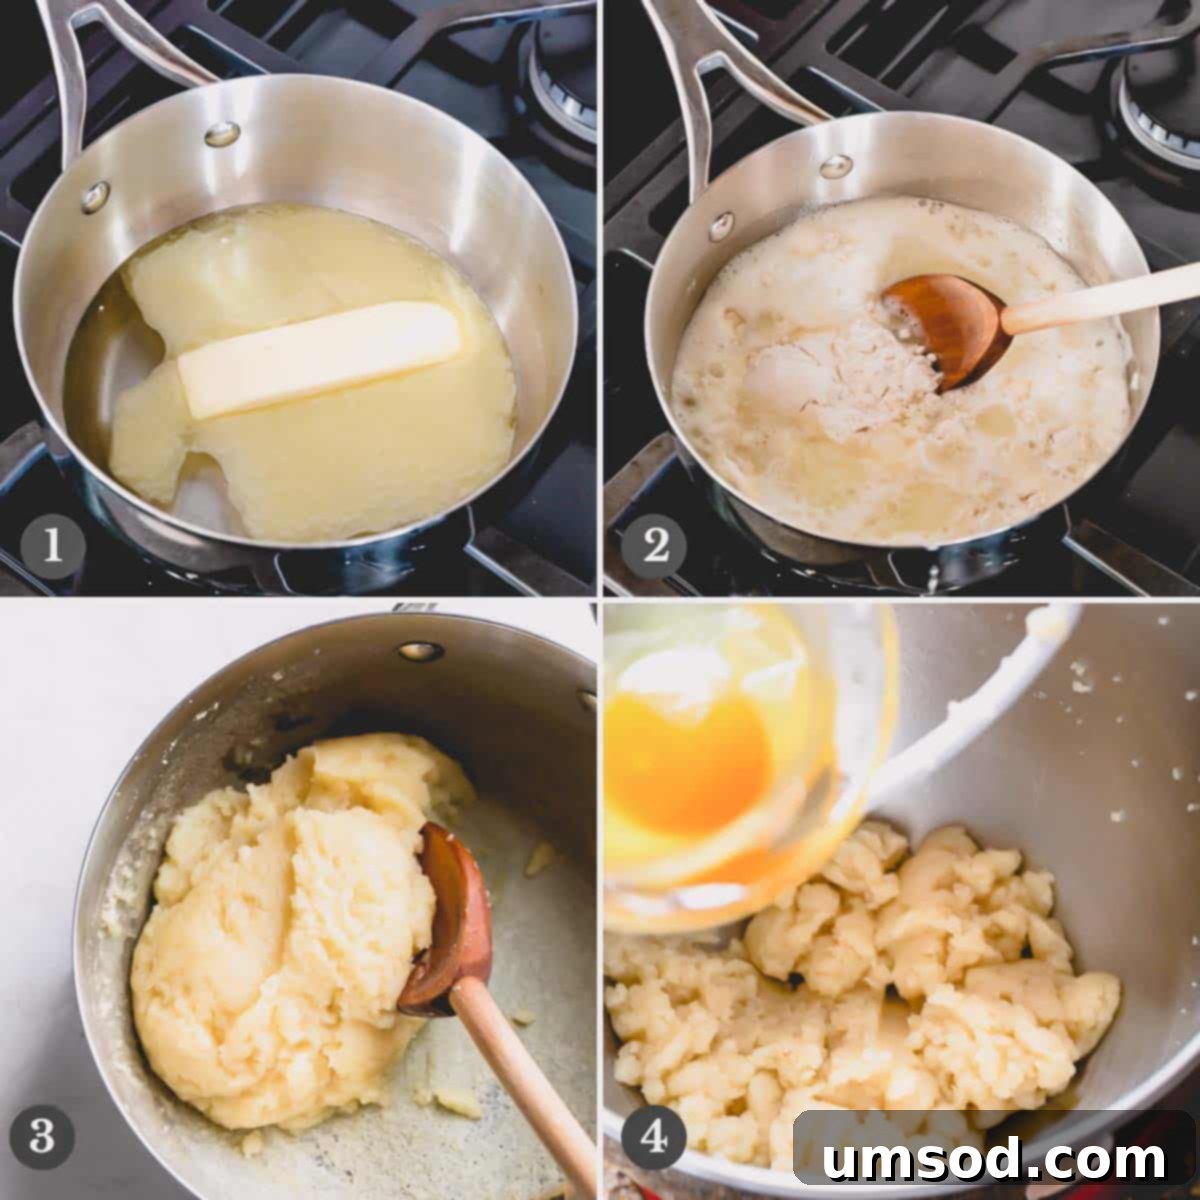
- Begin by combining water, butter, sugar, and salt in a sturdy saucepan. Gently heat this mixture over medium heat, stirring consistently. The goal at this stage is to fully dissolve the sugar and melt the butter without bringing the liquid to a rapid boil too quickly. Once the sugar is completely dissolved and the butter is fully melted, increase the heat to medium-high and bring the mixture to a rolling boil.
- As soon as the butter mixture reaches a vigorous boil, swiftly remove the saucepan from the heat. Add all of the sifted flour into the liquid at once. Immediately and vigorously mix the ingredients with a wooden spoon until all the flour is thoroughly absorbed and no dry streaks remain. This thick, cohesive mixture is now known as panade.
- Return the saucepan containing the panade to the burner and reduce the heat to medium. Continue to cook the dough, mixing constantly with your wooden spoon. You’ll notice the dough begin to form a single, cohesive ball, pulling away from the sides of the pan. Keep mixing and cooking for another 3-4 minutes. During this time, a light crust will form on the bottom of the pan – this is a good sign! (Important Note: This cooking step is crucial for at least 3-4 minutes as it helps to dry out the panade, creating an optimal base for absorbing the eggs that follow.)
- Remove the panade from the heat and transfer it to a mixing bowl. Allow the mixture to cool to room temperature, which helps prevent the eggs from scrambling. Once cooled, begin adding the eggs one at a time. After each egg addition, mix the batter thoroughly until the egg is completely absorbed into the dough before adding the next one. This gradual incorporation ensures a smooth, emulsified batter.
Expert Tip for Eggs
Resist the urge to add more than 2 eggs at a time! This is a critical step because the exact number of eggs needed can vary. You might not require all the eggs listed. The consistency of the dough is key, not a fixed number of eggs. Pay close attention to the visual cues in the video tutorial.
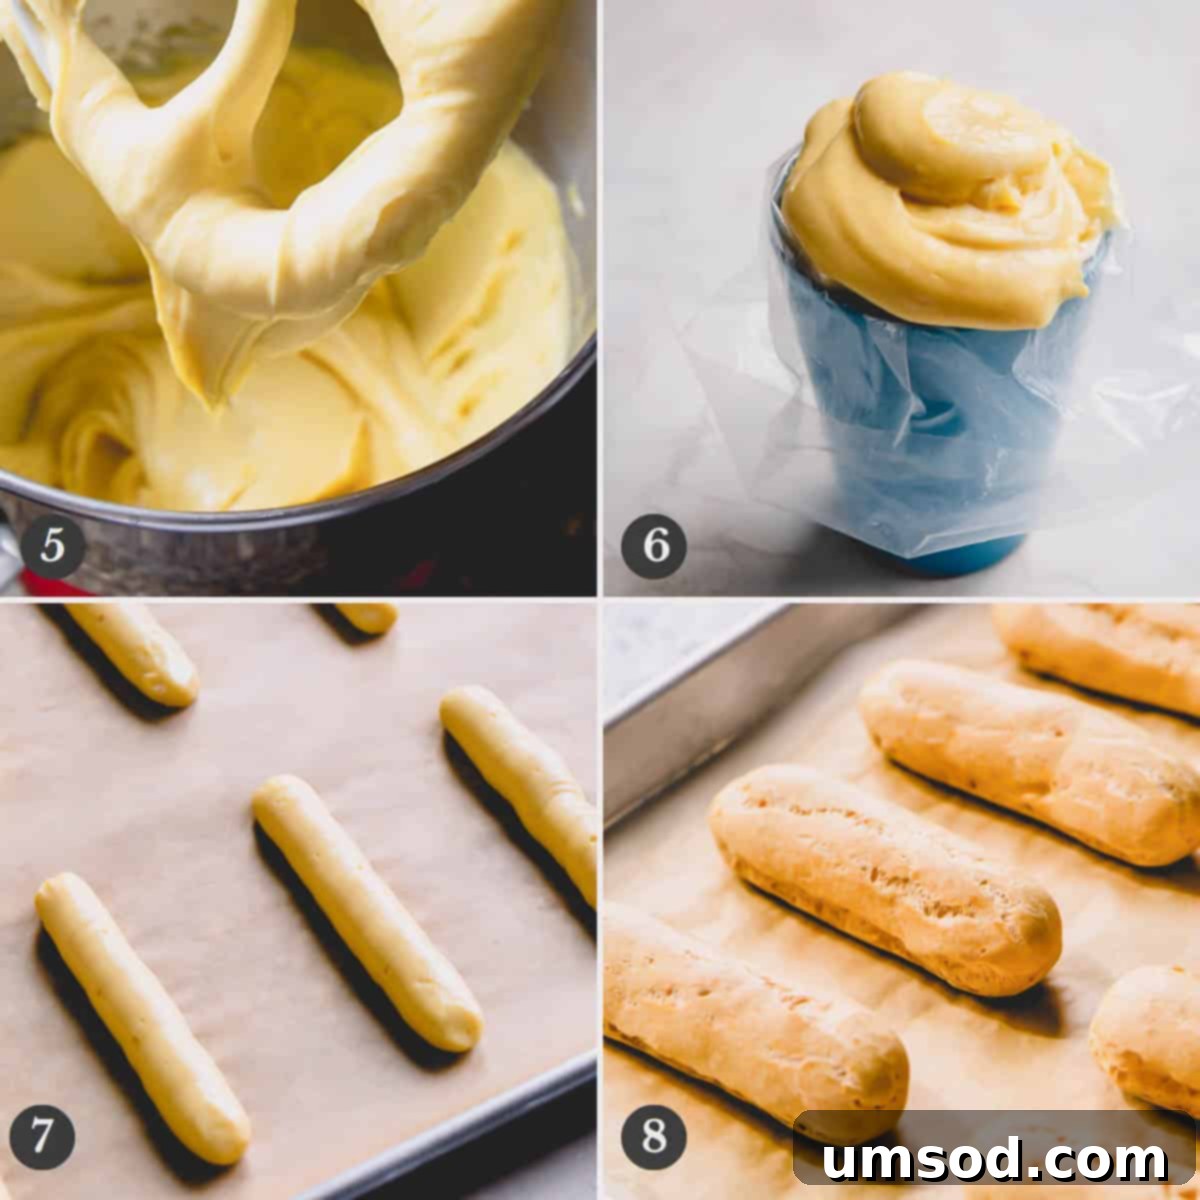
- The finished choux pastry dough should possess a beautiful smooth and shiny appearance. When lifted with a spatula or mixer paddle, it should be thick enough to slowly fall off in a ribbon, but not excessively runny. It should leave a distinct V-shape of batter clinging to the beater – this is the perfect consistency for piping.
- Carefully transfer the prepared batter into a large pastry bag that has been fitted with either a round or star tip (a round tip is traditional for eclairs). For optimal results and easier handling, allow the batter to rest for at least 1 hour at room temperature. Alternatively, you can refrigerate it for up to 2 days; just ensure you tightly close any openings on the pastry bag or container to prevent the batter from drying out.
- On your parchment-lined baking sheets, pipe the batter into neat, skinny logs, approximately 4 inches in length. Space them at least 2 inches apart to allow for expansion during baking. If any of the piped logs have peaked tops, gently smooth them down with a wet fingertip – this ensures even baking and a beautiful shape.
- Bake the eclair shells for approximately 30-35 minutes, or until they are impressively puffed up, golden brown, and feel firm to the touch. It’s best to bake one baking sheet at a time to maintain consistent oven temperature. (Crucial Note: Do NOT open the oven door during the first 25 minutes of baking. Opening the door releases steam, which can cause your delicate shells to collapse, losing their airy structure.)
Crafting the Irresistible Eclair Filling
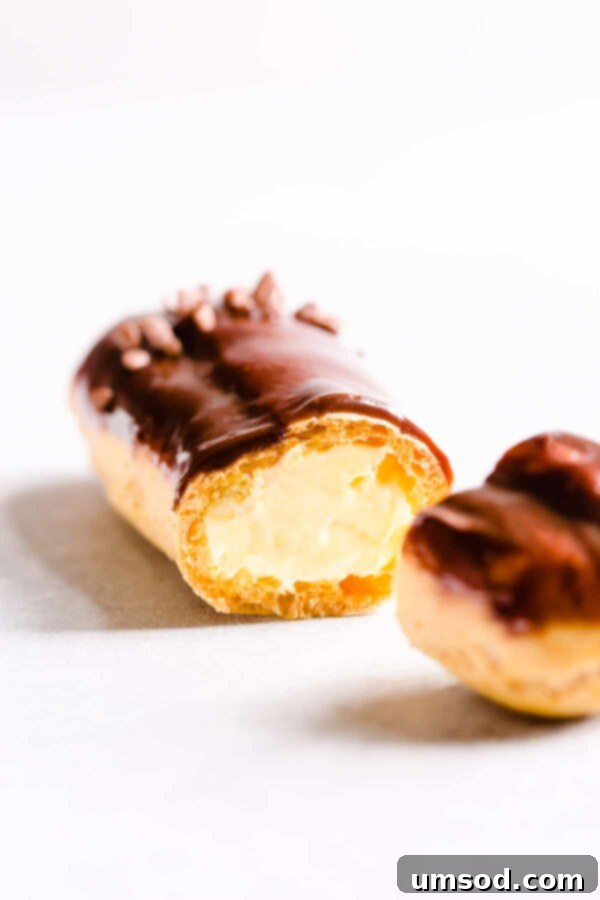
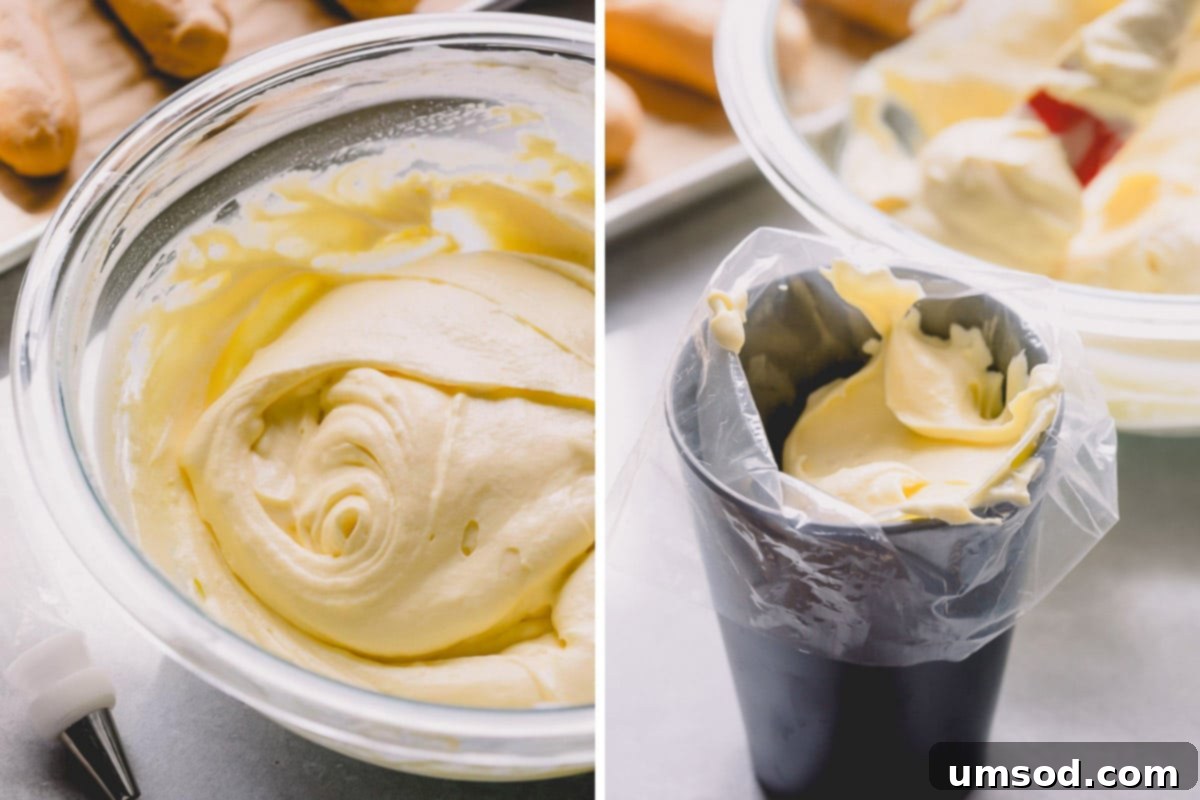
While classic pastry cream (crème pâtissière) is the traditional and utterly delicious filling for eclairs, I have a personal preference that takes it up a notch: a cream diplomat. This exquisite variation combines the rich, smooth texture of pastry cream with the light, airy fluffiness of whipped cream, creating a filling that is truly divine and not overly heavy. The resulting cream diplomat is incredibly silky, flavorful, and perfectly complements the crisp eclair shells. This filling adds a luxurious dimension that elevates your homemade eclairs to gourmet status.
To guide you through the process, I’ve prepared a detailed video tutorial. You can watch my pastry cream video tutorial here for a step-by-step visual demonstration, ensuring your filling turns out perfectly smooth and delicious.
Mastering the Art of Filling Your Eclairs
Once your beautiful eclair shells are baked to perfection, it’s time for the gratifying task of filling them. Before you introduce that delicious cream, I highly recommend an extra step to ensure your shells remain wonderfully crisp. This brief second bake helps dry out any residual moisture within the pastry, guaranteeing an exceptional texture.
- After the eclair shells have finished their initial bake and are cool enough to handle comfortably, prepare them for filling. You can either use a small round piping tip to cut out two small holes on the bottom of each shell, or simply use a small, sharp paring knife to create a discreet slit on the side of each shell. Both methods work well, but I often prefer the piping tip for a cleaner look.
- Once the holes or slits are made, arrange the shells back on a baking sheet with the openings facing upwards. Return them to a preheated oven (or the residual heat of a recently used oven) for an additional 5 minutes. This quick re-bake effectively dries out the inside of the pastry shells, making them incredibly crisp and less prone to becoming soggy once filled.
- After this drying step, transfer the shells onto a wire rack and allow them to cool completely. It is absolutely essential that the shells are at room temperature before you introduce the cold filling; otherwise, the temperature difference could cause condensation and make your shells soft.
- With your shells perfectly prepared and cooled, you’re ready to fill! Choose one of the two excellent options below to expertly inject your delicious cream diplomat.
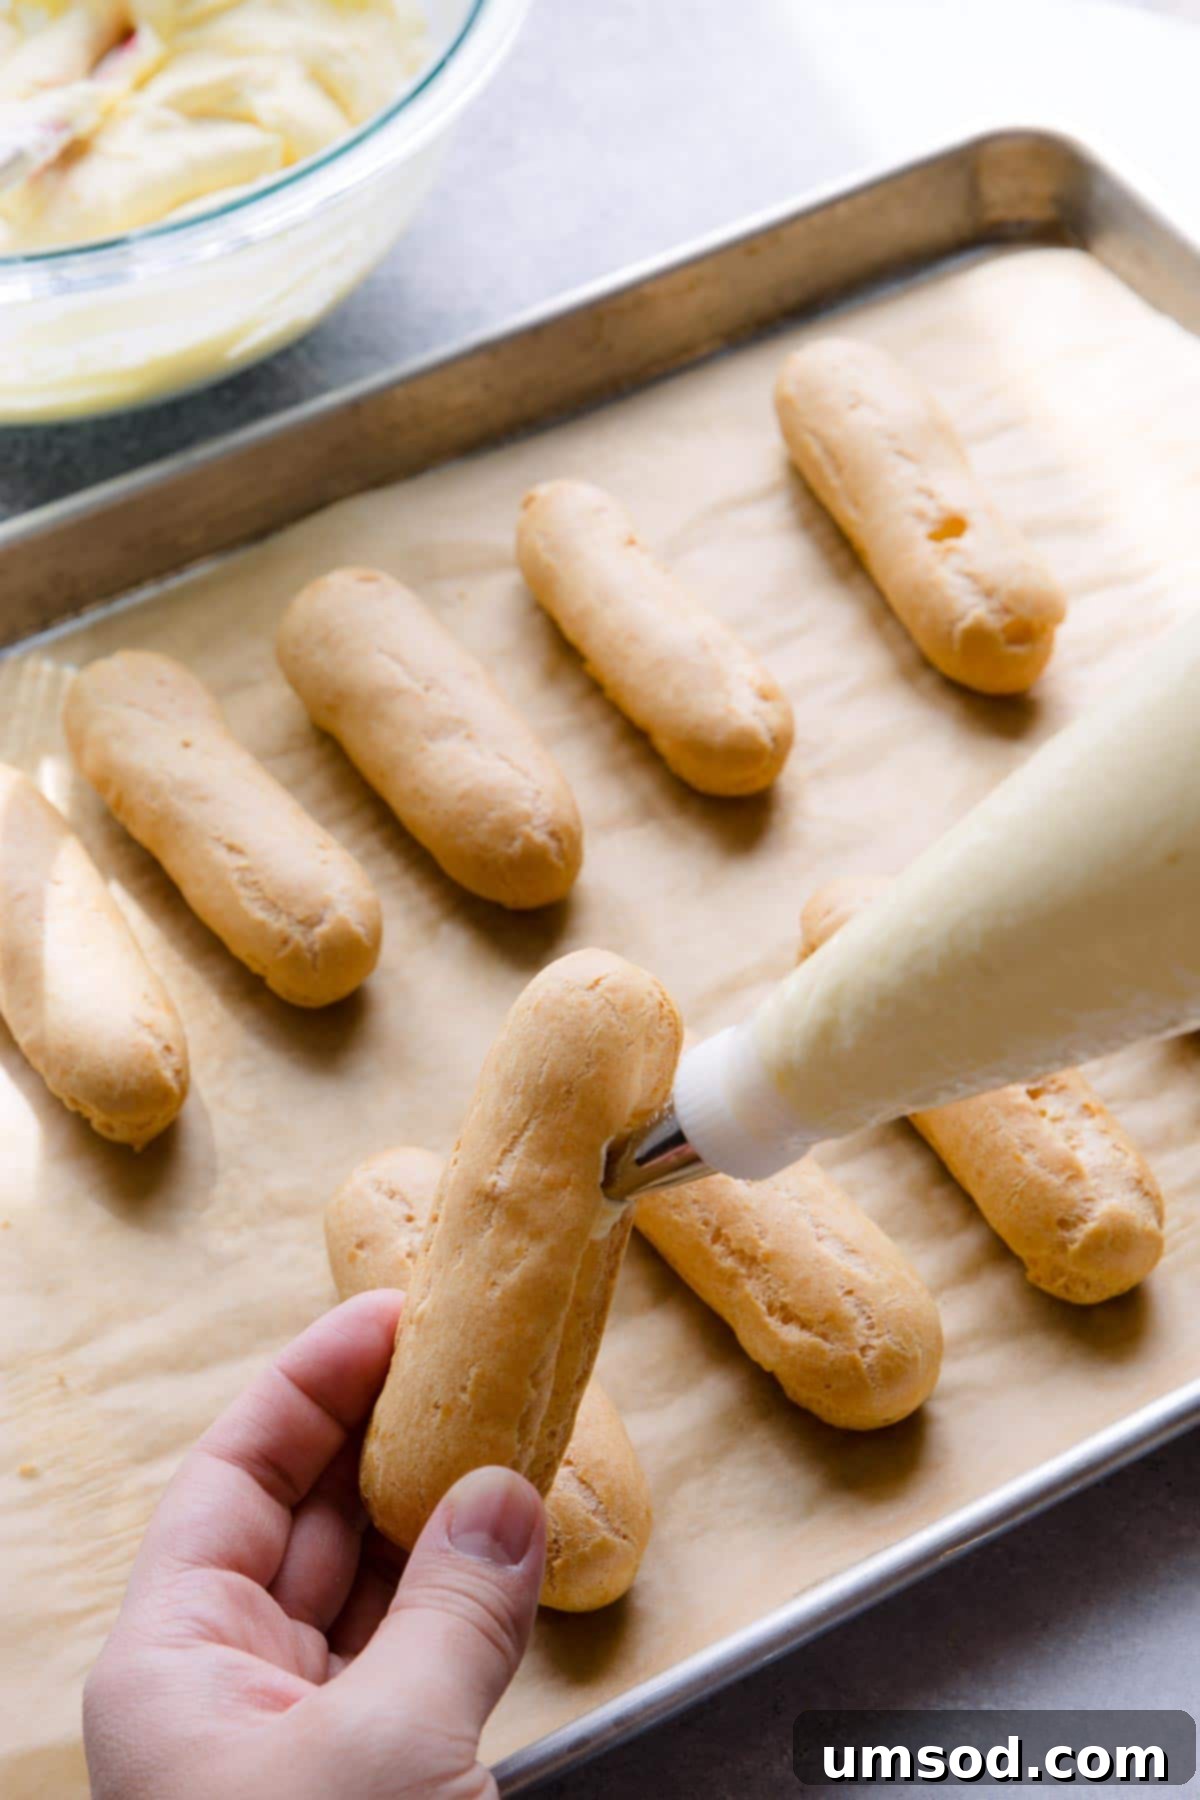
Option 1: Side Slit Filling
This method involves making a small, clean slit along the side of the pastry shells using a sharp paring knife. Once the slit is made, you can insert your piping bag nozzle into this opening and carefully fill the eclairs. This approach is straightforward and effective, offering a classic way to fill your pastries.
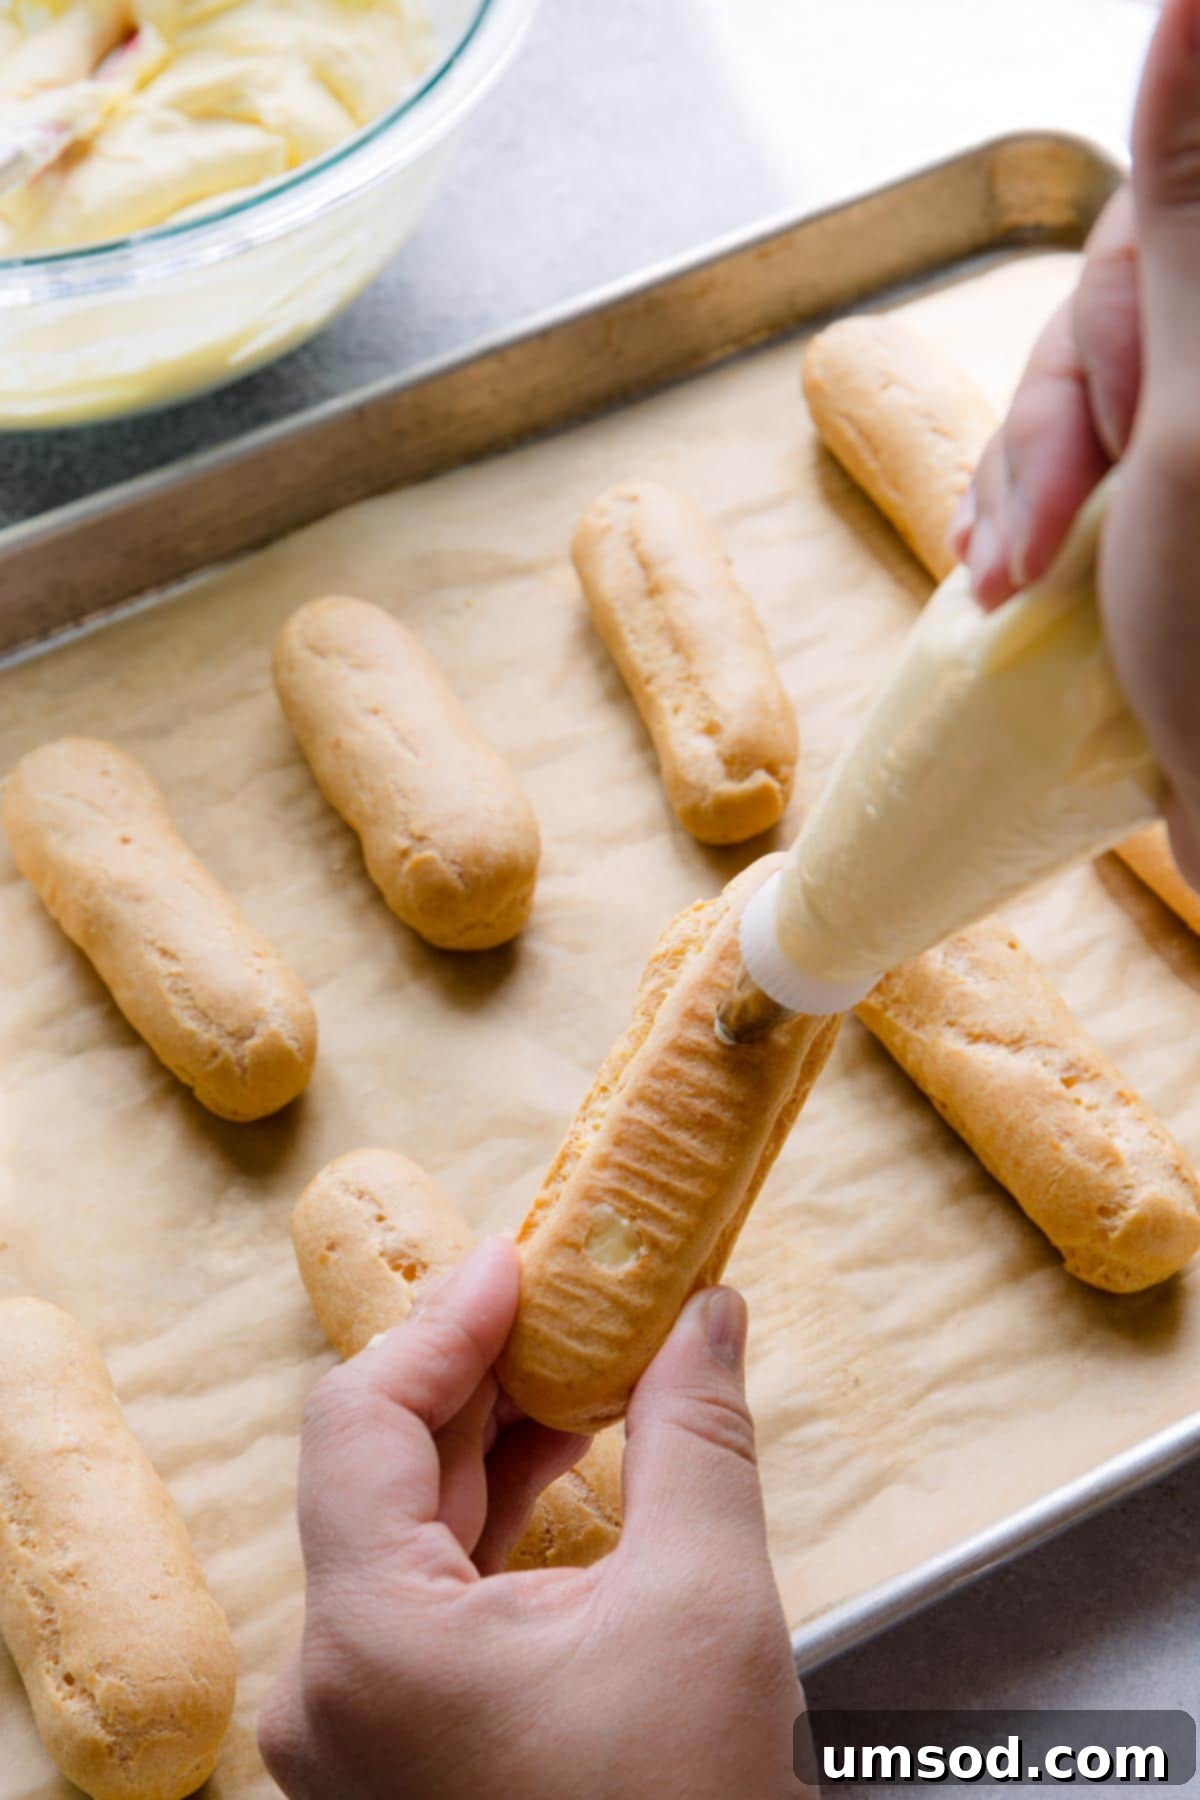
Option 2: Bottom Hole Filling (Recommended)
Alternatively, you can create two small holes on the bottom of the shells using a round piping tip or a similar small, sharp tool. Then, insert your piping bag nozzle into these holes and fill the eclairs. I personally favor this method because it results in a much cleaner and more professional presentation, with no visible slits on the top or sides of your beautifully glazed eclairs.
The Grand Finale: Crafting the Decadent Chocolate Ganache Glaze
The final, irresistible touch to your perfectly filled eclairs is a luxurious chocolate ganache frosting. This rich, glossy glaze not only adds an intense chocolate flavor but also provides that signature bakery-finish that makes eclairs so appealing. It’s a remarkably simple step that yields incredibly impressive results, transforming your pastries into true works of art.
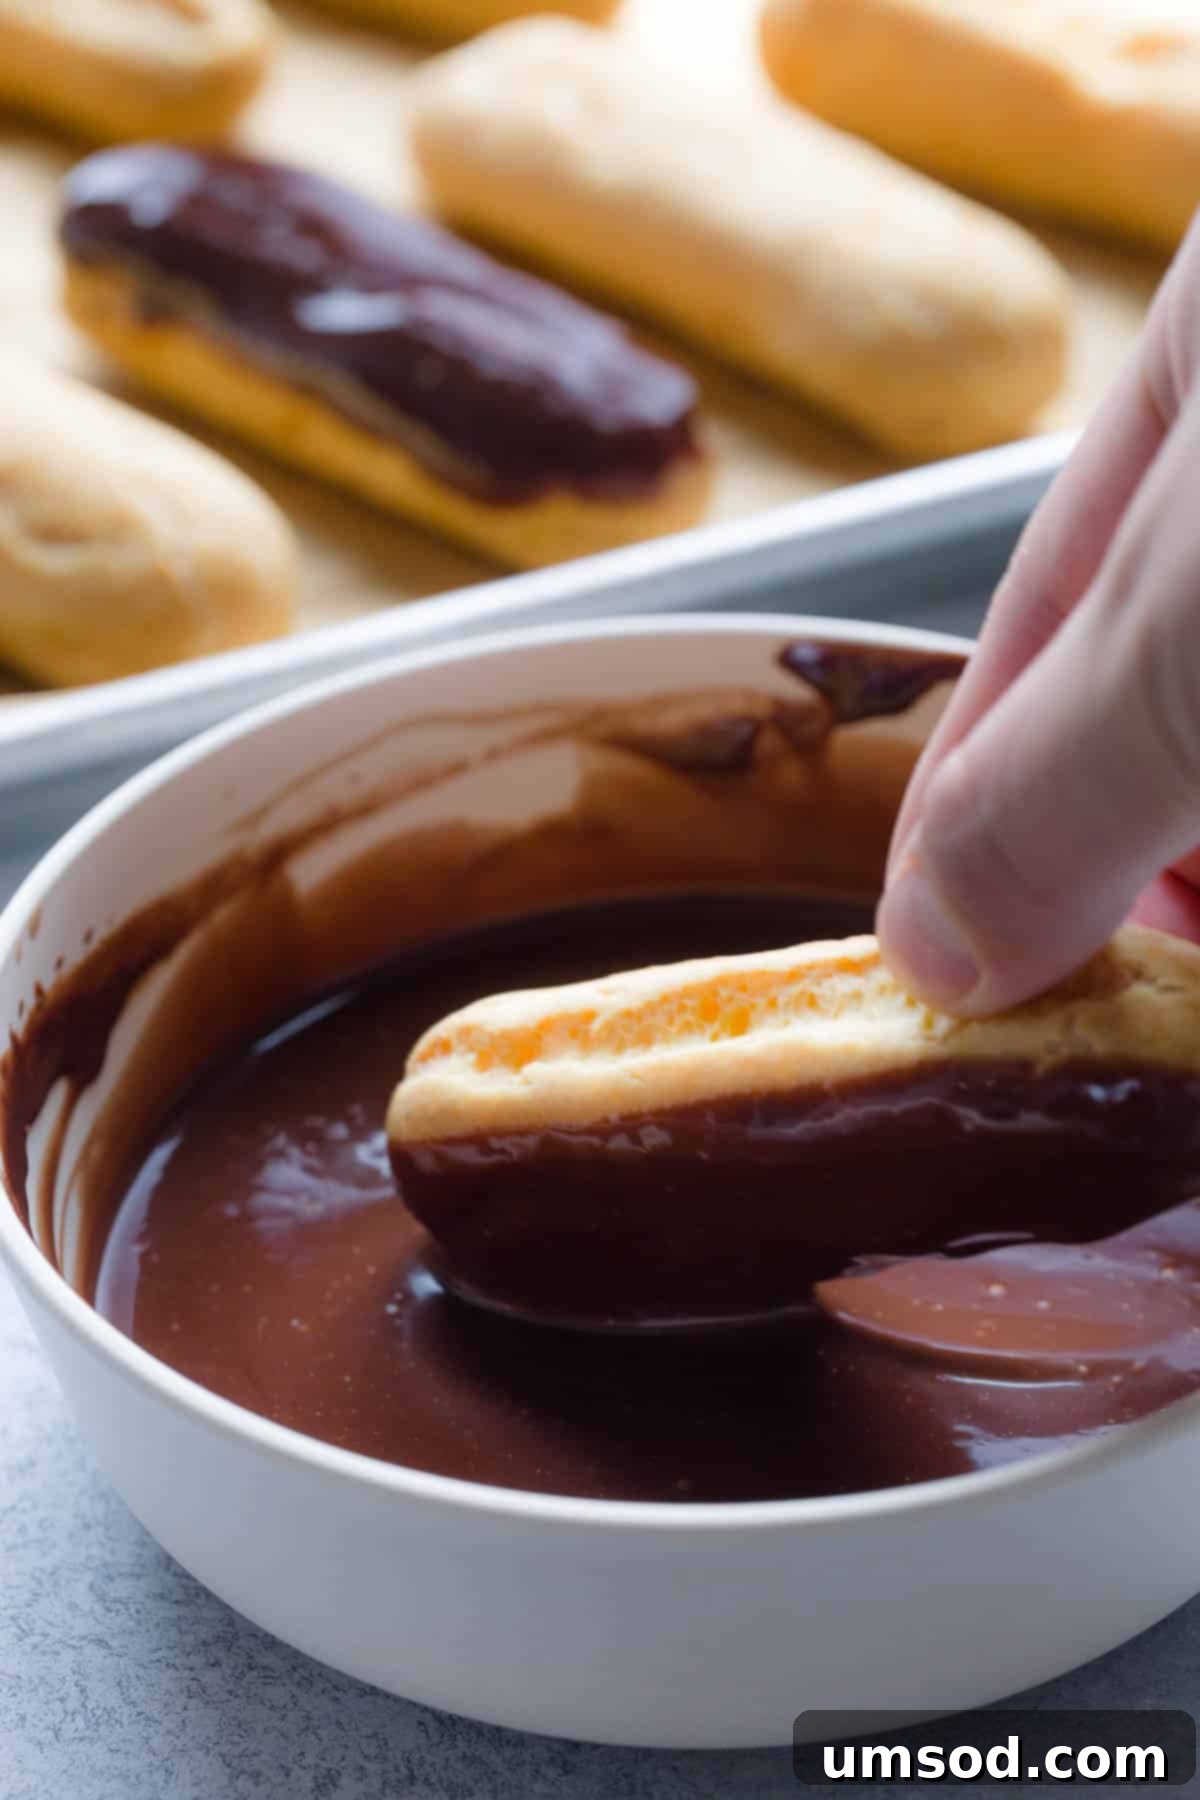
To create this irresistible topping, you’ll whip up a simple yet exquisite dark chocolate ganache. Once your ganache is ready and has cooled slightly to a pourable consistency, simply dip the top of each filled eclair into the luscious glaze. Allow the chocolate glaze a little time to set and firm up – a brief chill in the refrigerator can speed this process – and then, serve your fancy pastries with pride! The contrast between the crisp shell, creamy filling, and smooth chocolate ganache is truly an unforgettable experience.
8 Expert Tips for Achieving Flawless Eclair Shells Every Time
Mastering choux pastry is all about understanding a few key principles. These eight tips are designed to guide you to success, ensuring your eclair shells are consistently light, airy, and beautifully crisp.
- Slow and Steady Simmer: When combining water, butter, sugar, and salt, heat the mixture slowly over medium heat. Stir continuously until the sugar and salt are completely dissolved *before* the mixture comes to a boil. This prevents premature evaporation of too much liquid, which can throw off the delicate ingredient ratio crucial for perfect choux.
- Sift Your Flour: Always sift your flour prior to adding it. Sifting removes any clumps and aerates the flour, allowing it to incorporate smoothly and uniformly into the boiling liquid when added all at once. This creates a lump-free panade.
- Properly Cook the Panade: Once you add the flour, return the mixture to medium-high heat and cook the dough (the “panade”) for about 5 minutes, stirring vigorously and continuously. The primary goal at this stage is to evaporate as much moisture as possible from the dough. A drier panade is critical because it allows the dough to absorb more eggs later, and more eggs ultimately translate to a better rise and a lighter, airier pastry.
- Cool and Incorporate Eggs Gradually: After cooking, cool the panade down to room temperature before adding the eggs. Then, add the eggs one at a time, mixing the dough thoroughly after each addition until the egg is fully incorporated. This gradual process ensures proper emulsification and prevents the dough from becoming too runny too quickly.
- Achieve the Right Batter Consistency: Your finished choux batter should be wonderfully smooth and shiny. When you lift a portion of it with a spatula, it should be thick yet runny enough to slowly fall off, forming a distinct “V-shape” or a “bird’s beak” at the end of the spatula. This indicates perfect consistency for piping and optimal expansion.
- Rest the Batter: After preparing the batter, transfer it into a large pastry bag and allow it to rest for at least 1 hour at room temperature before piping. This resting period allows the flour to fully hydrate and the gluten to relax, resulting in a more stable and pliable dough that will pipe more smoothly and rise more consistently.
- Pipe Skinny Logs: When piping your eclairs, aim for slender, uniform logs. If you pipe wider logs, they will expand significantly during baking, resulting in fatter shells. While perfectly delicious, skinny logs are characteristic of classic eclairs and offer a more elegant presentation and a better shell-to-filling ratio.
- Do NOT Open the Oven Door: This is perhaps the most critical rule for baking choux pastry. During the first 25 minutes of baking, resist the urge to open the oven door. The initial high heat and trapped steam are essential for the eclairs to puff up dramatically and set their structure. Opening the door releases this crucial steam, causing a sudden drop in temperature and almost guaranteeing your delicate shells will collapse.
Chocolate Eclair Recipe: Frequently Asked Questions
For the absolute best taste and texture, it’s highly recommended to serve freshly filled eclairs within 6 hours of assembly. Beyond this time, the moisture from the filling can start to soften the delicate choux pastry shells, making them less crisp. However, if you have leftovers, they can be safely refrigerated in an airtight container for up to 3 days, though the shells may lose some of their initial crispness.
While both eclairs and profiteroles are delightful desserts crafted from the same versatile choux pastry, they have distinct differences in their shape and traditional fillings. Eclairs are characterized by their elongated, log-like shape, typically filled with a rich pastry cream (crème pâtissière) and elegantly topped with a chocolate ganache glaze. Profiteroles, on the other hand, are smaller, round-shaped pastries often filled with ice cream or whipped cream and frequently drizzled with chocolate ganache or a sweet sauce.
Eclairs are unequivocally a classic French dessert. They are a staple of French patisseries and are celebrated worldwide as an iconic example of French culinary artistry.
The primary difference lies in their shape and typical filling. Cream puffs (or choux à la crème) are small, spherical choux pastries, often filled with light whipped cream or a simpler custard. Eclairs, as discussed, are elongated choux pastries traditionally filled with a richer pastry cream or crème diplomat.
Eclairs are always eaten cold. The creamy filling is best enjoyed chilled, and a cold eclair offers a refreshing contrast to its crisp shell and rich glaze. Serving them cold also helps the ganache set perfectly.
A perfectly made eclair shell should have a crisp, delicate exterior that gives way to a light, airy interior. While the shells will naturally soften slightly from the moisture of the wet filling, like pastry cream or custard, they should never be soggy. The ideal eclair offers a delightful textural contrast between the slightly yielding, crisp shell and the smooth, creamy filling.
Watch & Learn: Eclairs Video Tutorial
Chocolate Eclair Recipe
Shinee Davaakhuu
1 hour
35 minutes
1 hour
25 minutes
3 hours
24
eclairs
Saved Recipe
Pin Recipe
Comment
Print Recipe
Ingredients
For Pastry Shells:
-
1
cup
(240
ml)
water
-
½
cup
(115
g)
unsalted butter
-
1
tablespoon
(15
g)
granulated sugar
-
¼
teaspoon
coarse kosher salt
-
1
cup
(125
g)
all-purpose flour
-
4-5
large eggs
at room temperature
For Pastry Cream:
-
2
cups
(500
ml)
milk
-
1
teaspoon
pure vanilla extract
-
4
egg yolks
-
1/3
cup
(70
g)
granulated sugar
-
2
tablespoons
(30
g)
all-purpose flour
-
2
tablespoons
(16
g)
cornstarch
-
½
cup
(120
ml)
heavy whipping cream
cold
For Chocolate Ganache:
-
½
cup
(120
ml)
heavy whipping cream
-
¼
cup
(50
g)
semi-sweet chocolate chips
-
1
tablespoon
unsalted butter
optional
Instructions
To make the eclair shells:
- Preheat oven to 375°F (190°C). Line 2 baking sheets with parchment paper, or silicone mat.
- In a medium saucepan, combine water, butter, sugar and salt. Slowly heat the mixture over medium heat, stirring frequently to dissolve sugar and melt the butter. Once sugar is dissolved and butter is melted, increase the heat to medium high heat and bring the mixture to a boil.
- Meanwhile, sift the flour.
- When the butter mixture comes to a boil, remove the saucepan from heat and add flour all at once. Quickly mix the mixture until all the flour is absorbed. (We just made panade!)
- Put the saucepan back to burner and reduce the heat to medium. Cook the dough, continuously mixing with a wooden spoon. The dough will start to form into a ball. Keep mixing for another 3-4 minutes until light crust forms on the bottom of the pan. (Note: It’s important to cook for at least 3-4 minutes to dry out the panade.)
- Transfer the dough into a mixing bowl with paddle attachment and mix it for a few minutes on low speed until the mixture is at room temperature, about 2 minutes. (No mixer? No problem. You can mix it with a wooden spoon!)
- Then add eggs one at a time, mixing the batter well after each addition. This will help to get egg absorbed into the dough quicker. Don’t add more than 2 eggs at a time! This is important, as you might not need to add all the eggs. The dough should be smooth and shiny, thin enough to slowly fall into a ribbon, but too runny.
- Transfer the batter into a large pastry bag, fitted with a round or star tip. Rest the batter for at least 1 hour at room temperature, or refrigerate for up to 2 days. (Note: Make sure to close any opennings to avoid drying out the batter.)
- Pipe the batter into 4-inch skinny logs at least 2 inches apart. Level the peaked tops with a wet fingertip.
- Bake the shells for 30-35 minutes, or until the shells are puffed up and golden brown, one baking sheet at a time. (Note: Don’t open the oven door the first 25 minutes.)
- Once the shells are baked, cool until safe to handle, cut out 2 wholes on the bottom using a round piping tip, or simply make a small slit on the side of shells, using a small sharp paring knife. Arrange the shells back on the baking sheet with the holes facing up. And bake them again for another 5 minutes. This dries out the inside of pastry shells and make them extra crisp.
- Transfer the shells onto a wire rack and cool completely before filling.
To make the Creme Diplomat filling:
- In a medium saucepan, bring milk and vanilla extract to a boil. Once it boils, turn the heat off.
- In a separate bowl, beat egg yolks with sugar until pale. And then stir in flour and cornstarch.
- To temper the egg yolk mixture, take about ½ cup of hot milk and add it into the egg yolk mixture, while stirring vigorously.
- Now, add the tempered egg mixture back into the saucepan with remaining milk. Cook it over medium heat, stirring constantly, until it comes to a boil, about 5 minutes. (Note: It’s normal if the mixture looks curdled in the beginning, be patient and it’ll smooth out.) To see if the mixture is boiling, stop whisking for a moment. If it’s burping bubbles, cook for 1 minute and remove from heat.
- Run the custard through a sieve, if desired, and transfer into a clean bowl and cover with a plastic wrap, so it touches the cream and refrigerate it for at least 2 hours. (TIP: Don’t be alarmed if your chilled pastry cream looks too thick and lumpy. Simply whisk it until smooth again.)
- Whip heavy whipping cream till hard peaks form. Fold in the whipped cream into the chilled pastry cream and gently fold until well combined. Transfer the filling into a large pastry bag fitted with a round tip.
To make the chocolate glaze:
- Heat heavy cream until just simmer. Do not boil. Pour it over chocolate chips, and let it sit for good 2 minutes. Then stir it until smooth for couple minutes. Stir in butter to add some shine.
To assemble the eclairs:
- Pipe the filling through the prepared holes on the bottom or a side slit. And then dip each filled eclair in the chocolate ganache.
- Let the eclairs set for about 1 hour in the fridge before serving.
⭐️ Did you make this recipe?
Please leave a review and let us know how you liked it!
Video
Tips & Notes
Make-Ahead Tips:
· Unfilled pastry shells can be stored at room temperature for 1 day, or frozen for up to 3 months.
· Pastry cream also can be prepared in advance and refrigerated until ready to use. Make sure to cover the filling with a plastic wrap touching the entire surface of the cream.
· It’s ideal to assemble the eclairs the day of serving. Assembled eclairs should be refrigerated.
Nutrition
1
filled and glazed eclair
153
kcal
11
g
3
g
11
g
5
g
83
mg
Dessert
French
Did you make this?
Leave a rating and your feedback. Thank you!
This recipe was originally published on January 22, 2013, and has since been updated and refined for your baking pleasure.
