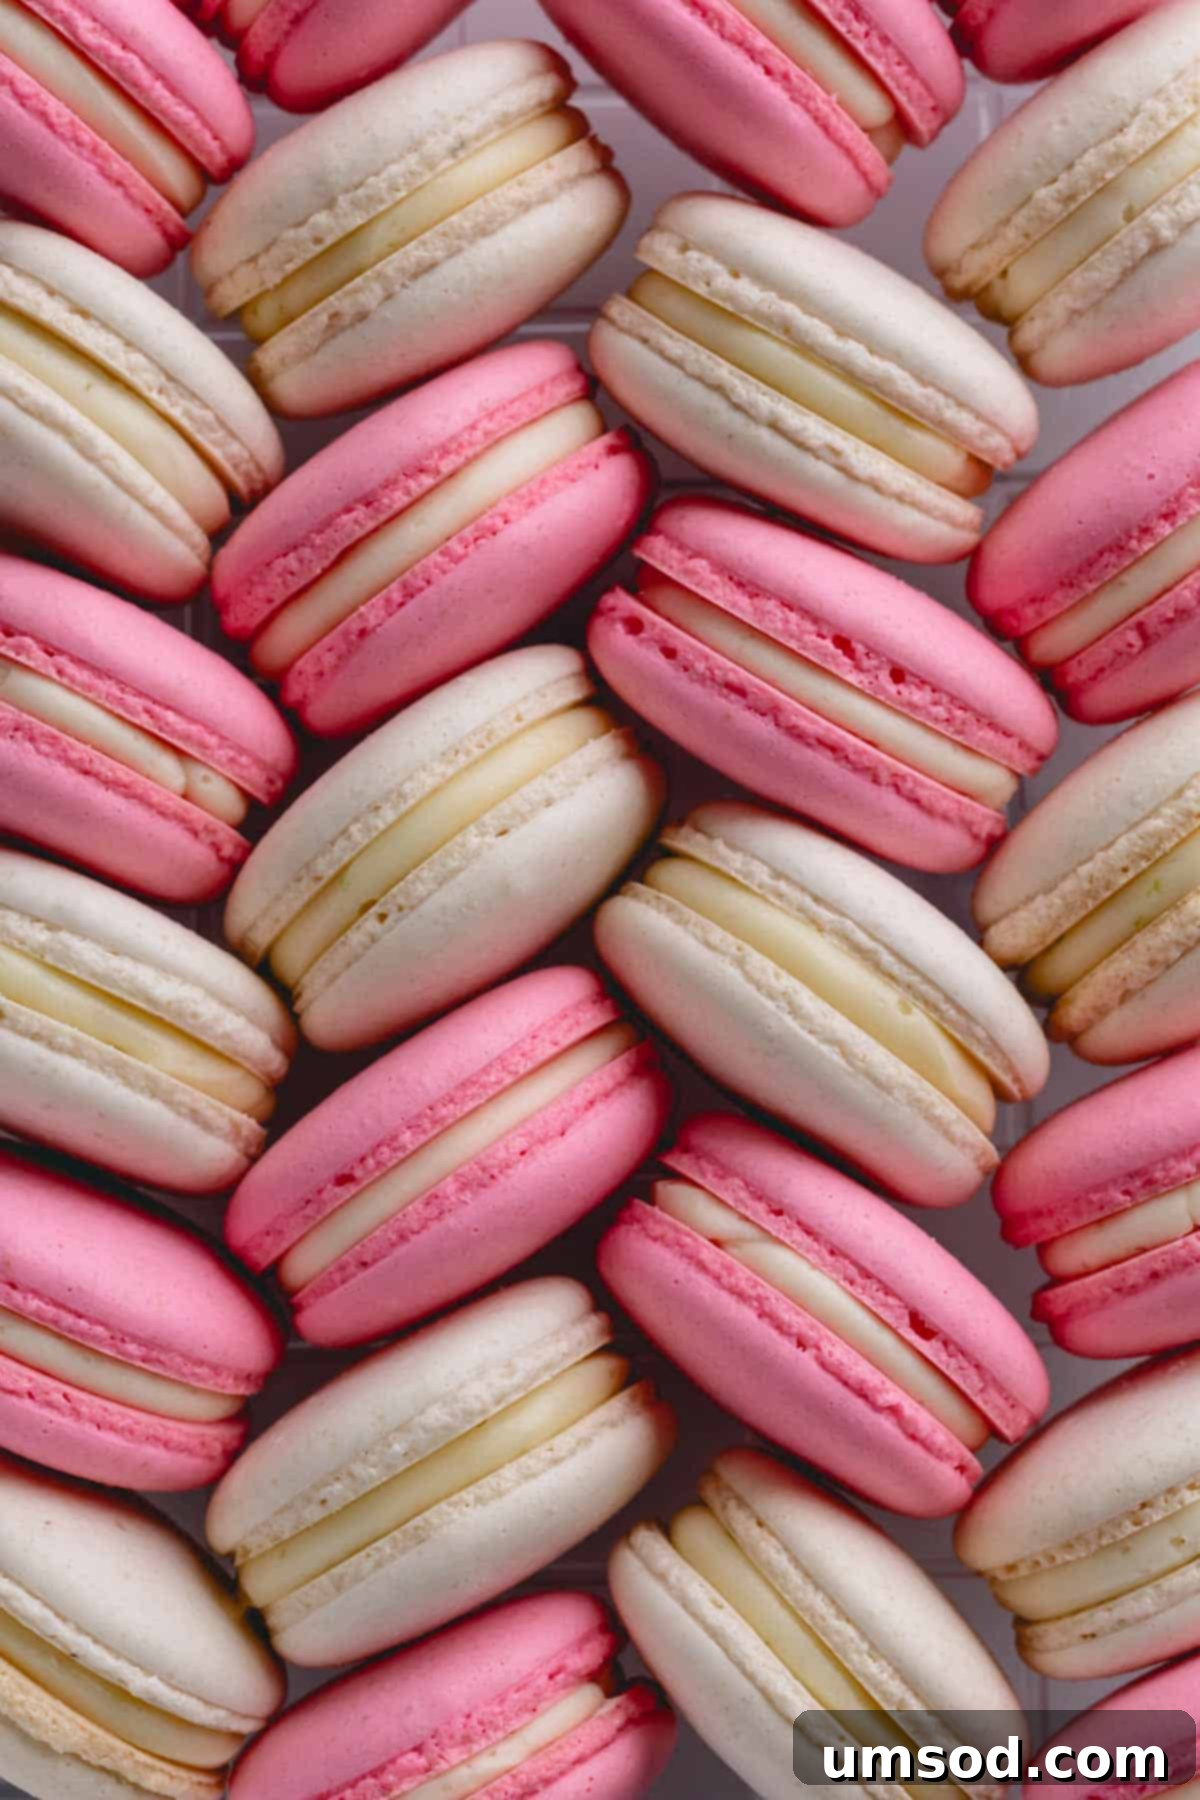
Unlock the secrets to baking exquisite classic French macarons with my expertly refined **easy macaron recipe**. This comprehensive guide provides an in-depth explanation of crucial techniques, accompanied by step-by-step visuals and a detailed video tutorial. You’ll learn how to consistently achieve perfectly formed macaron shells, boasting beautiful “feet” and irresistibly smooth, delicate tops.

Are you finally ready to conquer the delicate art of crafting French macarons? I am absolutely thrilled to guide you on this exciting culinary journey!
Consider this your **ultimate and indispensable resource** for mastering these elegant, dainty cookies. I’m holding nothing back – every tip, trick, and technique I’ve perfected over years of baking is laid out here to ensure your success. Get ready to impress yourself and everyone you share these delightful treats with!
Macarons vs. Macaroons: Understanding the Difference
It’s a common misconception, but did you know that macarons and macaroons are not merely different spellings of the same cookie? In reality, they are two entirely distinct and delightful treats!
- Macaroons [mak-a-roon] are typically dense, chewy coconut cookies, often featuring a base dipped in rich chocolate. They are rustic and wonderfully simple.
- French Macarons [mak-a-ron], on the other hand, are sophisticated, meringue-based confections made with finely ground almonds. These delicate, crisp-on-the-outside, chewy-on-the-inside shells are exquisitely filled with a variety of gourmet options, such as velvety buttercream, rich ganache, or tangy fruit curds.
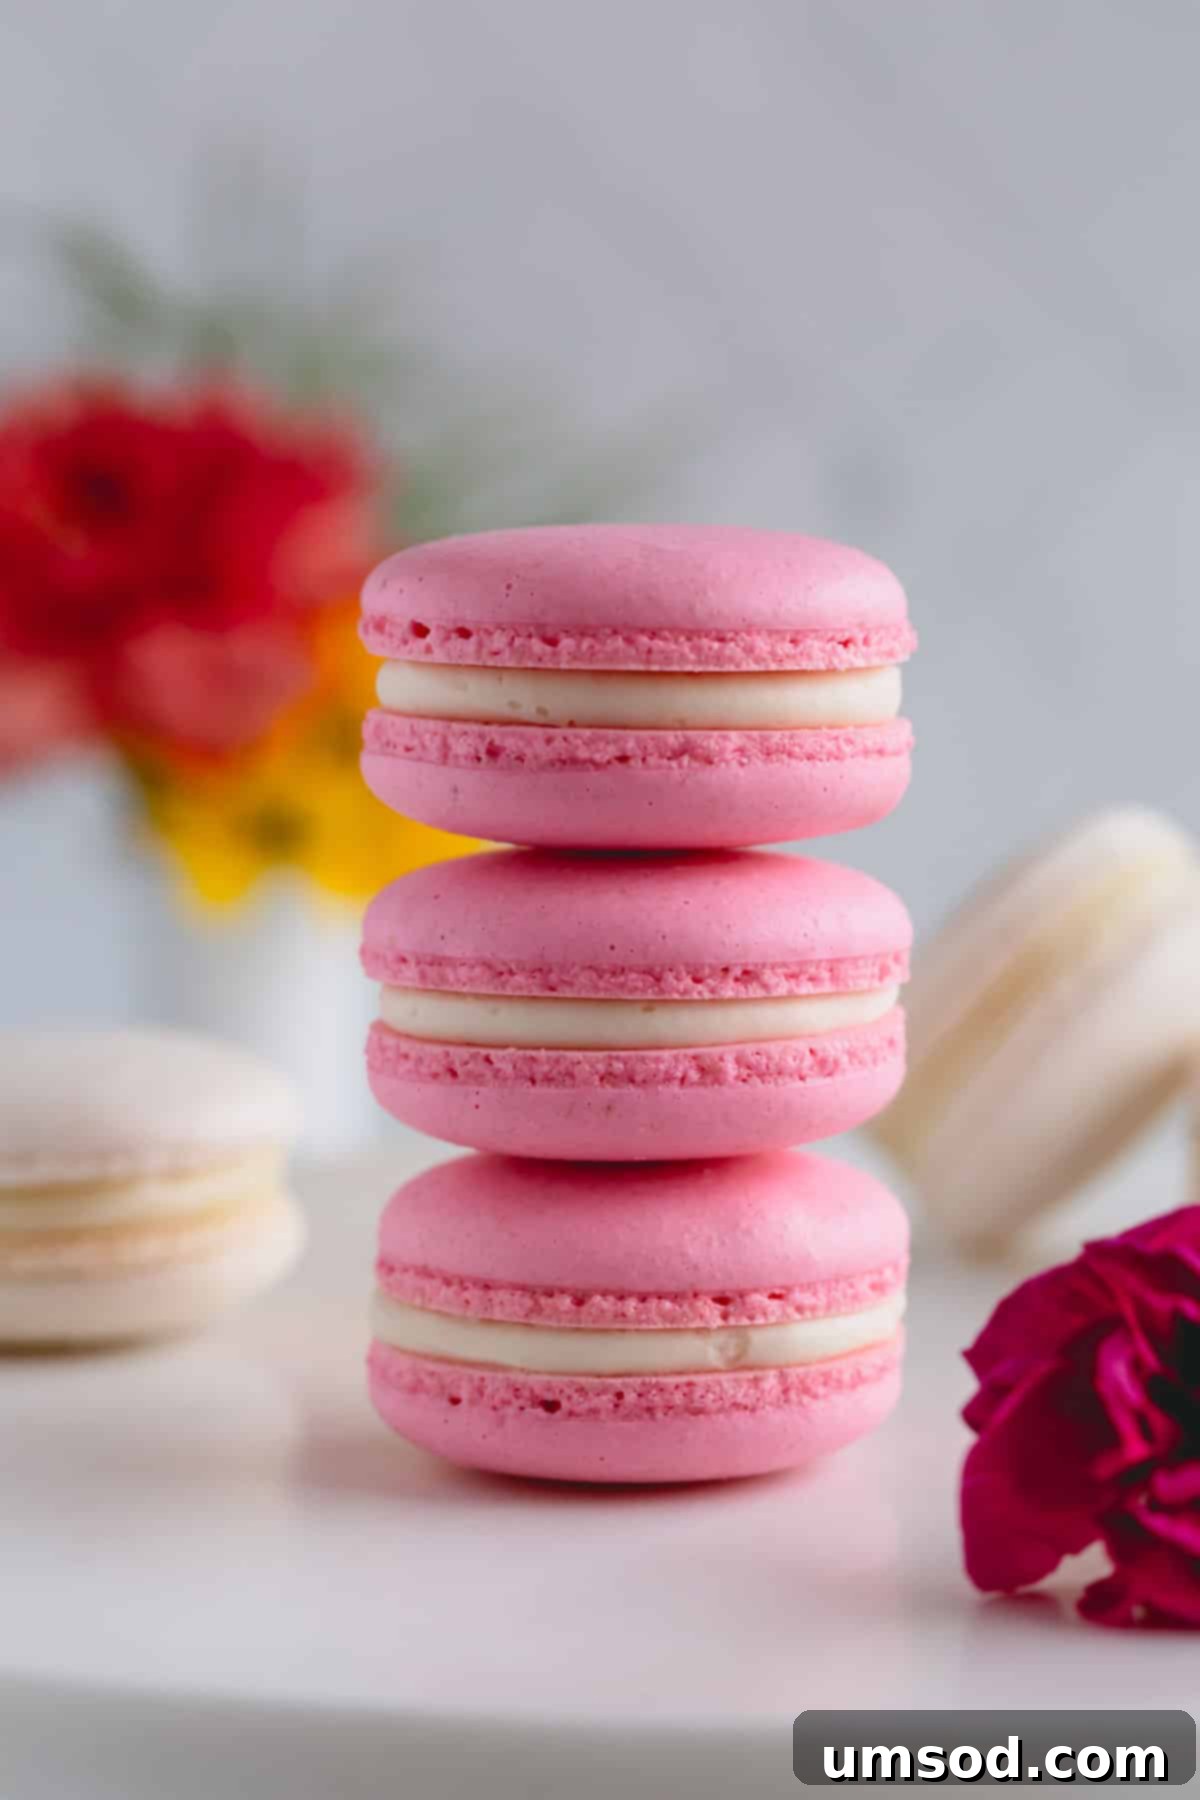
Why You’ll Adore This Macaron Recipe: More Than Just a Recipe
While some call them “foolproof,” I believe mastering macarons is less about a magic recipe and more about understanding and perfecting the **technique**. These finicky yet rewarding cookies demand precision, patience, and a keen eye for detail. This guide is designed to empower you with all the intricate details, allowing you to bake perfect macarons with unwavering confidence, batch after delicious batch.
My foundational macaron recipe, first shared in 2013, has been successfully reproduced by hundreds of my loyal readers, consistently yielding spectacular results. I am confident that you, too, can achieve this level of baking excellence!
Here’s what makes my French macaron recipe truly special and why it will become your go-to guide:
- Accessible French Meringue Method: There are three primary methods for preparing meringue: Italian, French, and Swiss. For the home baker, the French meringue method is by far the most approachable and straightforward, making it my preferred and recommended approach. It eliminates the need for hot sugar syrups, simplifying the process without compromising stability.
- Optimized Sugar Content: I have meticulously tested and refined this recipe countless times to utilize the absolute minimum amount of sugar possible, ensuring a perfectly balanced sweetness without sacrificing the delicate texture or structural integrity of the macaron shells. This means a less cloyingly sweet, more elegant cookie.
- Community-Validated Success: This isn’t just a recipe I’ve tested myself; it has been tried, loved, and successfully recreated by a vast community of my readers. Their consistent positive feedback stands as a testament to its reliability and clarity, proving its effectiveness for bakers of all skill levels.
Key Ingredient Notes for Perfect Macarons
French macaron shells require only a handful of ingredients – typically just five, with one being optional. Because of this simplicity, the quality and precise handling of each ingredient are paramount to achieving success. Understanding their role is critical:
- Egg Whites: The foundation of a stable meringue and, consequently, perfect macarons, lies in high-quality egg whites. Always opt for fresh eggs, carefully separating the whites from the yolks to avoid any contamination. Precision is key, so weigh your egg whites accurately. I’ve also had excellent results using carton egg whites; however, be sure to scrutinize the labels and avoid any brands that state “not for meringue” as they may contain additives that inhibit proper whipping. Room temperature egg whites are crucial as they whip to a greater volume and more stable foam than cold whites.
- Almond Flour: This is the defining ingredient for macaron texture. You must select **super-fine** almond flour with a light beige color and a fluffy, non-greasy texture. Coarse, oily, or yellowish almond flour will negatively impact the smoothness of your shells and can lead to an undesirable blotchy appearance.
- Powdered Sugar (Confectioners’ Sugar): While tempting to make your own, I strongly advise against it for macarons. Commercial powdered sugar typically contains a small amount of cornstarch, which is a vital component. This cornstarch plays a crucial role in absorbing excess moisture, helping to stabilize the meringue and contribute to the smooth, tender interior of the finished cookies.
- Granulated Sugar: For the meringue, using **fine granulated sugar** or caster sugar (also known as baker’s sugar) is essential. Its finer crystals dissolve more quickly and thoroughly into the egg whites, preventing a grainy texture in your shells and promoting a stable, glossy meringue.
- Cream of Tartar (Optional): While not strictly mandatory, cream of tartar is a highly recommended “extra insurance” ingredient. It acts as a stabilizer for the egg whites, helping them whip up faster, achieve greater volume, and form a sturdier, more resilient meringue that is less prone to collapsing.

Essential Tools for Macaron Mastery
To truly master macarons, having the right tools can make a significant difference, turning potential frustration into consistent success. For a comprehensive dive into all the gadgets, you can check my post on 9 essential tools to make macarons. However, here’s a quick rundown of the must-haves:
- Kitchen Scale: This is arguably the most critical tool for macaron making. Baking, especially for delicate confections like macarons, is a science. Inaccurate measurements by volume (cups) are a leading cause of failure. A digital kitchen scale ensures precise ingredient ratios, eliminating guesswork and dramatically increasing your chances of success.
- Sifter or Fine Mesh Strainer: Essential for achieving that signature smooth macaron shell. Whether you use a traditional sifter or a fine mesh strainer, this tool is vital for thoroughly combining and aerating your dry ingredients (almond flour and powdered sugar), removing any lumps and ensuring a light, even texture.
- Electric Mixer (Stand or Handheld): While it’s technically possible to whip egg whites by hand, it’s an arduous and often inconsistent process. An electric mixer is highly recommended for achieving the stable, stiff meringue required. Both stand mixers and powerful electric hand mixers work effectively, saving you time and arm strength.
- Heavy-Duty Baking Sheets: Sturdy, high-quality baking sheets are crucial for even heat distribution, which prevents uneven baking and browning. Avoid dark-colored sheets, as they tend to absorb more heat and can cause the macaron bottoms to brown too quickly.
- Other Handy Miscellaneous Tools:
- 16-inch Piping Bag: A generous size allows for comfortably holding all your macaron batter without needing to refill.
- Wilton 2A Round Tip: This specific piping tip is widely recommended for creating consistently round, beautifully formed macaron shells.
- Parchment Paper or Silicone Baking Mats: Both provide an excellent non-stick surface for baking. Silicone mats (like Silpat) are reusable and offer superior heat distribution.
- Large Silicone Spatula: Essential for the delicate “macaronage” process, allowing you to fold the batter gently yet thoroughly without deflating the meringue.
- Oven Thermometer: Even the most advanced ovens can have temperature fluctuations. An accurate oven thermometer is indispensable for verifying your oven’s actual temperature, ensuring consistent baking and preventing common issues like hollows or cracked shells.
How to Make French Macarons: A Step-by-Step Guide to Perfection
1. Prepare and Sift the Dry Ingredients
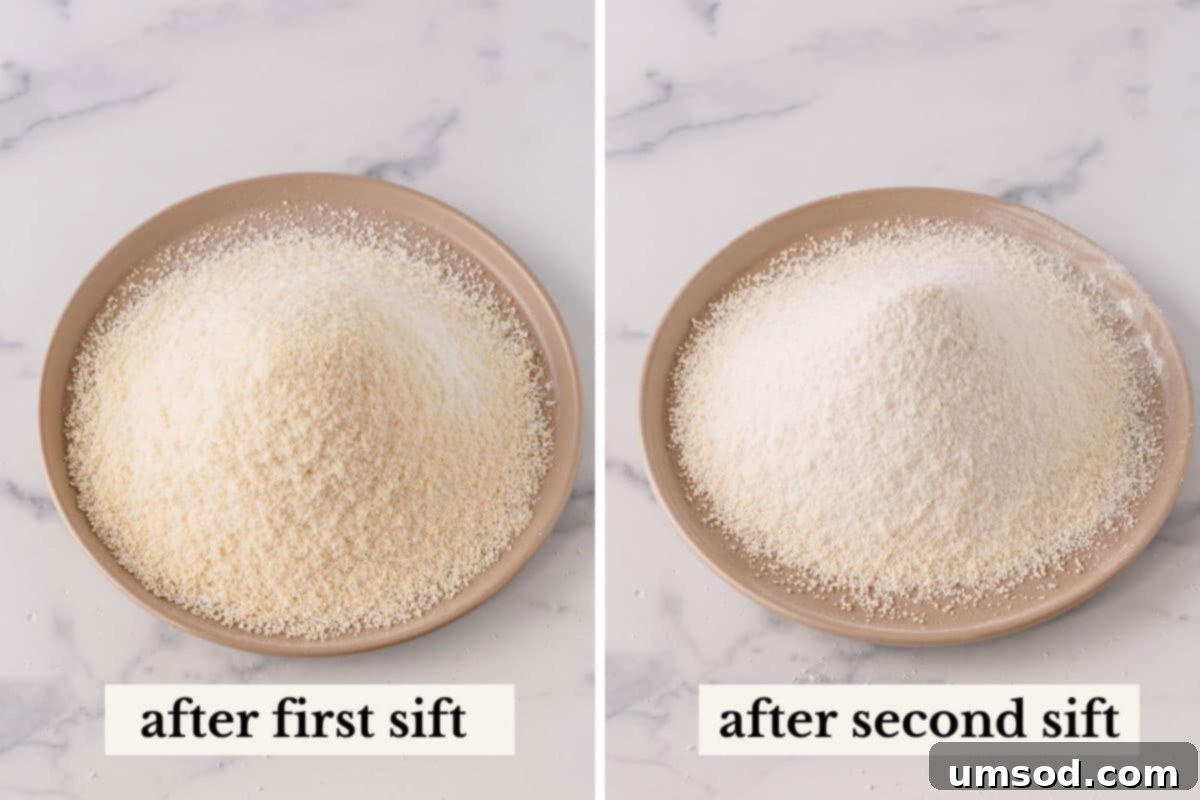
The first critical step to achieving flawlessly smooth macaron shells is preparing your dry ingredients. **Sift the almond flour and powdered sugar together not once, but twice.** This double sifting process is crucial for two main reasons: it ensures both ingredients are thoroughly combined and, more importantly, it aerates them. This aeration contributes to the beautiful, full interior texture of your finished macarons.

- Important Note: Unless your almond flour is noticeably lumpy or clumpy, I generally do not recommend processing the dry ingredients in a food processor. Over-processing almond flour can release its natural oils, leading to an oily mixture that can result in blotchy or uneven macaron shells. Sifting twice is sufficient for achieving the desired fine texture.
Dealing with Chunky Almond Bits
After sifting, it’s perfectly normal to have a small amount of chunky dry ingredients left in your sifter. If the amount is minimal – generally up to 2 tablespoons – there’s no need to replace it. Simply discard these larger almond bits. Attempting to force them through the sifter can introduce excess oil or a coarse texture that is undesirable for delicate macaron shells.

2. Crafting the Perfect French Meringue
The meringue is the backbone of your macarons, providing structure and lift. In a large, impeccably clean mixing bowl, combine your room temperature egg whites, fine granulated sugar, salt, and cream of tartar (if you are using it). The “clean” aspect is non-negotiable – any trace of grease can prevent your meringue from whipping properly.
That’s right, there’s no need for a slow, gradual addition of sugar. I’ve discovered through extensive testing that whipping all these ingredients together from the very beginning yields a remarkably stable and consistent meringue, which is ideal for macaron success!

2023 Update on Meringue Technique: Over the past year, I’ve refined my French meringue approach. Instead of slowly incorporating sugar into lightly whipped egg whites, I now combine egg whites, sugar, salt, and cream of tartar right from the start. This method has consistently produced a more robust and reliable meringue, proving superior for crafting flawless macarons.
Begin beating the egg whites on a consistent medium speed until they reach the “soft peaks” stage. For those using a KitchenAid stand mixer, a speed setting of 4 works perfectly. At this stage, the meringue will be foamy and hold soft, gentle peaks that curl over when the whisk is lifted.
If you desire colored macaron shells, this is the perfect moment to add your gel food coloring. Gel colors are concentrated and won’t add excess liquid, which is important for meringue stability.

Continue whipping the meringue at the same medium speed until it forms **stiff, glossy peaks**. This stage is crucial for macaron structure. Do not rush this process; slow and steady whipping builds the most stable meringue.
Visual Cues for Stiff Peaks: Your meringue should become incredibly thick and tightly ball up inside the whisk attachment. When you lift the whisk, the meringue should stand erect, forming a sharp, pointy end, and exhibit distinct, well-defined ridges along its surface. It should feel firm and resistant.

In the left image above, the meringue shows stiff peaks but isn’t quite firm enough. Notice how the peaks are somewhat soft. What you truly want to see are those **crisp, well-defined ridges** and unyielding peaks, as clearly illustrated in the right image. This level of stiffness indicates a truly stable meringue.
Technique #1: Mastering the Meringue – Your Foundation for Success
A stable meringue is not merely an ingredient; it’s the absolute foundation upon which perfect macarons are built. Any weakness here can lead to a host of common macaron issues. Pay close attention to these vital points:
- Room Temperature Egg Whites: Cold egg whites are easier to separate, but room temperature egg whites whip more effectively and achieve significantly greater volume and stability. Separate your egg whites directly from cold eggs, then allow them to sit on the counter for approximately 30 minutes to an hour to reach optimal room temperature before whipping.
- Ensure a Grease-Free Environment: This cannot be overstated. Your mixing bowl and whisk must be absolutely pristine and completely free of any fat or grease. Even the tiniest speck of yolk in your egg whites can catastrophically inhibit the formation of a stable meringue. Glass, stainless steel, or copper bowls are ideal choices as they are less porous than plastic and easier to degrease thoroughly.
- The Right Sugar: Always use **super-fine granulated sugar** or caster sugar for your meringue. Its fine granules dissolve much faster into the egg whites, preventing a gritty texture and promoting a smooth, stable foam.
- Patience is Key – Don’t Rush It!: For the most stable and resilient meringue, resist the urge to whip at high speed. Instead, beat the meringue on a **consistent medium-low speed** throughout the entire process. On my KitchenAid stand mixer, I consistently use speed 4. While this approach takes longer (expect 30-40 minutes of continuous whipping!), the resulting stable meringue is undeniably worth every minute. This slower, gentler whipping creates smaller, more uniform air bubbles, leading to a much stronger and less fragile structure in your macarons.
3. Blending the Batter: The Art of Macaronage
Once your meringue has reached stiff peaks, it’s time for the delicate process of macaronage. Gently sift the prepared almond flour and powdered sugar mixture directly into your stable meringue. This ensures a light integration, preventing the dry ingredients from clumping.
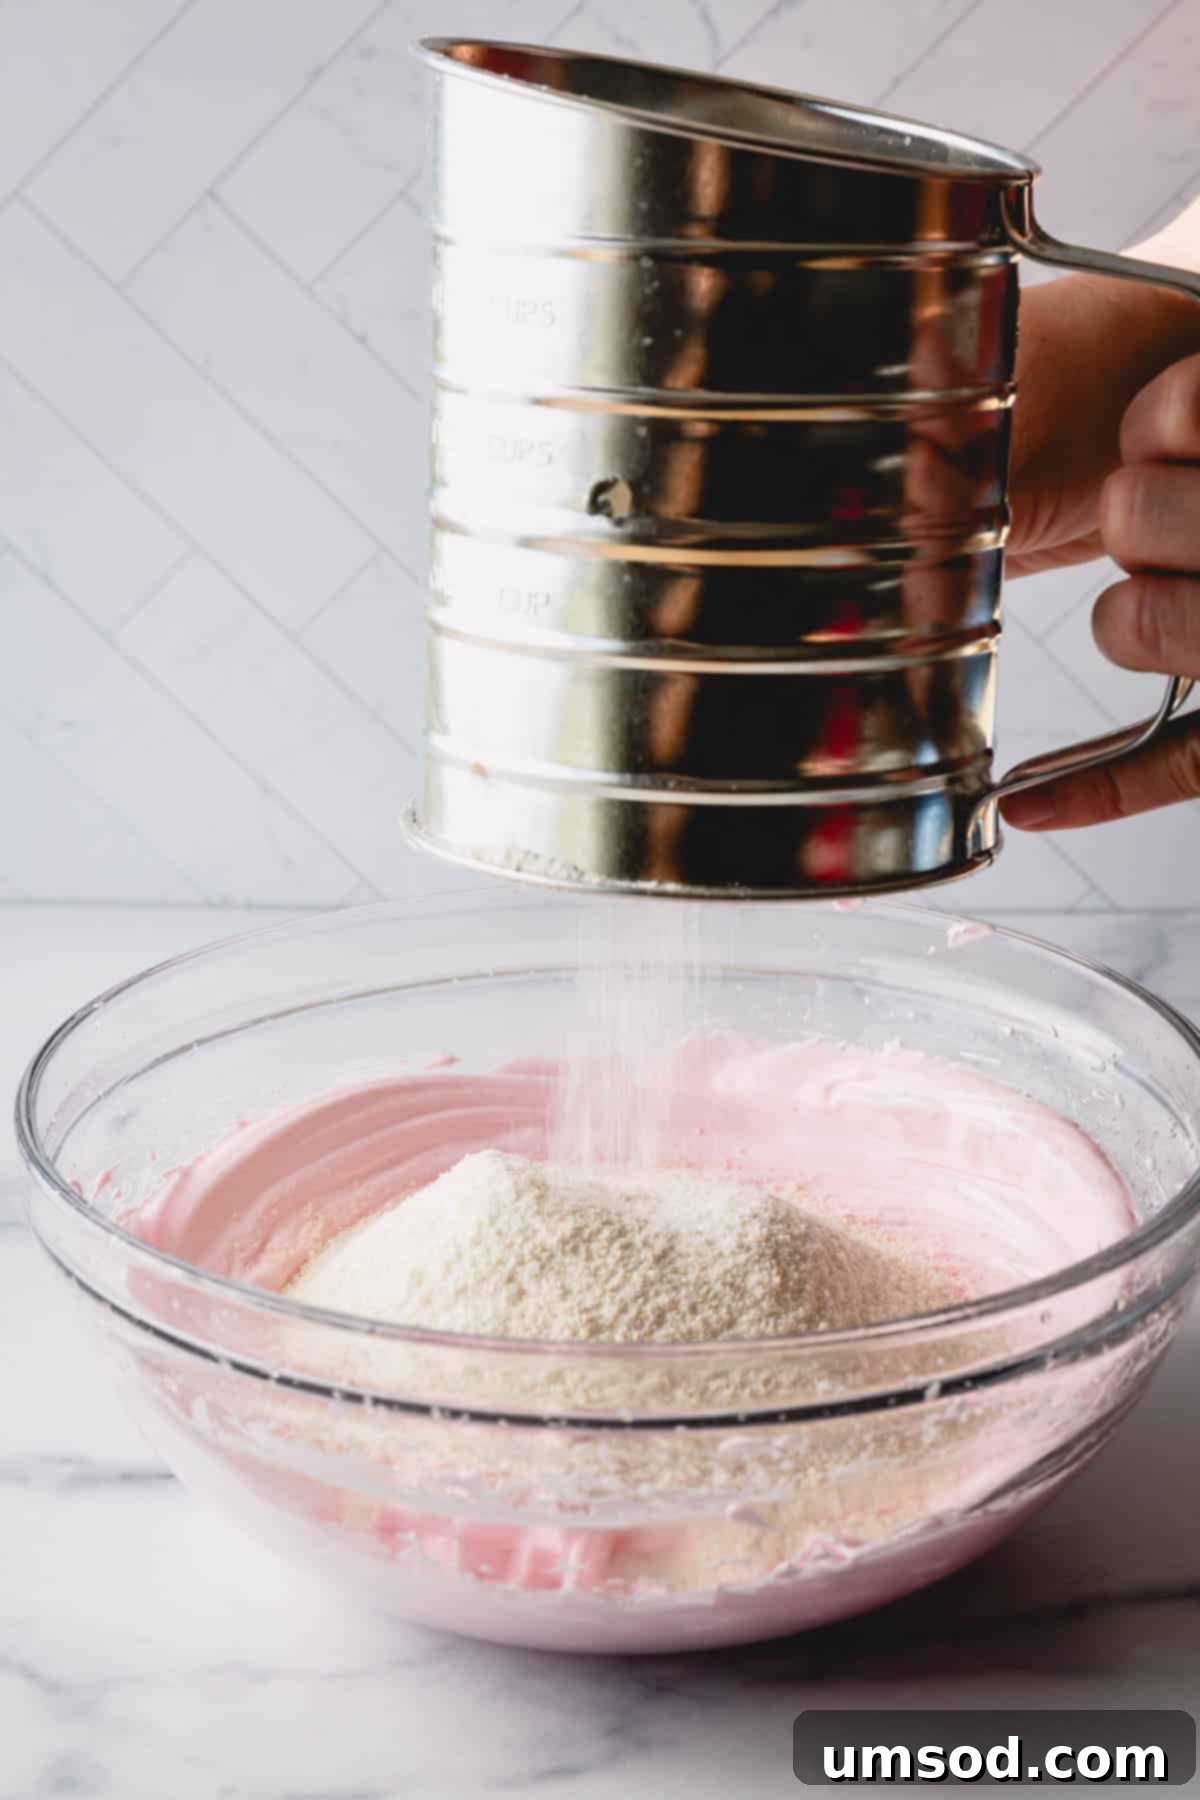
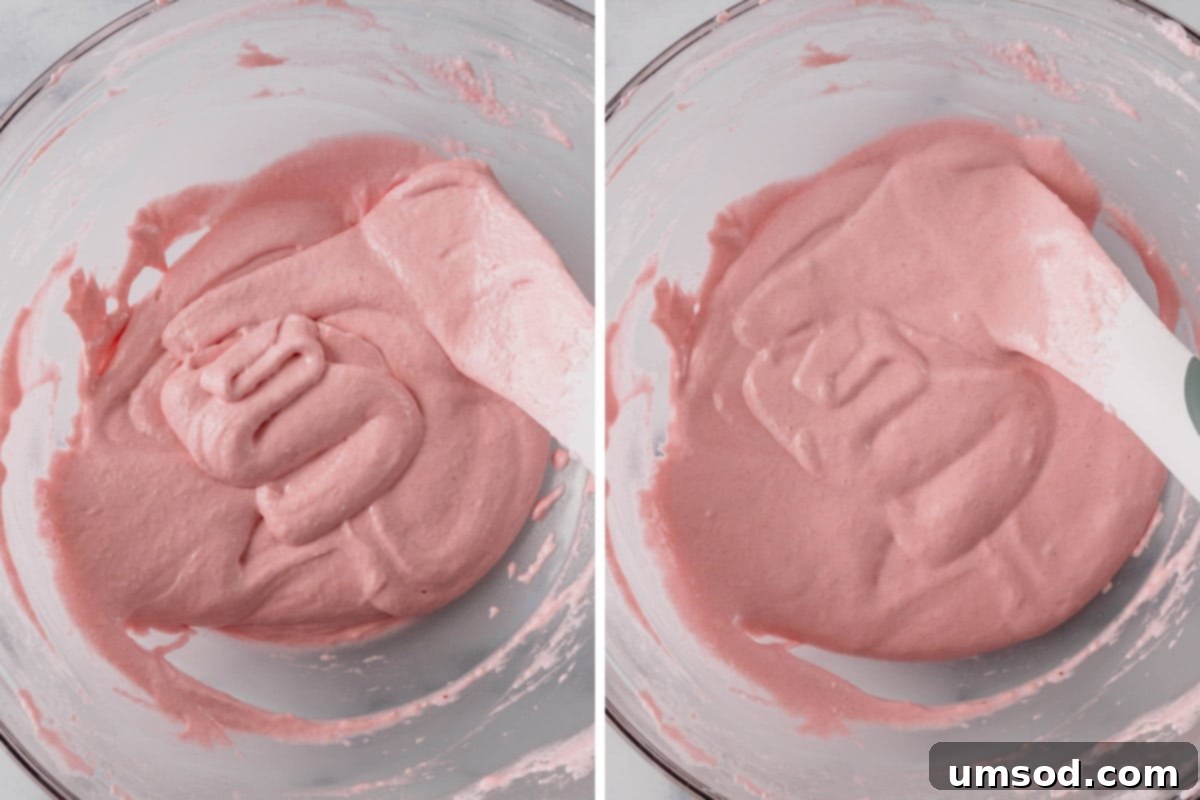
Using a large silicone spatula, carefully begin folding the dry ingredients into the meringue. The goal is to achieve a specific “lava-like” consistency. This means the batter should be thick enough to hold some body, yet fluid enough to slowly, gracefully flow off your spatula in a continuous ribbon. This stage is arguably the most critical and often the most challenging aspect of macaron making.
For a perfect visual demonstration and to truly understand the technique, I highly recommend you **WATCH MY REAL-TIME MACARONAGE VIDEO**. Seeing the movement and consistency firsthand is invaluable.

Technique #2: Mastering the Macaronage – The Ribbon Test
The proper consistency of your macaron batter is absolutely paramount; it will either make or break your final cookies. An over-mixed batter will be too runny, causing your shells to spread excessively and lose their shape. Conversely, an under-mixed batter will be too stiff, leading to numerous other issues such as hollows, lumpy tops, and a lack of “feet.”
**How to know when it’s ready?**
I recommend starting to check the consistency of your batter after approximately **50 folds**. (When I was first learning this technique, I literally counted every fold! You’ll develop an intuitive feel for the correct consistency with practice, making counting unnecessary later on.)
To execute the “Ribbon Test”: Scoop a generous amount of batter with your spatula and allow it to fall back into the bowl in a continuous stream. Then, gently tilt the bowl slightly and count to 10. If the edges of the batter ribbon smoothly dissolve back into the main body of the batter within those 10 seconds, your batter has reached the ideal “lava-like” or “ribbon” consistency. If the edges hold their shape too long, fold a few more times and re-test. The batter should flow slowly and deliberately, resembling molten lava.
4. Piping the Macaron Shells: Achieving Uniformity
Once your macaron batter is perfectly mixed, transfer it into a piping bag fitted with a round tip. I personally find the Wilton 2A tip ideal for creating consistent, beautiful shells. Pipe uniform 1.5-inch rounds onto two heavy-duty baking sheets, which you have lined with either Teflon sheets or parchment paper. Ensure each macaron is spaced about an inch apart to allow for proper air circulation during baking.
Shinee’s Pro Tip for Even Airflow: For optimal and consistent air circulation around your macaron shells, try flipping your baking sheets upside down and piping directly onto the inverted surface. This helps prevent hotspots and promotes even heat distribution.

Your Free Macaron Piping Template!
To ensure perfect consistency in size and shape, I’ve created a custom, easy-to-use template for you. **Subscribe to my e-mail list and download this custom macaron template for FREE**! This template is specifically designed to work seamlessly with my recipe, making the piping process incredibly simple and precise.
After piping, gently but firmly **tap the baking sheet** against your counter a few times. Alternatively, you can slap the bottom of the baking sheet with your hand. This action serves a crucial purpose: it helps to release any trapped air bubbles within the macaron shells, preventing hollows and promoting a smooth, unblemished top surface. If you notice any particularly stubborn air bubbles that refuse to pop, use a clean toothpick to gently burst them.
For a detailed visual guide on my piping method, **WATCH MY PIPING TECHNIQUE VIDEO**.

Technique #3: Precision in Piping Macaron Shells
The correct piping technique is vital for producing beautifully round macaron shells with that desirable full, “meaty” interior. Follow these guidelines for optimal results:
- Angle and Height: Hold your pastry bag at a strict 90° angle, approximately ½-inch above the baking surface. This vertical position helps create perfectly circular shells.
- Consistent Pressure: Apply even, steady pressure from the top of the piping bag. Pipe the batter to fill a 1½-inch circle without moving the piping bag up and down. Once the circle is filled, stop applying pressure and quickly flick your wrist upwards to create a clean break.
- Spacing: Always pipe your macarons about an inch apart on the baking sheet. This generous spacing is essential for ensuring good air circulation around each shell, allowing them to bake evenly and form their characteristic “feet” without merging.
5. Rest, Develop Feet, and Bake to Perfection
Before your macarons enter the oven, they need a crucial resting period. First, ensure your oven is accurately preheated to 300°F (150°C) for at least 30 minutes. It’s highly recommended to verify your oven’s temperature with an oven thermometer for the most consistent and best results, as oven temperatures can vary significantly.
Allow the piped macaron shells to **rest on the counter for a minimum of 15 minutes**. During this resting period, a thin “skin” forms on the surface of the shells. This skin is vital; it prevents the macaron from rising too quickly and cracking, forcing the air to escape from the bottom, which creates the iconic ruffled “feet.” The exact resting time can vary based on your kitchen’s humidity – in very humid conditions, you may need a longer rest (up to an hour) until the shells are no longer tacky to the touch.
Bake the macarons, one baking sheet at a time, for 15-18 minutes. I achieve the best results without using convection settings; my oven is set to heat from both the top and bottom elements for consistent baking.
Shinee’s Advanced Baking Tip: To prevent the delicate tops of your macarons from browning, especially in ovens with strong top heat, place an empty baking sheet on the top rack of your oven. This acts as a shield, diffusing the heat and allowing the macarons to bake evenly without discoloration.

How to Check for Doneness
To determine if your macarons are perfectly baked, gently touch the side of a macaron shell and attempt to move it. If it slides, wobbles, or feels unstable on its “feet,” it needs to bake for another minute or two. A perfectly cooked macaron will be firm to the touch and its base should not move from the baking surface. **Remember, it is always preferable to slightly over-bake macarons than to under-bake them!** Under-baked macarons will stick to the parchment paper and have an unpleasantly chewy interior.
6. Assembling Your Masterpiece: Filling and Pairing
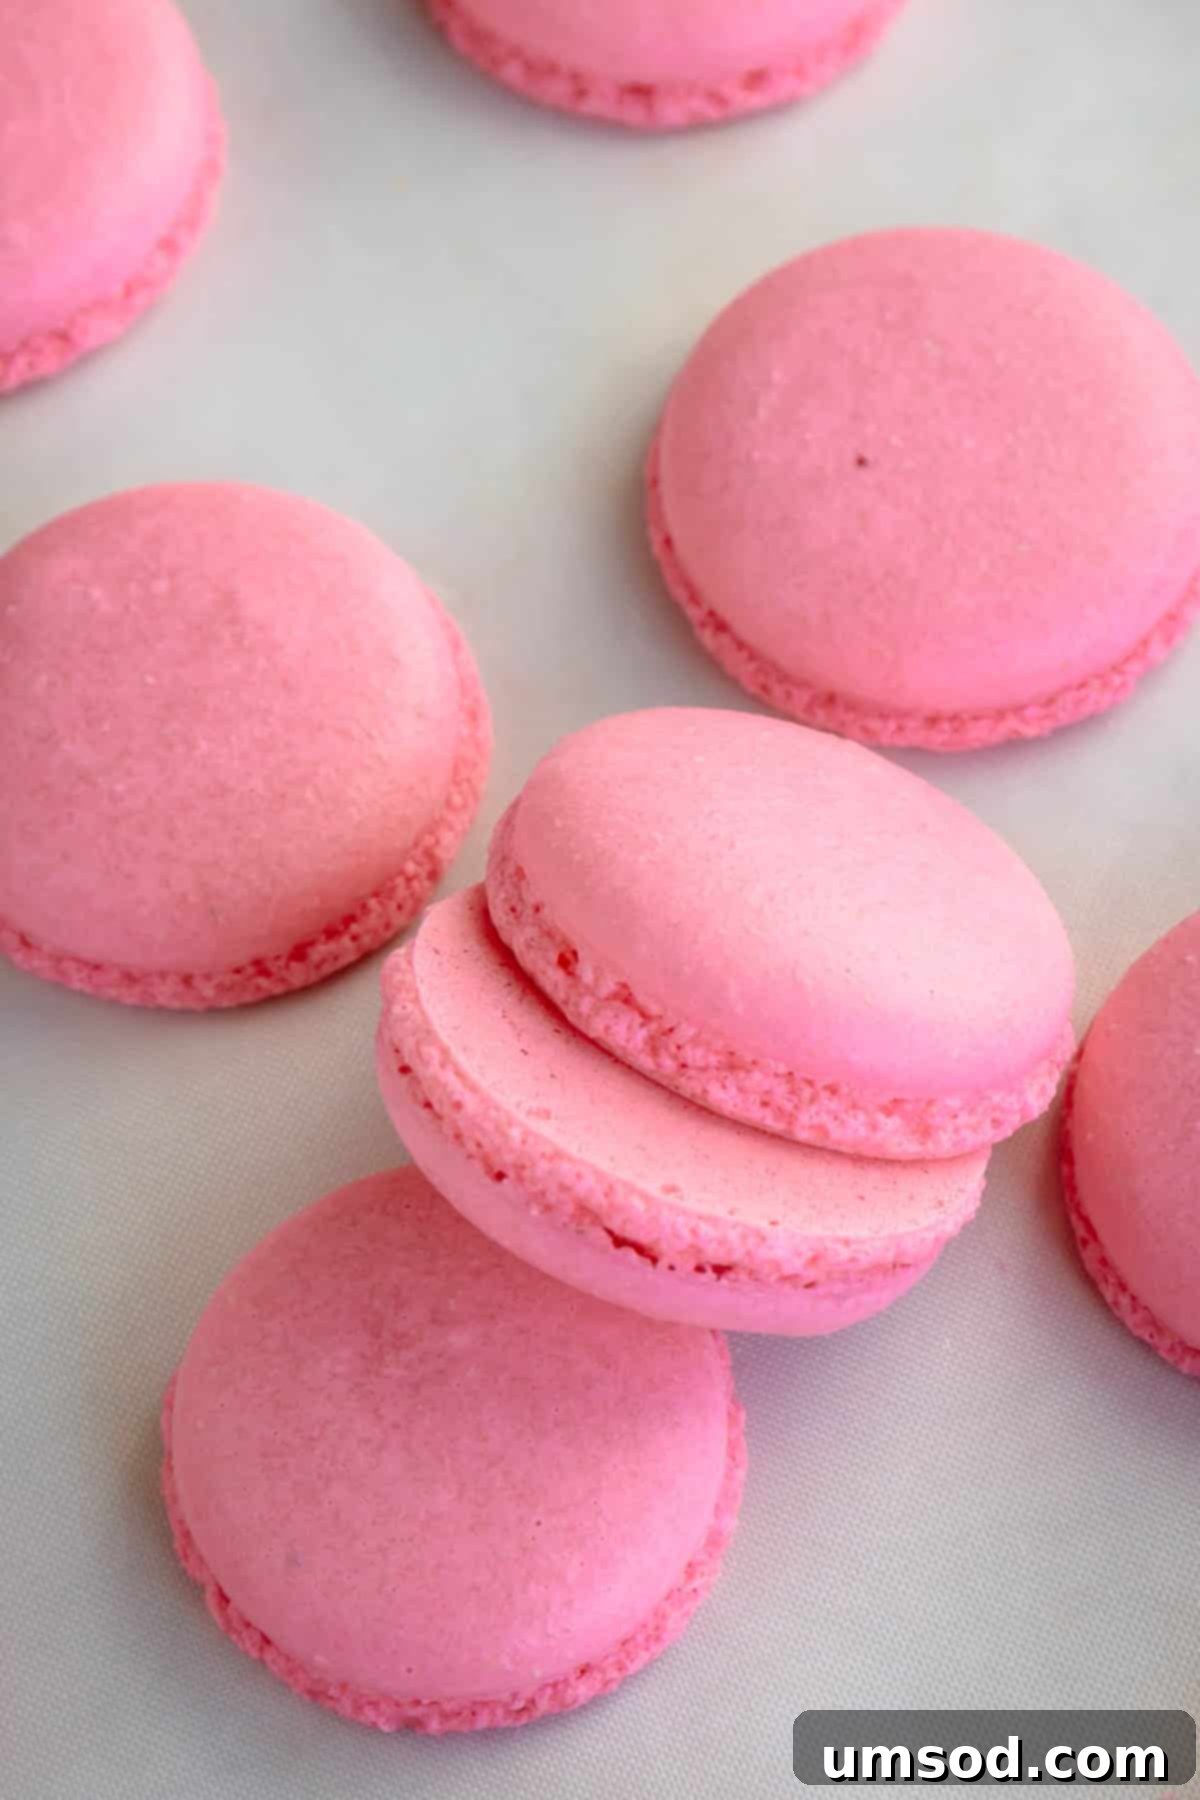
Once your macaron shells are baked, allow them to cool completely on the baking sheet before attempting to remove them. This is crucial: if the shells are still warm, they are much more fragile and prone to breaking, or they may stubbornly stick to the baking surface. Patience at this stage will save you from disappointment.
Next, carefully pair your cooled shells by size. Aim for shells that are similar in diameter to create aesthetically pleasing and evenly sized macarons. Arrange them on a baking sheet or wire rack, placing one shell bottom-side up, ready for filling.
Pipe a dollop of your chosen filling onto the center of the upturned bottom shells. Then, gently place a top shell over the filling and lightly press down until the filling spreads gracefully to the edges of the shells, creating a uniform sandwich.
The beauty of macarons lies in their versatility with fillings! You can use almost any kind of creamy filling imaginable. My personal favorite go-to options include a rich chocolate ganache and a classic, velvety French buttercream. In the tantalizing picture below, these exquisite macarons are filled with a luscious white chocolate ganache expertly paired with a vibrant and tangy pineapple curd.


7. Maturing the Macarons: The Secret to Enhanced Flavor and Texture
Once your macarons are beautifully assembled with their fillings, they require a crucial period of maturation. Place the filled macarons in an airtight container and refrigerate them for a minimum of 8 hours, though preferably for 24 hours. This essential process, known as **maturing** or “aging,” allows the moisture from the filling to gently seep into and soften the crisp macaron shells. This not only tenderizes the shells, giving them their characteristic chewy texture, but also allows the flavors of the filling and shell to meld and deepen, resulting in a more harmonious and delicious cookie.
Before serving these delectable treats, remember to bring them back to room temperature. Simply take them out of the refrigerator and let them sit on your counter for approximately 30 minutes. This ensures the filling softens to its ideal consistency and the flavors are at their peak.

French Macaron Tips for Success: Mastering the Delicate Art
As I’ve emphasized throughout this guide, achieving macaron perfection is a delicate dance involving a blend of precise technique, a nuanced understanding of your oven’s behavior, and the quality of your ingredients. Once you grasp the fundamental techniques and understand the rationale behind each step, you’ll be well on your way to consistently baking perfect macarons.
- Precision Weighing with a Scale is Non-Negotiable: This is, without a doubt, the most crucial step for setting yourself up for success. Measuring ingredients by volume (cups) is inherently prone to inconsistency and unreliability, especially for finicky recipes like macarons where ratios are vital. That’s why I exclusively provide metric measurements in my ingredients list. I genuinely want to give you the absolute best chance to succeed by eliminating measurement variables!
- A Stable Meringue is Your Anchor: The meringue is the structural foundation of your macarons. If your meringue is weak, you will inevitably encounter a myriad of common issues, such as hollow macarons, shells without “feet,” or even flat, cracked shells. Understanding and executing the technique to achieve the most stable French meringue (as detailed above) is paramount. It’s about slowly building tiny, resilient air bubbles.
- The Art of Macaronage: This is the stage where the dry ingredients are gently folded into the meringue until the batter reaches the perfect “lava-like” consistency. This balance is tricky – under-mixed batter will be stiff and lumpy, while over-mixed batter will be too runny, causing the macarons to spread without forming feet. Practice the ribbon test described earlier until you feel confident in this crucial step.
- Calibrating Your Oven Temperature: You can follow the most reliable macaron recipe, measure your ingredients precisely, and perfectly execute macaronage, yet still FAIL if your oven temperature is inaccurate. Every oven is unique; it’s entirely common for an oven’s actual temperature to vary by as much as 50°F (about 28°C) above or below its setting. Such variations can make or break your macarons. This is precisely why I emphatically recommend investing in an oven thermometer. Use it to double-check the accuracy of your oven and find its specific “sweet spot” for baking these delicate treats. Consistent oven temperature ensures consistent baking and beautiful results.
For more in-depth solutions to common challenges, be sure to check out my visual Macaron Troubleshooting Guide, which offers tips and tricks to fix or prevent typical macaron issues!
Macaron Storing Tips: Keeping Them Fresh
Proper storage is essential to maintain the delicate texture and flavor of your homemade macarons. Here’s how to keep them fresh, whether unfilled or filled:
Unfilled Macaron Shells:
- Room Temperature Storage: Store unadorned macaron shells in an airtight container at room temperature for up to 5 days. Ensure they are completely cooled before storing to prevent condensation.
- Freezing for Longer Shelf Life: For extended freshness, freeze unfilled macaron shells in an airtight container for up to 3 months. When ready to use, simply thaw them at room temperature for about 15-20 minutes before filling.
Filled Macarons:
- Refrigeration: Filled macarons, especially those with perishable fillings like ganache or buttercream, should be refrigerated in an airtight container. They will keep well for up to 5 days, though this can vary slightly depending on the specific filling used.
- Freezing Assembled Macarons: You can also freeze assembled, filled macarons in an airtight container for up to 1 month. **To thaw**, transfer the frozen macarons to the refrigerator and allow them to thaw slowly for at least 1 hour, or preferably overnight. Bringing them to room temperature for about 30 minutes before serving will ensure the filling is perfectly soft and the flavors are fully expressed.

Macaron 101: A Comprehensive Guide
Ready to take your macaron skills even further? Delve into my comprehensive guide, “Macaron 101,” and truly master the art of French macarons. Learn advanced techniques, troubleshoot common issues, and unlock your creativity to develop your own signature macaron flavors!
Macaron FAQs: Your Questions Answered
Macarons have a reputation for being challenging due to the intricate interplay of several critical factors. Achieving perfect results requires precision in various stages, including the formation of a stable meringue, the delicate “macaronage” mixing technique, controlled humidity levels in your kitchen, and an extremely accurate oven temperature, among others. Each of these elements must be “just right” to produce the desired delicate shells with their characteristic “feet.” This complexity is precisely why consistent experimentation and continuous refinement of your technique are essential for mastering perfect macarons.
Macarons offer incredible versatility when it comes to fillings, allowing for endless flavor combinations. The most popular and classic fillings are smooth buttercream and rich ganache. These can often be paired or layered with other elements such as vibrant fruit curds (like lemon or pineapple) or sweet fruit confitures (jams). My personal favorite macaron fillings include the luxurious chocolate Swiss meringue buttercream, a simple yet elegant easy French buttercream, a creamy peanut butter buttercream, a decadent dark chocolate ganache (typically a 1:1 ratio of chocolate to cream for richness), and a delicate white chocolate ganache (often a 2:1 ratio of chocolate to cream for stability and flavor).
Whether macarons need to be refrigerated largely depends on the type of filling used. If your macarons are filled with a shelf-stable ingredient that does not require refrigeration (e.g., some types of jam without fresh fruit), they may not need to be kept cold. However, the vast majority of macaron fillings, such as buttercreams, ganaches, and fruit curds, are perishable and contain dairy or eggs. For food safety and to maintain optimal freshness and texture, macarons filled with such ingredients absolutely need to be refrigerated.
Absolutely, making macarons at home is significantly more cost-effective than purchasing them from a bakery. While the initial investment in a few essential tools and ingredients might seem like a small hurdle, the cost per macaron you produce yourself will be dramatically lower, especially if you plan to make them regularly. Plus, the satisfaction of creating these exquisite treats from scratch is priceless!
The higher cost of store-bought macarons can be attributed to several factors. Firstly, their creation demands advanced baking skills, significant precision, and a considerable amount of time and labor. Professional bakers often undergo extensive training to master the intricate techniques involved. Secondly, the quality ingredients required—such as super-fine almond flour, high-grade chocolates, and fresh eggs—are not inexpensive. These factors, combined with overhead costs for bakeries, contribute to the premium price of these delicate confections.
Explore More Macaron Recipes:
Once you’ve mastered this basic recipe, the world of macarons is yours to explore! I’ve shared a multitude of delightful macaron recipes on my blog, but here are some of my top favorites to inspire your next baking adventure:
- Red Velvet Macarons: A classic cake flavor reimagined in a delicate macaron form, complete with a cream cheese filling.
- Chocolate Macarons: Rich chocolate shells paired with a decadent chocolate ganache for the ultimate indulgence.
- Pistachio Macarons: Elegant green shells infused with subtle nutty flavor, often filled with a delicate pistachio buttercream.
- Cotton Candy Macarons: A whimsical and fun macaron recipe, perfect for adding a touch of childlike wonder to your dessert table.

Easy Macaron Recipe
Pin Recipe
Comment
Print Recipe
Ingredients
For macaron shells:
- 100 g super-fine almond flour Note 1
- 65 g powdered sugar Note 2
- 70 g egg whites at room temperature Note 3
- 75 g fine granulated sugar Note 4
- ¼ teaspoon cream of tartar optional Note 5
- ¼ teaspoon coarse kosher salt
- Gel food coloring if desired
For buttercream filling:
- 2 large egg yolks
- ¼ cup (50 g) granulated sugar
- 3 ½ tablespoons milk
- ½ cup (115 g) unsalted butter softened
- 1 teaspoon pure vanilla extract
Instructions
To make macaron shells:
- Preheat the oven to 300°F (150°C). Line 2 baking sheets with parchment paper, or teflon sheet, or silicone mat.
- To prepare dry ingredients, sift together almond flour and powdered sugar twice. (Note: If you have up to 2 tablespoons of chunky dry ingredients left in the sifter, you don’t have to replace it. Simply discard those chunky bits.)
- To make meringue, in a clean mixing bowl with a whisk attachment, combine egg whites, granulated sugar, cream of tartar and salt and beat the mixture on medium speed until soft peaks form. (I set it to speed 4 on my KitchenAid stand mixer. It takes 30-40 minutes to whip the meringue, but it’s well worth it for nice and full shells.)
- If you’re making colored shells, add gel food coloring at soft peak stage.
- Continue beating the meringue at the same medium speed until hard peaks form. Visual cues: Meringue should ball up inside the whisk, and when you lift the whisk, the meringue should hold a pointy end and have sharp ribs.
- To make batter, sift almond flour mixture into the meringue. Using a silicone spatula, fold the dry ingredients into the meringue until fully incorporated. Then continue to fold the batter until it’s runny enough to draw a figure eight. To test, take a small amount of batter and drop it into the bowl. If the small peaks dissolve into the batter on its own in about 10 seconds, the batter is ready. If not, fold couple more times and test again. Be careful not to over-fold the batter. (TIP: Making french macarons is all about the technique. This is one of the most crucial step. Let me try to describe the folding motion as best as I can: run the spatula clockwise from the bottom, up around the sides and cut the batter in half. If you’re beginner macaron-baker, I suggest to count every fold. It takes roughly about 50 folds to reach the proper consistency. After 50 folds, start testing the batter, and continue testing after every couple folds.)
- To pipe macaron shells, transfer the batter into a pastry bag, fitted with a round tip. (I usethis Wilton 2A tip.)
- Hold the pastry bag at straight 90° angle and pipe about 1.5-inch rounds about an inch apart on prepared baking sheets. (TIP 2: Download my free macaron template. Simply pipe the batter to fill inner circle.)
- Tap the baking sheets firmly on the counter (or slap the bottom of the baking sheet with one of your hands) a few times to get rid of any air bubbles. You can also use a toothpick to burst some large air bubbles. This step ensures smooth tops.
- Let the macarons rest on the counter for 15 minutes before baking.
- To bake, bake the macarons for 15-18 minutes, one baking sheet at a time, on the middle rack. It’ll take longer for larger macarons. To test for doneness, touch a macaron lightly and try to move it. If it slides and wobbles, bake a minute or so longer. The cooked macarons should be firm to touch and the base shouldn’t move.
- Cool the macarons complete and then remove the shells from the baking surface. (TIP: Don’t remove the shells while warm, you may risk breaking the shells, or the bottom might get stuck to the baking surface.)
To make the buttercream filling
- In a medium bowl, beat the egg yolks slightly with a whisk and add sugar. Continue to whisk until the mixture is pale and sugar is mostly dissolved. Stir in the milk.
- Transfer the egg yolk mixture into a small saucepan and heat over low heat, stirring frequently. Continue to cook until it’s thick like pudding, about 5 minutes.
- Transfer the mixture back to a bowl and cool it to room temperature.
- Then stir in the softened butter in three batches. Add vanilla extract and continue to mix until smooth. Transfer the buttercream into a pastry bag with round tip.
To assemble macarons
- Pair the macaron shells by size and arrange them on a wire rack. Line them up so that bottom shells are upside down.
- Pipe a dollop of filling on bottom shells. Place the top shell over the filling and press lightly so the filling spreads till the edges.
- Refrigerate the filled macarons in an airtight container for at least 24 hours to mature, which allows the filling to soften and flavor the shells.
- To serve, bring the macarons out about 30 minutes prior to serving.
⭐️ Did you make this recipe?
Please leave a review and let us know how you liked it!
Video
Tips & Notes
Note 2: I don’t recommend making your own powder sugar, because commercial powdered sugar has cornstarch in it. And it helps with texture of the cookies.
Note 3: I’ve had success with carton egg whites (Bob Evans brand, #notsponsored). You’ll need 1/3 cup of egg whites.
Note 4: It’s important to use fine granulated sugar for meringue, as it dissolves quicker. You can also use caster sugar, aka baker’s sugar.
Note 5: Cream of tartar is optional and can be omitted. However, it helps to stabilize egg whites and create sturdier meringue. It’s just an extra insurance!
Note 6: You can easily double this macaron recipe.
GOT MACARON TROUBLE? Check out my macaron troubleshooting guide.
Nutrition

This comprehensive macaron recipe and guide was originally published on January 13, 2013, and has been continuously updated and refined for optimal success.
From my original post published on January 13, 2013:
Just a few months prior, these enchanting little cookies started appearing everywhere I looked – across social media, in magazines, and in every beautiful bakery display. They were so delicate, vibrant, and utterly tempting! Everyone was gushing about how absolutely wonderful these treats were, and I found myself captivated by their allure.
Being a curious person by nature, and unable to find anything like them in my remote corner of the world, I embarked on a quest. I dove into Google, searching for recipes for these exquisite confections. I devoured countless recipes, absorbed endless tips and tricks (learning quickly that they were indeed quite finicky!), and drooled over many, many gorgeous photos. Finally, with a mix of anticipation and determination, I made them myself!
Oh, sweet little macarons, where had you been all my life? The taste was absolutely heavenly, unlike anything I had experienced before. I was instantly smitten.
To compensate for all the lost time without these culinary gems, I became utterly obsessed. I was on a roll, making them day and night. Okay, perhaps a slight exaggeration, but you get the idea – I couldn’t get enough! My kitchen transformed into a macaron production hub.
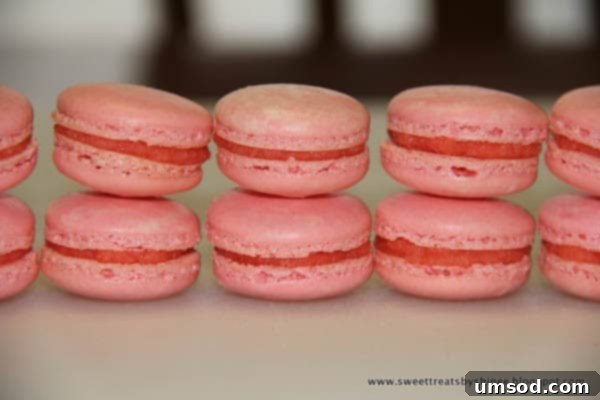
While I can’t claim to have perfected these delicate cookies overnight, as you can see, my early attempts weren’t too shabby. Each batch brought new insights and improved my technique.
Now, after having made these precious treats more times than I can count, and feeling truly confident in the intricate techniques involved, I felt it was time to share my entire process with you. My hope is that this detailed guide empowers you to experience the same joy and success in baking French macarons as I have.
