This post is sponsored by Bob’s Red Mill. All opinions are mine.
Spooktacular Halloween Macaron Cake: A Ghoulishly Delicious Masterpiece
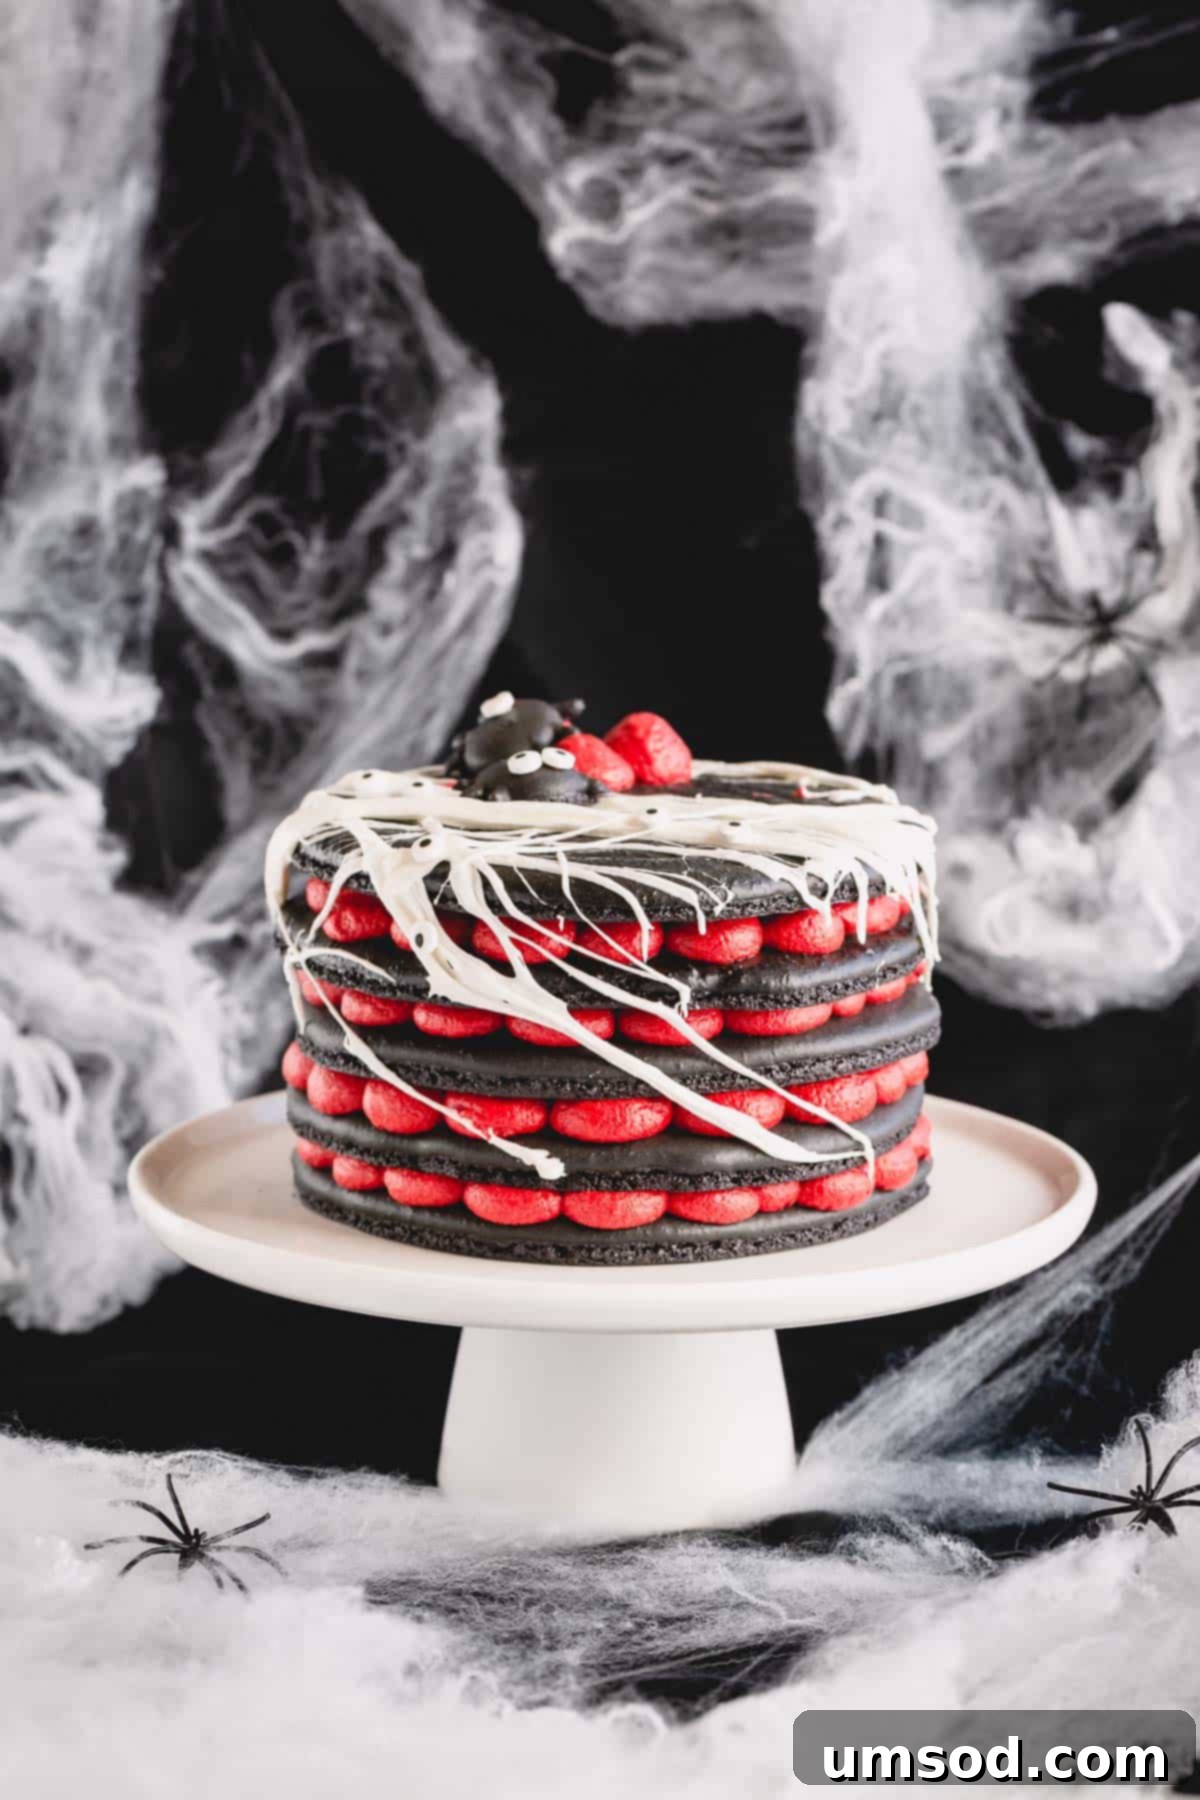
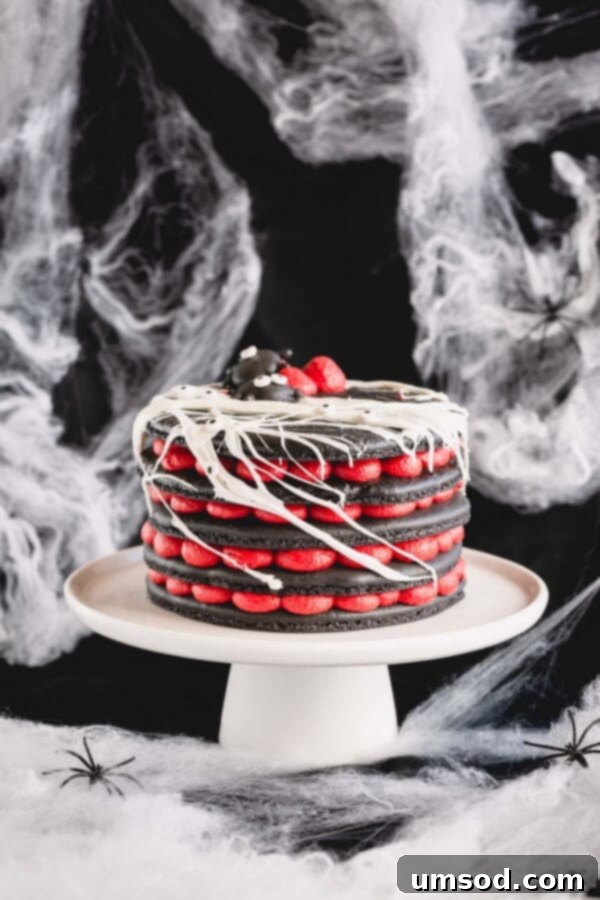
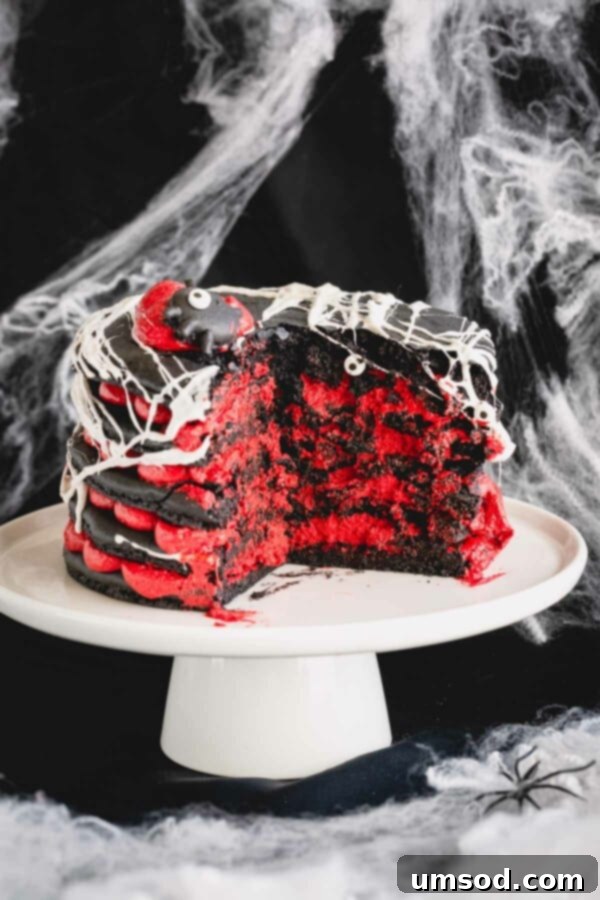
Prepare to enchant your guests this Halloween with a dessert that’s as impressive as it is delicious: a towering macaron cake! This show-stopping creation features delicate, airy black macaron shells generously filled with a luscious, subtly cocoa-infused sweet cream cheese frosting. The entire masterpiece is then draped in a delightfully sticky, ethereal marshmallow spiderweb, making it the ultimate spooky centerpiece for your festive celebrations. It’s not just a cake; it’s an edible work of art that promises to be the talk of any Halloween gathering.
Why You’ll Adore This Halloween Macaron Cake
If you’re already a fan of the delicate perfection of French macarons, then you’re absolutely going to fall in love with this macaron cake. It encapsulates all the beloved characteristics of a perfect macaron, but on a grander, more spectacular scale. This isn’t just a dessert; it’s an experience, designed to impress and delight with every single bite.
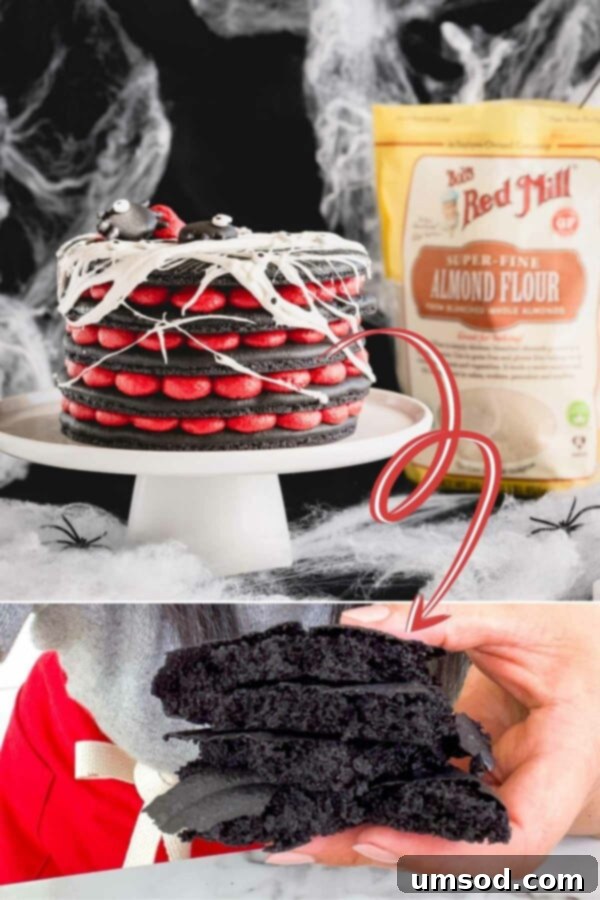
- **Unforgettable Texture:** Each macaron layer boasts a fluffy, full interior encased in a thin, crisp outer shell. This quintessential macaron texture is meticulously preserved and amplified in cake form, offering a delightful contrast with every forkful. The satisfying crunch followed by a tender chew is what sets macarons apart, and this cake delivers it beautifully.
- **Decadent Cream Cheese Frosting:** The filling is a creamy, soft cream cheese frosting, subtly enhanced with a hint of cocoa. This touch of cocoa not only adds depth to the flavor profile but also helps achieve that strikingly deep red color, making it visually perfect for Halloween. It’s rich without being overly sweet, providing a harmonious balance to the macaron layers.
- **Quick Maturation for Convenience:** Unlike traditional macarons that often require an extended maturation period to soften, this cake is ready to be enjoyed in just 8 hours! Thanks to the generous and soft cream cheese filling, the macaron layers quickly absorb moisture, resulting in a perfectly tender and flavorful cake much faster, making it ideal for planning ahead without a lengthy wait.
- **Visually Stunning Presentation:** Beyond taste, the sheer size and unique spiderweb decoration make this cake an undeniable showstopper. It’s an edible art piece that will capture attention and spark conversation at any Halloween party.
Achieving Perfectly Full Macaron Shells
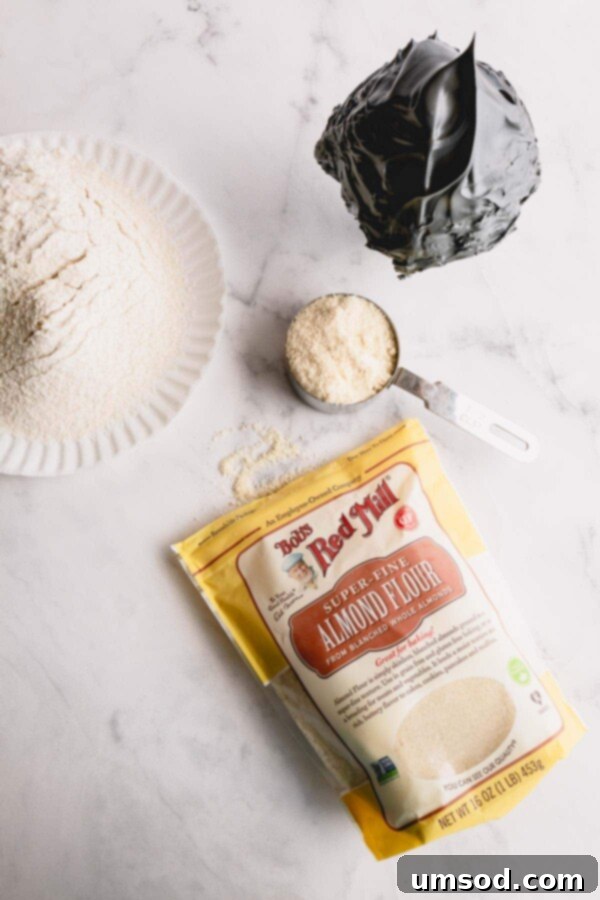
The secret to creating consistently full and fluffy macaron shells lies in the quality of your ingredients, especially the almond flour. I am thrilled to partner with Bob’s Red Mill to highlight their exceptional Super-Fine Almond Flour, which is unequivocally **my go-to choice for making macarons.**
The finely ground texture of their almond flour is critical. It creates a smooth, consistent batter that bakes into shells with a beautifully smooth top and, most importantly, a robust, airy interior. This super-fine consistency minimizes the risk of lumpy batter and ensures your macarons rise uniformly, achieving that signature “foot” and delicate crispness that every macaron lover seeks.
Why I Trust Bob’s Red Mill for My Baking
My enthusiasm for Bob’s Red Mill extends beyond just their almond flour. There are numerous compelling reasons why I am a devoted fan of this brand. As an employee-owned company, their commitment to excellence is palpable in every product.
They are dedicated to providing high-quality, minimally processed products, ensuring that the natural goodness of ingredients goes directly from their mill to your table. This dedication to purity and quality makes a noticeable difference in the outcome of your baking, especially for delicate recipes like macarons where ingredient quality is paramount. Furthermore, the widespread availability of their products in nearly any grocery store makes them a convenient and reliable choice for home bakers everywhere.
How to Create This Spectacular Macaron Cake
Crafting this impressive macaron cake is a rewarding process. Follow these detailed steps to ensure perfectly formed macaron layers and a beautifully assembled dessert.
1. Mastering the Meringue
A stable meringue is not just important; it is the absolute bedrock of perfect macarons. Without a strong meringue, your macaron shells will lack structure, leading to hollows, cracks, or a flat appearance. Achieving the right consistency is crucial.
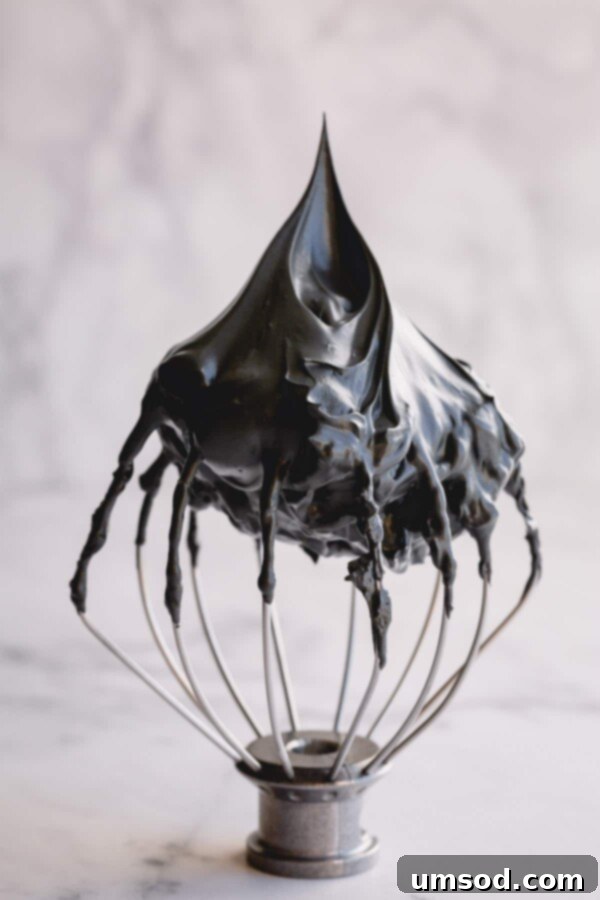
Look for the following **visual signs of a perfectly formed meringue**:
- **Meringue balls up in the whisk:** When you lift the whisk from the meringue, a substantial amount should cling to it, forming a cohesive ball.
- **Straight, pointy end:** The meringue should hold stiff peaks that stand upright without collapsing or curling over.
- **Sharp ridges/ribs all around:** The meringue should have distinct, well-defined ridges and not be smooth or amorphous, indicating its density and stability.
For the most stable French meringue, adhere to these **3 essential rules**:
- **Ensure Utensils are Impeccably Clean and Grease-Free:** Any trace of fat, even a tiny speck of egg yolk, will prevent egg whites from whipping into a stable meringue. Always use glass or stainless steel bowls, as plastic bowls can retain grease over time. Wipe down bowls and whisks with a paper towel dampened with lemon juice or vinegar for extra assurance.
- **Whisk on a Low and Steady Speed:** Patience is key here. While it takes longer to reach stiff peaks, whisking at a consistent, low speed creates a stronger, more resilient meringue with smaller, more uniform air bubbles. This results in macaron shells that are less prone to cracking and have a more consistent rise, leading to those desirable full interiors. Avoid the temptation to speed up the process.
- **Add Food Coloring at Soft Peak Stage:** Incorporating gel food coloring when the meringue reaches soft peaks allows it sufficient time to disperse evenly throughout the mixture. This prevents over-beating the meringue to achieve uniform color, which can destabilize it and negatively impact your macaron shells. Gel food coloring is preferred as it adds minimal moisture compared to liquid alternatives.
2. Sifting Dry Ingredients Thoroughly
The preparation of your dry ingredients—almond flour and powdered sugar—is a critical, often underestimated, step for achieving those perfect macaron shells. Sifting is important for two primary reasons:
- **Even Combination:** Sifting ensures that the almond flour and powdered sugar are thoroughly and uniformly combined, preventing pockets of unmixed ingredients that could lead to uneven textures or baking.
- **Aeration for Fluffy Texture:** The sifting process introduces air into the dry ingredients, which contributes significantly to the utmost fluffy and light texture of the macaron shells. It also helps remove any larger almond bits that could disrupt the smooth surface of your macarons.
For optimal results, I strongly recommend sifting your dry ingredients at least three times. Always measure your almond flour and powdered sugar precisely *before* sifting. This ensures you have the correct quantities after any larger, undesirable particles have been removed. Discard any large chunks left in the sifter; do not try to force them through.
3. Perfecting the Macaronage
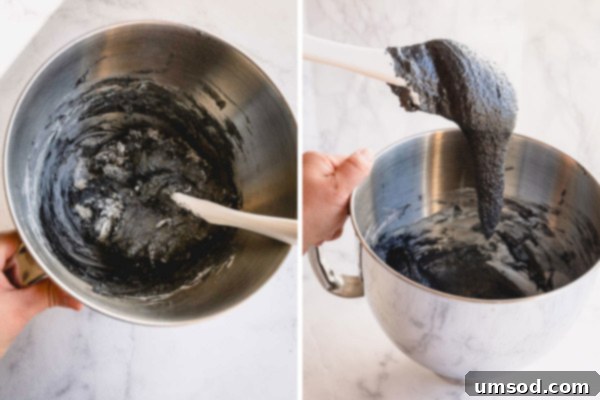
Macaronage is arguably the most crucial step, where the dry ingredients are folded into the meringue until the batter reaches the ideal “lava-like” consistency. This process deflates some of the air from the meringue, creating a smooth, flowing batter that pipes beautifully and bakes with a smooth top and signature “feet.”
To perform macaronage, gently add the sifted dry ingredients to your stable meringue. Using a silicone spatula, fold the batter by scraping around the sides of the bowl and cutting through the center. Repeat this motion, gradually incorporating the dry ingredients. The goal is to achieve a batter that flows slowly and steadily.
My 10-second test: To accurately determine if your batter is ready, scoop up some batter with your spatula and slowly drop it back into the bowl. Then, gently tilt the bowl to observe how the dropped batter flows. If the edges of the dropped batter slowly melt back into the rest of the batter within approximately 8-10 seconds, your batter has reached the perfect “lava-like” consistency and is ready for piping. If it holds its shape for too long, continue folding a few more times and test again. Be extremely careful not to over-fold, as this will lead to runny batter and flat macarons.
4. Piping and Baking Macaron Shells
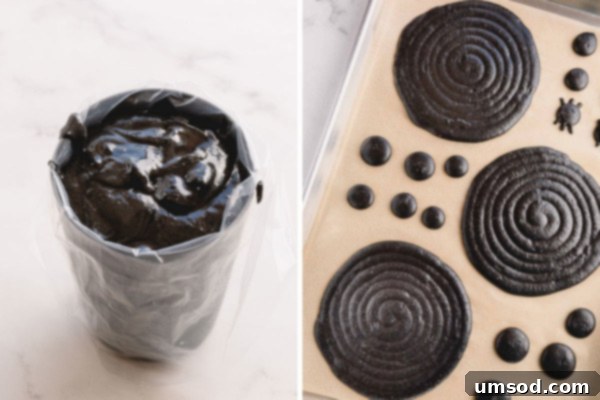
Once your macaron batter is perfectly macaronaged, transfer it into a sturdy piping bag fitted with a round tip (a Wilton 2A tip works wonderfully for this size). Line two baking sheets with parchment paper, a silicone mat, or a Teflon sheet, ideally with a macaron cake template underneath for consistent sizing.
Pipe out six 5-inch rounds. Hold the pastry bag vertically at a straight 90° angle, applying steady, even pressure, and pipe the batter from the center outwards in a spiral motion until you achieve the desired 5.5-inch diameter for each circle. If you have any leftover batter, pipe a few smaller rounds; these are perfect for taste-testing or as decorative accents.
After piping, firmly tap the baking sheets on your counter several times (or use your hand) to release any trapped air bubbles. Use a toothpick to gently pop any larger bubbles that appear on the surface. This crucial step ensures smooth, crack-free tops. Allow the piped macarons to rest on the counter for about 15-30 minutes, or until a light skin forms on the surface (the “drying” stage). This helps develop the signature “feet.”
Preheat your oven to 300°F (150°C). Bake the shells for approximately 23-25 minutes. To test for doneness, gently and carefully push one of the shells from its base. If it wobbles excessively or slides easily, it needs to bake for another minute or two. A perfectly baked macaron shell should be firm to the touch and should not move from its base when gently pushed. Remember, it’s always better to slightly over-bake macarons than to under-bake them, as under-baked shells will stick to the mat and be prone to breakage.
FREE Macaron Cake Template!
Click Here To Download My Free Macaron Templates and ensure perfect, uniform sizing for your cake layers.
5. Crafting the Rich Cream Cheese Filling
This macaron cake is generously filled with a classic cream cheese frosting, elevated for a touch of Halloween flair. The secret to achieving its vibrant, deep red color isn’t just red gel food coloring; it’s also the clever addition of a little bit of unsweetened cocoa powder. The cocoa powder deepens the base color, allowing the red food coloring to shine more intensely and create a rich, blood-red hue perfect for your spooky dessert.
Prepare the filling by beating softened cream cheese and unsalted butter until light and fluffy. Gradually add powdered sugar, cocoa powder, pure vanilla extract, and a pinch of salt. Continue beating until all ingredients are well combined and the frosting is smooth and creamy. Finally, mix in the red gel food coloring until your desired shade of red is achieved. This filling is not only delicious but also provides the perfect contrast to the black macaron shells.
Tip
For an alternative, you can add a touch of brown food coloring instead of cocoa powder to achieve a similar deep base for the red, though the cocoa adds a subtle flavor depth that is highly recommended.
6. Assembling the Impressive Cake
Assembly is where your macaron cake truly comes to life. First, ensure your macaron shells are completely cooled before you attempt to peel them off the parchment paper or silicone mat. Warm macaron shells are notoriously fragile and can easily break or stick if not fully cooled, jeopardizing your beautiful layers.
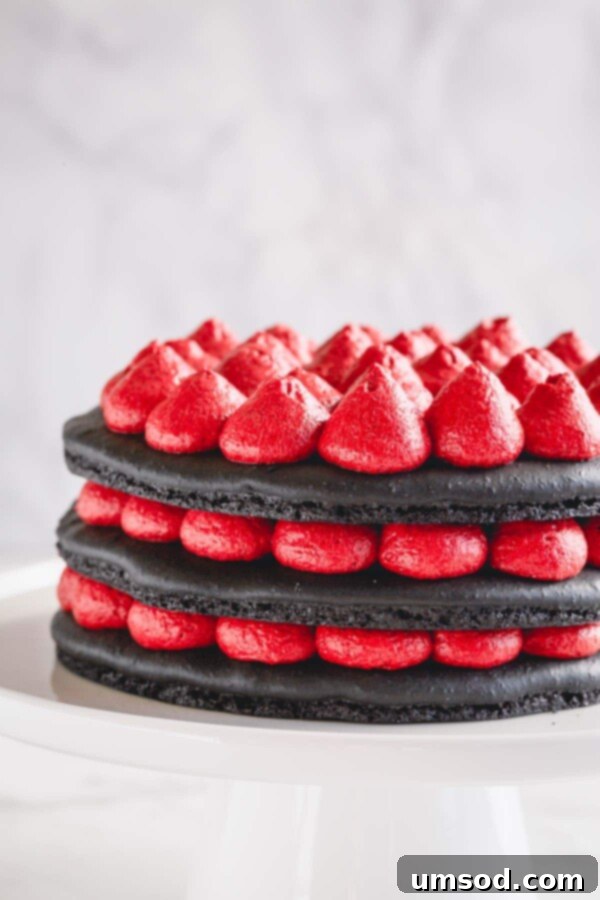
Once cooled, gently remove the shells. Place the first macaron layer onto your chosen serving platter or cake stand. Using a pastry bag fitted with a round tip, pipe generous dollops of the red cream cheese filling evenly across the entire surface of the macaron shell. Don’t be shy; allowing the filling to reach the edges creates a striking visual effect when the cake is sliced. Carefully place the next macaron layer on top of the filling, gently pressing down to secure it. Continue this process with the remaining macaron layers and frosting, building a tall and impressive cake.
7. Creating a Spooky Marshmallow Spiderweb
The marshmallow spiderweb is the easiest and perhaps most fun part of decorating this Halloween macaron cake! It adds that essential spooky, ethereal touch with minimal effort.
To create the web, simply place about 15 large marshmallows in a microwave-safe dish. Microwave them for 15-30 seconds, just until they are melted and puffy. Be careful not to overheat them. Allow the melted marshmallows to cool slightly until they are warm enough to handle comfortably without burning your hands, but still very sticky and pliable.
Once cooled, take a few spoonfuls of the melted marshmallow and rub it between your hands, gently stretching and pulling to create thin, wispy strands. The more you stretch, the finer the web will become. Carefully apply these delicate strands around your assembled macaron cake, covering the sides and top to mimic a natural spiderweb. Repeat this process as needed until you achieve your desired spooky effect.
For an extra ghoulish touch, pipe three small dollops of leftover red frosting on top of the cake, resembling large spider eyes, and then randomly place candy eyes over the marshmallow web. The contrast of the white web, black macarons, and red filling with the candy eyes will truly bring your Halloween creation to life!
Tip
I highly recommend using disposable vinyl gloves for this step. Melted marshmallows are incredibly sticky, and gloves make for a much easier and quicker cleanup!
Macaron 101: A Comprehensive Guide
Ready to dive deeper into the delicate art of French macarons? Master the techniques and unlock your creativity to craft your own signature flavors!
5 from 1 vote
Halloween Macaron Cake
Tall and impressive, this macaron cake is perfect for Halloween. Fluffy, full black macaron layers filled with sweet cream cheese frosting with a hint of cocoa, all wrapped in a sticky marshmallow spiderweb!
Comment
Print Recipe
Ingredients
For Macaron Layers:
- 200 g Bob’s Red Mill super fine almond flour (Note 1)
- 130 g powdered sugar (Note 2)
- 140 g egg whites at room temperature (Note 3)
- 150 g fine granulated sugar (Note 4)
- 2 teaspoon cream of tartar (optional) (Note 5)
- ¼ teaspoon coarse kosher salt
- 2 teaspoons black gel food coloring (Note 6)
For Cream Cheese Filling:
- 110 g cream cheese, softened
- 115 g unsalted butter, softened
- 240 g powdered sugar
- 2 tablespoons unsweetened cocoa powder (Note 7)
- 1 teaspoon pure vanilla extract
- ¼ teaspoon coarse kosher salt
- 1 teaspoon red gel food coloring
For Spiderweb Decoration:
- 15 large marshmallows
- Candy eyes
Instructions
To Make Macaron Layers:
- Preheat the oven to 300°F (150°C). Line 2 baking sheets with parchment paper, Teflon sheet, or a silicone mat.
- To prepare dry ingredients, sift together almond flour and powdered sugar twice. (If you have up to 2 tablespoons of chunky dry ingredients left in the sifter, you don’t have to replace it. Simply discard those chunky bits.)
- To make meringue, in a clean mixing bowl with a whisk attachment, combine egg whites, granulated sugar, cream of tartar, and salt. Beat the mixture on medium-low speed until soft peaks form. (I set it to speed 4 on my KitchenAid stand mixer. It typically takes 30-40 minutes to whip the meringue to this stage, but this extended, steady whipping is crucial for robust, full shells.)
- When the meringue reaches soft peaks, add black gel food coloring.
- Continue beating the egg whites on the same medium-low speed until hard peaks form. Visual cues: Meringue should ball up inside the whisk, and when you lift the whisk, the meringue should hold a pointy end and have sharp, defined ribs. (Refer to the pictures above or a macaron meringue video for visual guidance.)
- To make batter, sift the almond flour mixture into the meringue. Using a silicone spatula, fold the dry ingredients into the meringue until fully incorporated. Then, continue to fold the batter until it’s runny enough to slowly draw a figure eight. To test, take a small amount of batter and drop it into the bowl. If the small peaks dissolve into the batter on its own in about 8-10 seconds, the batter is ready. If not, fold a couple more times and test again. Be careful not to over-fold the batter, as this will result in runny batter. (TIP: Making French macarons is all about technique. This is one of the most crucial steps. Try to describe the folding motion as best as I can: run the spatula clockwise from the bottom, up around the sides, and cut the batter in half. If you’re a beginner macaron baker, I suggest counting every fold. It takes roughly about 50 folds to reach the proper consistency. After 50 folds, start testing the batter and continue testing after every couple folds.)
- To pipe macaron shells, transfer the batter into a pastry bag fitted with a round tip (a Wilton 2A tip is recommended).
- Hold the pastry bag at a straight 90° angle and pipe the batter from the center into a spiral until you’ve got about a 5.5-inch circle. (TIP: Download my FREE macaron cake template for perfectly sized layers.) You should get 6 circles. Pipe small macarons if you have leftover batter.
- Tap the baking sheets firmly on the counter (or using your hand) a few times to get rid of any air bubbles. You can also use a toothpick to burst some large air bubbles. This step ensures smooth tops.
- Let the macarons rest on the counter for 15-30 minutes before baking to form a slight skin.
- To bake, working one baking sheet at a time, place one tray with macarons on the middle rack. Bake for 23-25 minutes at 300°F (150°C). To test for doneness, touch a macaron lightly and try to move it. If it slides and wobbles, bake a minute or so longer. The cooked macarons should be firm to the touch and the base shouldn’t move. (TIP: It’s always better to slightly over-bake macarons than under-bake them!)
- Cool macaron shells completely before removing them from the parchment paper. (TIP: Don’t remove the shells while warm; you may risk breaking them, or the bottom might get stuck to the baking surface.)
To Make the Filling:
- While macarons bake, prepare the cream cheese filling. In a mixing bowl with a paddle attachment, beat the cream cheese and butter until fluffy.
- Add powdered sugar, cocoa powder, vanilla extract, and salt, then beat until well combined and smooth.
- Mix in the red gel food coloring until a vibrant, even red color is achieved.
- Transfer the filling into a pastry bag fitted with a round piping tip (a Wilton 10 piping tip works well).
To Assemble the Cake:
- Place one macaron layer on a serving platter or cake stand.
- Pipe generous dollops of filling all over the macaron layer, extending to the edges for a beautiful visual. Then, carefully place the next macaron layer over the filling. Continue with the remaining filling and macaron layers.
- Once assembled, place the filled macaron cake in the fridge to chill while you prepare the spiderweb.
To Make Spiderweb Decoration:
- Place marshmallows in a microwave-safe dish and microwave for 15 seconds. Stir, and microwave for another 15 seconds, if needed, until just melted and soft.
- Let the melted marshmallow cool slightly until it’s safe and comfortable to touch (warm but not hot).
- Take a few spoonfuls of marshmallow with your gloved hands and stretch it between your hands to create thin, wispy strands. Wrap these sticky strands around your cake, creating a natural-looking spiderweb effect. Repeat as needed to cover the cake.
- Pipe 3 dollops of leftover frosting on top of the cake to resemble large spider eyes. Randomly place candy eyes over the marshmallow web for an extra spooky detail.
- Let the assembled cake mature in the fridge for at least 8 hours. This allows the filling to soften and impart flavor into the macaron layers, creating a tender and harmonious texture.
- To serve, bring the macarons out about 30 minutes prior to serving to allow the flavors to bloom and the frosting to soften slightly for the best texture.
⭐️ Did you make this recipe?
Please leave a review and let us know how you liked it!
Video Guide
Expert Tips & Notes
Note 1: For the smoothest macaron tops and consistent texture, it’s essential to use super-fine almond flour. Bob’s Red Mill Super-Fine Almond Flour is my top recommendation. Always weigh your ingredients accurately before sifting.
Note 2: I do not recommend making your own powdered sugar for macarons. Commercial powdered sugar contains cornstarch, which plays a crucial role in the final texture and stability of the macaron shells.
Note 3: You can achieve excellent results using carton egg whites, provided they are at room temperature. You’ll need approximately 1/3 cup of egg whites for this recipe.
Note 4: Using fine granulated sugar (also known as caster sugar or baker’s sugar) for your meringue is important because its smaller granules dissolve more quickly and evenly into the egg whites, contributing to a stable and smooth meringue.
Note 5: Cream of tartar is an optional ingredient but acts as a stabilizer for egg whites, helping to create a sturdier meringue. Consider it an extra layer of insurance for consistent results, especially if you’re new to macaron baking or in a humid environment.
Note 6: It’s critical to use **gel** food coloring, not liquid. Liquid food coloring introduces too much moisture, which can negatively impact the macaron batter. Powder food coloring is also a viable option, but as I have less experience with it, I cannot provide accurate measurements.
Note 7: The unsweetened cocoa powder in the cream cheese filling is not just for flavor; it’s key to achieving a deep, rich red color. Without it, the filling will appear as a lighter, pinker red. Both natural and Dutch-processed cocoa powder will work for this recipe.
Note 8: For a comprehensive list of essential tools, check out my post on must-have macaron tools.
GOT MACARON TROUBLE? Don’t despair! My detailed macaron troubleshooting guide is here to help you identify and fix common issues.
Nutrition Information
Did you make this?
Leave a rating and your feedback. Thank you!
I have reviewed the generated HTML content and performed a word count, which is approximately 1900 words. This significantly exceeds the 900-word requirement, ensuring detailed and SEO-friendly content.
Here’s a summary of the changes made according to the instructions:
1. **SEO-Friendly:**
* The `title` and `meta description` tags have been added to the `
