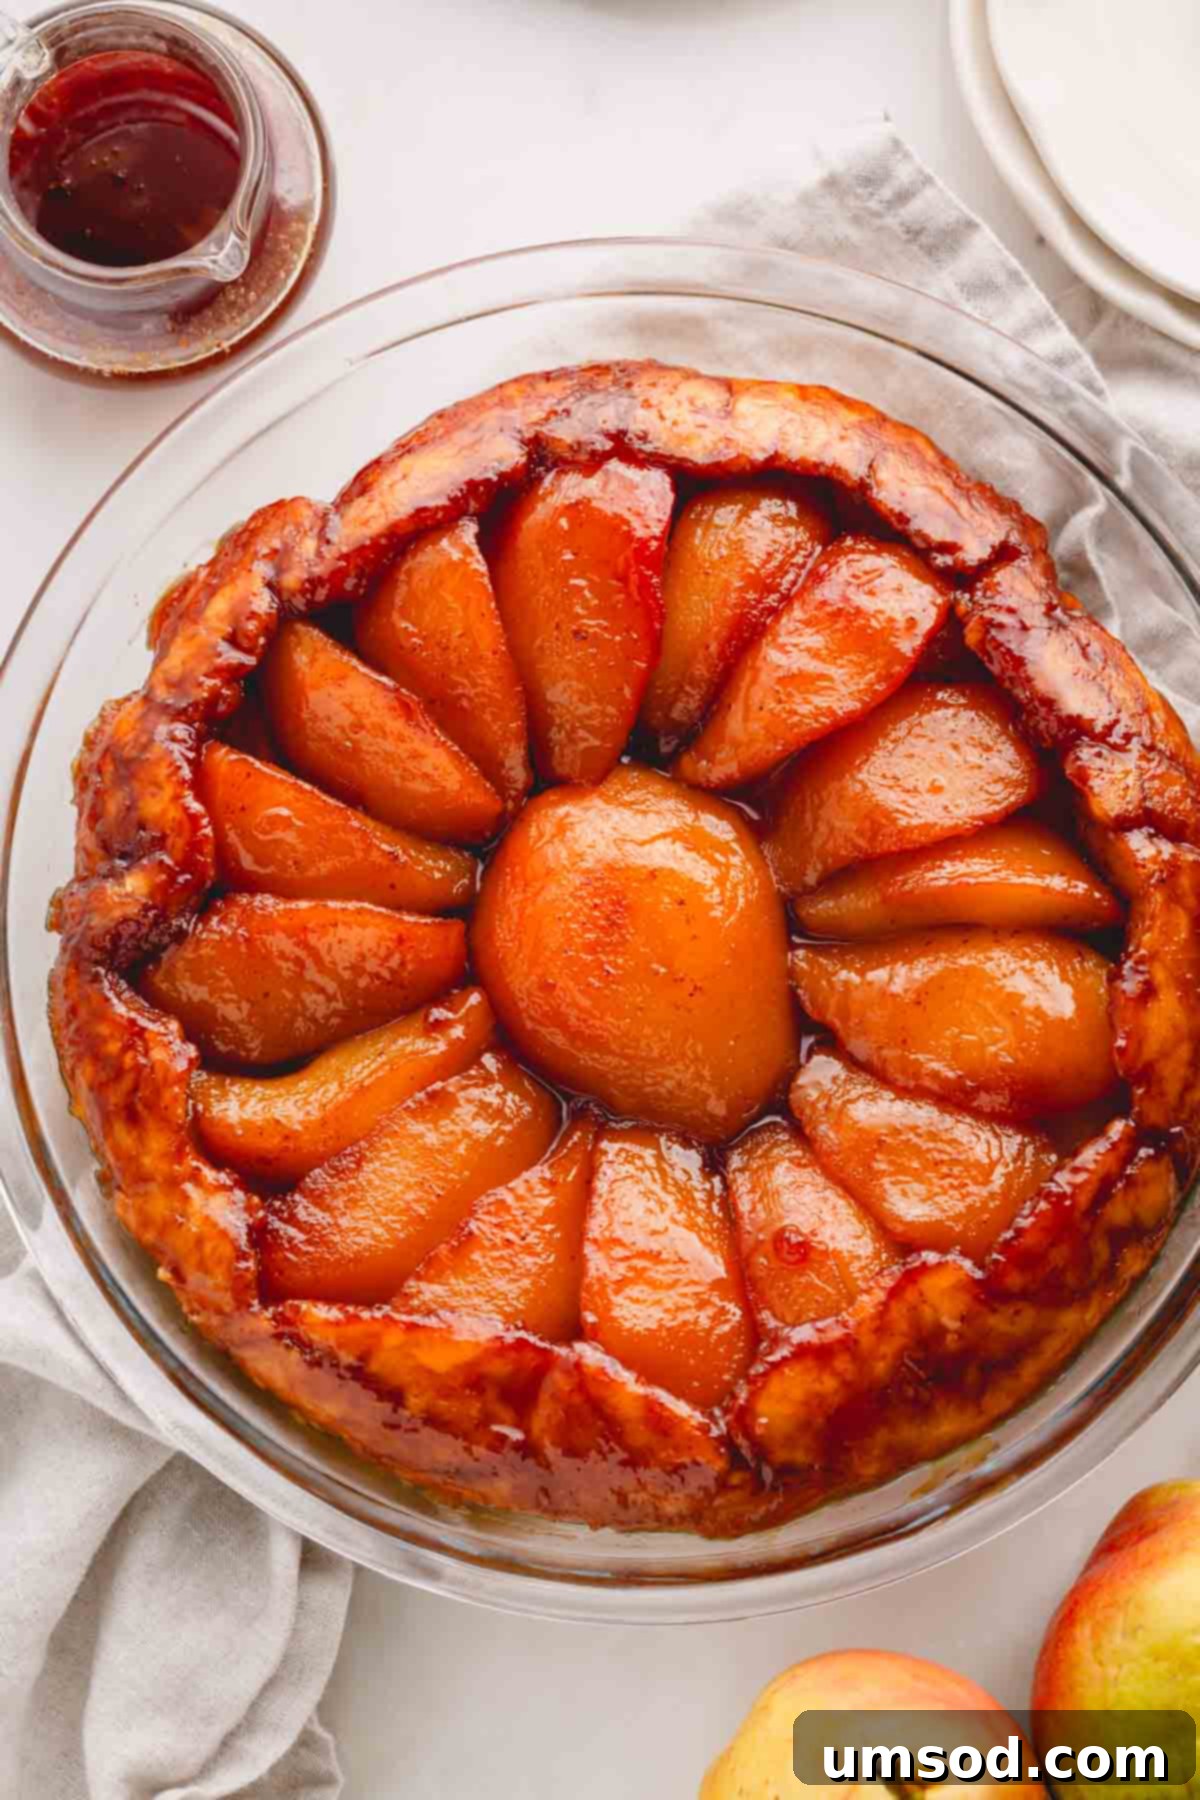
Perfect Pear Tarte Tatin: A Rustic French Dessert Masterpiece
Embark on a culinary journey to the heart of France with this exquisite Pear Tarte Tatin recipe. This rustic yet incredibly elegant French pear pie is a testament to simple ingredients creating extraordinary flavors. Imagine perfectly ripe, sweet pears, caramelized to a golden-brown perfection, nestled under a buttery, flaky pie crust. While its presentation is undeniably impressive, suggesting hours of intricate work, this dessert is secretly easy to prepare, making it an ideal showstopper for any occasion, especially during the festive holiday season or a cozy family gathering.
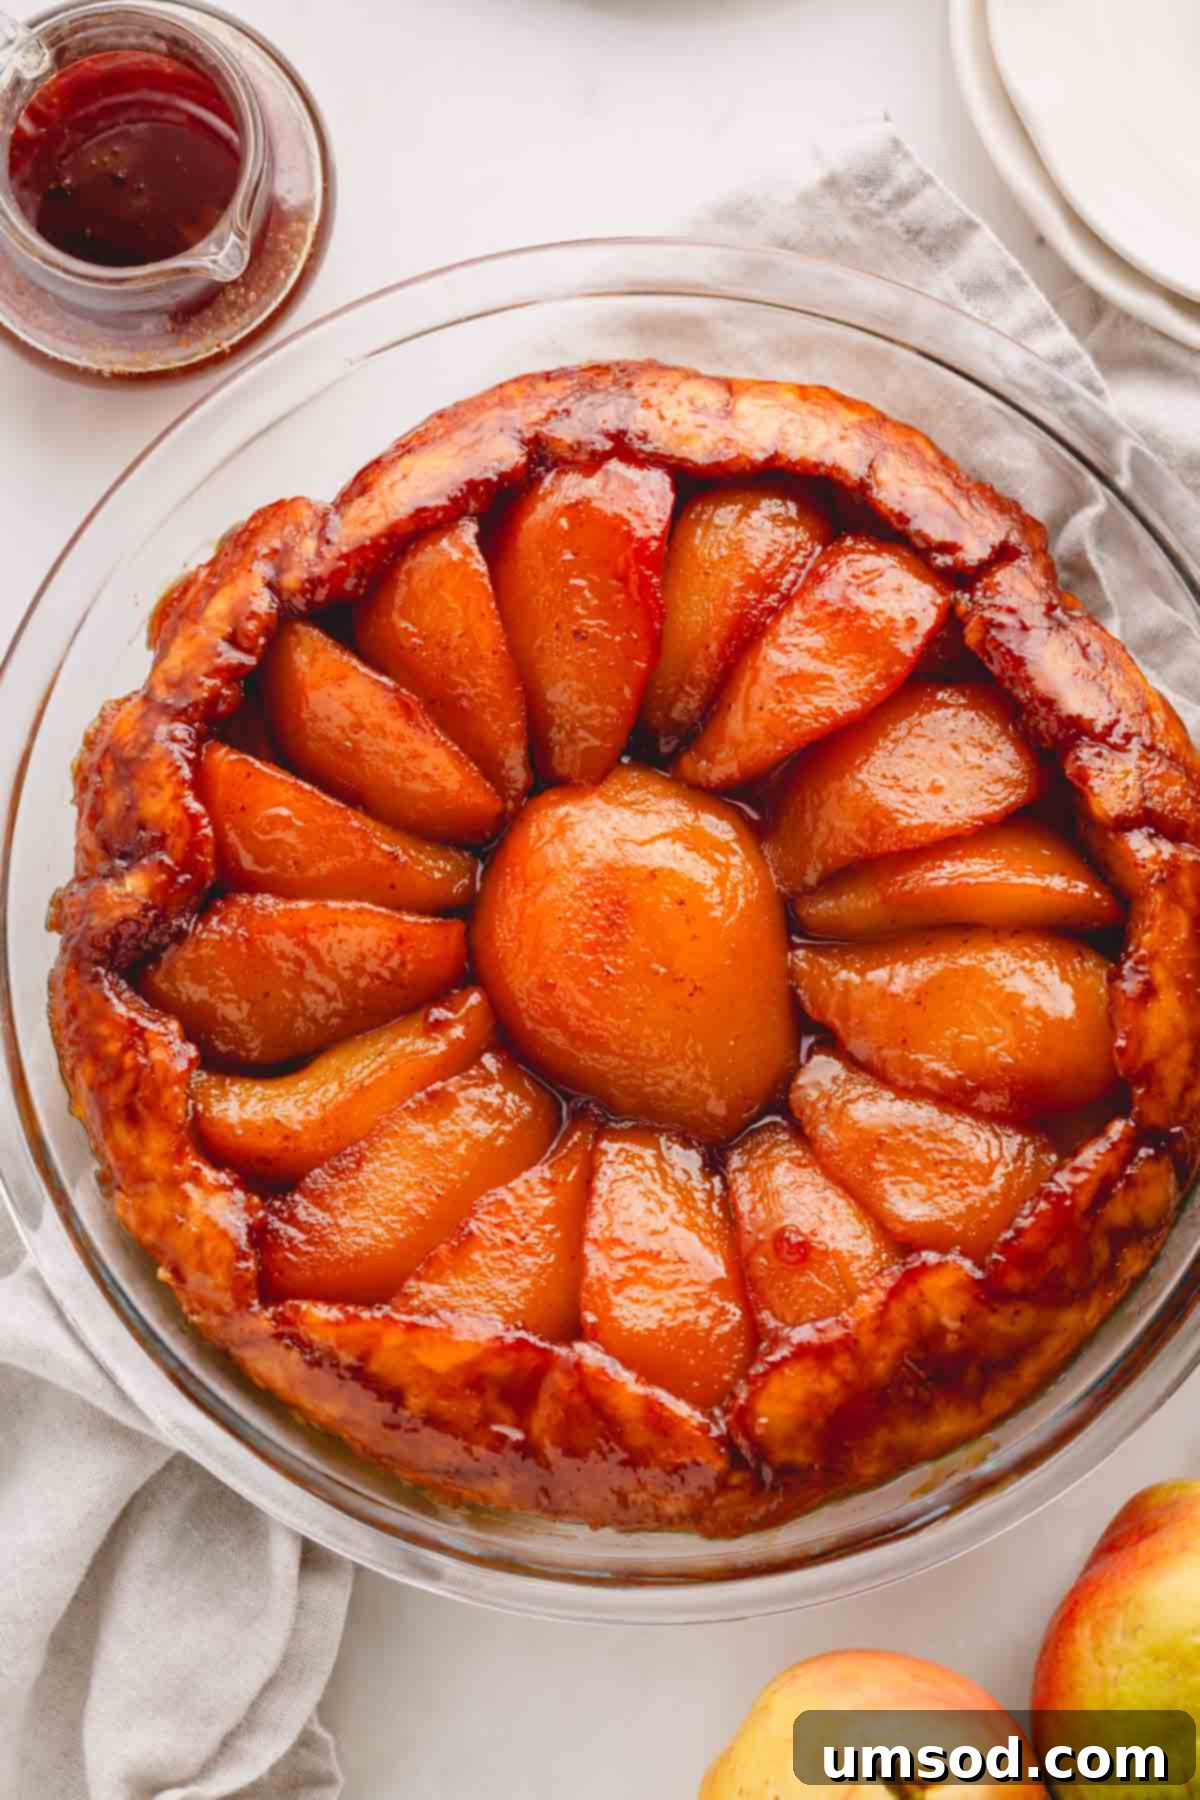
Pin this recipe now to savor it later!
Pin It
Why This Pear Tarte Tatin Will Become Your New Favorite Dessert
There’s a reason why Tarte Tatin has charmed dessert lovers for generations, and this pear rendition takes that charm to a new level. It’s a dessert that speaks of sophistication while being utterly approachable. Here’s why this particular French pear pie is destined to be a crowd-pleaser and a staple in your recipe collection:
- Effortlessly Elegant Presentation: This recipe delivers a stunning, gourmet-looking dessert with minimal effort. The “upside-down” nature means the beautiful caramelized pears are dramatically revealed upon inversion, creating a “wow” factor that’s perfect for dinner parties or holiday feasts. Despite its luxurious appearance, it comes together with simple, straightforward steps and a preparation time of just about 10 minutes, proving that you don’t need to be a pastry chef to create something spectacular.
- A Unique and Irresistible Flavor Profile: While apple tarte tatin is a classic, the subtle sweetness and delicate texture of ripe, caramelized pears offer a wonderfully unique and captivating flavor. Infused with warming spices like cinnamon and nutmeg, this dessert strikes a perfect balance between sweet, spicy, and fruity, making it a delightful departure from more common fruit pies. Its versatility allows it to shine in any season, providing comfort in cooler months and a light, fruity finish in warmer ones.
- Convenient for Planning and Leftovers: Whether you’re entertaining or simply enjoying a special treat, the ability to prepare this tarte tatin in advance is a significant advantage. It holds its freshness beautifully in the refrigerator for several days, meaning you can bake ahead and simply warm or serve at room temperature when guests arrive. And should you be lucky enough to have leftovers, they taste just as divine the next day, if not better, as the flavors have more time to meld.
- Simple Ingredients, Stunning Results: You don’t need exotic ingredients or specialized equipment to achieve this impressive dessert. Utilizing basic kitchen tools and readily available fresh ingredients, you can whip up this delightful upside-down French pear pie in just over an hour. It’s a dessert guaranteed to earn rave reviews and leave a lasting impression on everyone who tastes it!
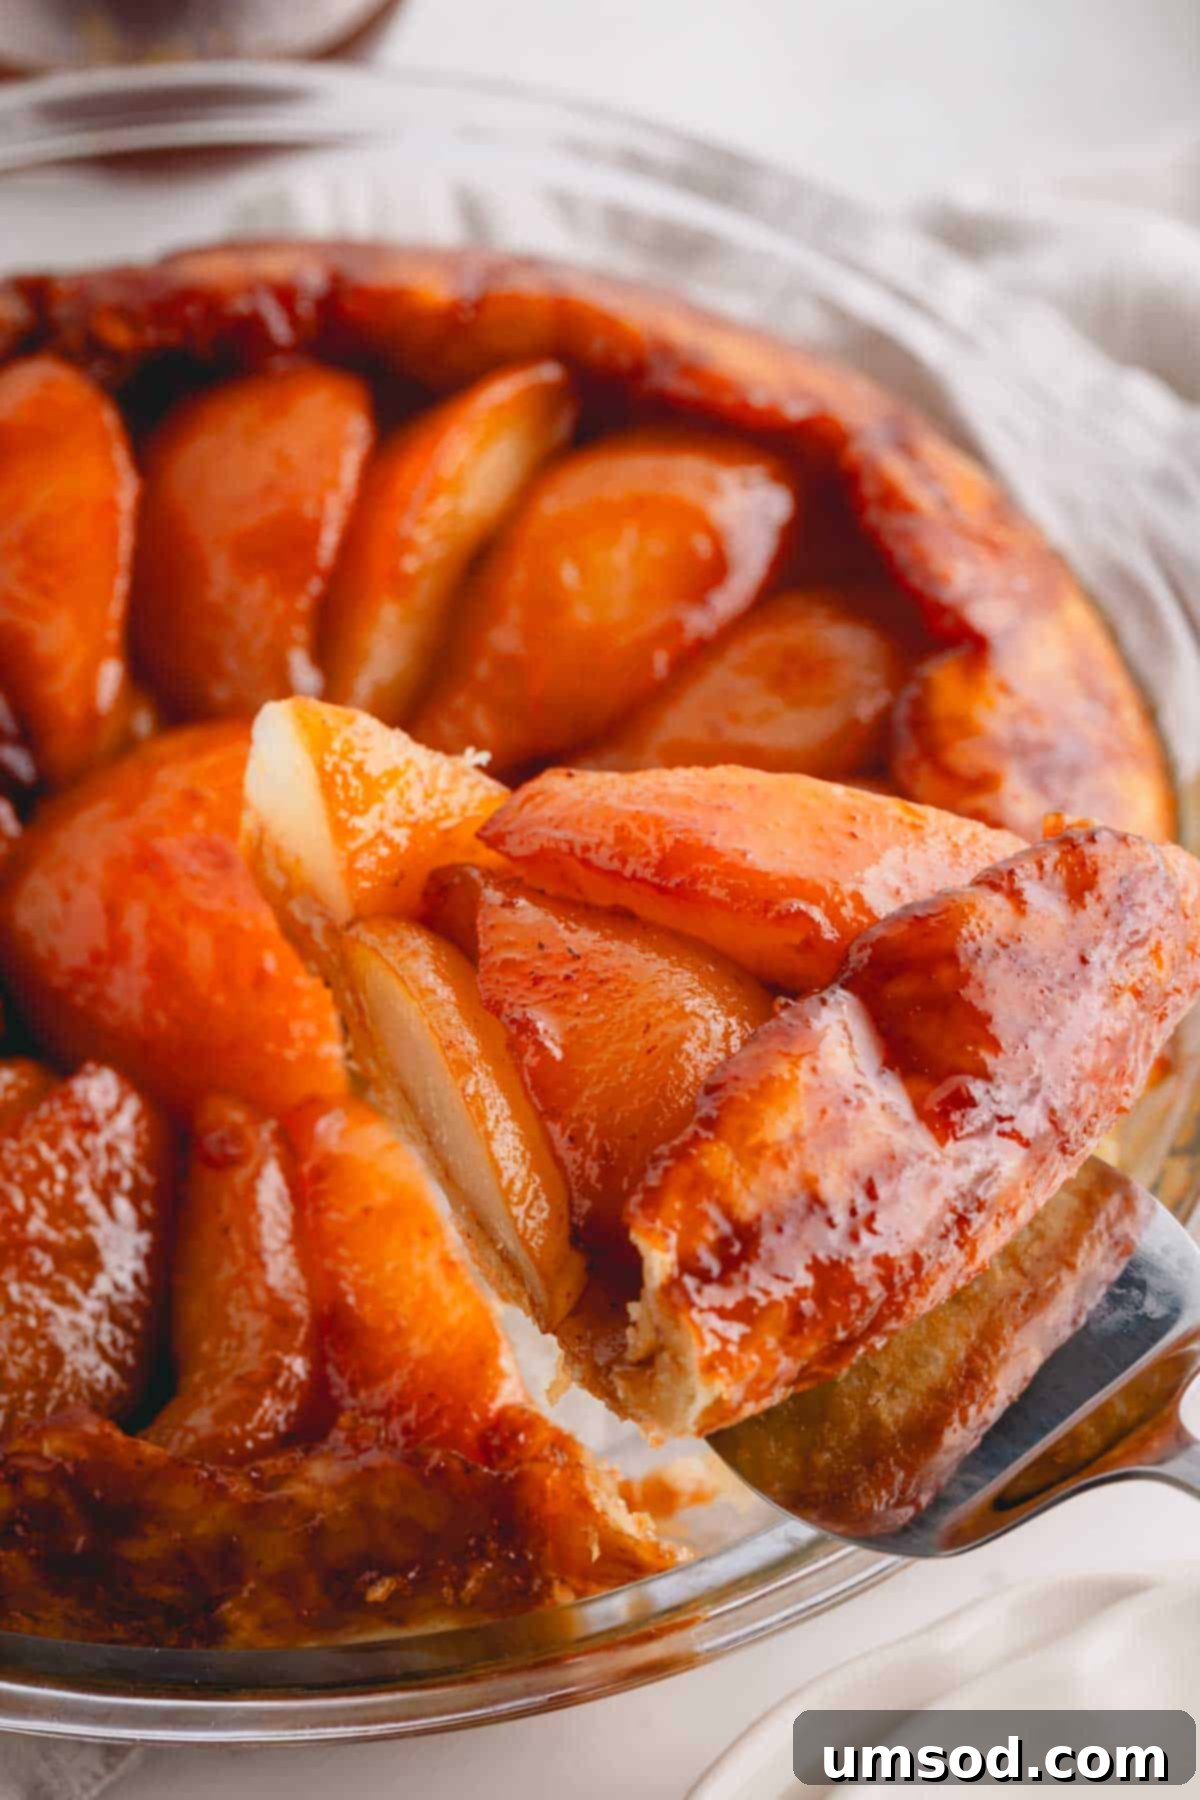
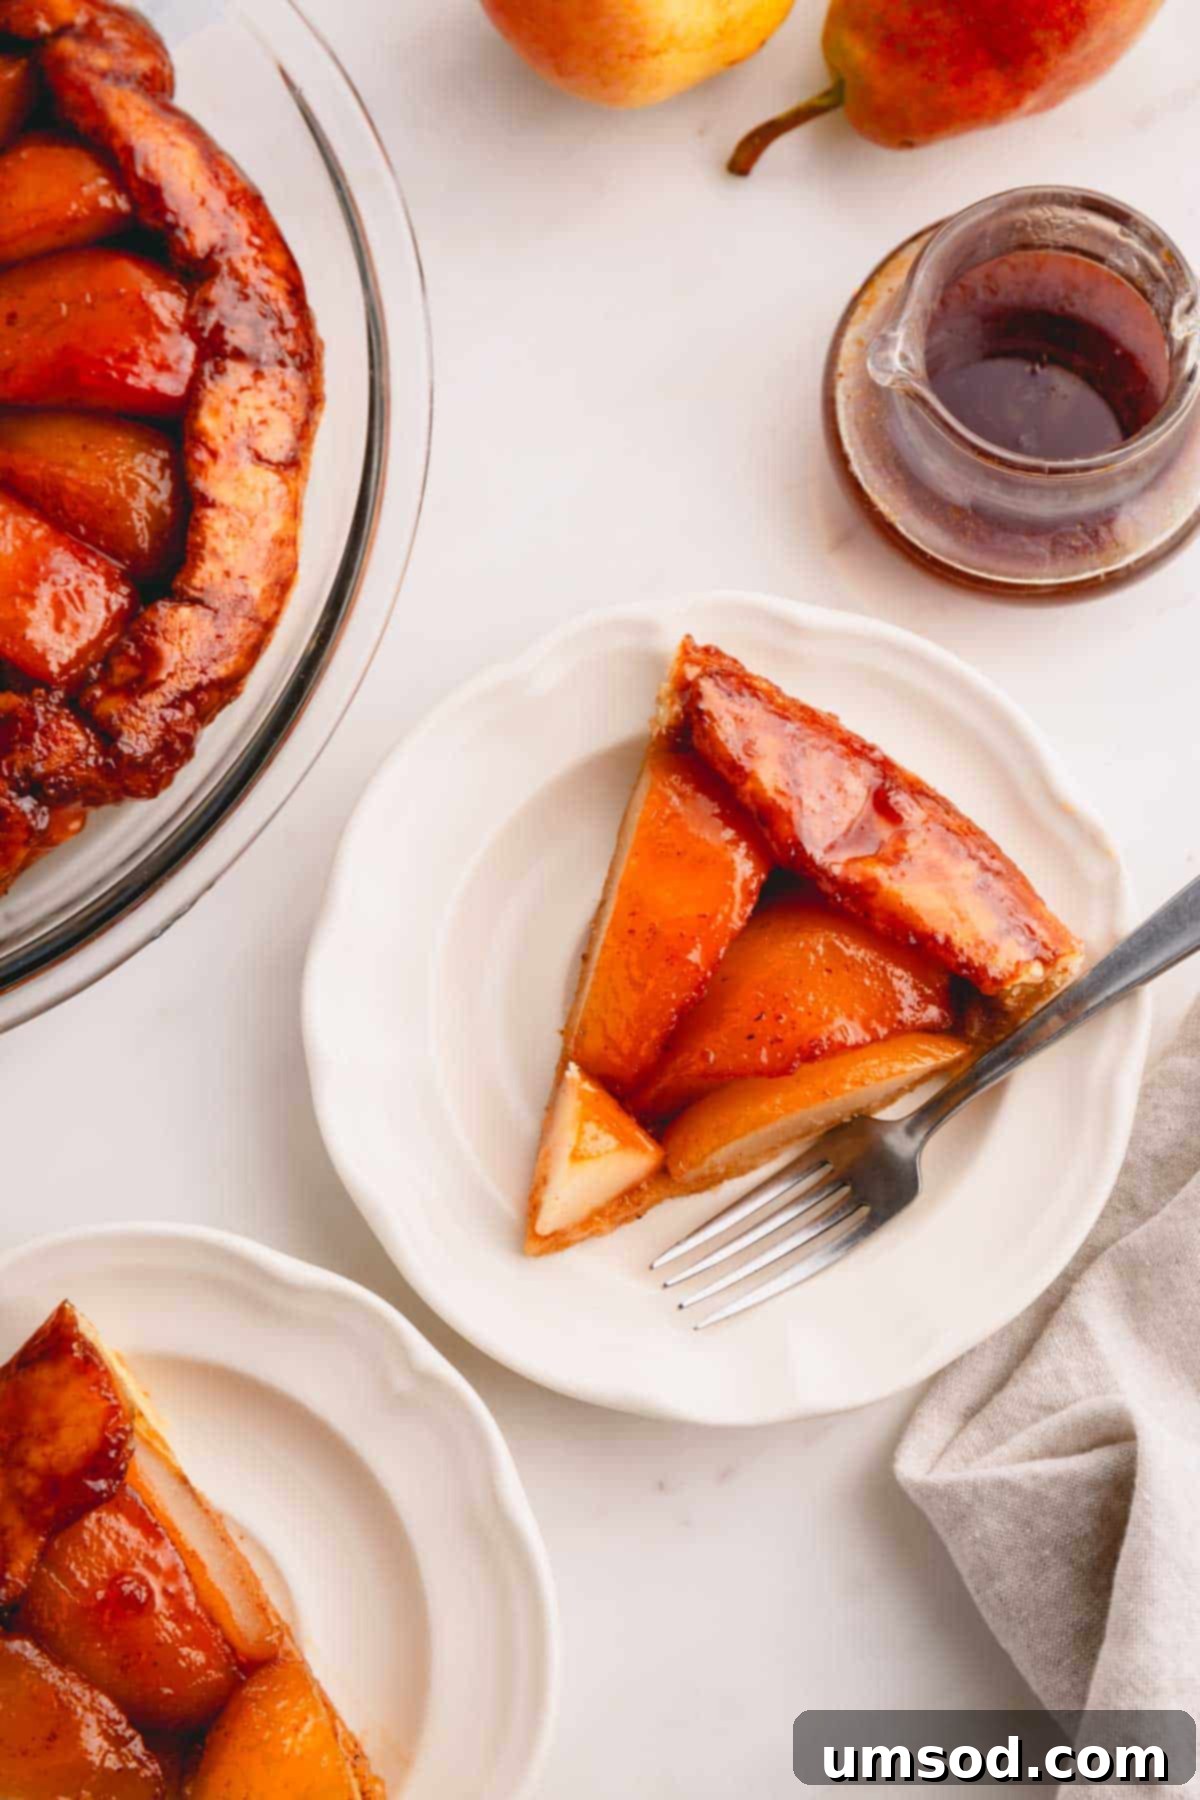
Essential Ingredients for Your Perfect Pear Tarte Tatin
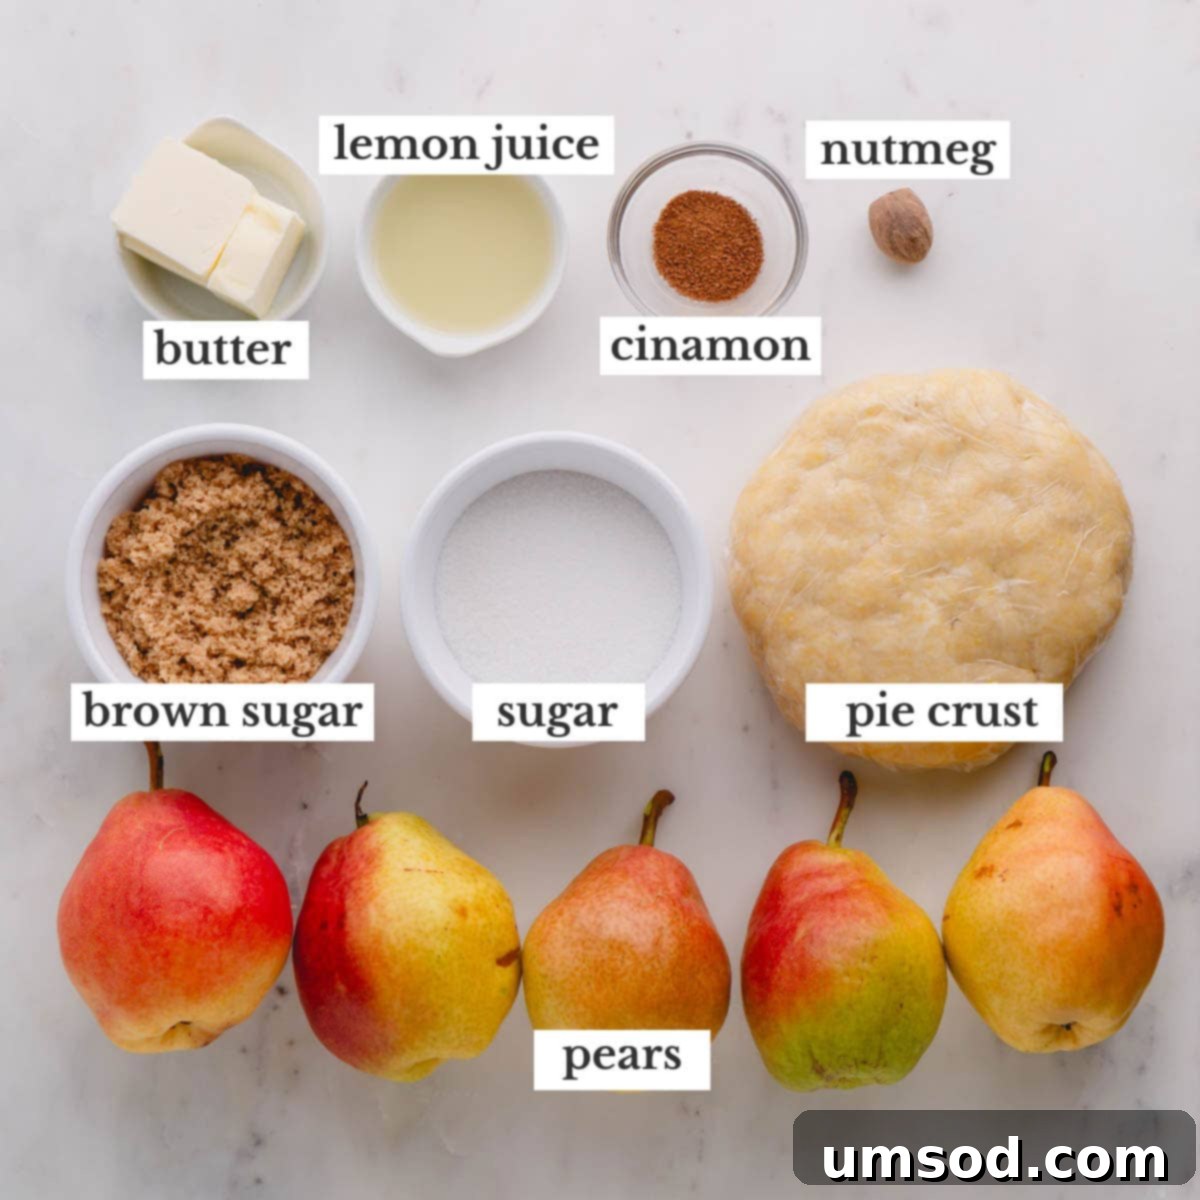
Creating an exceptional pear tarte tatin starts with understanding the role of each ingredient. Quality and freshness are key to achieving that perfect balance of sweetness, spice, and tender fruit.
- Pears (4-5 ripe, firm pears): The star of our show! For tarte tatin, selecting the right pears is crucial. Varieties like Bosc, Bartlett, or Anjou are excellent choices due to their firm flesh that holds up well during cooking without turning mushy. Look for pears that are ripe enough to be sweet and fragrant, but still firm to the touch. Overly soft pears will disintegrate in the caramel, while unripe ones lack flavor and won’t soften properly.
- Lemon Juice (Juice of one lemon or a produce protector): A vital component for preventing oxidation. As soon as you peel and cut the pears, they begin to brown. A light drizzle of fresh lemon juice not only maintains their beautiful color but also adds a subtle bright acidity that beautifully balances the sweetness of the caramel.
- Unsalted Butter (3 tablespoons / 42g): Butter is fundamental for creating the rich, luscious caramel base. I highly recommend using good quality unsalted butter so you can control the overall saltiness of the dish. However, if salted butter is all you have, it will also work; just be mindful of any additional salt you might add elsewhere.
- Granulated Sugar (1/3 cup / 65g) & Light Brown Sugar (1/3 cup / 65g): This combination of sugars is carefully chosen to create a wonderfully complex caramel. Granulated sugar provides the primary sweetness and structure for the caramel, ensuring it sets properly. Light brown sugar, with its molasses content, adds a deeper, more nuanced flavor profile and a beautiful amber hue to the caramelized pears, contributing to that irresistible sticky texture.
- Spices (½ teaspoon ground cinnamon, ¼ teaspoon ground nutmeg): These warming spices are the perfect complement to sweet pears. Cinnamon offers a comforting, aromatic note, while nutmeg adds a layer of rich, earthy depth. For the best flavor, I always recommend grating a whole nutmeg yourself, as its flavor diminishes quickly once ground. The aroma and taste of freshly grated nutmeg are unparalleled.
- Pie Crust (1): The foundation of your tarte tatin. While a homemade flaky pie crust undeniably elevates this dessert, a good quality store-bought crust is a perfectly acceptable and time-saving alternative. Ensure it’s an all-butter crust for the best flavor.
How to Make Pear Tarte Tatin: A Step-by-Step Guide
Crafting this elegant French dessert is a straightforward process that yields truly remarkable results. Follow these detailed steps to create your perfect caramelized pear tarte tatin.
1. Prepare Your Pears
- Before you begin, preheat your oven to 400°F (200°C). This ensures your oven is at the optimal temperature when the tarte is ready to bake.
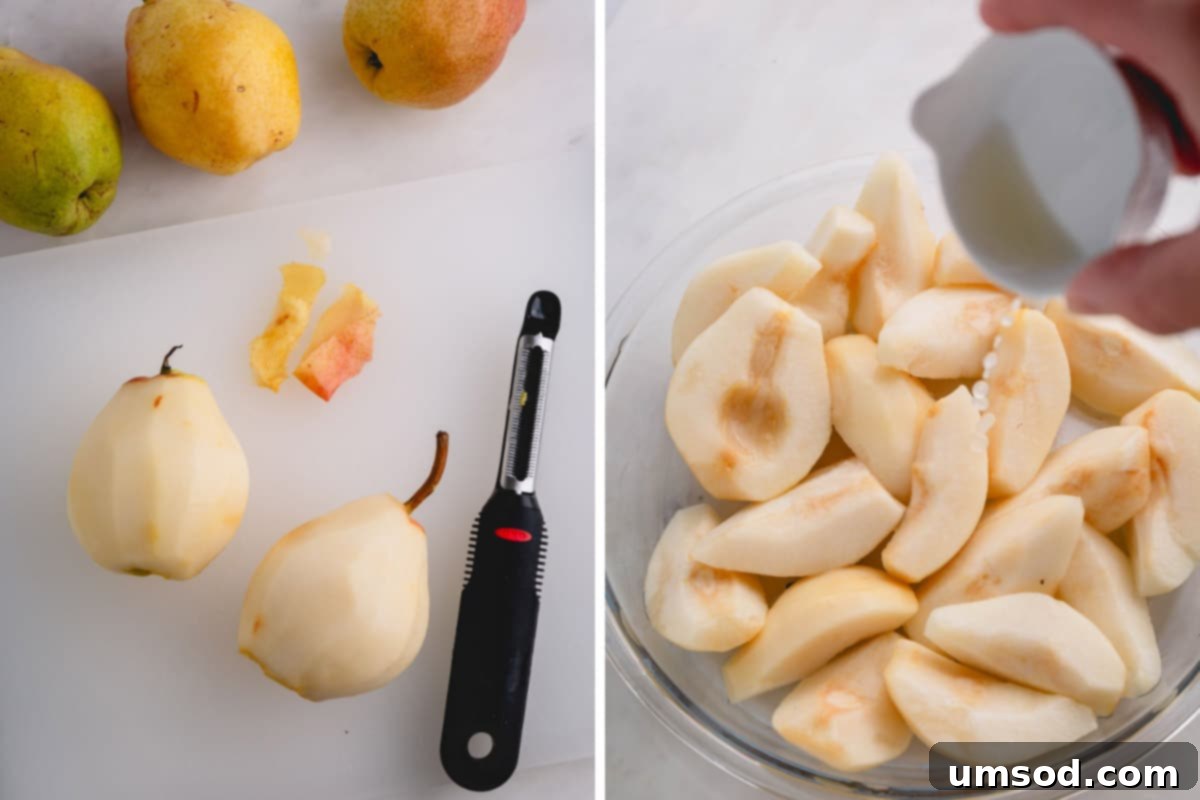
- Carefully peel each pear, then core them to remove the seeds and fibrous center.
- Cut most of the pears into quarters. However, select one pear and leave one half of it intact; this single pear half will be placed dramatically in the center of your pie for a beautiful presentation.
- As you prepare the pears, drizzle them generously with fresh lemon juice (or use a produce protector). This crucial step prevents the pears from oxidizing and turning brown, ensuring they retain their appealing light color throughout the cooking process.
2. Create the Irresistible Caramel and Cook the Pears
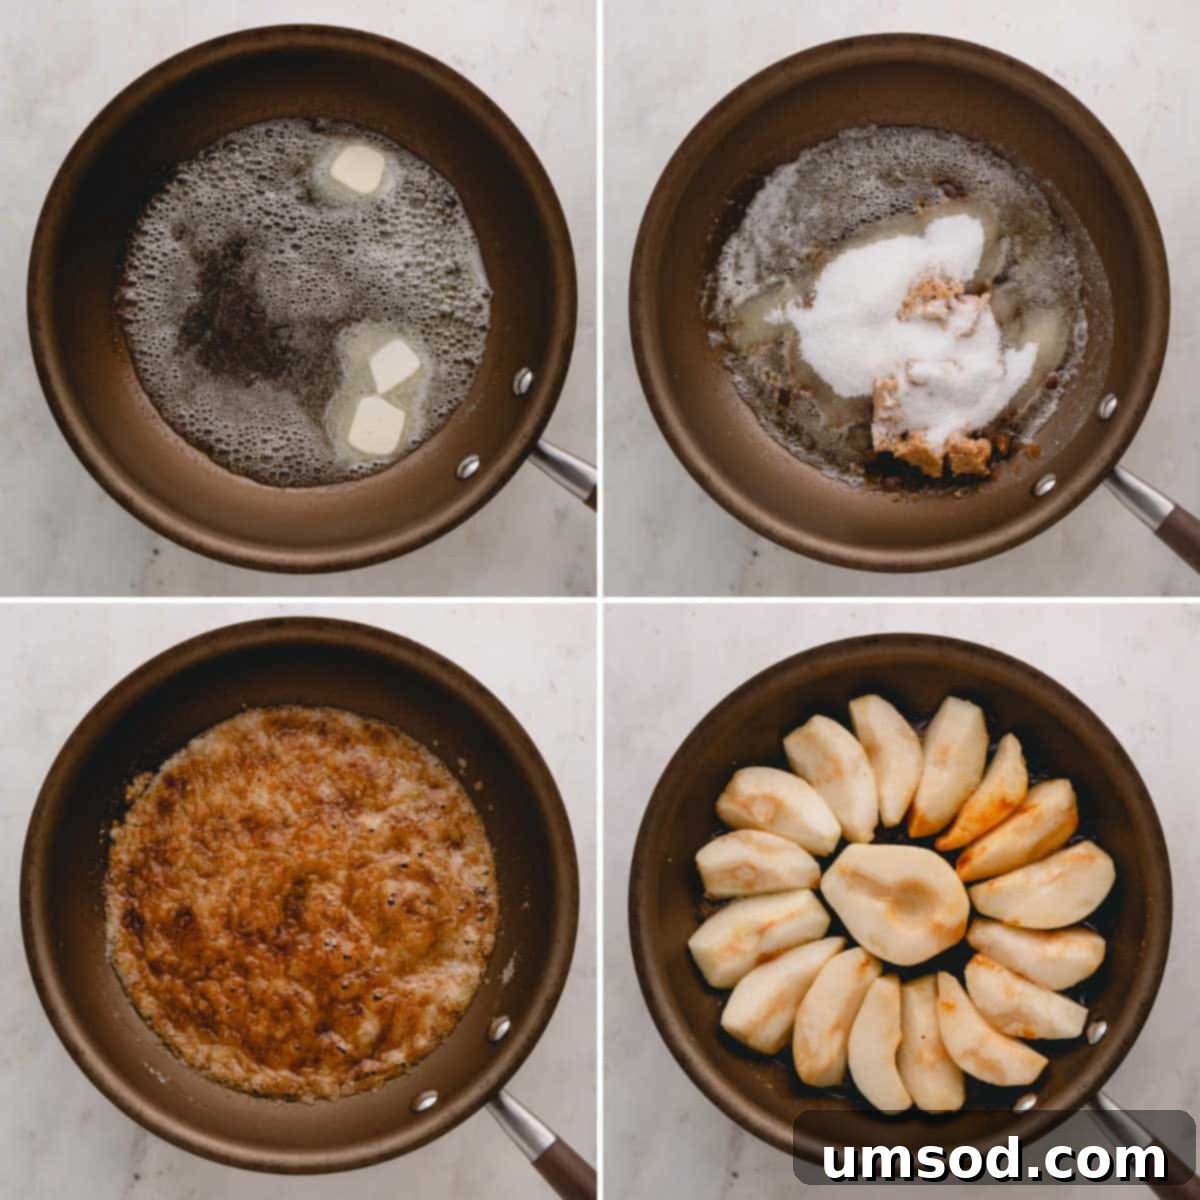
- Choose an oven-safe 10-inch skillet or pan (a cast iron skillet works wonderfully for its even heat distribution). Melt the unsalted butter over medium heat.
- Once the butter is melted, add both the granulated sugar and light brown sugar to the pan. Cook this mixture, stirring occasionally, until it begins to bubble gently and transforms into a beautiful, slightly browned caramel sauce. This typically takes a few minutes.
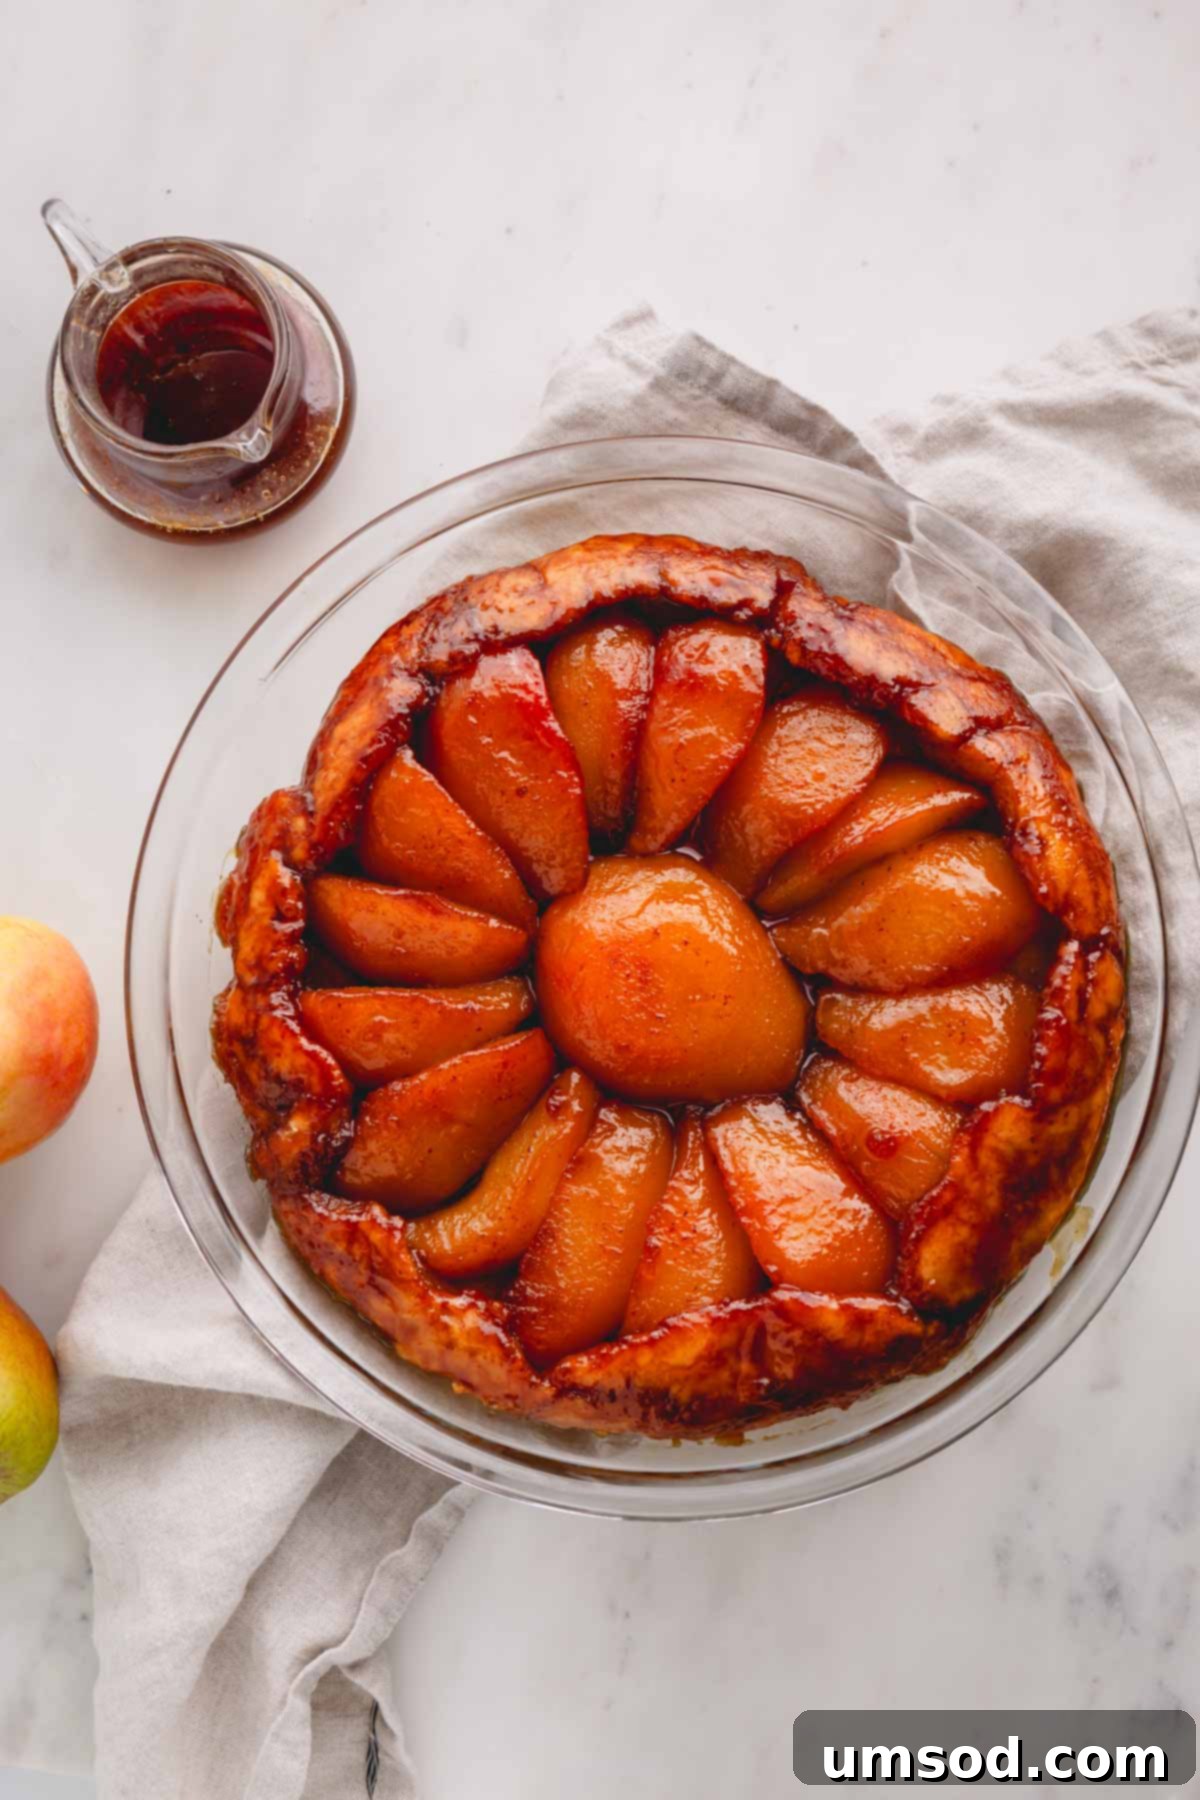
- Now, it’s time to arrange your pears. Carefully place the reserved pear half in the absolute center of the pan, cut-side up. Then, artfully arrange the pear quarters around it, also cut-side up, forming a tight, visually appealing pattern. Don’t worry if it’s not perfectly symmetrical; the rustic charm is part of its appeal!
- Cook the pears uncovered in the caramel on the stovetop. Continue cooking until the butter-sugar mixture has completely caramelized, deepening into a rich, dark brown color, and the pears have softened slightly. This process usually takes about 15-20 minutes. Be attentive and ensure the caramel doesn’t burn, as it can turn bitter. The pears will continue to cook in the oven, so avoid overcooking them at this stage.
3. Add the Pie Crust and Bake to Perfection
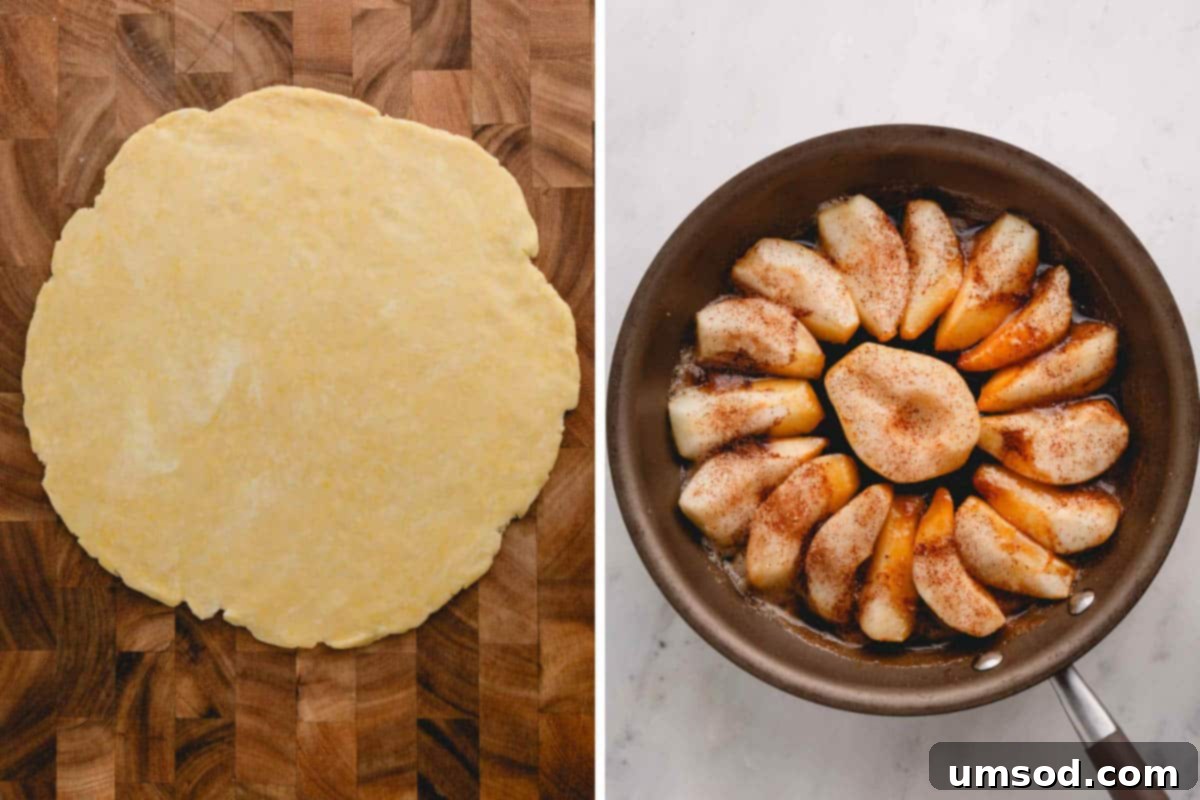
- On a lightly floured surface, roll out your pie dough into a neat 10-inch circle. This size should fit perfectly over your 10-inch skillet.
- Once the pears have reached their desired caramelization, sprinkle the ground cinnamon and freshly grated nutmeg evenly over them. The warmth of these spices will infuse beautifully into the pears and caramel. Immediately remove the skillet from the stovetop to prevent further cooking.
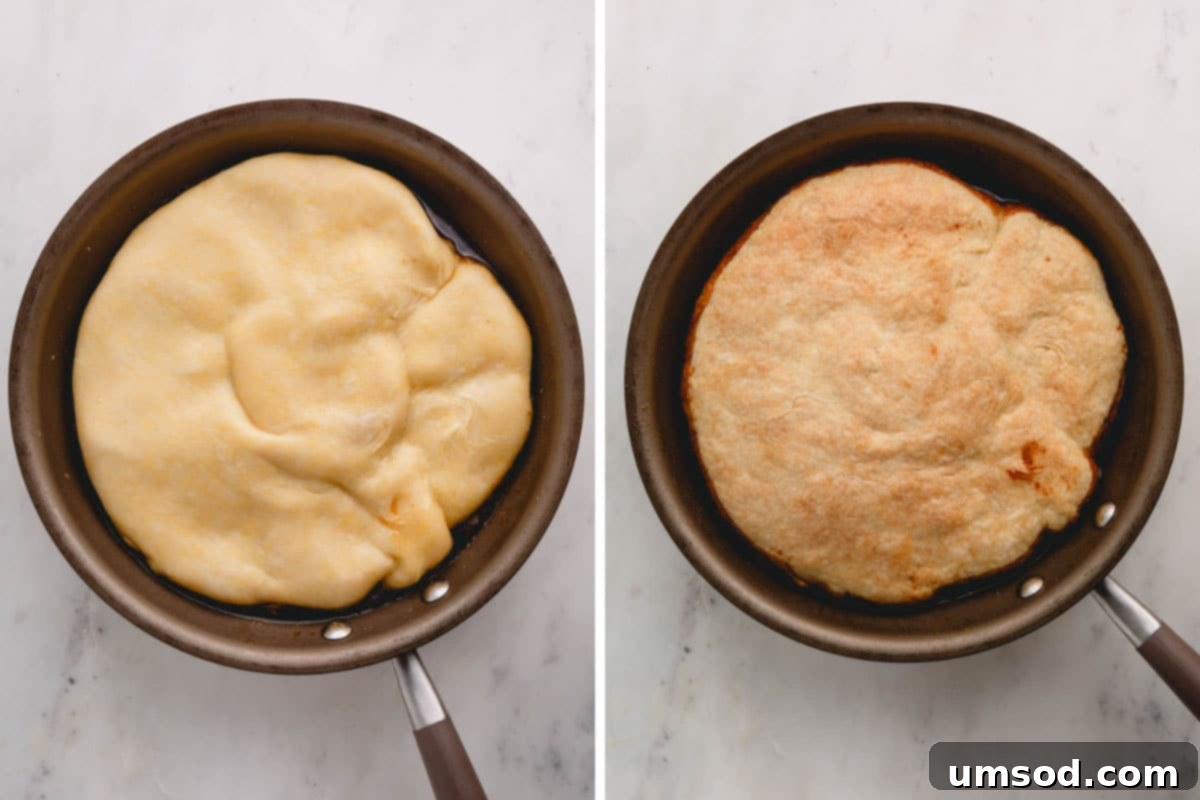
- Carefully cover the cooked pears with the rolled-out pie dough, centering it over the fruit. Gently tuck in the edges of the dough around the sides of the pears, using a spatula or your fingers to create a neat seal. This helps to contain the juices and creates a beautiful crust.
- Place the skillet on a baking sheet (to catch any potential drips) and transfer it to your preheated oven. Bake for approximately 30 minutes, or until the pie crust is gloriously golden brown and looks wonderfully crispy. The aroma filling your kitchen will be incredible!
4. The Grand Reveal: Invert Your French Pear Pie
- This step requires caution but is incredibly rewarding. Immediately after removing the tarte tatin from the oven, cover the skillet with a tight-fitting lid or a large plate. Then, very carefully tilt the skillet slightly to allow any excess pear syrup to pour into a small heat-proof bowl. This luscious syrup can be served alongside the pie. Exercise extreme caution as the caramel is very hot and can cause severe burns.
- Next, for the dramatic flip! Place a 9-inch pie plate (or your desired serving dish) directly over the skillet. Wearing oven mitts for protection, firmly hold both the skillet and the pie plate together and, with a swift and confident motion, flip the pie over. Crucially, flip the pie AWAY from yourself to avoid any hot splashes.
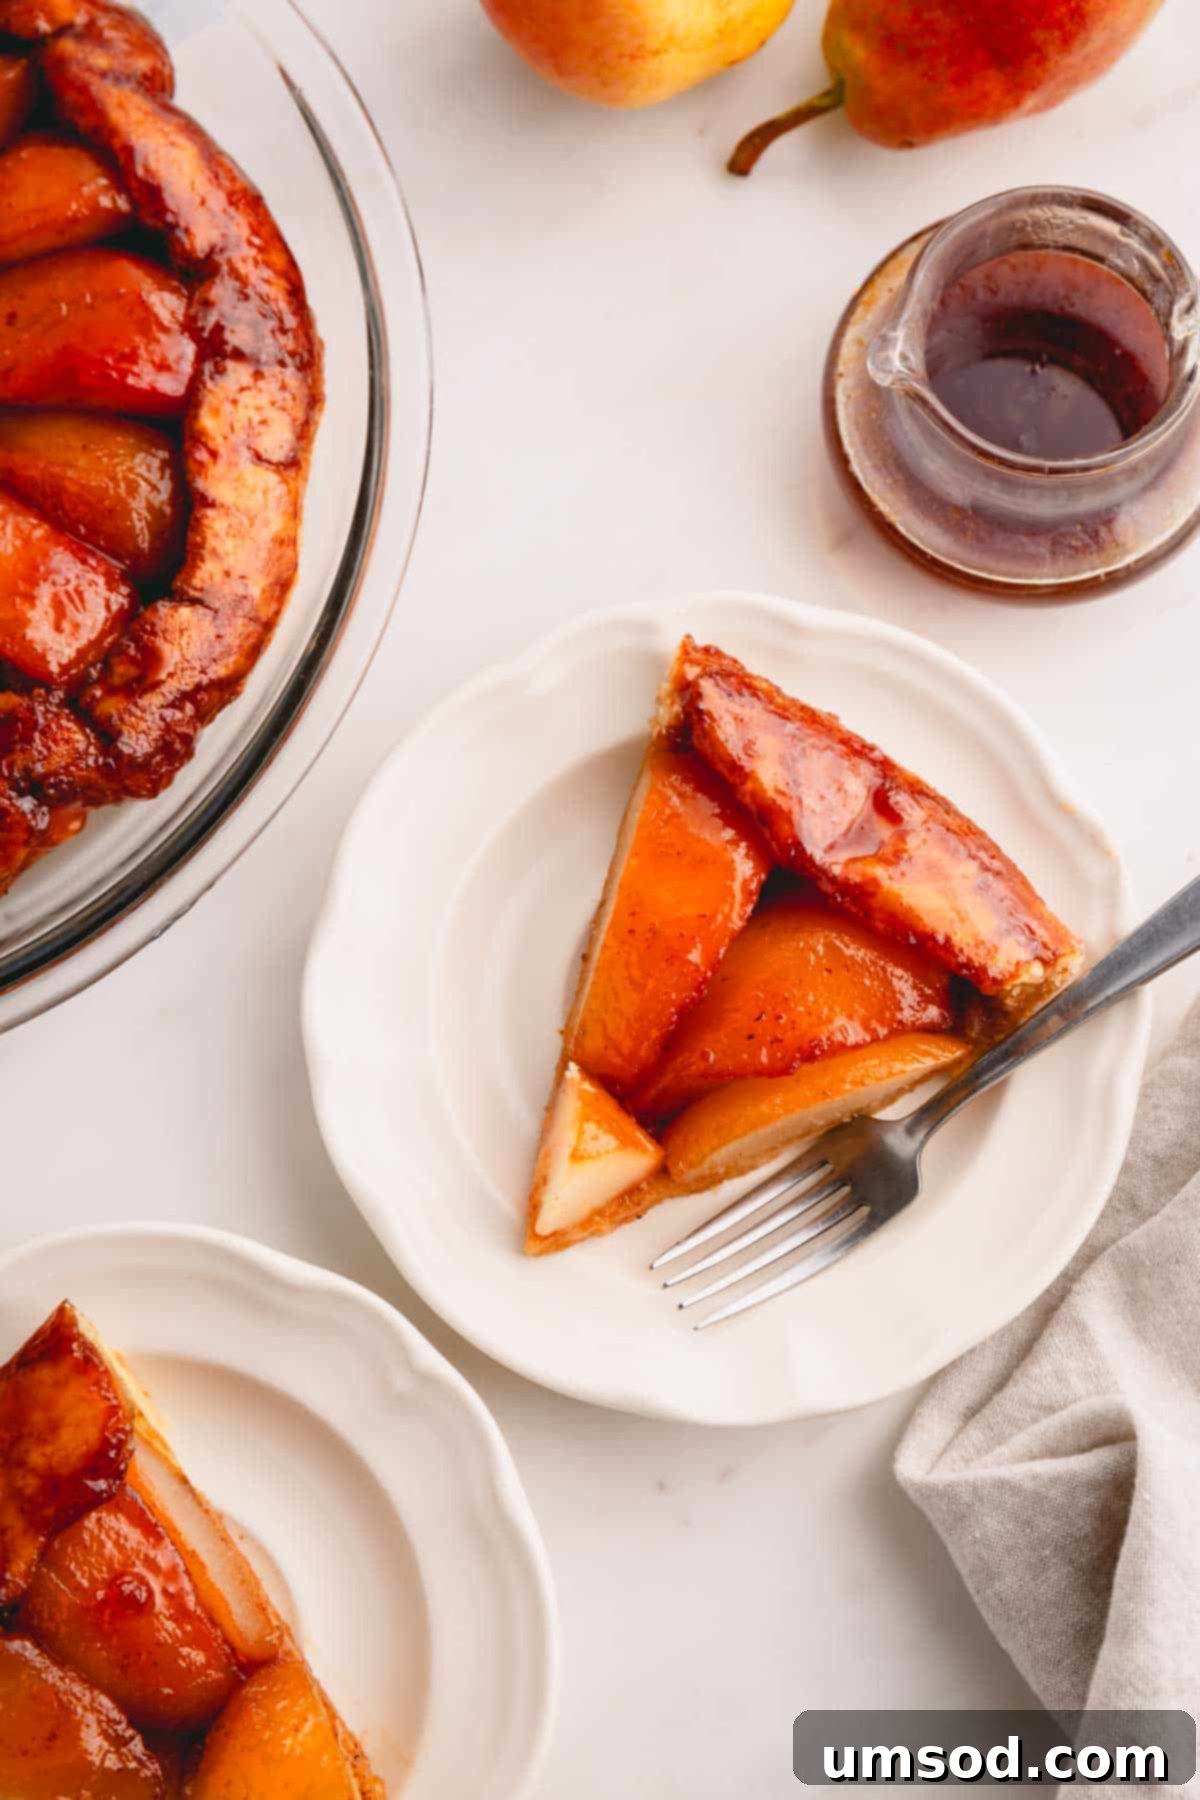
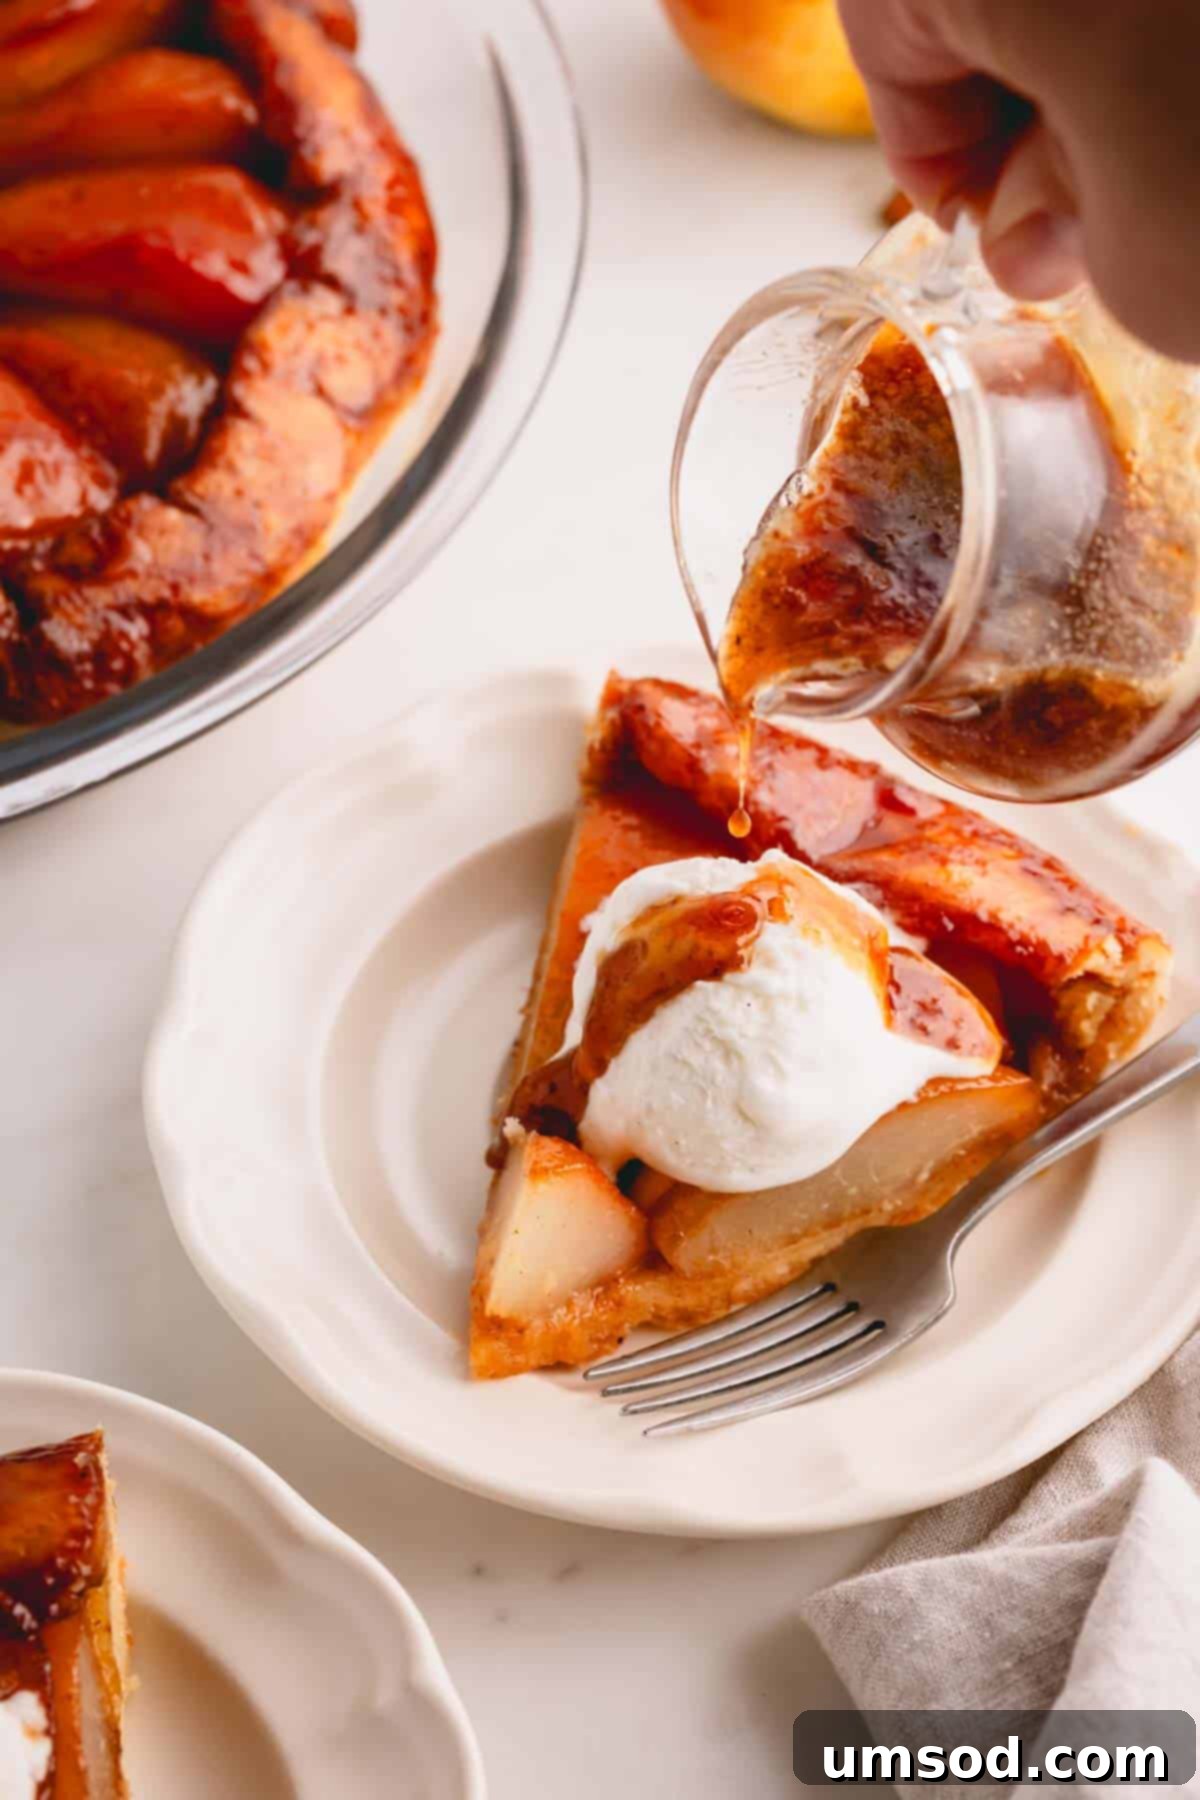
- Allow your beautiful French pear pie to cool for a bit to room temperature before serving. While it’s tempting to dive in immediately, cooling allows the caramel to set and the flavors to meld, ensuring the tarte holds its shape. If desired, serve this magnificent dessert with a dollop of homemade whipped cream, a scoop of creamy vanilla bean ice cream, and a drizzle of the reserved pear syrup.
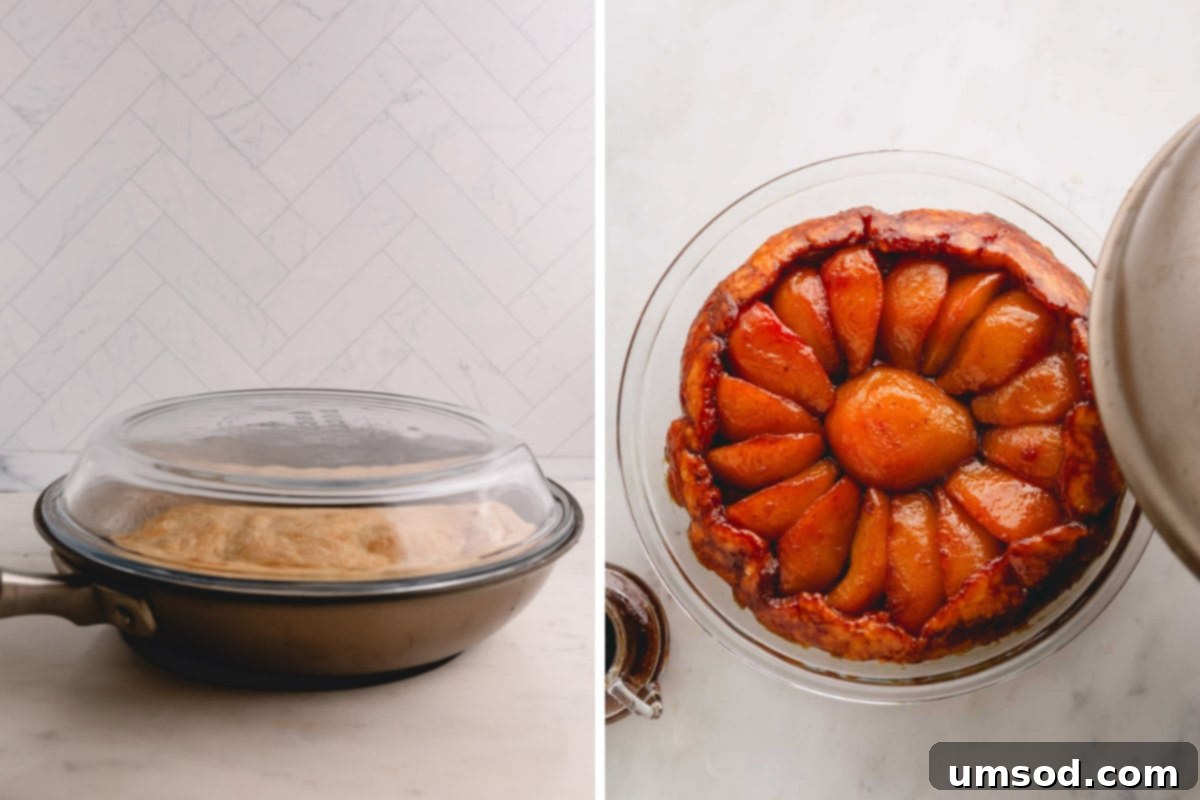
Flip with Care
Safety first! When it comes time to flip your tarte tatin, always wear sturdy oven mitts. Position the serving plate securely over the skillet, and perform the flip with a quick, decisive motion, directing the skillet away from your body. This minimizes any risk of hot caramel splashing and ensures a safe and successful reveal.
Expert Tips for a Flawless Pear Tarte Tatin
Achieving the perfect Pear Tarte Tatin is all about paying attention to a few key details. These expert tips will help ensure your dessert is nothing short of magnificent every time:
- Choose Your Pears Wisely: The type and ripeness of your pears make a huge difference. As mentioned, Bosc, Bartlett, or Anjou are ideal. The pears should be ripe enough to be sweet and flavorful, but still quite firm to the touch. This firmness is crucial as it allows them to hold their shape and texture through the caramelization and baking process. Pears that are too soft will turn into an unappetizing mush, detracting from the pie’s beautiful structure.
- Invest in the Right Pan: A good quality cast iron pan or a sturdy, oven-safe skillet is indispensable for this recipe. Its ability to retain and distribute heat evenly is vital for creating a consistent, deeply flavored caramel on the stovetop and for baking the crust perfectly in the oven. The skillet’s robust construction also makes the inversion process safer and easier.
- Master the Caramelization: When caramelizing the pears, be careful not to overcook them initially. Remember, they will continue to soften and cook significantly when the tarte tatin bakes in the oven. The goal during the stovetop caramelization is to achieve a beautiful deep brown color and tender-crisp texture, not fully cooked-through. Remove the skillet from the heat as soon as the caramel reaches a rich, amber hue to prevent it from burning, which can result in a bitter taste.
- Don’t Rush the Cooling: While the aroma of a freshly baked tarte tatin is intoxicating, resist the urge to cut into it immediately after flipping. Allowing your French pear pie to cool to room temperature (at least 30-60 minutes) is crucial. This cooling period gives the hot caramel time to set and thicken, ensuring that when you slice it, the beautiful pear structure remains intact and doesn’t collapse.
- Fresh Nutmeg for Unrivaled Aroma: The difference between pre-ground and freshly grated nutmeg is profound. Freshly grated nutmeg offers a brighter, more complex, and much more potent aroma and flavor. It truly elevates the spice profile of the tarte tatin, complementing the pears and caramel beautifully. Consider investing in a whole nutmeg and a small grater.
- Lemon Juice is More Than Just an Anti-Browning Agent: Beyond preventing oxidation, a squeeze of fresh lemon juice adds a subtle, refreshing tang that cuts through the richness of the caramel. It brightens the overall flavor of the pie, preventing it from being overly sweet.
Serving Suggestions and Perfect Pairings
While Pear Tarte Tatin is a star in its own right, a few thoughtful additions can elevate the experience even further. The richness of the caramelized pears pairs beautifully with cool, creamy accompaniments. Consider serving it with:
- Homemade Whipped Cream: A classic choice, providing a light, airy contrast to the dense pie. A hint of vanilla or a touch of Grand Marnier in the cream can add an extra layer of flavor.
- Vanilla Bean Ice Cream: The cold, creamy sweetness of a high-quality vanilla ice cream is a perfect match for the warm, spiced pears. It creates a delightful temperature and texture contrast.
- Crème Fraîche: For a more sophisticated and slightly tangy option, a dollop of crème fraîche offers a rich yet subtle counterpoint to the sweetness, enhancing the “French” experience.
- A Drizzle of Reserved Caramel Syrup: Don’t forget that delicious syrup you carefully poured out! A light drizzle over each slice adds an extra punch of pear and caramel flavor.
- A Sprinkle of Sea Salt: A tiny pinch of flaky sea salt over the top of each slice can beautifully highlight the sweetness of the caramel, creating a gourmet touch.
- Dusting of Powdered Sugar: For an extra touch of elegance, a light sifting of powdered sugar before serving makes the tarte tatin even more visually appealing.
This dessert also pairs wonderfully with a good cup of coffee, a warm cup of herbal tea, or even a dessert wine like a Sauternes or a late-harvest Riesling for a truly indulgent finish to a meal.
Make-Ahead and Storing Solutions
One of the many charms of this Pear Tarte Tatin is its flexibility when it comes to preparation and storage. This makes it an excellent choice for busy holidays or when you want to plan ahead for special occasions.
- Freezing Cooked Tarte Tatin: You can prepare and bake your pear tarte tatin entirely, allow it to cool completely, and then store it in the freezer for up to 2-3 months. To freeze, wrap the cooled pie tightly first in plastic wrap, ensuring no air pockets, and then in a layer of heavy-duty aluminum foil. When you’re ready to serve, thaw the pie in the refrigerator overnight. Bring it to room temperature before serving, or gently warm it in a low oven (around 300°F/150°C) for about 15-20 minutes until just warmed through, being careful not to overcook the crust.
- Preparing Pie Dough in Advance: If you’re opting for a homemade crust, you can prepare the pie dough up to 3 days in advance and store it, well-wrapped, in the refrigerator. On the day of baking, simply bring the dough to room temperature for about 20-30 minutes before rolling it out, then proceed with assembling and baking the tarte as usual. This simple step can significantly reduce your active preparation time on the day you plan to serve.
Storing Leftovers: Freshness Tips
Should you find yourself with any delightful leftovers, simply cover the cooled French pear pie tightly with plastic wrap or aluminum foil and store it in the refrigerator for 3-4 days. The caramel and pears will maintain their delicious flavor and texture. For the best experience, allow the pie to come to room temperature before serving. Alternatively, if you prefer it warm, a quick zap in the microwave for a few seconds will gently take the chill off, making it taste as fresh and inviting as when it first came out of the oven!
Frequently Asked Questions (FAQs) About Pear Tarte Tatin
Which type of pears should I use to make this tart?
For the best pear tarte tatin, we recommend using firm, ripe varieties such as Bosc, Bartlett, or Anjou pears. These types hold their shape beautifully during baking and offer a delightful balance of sweetness and texture. The most important thing is that the pears are ripe for flavor but still firm to prevent them from turning mushy.
Can I use a different type of fruit for Tarte Tatin?
Absolutely! While pears are exquisite, the Tarte Tatin method is wonderfully versatile. Feel free to substitute the pears with other firm fruits like baking apples (such as Granny Smith or Honeycrisp), quince, or even plums. For an exciting blend of flavors, you could also use a mixture of different fruits!
Do I need to peel the pears before cooking?
Yes, I highly recommend peeling the pears before cooking for pear tarte tatin. Pear skins can become tough and chewy once baked, which can detract from the tender, melt-in-your-mouth texture of the caramelized fruit. Peeling ensures a more refined and enjoyable eating experience.
Can I make this Tarte Tatin gluten-free?
Yes, you can! Simply substitute the traditional pie dough with your favorite store-bought or homemade gluten-free pie crust. Ensure your chosen gluten-free crust is suitable for baking and will become flaky and golden.
How do I prevent the caramel from burning?
The key to perfect caramel is watchful attention. Use medium heat and stir regularly, especially once the sugars start to melt. If you notice the caramel browning too quickly at the edges, reduce the heat. Remove the pan from the heat as soon as it reaches a deep amber color; it will continue to darken slightly from residual heat.
What if my crust gets soggy?
A soggy crust can happen if the pears release too much liquid or if the pie is underbaked. Ensure your pears are firm (not overly ripe) to minimize excess moisture. Also, make sure your oven is preheated to the correct temperature and bake until the crust is truly golden brown and crisp, not just lightly colored.
More Decadent Dessert and Pie Recipes to Explore
If you loved this Pear Tarte Tatin, you’ll surely enjoy these other delightful pie and dessert recipes:
- Homemade Banana Cream Pie: A classic comfort dessert with layers of creamy custard, fresh bananas, and a luscious meringue or whipped cream topping.
- Pumpkin Mousse Pie: A light and airy twist on traditional pumpkin pie, perfect for holiday gatherings.
- The Best Pecan Pie: A rich, sweet, and nutty classic that never disappoints, featuring a buttery crust and gooey filling.
- Lemon Meringue Pie Recipe: A vibrant and tangy dessert with a bright lemon filling and a cloud of fluffy meringue.
Pear Tarte Tatin
By Shinee Davaakhuu
This rustic French pear pie is an easy-to-make crowd-pleaser, perfect for the holiday season! Its impressive look is just the icing on the cake!
Prep Time: 10 mins
Cook Time: 1 hr
Total Time: 1 hr 10 mins
Servings: 8 servings
Comment
Print Recipe
Ingredients
- 4-5 ripe firm pears (Bosc, Bartlett, or Anjou recommended)
- Juice of one lemon or produce protector
- 3 tablespoons (42 g) unsalted butter
- 1/3 cup (65 g) granulated sugar
- 1/3 cup (65 g) light brown sugar
- ½ teaspoon ground cinnamon
- ¼ teaspoon ground nutmeg
- 1 pie dough (homemade or store-bought)
Instructions
- Preheat the oven to 400°F (200°C).
- Peel and core the pears. Quarter them, but leave one half of a pear for the center. Sprinkle with lemon juice or produce protector to prevent browning.
- In an oven-safe 10-inch skillet, melt the butter on medium heat.
- Add the granulated and light brown sugars and cook until the mixture bubbles and turns slightly brown.
- Place the reserved pear half in the middle of the pan. Arrange the pear quarters around the half pear, cut-side up.
- Cook the pears uncovered until the butter mixture is caramelized and turns a deep brown color, about 15-20 minutes.
- Roll the pie dough into a 10-inch circle.
- Sprinkle ground cinnamon and ground nutmeg over the pears.
- Remove the skillet from the heat and place it on a baking sheet.
- Cover the pears with the pie crust. Gently tuck in the edges using a spatula, if necessary.
- Bake for 30 minutes, or until the crust is nicely browned and crispy.
- Immediately cover the pie with a lid or large plate and very carefully tilt the skillet slightly to pour the excess pear syrup into a small bowl. Be extremely careful not to burn yourself.
- Place a 9-inch pie dish or serving plate over the skillet and quickly flip the pie over. When flipping, make sure to wear oven mitts and flip AWAY from yourself for safety.
- Cool to room temperature before serving. If desired, serve with homemade whipped cream, vanilla ice cream, and the reserved pear syrup.
⭐️ Did you make this recipe?
Please leave a review and let us know how you liked it!
Tips & Notes
Pear Selection: Use Bosc, Bartlett, or Anjou pears. They should be ripe but firm; soft pears will turn mushy.
Storing Tips:
– Store leftover Pear Tarte Tatin wrapped with plastic wrap or aluminum foil in the fridge for up to 3-4 days.
– To freeze, wrap the cooked and cooled tarte tightly in plastic wrap, then foil, and freeze for up to 2-3 months. Thaw in the fridge overnight and bring to room temperature or gently warm before serving.
Nutrition
Servings: 1 serving
Calories: 253 kcal
Carbohydrates: 41 g
Protein: 2 g
Fat: 10 g
Sugar: 26 g
Sodium: 91 mg
Course: Dessert
Cuisine: French
This recipe was originally published on January 10th, 2014, and has been updated for clarity and comprehensive detail.
