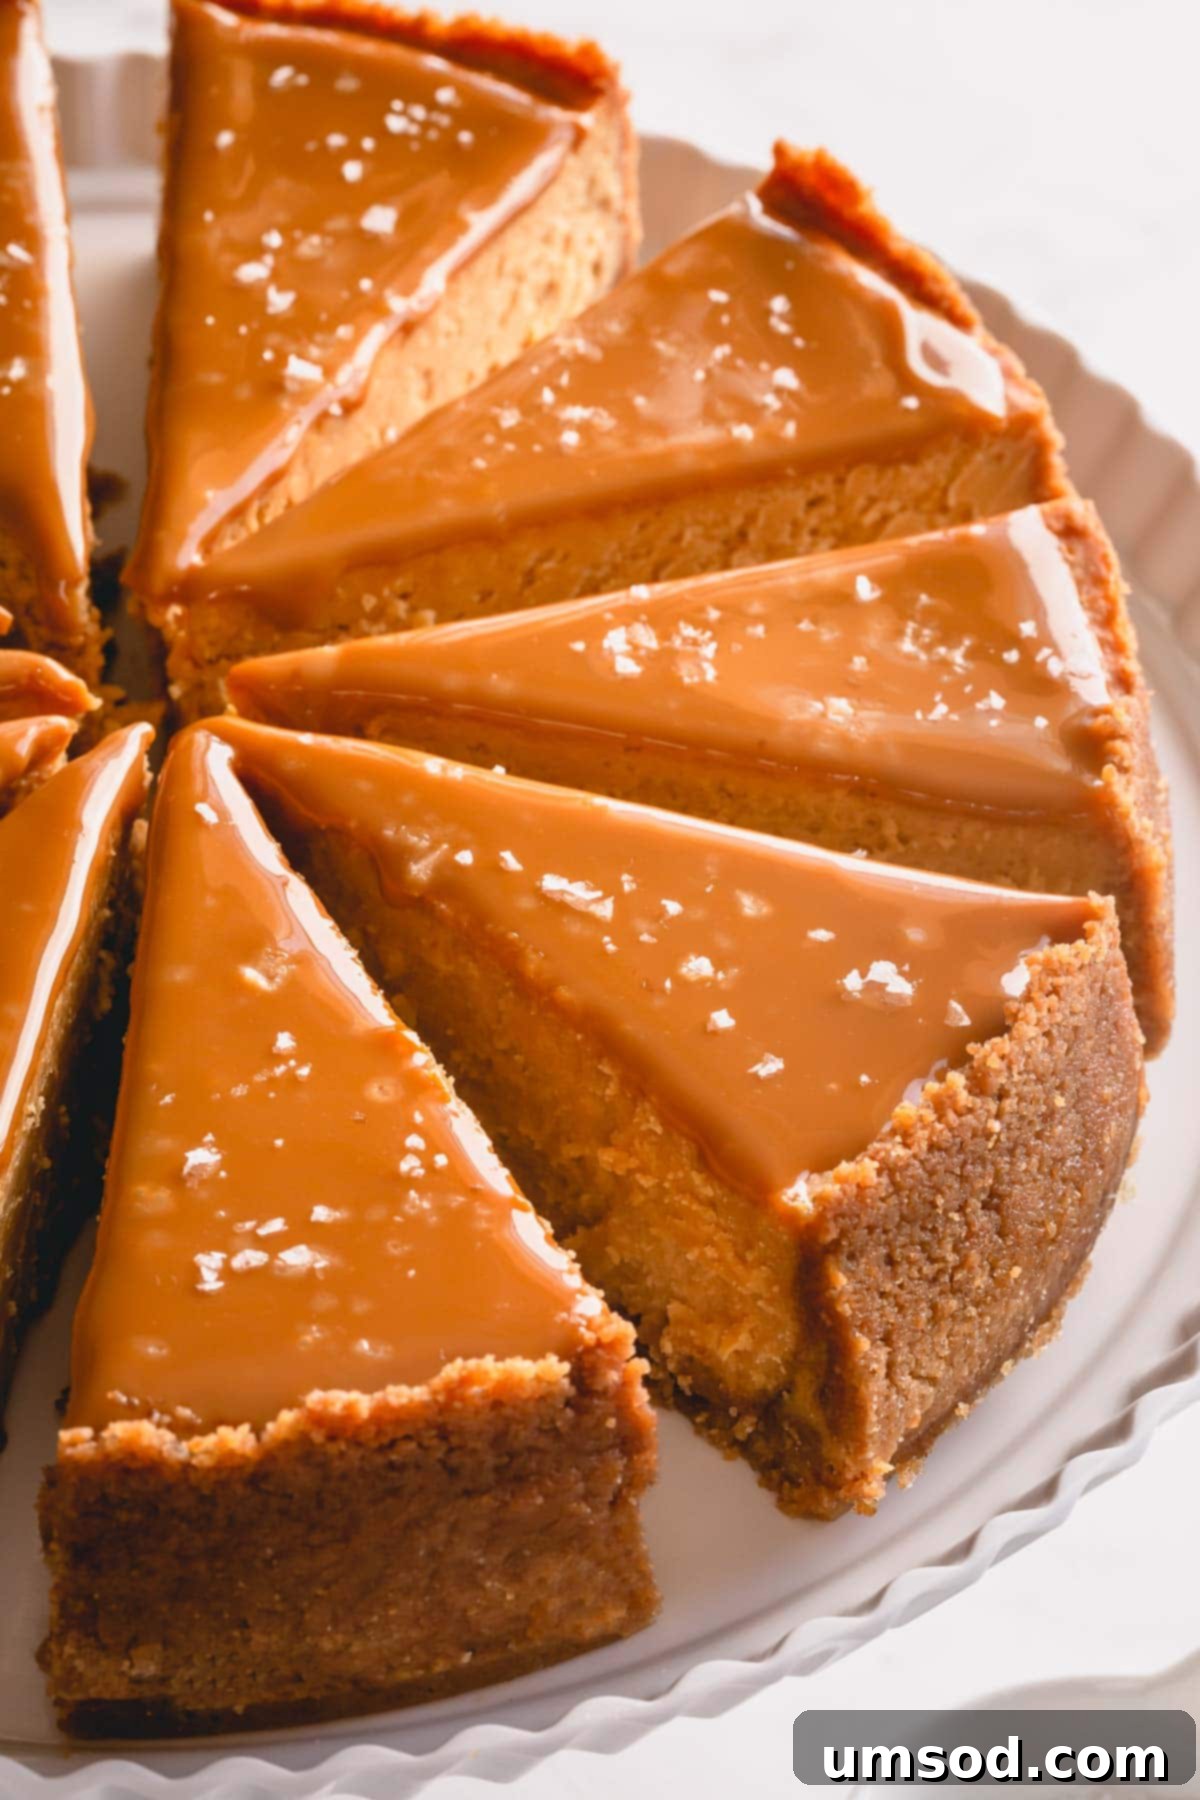
Prepare to indulge in the most exquisite, flawlessly creamy, and impossibly smooth Dulce de Leche Cheesecake you’ve ever tasted, perfectly complemented by a delicate sprinkle of flaky sea salt. This isn’t just a recipe; it’s your ultimate guide to mastering a show-stopping dessert that will captivate every palate. Within this comprehensive article, you’ll find easy-to-follow step-by-step photos, invaluable tips for guaranteed success, and a detailed video tutorial to guide you through every stage of the baking process.
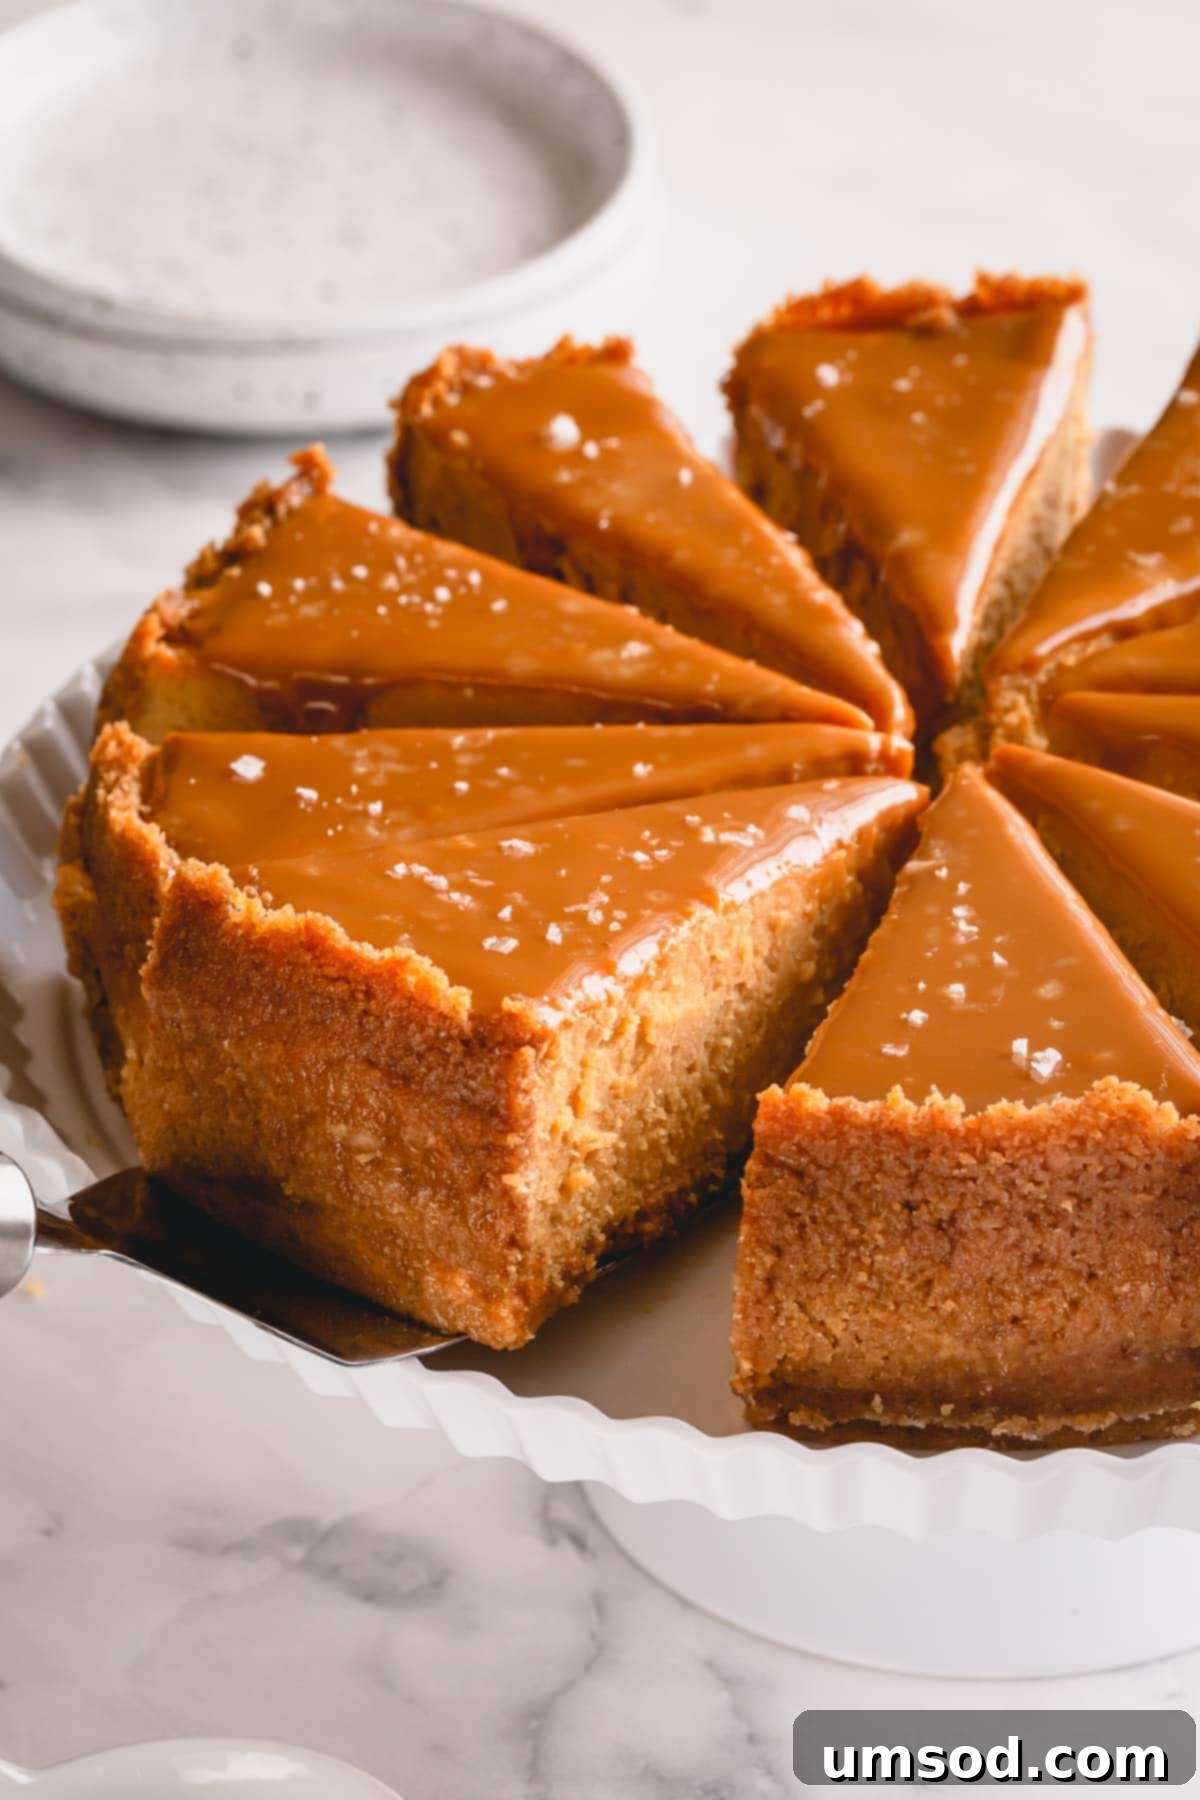
Why You’ll Fall in Love with This Dulce de Leche Cheesecake
It’s no secret that a truly magnificent cheesecake holds a special place in the hearts of dessert lovers. The taller, the creamier, the more decadent – the better! And if you, like us, appreciate a generous, flavorful crust, then this Dulce de Leche Cheesecake is crafted especially for you. Here’s a closer look at what makes this recipe absolutely irresistible:
- A Tall, Buttery, and Irresistibly Crumbly Crust: Forget about flimsy bases! Our recipe ensures a substantial graham cracker crust that not only provides incredible flavor but also a satisfying buttery crunch that beautifully contrasts the silky smooth filling. It rises proudly, creating the perfect embrace for the creamy layers within.
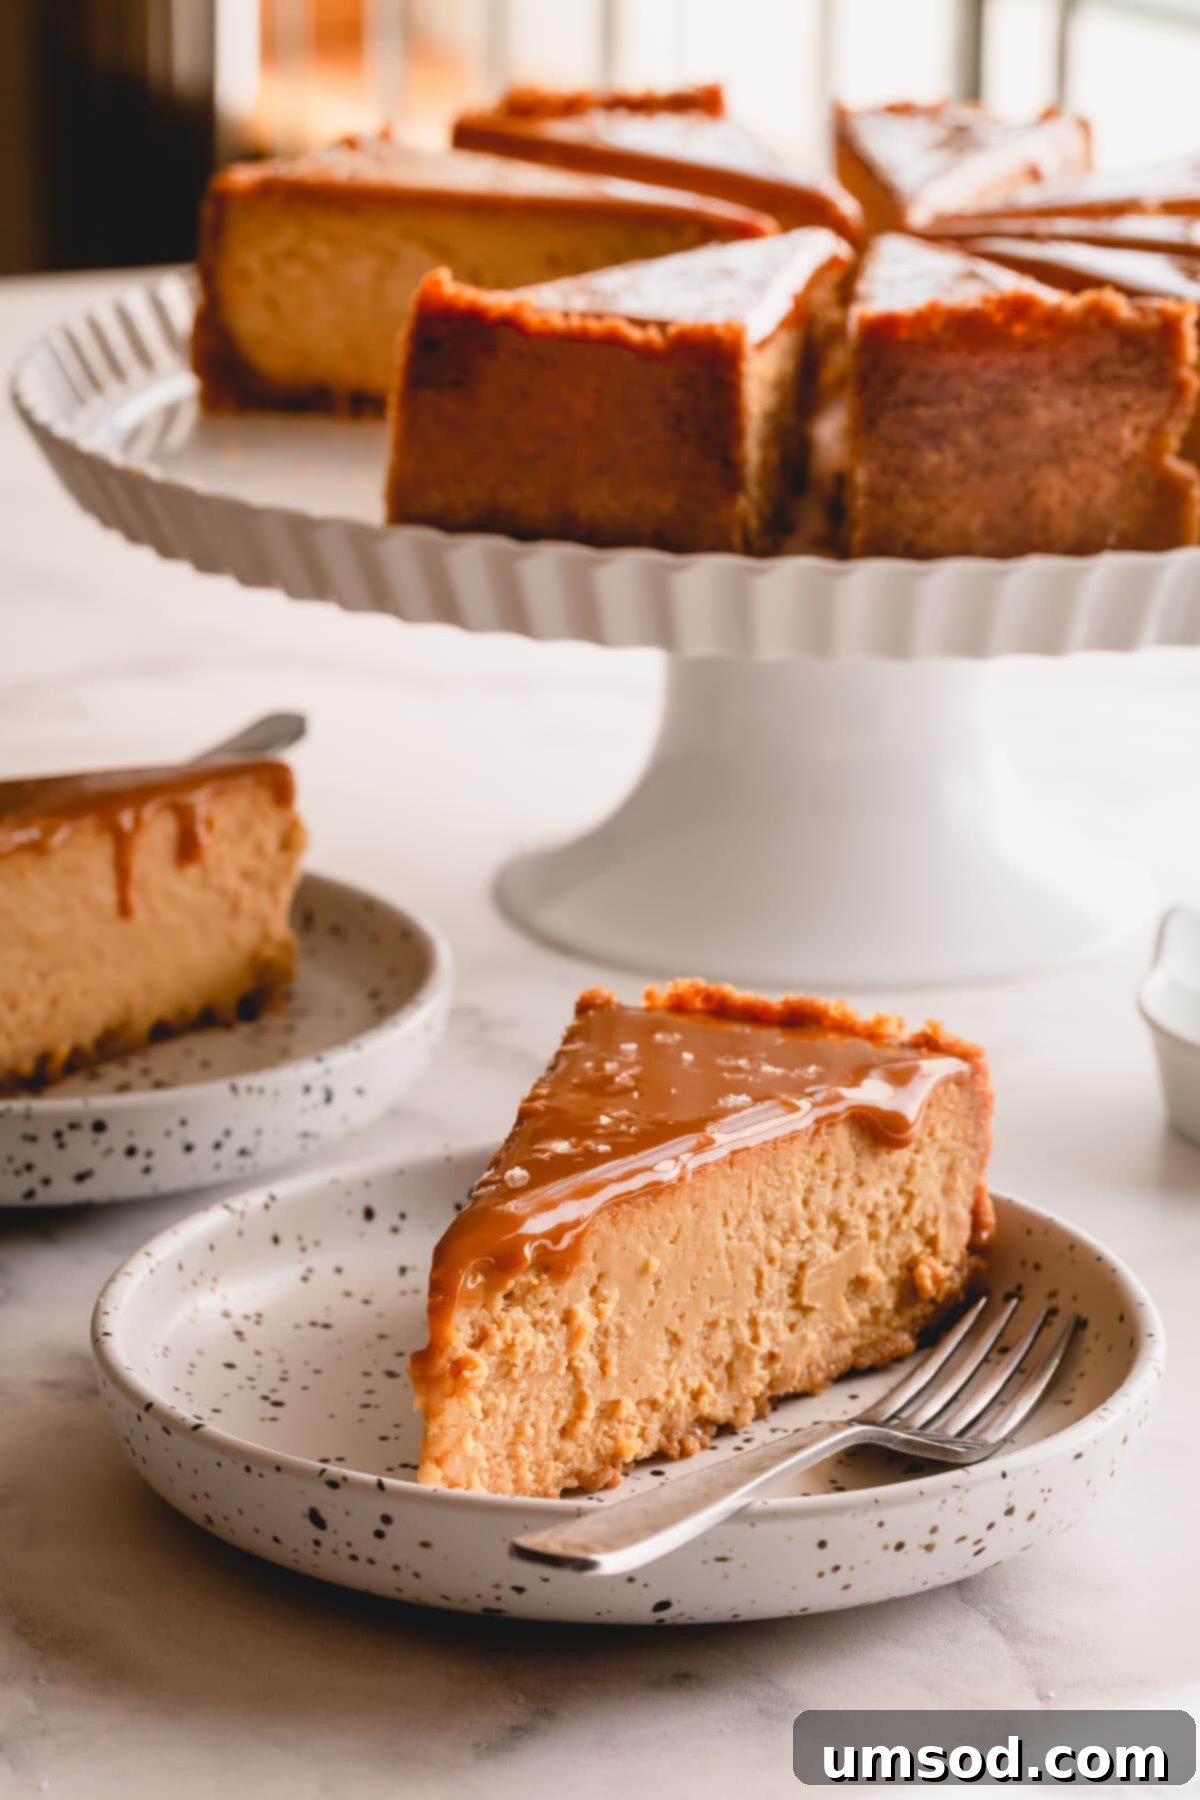
- An Impossibly Smooth and Velvety Filling: Every bite of this cheesecake delivers a melt-in-your-mouth experience. Crafted with care, the filling boasts a luxurious, lump-free texture that’s rich, dense, and deeply satisfying, without being overly heavy.
- An Indulgent Dulce de Leche Topping: The star flavor, dulce de leche, isn’t just an ingredient in the filling; it’s also a lavish topping. This golden, caramelized milk sauce cascades over the top, adding an extra layer of sweet, milky, and deeply complex flavor that makes this cheesecake truly unforgettable.
- The Perfect Balance with a Sprinkle of Chunky Sea Salt: This is our secret weapon! A delicate sprinkle of flaky sea salt isn’t just for garnish; it’s a flavor enhancer. The subtle saltiness brilliantly offsets the sweetness of the dulce de leche, awakening your taste buds and adding a gourmet touch that makes each bite even more exquisite and addictive.
The term “Dulce de Leche” might sound fancy, but it simply refers to cooked sweetened condensed milk, transformed into a rich, luscious caramel. And don’t worry, we’ve got you covered! You can easily make your own homemade dulce de leche with our straightforward tutorial, or you can opt for a high-quality store-bought version for convenience. This easy cheesecake recipe is not only a triumph of flavor and texture but also an ideal make-ahead dessert, perfect for impressing guests at any special occasion or simply treating yourself to an extraordinary culinary delight.
Essential Ingredients for Your Decadent Cheesecake
Creating this magnificent dulce de leche cheesecake requires just a handful of quality ingredients. Paying attention to these foundational elements is key to achieving that perfect texture and flavor. Here’s a breakdown of what you’ll need:
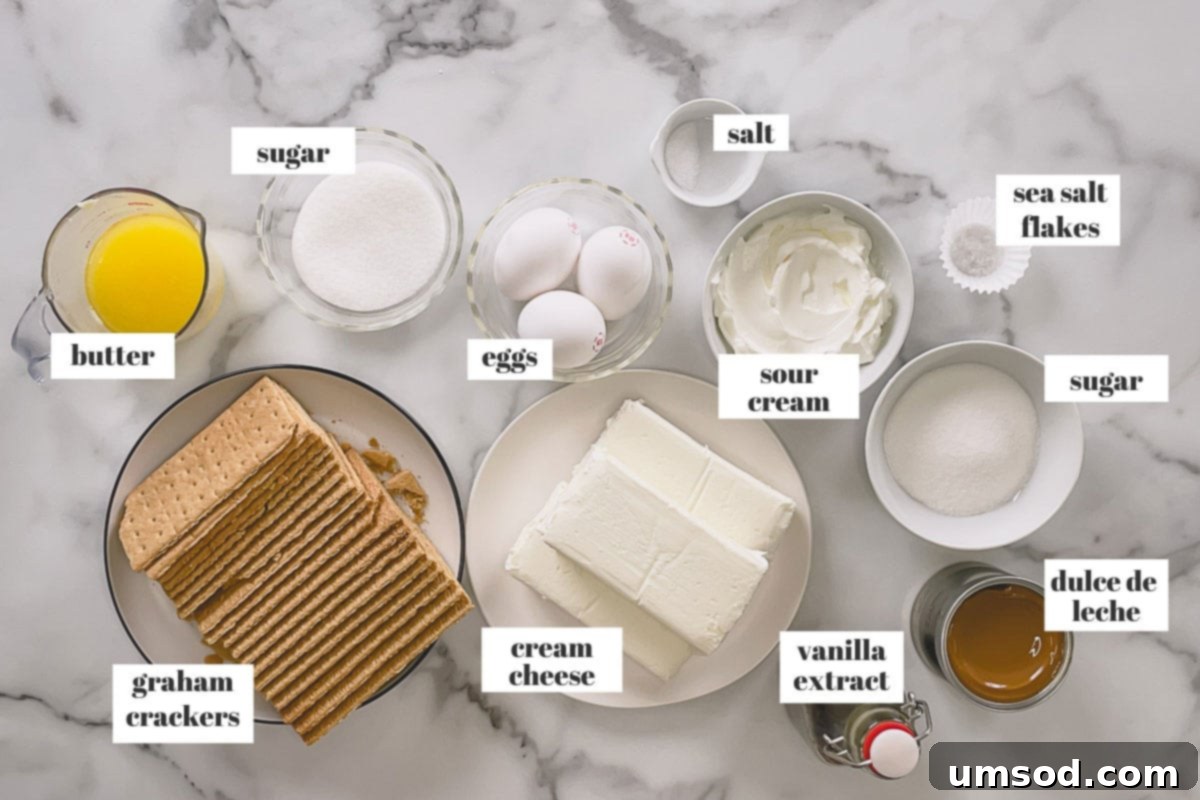
- Graham Crackers: These form the crunchy, sweet, and buttery base of our cheesecake. While classic plain graham crackers are perfect, you can certainly experiment with cinnamon or chocolate-flavored varieties for a unique twist. If you’re outside the U.S., digestive biscuits are an excellent and readily available substitute. You’ll need approximately 16 full sheets, which is roughly equivalent to two sleeves or about 260g, to create a tall, substantial crust.
- Full-Fat Cream Cheese (Brick Style): This is the cornerstone of any truly creamy and delicious cheesecake. Always opt for brick-style, full-fat cream cheese. Avoid whipped or low-fat versions, as they contain higher water content and less fat, which can result in a less rich flavor, a gummy texture, and a higher propensity for cracks during baking. Ensure it’s softened to room temperature for a smooth, lump-free batter.
- Sour Cream: This ingredient plays a vital role in adding an incredible richness, moisture, and a subtle tangy counterpoint to the sweetness of the filling. It contributes significantly to the cheesecake’s signature creamy texture. As a suitable alternative, plain full-fat Greek yogurt can be used, offering a similar tang and thickness.
- Dulce de Leche: The star flavor of this dessert! You can use either high-quality store-bought dulce de leche for convenience or immerse yourself in the rewarding process of making homemade dulce de leche. The homemade version often yields a deeper, more nuanced caramel flavor. If dulce de leche is unavailable, a rich homemade caramel sauce can be substituted, though the flavor profile will differ slightly. Remember to divide your dulce de leche, reserving a portion for the luscious topping.
- Granulated Sugar: Used in both the graham cracker crust and the creamy filling to provide the perfect level of sweetness, ensuring a balanced and delightful flavor.
- Unsalted Butter: Melted unsalted butter is crucial for binding the graham cracker crumbs together, creating a firm yet tender crust. Using unsalted butter allows you to control the overall saltiness of the recipe.
- Pure Vanilla Extract: A splash of good quality pure vanilla extract enhances the complex flavors of the cheesecake, adding a warm, aromatic note that rounds out the sweetness and richness.
- Kosher Salt: A small amount of kosher salt in the filling helps to amplify the other flavors and subtly balance the sweetness, preventing the cheesecake from tasting one-dimensional.
- Large Eggs (Room Temperature): Eggs act as a binder, providing structure and contributing to the cheesecake’s smooth, custardy texture. It is absolutely essential to use room temperature eggs. Cold eggs can cause the batter to seize and become lumpy, requiring more mixing and potentially incorporating too much air, which can lead to cracks.
- Sea Salt Flakes (Optional, but Highly Recommended): A finishing touch that truly elevates this dessert. Sprinkling chunky sea salt flakes, like Maldon, on top just before serving adds a delightful visual appeal, a subtle crunch, and a burst of savory flavor that brilliantly cuts through and complements the rich sweetness of the dulce de leche.
Step-by-Step Guide to Creating Your Flawless Cheesecake
Crafting a beautifully smooth, crack-free cheesecake is an achievable feat with careful attention to detail. Follow these steps meticulously, and you’ll be rewarded with a dessert that looks as incredible as it tastes.
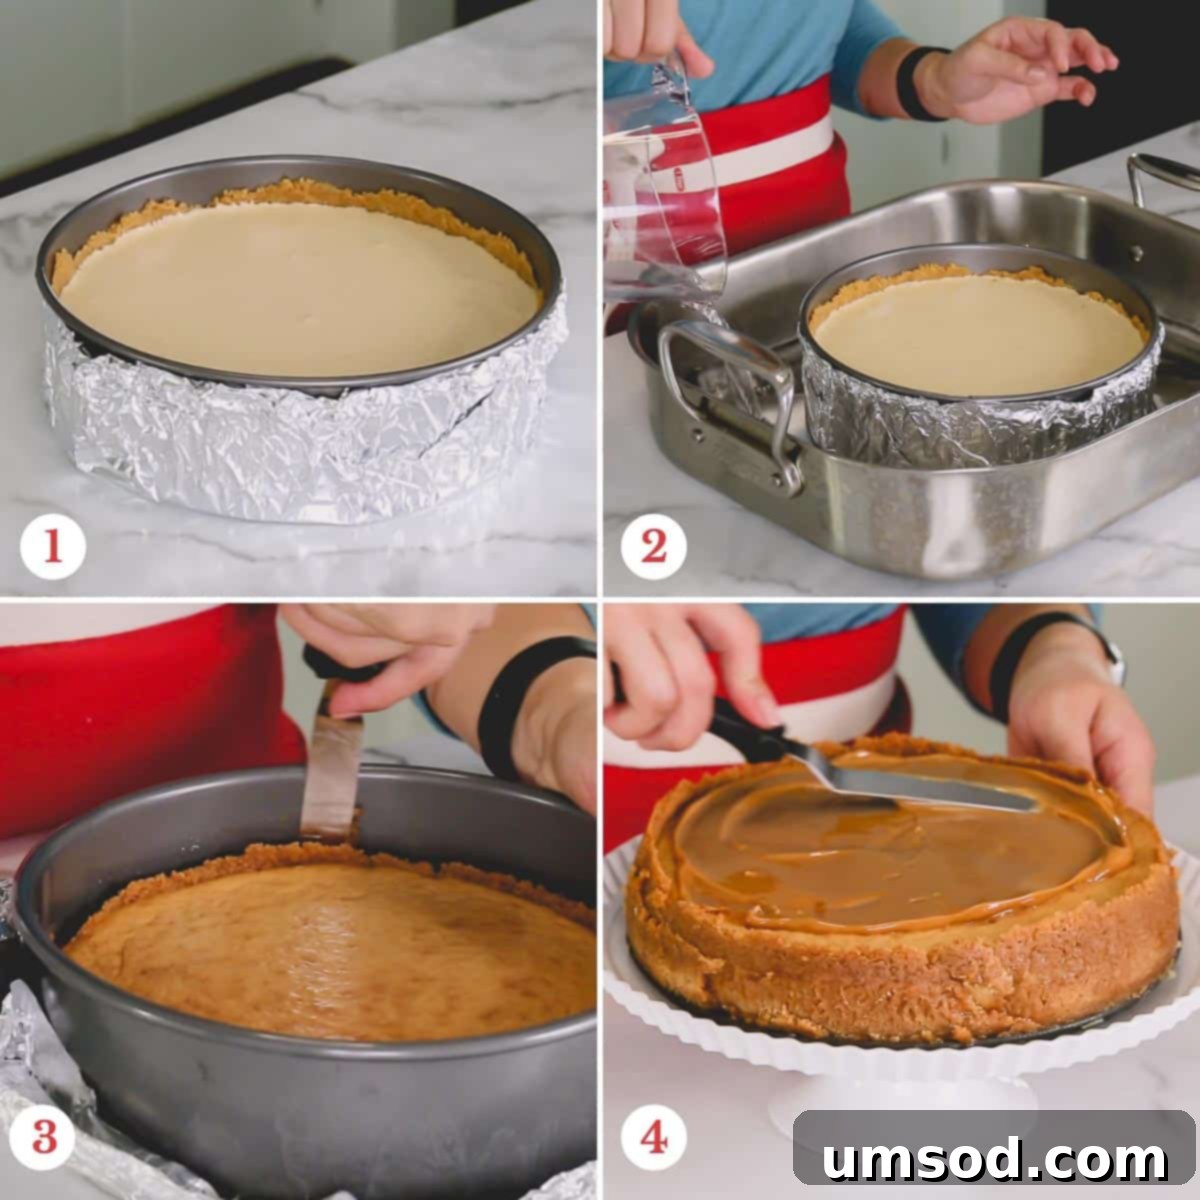
1. Preparing the Springform Pan for a Water Bath
The secret to an evenly cooked, perfectly smooth cheesecake without any cracks lies in the water bath method. This gentle baking environment ensures consistent heat. To prevent a soggy crust, it’s vital to meticulously wrap your springform pan:
- Lay two large sheets of heavy-duty aluminum foil on a clean, flat surface, overlapping them in a criss-cross pattern. This double layer offers superior protection against water seepage during the baking process.
- Carefully center your 9-inch springform pan on top of the layered foil.
- Gently and firmly bring the foil up the sides of the pan, pressing it tightly against the pan’s exterior. Ensure the foil extends at least an inch above the top edge of the pan to create a secure, waterproof barrier.
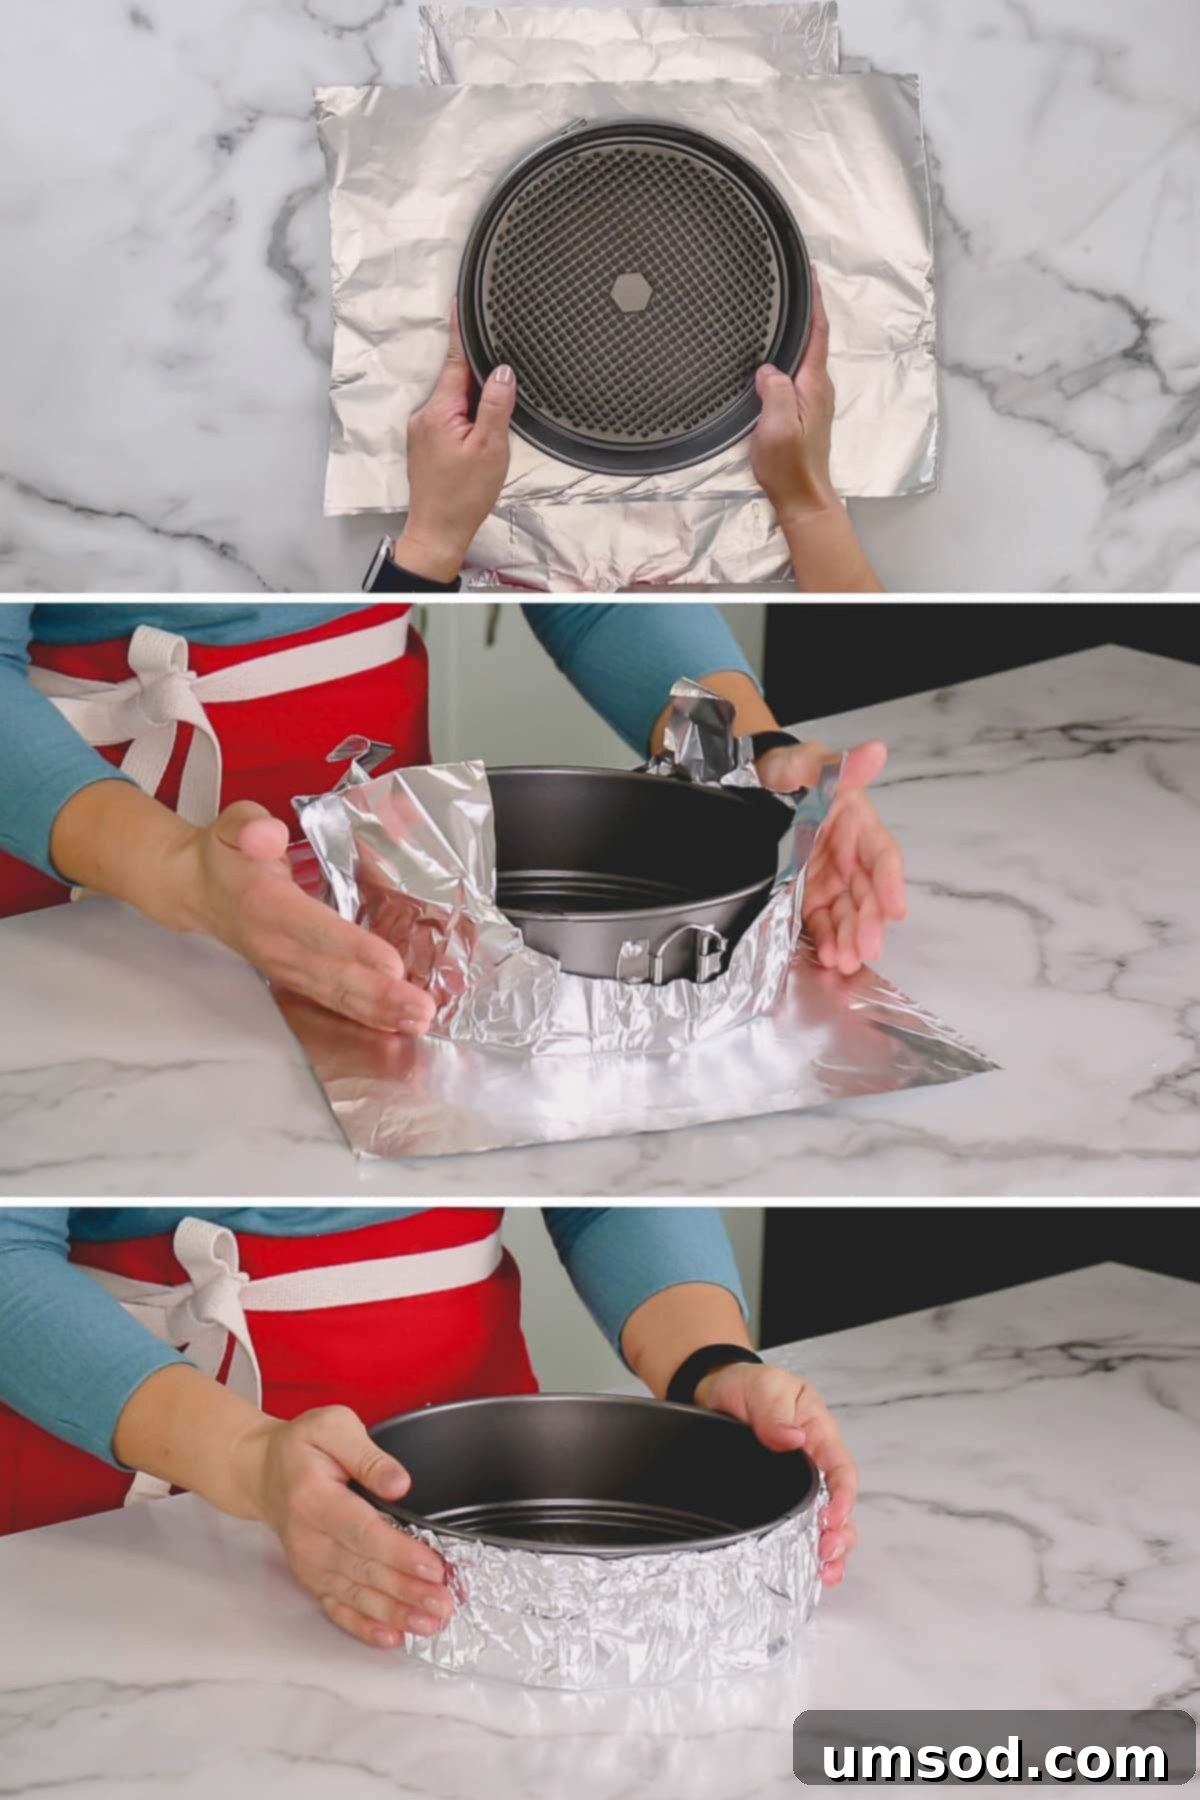
Pro Tip: Ensuring a Watertight Seal
It is paramount to handle the foil with care to avoid any tears or punctures. Even a small hole can compromise the water bath, allowing water to seep in and ruin your crust. Take your time to double-check that your springform pan is completely encased and sealed.
2. Crafting the Perfectly Buttery Graham Cracker Crust
Our recipe features a tall, sturdy, and flavorful graham cracker crust designed to perfectly envelop the creamy cheesecake filling. A robust crust is essential for both texture and structural integrity.
- In a food processor, pulse the graham crackers until they are finely ground into uniform crumbs. Consistency here is key for a cohesive crust.
- Transfer the fine crumbs to a medium-sized mixing bowl. Add the granulated sugar, then pour in the melted unsalted butter. Mix thoroughly, either with a spoon or your hands, until all the crumbs are evenly moistened and the mixture resembles wet sand.
- To test the consistency, squeeze a small amount of the mixture in your palm; it should hold together firmly without crumbling apart. If it feels too dry, add a touch more melted butter, a teaspoon at a time, until the desired consistency is achieved.
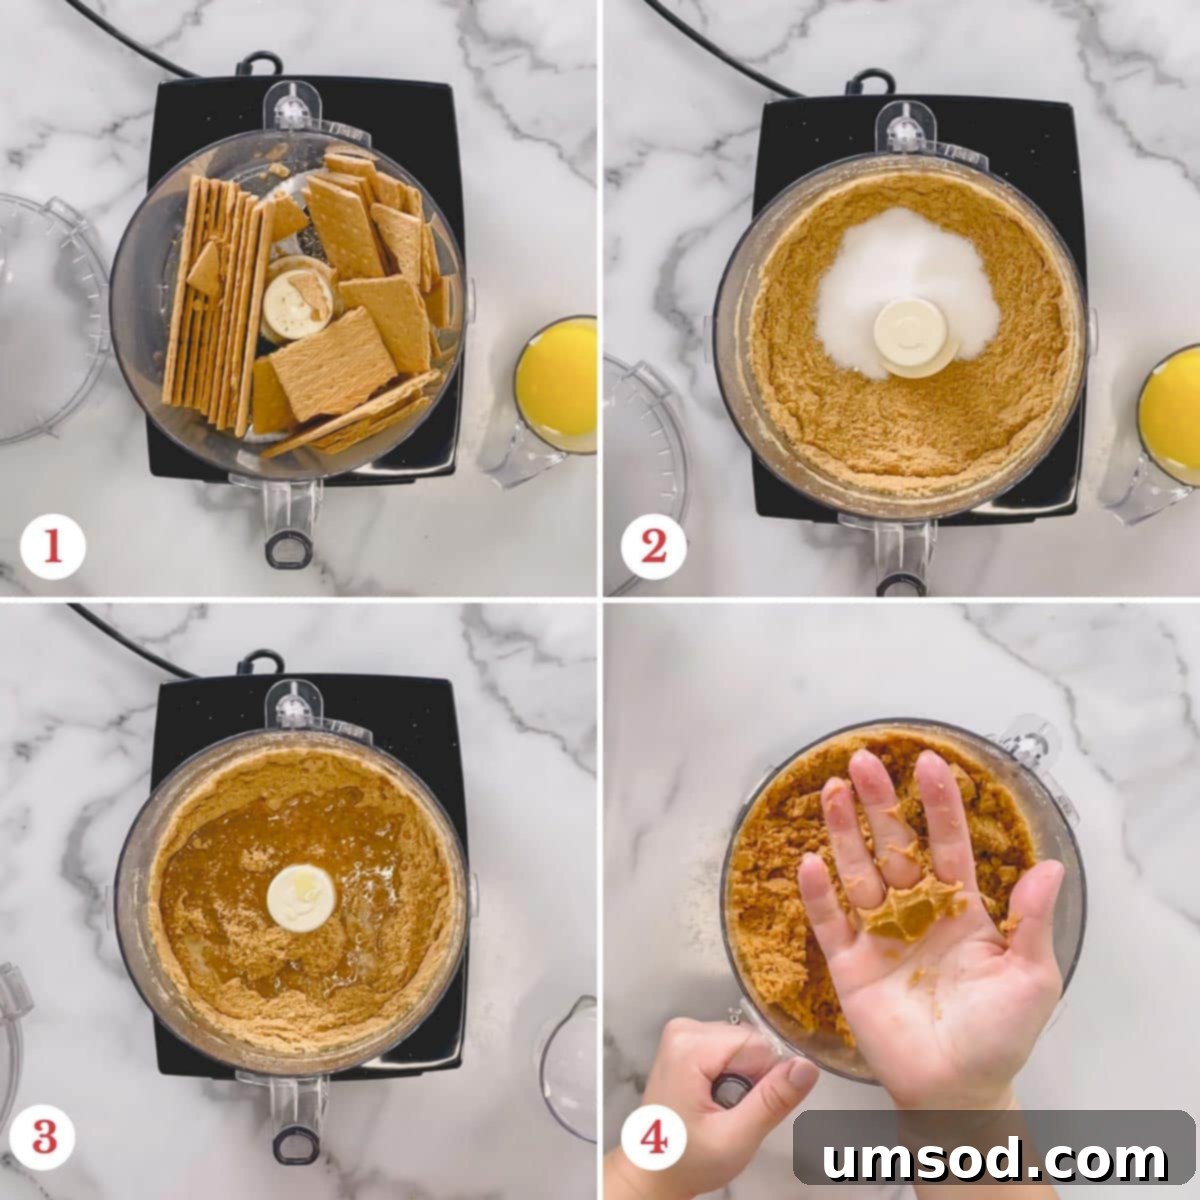
Pro Tip: Achieving Ideal Crust Texture
The ‘wet sand’ analogy is perfect: your crust mixture should clump together when pressed, but still feel sandy. This ensures a firm crust that won’t fall apart when slicing your baked cheesecake.
Now, carefully transfer the moistened crumb mixture into your prepared springform pan. Using the bottom of a flat-bottomed glass or your clean fingers, firmly and evenly press the mixture onto the bottom of the pan and all the way up the sides. Ensure an even thickness throughout the crust. Once pressed, refrigerate the pan for at least 30 minutes while you prepare the filling. Chilling allows the butter to solidify, creating a more stable crust and preventing it from slumping during baking.
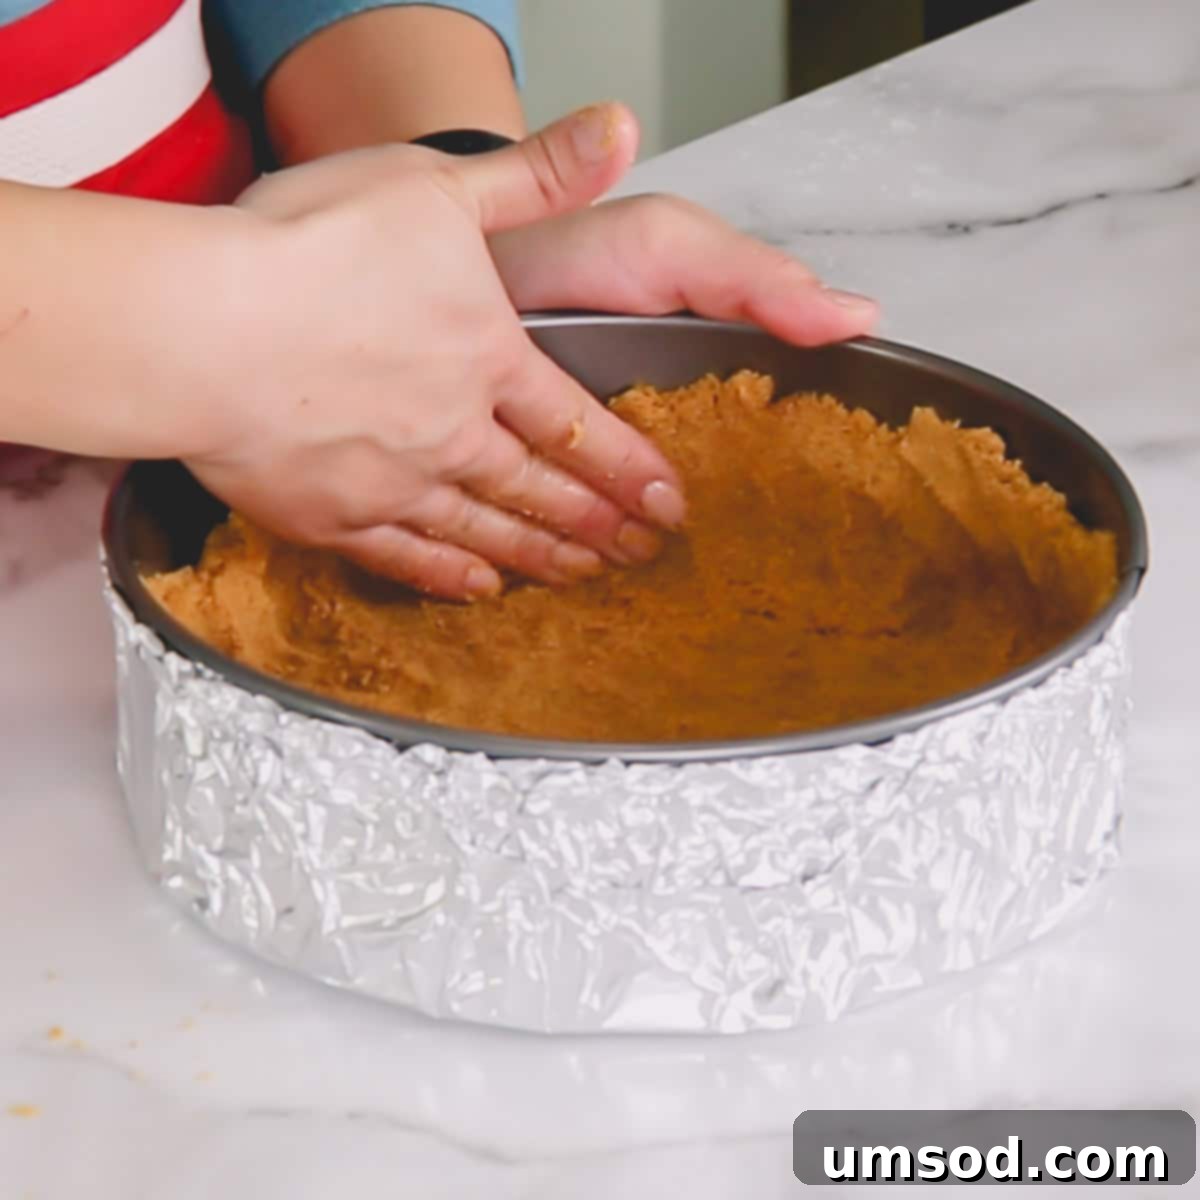
3. Mixing the Luxuriously Creamy Filling
The secret to a crack-free cheesecake with an exceptionally smooth texture lies in careful, gentle mixing. Avoid over-mixing, especially once the eggs are introduced, as this incorporates too much air.
- In a large mixing bowl, using a paddle attachment on your stand mixer (or a hand-held electric mixer), beat the softened full-fat cream cheese on medium speed for approximately 2 minutes. Continue until it becomes wonderfully light, fluffy, and completely smooth, with no lumps remaining.
- Next, add the granulated sugar, about three-quarters of the dulce de leche (reserving the remaining quarter for the luscious topping), sour cream, pure vanilla extract, and kosher salt. Continue beating the mixture on medium-low speed until all ingredients are perfectly smooth and well combined. Pause halfway through to thoroughly scrape down the sides and bottom of the bowl with a rubber spatula, ensuring an even consistency.
- Finally, add the large eggs, one at a time. Mix on medium-low speed just until each egg is incorporated into the batter before adding the next. This gentle approach is crucial to prevent incorporating excessive air. After the last egg is added, scrape the sides of the bowl one final time and mix for no more than 30 seconds to ensure homogeneity without overworking the batter.
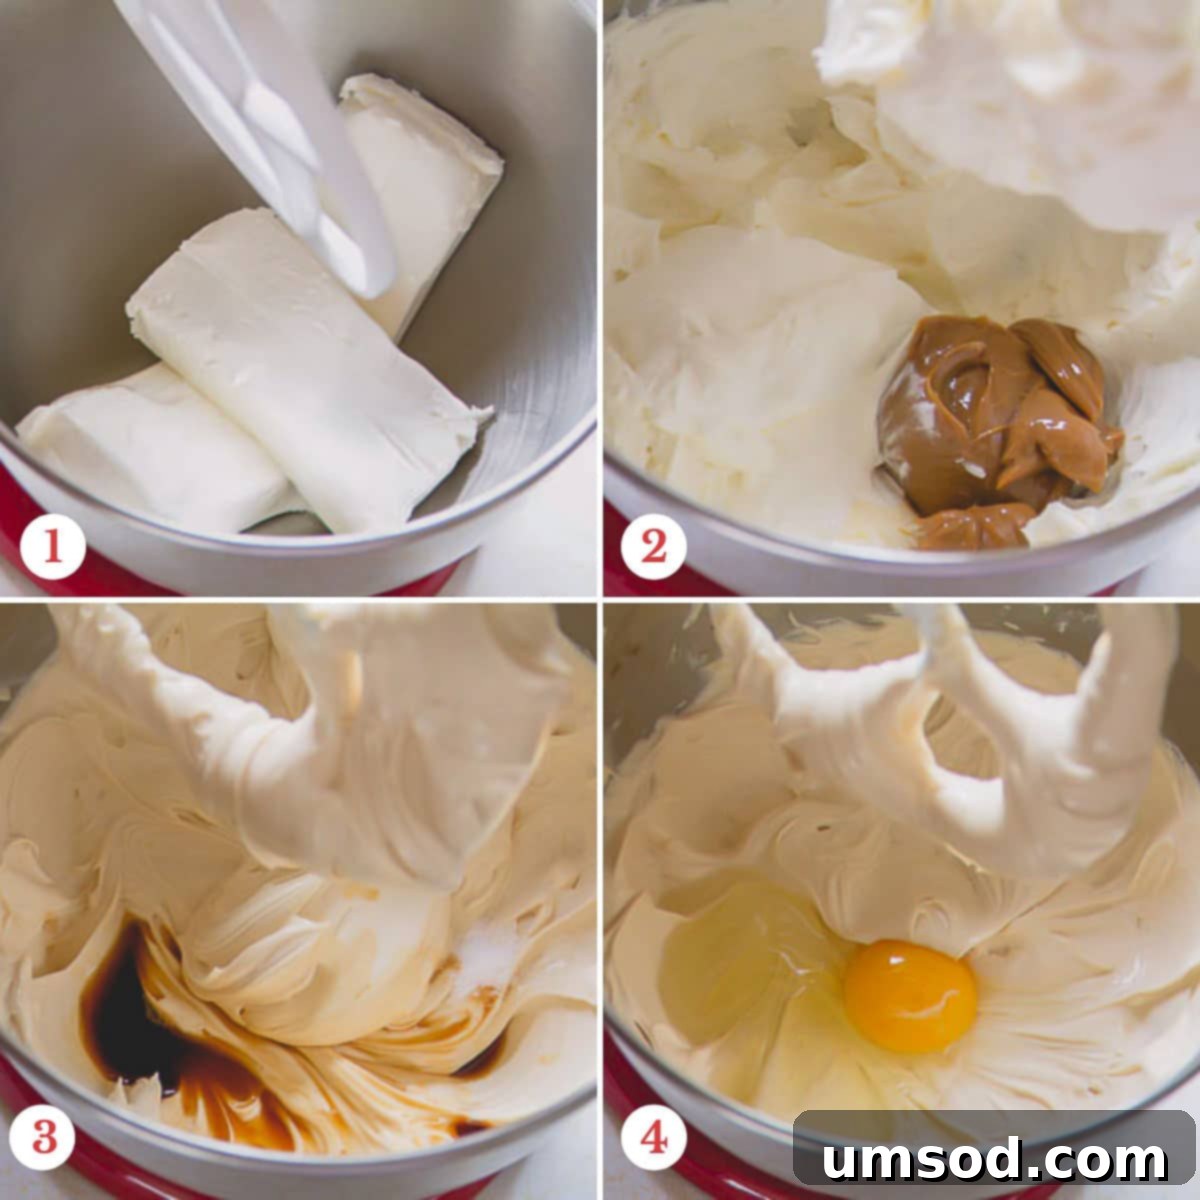
Pro Tip: Minimizing Air Incorporation
The primary culprit behind cheesecake cracks is excessive air in the batter. Always mix on medium-low speed, especially after adding eggs, and stop as soon as the ingredients are just combined. A few gentle taps of the filled pan on the counter before baking will also help release any trapped air bubbles.
4. Baking and Cooling for a Perfectly Crack-Free Cheesecake
Achieving a smooth, unblemished cheesecake top hinges on precise baking and, perhaps even more importantly, a gradual cooling process.
- Carefully pour the silky cheesecake filling into your chilled, foil-wrapped springform pan. Gently tap the pan on your counter a couple of times. This simple action helps any lingering air bubbles rise to the surface and pop, further reducing the risk of cracks.
- Place the springform pan (still wrapped in foil) into a larger roasting pan. Then, carefully pour 1 to 2 cups of hot water into the roasting pan, ensuring the water comes about halfway to two-thirds of the way up the sides of the springform pan. This creates the essential water bath, providing a moist and even baking environment. (If you don’t have a roasting pan large enough, you can still achieve a moist baking environment by placing a separate oven-safe baking pan filled with hot water on the bottom rack of your oven, with the cheesecake on a higher rack.)
- Bake the cheesecake in your preheated oven at 350°F (175°C) for approximately 60 to 75 minutes. The cheesecake is ready when the edges appear set and slightly puffed, but the very center (about 2-3 inches in diameter) still exhibits a slight, gentle wobble when the pan is carefully shaken.
- Once baked, resist the urge to immediately remove the cheesecake. Instead, turn off the oven heat and prop the oven door open slightly (about 2-3 inches). Allow the cheesecake to cool slowly within the residual warmth of the oven for at least 1 to 2 hours. This gradual cooling prevents the drastic temperature changes that can cause cheesecakes to shrink rapidly and crack.
- After the slow oven cool, carefully remove the cheesecake from the oven and the water bath. Transfer it to a wire rack and allow it to cool completely to room temperature.
- Once fully cooled, cover the cheesecake tightly with plastic wrap and refrigerate for a minimum of 6 hours, or ideally, overnight. This crucial chilling period allows the cheesecake to fully set, firm up, and allows its flavors to deeply meld, resulting in the best possible texture and taste.
- When you’re ready to serve, gently run a thin offset spatula or a butter knife around the inner edge of the springform pan to loosen the cheesecake. Then, unlatch and carefully remove the springform sides.
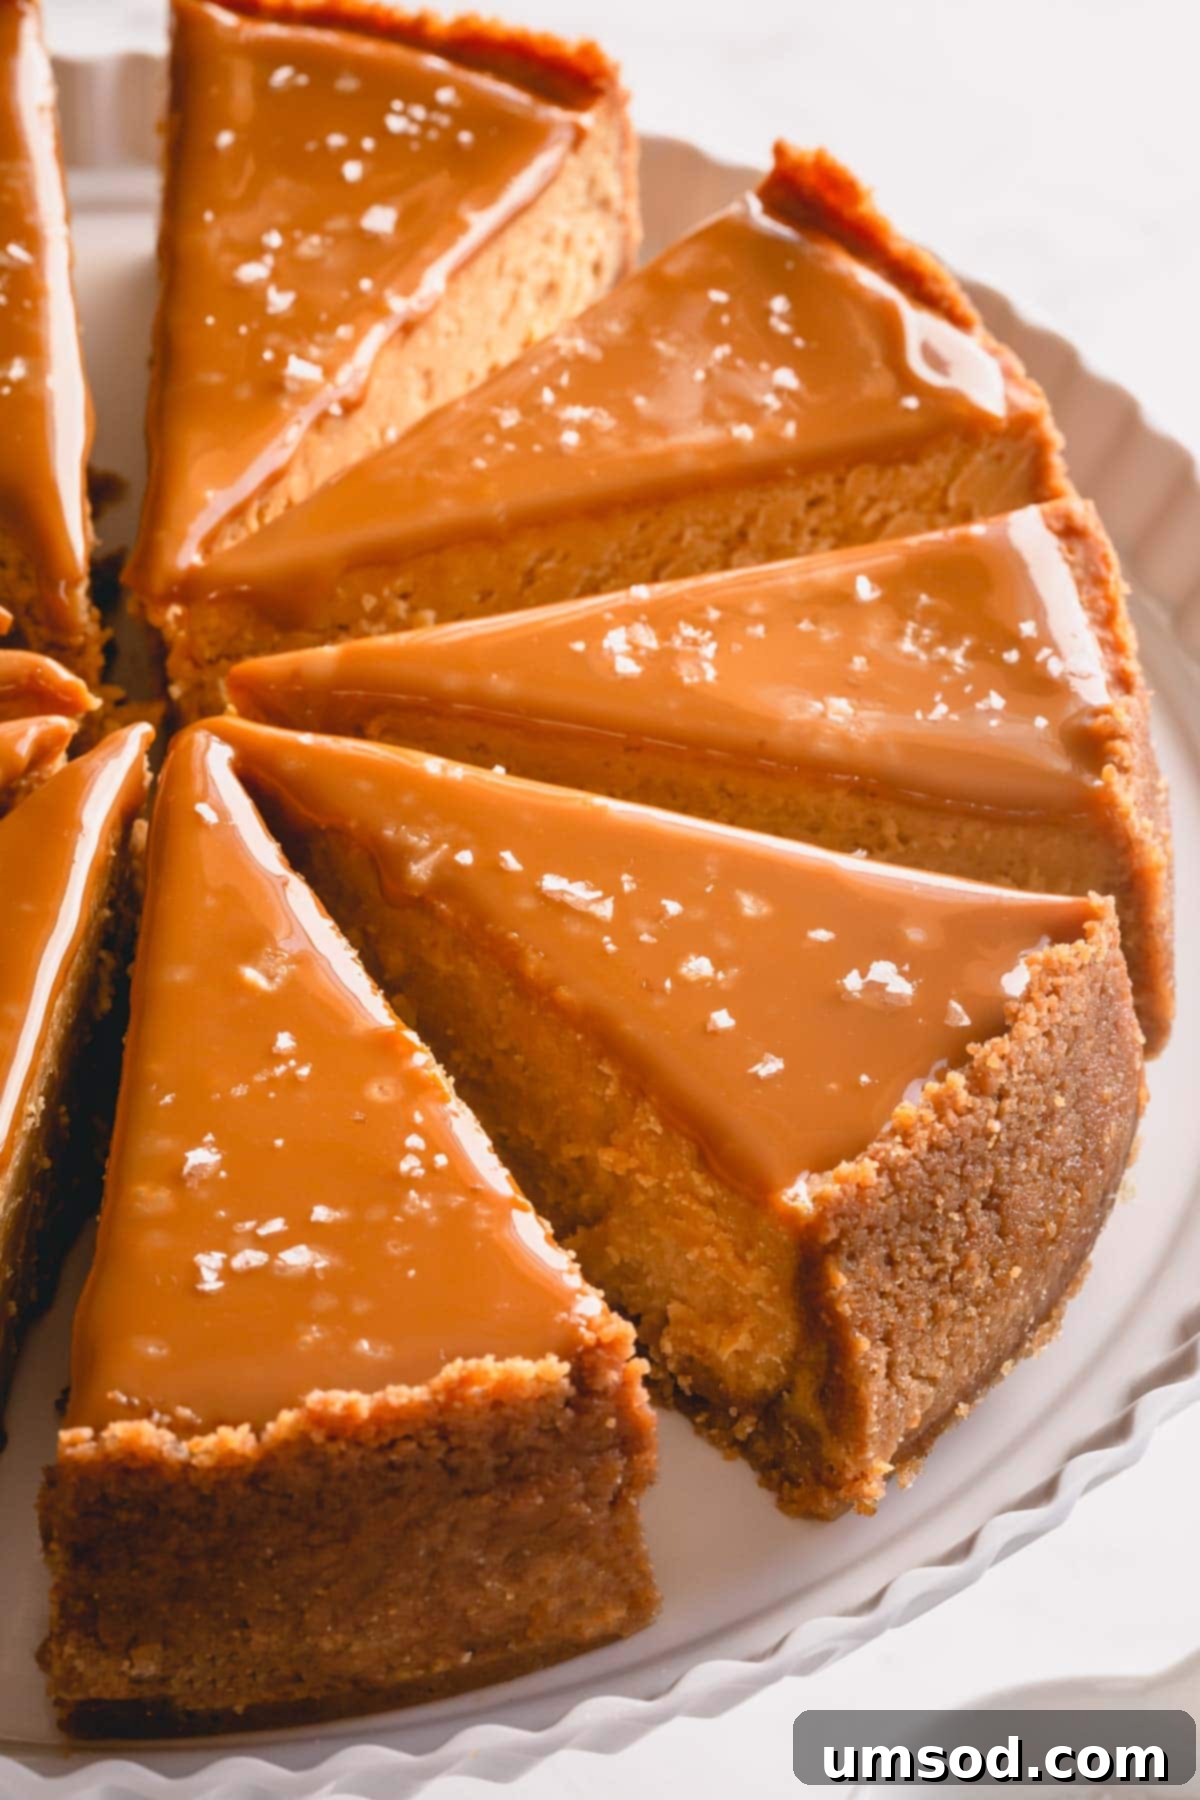
- Finally, spread the reserved dulce de leche generously over the top of your perfectly chilled cheesecake. For that ultimate gourmet touch, sprinkle a liberal amount of flaky sea salt just before slicing and serving. Enjoy!
Expert Cheesecake Baking Tips for Guaranteed Success
Baking a consistently perfect cheesecake is an art that becomes effortless with these tried-and-true techniques and insights:
- Always Soften Cream Cheese to Room Temperature: This is arguably the most critical step for a silky, lump-free cheesecake filling. Cold cream cheese will not cream smoothly and will result in lumps, forcing you to overmix the batter. Simply take your brick-style cream cheese out of the refrigerator about an hour before you plan to start baking.
- Room Temperature Eggs are a Must: Just like cream cheese, eggs should be at room temperature. They incorporate much more smoothly and evenly into the batter, preventing curdling and reducing the need for excessive mixing, which is vital for preventing cracks.
- Avoid High-Speed Mixing: When combining the filling ingredients, particularly after adding the eggs, use a medium-low speed. Over-mixing, especially at high speeds, whips too much air into the batter. This excess air expands rapidly during baking, then collapses upon cooling, which is the number one reason for dreaded cheesecake cracks. Mix only until just combined.
- Water Bath Alternatives: If your large roasting pan isn’t quite large enough to snugly fit your springform pan for a traditional water bath, there’s a simple workaround. Place a sturdy, oven-safe baking pan (such as a 9×13 inch pan) filled with 1-2 inches of hot water on the bottom rack of your oven. The steam generated will still create a moist baking environment for your cheesecake, which bakes on a higher rack.
- Gradual Cooling is Key to Preventing Cracks: Sudden changes in temperature are a primary cause of cheesecake cracks. After the cheesecake is baked, turn off your oven, but leave the cheesecake inside with the oven door propped open slightly (e.g., with a wooden spoon) for at least an hour. This slow, gentle cooling process allows the cheesecake to adjust to the temperature change without shocking it, preventing shrinkage and cracking.
- Embrace the Sea Salt: While optional, a sprinkle of flaky sea salt on top of your finished Dulce de Leche Cheesecake is highly recommended for a truly gourmet experience. Brands like Maldon sea salt flakes are excellent. The subtle crunch and briny notes of the salt beautifully cut through the rich sweetness of the dulce de leche, elevating the overall flavor profile and adding an exquisite balance.
Frequently Asked Questions About Baking Cheesecake
How do I prevent cracks in a cheesecake?
Preventing cracks in a cheesecake is a common concern for bakers. The most effective strategies include:
1. Gentle Mixing: Avoid incorporating too much air into the batter by mixing on low speeds, especially after adding eggs. Excessive air expands during baking and then collapses, causing cracks.
2. Water Bath Method: Baking the cheesecake in a water bath creates a moist, consistent heat environment. This allows the cheesecake to cook gently and evenly from the edges to the center, significantly reducing the likelihood of cracking.
3. Gradual Cooling: Sudden temperature changes are a major culprit. Always allow your cheesecake to cool slowly in the turned-off oven with the door slightly ajar before transferring it to a cooling rack and then the refrigerator. This gentle transition helps prevent the cheesecake from shrinking too quickly and cracking.
Why is it important to bake cheesecake in a water bath?
Baking cheesecake in a water bath (also known as a bain-marie) is crucial for achieving its signature smooth, creamy texture and preventing cracks. The water bath provides a gentle, consistent heat that surrounds the cheesecake, ensuring that it cooks evenly from all sides without the edges drying out too quickly. The steam from the water also creates a moist environment in the oven, which helps the cheesecake rise slowly, cook uniformly, and maintain a perfectly flat, unblemished surface.
Can you make cheesecake without a water bath?
Yes, it is possible to bake a cheesecake without a traditional water bath, but be aware that it significantly increases the risk of cracks and may result in a slightly less creamy texture. If you prefer to skip the full water bath, a useful alternative is to place another oven-safe baking pan filled with 1-2 inches of hot water on the bottom rack of your oven while the cheesecake bakes on a higher rack. This still introduces steam into the oven, providing some of the benefits of a water bath by humidifying the baking environment. While your cheesecake will still be delicious, achieving that perfectly smooth, crack-free surface might be more challenging without the full water bath immersion.
Storing and Serving Your Dulce de Leche Cheesecake Like a Pro
This Dulce de Leche Cheesecake is not only incredibly delicious but also makes a perfect make-ahead dessert, allowing you to prepare it well in advance for ultimate convenience and less stress on event day.
- Refrigeration: Once your cheesecake has completely cooled and been thoroughly chilled, ensure it is tightly covered with plastic wrap or stored in an airtight container. It will keep beautifully in the refrigerator for up to 5 days, maintaining its freshness, exquisite flavor, and creamy texture.
- Freezing for Longer Storage: For extended storage, this cheesecake freezes exceptionally well. Make sure it is completely cool and firm before freezing. You can freeze individual slices or the entire cheesecake (it’s best to freeze it without the final dulce de leche topping and sea salt). Wrap it tightly first in plastic wrap, then add an additional layer of aluminum foil to prevent freezer burn. It can be stored in the freezer for up to 1 month.
- Thawing Frozen Cheesecake: To enjoy a frozen cheesecake, transfer it from the freezer to the refrigerator and allow it to thaw slowly overnight, or for at least 8-12 hours, until it is completely defrosted. Once thawed, you can add the fresh dulce de leche topping and sprinkle with sea salt flakes just before serving.
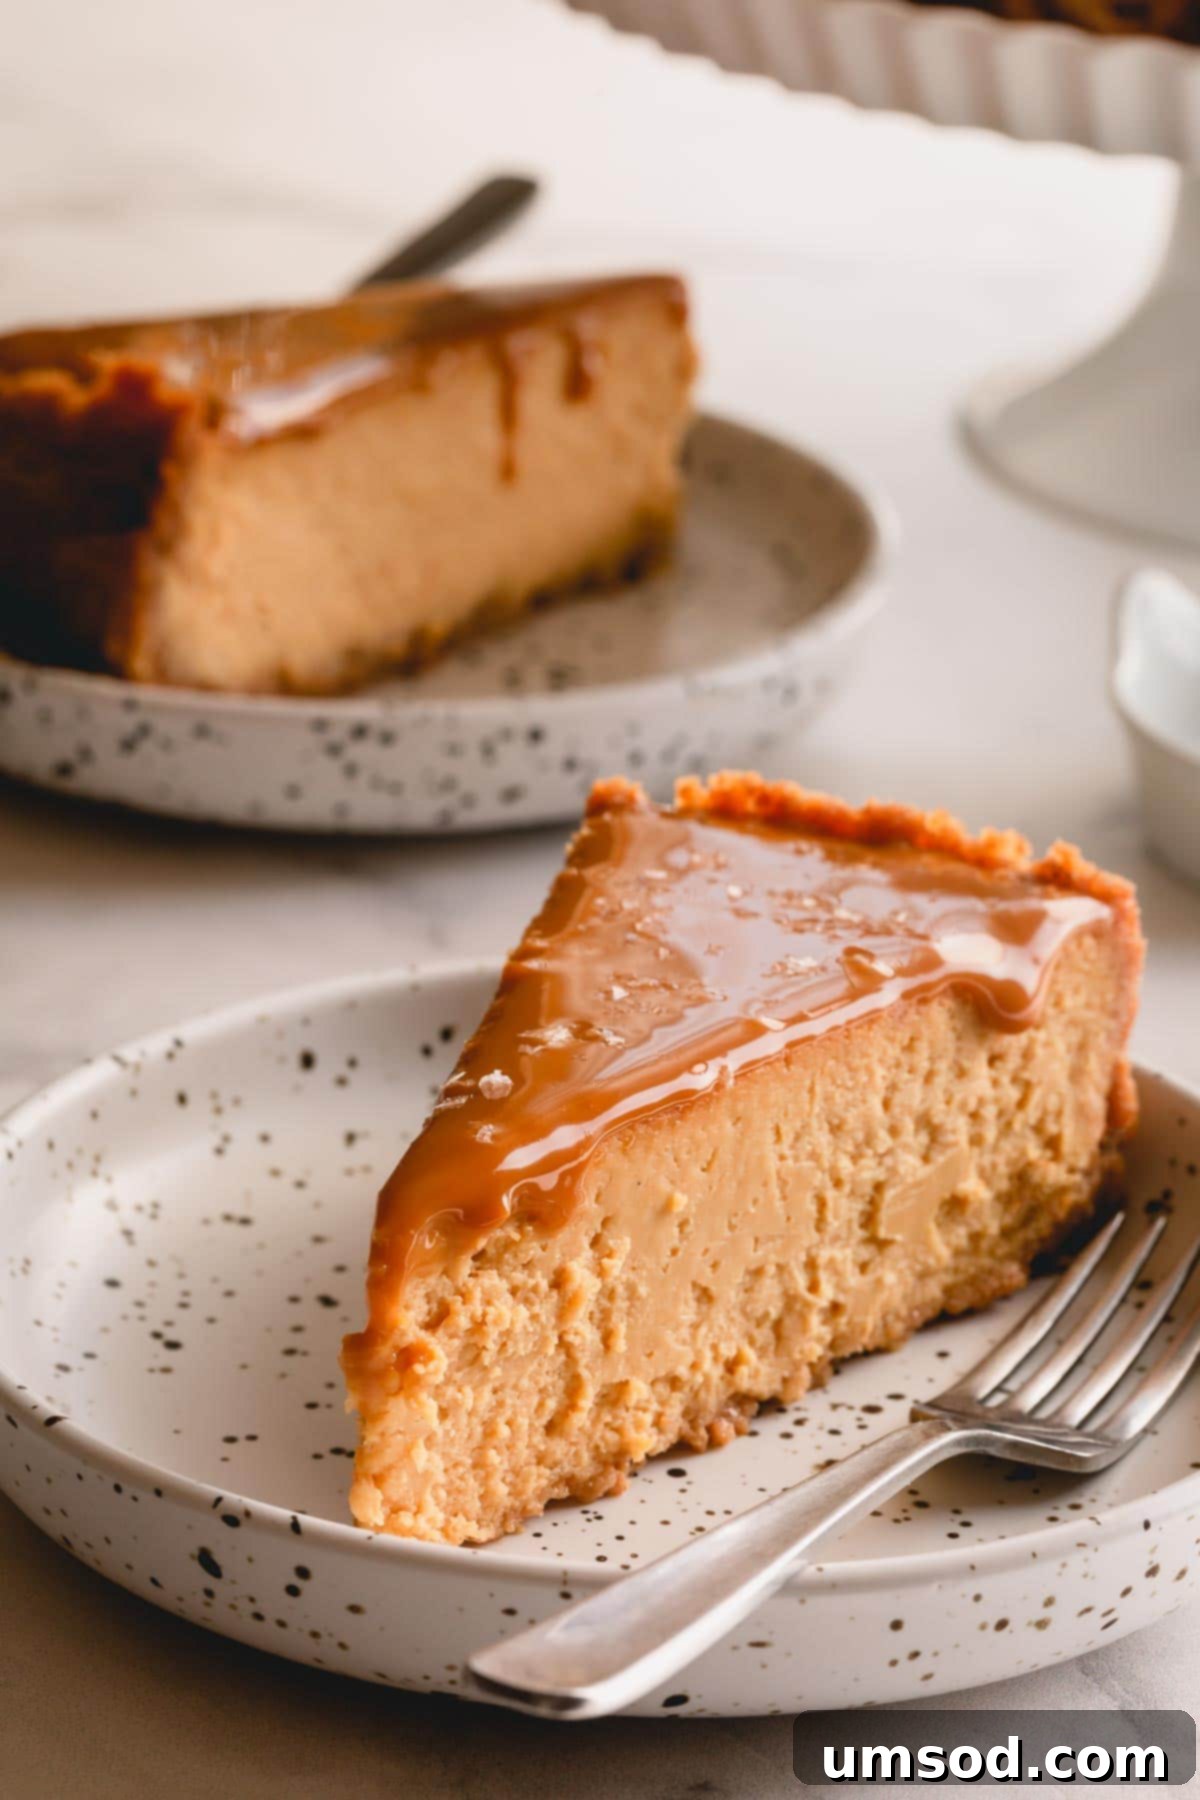
We genuinely hope you’ll embark on the delightful journey of making and savoring this sweet, creamy, and truly spectacular treat. If you do, please share your experience and valuable feedback in the comments section below, and consider giving it a star-rating! Your input is incredibly helpful to us and to other aspiring bakers in our community.
Video Tutorial: Decadent Dulce de Leche Cheesecake – NO CRACK!
Dulce de Leche Cheesecake Recipe Card
This recipe delivers a flawlessly creamy and smooth dulce de leche cheesecake, perfectly balanced with a sprinkle of sea salt. Get ready to impress with this decadent treat!
Recipe Details
- Yields: 12 servings
- Prep time: 20 minutes
- Cook time: 1 hour
- Chill time: 4 hours (minimum), 8+ hours (recommended for best results)
- Total time: Approximately 5 hours 30 minutes (including minimum chill time)
- By: Shinee Davaakhuu
Equipment
- 9-inch springform pan
- Food processor
- Large mixing bowl (preferably with a stand mixer and paddle attachment)
- Hand-held electric mixer (alternative to stand mixer)
- Large roasting pan (for water bath)
- Wire rack
- Rubber spatula
- Offset spatula or butter knife (for serving)
Ingredients
For the Graham Cracker Crust:
- 16 full sheets graham crackers (approximately 2 sleeves or 260g), finely crushed
- ¼ cup (50 g) granulated sugar
- 10 tablespoons (140 g) unsalted butter, melted
For the Dulce de Leche Cheesecake Filling:
- 24 oz (700 g) full-fat cream cheese, softened (brick-style, see Note 1)
- ⅓ cup (65 g) granulated sugar
- 1 (14oz) can (400 g) dulce de leche, divided (approximately ¾ for the filling, ¼ for the topping)
- ½ cup (125 g) sour cream (or plain full-fat Greek yogurt)
- 1 tablespoon pure vanilla extract
- ¼ teaspoon kosher salt
- 3 large eggs, at room temperature
- Sea salt flakes for dusting (optional, but highly recommended, e.g., Maldon sea salt flakes)
Instructions
To Prepare the Pan:
- Lay two large sheets of heavy-duty aluminum foil in a criss-cross pattern on a flat surface. Place a 9-inch springform pan in the center.
- Carefully and tightly wrap the pan with the foil, ensuring no tears or holes. Make sure the foil extends at least an inch above the pan’s edge to create a secure, watertight barrier against the water bath.
To Make the Crust:
- In a food processor, pulse the graham crackers until very fine crumbs are formed.
- Add the granulated sugar and melted unsalted butter to the food processor. Pulse again until the crumbs are evenly moistened and resemble wet sand.
- Transfer the crumb mixture into the prepared springform pan. Press the mixture firmly and evenly onto the bottom and all the way up the sides of the pan, forming a tall crust.
- Refrigerate the prepared crust for at least 30 minutes while you work on the filling. Preheat your oven to 350°F (175°C).
To Make the Filling:
- In a large mixing bowl (using a stand mixer with a paddle attachment or a hand mixer), beat the softened cream cheese on medium speed for about 2 minutes until it is light, fluffy, and completely smooth.
- Add the granulated sugar, approximately ¾ of the dulce de leche (reserving the remaining ¼ for topping), sour cream, pure vanilla extract, and kosher salt. Beat on medium-low speed until the mixture is smooth and well combined, scraping down the sides and bottom of the bowl with a spatula halfway through.
- Add the large eggs one at a time, mixing on medium-low speed only until each egg is just incorporated before adding the next. Avoid overmixing. Scrape the sides of the bowl one last time and mix for an additional 30 seconds to ensure homogeneity without incorporating too much air.
- Pour the creamy cheesecake batter into the chilled graham cracker crust. Gently tap the pan on the counter several times to release any trapped air bubbles.
To Bake:
- Place the foil-wrapped springform pan into a large roasting pan. Carefully pour 1 to 2 cups of hot water into the roasting pan, ensuring the water comes about halfway up the sides of the springform pan to create a water bath. (If a large roasting pan is unavailable, place a separate oven-safe pan filled with hot water on the bottom oven rack.)
- Bake in the preheated oven at 350°F (175°C) for 1 hour to 1 hour 15 minutes, or until the edges of the cheesecake are set and slightly puffed, but the center (a 2-3 inch circle) still has a slight, gentle wobble when the pan is gently shaken.
- Once baked, turn off the oven heat but leave the cheesecake inside with the oven door propped open slightly for 1-2 hours. This gradual cooling prevents cracking.
- Remove the cheesecake from the oven and the water bath. Allow it to cool completely on a wire rack at room temperature.
- Once fully cooled, cover the cheesecake tightly with plastic wrap and refrigerate for at least 6 hours, or preferably overnight, to allow it to firm up and for flavors to meld.
- When ready to serve, gently run a thin offset spatula or a butter knife around the inner edge of the springform pan to loosen the cheesecake. Unlatch and remove the springform sides.
- Generously spread the reserved dulce de leche over the top of the chilled cheesecake. If desired, sprinkle with sea salt flakes just before slicing and serving.
Recipe Notes & Tips
- Note 1 (Cream Cheese Selection): For the best results, always use full-fat, brick-style cream cheese. Whipped or reduced-fat cream cheese contains more water and less fat, which can compromise the cheesecake’s texture, leading to a less creamy consistency and a higher risk of cracks.
- Graham Crackers Quantity: Approximately 2 sleeves of standard graham crackers, weighing around 260g, are generally sufficient for the crust.
- Storing Tips:
- Refrigeration: Store your cooled and chilled cheesecake, tightly covered, in the refrigerator for up to 5 days.
- Freezing: For longer storage, you can freeze individual slices or the entire cheesecake (without the final dulce de leche topping and sea salt). Wrap it tightly first in plastic wrap, then in aluminum foil, and freeze for up to 1 month. Thaw in the refrigerator overnight before serving.
Nutrition Information (Approximate)
Based on 12 servings per recipe:
- Serving Size: 1 slice
- Calories: 432 kcal
- Carbohydrates: 27 g
- Protein: 6 g
- Fat: 34 g
- Sugar: 16 g
- Sodium: 378 mg
Category Details
- Course: Dessert
- Cuisine: American
This recipe was originally published on June 9th, 2016, and has been thoroughly updated and expanded for clarity, comprehensive guidance, and improved SEO performance.
