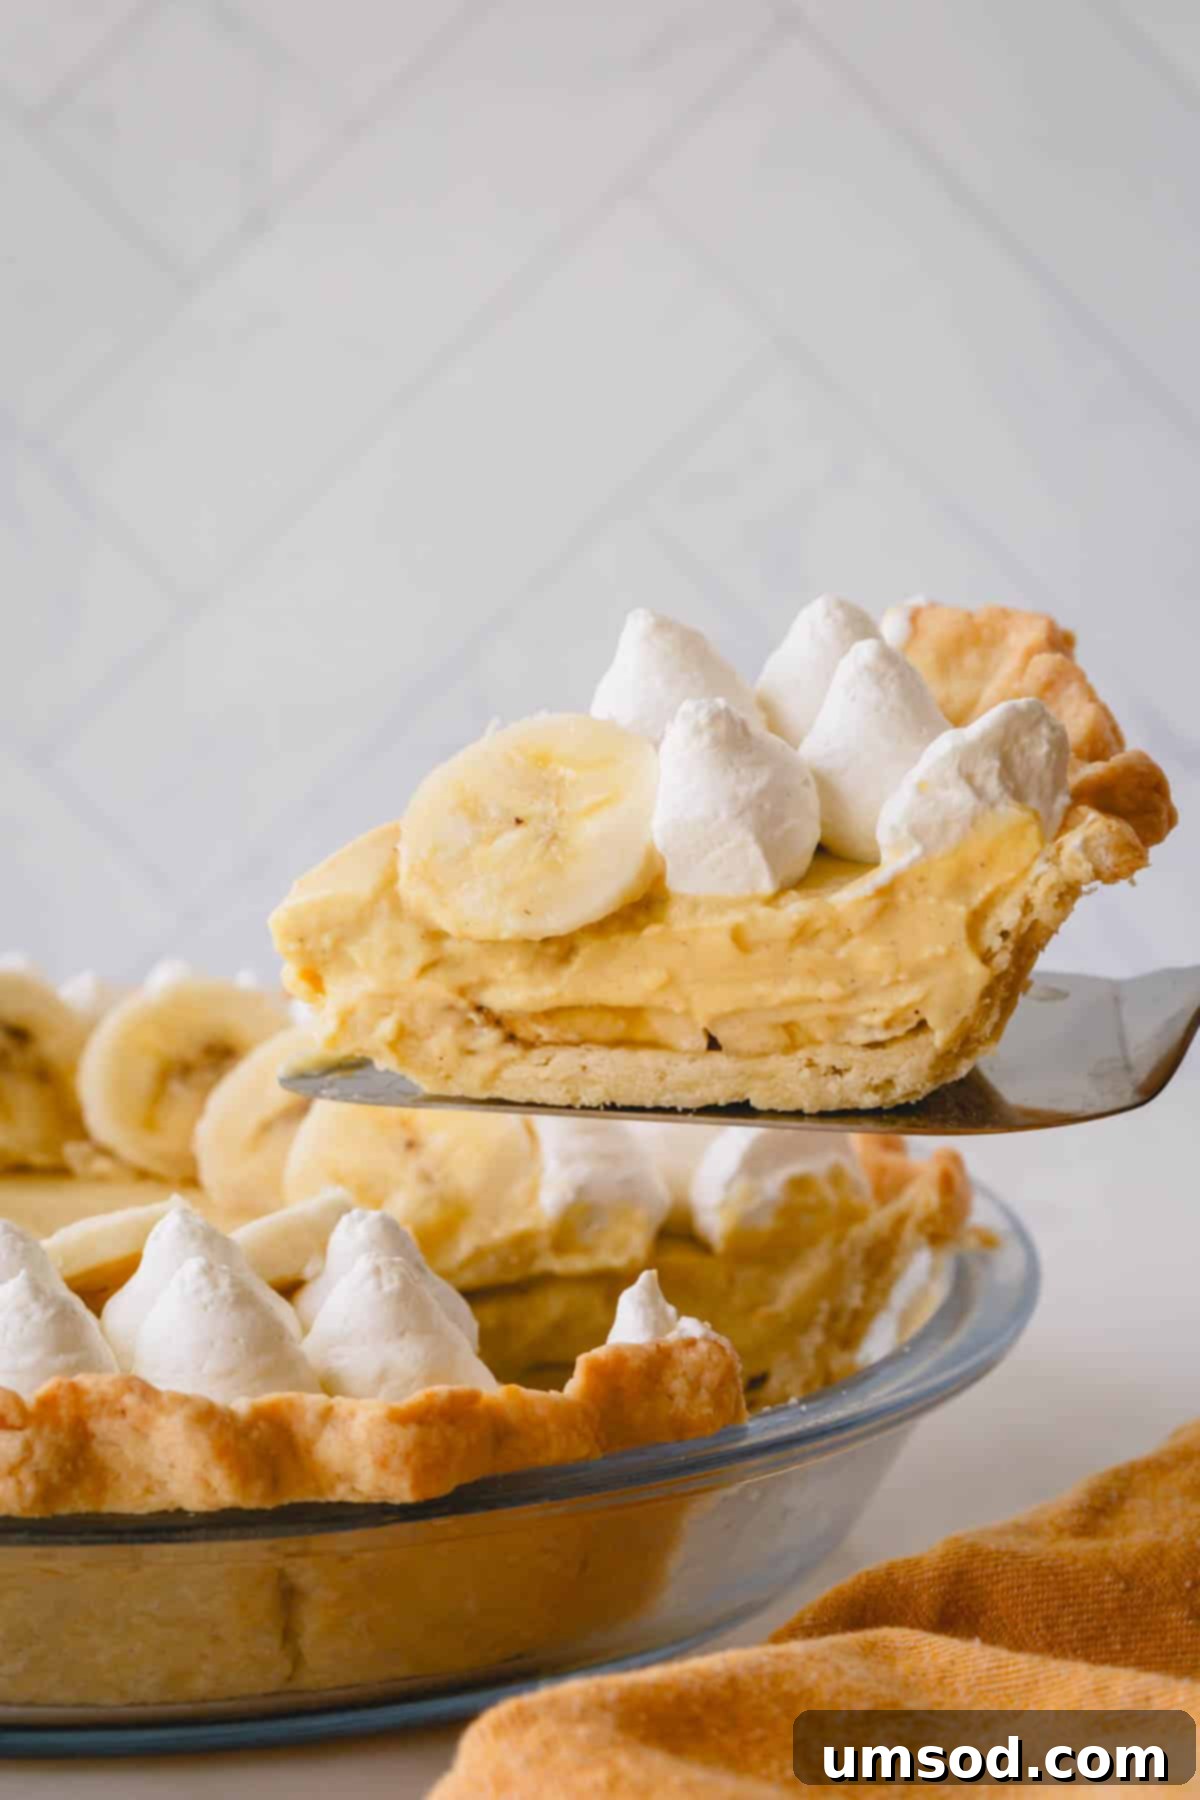
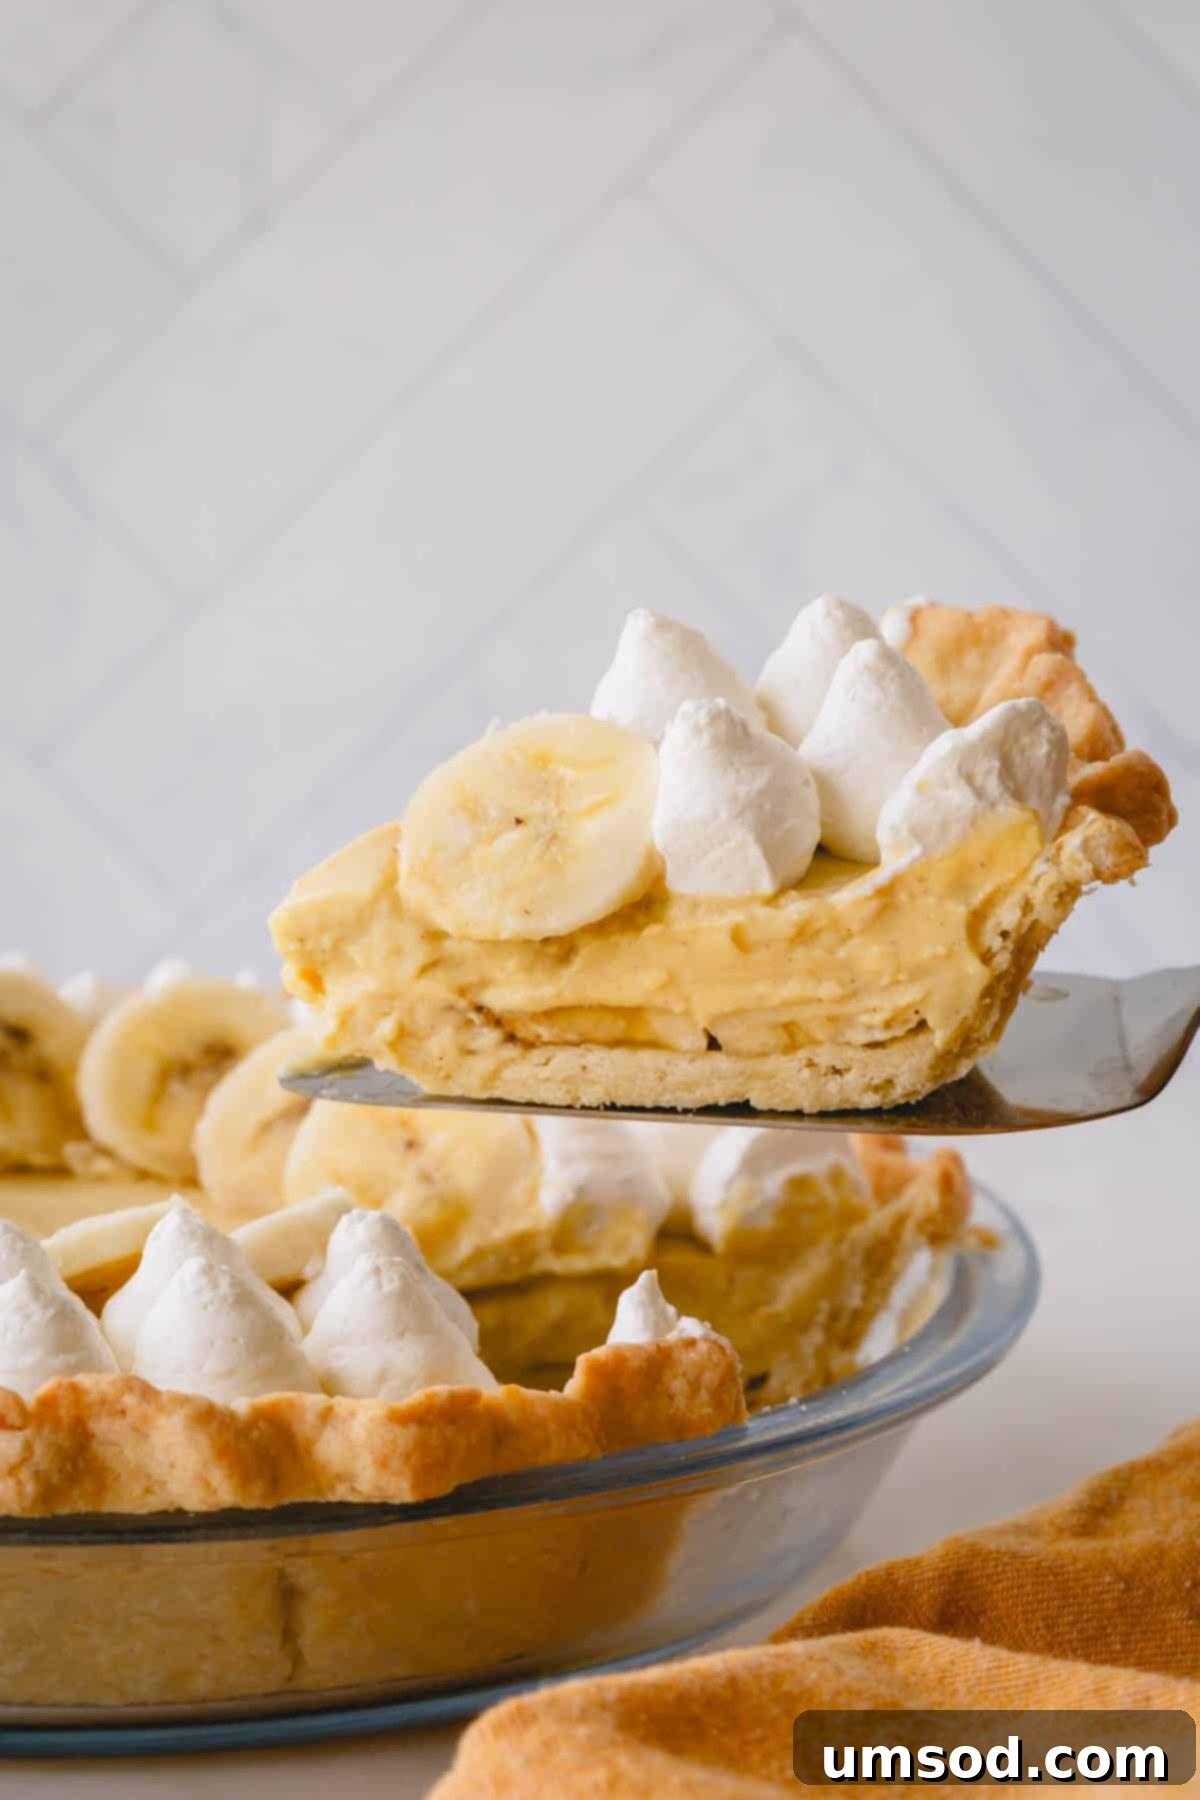
From the first bite of its irresistibly buttery, flaky pie crust to the exquisite, silky smooth vanilla pudding, this homemade banana cream pie is a testament to the joy of baking 100% from scratch! Each slice is generously packed with layers of sweet, fresh bananas and crowned with a cloud of homemade whipped cream, creating a dessert that is not only utterly delicious but also surprisingly easy to prepare in advance. Discover how to create this classic American comfort food that will undoubtedly become a family favorite.
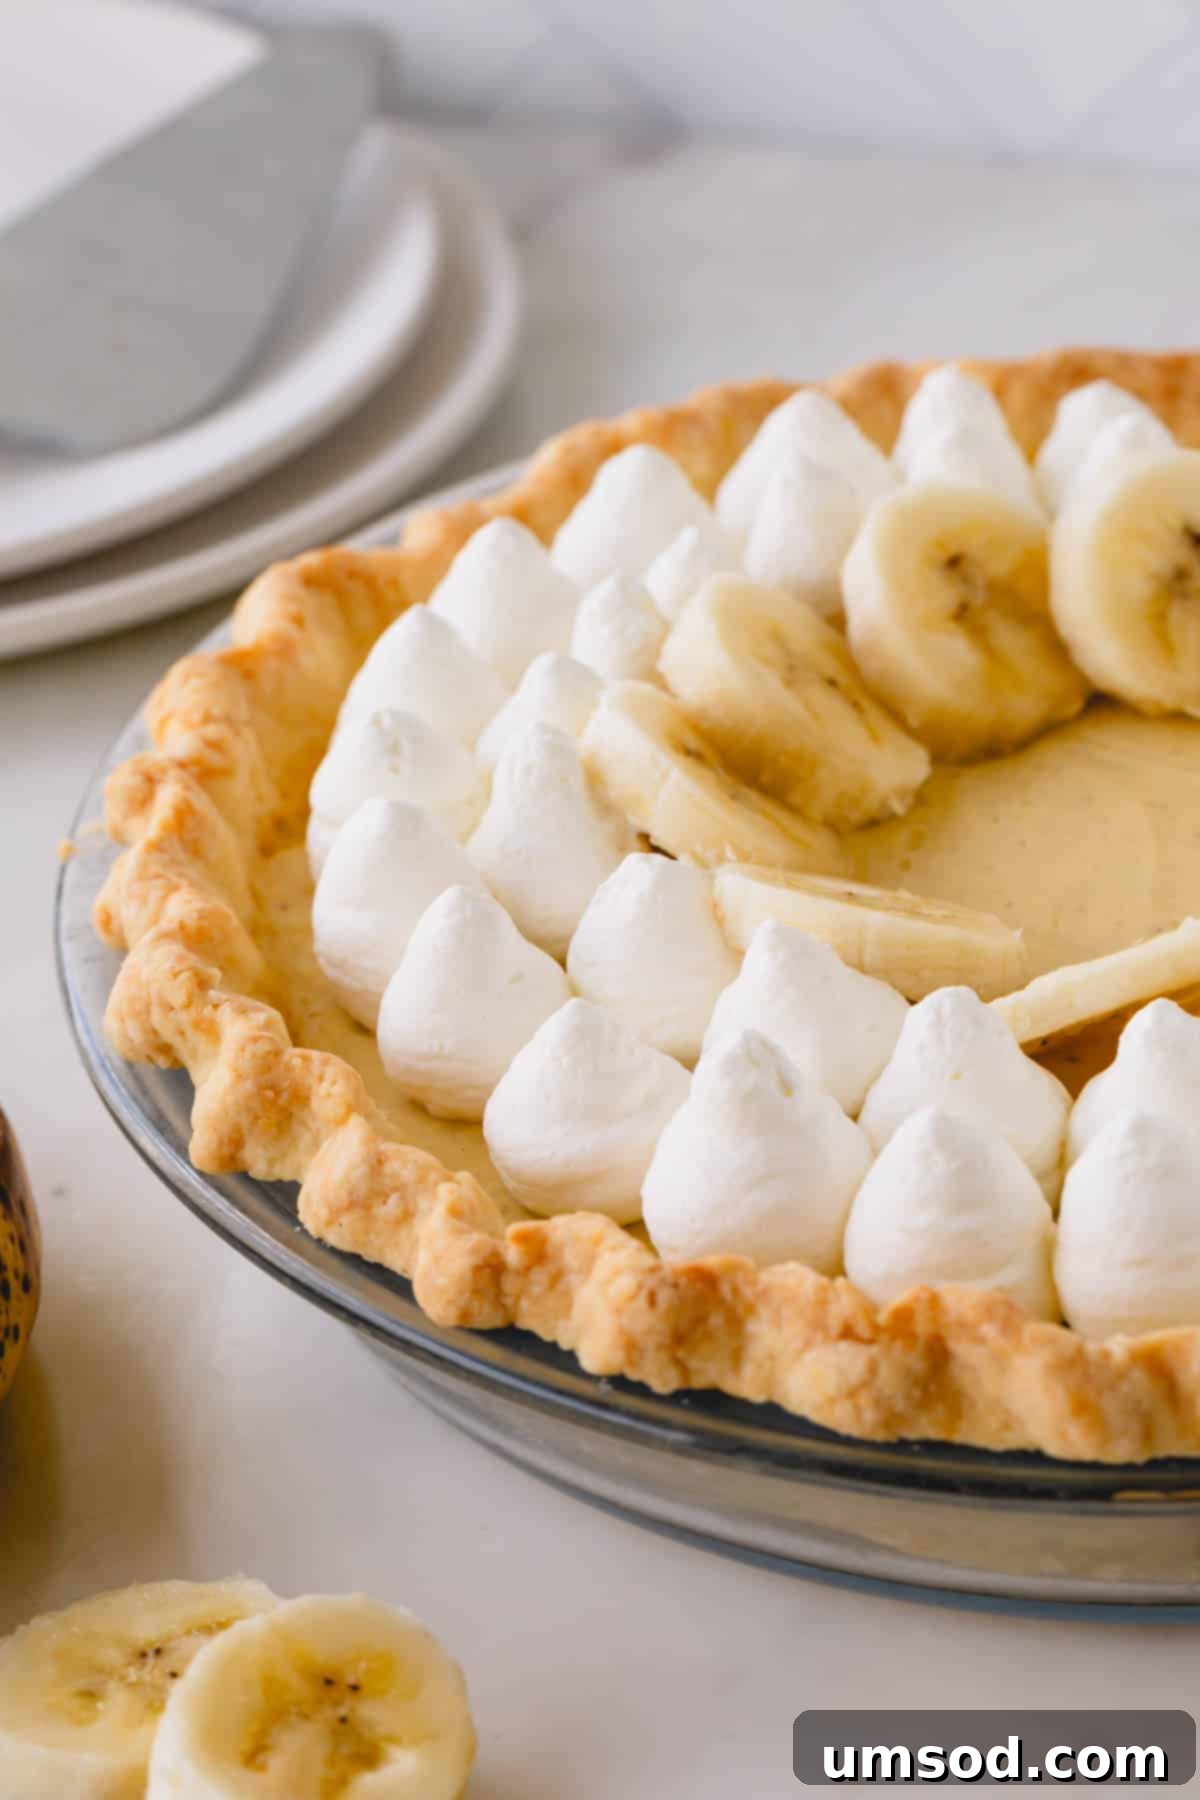
Pin this now to find it later
Pin It
Why You’ll Fall in Love with This Homemade Banana Cream Pie
An all-American, old-fashioned banana cream pie holds a special place in the hearts of dessert enthusiasts, and for good reason! If you haven’t yet experienced the sheer delight of a truly homemade version, prepare to be converted. This isn’t just any pie; it’s a culinary masterpiece crafted with care, guaranteeing a superior flavor and texture that store-bought alternatives simply cannot match. Here’s why this particular recipe stands out:
- Authentic, From-Scratch Goodness: Unlike recipes that rely on pre-made ingredients or instant pudding mixes, our banana cream pie recipe is the real deal. Every component, from the rich pastry to the creamy filling, is made from scratch, ensuring unparalleled freshness and depth of flavor. This commitment to homemade quality is evident in every bite, much like our homemade cherry pie.
- Irresistibly Smooth Vanilla Custard: The heart of this pie is its incredibly smooth yet sturdy vanilla custard. It’s slow-cooked to perfection, creating a luxurious base that beautifully complements the sweetness of fresh bananas and the lightness of whipped cream. The texture is divine – not too firm, not too runny, but perfectly creamy.
- Layers of Freshness: We layer generous slices of ripe, fresh bananas within the pie, ensuring a burst of natural fruit flavor in every spoonful. Combined with the rich custard and fluffy whipped topping, these fresh elements elevate the pie from good to extraordinary.
- Detailed Guidance for Guaranteed Success: Don’t be intimidated by the idea of a scratch-made pie. Our recipe directions are as detailed as possible, meticulously guiding you through each step. We’ve taken great care to provide clear instructions, ensuring that even novice bakers can achieve a perfect, show-stopping pie on their very first attempt. The extra time and effort invested are truly worth the exquisite results!
Prepare to impress your friends and family with this iconic dessert that brings back nostalgic memories of classic bakeries and grandmother’s kitchens.
Mastering the Four Essential Components of Banana Cream Pie
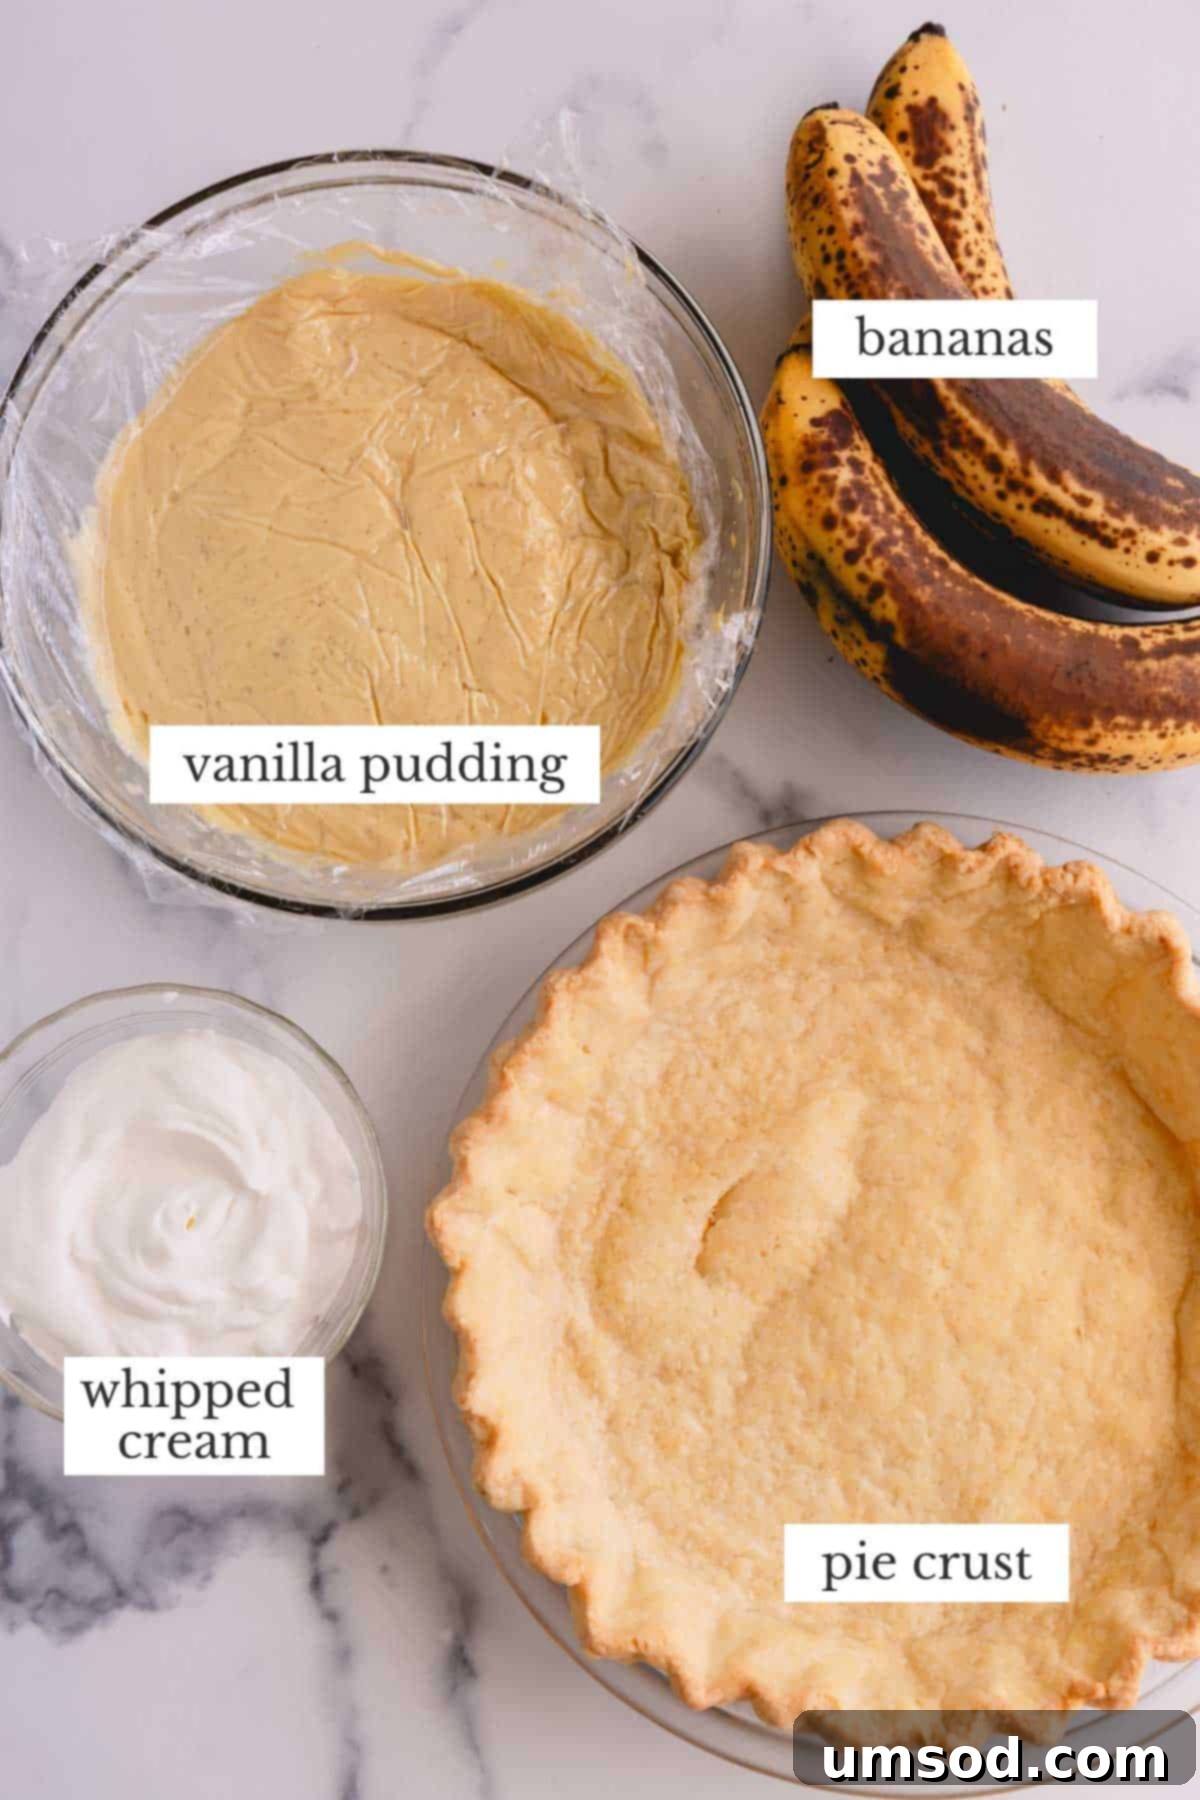
A truly exceptional homemade banana cream pie is built upon four perfectly executed components. Each part plays a crucial role in creating the harmonious balance of textures and flavors that define this beloved dessert. Understanding and mastering each element is key to achieving pie perfection:
- The Pie Crust: While store-bought pie crusts offer convenience, nothing compares to the tender, flaky texture and rich buttery flavor of a homemade crust. Our all-butter pie crust recipe is surprisingly easy to make and provides the perfect foundation, creating a delicate counterpoint to the creamy filling. Its crispness ensures your pie won’t be soggy, even after a day or two in the fridge.
- The Vanilla Pudding: This is where the magic truly happens! Forget instant mixes; our homemade vanilla pudding transforms this dessert into the best of the best. It’s a rich, velvety custard, infused with pure vanilla, cooked to a perfect consistency that holds its shape beautifully while remaining incredibly smooth and luscious. This pudding elevates the entire pie experience.
- The Whipped Cream: A light, airy, and stable whipped topping is essential for balancing the richness of the pudding. We’ll show you how to make a classic homemade whipped cream that holds its shape and doesn’t weep, providing a delightful contrast in texture. For an extra special touch, you might even consider trying our homemade whipped cream with a secret ingredient, though the simpler version included here is truly fantastic.
- Fresh Bananas: The star of the show! The quality and preparation of your bananas are paramount. We advocate for using firm, ripe (but not overripe) bananas for optimal flavor and presentation. We’ll also share a crucial tip on how to prevent those beautiful banana slices from browning, ensuring your pie looks as good as it tastes. Feel free to add as much banana as your heart desires for a truly indulgent experience!
Crafting Your Homemade Banana Cream Pie from Scratch: A Step-by-Step Guide
While the idea of a 100% scratch-made pie might initially seem daunting or high-maintenance, this easy banana cream pie recipe is designed to simplify the process without compromising on flavor or quality. We promise that the incredible taste and texture of a truly homemade pie will make every minute of your effort incredibly worthwhile. Let’s dive into the four main stages of creation:
1. Prepare and Blind Bake the Perfect Pie Crust
A golden, flaky crust is the essential foundation for any great pie. Our all-butter pie crust ensures a rich flavor and tender texture.
- Mix the Dough: Begin by preparing the pie dough according to our detailed all-butter pie dough tutorial. This typically involves combining flour and salt, cutting in cold, cubed butter, and then adding just enough ice water to bring the dough together.
- Roll It Out: On a lightly floured surface, roll the chilled dough out evenly into a perfect 10 to 11-inch circle, ensuring consistent thickness. Carefully transfer the rolled dough into your pie pan, easing it gently into place without stretching.
- Prevent Bubbles: To ensure your crust bakes flat and even, pierce holes all over the bottom and sides of the crust using a fork. This vital step allows steam to escape, preventing unsightly bubbles and air pockets from forming during baking. (Even experienced bakers sometimes forget this step, resulting in minor bubbles, but it’s not a major issue!)
- Weigh and Chill: To prevent the crust from shrinking and to maintain its shape, cover the dough with aluminum foil. Then, weigh it down with pie weights or dried beans. Chill the pie crust in the refrigerator for at least 30 minutes before baking to help the butter solidify and prevent shrinking.
- Blind Bake to Golden Perfection: Preheat your oven to 350°F (177°C). Bake the weighted crust for 15 minutes. After this initial bake, carefully remove the foil and pie weights. Return the crust to the oven and continue baking for another 10-15 minutes, or until the crust achieves a beautiful, golden-brown hue and appears fully cooked through. Allow it to cool completely on a wire rack before proceeding.
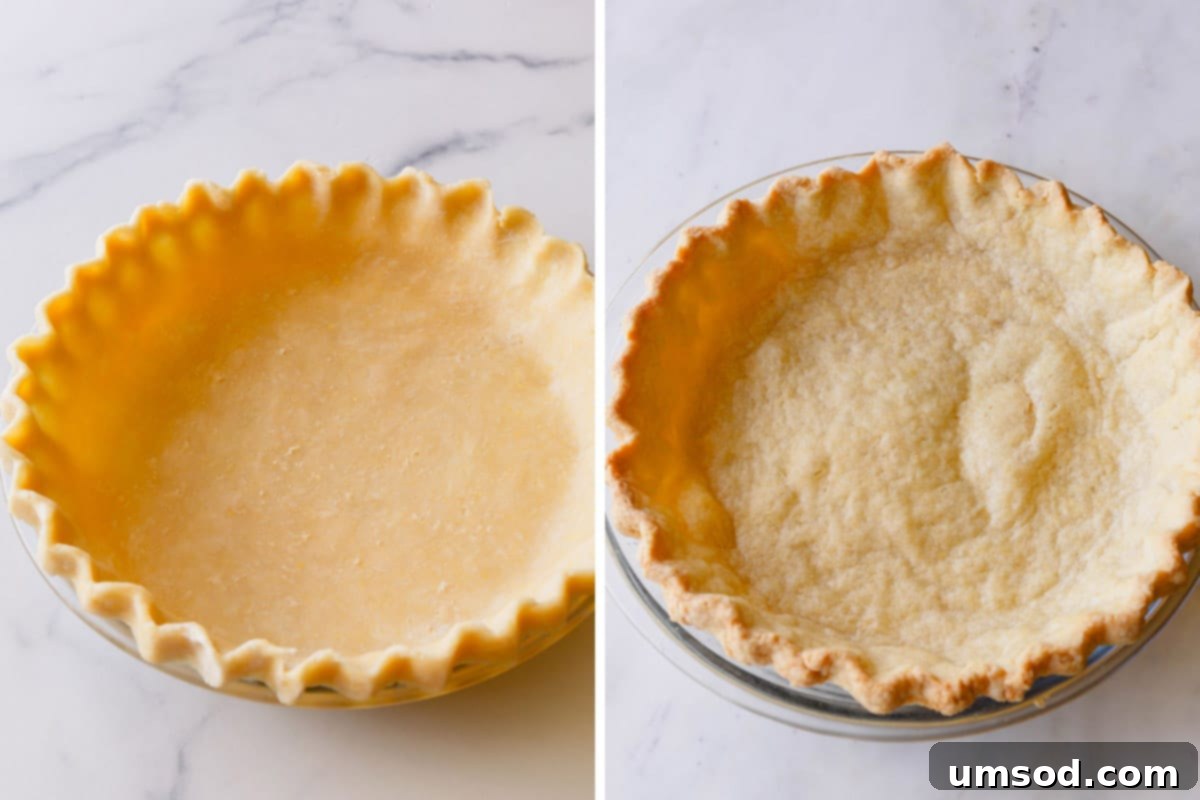
2. Prepare the Silky Homemade Vanilla Pudding
Creating vanilla pudding from scratch is surprisingly straightforward and yields a vastly superior result compared to instant mixes. For a comprehensive guide with step-by-step photos, refer to my detailed tutorial for the best vanilla pudding. In essence, here’s how to achieve that perfect, creamy consistency:
- Scald the Dairy: In a heavy-bottomed saucepan, gently heat milk and heavy cream over medium heat until it reaches a scalding point. This means tiny bubbles will form around the edges of the pan, and steam will rise. Be careful not to let it boil vigorously, as this can scorch the milk. This process helps to infuse the dairy with flavor and prepare it for tempering.
- Whisk the Egg Mixture: In a separate bowl, vigorously whisk together egg yolks, granulated sugar, cornstarch, pure vanilla extract, a touch of vanilla bean paste for rich flavor, and a pinch of salt. Continue whisking until the mixture becomes pale, creamy, and roughly doubles in volume, indicating it’s well aerated.
- Temper the Eggs: This crucial step prevents the egg yolks from scrambling. While continuously whisking the egg yolk mixture, slowly pour about one cup of the hot, scalded milk into the egg mixture. This gradual addition raises the temperature of the egg yolks gently, acclimatizing them to the heat.
- Combine and Thicken: Pour the tempered egg mixture back into the saucepan with the remaining scalded milk. Cook this mixture over medium heat for approximately 8-10 minutes, stirring constantly with a whisk or a wooden spoon. Continuous stirring is vital to prevent sticking and ensure even cooking, leading to a smooth, thick pudding.
- Ensure Smoothness: Once the pudding has thickened, remove it from the heat. For an extra velvety smooth texture, you may wish to press the pudding through a fine-mesh sieve to catch any potential lumps or stray bits of cooked egg.
- Chill Properly: Immediately cover the surface of the warm pudding with plastic wrap, pressing it directly onto the pudding to prevent a skin from forming. This seal is important for maintaining moisture and smoothness. Chill the pudding in the refrigerator for at least 1 hour, or until it is completely cool and firm.
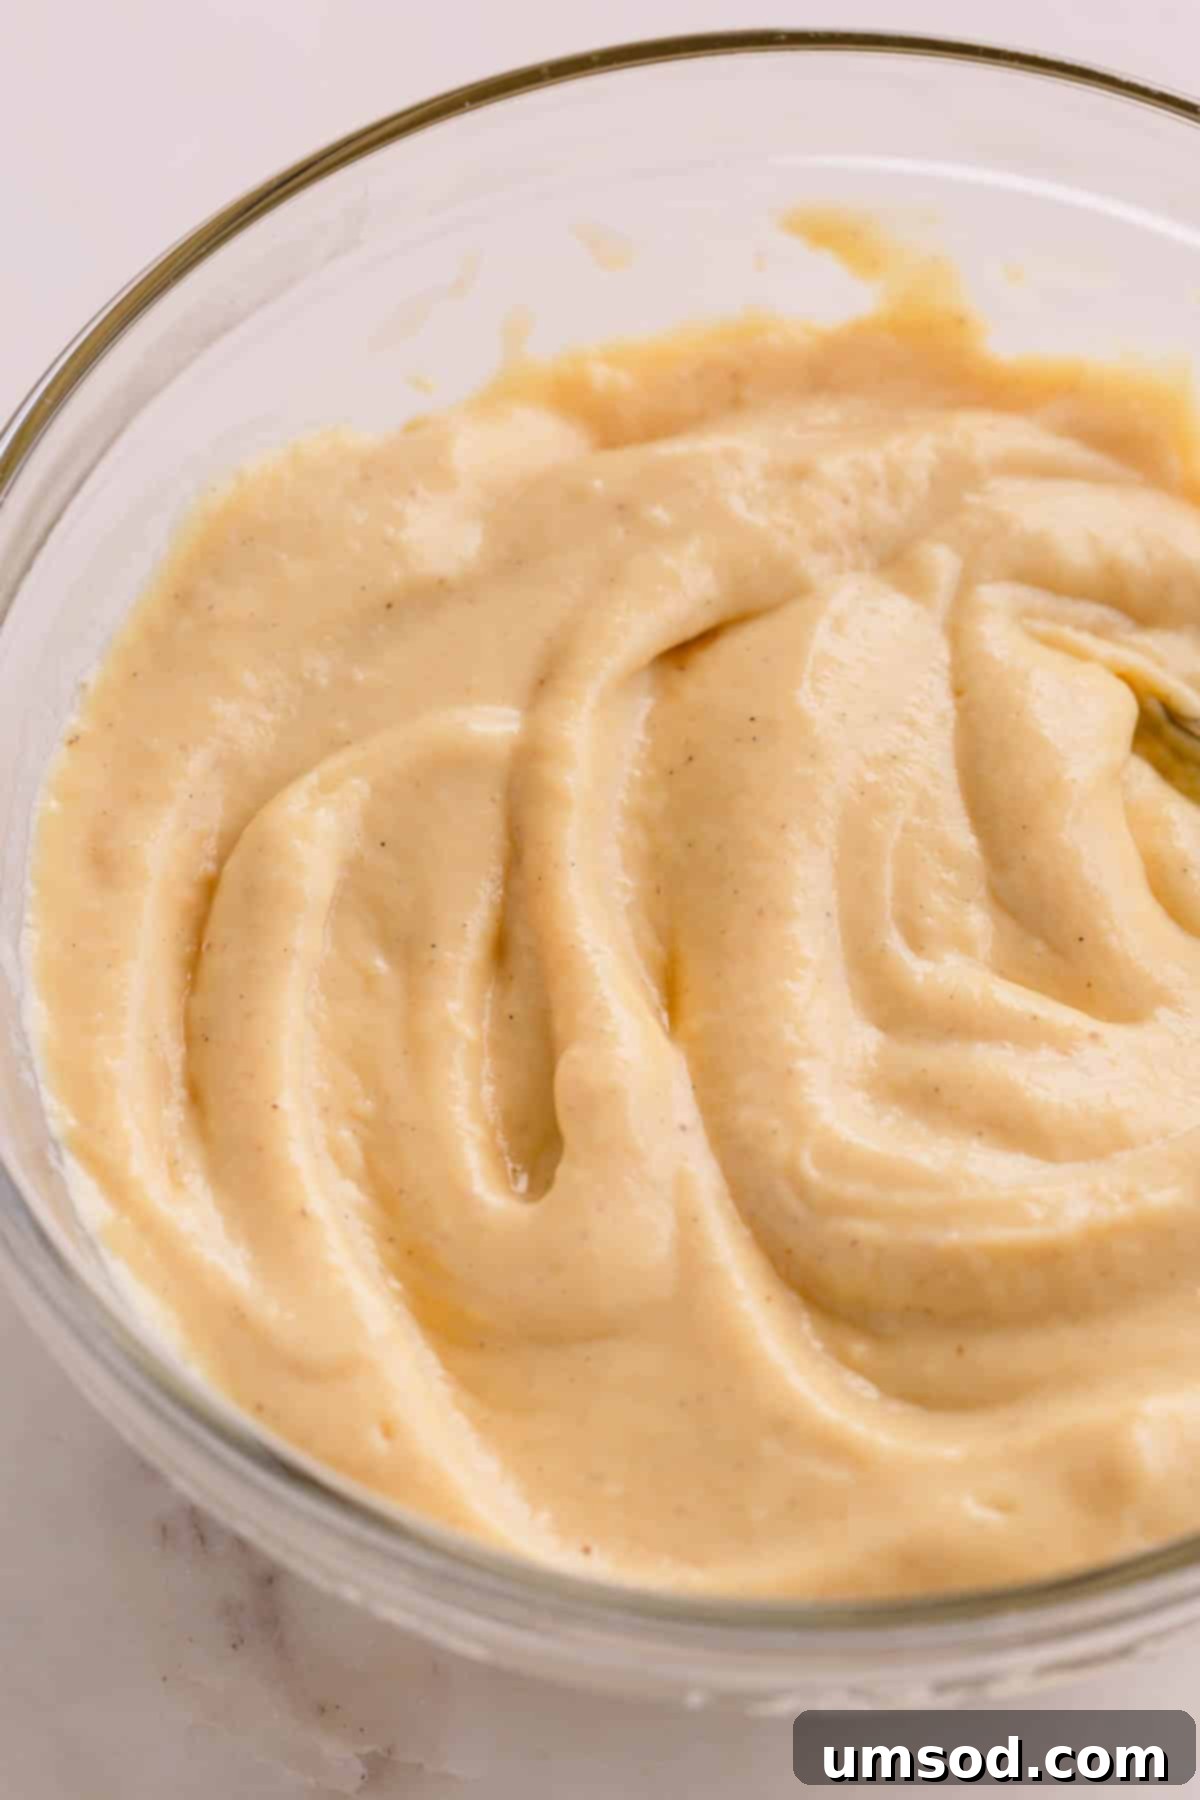
How to Check Your Pudding for Perfect Doneness
A simple yet effective trick ensures your pudding has reached the ideal thickness. After cooking, coat the back of a spoon with the pudding. Then, run your finger directly down the middle of the coated spoon, creating a clear line. If your finger trail remains separated, with the pudding on either side holding its position, your pudding is perfectly done and ready to chill. If the pudding immediately runs back together to fill the gap, it requires a few more minutes of cooking time and constant stirring.
3. Assembling Your Exquisite Homemade Banana Cream Pie
With your perfectly blind-baked crust and rich vanilla pudding ready, assembling the pie is the final exciting step before chilling. The key here is careful layering to ensure every slice is a delightful experience.
- Layer the Bananas: Begin by thinly slicing your fresh bananas. Arrange about two-thirds of these slices evenly over the bottom of your prepared, cooled pie crust. Ensure a good, consistent layer, reserving the remaining banana slices for a beautiful topping later.
- Add the Pudding: Gently pour the completely cooled and thickened vanilla pudding over the banana layer. Use an offset spatula or the back of a spoon to smooth the surface, ensuring the pudding fills the crust evenly and encapsulates the bananas.
- Chill for Stability: To allow the flavors to meld and the pie to set properly, cover the entire pie with plastic wrap. Press the plastic wrap gently onto the surface of the pudding to prevent a skin from forming and to keep the bananas fresh. Chill the pie in the refrigerator for at least 2-3 hours, or until it is firm and thoroughly cooled, before decorating and serving. This chilling time is crucial for a pie that slices cleanly and holds its shape.
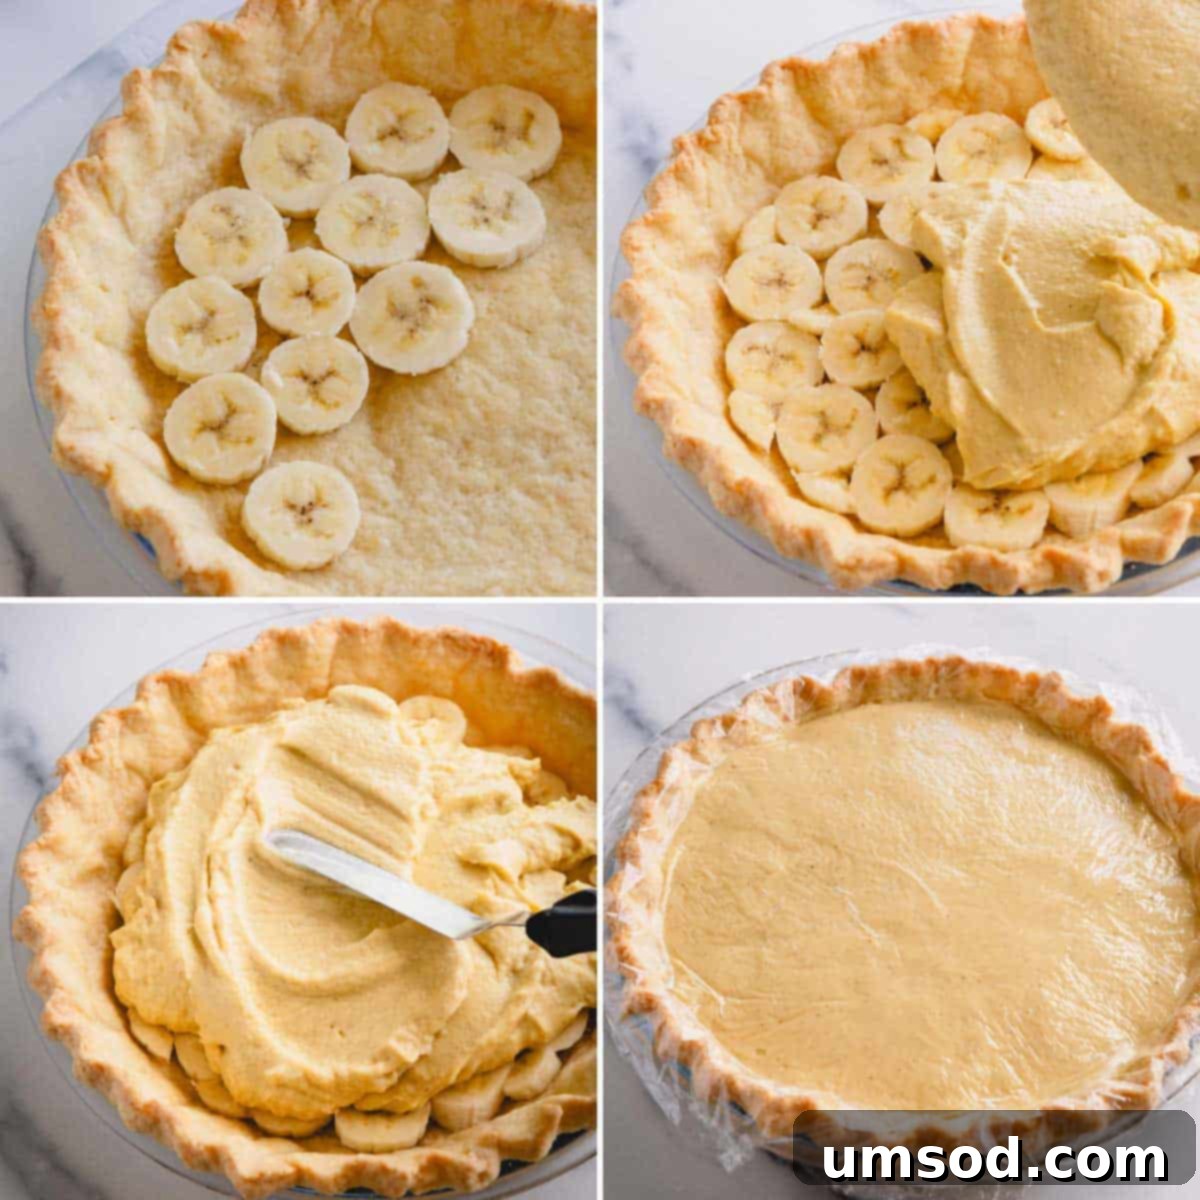
The Secret to Preventing Banana Slices from Browning
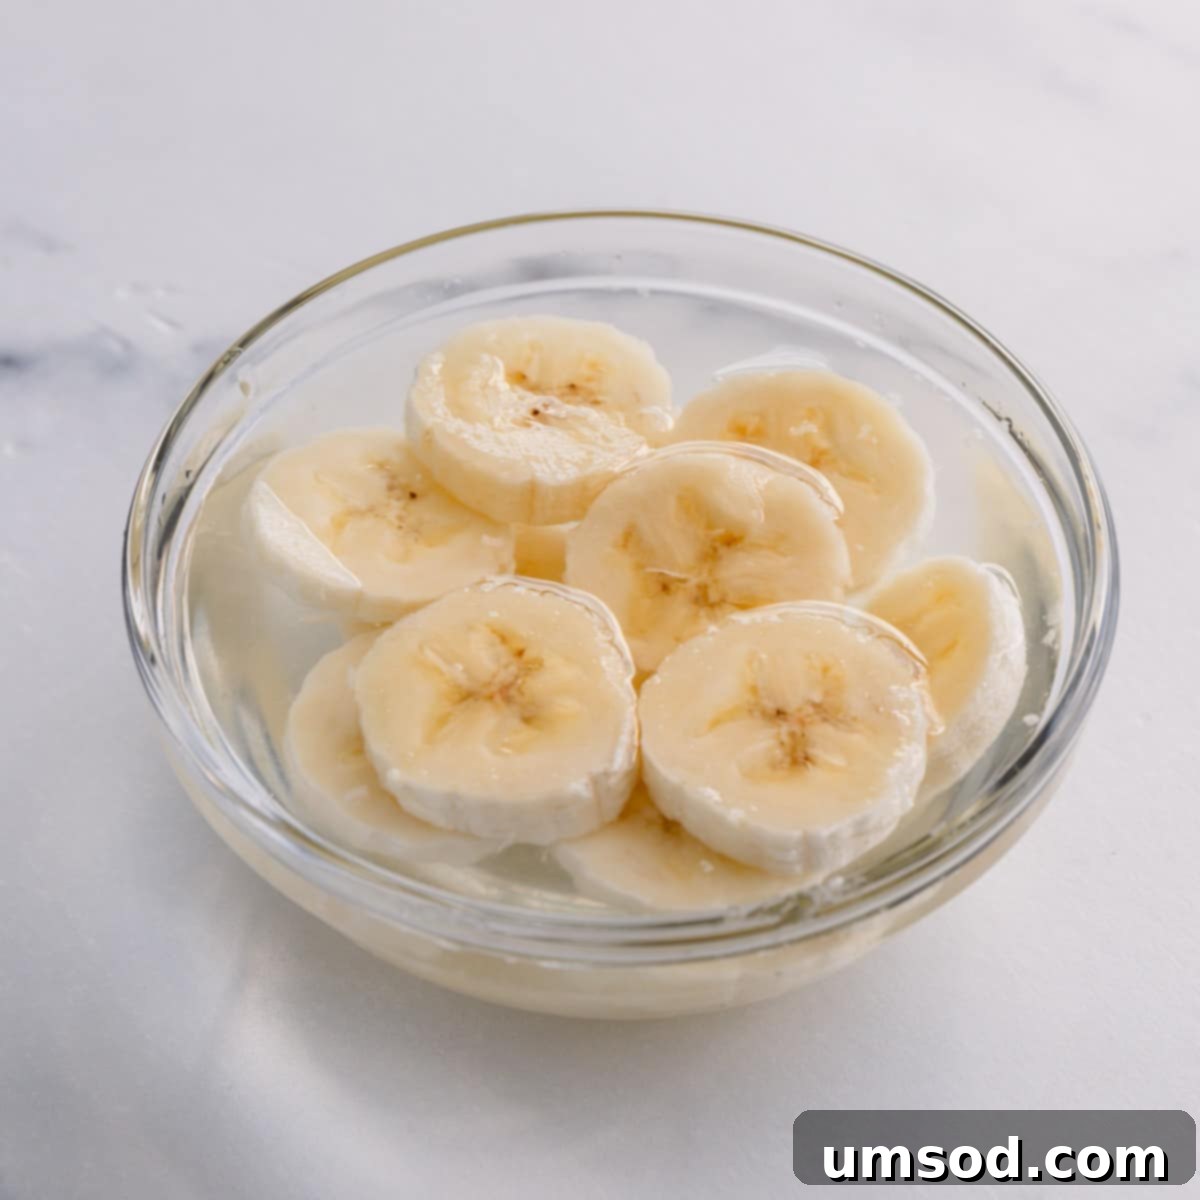
Bananas naturally oxidize and turn brown quickly once exposed to air. To maintain their beautiful, vibrant yellow color and fresh appearance in your pie, employ this simple trick: immediately after slicing, soak the banana slices in a bowl of water with a few drops of freshly squeezed lemon juice. Let them soak for just 1-2 minutes. This brief lemon bath provides enough acidity to inhibit oxidation without imparting a strong lemon flavor. Afterward, gently remove the banana slices and pat them thoroughly dry on a plate lined with paper towels to absorb any excess moisture. Remember, don’t soak the banana slices for too long, or they may become mushy and lose their firm texture.
4. Crafting the Fluffy Whipped Cream Topping
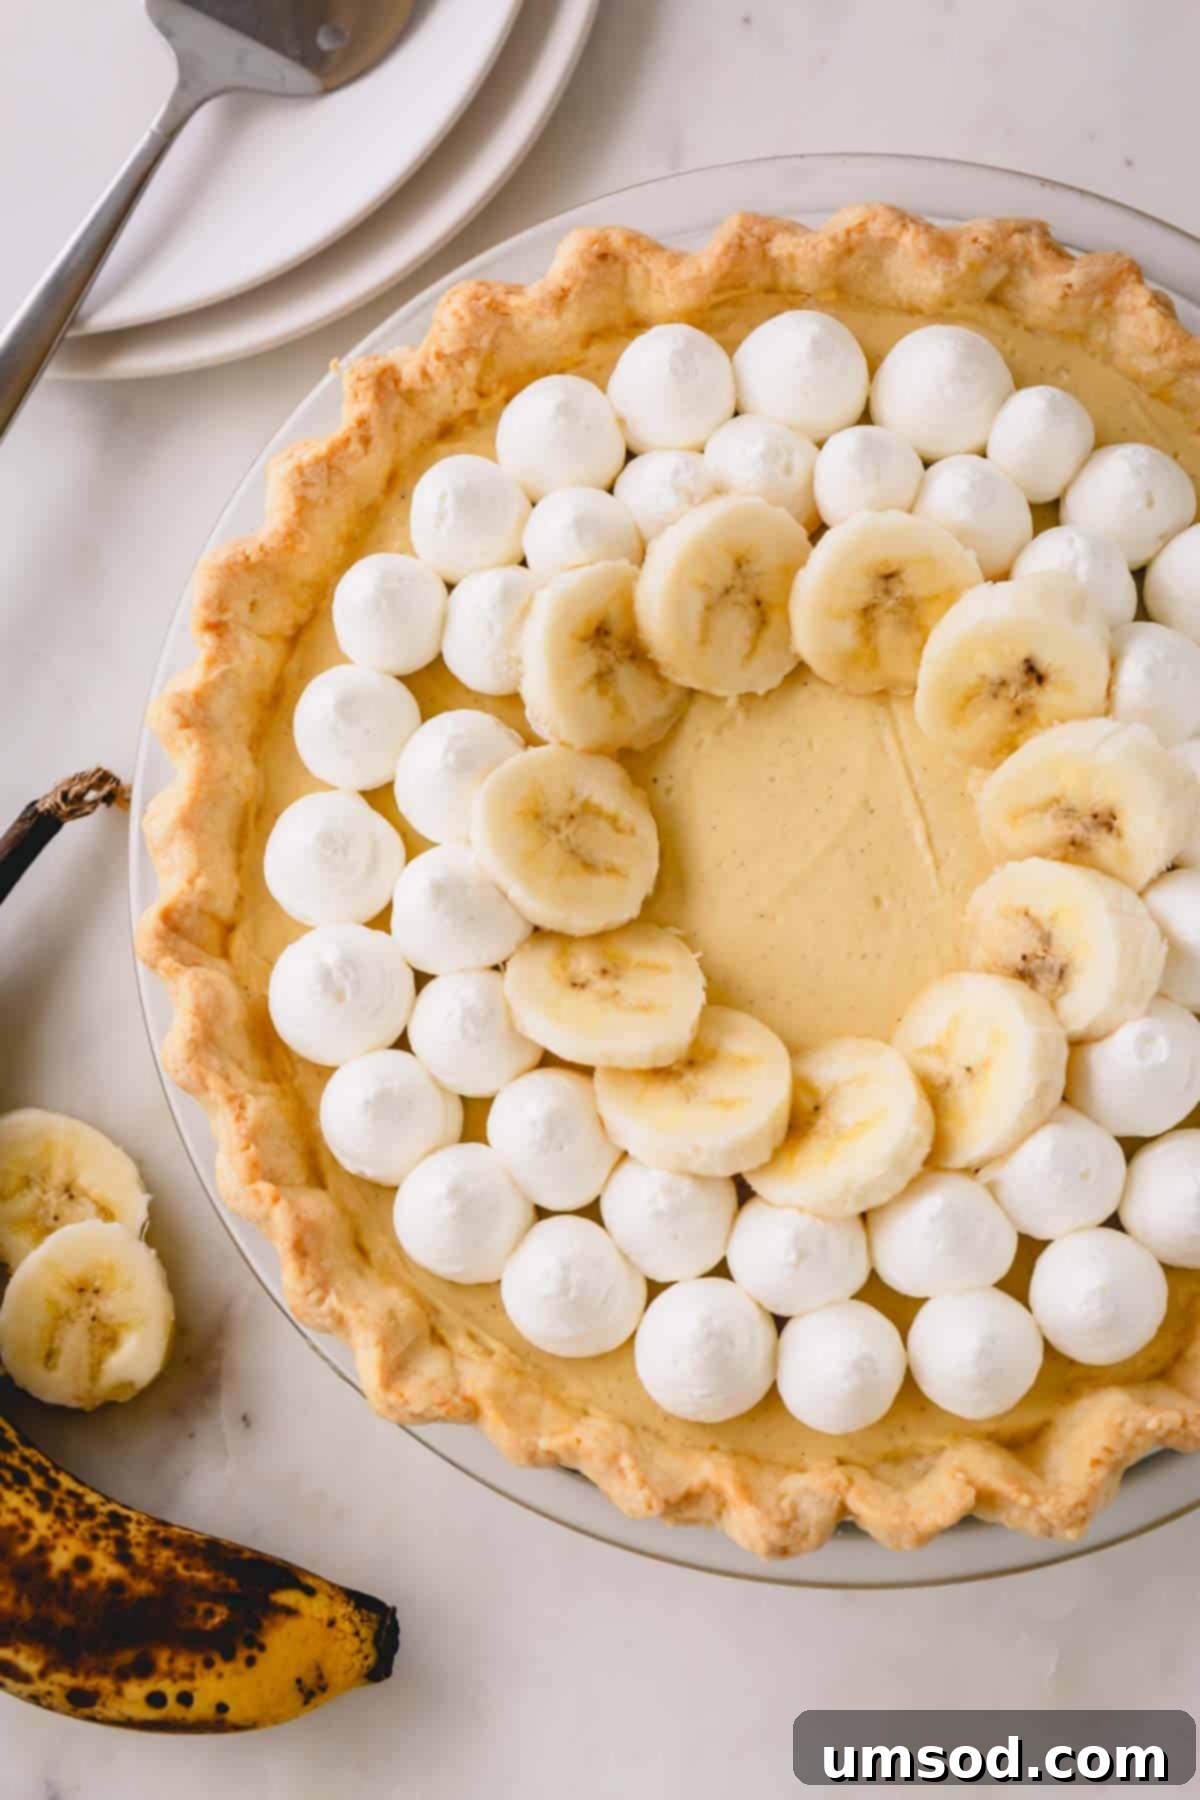
The final crowning glory of your banana cream pie is a generous layer of freshly whipped cream. For the best presentation and texture, it’s ideal to prepare the whipped cream just before you plan to serve the pie.
- Begin Whipping: Pour cold heavy cream into a mixing bowl fitted with the whisk attachment (ensure both the bowl and whisk are chilled for best results). Start whisking the cream on medium speed.
- Add Sweeteners: As soon as the cream begins to thicken and traces of the whisk lines appear, gradually add the granulated sugar and vanilla extract. These ingredients enhance the flavor and provide a touch of sweetness.
- Whip to Stiff Peaks: Continue mixing on medium speed until stiff peaks form. Stiff peaks mean that when you lift the whisk, the cream holds its shape firmly, with the tips standing straight up. Be careful not to over-whip, as this can turn the cream grainy.
The Magic of Medium Speed for Whipped Cream
For truly stable and long-lasting whipped cream, whisking at medium speed is your secret weapon! Beating the cream at a moderate speed incorporates air more gradually and evenly, creating smaller, more stable air bubbles. This results in sturdier whipped cream with beautiful, defined stiff peaks that hold their shape longer and are less prone to weeping or deflating quickly. In contrast, beating at a high speed incorporates too much air too quickly, leading to larger, less stable air bubbles that can cause the whipped cream to break down and weep more rapidly.
Essential Tips for Banana Cream Pie Perfection
Achieving a truly outstanding homemade banana cream pie is easier with these expert tips and tricks. Follow these guidelines to ensure every component of your pie is flawless, from the crust to the topping.
- Precision in Flour Measurement: The accuracy of your flour measurement for the pie crust is critical for texture. For the most reliable results, weigh your pie crust flour using a digital kitchen scale. If you don’t have a scale, use the spoon-and-level method: spoon flour into your measuring cup until it overflows, then level it off with a straight edge. Avoid scooping directly with the measuring cup, as this compacts the flour and adds too much. Our guide to measuring flour provides detailed instructions for both methods.
- Preventing Pie Crust Shrinkage: A common challenge, but easily overcome! To ensure your pie crust maintains its size and shape, always chill the dough for at least 30 minutes before blind baking. Additionally, take care to crimp the edges of the dough firmly over the lip of the pie dish. For a simple and effective edge, take a look at my no-fuss, 3-finger method for crimping pie dough. It might not be the fanciest technique, but it’s incredibly simple and prevents any precious pie dough from going to waste!
- Batch Bake Pie Dough for Convenience: To make future pie-making even quicker, consider preparing a few extra batches of pie dough. Wrap them tightly in plastic wrap and store them in the freezer. This way, a flaky, homemade crust is always at arm’s reach whenever the craving for homemade banana cream pie (or any other pie!) strikes.
- Your Favorite Crust is Welcome: If you have a tried-and-true favorite pie dough recipe, feel free to use it! The most important aspect is that you do not skip the crucial blind-baking step. The crust for homemade banana cream pie must be fully baked and golden brown before you add the layers of bananas, creamy custard, and fluffy whipped topping to prevent a soggy bottom.
- Achieving Thick, Non-Soupy Pudding: The number one reason for runny pudding is undercooking or using low-fat dairy. To avoid a soupy, runny filling, always use whole milk (or at least 2% milk) for richness, and ensure you cook the pudding until it is visibly thick and coats the back of a spoon thoroughly (refer to our doneness test above). The pudding will also continue to thicken as it cools and chills.
- Gentle Heat for Milk and Cream: When scalding the milk and cream, cook them low and slow, maintaining a gentle simmer rather than bringing them to a rolling boil. High heat can cause the cream to scorch and stick to the bottom of the pan, imparting an unpleasant burnt taste to your otherwise delicate pudding.
- Cold Cream for Sturdy Whipped Topping: For the fluffiest, most stable whipped cream that whips up quickly and holds its peaks beautifully, always use heavy cream straight from the coldest part of your refrigerator. Chilled cream aerates much more efficiently. Even chilling your mixing bowl and whisk beforehand can make a significant difference!
- Select Firm, Ripe Bananas: The quality of your bananas directly impacts the pie’s taste and presentation. Opt for firm, bright yellow bananas that are ripe but not overly soft or starting to show brown spots. Firm bananas are much easier to slice neatly and will contribute the best fresh flavor and a vibrant appearance to your finished pie. Avoid mushy, overripe bananas, as they can make the pie watery and have a less appealing texture.
Smart Make-Ahead Strategies for Effortless Pie Baking
One of the many reasons to adore this homemade banana cream pie recipe is its fantastic flexibility for advance preparation. You can prepare almost all components at least a day ahead, significantly reducing your last-minute kitchen time. However, for the freshest appearance of the banana slices, it’s always best to assemble the entire pie on the day you plan to serve it.
- Pie Dough: The pie dough can be prepared up to 3 days in advance. After shaping it into a disk, wrap it tightly in plastic wrap and store it in the refrigerator. This allows the gluten to relax, resulting in a more tender crust.
- Blind-Baked Pie Crust: Your blind-baked pie crust can be prepared up to 1 day in advance. Once fully cooled, simply store it uncovered at room temperature until you’re ready to fill and assemble the banana cream pie. This prevents it from getting soggy.
- Vanilla Pudding: The delicious vanilla pudding is another excellent candidate for advance preparation. It can be made up to 2 days ahead of time. After cooling, store it in the refrigerator, ensuring it is covered tightly with plastic wrap that directly touches the entire surface of the pudding. This prevents a skin from forming and keeps it perfectly smooth.
- Whipped Cream: While whipped cream is always freshest when made just before serving, it can be prepared up to 1 day in advance. Store it in a covered container in the refrigerator. If it seems to have deflated slightly or become a bit loose, you can gently re-whip it for a few seconds with a hand mixer just before topping the pie to restore its fluffy texture.
Storing Your Delicious Banana Cream Pie
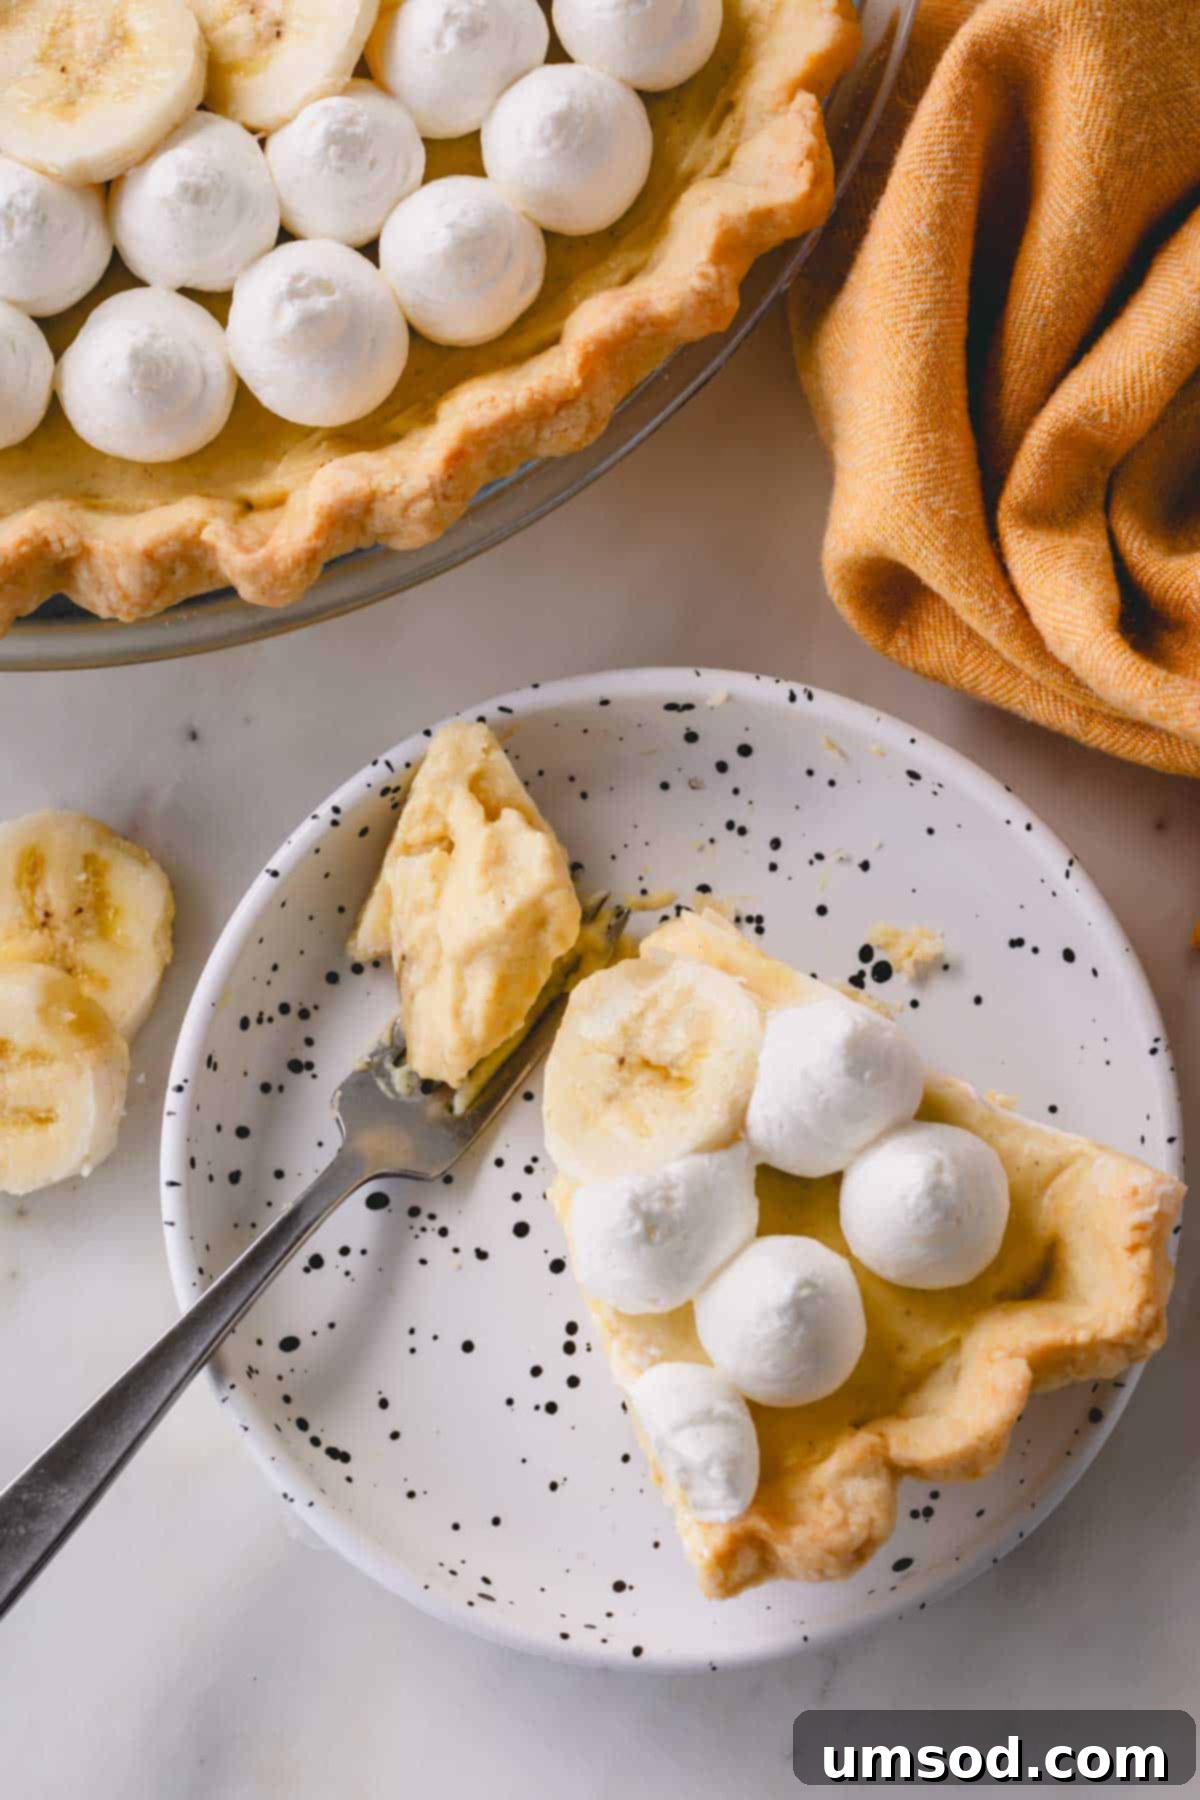
For the absolute best flavor and visual appeal, homemade banana cream pie is truly best enjoyed on the day it’s assembled. The freshness of the bananas and the light texture of the whipped cream are at their peak. However, if you find yourself with delightful leftovers, they can be stored covered in the refrigerator for up to 3 days. It’s important to keep in mind that the banana slices will naturally start to brown and soften over time, affecting the pie’s aesthetic, though the flavor will still be wonderful. Ensure the pie is covered snugly with plastic wrap or in an airtight container to preserve its freshness and prevent it from absorbing any refrigerator odors.
Frequently Asked Questions About Banana Cream Pie
As soon as bananas are peeled and exposed to air, they undergo oxidation, which causes them to turn brown and can make them slightly slimy. To effectively prevent this natural discoloration, immerse the freshly sliced bananas in a bowl of water containing just a few drops of freshly squeezed lemon juice. Let them soak for a brief 1-2 minutes. The mild acidity from the lemon acts as an antioxidant. After soaking, remove the banana slices and gently pat them completely dry with paper towels to absorb any excess water before layering them into your pie. Be careful not to soak the bananas for too long, as prolonged exposure to water can make them mushy.
There are primarily two reasons why your banana cream pie filling, or vanilla custard, might not be thickening properly: using low-fat milk or not cooking the custard for a sufficient duration. For a consistently thick, rich, and creamy vanilla custard filling, it is essential to use whole milk (or at least 2% milk) as the higher fat content contributes to its luxurious texture. Crucially, you must cook the pudding until it reaches the correct consistency – it should be noticeably thick and coat the back of a spoon without immediately running off. Don’t worry if it seems a little loose right off the heat; the custard will continue to thicken significantly as it cools and chills in the refrigerator.
Yes, absolutely! The luscious, creamy filling of banana cream pie is fundamentally made from a type of pudding or custard. Traditional, authentic banana cream pies, like this recipe, feature a rich, homemade vanilla pudding (or sometimes a banana-flavored pudding for an even more intense banana flavor). The typical construction of a banana cream pie involves a flaky pie crust, a generous layer of thinly sliced fresh bananas, followed by the creamy pudding, and finally crowned with a mountain of light, fluffy whipped cream and often more fresh banana slices for garnish. It’s the pudding that gives the pie its characteristic smooth and indulgent texture.
Explore More Delicious Pie Recipes
If you’ve enjoyed mastering this banana cream pie, you’re in for a treat! Discover other fantastic pie recipes from our collection, perfect for any occasion:
- The Best Pecan Pie
- Homemade Cherry Pie
- Easy Pumpkin Pie
- Lemon Meringue Pie
Homemade Banana Cream Pie
Shinee Davaakhuu
50 minutes
40 minutes
4 hours
8 servings
One 9-inch pie
Saved Recipe
Pin Recipe
Comment
Print Recipe
Ingredients
For the Flaky Pie Crust:
- 1 ½ cups (190 g) all-purpose flour
- ¼ teaspoon kosher salt
- ½ cup (113 g) unsalted butter cut into ½ tablespoon pieces and frozen, for ultimate flakiness
- 1 egg yolk, which adds richness and helps with browning
- 3-4 tablespoons ice water, as needed to bind the dough
For the Silky Vanilla Pudding:
- 2 cups (480 ml) whole milk (2% milk will also yield a delicious, slightly lighter pudding)
- ½ cup (120 ml) heavy (whipping) cream, for extra richness
- 1/3 cup (65 g) granulated sugar
- 3 large egg yolks, providing richness and thickening power
- 3 ½ tablespoons cornstarch, for a perfectly thick pudding
- 1 tablespoon pure vanilla extract, for classic flavor
- 1 tablespoon vanilla bean paste, for visible specks and intense vanilla aroma
- ¼ teaspoon kosher salt, to enhance all flavors
- 4 medium bananas, firm and ripe for best results
For the Light Whipped Cream Topping:
- 1 cup (240 ml) cold heavy whipping cream, for optimal fluffiness
- 2 tablespoons granulated sugar, for a touch of sweetness
- 1 teaspoon pure vanilla extract
Equipment You’ll Need
- 1 Pastry Cutter (or a stand mixer with paddle attachment)
- 1 Set of Pie Weights (or dried beans)
- 9-inch Pie Dish
- Heavy-Bottomed Saucepan
- Whisk
- Plastic Wrap
Step-by-Step Instructions
To make the Pie Dough:
- In a large mixing bowl (or the bowl of a stand mixer fitted with a paddle attachment), combine the all-purpose flour and kosher salt. Whisk briefly to ensure they are well-integrated.1 ½ cups all-purpose flour, ¼ teaspoon kosher salt
- Add the small, frozen cubes of unsalted butter to the flour mixture. Mix on low speed (or use a pastry cutter) until the butter is mostly incorporated into the flour, but still has visible chunks. These chunks are crucial for creating a flaky crust.½ cup unsalted butter
- Incorporate the egg yolk into the mixture and continue mixing until the butter pieces are roughly the size of small peas. The dough will still appear crumbly.1 egg yolk
- Gradually add the ice water, one tablespoon at a time, mixing after each addition, until the dough just begins to come together into large clumps. It should not be wet or sticky. (TIP: The exact amount of water needed can vary depending on your environment’s humidity. You’re looking for the dough to form cohesive clumps, but still be a bit shaggy. Don’t worry if you still see small pieces of butter; these are essential for the flakiest, most tender crust as they create steam pockets during baking.)3-4 tablespoons ice water
- Gently gather the dough and form it into a ball, then flatten it slightly into a disc. Wrap the disc tightly in plastic wrap and refrigerate for a minimum of 1 hour, or up to 3 days. This chilling period allows the gluten to relax and the butter to firm up, making the dough easier to roll and ensuring a tender crust.
To Blind Bake the Pie Crust:
- On a lightly floured surface, roll the chilled pie dough into an even 11-inch circle. Carefully transfer the rolled dough into your 9-inch pie pan by wrapping it loosely around your rolling pin, then unrolling it over the pan. Gently press it into the pan without stretching.
- Trim any excess dough, leaving about a ½-inch overhang. Fold the edges under and roll them flush with the rim of the pie pan. Crimp the edges decoratively using your fingers or a fork, creating a beautiful border.
- Using a fork, generously pierce holes all over the bottom and sides of the pie crust. This step, known as docking, is essential to prevent steam from building up and creating large bubbles or puffing the crust during baking. Place the prepared crust back into the refrigerator for at least 30 minutes to ensure it is very cold before baking, which helps prevent shrinkage.
- Preheat your oven to 350°F (177°C).
- Line the chilled crust with aluminum foil or parchment paper, pressing it firmly against the bottom and sides. Fill the lined crust with pie weights or raw dried beans, ensuring an even layer that fills the pan. This weight helps prevent the crust from puffing up and shrinking.
- Bake the weighted crust for 15 minutes. Afterward, carefully remove the foil and pie weights. Return the crust to the oven and continue baking for another 10-15 minutes, or until the entire crust is beautifully golden brown and looks fully cooked. Let the crust cool completely on a wire rack before filling.
To Make the Velvety Vanilla Pudding:
- In a clean, heavy-bottomed saucepan, combine the whole milk and heavy cream. Heat this mixture slowly over medium heat, stirring frequently with a whisk or wooden spoon, until it reaches a scalding point. This means you will see small bubbles forming around the edges of the pan and steam gently rising, but do not allow it to boil vigorously. Once scalded, remove from heat. (This process gently heats the dairy and prevents the egg yolks from scrambling when combined.)2 cups whole milk, ½ cup heavy (whipping) cream
- In a separate medium-sized bowl, vigorously whisk together the egg yolks, granulated sugar, cornstarch, pure vanilla extract, vanilla bean paste, and kosher salt. Continue whisking until the mixture becomes pale yellow, creamy, and somewhat aerated, nearly doubled in size.1/3 cup granulated sugar, 3 egg yolks, 3 ½ tablespoons cornstarch, 1 tablespoon pure vanilla extract, 1 tablespoon vanilla bean paste, ¼ teaspoon kosher salt
- To temper the egg mixture, slowly drizzle approximately one cup of the hot, scalded milk into the egg yolk mixture while continuously and vigorously whisking. This gradual addition prevents the eggs from cooking too quickly and scrambling, ensuring a smooth custard.
- Once tempered, pour the entire egg-and-milk mixture back into the saucepan with the remaining scalded milk.
- Return the saucepan to medium heat and cook the mixture, stirring constantly with a whisk or wooden spoon, for 8-10 minutes, or until the pudding thickens significantly and coats the back of the spoon. (TIP: To check for doneness, coat the back of a wooden spoon with pudding and run your finger through the middle. If the trail remains separate without the pudding running back into the gap, it’s done.)
- For an exceptionally smooth and lump-free texture, press the finished custard through a fine-mesh sieve into a clean bowl. This step is optional but highly recommended.
- Cover the surface of the pudding with plastic wrap, pressing it directly onto the pudding to create an airtight seal. This prevents a skin from forming as it cools. Chill the pudding in the refrigerator for at least 1 hour, or until completely cold and set.
To Assemble the Pie:
- Slice 2-3 of the medium bananas into even rounds. Arrange approximately two-thirds of these banana slices in a single, even layer over the bottom of your cooled, blind-baked pie crust. Reserve the remaining banana slices for decorating the top of the pie just before serving.4 medium bananas
- Carefully pour the thoroughly cooled vanilla pudding over the banana layer in the pie shell. Use an offset spatula or the back of a spoon to gently smooth the surface, ensuring the pudding evenly covers the bananas and fills the crust. Cover the pie with plastic wrap, pressing it directly onto the surface of the pudding to prevent a skin from forming.
- Chill the assembled pie in the refrigerator for at least 2-3 hours, or until it is well-set and thoroughly chilled. This allows the pudding to firm up completely, making for clean slices and a more enjoyable texture.
To Make the Fluffy Whipped Cream:
- In a large mixing bowl with a whisk attachment (preferably chilled), combine the cold heavy whipping cream, granulated sugar, and pure vanilla extract. Beat the mixture on medium speed until stiff peaks form. Stiff peaks mean the cream holds its shape firmly when the whisk is lifted. (TIP: Whipping at medium speed helps create a more stable, less watery whipped cream that holds its shape longer, compared to high speed which can incorporate too much air causing it to weep quicker.)1 cup heavy whipping cream, 2 tablespoons granulated sugar, 1 teaspoon pure vanilla extract
- When you are ready to serve, spread or pipe the whipped cream over the chilled pie. Garnish with the reserved fresh banana slices for a beautiful presentation. Slice and serve immediately!
⭐️ Did you make this recipe?
Please leave a review and let us know how you liked it!
Additional Tips & Notes
– Pie Crust: You can prepare and blind bake your pie crust up to 1 day in advance. Once cooled, store the blind-baked crust at room temperature. This saves significant time on baking day.
– Vanilla Pudding: The luscious vanilla pudding filling can also be prepared 1-2 days ahead of time. Store it separately in the refrigerator, ensuring it’s covered tightly with plastic wrap that directly touches the surface of the pudding to prevent a skin from forming and keep it perfectly smooth.
– Assembly: For the most visually appealing and freshest-tasting pie, it is always best to assemble the full banana cream pie (layering bananas, pudding, and whipped cream) on the very day you plan on serving it. This ensures the banana slices remain vibrant and the whipped cream is at its peak fluffiness.
Remember, the key to a truly fantastic homemade banana cream pie is fresh ingredients and careful attention to each step. Enjoy the process and the incredibly delicious results!
Nutrition Information
1 slice
544kcal
50.9g
10.2g
33.3g
23.5g
220.4mg
Dessert
American
Did you make this?Leave a rating and your feedback. Thank you!
This recipe was originally published on May 16th, 2018, and has since been updated with enhanced details, tips, and improved clarity for an even better baking experience.
