Spook-tacularly Healthy Halloween Snack Board for Kids: Fun & Nutritious Treats!
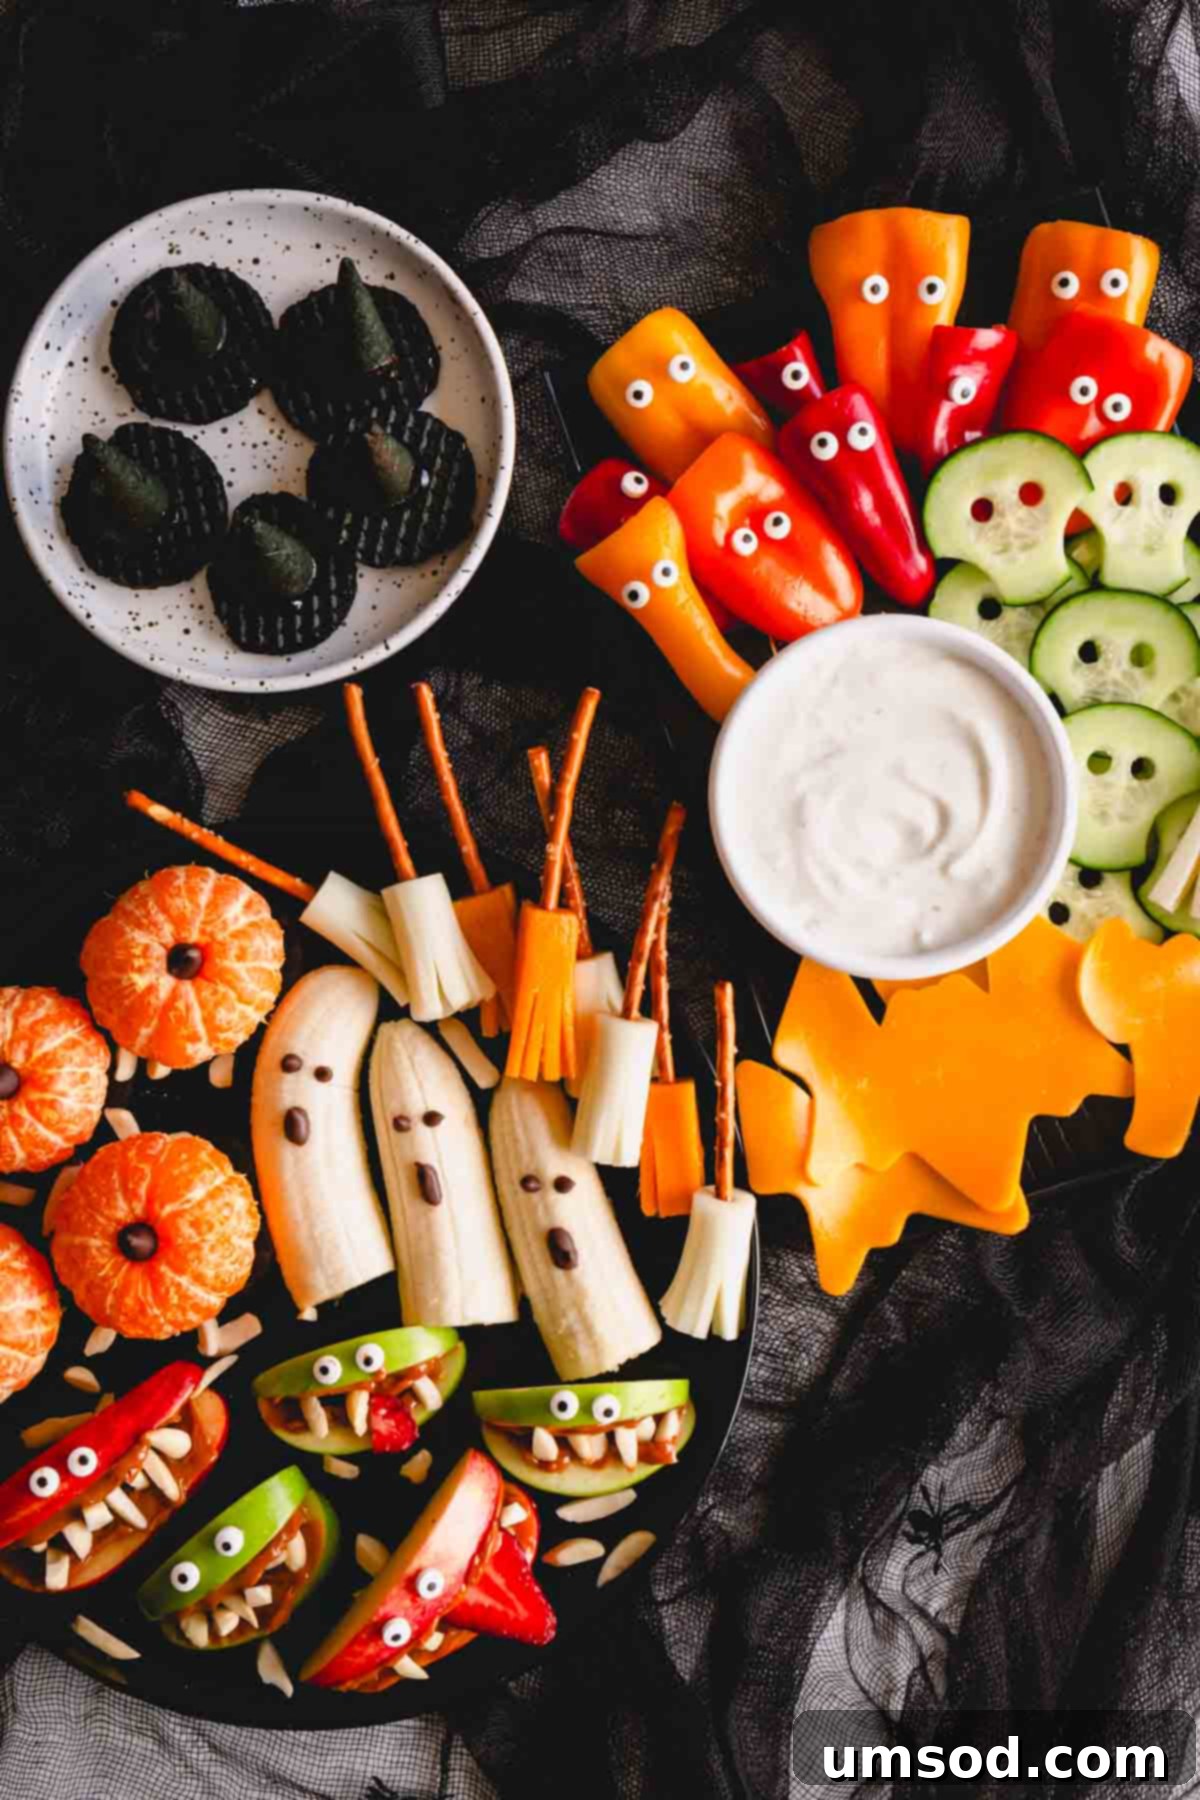
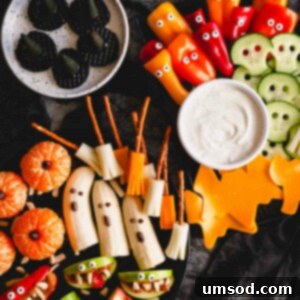
Halloween is a time for costumes, trick-or-treating, and, let’s be honest, a whole lot of sugary treats! While a little candy is certainly part of the fun, it’s also a fantastic opportunity to introduce some wholesome, yet equally exciting, options. This year, ditch the sugar overload and delight your little ghouls and goblins with a spook-tacularly healthy Halloween snack board! Packed with vibrant fruits and veggies disguised as adorable monsters and ghosts, these healthy Halloween snacks are perfect for school Halloween parties, after-school munchies, or even a pre-trick-or-treat energy boost. Get ready to create ghost-nanas, adorable orange pumpkins, toothy apple monster mouths, enchanting broomsticks, and eerie cucumber skulls – treats that are not only healthy but irresistibly spooky and fun!
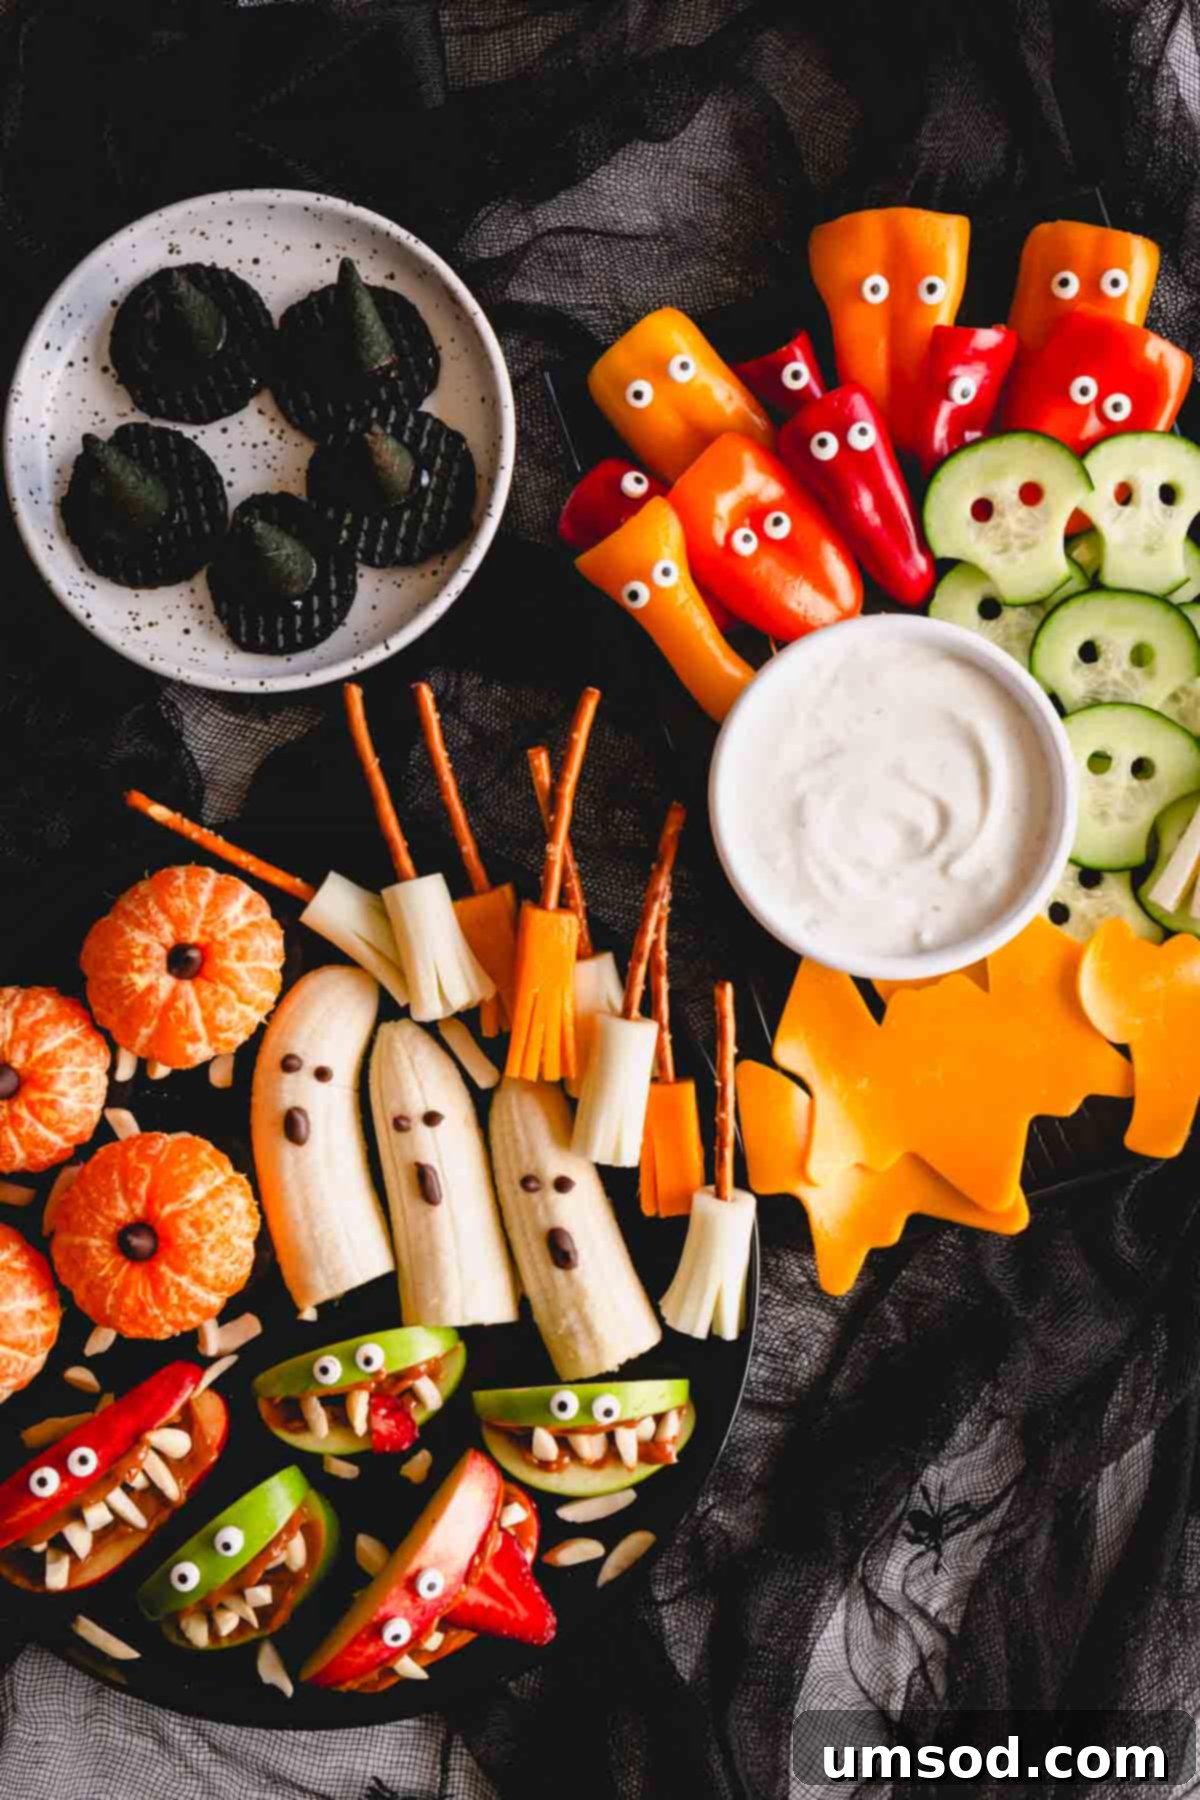
Pin this idea now to find it later!
Pin It
Why You’ll Adore This Healthy Halloween Snack Board
As parents, we often find ourselves navigating the sea of sugar temptations, especially around holidays like Halloween. It’s rare that I meticulously craft themed food for my children, but Halloween calls for an exception. With the sheer abundance of candy, offering a healthy alternative that’s equally enticing becomes a fun challenge!
While plain carrot sticks might get a hard pass, I can almost guarantee your kids will eagerly devour these imaginative Halloween treats. My own children certainly did! This Halloween snack board isn’t just a meal; it’s an interactive experience that makes healthy eating exciting and adventurous.
- Fun & Healthy: These aren’t just snacks; they’re edible characters! They strike the perfect balance between festive fun and essential nutrition, making them ideal school Halloween party snacks that parents and teachers will appreciate.
- Effortlessly Easy: Don’t be fooled by their elaborate appearance. Assembling a snack board is surprisingly simple. This entire Halloween charcuterie board for kids can be put together in less than 30 minutes, freeing you up to enjoy the spooky festivities.
- Sparkling Creativity: This board encourages imagination, transforming everyday fruits and vegetables into magical, and just a touch spooky, creations. It’s a wonderful way to engage kids in the kitchen and make snack time an adventure.
- Kid-Approved Delight: Beyond being healthy, these treats are designed to appeal directly to children’s sense of wonder. The playful shapes and spooky themes make them irresistible, even to picky eaters.
While the kids are busy with their “Cha-BOO-terie” board, why not prepare an epic charcuterie and cheese board for the grown-ups? Halloween can be a gourmet affair for everyone!
Key Ingredients for Your Spooky Snack Creations
Creating these delightful healthy Halloween snacks begins with selecting the right ingredients. Here’s a closer look at what you’ll need to bring your spooky vision to life, along with some helpful tips for each:
For the Fruit Platter: Sweet & Spooky Delights
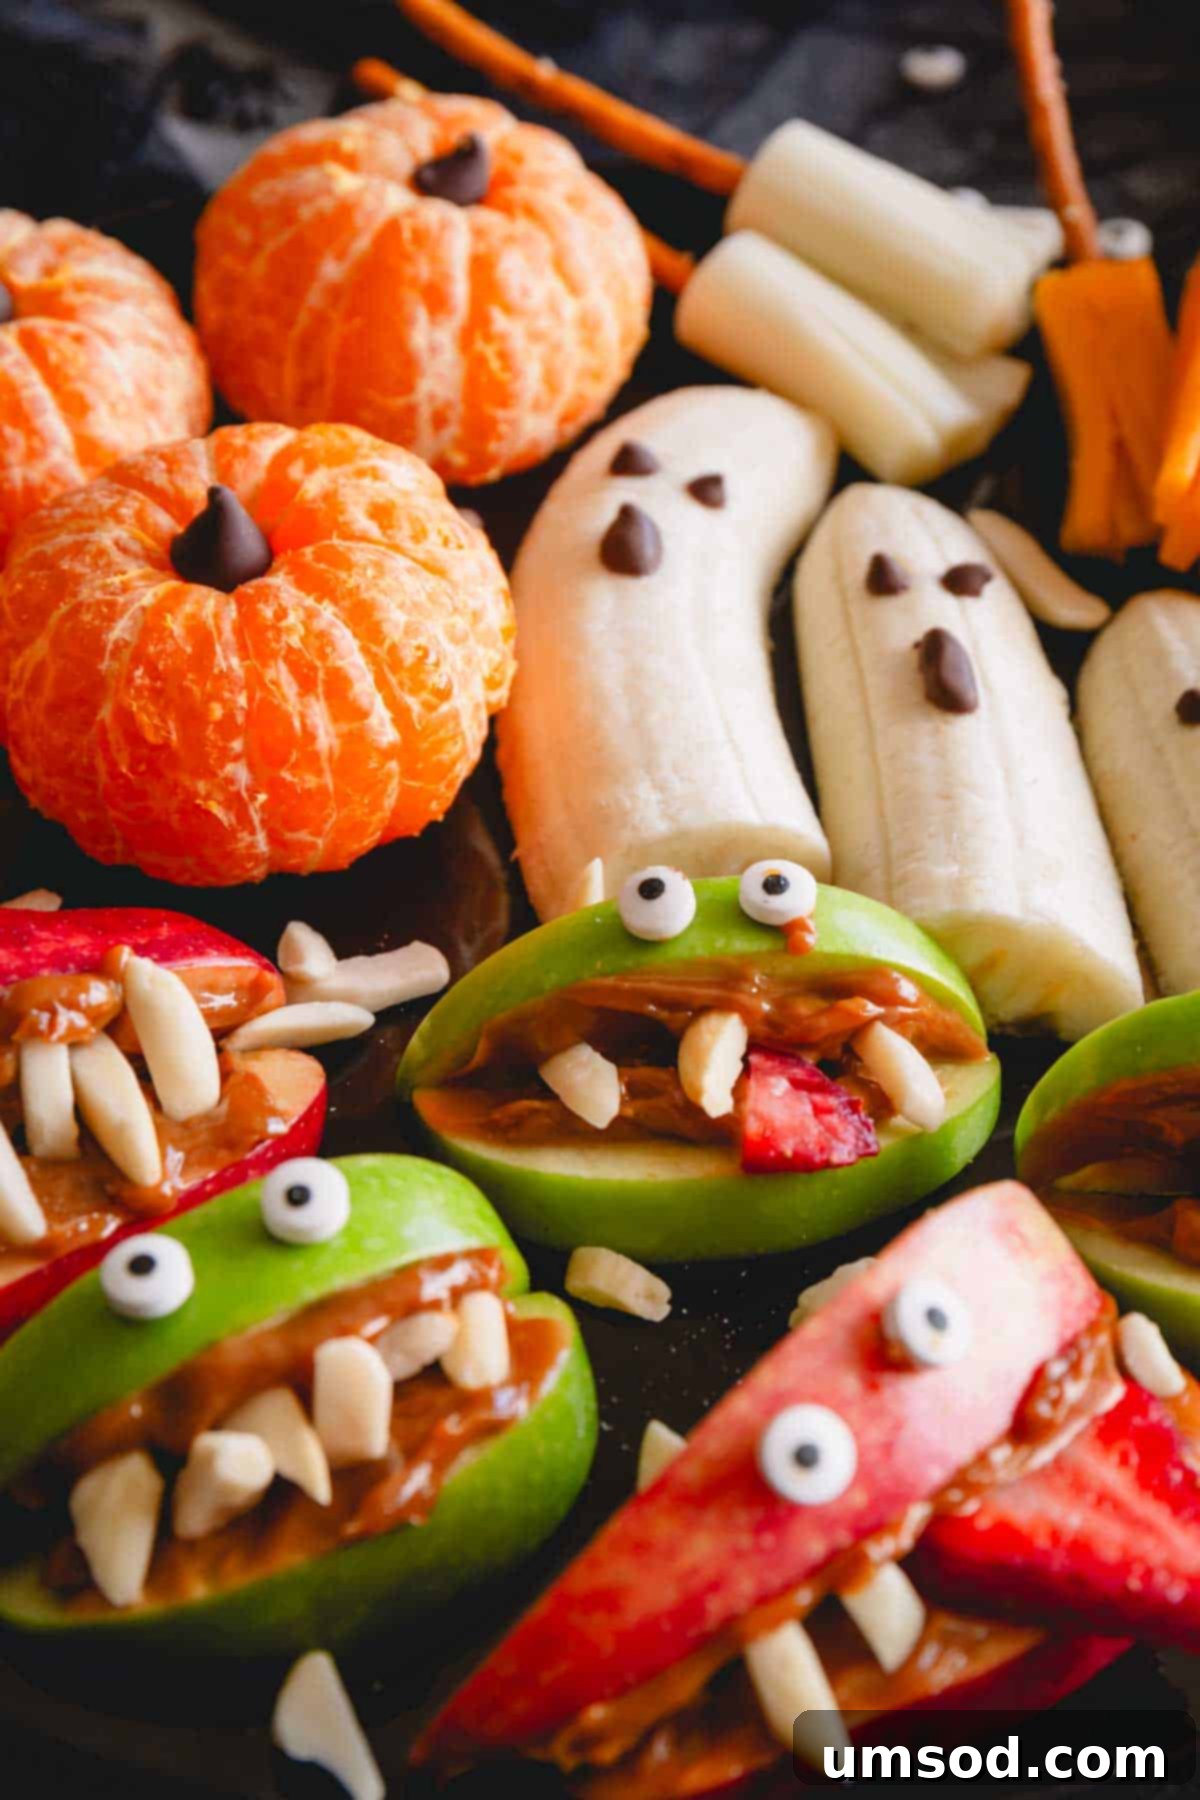
- Mandarin Oranges: Look for mini, easy-to-peel, and seedless varieties. Mandarins are ideal for their size and sweetness, but clementines, tangerines, or “cuties” will also work wonderfully to create your adorable pumpkin oranges. Their bright orange color is naturally festive!
- Mini Chocolate Chips: These are essential for creating the ghostly faces and pumpkin stems. You can use either milk chocolate or semi-sweet varieties, depending on your preference. Keep a few extra for melting if you opt for drawn faces.
- Bananas: Choose bananas that are just ripe – firm with no brown spots. This ensures they hold their shape well when sliced and maintain that pristine “ghost” appearance. Overly ripe bananas will be too soft and might discolour quickly.
- Apples: Crisp, large apples are best for creating the apple monster mouths. Feel free to use green apples (like Granny Smith) for a classic monster look, red apples for a bolder statement, or a mix of both for variety and color contrast.
- Dulce de Leche, Caramel, or Peanut Butter: These act as the delicious “glue” for your monster teeth and eyes. Spread a thin layer on apple slices. For school Halloween parties or if there are nut allergies, always opt for nut-free butter alternatives or stick to dulce de leche or caramel. Homemade dulce de leche is always a treat: Homemade Dulce de Leche.
- Slivered Almonds: These form the spooky teeth for your apple monsters. For a nut-free option, mini marshmallows or sunflower seeds make excellent, safe substitutes.
- Candy Eyes: No monster is complete without its googly eyes! These edible candy eyes instantly add a playful and spooky charm. Experiment with different sizes and numbers of eyes for unique monster personalities.
For the Creamy Ranch Dip: A Savory Companion
- Cottage Cheese: This surprising ingredient forms the protein-rich base of your creamy veggie dip. When blended, it transforms into a smooth, luxurious texture, mimicking sour cream or mayonnaise but with added nutritional benefits. For the creamiest result, choose full-fat cottage cheese.
- Ranch Dressing Mix: A powdered ranch dressing mix packet is your secret weapon for a flavorful, tangy dip. It infuses the cottage cheese with classic savory garlic and onion notes that pair perfectly with crisp vegetables.
For the Veggie Platter: Creative & Crunchy Elements
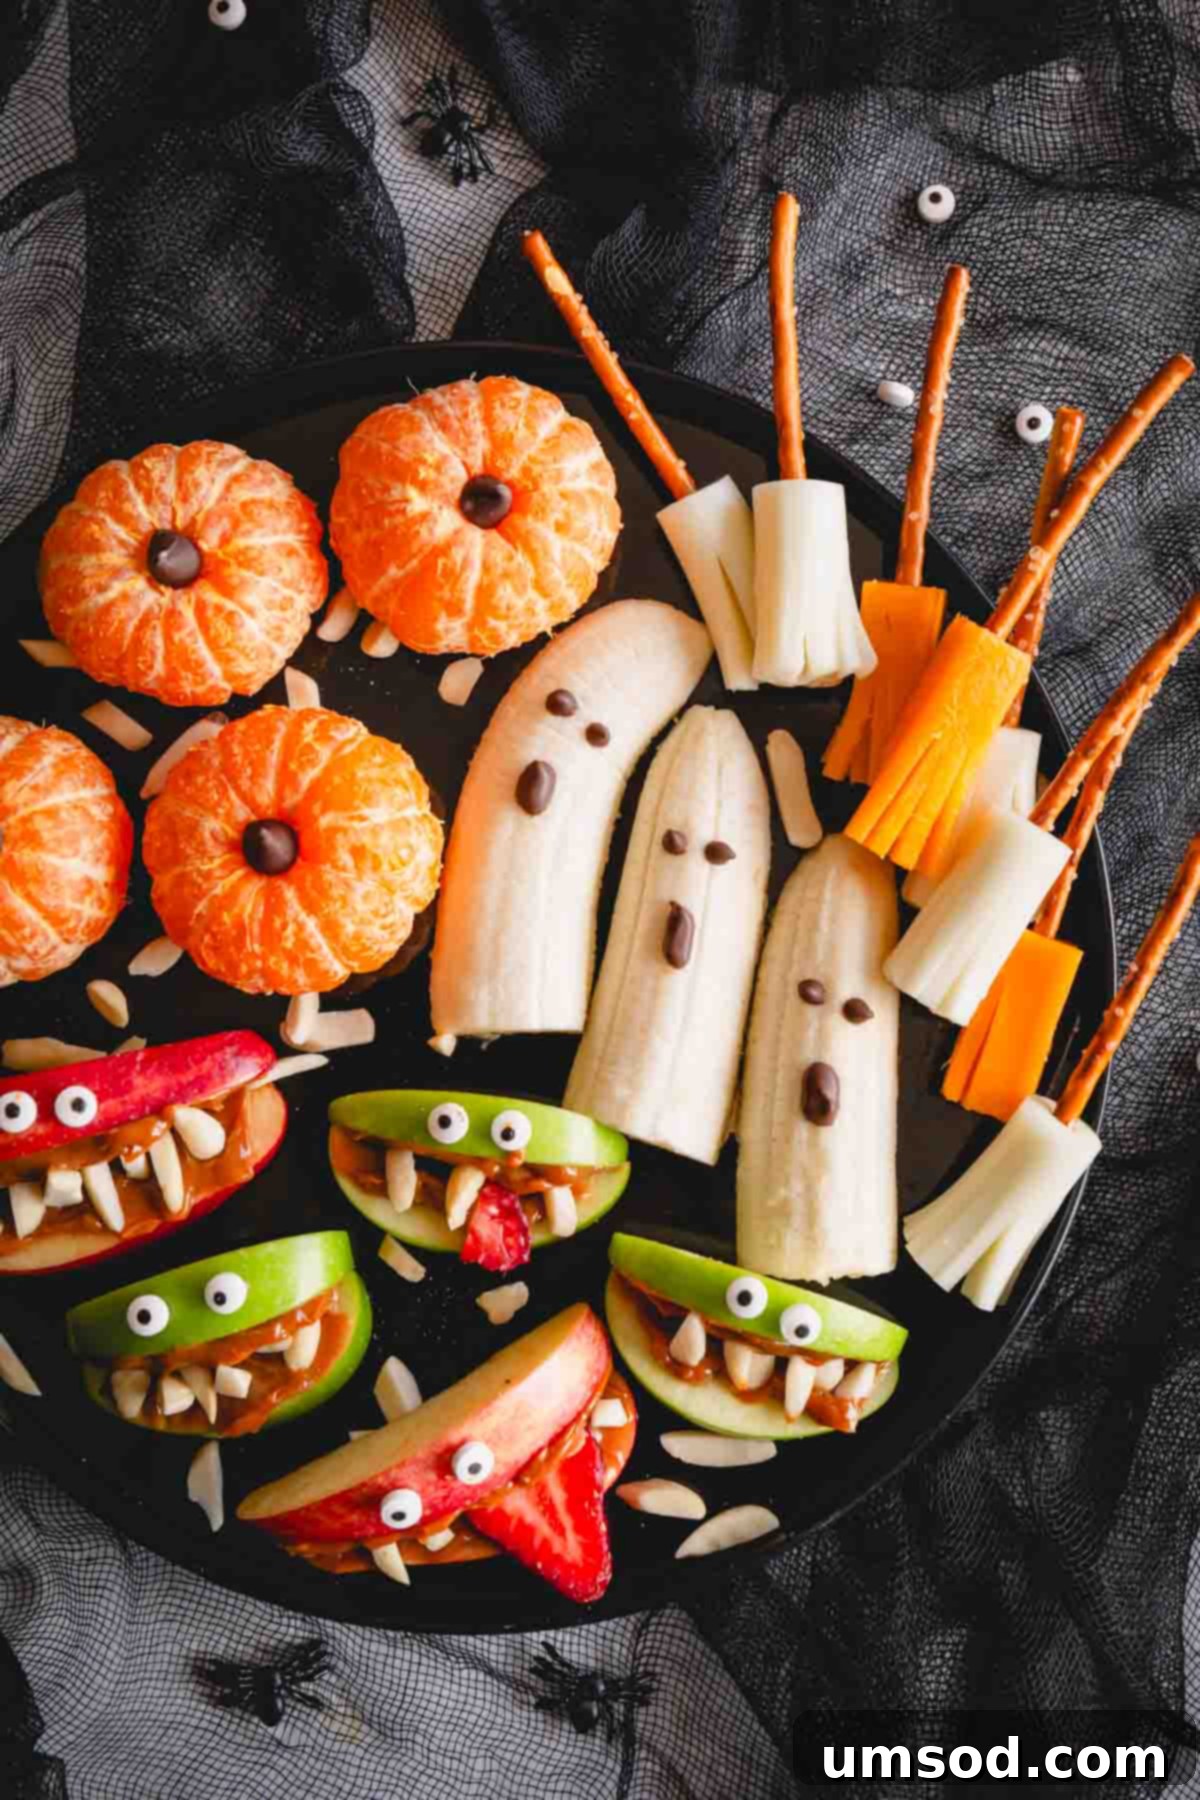
- Cheese Sticks: Mozzarella string cheese is highly recommended for its flexibility, making it easy to slice into broomstick bristles. While cheddar cheese sticks can be used for variety, be aware they are less pliable and may break more easily when thinly sliced.
- Pretzel Sticks: These are the perfect sturdy handles for your cheese broomsticks. Opt for a reliable brand that isn’t marketed as “extra thin” to ensure they can withstand gentle handling.
- Cucumber: English cucumbers or other seedless varieties are ideal for creating the intricate cucumber skulls. Remember to leave the skins on for added color and nutrients.
- Sweet Peppers: Mini sweet peppers, often found in bags in the produce section, are wonderfully mild and slightly sweeter than traditional bell peppers. Their vibrant colors make them excellent “ghost” bodies.
- Cheddar Cheese: Standard sandwich-sized slices of cheddar cheese are perfect for cutting out Halloween-themed shapes using cookie cutters. Orange cheddar or Colby Jack varieties enhance the festive color palette of your snack board.
Add Extra Spooky Fillers!
Don’t let any leftover veggies or snacks go to waste! Use them to fill in any empty spaces on your Halloween snack board, adding even more variety and visual appeal. Think grapes, berries, cherry tomatoes, or even small crackers.
Essential Equipment for Your Halloween Snack Masterpiece
Gathering the right tools before you begin will make the assembly process smooth and enjoyable. Here’s a list of key equipment you’ll need for these easy Halloween recipes:
- Halloween Cookie Cutters: A crucial item for transforming cheese slices into spooky shapes. Ensure your set includes at least one bat shape, as well as pumpkins, witch hats, or black cats for added festive flair.
- Blender: Any high-speed blender will work perfectly to achieve a silky-smooth, lump-free cottage cheese base for your ranch dip.
- Round Piping Tip: This versatile tool is surprisingly effective for neatly cutting out the specific shapes needed for your cucumber skulls. Look for various sizes to create different features.
- Piping Bag (or Ziploc bag): An empty piping bag (or even a sturdy Ziploc bag with a corner snipped off) is essential for neatly drawing faces on your banana ghosts with melted chocolate.
- Sharp Paring Knife: While not strictly “equipment,” a good, sharp paring knife will greatly assist in making precise cuts, especially for the intricate cheese broomstick bristles.
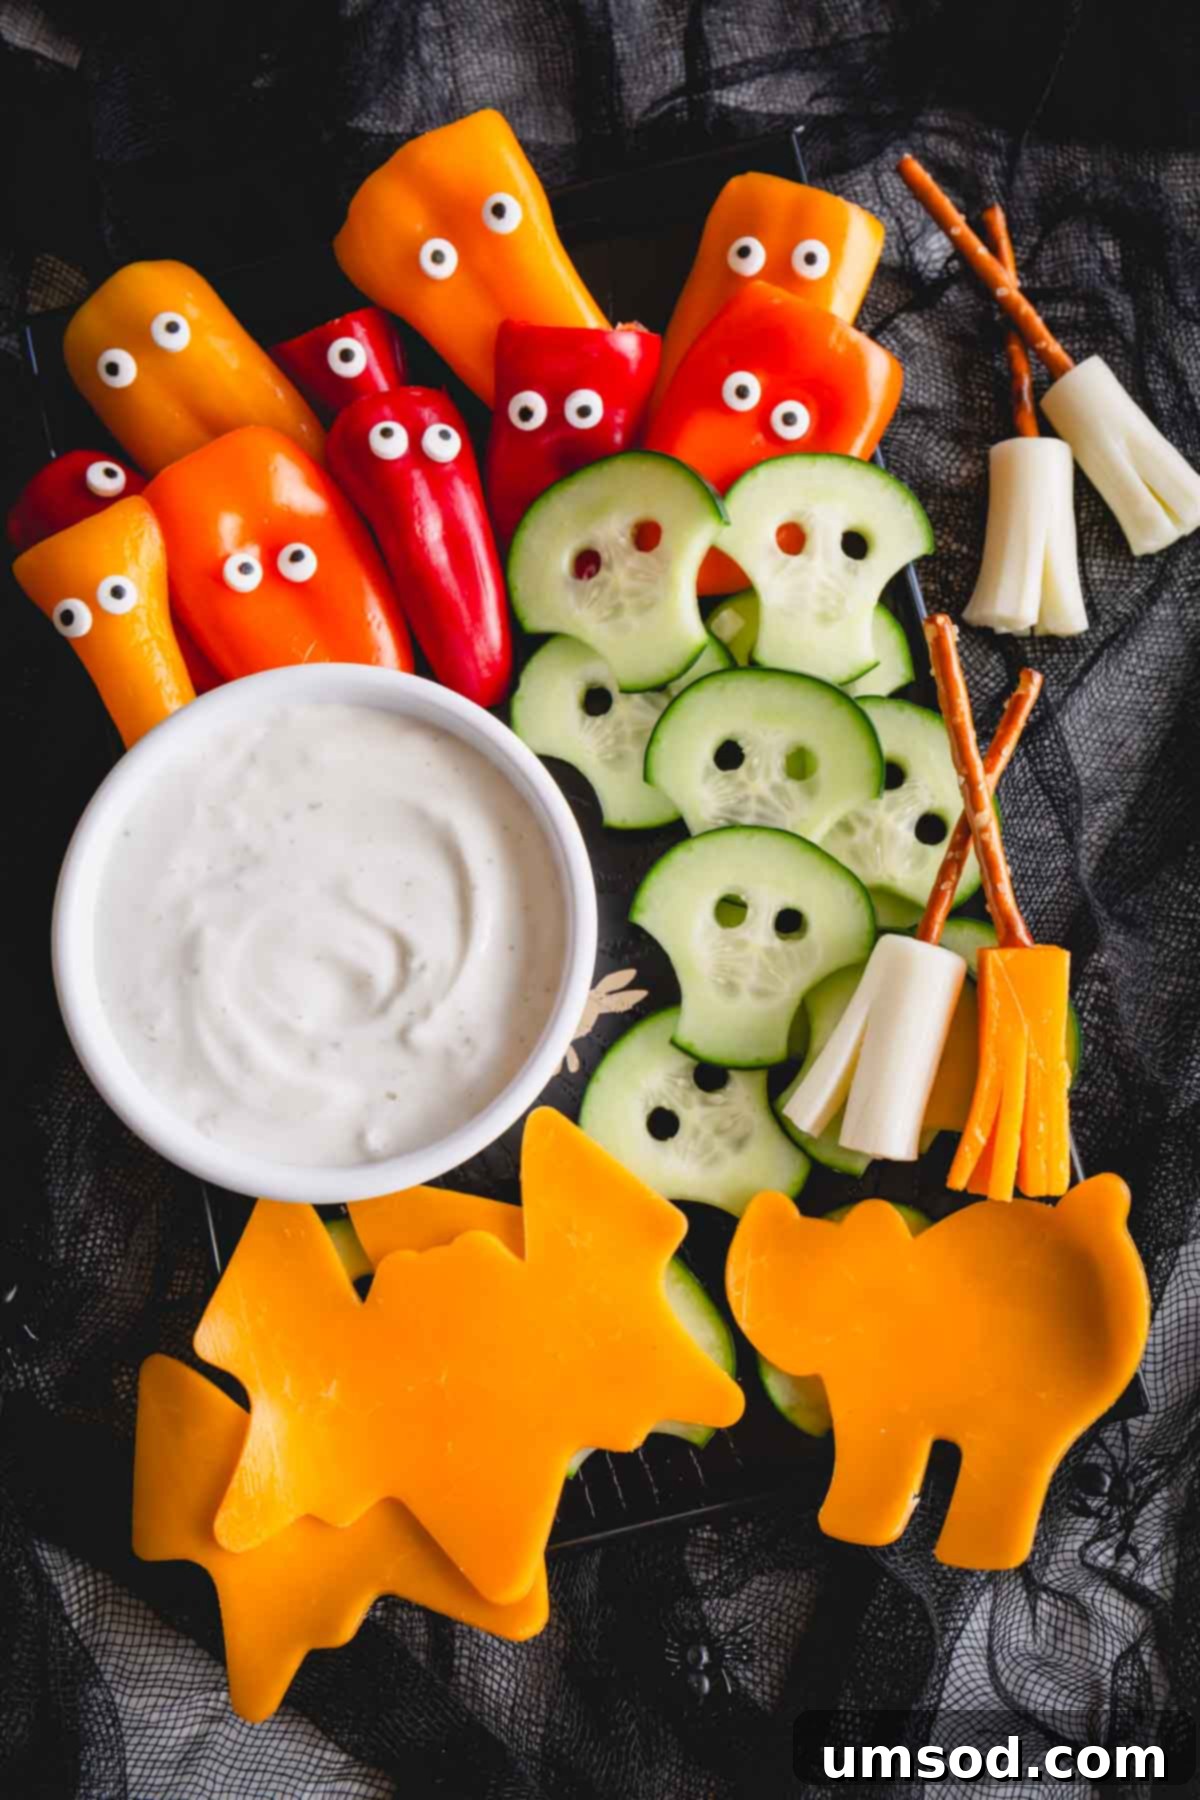
Crafting Your Healthy Halloween Snack Board: Step-by-Step Guide
Let’s get creative! Follow these simple steps to assemble your vibrant and spooky snacks. Before you begin, gather all your ingredients and equipment, including your cookie cutters, blender, and piping tips.
How to Make Adorable Pumpkin Oranges
- Peel the Oranges: Carefully peel your mandarin oranges, ensuring all pith is removed for a smooth surface.
- Add a Stem: Gently press a single mini chocolate chip into the top center of each peeled orange. This instantly transforms it into a cute mini pumpkin, adding a simple yet effective decorative touch.
How to Create Spooky Ghost-Nanas
- Melt the Chocolate: Place about ¼ cup of mini chocolate chips in a microwave-safe bowl. Microwave in 30-second increments, stirring well after each, until the chocolate is completely smooth and melted. Be careful not to overheat.
- Prepare Piping Bag: Transfer the melted chocolate into an empty piping bag. If you don’t have one, a sturdy Ziploc bag with a tiny corner snipped off will work just as well.
- Slice the Bananas: Peel the bananas and carefully cut each one in half horizontally. Then, slice each half vertically down the middle, starting from the top point. You should get four ghost shapes from each banana.
- Draw Ghost Faces: Using your piping bag filled with melted chocolate, draw two eyes and a wavy mouth onto each banana ghost. For a quicker alternative, you can simply press mini chocolate chips for eyes and a regular-sized chocolate chip for the mouth, though drawing offers more character!
How to Assemble Ghoulish Apple Monster Mouths
- Slice the Apples: Wash and slice your apples into thin, even wedges.
- Apply the “Glue”: Gently pat the apple wedges dry with a paper towel if they are moist, as this helps the spread adhere better. Then, spread a thin layer of dulce de leche, caramel, or nut-free butter onto one side of each apple wedge.
- Add Monster Teeth: Carefully press slivered almonds (or mini marshmallows/sunflower seeds for a nut-free option) into the spread along the curved edge of some apple wedges to create eerie monster teeth.
- Form the Mouths: Stack two apple wedges, one with “teeth” and one plain, on top of each other with the spread sides facing inwards. This creates the gaping monster mouth effect.
- Attach Candy Eyes: Use a tiny dab of dulce de leche or chosen spread as “glue” to stick one or more candy eyes onto the top apple wedge of each monster mouth. Get creative with eye placement for different monster expressions!
How to Prepare Creamy Ranch Dip
- Blend Cottage Cheese: Scoop the cottage cheese into a high-speed blender. Blend until it becomes completely smooth and creamy, with no lumps remaining.
- Mix in Ranch Seasoning: Add the packet of ranch dressing mix to the blended cottage cheese. Mix thoroughly until the dressing mix is fully incorporated and the dip is evenly flavored. For best results, chill the dip in the refrigerator for at least 30 minutes to allow the flavors to meld.
How to Craft Whimsical Cheese Broomsticks
- Cut Cheese Sticks: Take a mozzarella cheese stick and cut it horizontally into three equal sections.
- Create Bristles: For each section, carefully slice one half of the cheese into thin, parallel strips, stopping about halfway up the cheese stick. This forms the broom’s bristles while keeping the top intact. A sharp paring knife will give you cleaner, more precise cuts.
- Add Pretzel Handle: Gently poke a pretzel stick into the unsliced top portion of each cheese broomstick section. And voilà – you have a cute, edible witch’s broom!
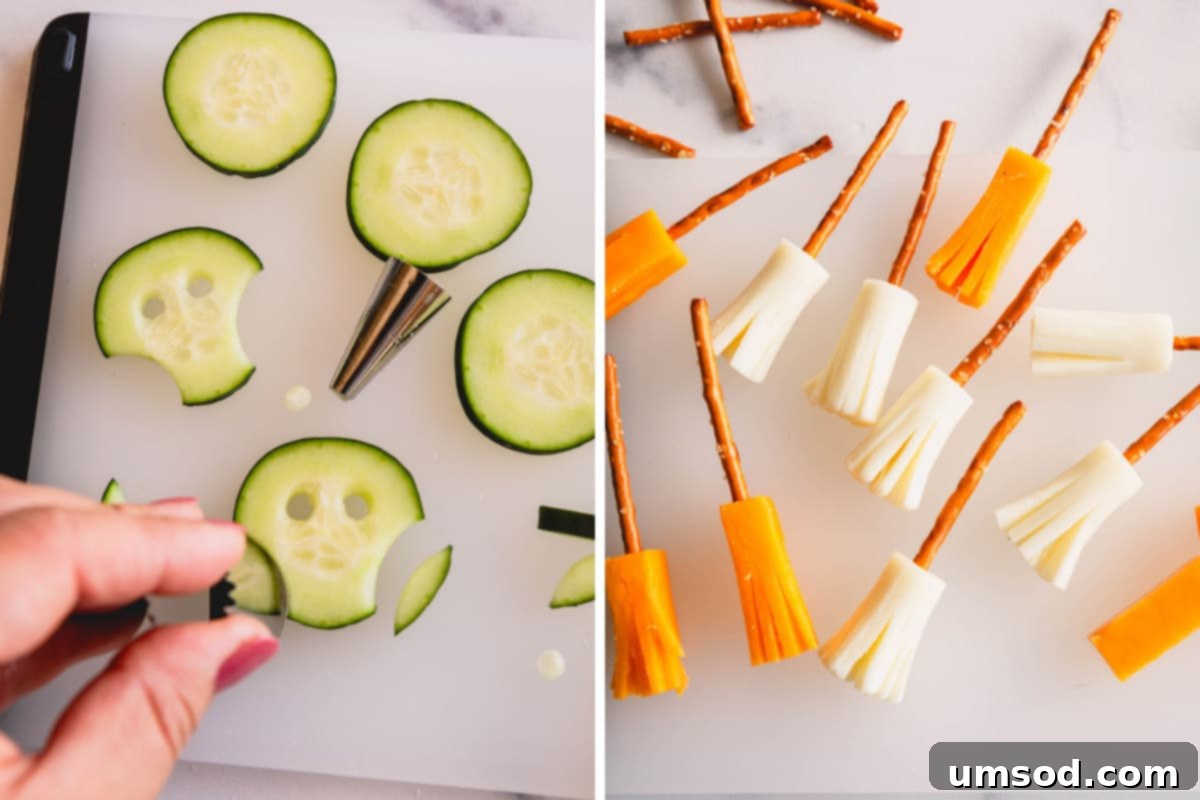
How to Carve Eerie Cucumber Skulls
- Slice Cucumber: Slice your English cucumber into thin, uniform rounds.
- Shape Lower Cheeks: Using the wider end of a round piping tip, cut out two small, curved sections from the lower sides of each cucumber slice. This creates the distinctive lower cheekbones of a skull.
- Create Eye Sockets: Switch to the smaller end of the piping tip (a Wilton 10 round piping tip works well) and carefully cut out two small, round holes for the eye sockets. This step truly brings your cucumber skulls to life with a wonderfully eerie effect.
How to Make Adorable Pepper Ghosts
- Prepare Peppers: Cut the tops off your mini sweet peppers. Slice each pepper in half lengthwise and carefully remove all seeds and membranes.
- Arrange and Decorate: Arrange the pepper halves on your platter with the outside (skin) facing up. Using a small dab of the creamy ranch dip as adhesive, add two small candy eyes to each pepper half, transforming them into cute, ghostly figures.
How to Create Fun Bat Cheese Shapes
- Prepare Cheese Slices: Lay your cheddar cheese slices flat on a cutting board.
- Cut Out Shapes: Use your Halloween-themed cookie cutters to press out fun shapes like bats, pumpkins, or witch hats from the cheese slices. Remember, cold cheese is easier to cut cleanly. Arrange these festive shapes artfully on your snack board.
Tips for a Perfectly Spooky & Healthy Snack Board
To ensure your Halloween snack board is a resounding success, keep these handy tips in mind:
- Simplify Ghost-Nanas: If you’re short on time or prefer a less intricate look for your ghost-nanas, use mini chocolate chips for the eyes and a regular-sized chocolate chip for the mouth. It’s still charmingly spooky and saves a step with melted chocolate.
- Chill the Ranch Dip: For the most robust and satisfying flavor, prepare your ranch dip first and allow it to chill in the refrigerator for at least 30 minutes. This gives all the savory ingredients time to meld beautifully, resulting in a deeper, more pronounced taste.
- Precision with a Paring Knife: When creating the delicate “bristles” for your cheese broomsticks, a sharp paring knife is your best friend. Its smaller blade allows for greater control and more precise, clean cuts, making the process much easier.
- Work with Cold Cheese: For crisp, clean cuts when using cookie cutters on cheese slices (like for the bat cheese), ensure the cheese is thoroughly chilled. Cold cheese is firmer and less likely to crumble or stick to the cutter.
- Plan for Portions: Consider the number of children and their ages when preparing your snack board. It’s always better to have a little extra, as any uneaten components that haven’t discolored can often be saved for later.
- Last-Minute Fruit Prep: To prevent browning and keep your fruit looking its best, slice the bananas and apples as close to serving time as possible. A little lemon juice or a fruit protector dip can also help slow down oxidation.
Smart Make-Ahead Strategies for Stress-Free Snacking
Halloween preparations can be hectic, but with a little planning, you can get ahead of the game. Many components of this Halloween party food can be made in advance:
- You can prepare the pumpkin oranges, cheese broomsticks, cucumber skulls, pepper ghosts, bat cheese shapes, and the ranch dip up to 1-2 days before your event.
- After preparing, tightly wrap each component individually in plastic wrap or store them in separate airtight containers. Keep them refrigerated until you are ready to assemble your full Halloween snack board platter.
- However, the banana ghosts and apple monster mouths are best prepared no more than an hour before serving to maintain their freshness and appealing appearance, as they tend to brown quickly.
Storing Leftovers & Enjoying Freshness
While these healthy Halloween treats are truly best enjoyed fresh, you might have a few leftovers. Here’s how to handle them:
- Ideally, these fun snacks are designed for immediate enjoyment. Leftovers, especially those involving sliced fruit, might not retain their original appealing texture and appearance for long.
- If you do have components that haven’t discolored or dried out (like cheese shapes, whole peppers, or dip), transfer them to an airtight container. They can be safely stored in the refrigerator for 2-3 days. Always inspect them for freshness before serving again.
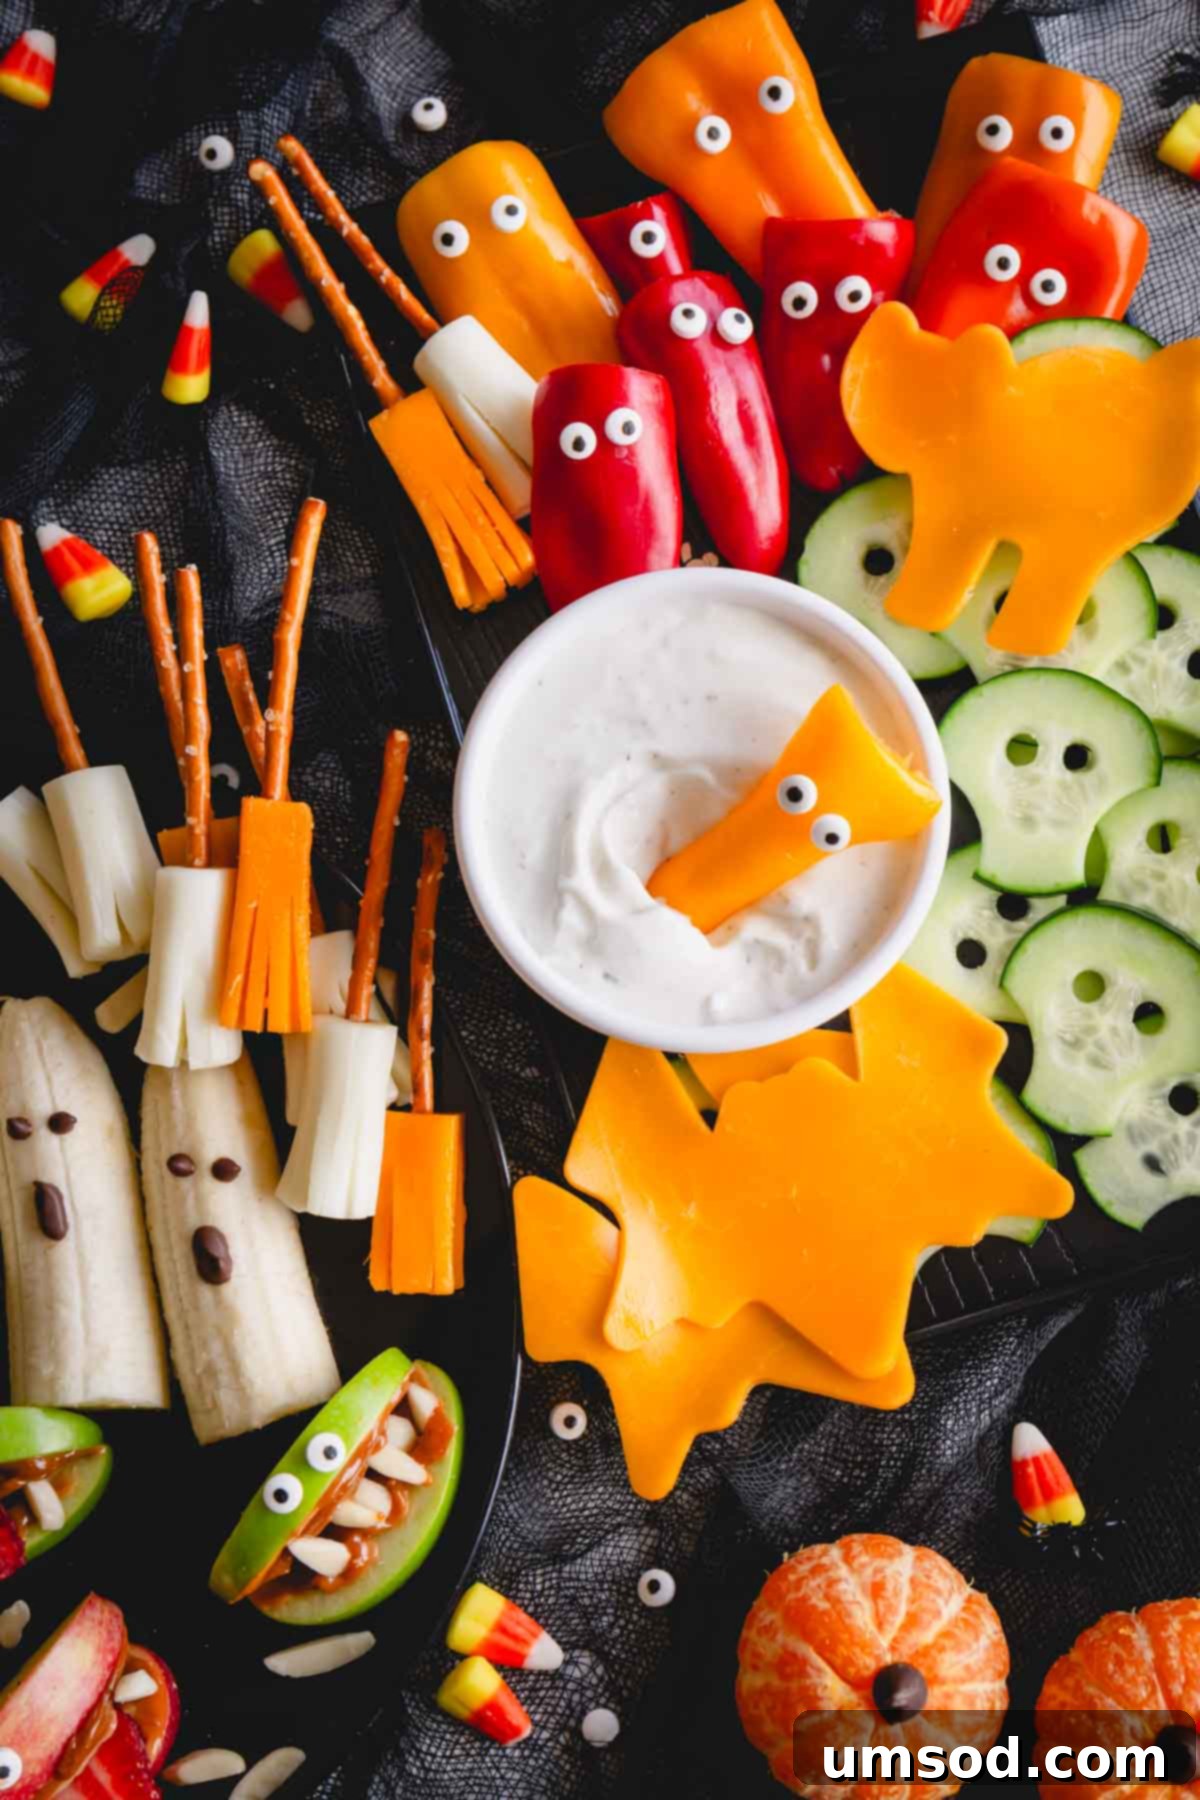
Frequently Asked Questions About Healthy Halloween Snack Treats
What do you typically put on a charcuterie board for Halloween?
For a comprehensive Halloween charcuterie board, beyond these fruit Halloween snacks and veggie Halloween snacks, popular additions include chocolate-covered almonds, candy corn (in moderation!), peanut butter cups, M&M’s, yogurt-covered pretzels, mini cookies, and of course, plenty of candy eyeballs! For savory options, mini mummy hotdogs are always a hit. Don’t forget themed treats like Halloween cake pops. The beauty of a snack board is its versatility – feel free to mix and match whatever festive items you have on hand!
What is considered the most popular Halloween snack?
It’s challenging to pinpoint one single “most popular” Halloween snack, as preferences vary widely. However, classics like candy corn, Tootsie Pops, Reese’s Peanut Butter Cups, and Twizzlers consistently rank high during the Halloween season. Generally, if it’s chocolate or candy, it’s a surefire bestseller in October! Our healthy Halloween snack board offers a fantastic alternative to these traditional, sugar-laden favorites.
What kind of serving board should I use for Halloween snacks?
Any large platter or tray will work wonderfully for serving your spooky snacks. To enhance the Halloween theme, consider using black or orange platters if you have them. Alternatively, a simple baking sheet can be transformed into a festive serving tray with a bit of parchment paper and creative arrangement. The key is to have a spacious surface to display all your delightful kids Halloween treats!
Discover More Delicious Snack Board Inspiration
Loved creating this festive Halloween board? Explore our other popular snack board ideas for every occasion:
- The BEST Charcuterie Board
- Ultimate Snack Board for Game Day
- How to Make an Epic Charcuterie and Cheese Board
- Cheese Platter for Two
Halloween Snack Board
By Shinee Davaakhuu
A Halloween sugar rush is practically inevitable! Balance it out with this wonderfully healthy and incredibly fun Halloween snack board designed specifically for kids. It’s brimming with fresh produce and a delightful, creamy dip, making it the perfect antidote to too much candy.
Total Time: 30 mins
Comment
Print Recipe
Ingredients
For the Fruit Platter:
- Mandarin Oranges: Essential for cute pumpkin shapes.
- Mini Chocolate Chips: About ¼ cup, plus extra for decorations. Used for ghost eyes and pumpkin stems.
- Bananas: Choose firm, just-ripe bananas for perfect ghost-nanas.
- Apples: A mix of green and red apples works best for vibrant monster mouths.
- Dulce de Leche, Caramel, or Peanut Butter: Acts as the “glue” for monster teeth and eyes. Use nut-free options for school parties.
- Slivered Almonds: For realistic monster teeth. Substitute with mini marshmallows or sunflower seeds for a nut-free version.
- Candy Eyes: For giving your monster creations personality!
For the Creamy Ranch Dip:
- Cottage Cheese: 24 oz (680g), plain, full-fat for the creamiest texture.
- Ranch Dressing Mix: 1 oz packet, providing savory flavor.
For the Savory Veggie Platter:
- Cheese Sticks: Mozzarella string cheese is recommended for its flexibility; a few cheddar sticks can be added for variety.
- Pretzel Sticks: Sturdy ones are needed for broom handles.
- Cucumber: English or seedless varieties for carving skulls.
- Sweet Peppers: Mini sweet peppers for making ghost shapes.
- Cheddar Cheese Slices: For cutting out festive Halloween shapes. Orange cheddar or Colby Jack enhances the theme.
Equipment
- Halloween cookie cutters (at least one bat shape!)
- High-speed blender
- Round piping tip (e.g., Wilton 10)
- Piping bag (or a small, sturdy Ziploc bag)
- Sharp paring knife
Instructions
For Pumpkin Oranges:
- Peel the Oranges: Carefully peel your mandarin oranges.
- Add Stems: Place a single mini chocolate chip on top of each peeled orange to create a tiny stem.
For Ghost-Nanas:
- Melt Chocolate: Melt ¼ cup mini chocolate chips in the microwave in 30-second intervals until smooth. Transfer to a piping bag with a snipped tip.
- Slice Bananas: Peel bananas, then cut each horizontally in half. Slice each half vertically down the middle to yield four ghost shapes per banana.
- Draw Faces: Use the melted chocolate in the piping bag to draw eyes and a mouth on each banana ghost. Alternatively, use mini chocolate chips for eyes and a regular chocolate chip for the mouth.
For Apple Monster Mouths:
- Slice Apples: Cut apples into thin wedges.
- Spread “Glue”: Wipe any moisture off apple wedges with a paper towel. Spread dulce de leche, caramel, or peanut butter on one side of each wedge.
- Add Teeth: Press slivered almonds (or nut-free substitute) into the spread to resemble teeth.
- Form Mouths: Stack two apple wedges, one with teeth, to form a mouth shape.
- Attach Eyes: Use a tiny dab of spread to glue candy eyes onto the top apple wedge.
For Creamy Ranch Dip:
- Blend Cottage Cheese: Blend 24 oz (680g) cottage cheese in a high-speed blender until completely smooth and creamy.
- Mix in Ranch: Add the 1 oz packet of ranch dressing mix and blend until thoroughly combined. Chill for at least 30 minutes for best flavor.
For Cheese Broomsticks:
- Cut Cheese Sticks: Cut a cheese stick horizontally into three equal parts.
- Create Bristles: Slice half of each cheese stick section into thin strips, stopping halfway up, to resemble broom bristles. A sharp paring knife is helpful here.
- Add Handles: Gently poke a pretzel stick into the unsliced top portion of each cheese stick to complete your broom.
For Cucumber Skulls:
- Slice Cucumber: Chop cucumber into thin, round slices.
- Shape Cheeks: Use the wide end of a piping tip to cut out the lower sides of each cucumber slice, forming the lower cheeks.
- Cut Eye Sockets: Use the smaller end of a piping tip (e.g., Wilton 10) to cut out two eye sockets in each cucumber slice.
For Pepper Ghosts:
- Prepare Peppers: Cut the tops off sweet peppers, slice them in half lengthwise, and remove seeds.
- Arrange & Decorate: Arrange peppers on your platter with the outside facing up. Use a small dab of cottage cheese dip as glue to attach candy eyes.
For Bat Cheese:
- Cut Shapes: Use Halloween-themed cookie cutters to cut shapes (like bats) from cold cheddar cheese slices.
- Arrange: Place the cut cheese shapes artfully on your snack board.
⭐️ Made this recipe? Please leave a review and let us know how much you loved it!
Tips & Notes
- Banana ripeness: Use just-ripe, slightly firm bananas; overly soft ones won’t hold their shape well.
- Cottage cheese for dip: Plain, full-fat cottage cheese yields the creamiest dip, but any fat percentage will work.
- Nut-free option: For a nut-free Halloween snack board, substitute slivered almonds with mini marshmallows or sunflower seeds.
- Storing Tips: Prepare pumpkin oranges, broomsticks, cucumber skulls, pepper ghosts, bat cheese, and Ranch dip 1-2 days in advance. Wrap tightly and refrigerate. Banana ghosts and apple monster mouths are best prepared no more than an hour before serving to prevent browning. Leftovers of non-browning items can be stored in an airtight container in the fridge for 2-3 days, though fresh is always best.
Nutrition
Estimates are per serving, based on 8 servings for the entire board.
- Servings: 1 serving (based on total yields 4-8 servings)
- Calories: Approximately 777 kcal (for the entire board as a single serving)
- Carbohydrates: Approximately 91g
- Protein: Approximately 40g
- Fat: Approximately 32g
- Sugar: Approximately 59g
- Sodium: Approximately 1605mg
Course: Appetizer, Snack
Cuisine: American
Did you make this?
Leave a rating and your feedback. Thank you!
