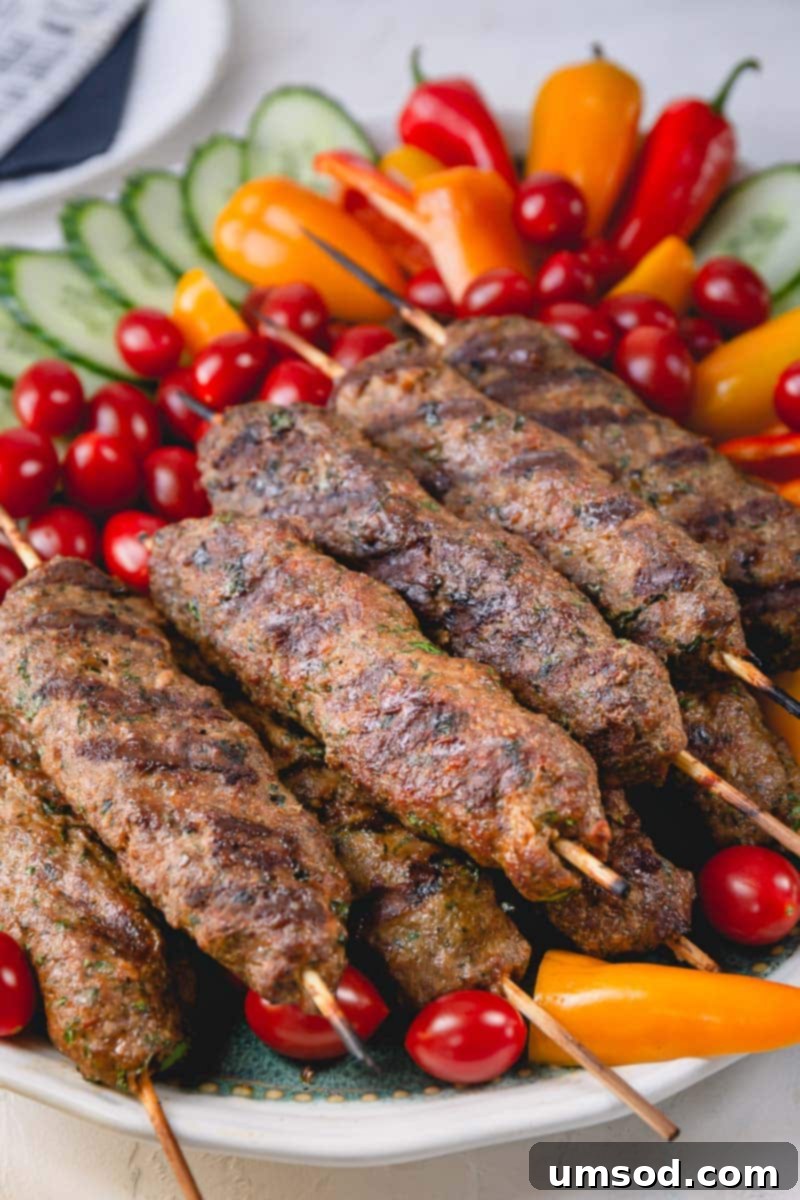
Authentic Urfa Kebab Recipe: Mild, Juicy & Flavorful Turkish Skewers for Grilling
Prepare to delight your taste buds with these incredible **Urfa kebabs**! Known for their succulent texture and rich, aromatic flavor, these Turkish skewers are a true culinary gem. Unlike their spicier cousin, the Adana kebab, Urfa kebabs offer a wonderfully mild profile, making them an instant hit with everyone, even the little ones in your family. Get ready to transform simple ingredients into an unforgettable grilling experience!
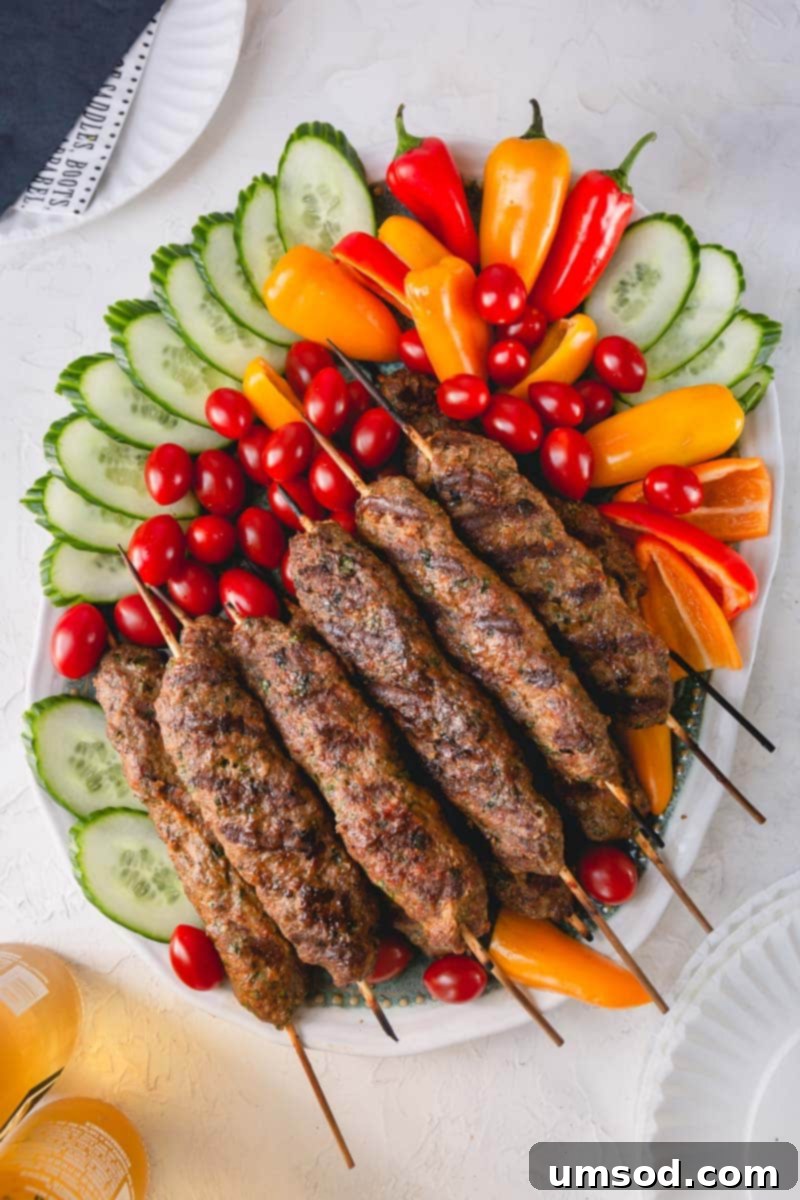
My journey into the captivating world of Turkish cuisine began with a simple fascination for their diverse range of kebabs. While the iconic Döner kebab first captured my imagination, there’s so much more to explore within this rich culinary tradition. I’ve always dreamed of a trip to Turkey, purely to immerse myself in the authentic flavors and vibrant food culture. It was during one of my casual scrolls through Instagram last summer that I stumbled upon a plate of food so irresistibly appealing, it practically called my name.
That picture featured perfectly grilled kebabs, radiating a smoky aroma even through the screen. Naturally, my curiosity was piqued, and I reached out for the recipe. I was incredibly fortunate that Joanna Tahar, a talented home cook, graciously shared her method. Since then, these Urfa kebabs have become a cherished staple in my household. I’ve made them countless times, and they consistently receive rave reviews. It’s particularly heartwarming to see my boys, aged four and two, get so genuinely excited about these flavorful skewers!
This tried-and-true Urfa kebab recipe is your ultimate secret weapon to becoming the undisputed barbecue sensation of your neighborhood. Simple to prepare, bursting with flavor, and universally loved – what more could you ask for? Let’s unlock the secrets to these wonderfully juicy Turkish kebabs.
What Exactly is Urfa Kebab? A Culinary Journey to Şanlıurfa
Before we dive into the delicious details of preparation, let’s explore the rich background of this iconic dish. Turkish cuisine boasts a remarkable variety of kebabs, and among the most celebrated are Urfa kebab and Adana kebab. Both are named after their cities of origin – Şanlıurfa and Adana – which are renowned gastronomic hubs in southeastern Turkey, known for their vibrant food traditions and unique culinary specialties.
While these two kebabs share many similarities, particularly in their presentation as hand-minced meat molded onto wide skewers, their defining difference lies in their spice level. **Adana kebab** is famously fiery, packed with hot red pepper flakes and a robust blend of spices that deliver a powerful kick. In contrast, **Urfa kebab** is characterized by its delightful mildness. It relies on a harmonious blend of fragrant herbs and warm, earthy spices like cumin and smoked paprika, rather than heat, to create a deeply satisfying and complex flavor profile. This gentle spice makes Urfa kebab exceptionally versatile and appealing to a broader audience, including those who prefer milder dishes or families with young children.
Traditionally, Urfa kebab is made with a specific blend of ground lamb and beef, meticulously minced using a large, crescent-shaped knife called a zırh. This unique mincing process contributes to the kebab’s distinctive texture and ability to cling to the skewers. The result is a finely textured, almost paste-like meat mixture that, when grilled, becomes incredibly tender and juicy. While mastering the zırh might be a task best left to seasoned Turkish chefs, our home-friendly recipe delivers equally delicious results using readily available ground meats and standard kitchen tools, allowing you to capture the authentic essence of this beloved dish in your own backyard.
Essential Ingredients for Your Flavorful Urfa Kebabs
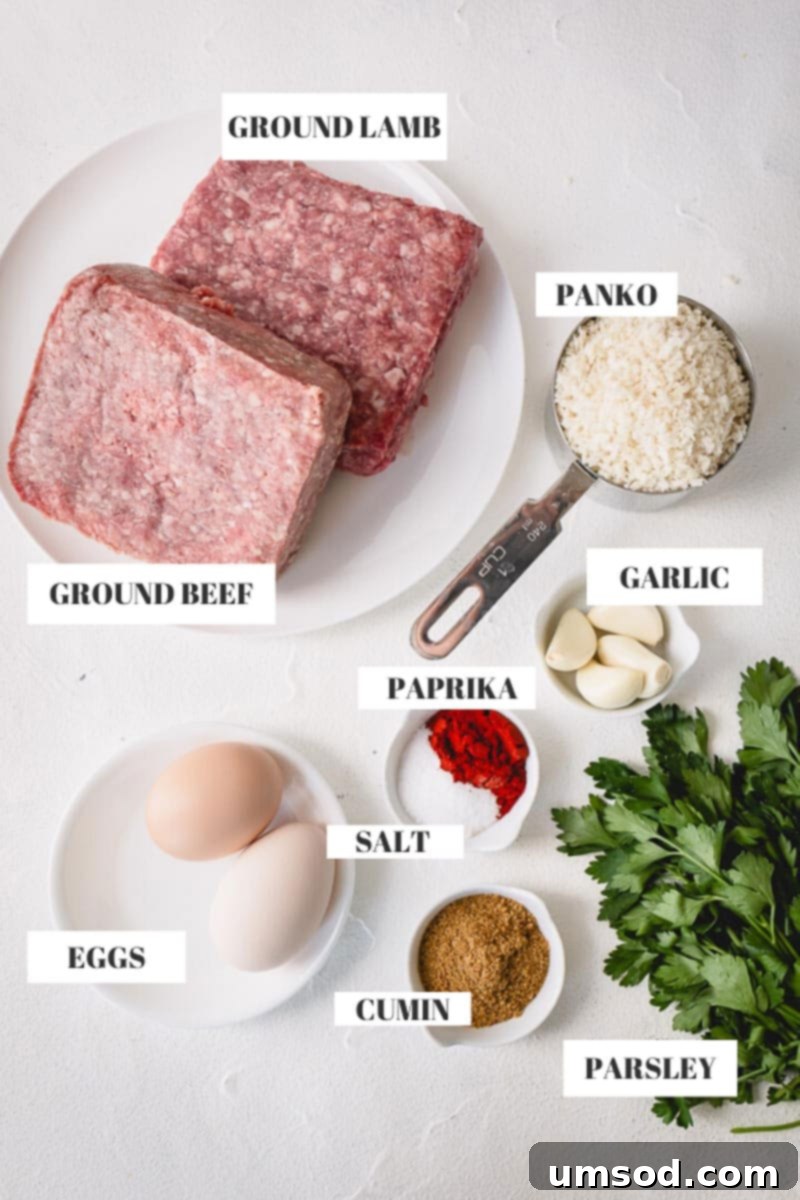
One of the most appealing aspects of this Urfa kebab recipe is its simplicity, requiring just a handful of straightforward ingredients. You’ll likely find most of them already in your pantry! I was genuinely surprised to learn that no exotic or hard-to-find spices were needed to achieve such a profound and authentic flavor profile.
- Meat: The heart of any great kebab. Traditionally, Urfa kebabs feature a specific blend of beef and lamb, finely minced. For home cooking, a combination of **ground beef and ground lamb** works wonders, offering a balanced and rich flavor. I highly recommend using an **80% lean, 20% fat ratio** for both meats. This fat content is absolutely crucial for achieving that characteristic juicy, tender, and incredibly flavorful kebab. The fat renders beautifully during grilling, keeping the meat moist and adding a depth of richness that leaner cuts simply can’t provide. While a professional Turkish chef might use a special chopping tool (a fascinating process to watch, starting at 1:30 in this video), high-quality ground meat from your local butcher or supermarket works perfectly for our purposes.
- Panko Breadcrumbs: These light, airy Japanese breadcrumbs act as an excellent binder, helping the meat mixture hold its shape on the skewer and contributing to a tender, not dense, texture. Joanna’s original recipe called for making homemade breadcrumbs from sliced bread, which is always an option if you prefer. However, I often opt for the convenient shortcut of Panko, as I typically do with other ground meat recipes like my popular meatball recipe. Panko’s texture also helps keep the kebabs light.
- Eggs: Eggs serve as another vital binding agent in this recipe, ensuring the kebab mixture adheres securely to the skewers and doesn’t crumble or fall apart during grilling. They also add a subtle amount of moisture, contributing to the overall juiciness.
- Onion and Garlic: These aromatic powerhouses are fundamental to building the savory base of the kebab’s flavor. For onion, I typically recommend using a finely grated yellow or white onion for its balanced sweetness and pungency. However, due to dietary preferences in my family, I sometimes omit the onion (which is why you might not see it in all my photos). Freshly grated or pressed garlic, however, is non-negotiable and provides an indispensable punch of flavor that truly brightens the meat mixture.
- Fresh Herbs: Herbs are crucial for adding vibrancy, freshness, and a complex aroma to these kebabs. We use a generous amount to really elevate the flavor profile. Fresh flat-leaf parsley and dill are key players here. Parsley offers a clean, earthy note, while dill contributes a distinctive, slightly anisy freshness that is characteristic of many Mediterranean and Middle Eastern dishes. If fresh dill is unavailable, you can substitute with dried dill, but remember that dried herbs are more concentrated, so use about a third of the amount (e.g., ¼ cup dried dill for ½ cup fresh).
- Spices: True to its mild nature, Urfa kebab doesn’t require an extensive list of aggressive, fiery spices. The stars here are **ground cumin** and **smoked paprika**. Cumin lends its earthy, warm, and slightly nutty notes, which are a hallmark of Turkish cuisine. Smoked paprika, on the other hand, contributes a lovely depth of color and a subtle smokiness without any heat, enhancing the grilled flavor. This gentle blend ensures the kebabs are incredibly flavorful yet perfectly suitable for even the youngest or most spice-averse diners, making them a fantastic family-friendly option.
- Salt and Black Pepper: These are essential for proper seasoning, bringing out and balancing all the wonderful, nuanced flavors of the other ingredients. Adjust to your personal taste.
Step-by-Step: How to Craft the Best Urfa Kebabs at Home
Making Urfa kebabs at home is surprisingly straightforward, but a little planning goes a long way in achieving perfection. I highly recommend preparing the meat mixture ahead of time and allowing it to chill in the refrigerator for at least one hour. This crucial step serves two important purposes:
- **Enhanced Firmness:** Chilling the mixture significantly firms it up. The fat solidifies, making the meat much easier to handle and expertly shape around your skewers without it falling apart during preparation or grilling.
- **Flavor Development:** The resting period allows all the aromatic spices and fresh herbs to thoroughly meld and infuse into the meat. This process, known as ‘marination’ or ‘flavor development’, results in a deeper, more cohesive, and truly delicious flavor profile that is essential for authentic kebabs.
Now, let’s get those skewers ready for the grill and bring these flavorful Urfa kebabs to life!
- Step 1: Prepare the Meat Mixture. In a large mixing bowl, combine the ground beef, ground lamb, Panko breadcrumbs, eggs, ground cumin, smoked paprika, grated onion (if using), grated garlic, minced fresh parsley, minced fresh dill, salt, and black pepper. Using your hands, knead the mixture vigorously for several minutes until all ingredients are thoroughly combined and the mixture is smooth, cohesive, and slightly sticky. This kneading process is vital as it helps bind the proteins in the meat, preventing the kebabs from crumbling during cooking. Cover the bowl tightly with plastic wrap and refrigerate for at least 1 hour, or ideally, overnight, to allow the flavors to deepen and the mixture to firm up.
- Step 2: Shape the Kebabs. Have a small bowl of cold water handy to moisten your hands – this crucial step prevents the sticky meat mixture from clinging to your skin as you work. Take approximately ½ cup of the chilled meat mixture and firmly mold it around a skewer. Shape it into a flat, elongated log, ensuring the meat is evenly distributed and pressed tightly onto the skewer to prevent it from slipping off during grilling. Repeat with the remaining mixture and skewers. The ideal shape is slightly flattened to maximize surface area for grilling and even cooking.
PRO TIP: Keeping your hands slightly wet throughout the shaping process is key. The moisture acts as a barrier, stopping the sticky meat mixture from clinging to your skin, making the process much cleaner and more efficient. Don’t be afraid to re-wet your hands as needed.
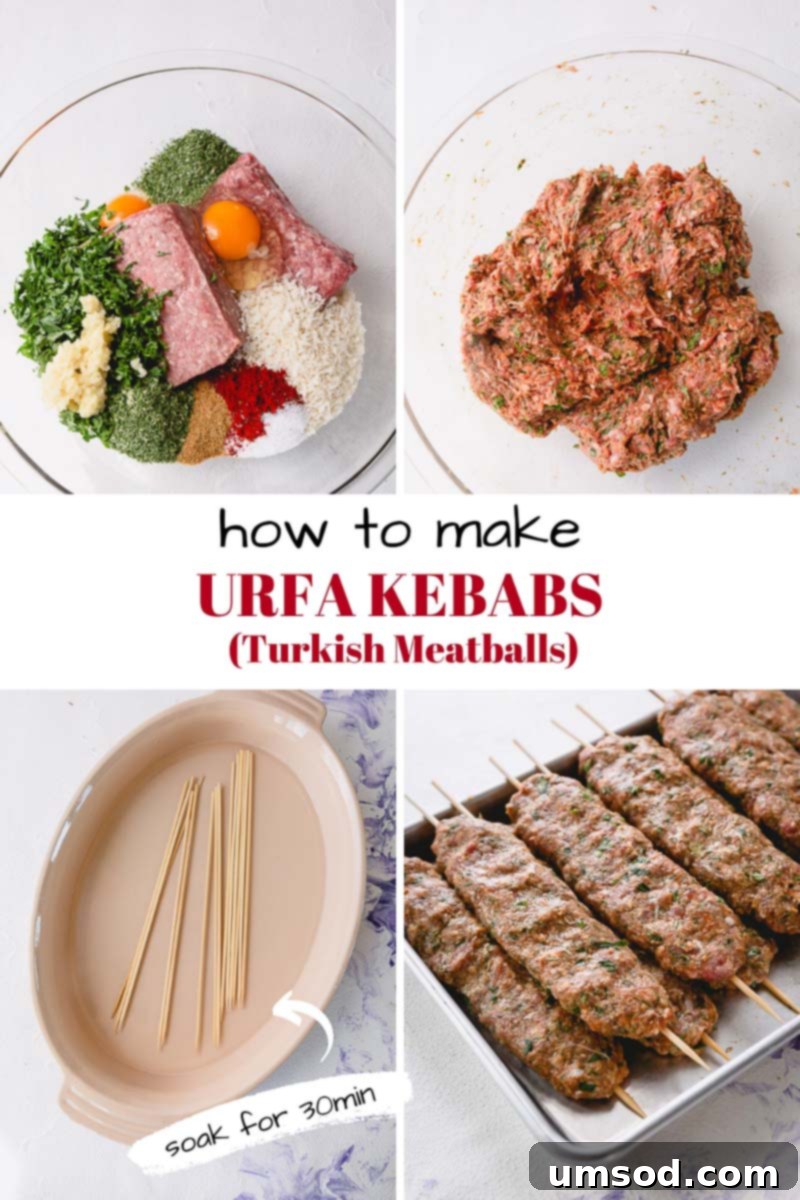
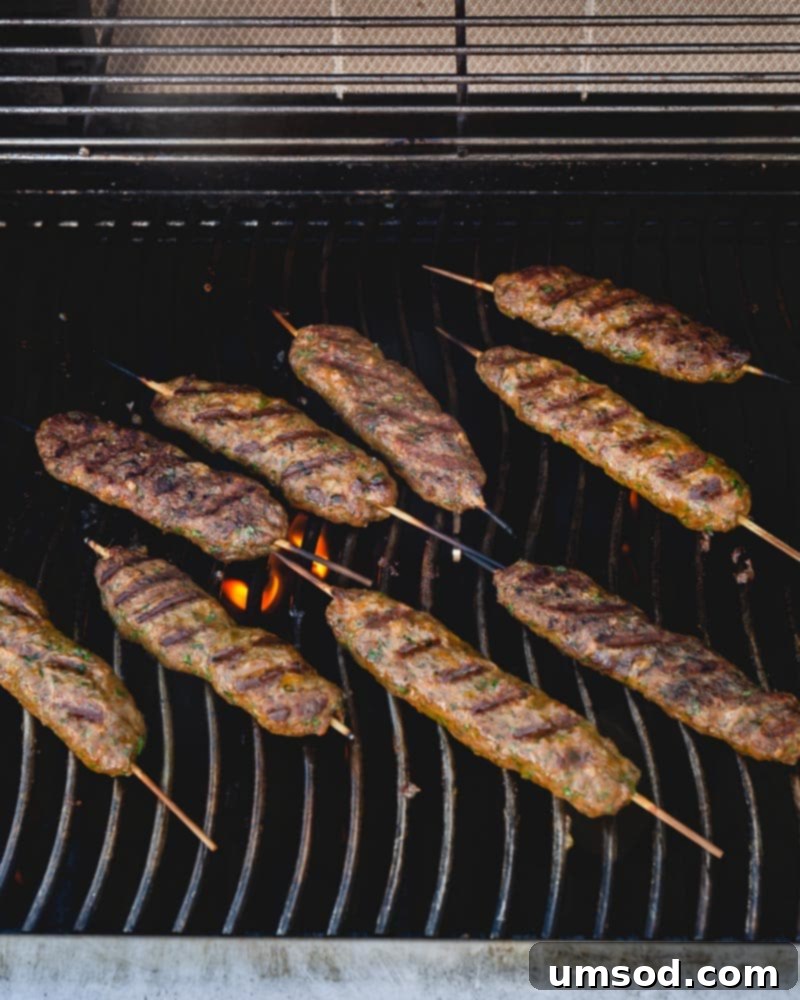
- Step 3: Preheat Your Grill. Preheat your gas grill to high heat. While it’s heating, clean the grates thoroughly with a sturdy grill brush to remove any residue. Once clean, lightly oil the grates by dipping a paper towel in a little vegetable oil (using tongs for safety) and wiping it across the hot grates. This step is essential to prevent the kebabs from sticking and ensures a beautiful release.
- Step 4: Grill to Perfection. Once the grill is nice and hot, carefully place the shaped kebabs directly on the oiled grates. Close the lid and cook for approximately 8-10 minutes in total. Make sure to flip them gently once halfway through (after about 4-5 minutes) to ensure even cooking and beautiful, appetizing grill marks on all sides. The internal temperature of the kebabs should reach 160°F (71°C) for safe consumption of ground beef and lamb. Once cooked to your liking and beautifully browned, remove them from the grill and let them rest for a few minutes before serving. This resting period allows the juices to redistribute throughout the meat, resulting in an even juicier kebab.
Wooden Skewers vs. Metal Skewers: Making the Right Choice for Your Kebabs
When it comes to grilling kebabs, the choice of skewers can significantly influence both your preparation and cooking experience. You essentially have two main options: wooden and metal. If you’re an occasional kebab maker, wooden skewers might seem more convenient for their disposability. However, for regular grilling enthusiasts and those seeking efficiency, I personally lean towards reusable metal skewers, and here’s why I recommend them:
- Sustainability & Cost-Effectiveness: Metal skewers are a smart, one-time investment. You purchase them once, and with proper care, they can last a lifetime, making them far more environmentally friendly and economical in the long run than continually purchasing disposable wooden ones.
- No Soaking Required: One of the biggest practical advantages of metal skewers is that they don’t require pre-soaking. Wooden skewers need to be submerged in water for at least 30 minutes (or even longer) before grilling to prevent them from burning on the high heat of the grill. With metal skewers, you can skip this preparatory step entirely, saving you valuable time and effort.
- Durability & Heat Conduction: Metal skewers are robust and won’t break, splinter, or warp under heat. They also efficiently conduct heat, which helps cook the kebab from the inside out, leading to more evenly cooked and consistently juicy results, especially important for thicker kebabs like Urfa. This internal heat helps ensure the meat is cooked through without over-charring the exterior.
- Optimal Shaping & Flipping: Many metal skewers come in flat or square shapes rather than round. This design is crucial because it prevents the meat from rotating freely when you flip the skewer on the grill, ensuring all sides get consistent contact with the heat and develop those perfect grill marks.
Whichever type you choose, ensure they are sturdy enough to hold the meat mixture firmly and are long enough for comfortable handling on your grill.
Serving Suggestions: What to Pair with Your Delicious Urfa Kebabs
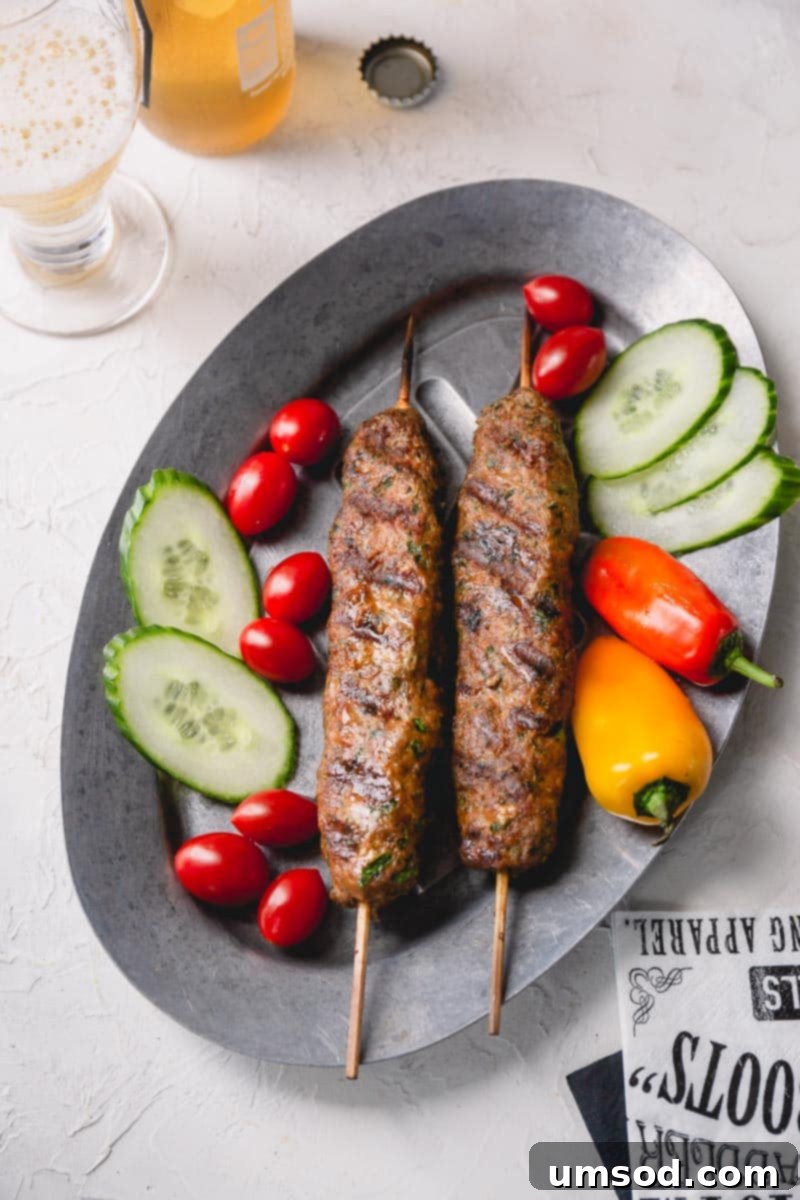
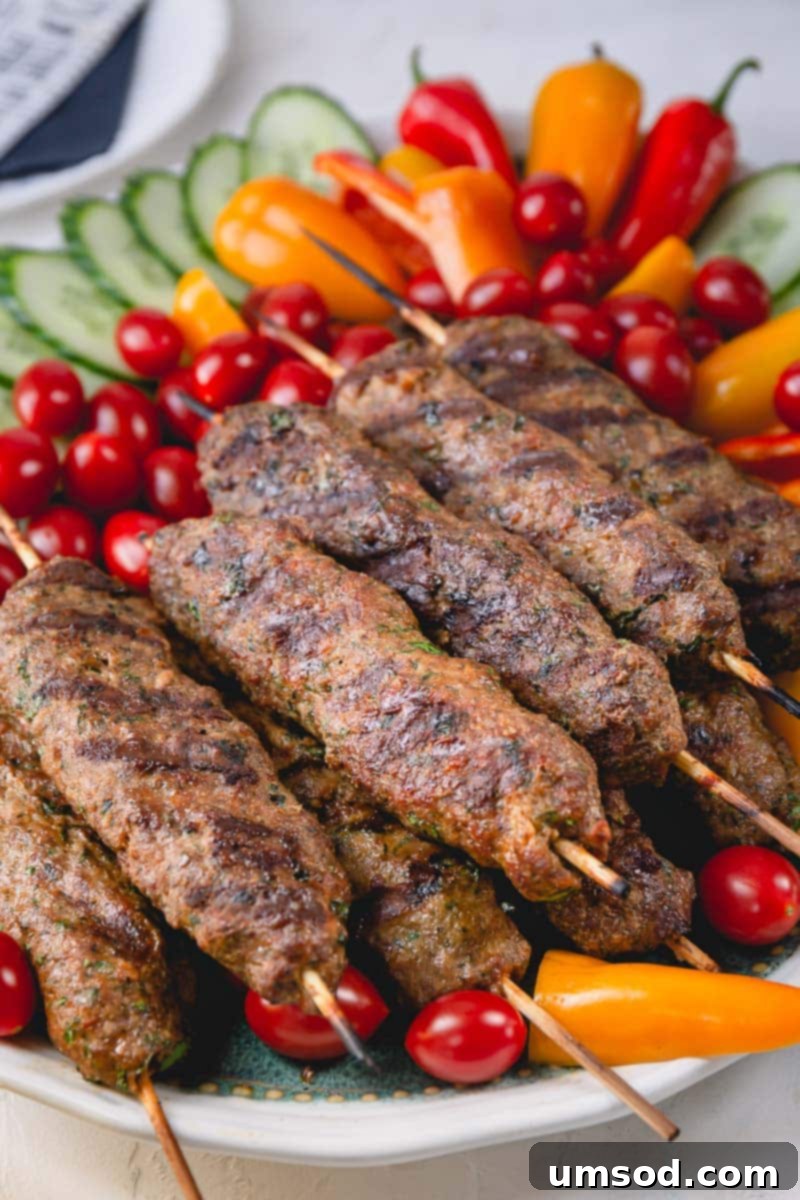
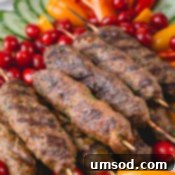
Urfa kebabs are incredibly versatile and pair wonderfully with a variety of fresh and flavorful sides, creating a complete and satisfying meal. When I first learned this recipe, Joanna suggested serving them with crisp, fresh cucumbers and ripe, juicy tomatoes, often accompanied by grilled sweet peppers – a classic and refreshing combination that perfectly complements the rich meat. This traditional pairing highlights the kebab’s flavors without overpowering them. But don’t feel limited! You can certainly serve your kebabs with anything your heart desires. Here are some fantastic suggestions to inspire your next meal, ensuring a diverse and delicious spread:
- **Fresh Salads:**
- A vibrant **Shepherd’s Salad (Çoban Salata)** with finely diced tomatoes, cucumbers, bell peppers, and red onion, dressed simply with good quality olive oil and fresh lemon juice, is a traditional Turkish accompaniment that provides a delightful acidity and crunch.
- For a creamy and cooling touch, try a refreshing Creamy Cucumber Tomato Salad, which can balance the richness of the meat.
- A zesty Cucumber Mango Salad offers a delightful sweet and savory contrast, adding an unexpected tropical twist.
- Or explore the unique textures and vibrant green of a Cucumber Edamame Salad for a nutritious and interesting side.
- **Rice Dishes:** A bed of fluffy **pilaf rice** (often a buttery Turkish rice pilav with orzo) or a simple basmati rice can beautifully absorb the kebab’s savory juices and create a hearty, comforting meal. Alternatively, a lemon-herb couscous could also be a lighter grain option.
- **Breads and Wraps:** Warm, soft **lavash bread** (a thin, unleavened flatbread) or fluffy pita bread is absolutely perfect for wrapping the kebabs, along with some salad, to create a delicious handheld meal. Don’t forget some crusty bread to soak up any juices!
- **Yogurt-Based Dips:** A cooling **cacık** (Turkish cucumber and yogurt dip, very similar to Greek tzatziki) or a simple bowl of plain, thick yogurt with a drizzle of olive oil and a sprinkle of mint can provide a wonderfully refreshing counterpoint to the rich meat, cleansing the palate between bites.
- **Grilled Vegetables:** Beyond the traditional sweet peppers, consider grilling other complementary vegetables like zucchini, eggplant slices, red onions, or cherry tomatoes on skewers for a complete and wholesome plate that adds color and additional smoky flavors.
No matter how you choose to serve them, these Urfa kebabs promise a delicious, satisfying, and authentically flavored meal that will transport your taste buds straight to the bustling markets and warm hospitality of Turkey!
Urfa Kebabs Recipe
These Urfa kebabs are incredibly juicy and packed with flavor, thanks to a simple blend of ingredients. Being mild and not spicy, they are a fantastic option for families and anyone who loves a good, grilled Turkish kebab!
- Prep time: 20 minutes
- Cook time: 10 minutes
- Total time: 1 hour 30 minutes (includes chilling time)
- Yields: 10 skewers
- Cuisine: Turkish
- Course: Main Course
Ingredients
- 1 lb (450g) ground beef (80/20 fat ratio)
- 1 lb (450g) ground lamb (80/20 fat ratio)
- 1 cup Panko breadcrumbs
- 2 small eggs
- 4 teaspoons ground cumin
- 4 teaspoons smoked paprika
- 1 small onion, finely grated (optional, see Note 3)
- 4-6 garlic cloves, grated or pressed
- 1 bunch fresh flat-leaf parsley, finely minced
- ½ cup minced fresh dill (see Note 4 for dried dill substitution)
- 2 teaspoons salt
- 1 teaspoon black pepper
Instructions
- Prepare Skewers: If using wooden kebab sticks, soak them in water for at least 30 minutes prior to use to prevent them from burning on the grill. If you are using metal skewers, this step is not necessary.
- Make the Kebab Mixture: In a large mixing bowl, combine the ground beef, ground lamb, Panko breadcrumbs, eggs, ground cumin, smoked paprika, grated onion (if choosing to use), grated garlic, minced fresh parsley, minced fresh dill, salt, and black pepper. Using your hands, thoroughly mix and knead the ingredients until well combined and the mixture is smooth and cohesive.
- Chill the Mixture: Cover the bowl with plastic wrap and refrigerate the meat mixture for at least 1 hour. This chilling period allows the flavors to properly meld together and the mixture to firm up, making it significantly easier to handle and shape around the skewers.
- Check Consistency and Seasoning: After chilling, the mixture should be firm enough to shape but not overly dry. If it feels too wet or sticky, you can add an additional tablespoon or two of Panko breadcrumbs to achieve the right consistency. For a quick seasoning check, fry a small pinch of the mixture in a pan and taste, adjusting salt and pepper if necessary.
- Shape the Kebabs: Keep a small bowl of cold water nearby to moisten your hands. This trick prevents the meat mixture from sticking to your hands. Take approximately ½ cup of the prepared meat mixture and firmly shape it around each skewer into a flat, elongated log. Ensure the meat is evenly distributed and pressed tightly onto the skewer to prevent it from slipping off during grilling.
- Chill Shaped Kebabs (Optional but Recommended): For best results, arrange the shaped meat skewers on a baking sheet and refrigerate them for another 15-20 minutes. This extra chill helps them hold their shape even better on the hot grill.
- Preheat Grill: Meanwhile, preheat a gas grill to high heat. Clean the grill grates thoroughly with a grill brush. Once clean, lightly oil the grates by dipping a paper towel in a little vegetable oil (held with tongs for safety) and wiping it across the hot grates.
- Grill the Kebabs: Once the grill is hot, carefully place the meat skewers on the oiled grates. Close the lid and cook for about 8-10 minutes in total. Make sure to flip them gently once halfway through (after approximately 4-5 minutes) to ensure even cooking and beautiful char marks on all sides. Cook until the internal temperature reaches 160°F (71°C) and the kebabs are nicely browned and cooked through.
- Serve: Remove the kebabs from the grill and let them rest for a few minutes. Serve immediately with fresh tomatoes, cucumbers, and grilled sweet peppers, or any of your preferred accompaniments.
Tips & Notes
- Note 1 (Meat Selection): For this recipe, you have the flexibility to use all ground beef, all ground lamb, or a combination of both. For the juiciest and most flavorful kebabs, we highly recommend an 80% lean, 20% fat ratio for your chosen ground meat.
- Note 2 (Panko vs. Fresh Breadcrumbs): While Panko breadcrumbs offer convenience and contribute to a light texture, you can certainly make your own fresh breadcrumbs from a few slices of stale bread for a more traditional approach if you prefer.
- Note 3 (Onion): We sometimes omit the grated onion from this recipe due to family preferences, which is why it might not always appear in our step-by-step photos. However, for a classic and deeply aromatic flavor profile, a finely grated small onion is highly recommended.
- Note 4 (Dill Substitution): If fresh dill is not readily available, you can substitute it with dried dill. Use approximately ¼ cup of dried dill for every ½ cup of fresh dill, as dried herbs are generally more potent and concentrated in flavor.
Nutrition Information (per skewer, approximate)
- Calories:
- 292 kcal
- Carbohydrates:
- 7 g
- Protein:
- 18 g
- Fat:
- 21 g
- Sugar:
- 1 g
- Sodium:
- 583 mg
We hope you’re inspired to try this delightful Urfa kebab recipe soon! If you do, please consider leaving a review and sharing your feedback. Your experience means a lot to us, and we’d love to hear how much you enjoyed these authentic Turkish flavors!
