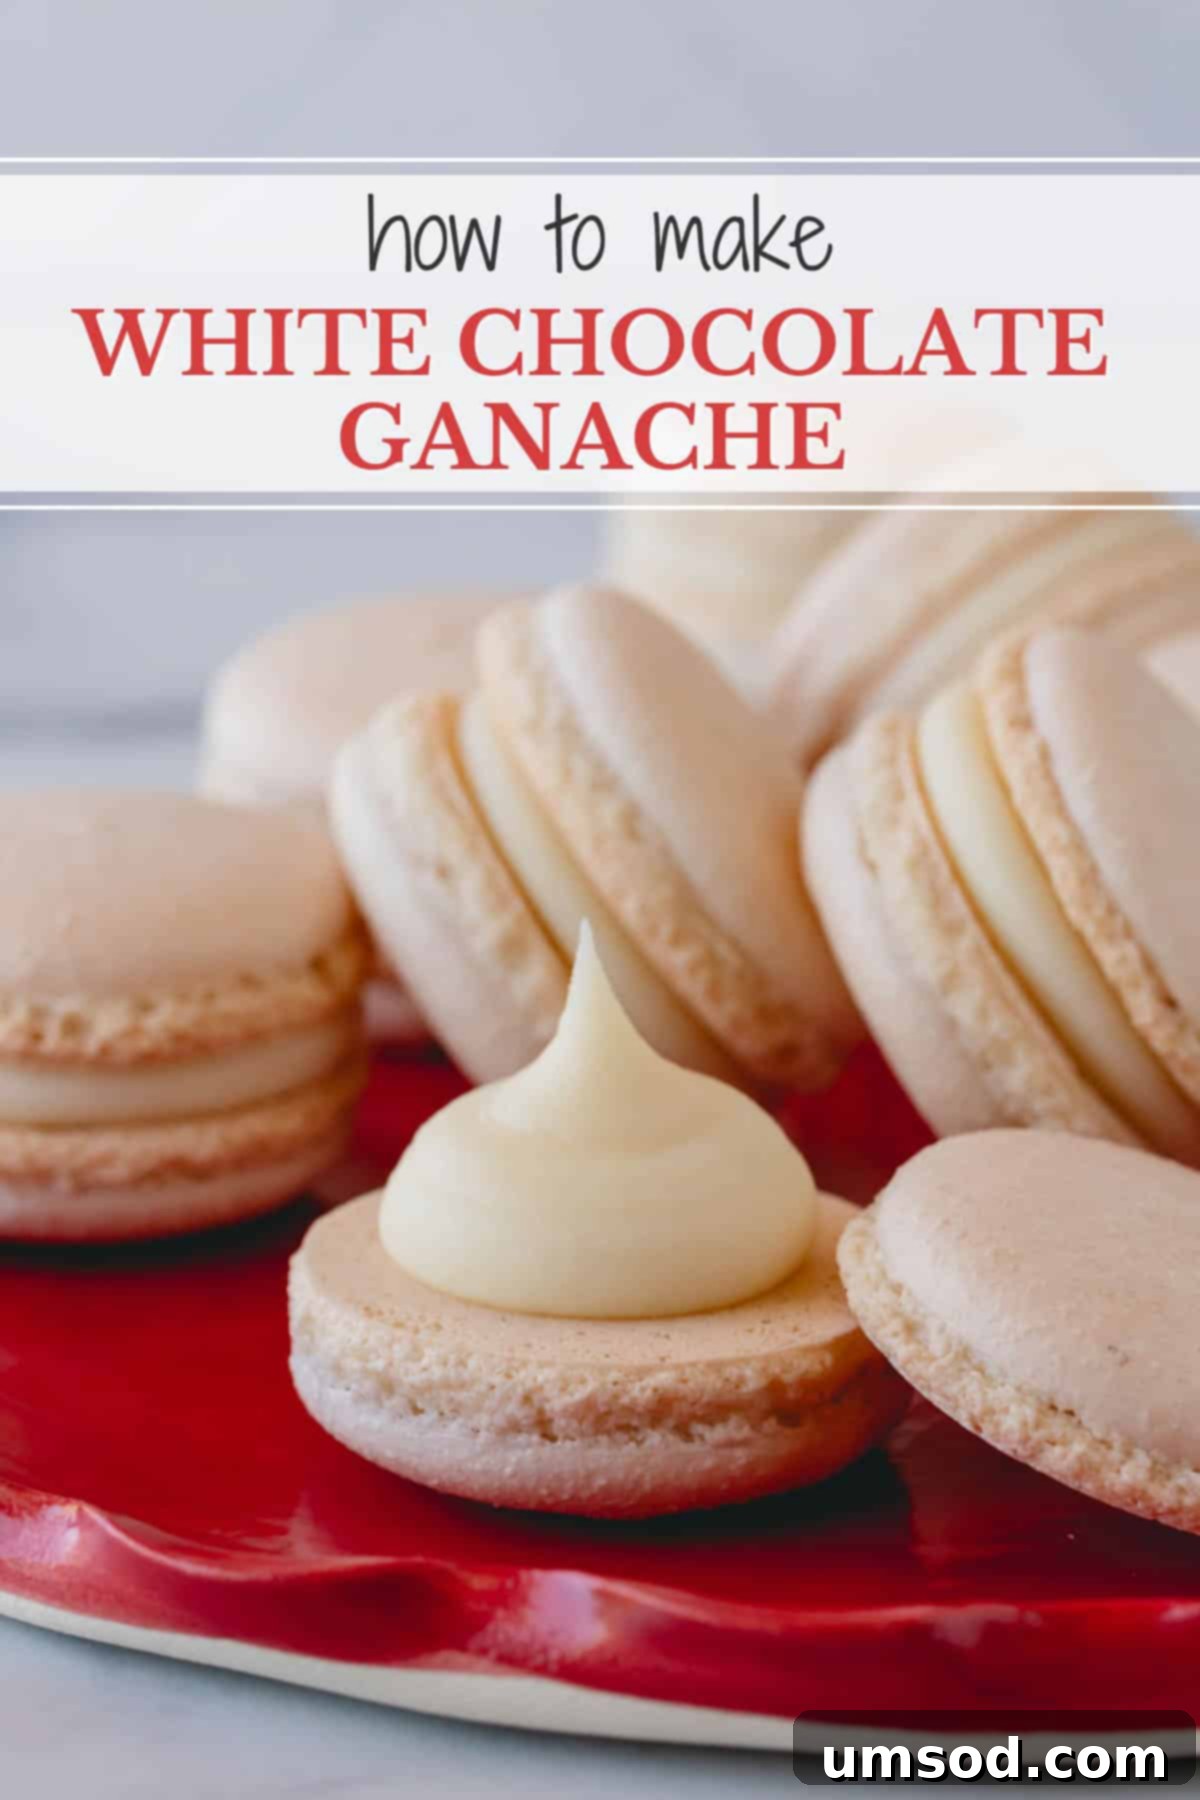
White chocolate ganache, with its luxurious texture and delicate flavor, is a beloved component in countless desserts. However, unlike its darker counterpart, achieving a consistently perfect white chocolate ganache can be surprisingly tricky. Many home bakers struggle with common issues like seizing, grainy textures, or a ganache that simply won’t set. But don’t fret! This comprehensive guide is designed to demystify the process, sharing all the essential tips, tricks, and variables you need to master white chocolate ganache every single time. Prepare to create velvety smooth, stable, and utterly delicious ganache for all your baking needs.
Pin this now to find it later
Pin It
Why You’ll Adore This White Chocolate Ganache Recipe
White chocolate, by its very nature, is a delicate ingredient. This inherent characteristic makes white chocolate ganache considerably trickier to perfect than a standard dark chocolate ganache. Dark chocolate contains more cocoa solids, which contribute to its stability, while white chocolate relies primarily on cocoa butter and milk solids, making it more susceptible to temperature fluctuations and ingredient ratios. Mastering it, however, opens up a world of exquisite dessert possibilities.
Because of these nuances, there isn’t a single “perfect” foolproof recipe that works universally for every situation. The ideal consistency of your ganache will vary significantly based on its intended use – whether it’s a firm filling, a pourable glaze, or a light whipped frosting. Furthermore, the brand and quality of white chocolate you choose will play a monumental role, as cocoa butter content differs widely across products. You might need to make slight adjustments to tailor the recipe to your specific ingredients and desired outcome.
However, fear not! This guide is meticulously crafted to empower you with all the knowledge required. We’ll explore every critical variable, teaching you how to anticipate potential issues and confidently adjust your technique to achieve a flawless, smooth, and utterly delicious white chocolate ganache every single time. Say goodbye to grainy textures and separated mixtures, and hello to ganache perfection!
What Exactly is White Chocolate Ganache?
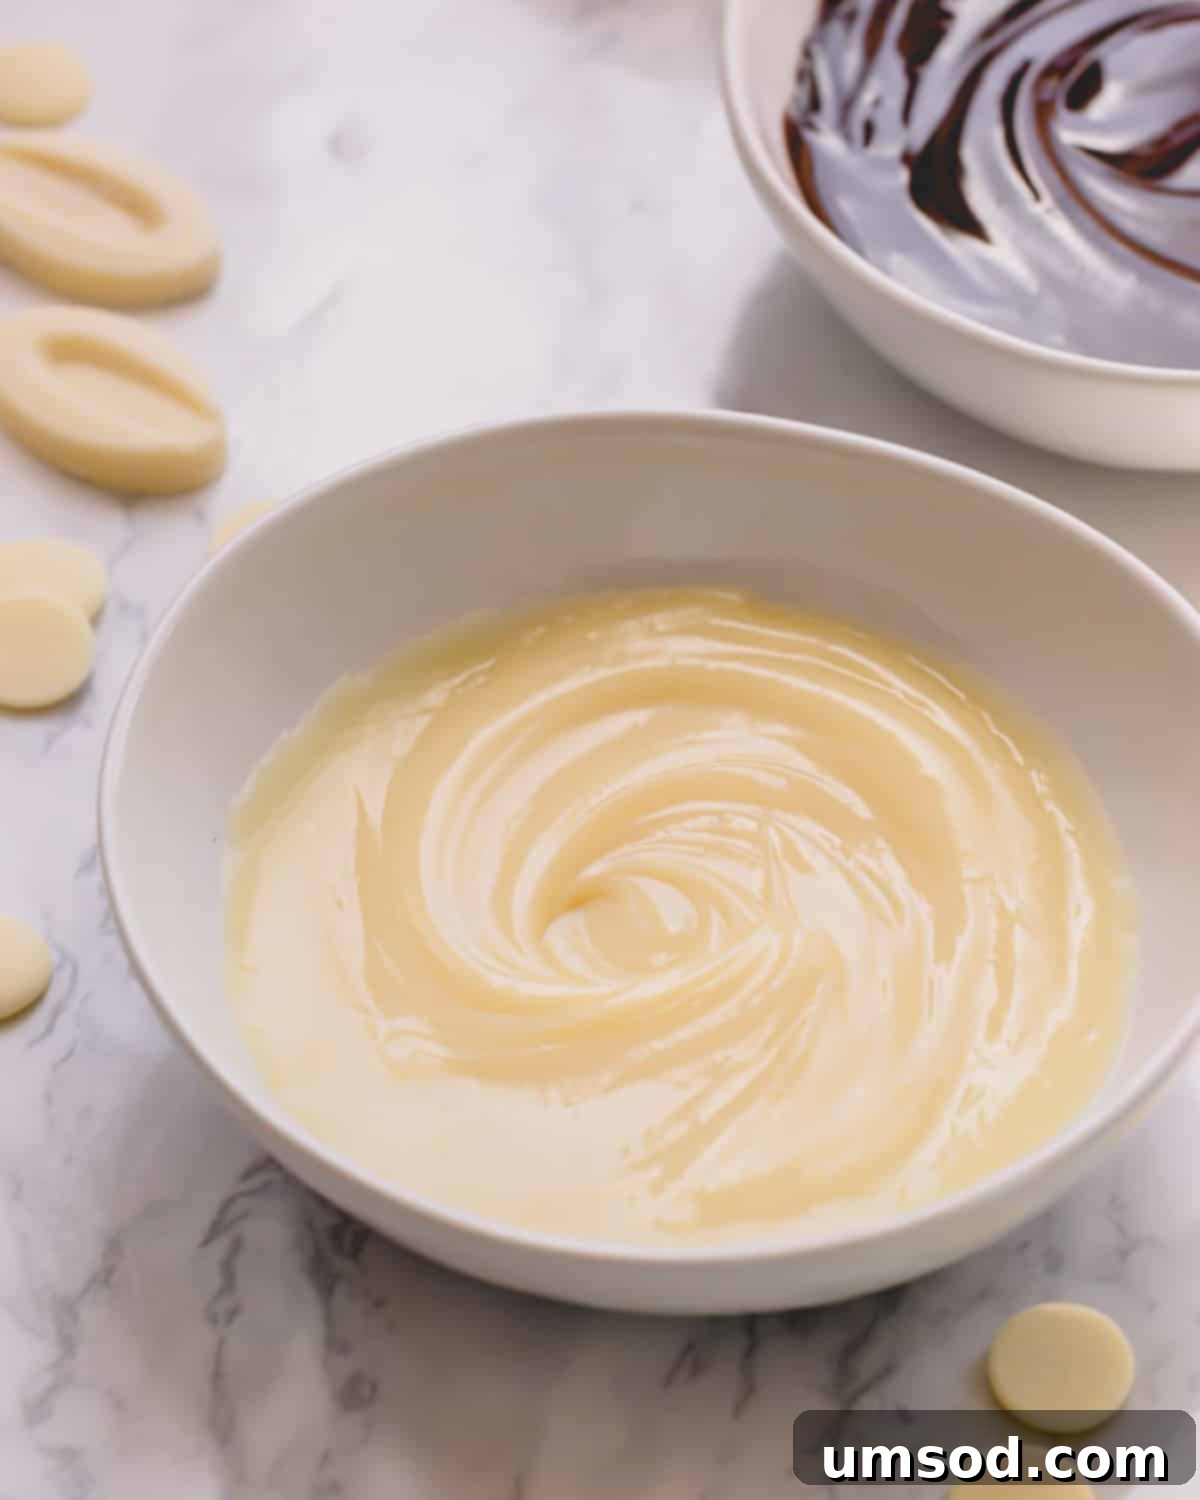
At its core, white chocolate ganache is a luxurious emulsion formed by combining melted white chocolate with warm cream. This simple yet magical chemical reaction creates a smooth, stable, and incredibly versatile mixture that is a staple in the world of pastry arts. The term “ganache” itself is French, typically referring to a glaze, icing, filling, or sauce made from chocolate and cream.
The texture of white chocolate ganache can range from a pourable liquid to a thick, pipeable frosting, depending on the ratio of chocolate to cream and the temperature at which it’s served or used. Its rich, sweet flavor profile, coupled with a velvety texture, makes it an ideal choice for a multitude of applications. Common uses include elegant cake or cupcake fillings, decadent coatings for truffles, luscious macaron fillings, smooth glazes for pastries, and even as a base for whipped frostings that add an airy touch to desserts. Understanding this fundamental emulsion is the first step to mastering its many forms.
Key Ingredients for Superior White Chocolate Ganache
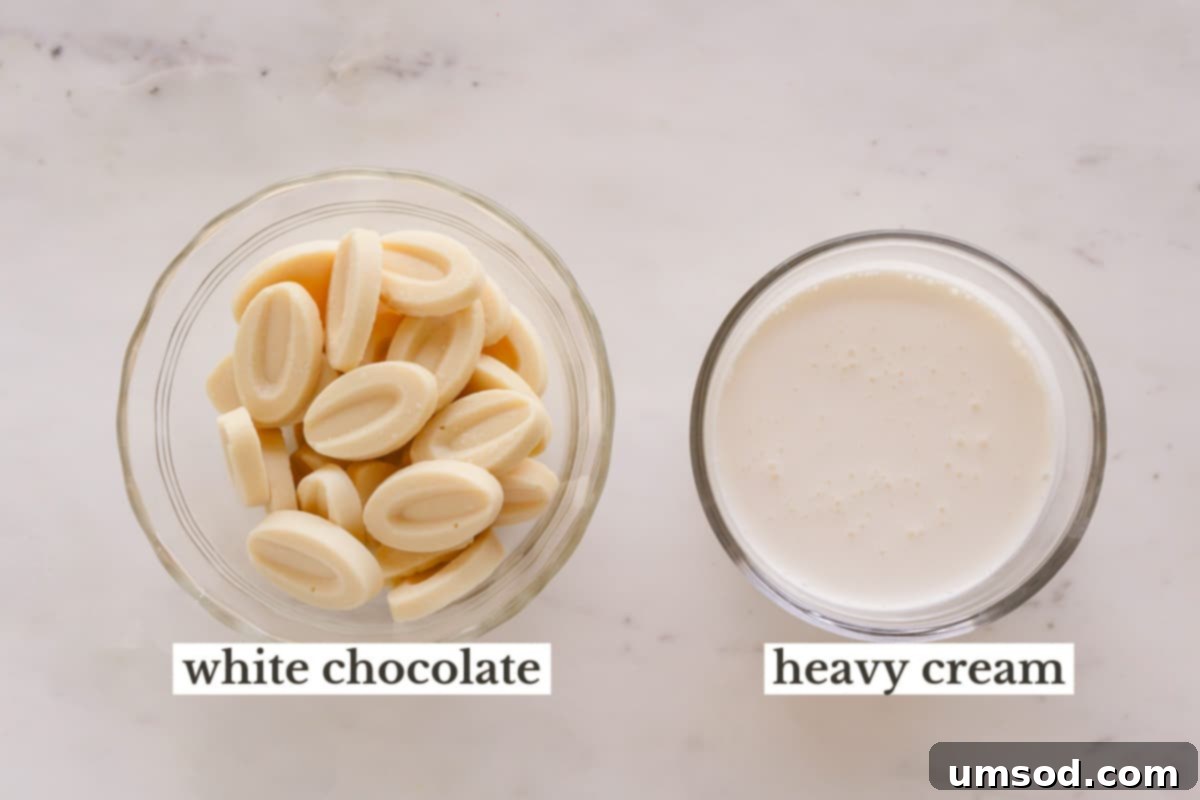
While the recipe for ganache is deceptively simple, featuring just two main ingredients, the quality and type of each component are paramount to your success. Selecting the right white chocolate and cream will significantly impact the flavor, texture, and stability of your final ganache.
- White Chocolate: This is arguably the most critical ingredient. The type of white chocolate you choose directly influences the ganache’s consistency and overall quality. Always read labels carefully. True white chocolate contains cocoa butter; if the label says “white chocolate confectionary,” “white coating wafer,” or “compound chocolate,” it’s not real white chocolate. These products often substitute cocoa butter with other vegetable fats, leading to a waxy mouthfeel and an inferior ganache that is prone to separating or failing to set correctly. We’ll delve deeper into choosing the best white chocolate below.
- Heavy Whipping Cream: For the most luxurious and stable white chocolate ganache, heavy whipping cream is indispensable. Look for cream with a fat content of 36% or higher. The high-fat content is crucial for achieving a stable emulsion and a rich, creamy texture. Avoid using lighter creams or milk, as their lower fat content will result in a much thinner ganache that struggles to set and may separate more easily.
- Optional Flavorings (Enhance Your Ganache): While not strictly necessary for a classic ganache, a dash of high-quality vanilla extract or bean paste can elevate the flavor profile. For an adult twist, consider adding a splash of liqueur such as Grand Marnier, Chambord, or a delicate coffee liqueur, ensuring it complements the white chocolate’s sweetness without overpowering it. Always add these after the ganache has been emulsified and is cooling slightly.
Decoding White Chocolate: How to Choose the Right Kind
White chocolate is unique amongst chocolates, as it contains no cocoa solids, the ingredient that gives dark and milk chocolate their characteristic brown color and robust flavor. Instead, white chocolate is primarily composed of cocoa butter, sugar, milk solids (such as whole milk powder), lecithin (an emulsifier), and often vanilla. Cocoa butter is a natural fat extracted from the cocoa bean, contributing to white chocolate’s smooth melt-in-your-mouth quality.
The cost of cocoa butter is significant, which unfortunately leads some manufacturers to use cheaper fats as substitutes in their “white chocolate” products. These inferior fats often result in an unpleasant waxy mouthfeel and can severely compromise the texture and stability of your ganache. According to FDA regulations, a product must contain at least 20% cocoa butter by weight to be legally labeled as white chocolate. However, many premium white chocolates, often referred to as ‘couverture’ chocolate, boast much higher percentages, sometimes exceeding 30-35% cocoa butter.
High-quality white chocolate couverture is characterized by its luxurious smoothness and delicate flavor. It melts beautifully on the tongue, leaving no greasy residue, thanks to its generous cocoa butter content. Choosing such a chocolate not only guarantees superior flavor but also contributes significantly to the structural integrity and desired consistency of your ganache.
Always Read the Labels Carefully!
This cannot be stressed enough. If a product is labeled “White Chocolate Confectionary,” “White Coating Wafers,” “Compound White Chocolate,” or simply “White Flavored Meltables,” it is typically *not* real white chocolate. These products contain little to no cocoa butter, replacing it with hydrogenated vegetable oils. While they might be easier to melt and temper, they will yield a ganache with an inferior taste and texture that is far more difficult to work with and prone to greasiness or separation. Always look for “cocoa butter” listed as a primary ingredient.
The Impact of Cocoa Butter Content on Ganache Consistency
The percentage of cocoa butter in white chocolate is not just a detail; it’s a game-changer for your ganache. This natural fat is the primary component responsible for white chocolate’s structure and how it behaves when melted and cooled. Consequently, the cocoa butter content directly dictates the final consistency of your white chocolate ganache. Not all white chocolates are created equal, and understanding this variation is key to mastering your ratios.
The amount of cocoa butter in your chosen white chocolate plays a paramount role in determining the final texture and firmness of your ganache. A higher cocoa butter content means the ganache will naturally set firmer and become more stable with less chocolate required in proportion to the cream.
You don’t necessarily need to opt for the most expensive white chocolate to achieve a perfect ganache. However, it is absolutely vital to be aware of the cocoa butter content of your chosen brand. This knowledge allows you to accurately adjust the chocolate-to-cream ratio to achieve your desired consistency, ensuring a stable and workable ganache every time.
HERE IS WHY: Simply put, the higher the cocoa butter content in your white chocolate, the firmer and more stable your white chocolate ganache will be, even with a relatively lower proportion of chocolate in the recipe.
Consider this illustrative example: let’s say you prepare the exact same ganache recipe using a 1:1 chocolate-to-cream ratio, but with two different types of white chocolate.
- Batch A: You use a readily available “generic” white chocolate, such as Ghirardelli white baking bar, which typically contains around 20-25% cocoa butter.
- Batch B: You opt for a high-end white chocolate couverture with a declared 35% cocoa butter content.
After chilling, the ganache from Batch A will be significantly softer and potentially runnier than the ganache from Batch B. This difference is directly attributable to the higher cocoa butter content in Batch B’s chocolate, which provides greater structural integrity and allows the ganache to set much firmer. Therefore, if you’re using a lower cocoa butter content chocolate, you’ll need to increase the chocolate-to-cream ratio to achieve a similar firmness to a ganache made with higher cocoa butter chocolate.
Recommended White Chocolate Brands for Ganache
Investing in good quality white chocolate pays dividends in the final texture and taste of your ganache. Here are some of my top recommendations for white chocolate couverture that consistently deliver excellent results:
- Cacao Barry Blanc Satin 29% White Chocolate Discs: These are a fantastic choice for ganache due to their balanced cocoa butter content (29%) and smooth melting properties. My foundational recipe ratios are often developed with this specific brand in mind, ensuring reliable and consistent results.
- Valrhona Ivoire 35% White Couverture Chocolate Feves: For those seeking a truly luxurious experience and a ganache that sets beautifully firm, Valrhona Ivoire is an unparalleled option. With its higher 35% cocoa butter content, it’s perfect for creating a nice, thick ganache ideal for frosting cakes, piping intricate designs on cupcakes, and crafting perfectly stable macaron fillings.
- Callebaut White Chocolate (W2): Another highly respected brand in professional patisserie. Callebaut’s W2 white chocolate has a balanced flavor profile and excellent workability, making it a reliable choice for any ganache application.
Where to Purchase Quality Chocolate Couverture
While I’ve provided Amazon links for easy visual reference to the packaging, I typically source my professional-grade chocolate from specialized retailers. For smaller, re-packaged quantities of these gourmet chocolates, I highly recommend World Wide Chocolate. They are my trusted go-to for all things premium chocolate, offering a wide selection and ensuring freshness.
Step-by-Step Guide: How to Make Perfect White Chocolate Ganache
Making white chocolate ganache is a straightforward process, but precision and attention to detail are paramount. Follow these steps for a consistently smooth and stable emulsion.
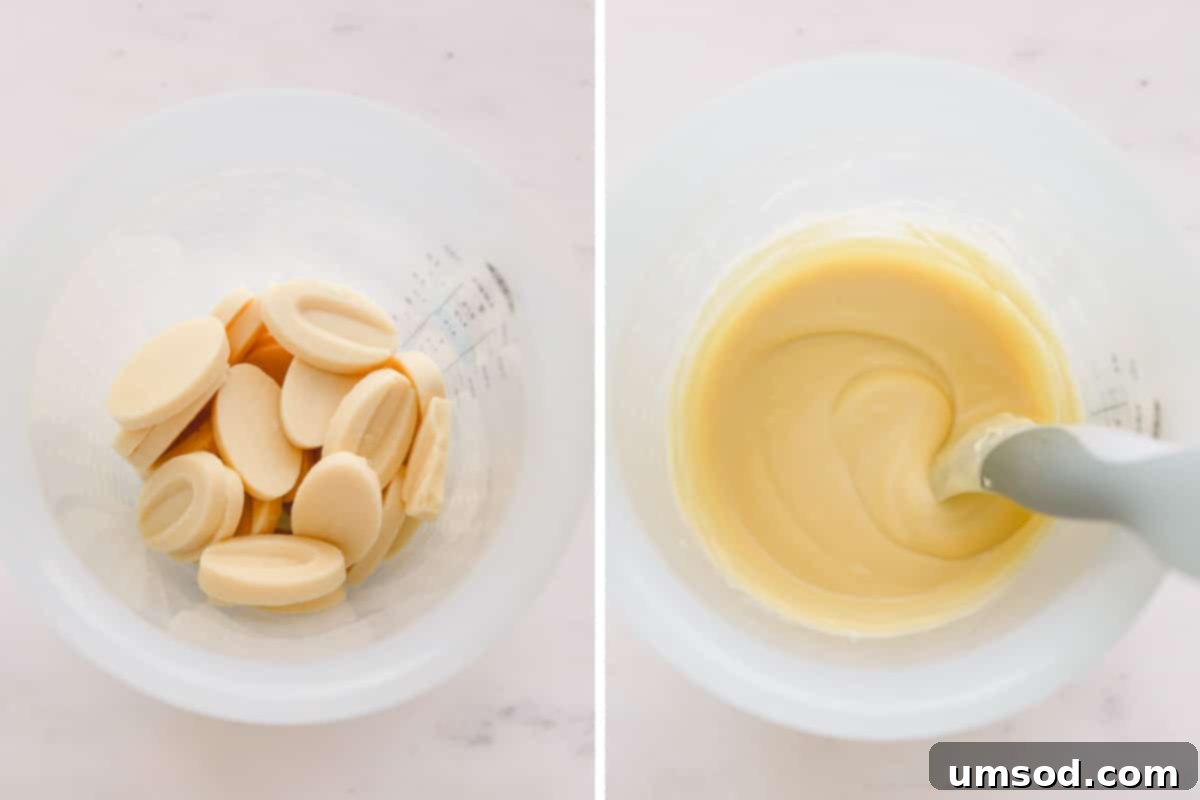
1. Expertly Melt the White Chocolate
Properly melting white chocolate is crucial to prevent seizing or scorching. White chocolate is more heat-sensitive than dark chocolate due to its lack of cocoa solids. Two popular methods are the microwave and a double boiler.
- Microwave Method:
- Place your finely chopped white chocolate (or discs/feves) in a microwave-safe bowl. Chopping ensures even melting.
- Start by microwaving at 50% power for 1 minute (this is for a standard 1000-watt microwave). Using lower power prevents overheating and ensures a gentle melt.
- Remove and stir thoroughly with a rubber spatula. Even if the chocolate doesn’t appear visibly melted, stirring helps distribute heat and continues the melting process.
- Continue microwaving in shorter intervals: 15-30 seconds at 50% power, stirring vigorously after each interval. Adjust time based on how much the chocolate has melted. If it’s still quite solid, go for 30 seconds; if it’s starting to soften, 15 seconds is usually enough.
- Repeat this process until the chocolate is completely melted and smooth, with no lumps remaining. Be patient and avoid the temptation to blast it with high power, which can easily scorch or seize the delicate white chocolate.
- Double Boiler Method (Recommended for novices):
- Place chopped white chocolate in a heatproof bowl.
- Set the bowl over a saucepan containing about an inch or two of simmering water, ensuring the bottom of the bowl does not touch the water.
- Gently stir the chocolate as it melts from the steam’s indirect heat. This method offers more controlled heating and significantly reduces the risk of scorching. Remove from heat as soon as it’s fully melted and smooth.
2. Gently Heat the Heavy Cream
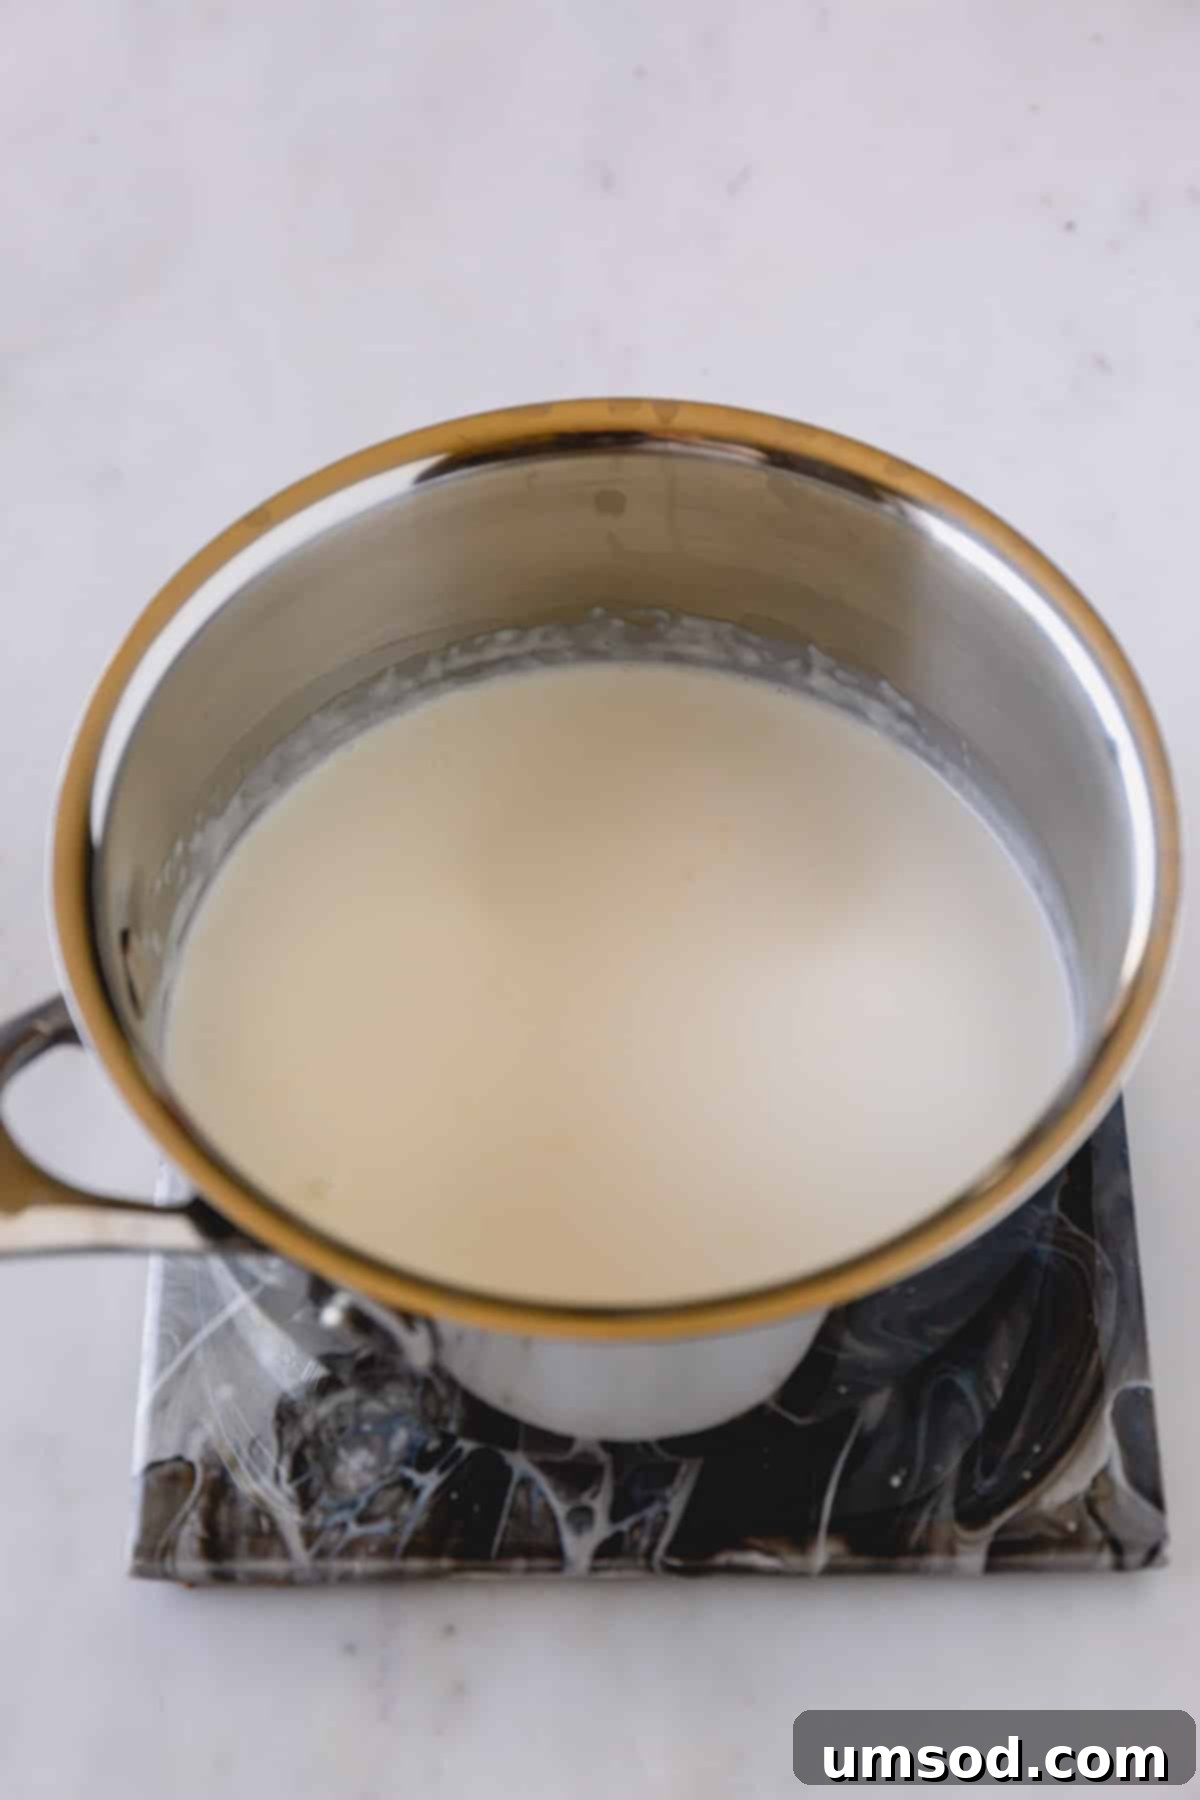
The cream needs to be adequately warm to facilitate the emulsion process without shocking the melted chocolate.
- Pour the heavy whipping cream into a small saucepan.
- Warm the cream over medium heat. Watch it carefully! You’re looking for small bubbles to just begin forming around the edges of the saucepan, indicating it’s hot but not boiling. The goal is to heat the cream to a temperature where it can melt the chocolate further and create a stable emulsion, typically around 180-190°F (82-88°C).
- Avoid boiling the cream vigorously, as this can cause too much moisture to evaporate, altering your desired ratio, and potentially scorching the cream itself. Once bubbles appear, remove it immediately from the heat.
3. Master the Emulsion: Mixing Chocolate and Cream
This is the most critical step for a smooth ganache. The key is to add the cream in stages, allowing the emulsion to form gradually.
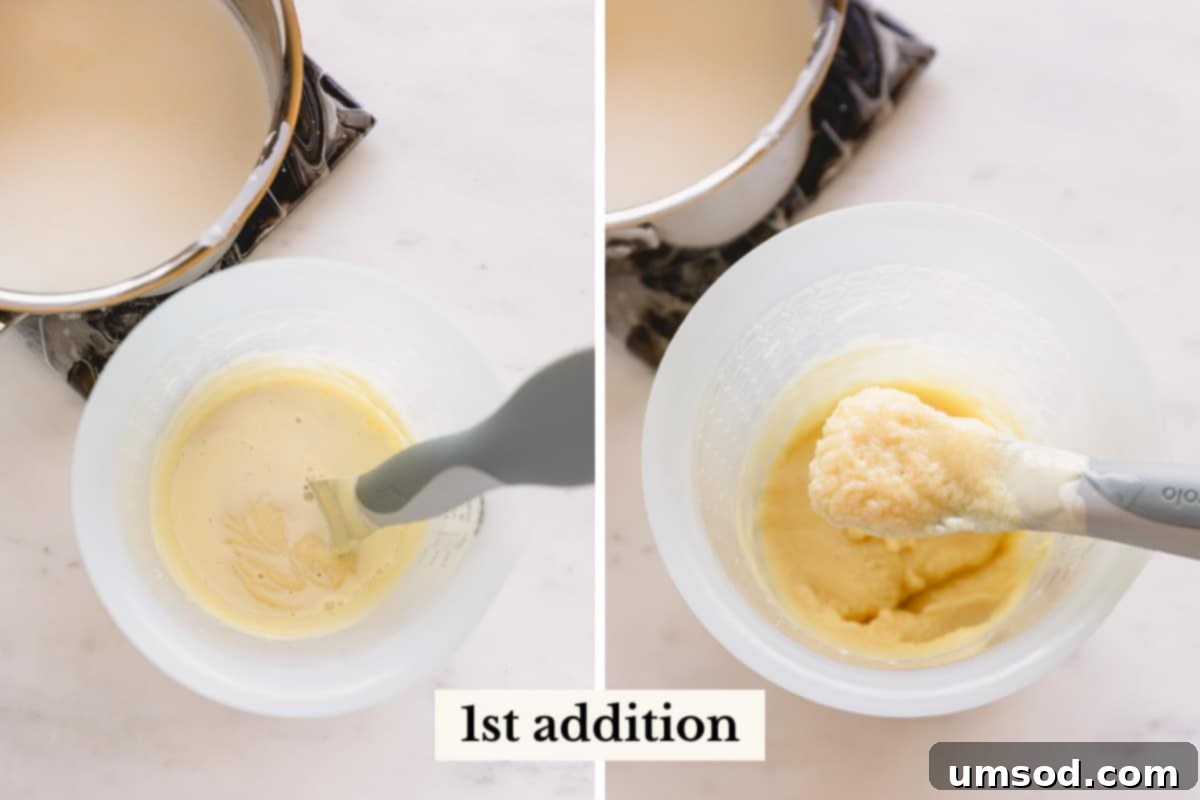
- Initial Mix (The “Grainy” Stage): Begin by adding only about one-third of the hot cream into your bowl of melted white chocolate.
- Stir Gently but Firmly: Using a rubber spatula or a whisk, start stirring the mixture gently from the center outwards. At first, it will likely look grainy, lumpy, or even “seized” – resembling curdled milk. Do not panic! This is a normal and expected phase. Continue stirring, gathering the mixture from the sides of the bowl into the center.
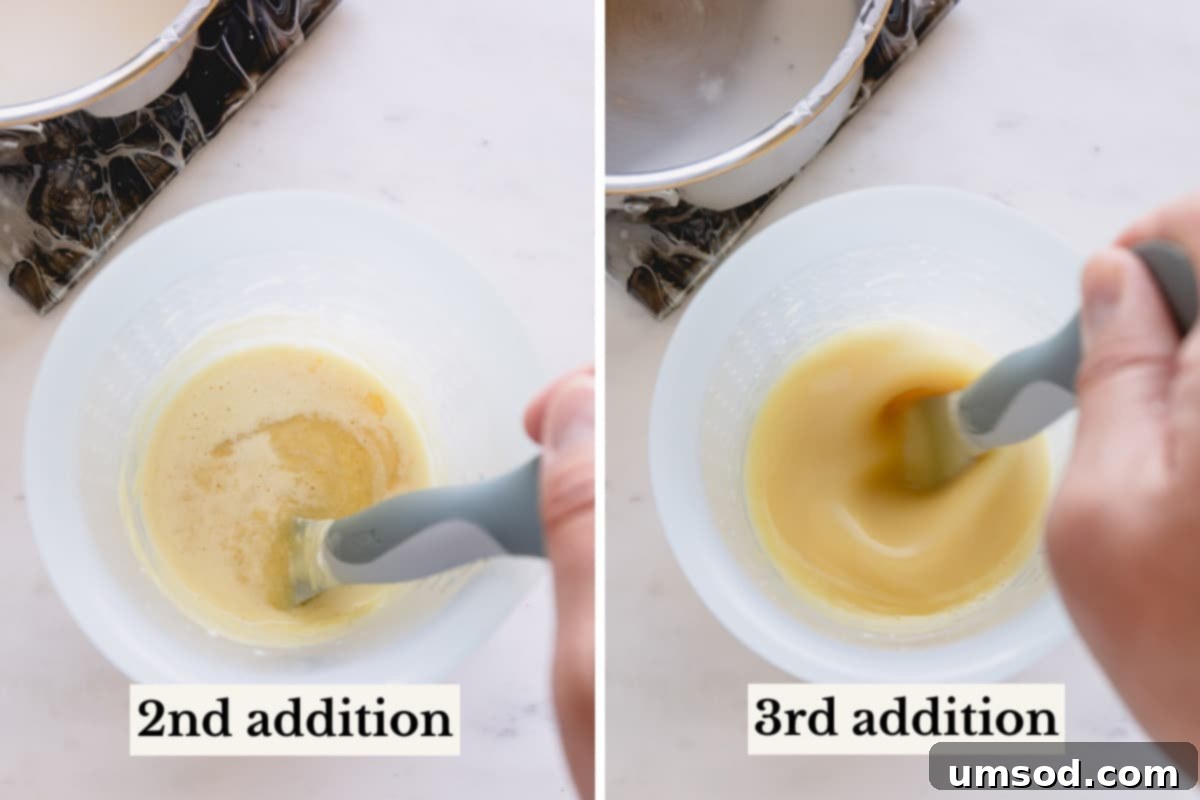
- Second Addition (Approaching Smoothness): Once the first third of the cream is somewhat incorporated, and the mixture is still grainy but starting to loosen, add another one-third of the hot cream. Continue to stir, maintaining a circular motion from the center. You’ll notice the ganache starting to come together, becoming smoother and more homogenous.
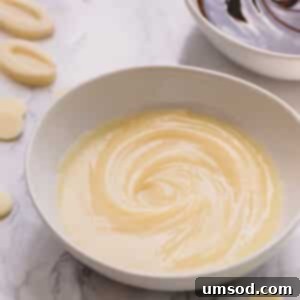
- Final Addition (Silky Perfection): Pour in the remaining one-third of the cream. Stir steadily until the entire mixture transforms into a silky, smooth, and glossy emulsion. There should be no lumps or separated fat visible. The process of adding cream in stages helps create a stable bond between the fat in the chocolate and the water in the cream, forming a beautiful, uniform ganache.
- Optional, but Highly Recommended: For an exceptionally smooth and perfectly emulsified ganache, use an immersion blender (also known as a stick blender). Carefully insert the blender into the ganache, ensuring the head is fully submerged to avoid incorporating air bubbles. Blend for approximately 30 seconds, moving it gently around the bowl. This step effectively breaks down any tiny chocolate pieces and ensures a homogenous, streak-free ganache, resulting in an unbeatable texture.
4. Allow the Ganache to Properly Set
Setting the ganache is crucial for achieving its desired thickness and stability. Rushing this step can lead to a runny or unstable final product.
- Transfer and Spread: Pour the warm ganache into a clean, flat container or a shallow baking pan. Spreading it thinly helps the ganache cool and set more quickly and evenly.
- Cover with Plastic Wrap: Immediately press plastic wrap directly onto the entire surface of the ganache. This prevents a “skin” from forming on top, which can lead to lumps and an uneven texture.
- Chill Thoroughly: Place the covered ganache in the refrigerator. Allow it to set for at least 5 hours, or ideally, overnight. This extended chilling time is essential for the cocoa butter to re-crystalize and for the ganache to thicken and stabilize properly.
- Check Consistency: After chilling, your ganache should be firm, thick, and hold its shape when a spoon or spatula is pressed into it. It should be ready to be piped or used as a sturdy filling.
- Restore Shine and Smoothness: Before using, briefly stir the set ganache with a rubber spatula. This gentle mixing will soften it slightly, making it more pliable, and restore its beautiful glossy sheen. If it’s too firm for your application, let it sit at room temperature for 15-30 minutes, or gently microwave in 5-second bursts, stirring in between, until desired consistency is reached (be very careful not to overheat).
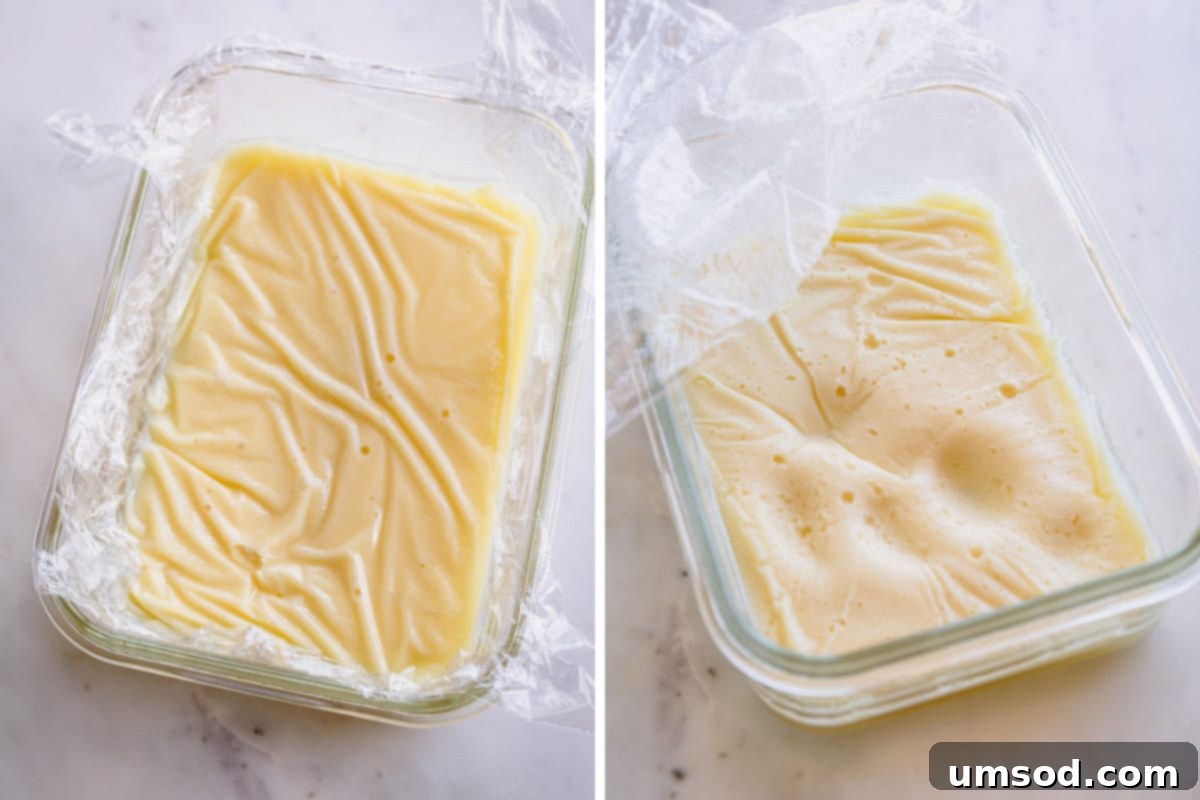
Pro Tip: Optimize Ganache Setting
Transferring your freshly made ganache into a flat container offers two significant benefits: it ensures the ganache sets evenly throughout, and it drastically accelerates the cooling and setting process. This simple step can save you time and prevent inconsistencies.
Understanding White Chocolate to Cream Ratios for Versatile Applications
The magic of ganache lies in its versatility, which is primarily controlled by the ratio of white chocolate to heavy cream. By adjusting these proportions, you can achieve a spectrum of consistencies suitable for various dessert applications. As we’ve extensively discussed, the final firmness and texture are also heavily influenced by the cocoa butter content of your chosen white chocolate. Higher cocoa butter means a firmer set with less chocolate, and vice-versa.
For clarity and ease of use, the following ratios are provided assuming you are using a generic white chocolate readily available in most grocery stores, such as Ghirardelli white chocolate baking bars. These typically contain the minimum legal cocoa butter percentage (around 20-25%). If you are using a premium couverture with higher cocoa butter, you might need to slightly reduce the chocolate or increase the cream for a similar consistency, or embrace the firmer set for structural purposes.
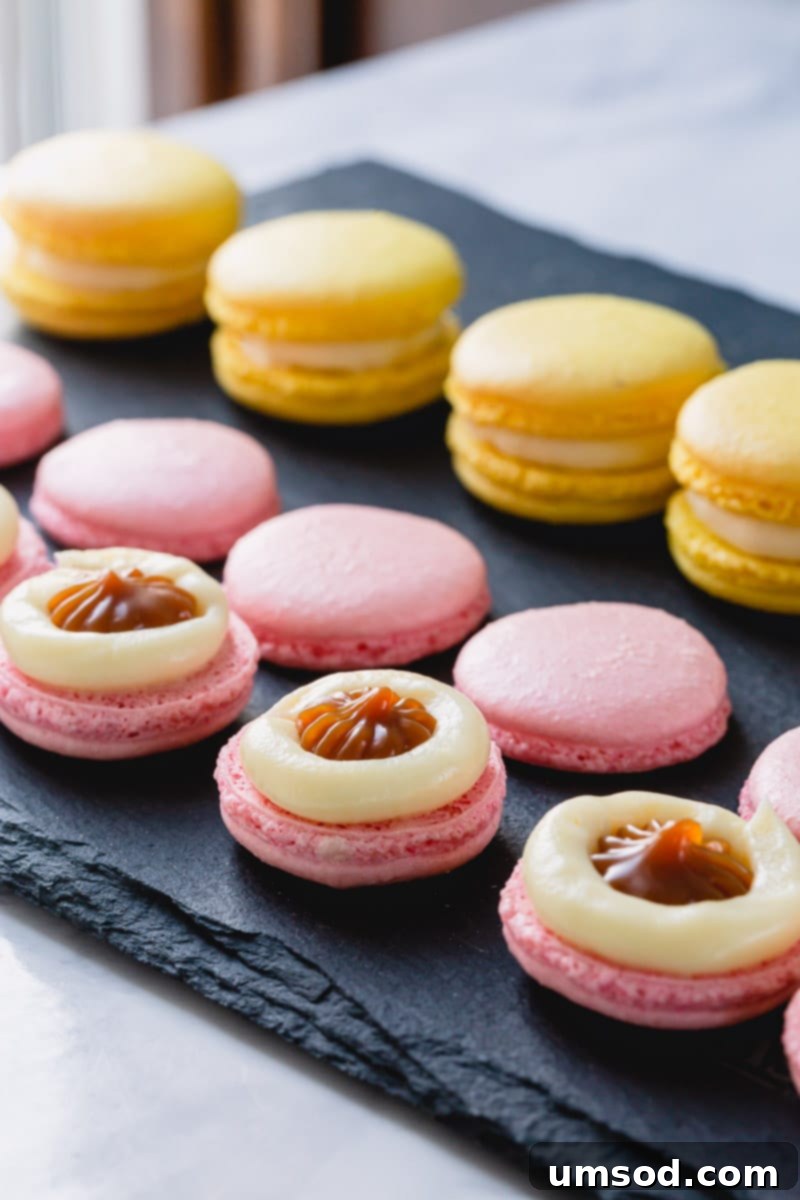
For Rich, Stable Fillings (e.g., Macarons, Cakes): 3:1 Ratio
For applications requiring a firm, stable ganache that holds its shape beautifully, a 3 parts white chocolate to 1 part heavy cream ratio is ideal for generic white chocolate. This consistency is comparable to thick peanut butter, making it perfect for filling delicate French macarons, piping intricate borders, or creating a robust filling for cakes and tarts that won’t ooze out.
Example: 6 oz (170g) generic white chocolate + 2 oz (57g) heavy cream
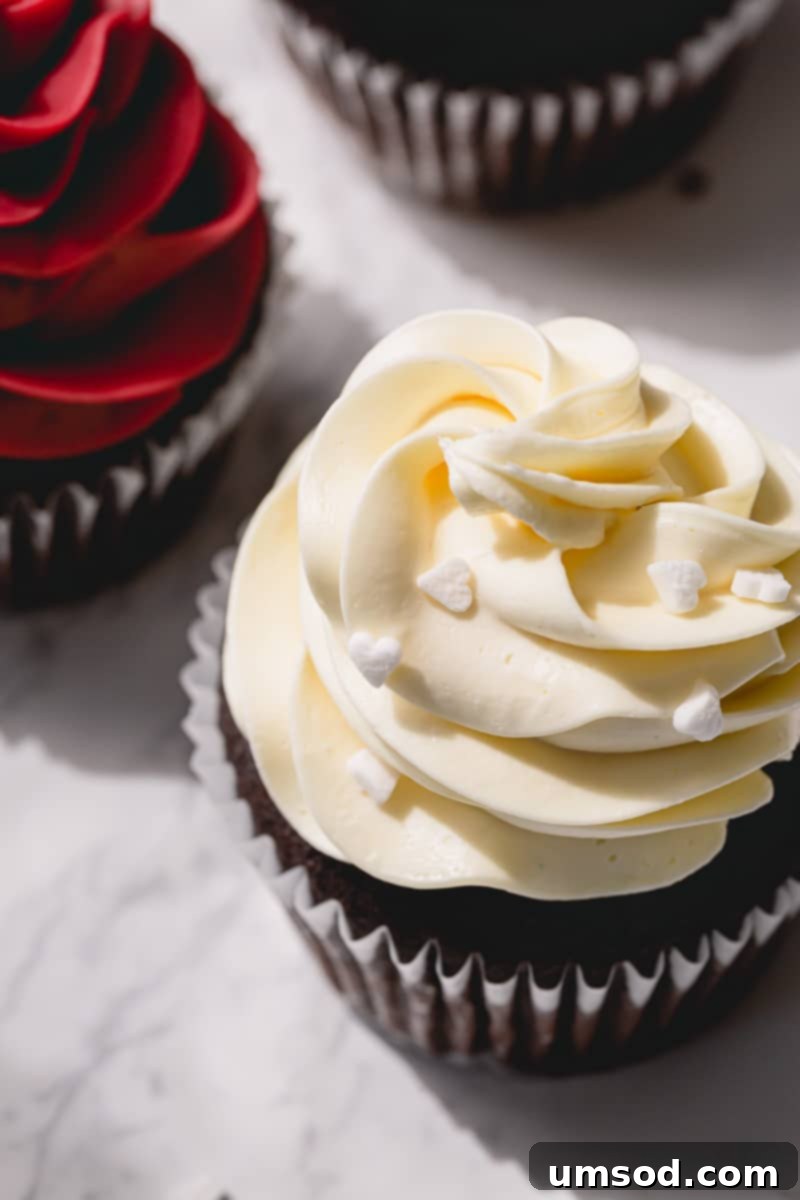
For Light, Whipped Frostings (e.g., Cupcakes): 1:2 Ratio
If you desire a lighter, airier texture akin to a buttercream frosting, a 1 part white chocolate to 2 parts heavy cream ratio (for generic white chocolate) will yield a thinner ganache that can be whipped. This ratio creates a base that is still rich in flavor but becomes wonderfully fluffy and pipeable after aeration.
Example: 4 oz (113g) generic white chocolate + 8 oz (227g) heavy cream
To make whipped white chocolate ganache: After preparing your ganache with this ratio, ensure it is completely cooled and firm – ideally chilled for several hours or overnight in the refrigerator. Once thoroughly chilled, transfer the ganache to a stand mixer fitted with a whisk attachment. Whip on medium-high speed until it becomes light, fluffy, and holds stiff peaks, similar to whipped cream or buttercream. This makes an exquisite frosting for cupcakes, cakes, or even as a decadent topping for hot cocoa.
For Elegant Cake Drips or Glazes: 1:1 Ratio
To achieve a beautifully flowing yet controlled ganache for cake drips, glazes, or pourable dessert sauces, a 1 part white chocolate to 1 part heavy cream ratio (using generic white chocolate) is often preferred. This consistency provides a lovely sheen and drapes elegantly over cakes without being too thin or too thick.
Example: 4 oz (113g) generic white chocolate + 4 oz (113g) heavy cream
For a perfect drip, ensure your ganache is slightly warm, around body temperature (95-100°F or 35-38°C). If it’s too hot, it will be too runny; if it’s too cool, it will be too thick and chunky. Use a squeeze bottle or spoon for controlled application around the edges of your chilled cake.
Important Considerations for White Chocolate Ratios
Understanding and adjusting your ratios is crucial for consistent success with white chocolate ganache. Here’s a summary of key points to keep in mind:
- Cocoa Butter Content is King: The less cocoa butter your white chocolate contains (e.g., generic brands with 20-25%), the more chocolate you’ll need to use relative to the heavy cream to achieve a thick, stable filling consistency. Conversely, high-quality couverture with 30-35% cocoa butter will set much firmer with less chocolate.
- Sweetness Factor: Be mindful that increasing the amount of white chocolate to achieve a firmer ganache will also significantly increase its sweetness. This is why using higher quality white chocolate couverture with a good balance of flavor and cocoa butter content is highly recommended. It allows you to achieve desired firmness without making the ganache overly sweet.
- Weigh Your Ingredients: For optimal precision and repeatable results, always measure your white chocolate and heavy cream by weight using a digital kitchen scale, rather than by volume (cups). This eliminates discrepancies and ensures your ratios are exact.
- Practice and Patience: White chocolate ganache can be temperamental. Don’t be discouraged if your first attempt isn’t perfect. With practice, and by paying attention to the nuances of your ingredients and technique, you’ll soon develop an intuitive feel for achieving the perfect ganache every time.
How to Beautifully Color White Chocolate Ganache
White chocolate ganache provides a beautiful neutral canvas for coloring, allowing you to match it to any theme or aesthetic. However, introducing color requires a bit of finesse to prevent compromising the ganache’s delicate emulsion.
1. Select the Appropriate Food Coloring
- Oil-Based Food Coloring: This is unequivocally the best choice for coloring ganache, especially white chocolate ganache. Oil-based colors blend seamlessly with the fat (cocoa butter and cream) in the ganache, ensuring smooth incorporation without any risk of seizing or separation.
- Gel or Powdered Food Coloring: These types can also work effectively. Gel colors have a concentrated pigment with minimal moisture, making them a safer alternative to liquid colors. Powdered food colorings are another excellent option as they contain no water whatsoever, eliminating any risk of adverse reactions with the chocolate.
- Avoid Liquid Food Coloring: It is crucial to steer clear of traditional liquid food colorings. Their high water content can cause the cocoa butter in the white chocolate to seize immediately, resulting in a grainy, lumpy, and unusable ganache. If you only have liquid coloring, you might try mixing it with a tiny amount of oil first, but it’s generally best to avoid it altogether for ganache.
2. Prepare Your White Chocolate Ganache
- Basic Preparation: Follow the steps outlined above to prepare your white chocolate ganache. Ensure it is perfectly emulsified and smooth.
- Optimal Temperature for Coloring: Allow the ganache to cool slightly from its initial warm state, but don’t let it fully set. It should still be warm and liquid enough to easily incorporate the color, but not so hot that the color might lose its vibrancy. This ensures the coloring will mix in smoothly without affecting the ganache’s texture or stability as it cools.
3. Carefully Add and Adjust the Food Coloring
- Start Small: For oil-based or gel colors, begin by adding just a few drops at a time. If using powdered color, start with a tiny pinch.
- Gentle Mixing: Stir the ganache gently but thoroughly with a spatula until the color is evenly distributed. White chocolate ganache can be more delicate than dark chocolate ganache, so avoid aggressive whisking.
- Gradual Adjustment: Continue adding color in very small increments, mixing well after each addition, until you achieve your desired shade. Remember, it’s always easier to add more color than to lighten an overly dark hue.
4. Final Check and Usage
- Observe Consistency: After coloring, check the ganache’s consistency. If it appears slightly thicker due to the addition of color, you can very gently warm it over a double boiler for a few seconds (stirring constantly) to restore its smooth flow, if needed for immediate use.
- Avoid Over-Mixing: As mentioned, over-mixing or adding too much color (especially liquid-based ones, if you mistakenly used them) can sometimes alter the delicate emulsion. Gentle, steady stirring is key to maintaining the perfect ganache texture.
Smart Storage Solutions for White Chocolate Ganache
One of the many advantages of white chocolate ganache is its impressive shelf stability, thanks to its high sugar and fat content. Proper storage ensures its freshness, texture, and flavor are maintained, allowing you to prepare it in advance for your baking projects.
- Room Temperature Storage: For short-term storage, white chocolate ganache can be kept in an airtight container at cool room temperature (below 70°F or 21°C) for up to 2 days. This is ideal if you plan to use it soon or if you need a slightly softer consistency for spreading.
- Refrigeration: For longer storage, transfer the ganache to an airtight container and refrigerate it for up to a week. The ganache will firm up considerably when chilled.
- Freezing for Extended Shelf Life: White chocolate ganache freezes beautifully, extending its shelf life significantly. Place it in a freezer-safe, airtight container for up to 3 months. This is perfect for batch preparation or leftover ganache.
- Thawing and Rejuvenating:
- To thaw frozen ganache, transfer it to the refrigerator overnight.
- Once thawed, bring it to room temperature. If it’s too firm, you can gently soften it. Place the ganache in a microwave-safe bowl and microwave in short, 15-second increments at 50% power, stirring thoroughly after each interval. Continue until it reaches your desired consistency.
- Alternatively, you can gently reheat it over a double boiler, stirring constantly until smooth.
- Crucial Caution: Be extremely careful not to overheat the ganache, as this can cause the emulsion to “break,” resulting in an oily, separated mixture. Slow, gentle reheating is key to restoring its smooth texture. If it does separate, try whisking in a tablespoon of warm cream at a time to bring it back together.
Troubleshooting Common White Chocolate Ganache Issues
Even with the best intentions, things can sometimes go awry. Here’s how to fix common white chocolate ganache problems:
- Grainy or Lumpy Ganache:
- Cause: Often due to insufficient stirring during the emulsion process, not chopping chocolate finely enough, or the chocolate seizing.
- Fix: Gently reheat the ganache over a double boiler on very low heat, stirring constantly until smooth. If it’s just a few lumps, an immersion blender can quickly smooth it out.
- Separated or Oily Ganache (Broken Emulsion):
- Cause: Overheating, adding cream too quickly, incorrect ratio, or temperature shock.
- Fix: This is fixable! If it’s slightly separated, try whisking in a tablespoon of *cold* cream, or for more severe cases, a tablespoon of *hot* cream (depending on the temperature of your ganache) until it comes back together. Another method is to add a tiny amount (1/2 teaspoon) of neutral oil (like grapeseed) and vigorously whisk it in. An immersion blender can also help bring it back together.
- Ganache Too Thin/Runny:
- Cause: Too much cream relative to chocolate, or low cocoa butter content in the chocolate.
- Fix: If it’s too thin, you have two options:
- Add More Chocolate: Gently melt a small amount of additional white chocolate, then gradually whisk it into your ganache.
- Chill Longer: Often, simply chilling the ganache for a longer period (up to 24 hours) will allow it to firm up.
- Ganache Too Thick/Hard:
- Cause: Too much chocolate relative to cream, or over-chilling.
- Fix: Gently warm the ganache over a double boiler or in short microwave bursts (5-10 seconds) until it softens to the desired consistency. Alternatively, you can beat in a teaspoon of warm cream at a time until it becomes pliable.
- Ganache Not Setting:
- Cause: Usually too much cream, or using a “white confectionery” product instead of real white chocolate with sufficient cocoa butter.
- Fix: If using real white chocolate, ensure it’s chilled thoroughly. If it still won’t set, try melting it down again and incorporating more melted white chocolate to adjust the ratio. If you used “confectionery” white coating, it might not set properly due to the type of fats used.
White Chocolate Ganache FAQ
Thickening ganache doesn’t require any special agents. It’s fundamentally about the ratio of white chocolate to heavy cream. To thicken, you need to increase the proportion of white chocolate to cream, or ensure you’re using white chocolate with a higher cocoa butter content. Chilling the ganache for an adequate period is also crucial for it to set to its full thickness.
Yes, white chocolate ganache can harden, but its final firmness depends significantly on your chocolate-to-cream ratio and the cocoa butter content of your chocolate. A higher chocolate ratio (e.g., 3:1) will result in a ganache that sets very firm when chilled, suitable for solid fillings. A lower chocolate ratio (e.g., 1:1 or 1:2) will yield a softer ganache, even when chilled, which is ideal for glazes or whipped textures.
There are typically two main reasons: 1. Your white chocolate has a low percentage of cocoa butter (often found in “white confectionery” or “baking chips” that aren’t true white chocolate). Real white chocolate needs at least 20% cocoa butter to set properly. 2. You’ve used too much cream or liquid in proportion to the white chocolate. Re-evaluate your ratio, ensuring there’s enough chocolate to create a stable structure. Chilling time is also critical; ensure it has been refrigerated for at least 5 hours or preferably overnight.
Absolutely! White chocolate ganache is excellent for make-ahead preparation. You can store it covered at room temperature for up to 2 days, or refrigerated for up to a week. For longer storage, it can be frozen for up to 3 months. Always allow refrigerated or frozen ganache to come to room temperature, or gently warm it if needed, before using.
The safest way to reheat chilled or firmed-up ganache is gently. Place it in a microwave-safe bowl and microwave in 15-second increments at 50% power, stirring thoroughly after each burst, until it reaches your desired consistency. Alternatively, use a double boiler over low heat, stirring constantly until smooth. The key is slow, gentle heat to avoid breaking the emulsion.
Classic White Chocolate Ganache Recipe
Shinee Davaakhuu
10 minutes
5 hours 10 minutes
1 cup
ganache
24 (for macarons)
Comment
Print Recipe
Ingredients
- 8 oz (227 g) 29% white chocolate (Note 1: Use high-quality white chocolate couverture)
- 4 oz (113 g) heavy whipping cream
Instructions
- Finely chop the white chocolate and place it in a microwave-safe bowl (or use a double boiler for melting). If microwaving, heat for 1 minute at 50% power (for a 1000-watt microwave).
- Stir the chocolate well, then return to the microwave for 15-30 seconds at 50% power, depending on how melted it is. (Use 30 sec if mostly solid, 15 sec if softening.)
- Stir again and continue microwaving in 15-second intervals at 50% power, stirring thoroughly after each, until the chocolate is completely melted and smooth.
- In a small saucepan, gently warm the heavy cream over medium heat until small bubbles form around the edges. Do not boil vigorously.
- Pour 1/3 of the warm cream into the melted white chocolate. Stir gently with a rubber spatula or whisk from the center outwards. The mixture will appear grainy or seized – this is normal.
- Add another 1/3 of the cream and continue mixing until it starts to smooth out.
- Add the final 1/3 of the cream and stir until the ganache is completely silky, smooth, and emulsified.
- Optional, but highly recommended: Use an immersion blender for 30 seconds to ensure a perfectly smooth emulsion.
- Transfer the ganache into a flat container or baking pan. Press plastic wrap directly onto the surface to prevent a skin from forming.
- Refrigerate for at least 5 hours, or ideally overnight, to allow the ganache to thicken and stabilize.
- Before use, stir the set ganache gently with a rubber spatula to soften it slightly and restore its glossy texture.
⭐️ Did you master this recipe?
Please leave a review and let us know how your perfect white chocolate ganache turned out!
Tips & Notes
Choosing Your White Chocolate: The type and quality of white chocolate are paramount. As discussed in the main article, not all white chocolates are equal. If your chosen white chocolate brand doesn’t specify its cocoa butter percentage, assume it’s around 20-25% (typical for generic brands). In such cases, to achieve a similar thick filling consistency, adjust your ratio to 3 parts chocolate to 1 part heavy cream. For instance, use 6 oz (170g) of a generic white chocolate bar (like Ghirardelli) with 2 oz (57g) of heavy cream. Always weigh your ingredients for accuracy.
Storing Your Ganache:
– Room Temperature: Store in an airtight container for up to 2 days (in a cool environment).
– Refrigerated: Keep in an airtight container for up to 1 week.
– Frozen: Freeze in an airtight container for up to 3 months.
Reheating Frozen/Refrigerated Ganache: To use, transfer from the freezer to the fridge overnight to thaw. Then, bring to room temperature. If further softening is needed, microwave in 15-second intervals at 50% power, stirring thoroughly after each. Exercise extreme caution not to overheat, which can cause the ganache to separate.
Nutrition
1614kcal
138g
16g
115g
134g
247mg
Dessert
American
Did you make this?
Leave a rating and your feedback. Thank you!
